Download PDF - Adafruit Learning System
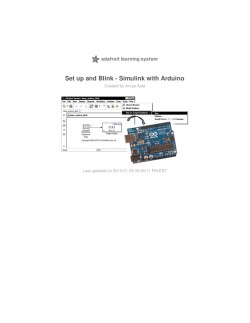
Set up and Blink - MATLAB and Simulink with Arduino
Created by Anuja Apte
Last updated on 2015-01-30 04:45:14 PM EST
Guide Contents
Guide Contents
2
Overview
3
Parts and Software
4
Build the circuit
5
Set up MATLAB and Simulink support package for Arduino Due
7
Set up compiler support
10
Simulink model
11
Generate code, Load and Run
13
Resources
15
© Adafruit Industries
https://learn.adafruit.com/how-to-use-matlab-and-simulink-witharduino
Page 2 of 16
Overview
MATLAB Support Package for Arduino enables you to use MATLAB to communicate with the
Arduino board over a USB cable.
Simulink Support Package for Arduino enables you to convert your Simulink
models to code that runs on the Arduino board (in a click of a button).
This tutorial covers a step-by-step guide to:
MATLAB Support Package
1. Set up the MATLAB support package for Arduino
2. Send commands from MATLAB to Arduino to blink an LED
Simulink Support Package
1. Set up the Simulink support package for Arduino
2. Build a simple Simulink model for controlling pins on the Arduino
3. Generate, download and run code on the Arduino to blink an LED
This is the first tutorial in a series on using MATLAB and Simulink to program an Arduino. In
this tutorial Arduino Due is used as an example, however the same steps can be used for
other boards like Uno, Mega 2560 etc.
© Adafruit Industries
https://learn.adafruit.com/how-to-use-matlab-and-simulink-witharduino
Page 3 of 16
Parts and Software
So ftware
MATLAB and Simulink Student Suite Release 2014a - now available for 99 $
MathWorks (http://adafru.it/d5E)
Amazon US (http://adafru.it/eoc)
Amazon UK (http://adafru.it/eod)
If you are not a student, you can purchase the MATLAB Home-Use license:
MATLAB home-use (http://adafru.it/eoe)
Hardware
1.
2.
3.
4.
5.
6.
Small breadboard (http://adafru.it/64)
220 Ohm resistor
LED (http://adafru.it/845)
Connecting wires (http://adafru.it/153)
Arduino Due (http://adafru.it/50)
USB cable (http://adafru.it/2008)
© Adafruit Industries
https://learn.adafruit.com/how-to-use-matlab-and-simulink-witharduino
Page 4 of 16
Build the circuit
Circuit
Use the following image to build a simple circuit that connects an LED to pin 9 of Arduino
Due.
Co nnect the hardware
Using the USB connector, connect Arduino Due to the computer that has a MATLAB &
Simulink installation.
© Adafruit Industries
https://learn.adafruit.com/how-to-use-matlab-and-simulink-witharduino
Page 5 of 16
© Adafruit Industries
https://learn.adafruit.com/how-to-use-matlab-and-simulink-witharduino
Page 6 of 16
Set up MATLAB and Simulink support package for
Arduino Due
Start MATLAB
Open MATLAB and click the Add-Ons drop down menu on the top right
Start Suppo rt Package Installer
Click on Get Hardware Support Packages in the drop down menu to start the installer. Select
'Internet' as a source for installing the support package
Select Arduino fro m a list o f suppo rt packages
Click Next to see a list of support packages and select Arduino from the list for MATLAB
Support Package and Arduino Due for the Simulink Support Package.
© Adafruit Industries
https://learn.adafruit.com/how-to-use-matlab-and-simulink-witharduino
Page 7 of 16
MathWo rks Acco unt
Click next and log in to your MathWorks account. If you don't have a MathWorks account, you
can create one during the install process or by visiting this page on the MathWorks
website (http://adafru.it/eoA). (http://adafru.it/d5K)
© Adafruit Industries
https://learn.adafruit.com/how-to-use-matlab-and-simulink-witharduino
Page 8 of 16
Co ntinue and Co mplete the Installatio n
Accept the license agreement on the next screen and click Next through the following
screens to finish the installation for both MATLAB and Simulink Support Package for Arduino.
© Adafruit Industries
https://learn.adafruit.com/how-to-use-matlab-and-simulink-witharduino
Page 9 of 16
Set up compiler support
Install a suppo rted co mpiler
Simulink support package for Arduino is supported on 32-bit and 64-bit Microsoft Windows
and Mac OS X. For the code generation process to work, a supported compiler installation is
required. Refer to the following page on MathWorks website for a list of supported
compilers on Windows and Mac OS:
List of supported compilers (http://adafru.it/eof)
For example, you can download a Simulink supported compiler from the Microsoft
website (http://adafru.it/d5J) for free.
Co mpiler set up in MATLAB
Enter mex -setup at the MATLAB command prompt to start the compiler set up. When the
compiler set up is complete, you should see on MATLAB Command Window the compiler
being used.
© Adafruit Industries
https://learn.adafruit.com/how-to-use-matlab-and-simulink-witharduino
Page 10 of 16
Simulink model
Open a Simulink demo mo del
Enter arduinodue_gettingstarted at the MATLAB Command Window to open a demo
model. Again, in this tutorial Arduino Due is used as an example but the same steps can be
used for other boards like Uno, Mega 2560 etc.
Double-click the Pulse Generator block to explore its pre-configured parameters. The Digital
Output block is set up to send the output of the Pulse Generator to pin 9 of the Arduino Due.
Double-click the block to explore its pre-configured parameters.
You are now ready to program Arduino boards!
Optio nal - Create the mo del o n yo ur o wn
Click on the Simulink Library icon to open the Simulink library browser
In the left navigation pane, select Simulink Support Package for Arduino Hardware
On the right navigation pane, double-click the [Examples] block to open the
documentation
© Adafruit Industries
https://learn.adafruit.com/how-to-use-matlab-and-simulink-witharduino
Page 11 of 16
Open step-by-step guide
Click 'Getting started with Arduino Due Hardware' in the list of demos to open the step-bystep guide to build this model on your own.
© Adafruit Industries
https://learn.adafruit.com/how-to-use-matlab-and-simulink-witharduino
Page 12 of 16
Generate code, Load and Run
If you opened the demo model, you can go straight to Run the model on Arduino section. If
you followed the steps to create your own model, then to configure the model for Arduino
boards follow this section.
Prepare the mo del to run o n Arduino bo ards
Connect the Arduino board to your computer with a USB cable
Select To o ls > Run o n Target Hardware > Prepare to Run...
Review the parameters in the dialog that opens
Unless already set, set the Target hardware parameter to the Arduino board being
used (Arduino Due here)
Do not change any other settings
Click OK
Save the model
Run the mo del o n Arduino
Click on the 'Deploy to Hardware' button as shown in the figure below
You should see the LED on Pin 9 blinking
© Adafruit Industries
https://learn.adafruit.com/how-to-use-matlab-and-simulink-witharduino
Page 13 of 16
© Adafruit Industries
https://learn.adafruit.com/how-to-use-matlab-and-simulink-witharduino
Page 14 of 16
Resources
Examples fo r getting started
MATLAB examples (http://adafru.it/d5M)
Simulink (http://adafru.it/d5L)examples (http://adafru.it/d5L)
Open Examples fo r the Suppo rt Package
Full tuto rials
MATLAB Getting Started Tutorial (http://adafru.it/d5N) (3 hrs 15 mins)
© Adafruit Industries
https://learn.adafruit.com/how-to-use-matlab-and-simulink-witharduino
Page 15 of 16
Simulink Getting Started Tutorial (http://adafru.it/d5N) (2 hrs 15 mins - 10 mins per
module)
© Adafruit Industries
Last Updated: 2015-01-30 04:45:15 PM EST
Page 16 of 16
© Copyright 2026
