1 2 - Delta Dore
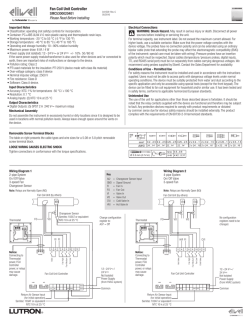
Contenu / Contents / Inhalt / Contenuto / Contenido / :AWARTOÜĀ / Inhoud Instructions TL 2000 TYXAL+ www.deltadore.com Important Product Informations FR Notice d’installation EN Installation guide DE Installationsanleitung IT Guida di installazione ES Manual de instalación PL Instrukcja instalacji NL Installatiehandleiding 1 CR 2430 - 3V - Lithium Autonomie 10 ans - Autonomy 10 years Présentation / Presentation / Beschreibung / Presentazione / Presentación / Prezentacja / Voorstelling FR Avant d’utiliser la télécommande, vous devez : 1) Personnaliser les touches 1 et 2 en fonction de vos besoins. 2) Associer la télécommande à la centrale d’alarme. 3) Si les touches 1 et 2 sont utilisées en mode D ou E, les associer à un récepteur automatisme. EN Before using the remote control, you must: 1) Customise buttons 1 and 2 according to your requirements. 2) Associate the remote control with the alarm control unit. 3) If buttons 1 and 2 are used in mode D or E, associate them with a control system receiver. DE Vor der Verwendung der Fernbedienung müssen Sie folgendes tun: 1) Tasten 1 und 2 individuell konfigurieren, je nach Bedarf. 2) Fernbedienung der Alarmzentrale zuordnen. 3) Werden die Tasten 1 und 2 im Modus D oder E verwendet, diese einem Empfänger (Hausautomation) zuordnen. IT Prima di utilizzare il telecomando, è necessario : Personalizzare i pulsanti 1 e 2 in base alle vostre esigenze. Associare il telecomando alla centrale d’allarme. Se i pulsanti 1 e 2 sono utilizzati in modalità D o E, associarli ad un ricevitore di automatismo. ES Antes de utilizar el mando, deberá: 1) Personalizar las teclas 1 y 2 en función de sus necesidades. 2) Asociar el mando con la central de alarma. 3) Si las teclas 1 y 2 se utilizan en el modo D o E, asócielas con un receptor de automatismo. PL 0RZEDÒROZPOCZĂCIEMÒUêYWANIAÒPILOTAÒNALEêY 1) Dostosowaæ przyciski 1 i 2 do w³asnych potrzeb. 2) Powi¹zaæ pilota z central¹ alarmow¹. Ò*EêELIÒPRZYCISKIÒÒIÒÒSæÒUêYWANEÒWÒTRYBIEÒ$ÒLUBÒ%ÒPOWIæZAĀÒJEÒZÒODBIORNIKIEMÒAUTOMATYKI NL Voordat u de afstandsbediening gebruikt, moet u: 1) De toetsen 1 en 2 aanpassen aan uw behoeften. 2) De afstandsbediening aan de alarmcentrale koppelen. 3) Als de toetsen 1 en 2 in de modus D of E worden gebruikt, dan moet u deze koppelen aan een automatische ontvanger. 75% 42 x 65 x 8 mm - 25 gr. Consumption stand-by : 0,6 μA Consumption : 23 mA R&TTE 1999/5/CE 868,30 MHz / 868,95 MHz (EN 300 220) - 100 > 300 m EN 50131-3 / RTC 50131-3 / EN 50131-6 / RTC 50131-6 / EN 50131-1 Grade 2 -10°C / +70°C Environmental class II -10°C / +55°C Important product information (Ë Ì) IP 2 IP 32 Personnaliser les touches et 2 / Customise the and 2 buttons / Tasten und 2 individuell konfigurieren / Personalizzare i pulsanti et 2 / Personalización de las teclas y 2 / Personalizacja przycisków i 2 / Toetsen en 2 personaliseren FR Les touches 1 et 2 sont programmables indépendamment ( Mode A par défaut). Il existe 5 modes A, B, C, D ou E. Il est possible d’en mixer 2 uniquement, (ex : avec Mode A * , voir tableau ) Mode D EN Buttons 1 and 2 can be programmed separately ( Mode A by default). There are 5 modes A, B, C, D or E. Only 2 of them can be combined, (e.g. refer to table ). Mode A * with Mode D , * DE Die Tasten 1 und 2 sind separat programmierbar ( Mode A Standard). Es gibt 5 Modi: A, B, C, D oder E. Es können jeweils nur zwei zusammen verwendet werden, (z. B.: Mode A I pulsanti IT mit Mode D * , siehe Tabelle ). Mode A 1 e 2 sono programmabili indipendentemente ( Mode A 2 1 X Mode A Mode B * vedi tabella Mode A por defecto). Mode D Mode A Mode E 1 1 ). 1 Mode E Mode A ... 2 1 ON / OFF zone 1 et/ou zone 2 / ON / OFF zone 1 and/or zone 2 / ON / OFF Zone 1 und/oder Zone 2 / ON/OFF zona 1 e/o zona 2 / ENCENDIDO / APAGADO de zona 1 y/o zona 2 / WŁ / WYŁ strefa 1 i/lub strefa 2 / ON / OFF zone 1 en/of zone 2 Mode B FR Ê Appuyez simultanément 5 secondes sur les touches 1 et 2 , jusqu’à ce que le voyant s’allume orange. Ì Validez en appuyant Ë Appuyez sur la touche 1 ou 2 , puis par sur la touche ON . appuis brefs, sélectionnez le mode de Le voyant s’allume vert. fonctionnement à lui appliquer : Mode A : 1 clignotement, Mode B : 2 clignotements, ..., Mode E : 5 clignotements. EN Ê Press the 1 and 2 buttons simultaneously for 5 seconds until the LED changes to orange. Ì Press the ON button to Ë Press the 1 or 2 button, then select the confirm. required operating mode by briefly pressing The LED changes to the button as many times as necessary: green. Mode A: 1 flash, Mode B: 2 flashes, ..., Mode E: 5 flashes. DE Ê Drücken Sie gleichzeitig 5 Sekunden lang auf die beiden Tasten 1 und 2 , bis die Kontrollleuchte orange leuchtet. Ë Drücken Sie die Taste 1 oder 2 , und wählen Sie anschließend durch mehrfaches kurzes Drücken die Betriebsart: Modus A: 1-maliges Blinken, Modus B: 2-maliges Blinken, ..., Modus E: 5-maliges Blinken. Ì Bestätigen Sie mit der Taste ON . Die Kontrollleuchte leuchtet grün. IT Ê Premere simultaneamente per 5 secondi i pulsanti 1 e 2 , fino a che il LED arancione si illumina. Ë Scegliere il pulsante 1 o 2 , poi con pressioni brevi selezionare la modalità di funzionamento da applicare : Mode A : 1 flash, Mode B : 2 flash,..., Mode E : 5 flash. Ì Convalidare premendo il pulsante ON . Il LED verde si illumina. ES Ê Pulse de forma simultánea durante cinco segundos la teclas 1 y 2 , hasta que el indicador se encienda de color naranja. Ë Pulse la tecla 1 o 2 , después, con pulsa- Ì Confirme pulsando en la tecla ON . ciones breves, seleccione el modo de El indicador se funcionamiento que desea aplicar: enciende de color Modo A: 1 parpadeo, Modo B: 2 parpadeos, verde. ..., Modo E: 5 parpadeos. SOS Déclenchement d’un SOS discret / Triggering a discreet SOS / DE Auslösen eines stillen Notrufs / Scatto di un SOS discreto / ES Activación de un SOS discreto / Dyskretne wezwanie pomocy SOS / Activeren van een discrete SOS Mode C Appel transmetteur / Transmitter call / Anruf des Telefonmodems / Chiamata al trasmettitore / Llamada del transmisor / 0RZYWOåANIEÒPRZEKAßNIKA / Zender oproepen SOS FR Déclenchement d’un SOS sonore / EN Triggering an audible SOS / DE Auslösen eines lauten Notrufs / IT Scatto di un SOS sonoro / ES Activación de un SOS sonoro / PL 'åOÜNEÒ wezwanie pomocy / NL Activeren van hoorbare SOS + Appel + alerte sonore / Call + audible alert / Anruf + akustisches Warnsignal / Chiamata + avviso sonoro / Llamada + alerta sonora / Przywo³anie + alarm DßWIĂKOWY / Oproep + hoorbaar alarm Mode D FR Commande impulsionnelle d’1 automatisme ou d’1 éclairage / Pulse control for 1 control system or 1 set of lighting / Impulssteuerung von 1 Hausautomationsfunktion oder 1 Beleuchtung / IT Comando di un automatismo o di una luce / ES Mando impulsional de un automatismo o de una iluminación / PL Sterowanie impulsowe 1 uk³adem automatycznym lub 1 OÜWIETLENIEM / NL Impulsopdracht van een automatisatie of een verlichting EN DE Mode E FR EN DE IT ES PL NL ... * FR Commande de l’alarme par zone / EN Control of the alarm per zone / DE Alarmsteuerung Zone 1 oder 2 / IT Comando dell’allarme per zona / ES Mando de alarma por zona / PL Sterowanie alarmem wg stref / NL Alarm per zone regelen NL ... , zie tabel ). Mode A IT ... 2 or 2 PL ON ... Mode D * Er zijn 5 modi A, B, C, D of E. Het is mogelijk om 2 te mengen (bv. EN ... 2 or z NL De toetsen 1 en 2 zijn onafhankelijk programmeerbaar ( Mode A standaard). FR ... Mode C 2 > 5s Mode A ... 2 or ÒPATRZÒTABELA ). Mode D Mode B Mode A * $OSTĂPNYCHÒJESTÒÒTRYBWÒ!Ò"Ò#Ò$ÒLUBÒ%Ò-OêNAÒZEÒSOBæÒMIESZAĀÒWYåæCZNIEÒÒNPÒ met ... ... ... 2 1 X , ver tabla ). PL Przyciski 1 i 2 MOêNAÒPROGRAMOWAĀÒNIEZALEêNIEÒDOMYÜLNIEÒ Mode D or Mode C Existen cinco modos: A, B, C, D, o E. Solamente pueden combinarse dos, (por ejemplo: Mode D 1 con ). ES Las teclas 1 y 2 se pueden programar de manera independiente ( Mode A con 3 2 di default). Esistono 5 modalità: A,B,C,D o E. E’ possibile combinarne solamente 2. (per es. Mode D Pile à l’intérieur / Battery inside / Mit Batterie / Batterie all’interno / Pila en el interior / "ATERIAÒWEWNæTRZ / Batterijblok binnenin PL x1 ON / OFF Commande ON / OFF d’éclairages ou de volets roulants / ON / OFF control for lighting or roller shutters / ON / OFF-Steuerung der Beleuchtung oder Rollläden / Comando ON/OFF delle luci e delle tapparelle / Mando de ENCENDIDO / APAGADO de iluminaciones o de persianas motorizada / 0OLECENIEÒWåWYåÒOÜWIETLENIAÒLUBÒROLET / ON / OFF opdracht van verlichting of rolluiken NL Ì :ATWIERDßÒNACISKAJæCÒ Ê .ACISKAJÒPRZEZÒÒSEKUNDÒ Ë .ACIÜNIJÒPRZYCISKÒ 1 lub 2 ÒAÒNASTĂPNIEÒ przycisk ON . przyciski 1 i 2 ÒRWNOCZEÜNIEÒ KRTKIMIÒNACIÜNIĂCIAMIÒWYBIERZÒTRYBÒDZIAåA ,AMPKAÒSYGNALIZACYJNAÒ DOÒMOMENTUÒAêÒLAMPKAÒ NIAÒKTRYÒMAÒBYĀÒZASTOSOWANYÒ ÜWIECIÒSIĂÒNAÒZIELONO SYGNALIZACYJNAÒZAÜWIECIÒSIĂÒNAÒ 4RYBÒ!ÒÒMIGNIĂCIEÒTRYBÒ"ÒÒMIGNIĂCIAÒÒ pomarañczowo. TRYBÒ%ÒÒMIGNIĂĀ Ê Druk simultaan 5 seconden Ë Druk op de toets 1 of 2 , vervolgens op de toetsen 1 en 2 , selecteert u de werkingsmodus, door korttotdat het lampje oranje wordt. stondig te drukken: Modus A: 1 keer knipperen , Modus B : 2 keer knipperen, ... , Modus E: 5 keer knipperen Ì Bevestig door te drukken op de knop ON . Het lampje licht groen op. 3 Fonctionnement avec un système d’alarme / Operation with an alarm system / Betrieb mit einer Alarmanlage / Funzionamento con un sistema d’allarme / Funcionamiento con el sistema de alarma / Działanie z systemem alarmowym / Werking met een alarmsysteem FR • Association avec un système d’alarme • Test • Retour à la configuration usine Voir notice d’intallation système EN • Association with an alarm system • Test • Restoring factory settings Refer to system installation guide DE • Verbindung mit einer Alarmanlage • Test • Rückkehr zur Werkseinstellung Siehe Installationsanleitung System 4 IT • Associazione con un sistema d’allarme Vedi le istruzioni • Test • Ritorno alla configurazione di fabbrica “Sistema” ES • Asociación con el sistema de alarma • Prueba • Volver a la configuración original Associer les touches et 2 à un récepteur automatisme / Associate the buttons and 2 with a control system receiver / Tasten und 2 einem Empfänger (Hausautomation) zuordnen / Associare i pulsanti e 2 cad un ricevitore di automatismo / Asociar las teclas y 2 a un receptor de automatismo / 0OWIæZYWANIEÒPRZYCISKWÒ i 2 ÒZÒODBIORNI kiem automatyki / De toetsen en 2 koppelen aan een automatische ontvanger 1 5 Ver manual de instalación del sistema PL • Powi¹zanie z systemem alarmowym • Test jÒ0RZYWRCENIEÒKONµGURACJIÒFABRYCZNEJ Patrz INSTRUKCJA INSTALACJI systemu NL • Koppeling aan alarmsysteem • Test • Fabrieksinstellingen herstellen Zie installatiehandleiding systeem Fonctionnement / Location / Betrieb / Funzionamento / Funcionamiento / Działanie / Werking 1 2 Exemple / Example / Beispiel / Esempio / Ejemplo / Przyk³ad / Voorbeeld Mode D or 2 Mode D 1 Mode E 1 or 2 3 2 Exemple 1 / Example 1 / Beispiel 1 Esempio 1 / Ejemplo 1 / przyk³ad 1 Voorbeeld 1 OK Exemple 1 / Example 1 / Beispiel 1 / Esempio 1 / Ejemplo 1 / przyk³ad 1 / Voorbeeld 1 >5s 1 >3s or FR Appuyez sur la touche 1 ou 2 . Le voyant s’allume rouge puis vert. EN Press button 1 or 2 . The LED changes from red to green. DE Drücken Sie die Taste 1 oder 2 . Die Kontrollleuchte leuchtet rot und anschließend grün. IT Premere il pulsante 1 o 2 . Il LED si illumina di rosso, poi di verde. ES Pulsar la tecla 1 o 2 . El indicador se enciende de color rojo y después de color verde. PL .ACIÜNIJÒPRZYCISK 1 lub 2 .Ò,AMPKAÒSYGNALIZACYJNAÒÜWIECIÒSIĂÒNAÒCZERWONOÒAÒNASTĂPNIEÒNAÒZIELONO NL Druk op 1 of 2 . Het lampje licht rood en vervolgens groen op. OFF 2 Exemple 2 / Example 2 / Beispiel 2 / Esempio 2 / Ejemplo 2 / przyk³ad 2 / Voorbeeld 2 Exemple 2 / Example 2 / Beispiel 2 / Esempio 2 / Ejemplo 2 / przyk³ad 2 / Voorbeeld 2 1 2 < 2s Mode E On 1 >3s or ON 2 Exemple / Example / Beispiel / Esempio / Ejemplo / przyk³ad / Voorbeeld < 2s FR EN Ê Mettez le récepteur en attente d’association (voir notice). Ê Set the receiver to association wait mode (refer to the user guide). Ë Maintenez appuyée 5 secondes la touche à associer. Le voyant rouge clignote rapidement, s’éteint puis clignote lentement. Relâchez. Ì Le voyant s’allume vert. Vérifiez que le voyant du récepteur est éteint. Ë Press and hold the button to associate for 5 seconds. The red LED flashes quickly, switches off then flashes slowly. Release. Ì The LED lights up green. Make sure that the receiver LED is off. Ê Bringen Sie den Ë Drücken Sie 5 Sekunden lang Empfänger in Einlernmodus. die zuzuordnende Taste. Die rote (siehe Bedienungsanleitung). Kontrollleuchte blinkt schnell, geht dann aus und blinkt anschließend langsam. Lassen Sie die Tasten los. Ì Die Kontrollleuchte leuchtet grün. Achten Sie darauf, dass die Kontrollleuchte am Empfänger jetzt nicht mehr leuchtet. Ê Mettere il ricevitore in attesa di associazione (vedi istruzioni). Ë Tenere premuto per 5 secondi il pulsante da associare. Il LED lampeggia velocemente, si spegne, poi lampeggia lentamente. Riavviare. Ì Il LED verde si illumina. Verificare che il LED del ricevitore sia spento. ES Ê Ponga el receptor en modo asociación (ver manual). Ë Mantenga pulsada durante cinco segundos la tecla que deba asociar. El indicador rojo parpadea rápidamente, se apaga y después parpadea lentamente. Suelte la tecla. Ì El indicador se enciende de color verde. Compruebe que el indicador del receptor está apagado. PL Ê Ustaw odbiornik w trybie oczekiwania na powi¹zanie PATRZÒINSTRUKCJA Ë .ACISKAJÒPRZEZÒÒSEKUNDÒPRZYCISKÒDOÒ POWIæZANIAÒ#ZERWONAÒLAMPKAÒMIGAÒ SZYBKOÒWYåæCZAÒSIĂÒAÒNASTĂPNIEÒ MIGAÒPOWOLIÒ0UÜĀ Ì ,AMPKAÒSYGNALIZACYJNAÒ WåæCZAÒSIĂÒNAÒZIELONOÒ 3PRAWDßÒCZYÒLAMPKAÒ SYGNALIZACYJNAÒODBIORNIKAÒ ZGASåA DE IT NL 6 Ê De ontvanger in stand-by zetten voor koppeling (zie handleiding). Ë Druk 5 seconden op de toets die u wilt koppelen. Het lampje knippert snel (rood), dooft en gaat vervolgens langzaam knipperen. Laat de toets los. Ì Het lampje licht groen op. Controleer of het lampje van de ontvanger is gedoofd. Changement de la pile / Changing the batteries / Batteriewechsel / Sostituzione delle batterie / Cambio de la pila / Wymiana baterii / Batterij vervangen 4 Off 1 Clic FR Appuyez sur la touche 1 ou 2 puis sur EN Press the 1 or 2 button then DE Drücken Sie die Taste 1 oder 2 und dann schließend grün. IT Premere il pulsante 1 o 2 , poi Lithium CR 2430 FR Le voyant clignote rouge à chaque appui, la pile est usée (< 2,2V). EN The LED flashes red whenever the button is pressed. The battery is dead (< 2,2V). DE Kontrollleuchte blinkt bei jedem Tastendruck rot, die Batterie ist leer (< 2,2V). IT Il LED rosso lampeggia ad ogni pressione, la batteria è esaurita (< 2,2V). ES El indicador parpadea de color rojo cada vez que se pulsa, la pila se ha agotado (< 2,2V). PL ,AMPKAÒMIGAÒNAÒCZERWONOÒPRZYÒKAêDYMÒNACIÜNIĂCIUÒkÒBATERIAÒJESTÒROZåADOWANA (< 2,2V). NL Het lampje knippert (rood) bij elke druk op de knop, batterij is bijna leeg (< 2,2V). Référentiel de certification NF324-H58 pour la classification 2 boucliers. Organismes certificateurs AFNOR Certification : www.marque-nf.com CNPP Cert. : www.cnpp.com Certificazione IMQ : IMQ Sistemi di sicurezza. IMQ S.p.A : www.imq.it 1 después ON ou OFF . The o NL Druk op 1 of 2 vervolgens op of Le voyant s’allume rouge puis vert. oder OFF . Die Kontrollleuchte leuchtet rot und an- Il LED si illumina di rosso, poi di verde. .ACIÜNIJÒPRZYCISKÒ 1 lub 2 ÒAÒNASTĂPNIEÒ ON lub NASTĂPNIEÒNAÒZIELONO ON OFF . ON PL ON o OFF . OFF . LED changes from red to green. Pulse la tecla verde. 7 o 2 or ON ON ES El indicador se enciende de color rojo y después de color OFF . OFF Ò,AMPKAÒSYGNALIZACYJNAÒÜWIECIÒSIĂÒNAÒCZERWONOÒAÒ Het lampje licht rood en vervolgens groen op. Supprimer l’association à un récepteur automatisme / Removing the association from a control system receiver / Zuordnung zu einem Empfänger (Hausautomation) löschen / Eliminare l’associazione ad un ricevitore di automatismo / Eliminar la asociación con un receptor de automatismo / Usuwanie powi¹zania z odbiornikiem automatyki / Koppeling aan een automatisatie ontvanger verwijderen Mode D Mode E 1 2 5s 5s 20s OK or >30s FR Maintenez appuyée la touche 1 ou 2 : - le voyant clignote rouge rapidement, s’éteint puis clignote lentement. - après 10 secondes, le voyant s’éteint, après 30 secondes, le voyant clignote rouge rapidement. Relâchez et appuyez immédiatement sur la touche, le voyant s’allume vert. EN Press and hold the 1 or 2 button: - the red LED flashes quickly, switches off then flashes slowly. - after 10 seconds, the LED switches off, after 30 seconds, the red LED flashes quickly. Release and press the button immediately, the green LED comes on. DE Halten Sie die Taste 1 oder 2 gedrückt: - Die Kontrollleuchte blinkt schnell (rot), geht dann aus und blinkt anschließend langsam. - Nach 10 Sek. erlischt die Kontrollleuchte, nach 30 Sek. blinkt die Kontrollleuchte schnell (rot). Lassen Sie die Taste los und drücken Sie sofort nochmal auf die Taste. Die Kontrollleuchte leuchtet grün. IT Tenere premuto il pulsante 1 ou 2 : il LED rosso lampeggia velocemente, si spegne poi lampeggia lentamente. - dopo 10 secondi, il LED si spegne. - dopo 30 secondi, il LED rosso lampeggia rapidamente. Riavviare. ES Mantenga pulsada la tecla 1 o 2 : - el indicador parpadea en rojo rápidamente, se apaga y después parpadea lentamente. - tras 10 segundos, el indicador se apaga. Tras 30 segundos, el indicador parpadea en rojo rápidamente. Suelte la tecla y vuélvala a pulsar inmediatamente. El indicador se enciende de color verde. PL .ACIÜNIJÒIÒPRZYTRZYMAJÒPRZYCISKÒ 1 lub 2 Ò ÒCZERWONAÒLAMPKAÒMIGAÒSZYBKOÒWYåæCZAÒSIĂÒAÒNASTĂPNIEÒMIGAÒPOWOLI ÒÒPOÒÒSEKUNDACHÒLAMPKAÒGAÜNIEÒPOÒÒSEKUNDACHÒLAMPKAÒMIGAÒSZYBKOÒNAÒCZERWONOÒ 0UÜĀÒIÒNATYCHMIASTÒNACIÜNIJÒPRZYCISKÒWåæCZYÒSIĂÒZIELONAÒLAMPKAÒSYGNALIZACYJNA NL Houd de toets 1 of 2 ingedrukt: - Het lampje knippert snel (rood), dooft en gaat vervolgens langzaam knipperen. - Na 10 seconden gaat het lampje uit, na 30 seconden knippert het lampje snel (rood). Laat de toets los en druk onmiddellijk op de toets, het lampje licht groen op. 2s 3 OFF 5 1 2 or 2
© Copyright 2026
