
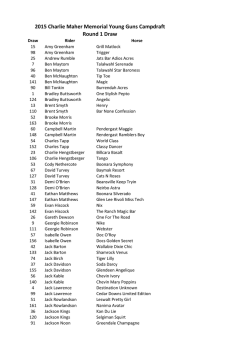
ASPECT™ CLADDING FC:555
CSR CEMINTEL™
ASPECT™ CLADDING
EXTERNAL CLADDING
FC:555
FEBRUARY 2015
Cemintel Aspect™ Cladding utilises a wide shiplapped board with a distinctive horizontal feature to produce a versatile
and durable façade to complement both classic or contemporary building styles. Easy to install, Aspect™ cladding is
available in 4.2m lengths for wide coverage and offers both face or concealed fixing options.
2
CEMINTEL ASPECT™ CLADDING
CONTENTS
DESCRIPTION
DESCRIPTION
2
APPLICATIONS
3
ADVANTAGES
3
SYSTEM OVERVIEW
3
DESIGN CONSIDERATIONS
4
COMPONENTS
8
BUILDER’S INSTALLATION CHECKLIST
11
INSTALLATION PROCEDURE
12
INSTALLATION DETAILS
16
FIRE RATED EXTERNAL WALL SYSTEMS
22
HEALTH & SAFETY
24
WARRANTY
24
CONTACT DETAILS
24
Cemintel Aspect™ provides a versatile and durable façade
with a modern style for timber or steel frame residential
buildings.
Cemintel Aspect™ is a 300mm wide, 12mm thick board
with a machine profiled shiplapped joint. It has a recessed
overlap providing a 16mm horizontal joint feature providing
a similar aesthetic to a decorative render.
Cemintel Aspect™ is fixed flat against stud framing and can
be face fixed using a nail gun or fixings can be concealed by
hand nailing. Boards are 4.2m long for maximum coverage
and factory sealed to easily accept exterior grade paints.
Manufactured from fibre cement Cemintel Aspect™ Cladding
is resistant to cracking, warping and swelling, creating a
highly durable and stable façade solution.
CEMINTEL ASPECT™ CLADDING
3
APPLICATIONS
ADVANTAGES
Cemintel Aspect™ Cladding is suitable for both external
façades and internal feature linings.
The Cemintel Aspect™ Cladding system features include:
• Achieves the natural look of a wide timber board
with long-term stability and minimal maintenance
requirements.
The Cemintel Aspect™ Cladding may be used on timber
or steel framed buildings of up to two storeys that meet
the geometric limits of AS4055 : Wind loads for housing.
When used as an external cladding it is suitable for Class 1
and Class 10 buildings only in wind classifications up and
including N6/C4.
• Wide 300mm board with shiplap joining provides
attractive façade with 16mm high horizontal expressed
grooves.
• Simple installation with direct fixing to stud framing over
wall wrap/sarking.
Cemintel Aspect™ Cladding can be used in many residential
external and internal applications including:
• Nail fixing by gun or hand to timber framing or screw
fixing to steel framing. Concealed or face fixing options.
• New homes, town houses and medium densit y
residential construction in stand-alone or composite
construction.
• Factory sealed board ready for paint finishing.
• Manufactured from highly durable and robust fibre
cement.
• Feature walls, building façades and additions.
• Immune to permanent water damage, termite resistant,
fire resistant, and resistant to cracking, swelling and
warping.
• Recladding of existing walls.
• Gable ends.
• Infill panels around windows and doors.
• Cladding for garages and tool sheds.
• Internal feature walls. (Not suitable for wet areas).
SYSTEM OVERVIEW
➊
Timber or steel stud framing at
600mm maximum centres
➋
Building
Wrap
➒
CSR Cavity
Insulation
➓
Gyprock plasterboard
internal lining
➌
Internal and external
Corner Profiles
➏
➐
➎
On-stud joints with Bond
Breaker and Sealant (narrow
studs require trimmer or
double studs)
➑
Sealant behind
boards at corners
➍
Gun or hand face
fixing, or concealed
fixing by hand
Aspect™ Boards (full length where
possible – up to 4.2 metres)
Sealant filled gaps
at board ends
4
CEMINTEL ASPECT™ CLADDING
DESIGN
CONSIDERATIONS
This guide represents good practice, though it is not intended
as an exhaustive statement of all relevant information. It
remains the responsibility of the building designer to verify
that the Cemintel Aspect™ cladding system is suitable for
the particular requirements of any given project.
FRAMING
The Cemintel Aspect™ cladding can be fixed horizontally
to timber or steel framing with studs at 600mm maximum
centres. Studs at board end joints must have a minimum
face fixing width of 45mm for timber or 50mm for steel to
provide sufficient support for fixings. Where smaller framing
is used, double studs, trimmers or battens must be provided
at vertical sheet joints to ensure fasteners have suitable
edge distances. Refer to FIG 1.
As a minimum requirement, framing shall be in accordance
with the following applicable standards:
• AS1684 – Residential timber-framed construction.
• AS/NZS4600 – Cold-formed steel structures.
• AS3623 – Domestic metal framing.
• AS4055 – Wind loads for housing.
• The Building Code of Australia (BCA).
Timber shall be seasoned or have reached an equilibrium
moisture content of 16% or less at the time of framing.
Unseasoned timber is not recommended.
The design and construction of the steel frames should
be considered in conjunction with the advice from the
manufacturer. In highly corrosive environments, appropriate
measures should be taken to protect the frame from
corrosion. Steel framing must be a minimum 0.55mm BMT
to a maximum 1.6mm BMT. Do not fix Cemintel Aspect™
cladding to thicker cold rolled members or to hot rolled steel.
Vertical timber or metal battens may be used over these
members. Refer to framing manufacturer for appropriate
products.
WIND LOADING
Cemintel Aspect™ cladding is suitable for buildings within
the geometric limits of AS4055 – Wind Loads for Housing.
These limits include a roof height less than 8.5m, eaves
height less than 6m, and a building width less than 16m.
Stud spacing and board fixing specifications are provided
for wind classifications N1 to N6 and C1 to C4 for timber and
steel framing. It is the responsibility of the building designer
to determine the wind class of the building and the suitability
of the system.
Studs spacing and board fixing are to be in accordance
with Table 6.
LIMITATIONS
Aspect™ cladding is unsuitable for the following applications:
panels with non-vertical face (e.g. parapet capping); internal
wet areas; water features; chimney cladding; exposure to
temperatures over 50°C; contact with standing snow or ice.
STRUCTURAL BRACING
Cemintel Aspect™ cladding is not designed to provide wall
bracing. Bracing must be provided in the structural framing
in the normal manner by using methods such as strap
bracing or sheet bracing. Where sheet bracing is used,
the entire wall framing to be clad with Cemintel Aspect™
cladding must be sheeted to maintain a uniform fixing plane.
Note that window set-out will be affected.
CONTROL JOINTS
As Cemintel Aspect™ cladding has multiple horizontal joints
and random positioned end joints, no additional control
joints are required. Movement joints provided in framing
should be aligned to joints in the boards.
A control joint must be installed when a masonry wall adjoins
framed construction, and at the junction of framed additions
or existing buildings, to allow for differential movement.
The current and new framing and cladding systems must
be discontinuous at this control joint. Refer to 'Installation
Details'.
For two storey construction, frame shrinkage may require
consideration by the building designer.
THERMAL BREAK
A thermal break is required where Cemintel Aspect™
cladding is fixed directly to steel framing of walls enclosing
habitable or usable spaces. For detailed information refer
to the BCA.
The thermal break is applied to the face of the frame to meet
the deemed to satisfy requirements of the BCA. The thermal
break is used to ensure that the thermal performance of
the wall is comparable to that of a timber framed wall. For
systems with timber battens 20mm or thicker, a thermal
break is not required.
BUSHFIRE PRONE AREAS
In accordance with AS3959, Aspect™ cladding is suitable
as an external wall lining for buildings assessed as BAL-19
or lower, and where the wall includes sarking, for buildings
up to BAL-29.
Cemintel Aspect™ has been tested to AS1530.3 and can
achieve BAL-40 or FZ>10 when used in conjunction with
Gyprock Fyrchek MR plasterboard and installation methods in
CEMINTEL ASPECT™ CLADDING
accordance with Gyprock fire rated system specifications and
details. Please refer to information beginning on page 22.
For additional bush fire requirements, refer to AS3959
Construction of buildings in bushfire prone areas, and to the
BCA Volume 1 Part 3.7.4.
TERMITE PROTECTION
As there is a wide variety of methods for managing termite
entry to buildings, and selecting the appropriate method for
any structure depends on specific risk factors and the form
of construction, measures for termite management have not
been addressed in this guide.
Refer to your local pest management service, the BCA,
AS3660 : Termite management, and your local building
authorities for more information about the requirements for
the design of a suitable termite management system.
SERVICES
The Cemintel Aspect™ cladding system will accommodate
services that are run through the framing. Any notches or
holes formed must be considered in the framing design
PENETRATIONS
Penetrations in the Cemintel Aspect™ cladding system
panels must be neatly cut using appropriate tools such as
a saw, drill or hole saw. Penetrations should be prepared
with a clearance of 5mm all around and the gap must be
fully sealed with Sealant
WATER RESISTANCE
The control of water ingress to a building is the responsibility
of the designer. All flashings, damp proof courses and
sealants must be installed in accordance with the relevant
instructions, standards and building codes.
WALL WRAP/SARKING SELECTION
To ensure occupant comfort and protection of the building
frame, the following factors should be considered during the
selection of the correct wall wrap/sarking.
• Condensation Risk: This is a complex problem and
can occur under a variety of conditions (not just in cold
and tropical climates) so selection of the right wall wrap/
sarking needs to consider the local climate, building use
and orientation, material R-Value of the insulation, as well
as the degree and location of ventilation.
• Weather Barrier: Wind loads can produce lower air
pressures within buildings than on the outside, forcing
water through small gaps in the building envelope around
penetrations and joints, even at low wind speeds.
Careful selection of a wall wrap/sarking with the appropriate
level of vapour permeability or vapour resistance is one
key factor in reducing condensation risk. Table 1 provides
5
guidance on recommended wall wrap/sarking selection.
Key selection characteristics for a suitable wall wrap/sarking
are as follows:
• The wall wrap/sarking must have a ‘high’ water barrier
classification – an ‘unclassified’ rating is not suitable.
• Wall wrap/sarking must meet the requirements of
AS/NZS4200.1: Pliable building membranes and
underlays – Materials, and be installed in accordance
with AS/NZS4200.2: Pliable building membranes and
underlays – Installation requirements.
Whilst the requirement to seal joins and penetrations may
vary depending upon BCA and/or state requirements,
CSR recommends sealing the external wall wrap/sarking
to maintain vapour performance and draught proofing
effectiveness, as well as to ensure water barrier integrity. As
there are a number of factors that need to be considered
in assessing and managing condensation risk, it is
recommended that designers undertake a condensation
risk analysis prior to wall wrap/sarking selection as part of
the building design. Additional literature on this subject is
available from CSIRO/BRANZ/ASHRAE/ABCB and CSR
DesignLINK can help with this assessment.
INSULATION
Energy efficiency requirements for buildings are set out
in the BCA as performance requirements and acceptable
construction practices, and are dependant on geographical
climate zones. To meet the requirements, it is recommended
that CSR Bradford insulation be installed in the wall framing.
Check with local building authorities for minimum insulation
requirements.
It is recommended that insulation values above the minimum
be chosen for energy conservation and occupant comfort.
Insulation also improves the acoustic performance of the
wall against outside noise.
The level of insulation provided in a wall is described by its
R-value. The higher the R-value the greater the insulation
provided.
R-values for some systems are given in the Table 2.
Refer to 'Components' for product information.
COLD CLIMATES
In cold climates where condensation in the wall cavity is
possible, a vapour barrier is also recommended between
any internal linings and the framing
Cemintel Aspect™ cladding is not designed to be in contact
with snow or ice build-up, such as is experienced in alpine
areas subject to snowdrifts. When used in freeze/thaw
conditions, Aspect™ cladding must be painted prior to
exposure to freezing conditions.
CEMINTEL ASPECT™ CLADDING
6
Table 1: Guidance on Wall Wrap/Sarking
Climate
Guidance on wall wrap/sarking to be used behind the cladding
Performance Criteria
Recommended Product
Cold Climates*
In cold climates where the risk of condensation is high, vapour
permeable membranes should always be installed on the cold
external side of the insulation.
Vapour Permeability
> 2.5µg/N.s
Enviroseal ProctorWrap
RW or CW
Temperate and inland
climate zones
It is recommended to use vapour permeable membranes to
avoid creating a seasonal moisture trap and to allow drying in
either direction – interior or exterior.
Vapour Permeability
> 2.5µg/N.s
Enviroseal ProctorWrap
RW or CW or
Thermoseal Resiwrap or
Thermoseal Wall Wrap or
Thermoseal 733
* For alpine areas and buildings that have high internal levels of humidity (such as indoor swimming pool areas), please contact CSR Bradford for
project specific technical advice.
Warm humid coastal
and tropical climates
Where vapour flow is typically inward, such as where the building
is air-conditioned, membrane should be non-permeable.
Vapour Resistance
> 7MNs/g
Table 2: Thermal Performance Selection
CEMINTEL ASPECT™ CLADDING SYSTEM
Cemintel Aspect™ cladding fixed to the outside of framing.
Wall Wrap/Sarking as per table below.
Studs at 600mm maximum centres – (minimum depth to suit insulation thickness).
Thermal break where required for steel framing.
Insulation in framing as per table below.
1 layer x 10mm GYPROCK Standard Plasterboard to the inside of framing.
•
•
•
•
•
•
Winter Total
Wall R-Value
Summer Total
Wall R-Value
Bradford Thermoseal Wall Wrap
2.5
2.3
(b) BRADFORD 90mm Gold
Wall Batts R2.5
Bradford Thermoseal Wall Wrap
2.9
2.7
(c) Bradford 90mm Gold
Wall Batts R2.7HP
Bradford Enviroseal Proctorwrap
RW
3.1
2.9
(d) Bradford 90mm Gold
Wall Batts R2.7HP
Bradford Thermoseal Wall Wrap
3.1
2.9
(e) NIL
Bradford Thermoseal 733*
0.8
0.7
Insulation
Wall Wrap/Sarking
(a) BRADFORD 70mm Gold
Wall Batts R2.1
NOTES: Values calculated in accordance with AS4859.1, and are based on an un-ventilated cavity and using Bradford Thermal Calculator v1.2.
* Bright side of foil facing stud cavity. Bradford Thermofoil 733 is wall wrap/sarking with reflective finish both sides. Using an alternative
product with anti-glare finish will REDUCE the stated R-value performance.
INTERNAL LININGS
COASTAL AREAS
Internal linings are to be designed for the applicable
pressures calculated in accordance with AS4055. For
Gyprock Standard Plasterboard linings, the arrangements
in Table 3 may be used. Sheet fixing details are to be in
accordance with GYP547 Gyprock Residential Installation
Guide. For other lining materials, consult the manufacturer.
Cemintel Aspect™ cladding is suitable for many coastal
areas. Corrosivity zones are detailed in AS4312. Cemintel
Aspect™ cladding may be used in zones up to and including
C4 - High. In C4 corrosivity zones, face fixings that are not
countersunk and covered with recommended filler must
be Class 4 or stainless steel. It is recommended that the
building designer assess the site in accordance with the
standard and local conditions.
Table 3: Internal Lining Design
Wind
Category
Internal
Pressure
(kPa)
Lining
Sheet
Orientation
N1, N2, N3
0.45
10mm Gyprock
SP*
Horizontal or
Vertical
N4, N5, N6,
C1
1.33
10mm Gyprock
SP*
Horizontal
C2, C3
2.30
13mm Gyprock
SP*
Horizontal
C4
3.11
2 x 10mm Gyprock
SP*
* Gyprock SP = Gyprock Standard Plasterboard
Cemintel Aspect™ cladding is NOT suitable for Corrosivity
Zone C5 – Very High. This includes the beachfront in regions
of rough seas and surf beaches, and inland for several
hundred metres, e.g. around Newcastle extending over
half a kilometre from the coast. It also includes aggressive
industrial areas where the environment may be acidic with
a pH of less than 5.
Horizontal
Consideration must also be given to local weather and
topographical features that can cause an increase in the
distance that salt spray can travel beyond the limits detailed
in AS4312.
CEMINTEL ASPECT™ CLADDING
In Category C3 and above, salt laden air must be excluded
from the wall cavity, for instance by lapping and sealing
vapour barriers and flashings at corners, penetrations and
joins. All walls which are protected by soffits above should
be washed down twice per year, to remove salt and debris
build-up, particularly around window/door openings.
Window Drainage
Face
Draining
Windows
✓
Sill
Draining
Windows
7
✘
WASH-DOWN
Whe n cle aning panels, use no more than 70 0 psi
(50kg/cm2) of water pressure at 3m to 3.5m distance from
the face. Water pressure should be applied downward to
avoid forcing water into the board joints.
BUILDING RENOVATIONS
FLASHINGS & CAPPINGS
In general, flashings shall be designed and installed in
accordance with SAA-HB39 1997 - Installation code for
metal roofing and wall cladding. All flashings are supplied
by others.
Table 4: Flashing Upstand
Wind Classification
Flashing Upstand Minimum
(mm)
N1, N2, N3/C1
150
N4/C2
200
N5/C3
300
N6/C4
350
WINDOW SELECTION
The Aspect™ system is designed to accept standard
aluminium or timber framed windows and doors. Aluminium
windows MUST NOT have sill drain holes which can direct
water behind the cladding.
Consideration must be given to the total depth of the wall
to ensure the required clearance is provided at the window
jamb to accommodate the cladding. As per normal industry
practice, reveal depth is usually varied to adjust the window
location.
Elements that affect window/door installations include the
depth of the stud framing, the thickness of internal linings,
the depth and design of the chosen window frame, the
depth of the timber reveal and the total depth of the cladding
system. Refer to typical window installation details later in
this guide.
Jamb flashing is recommended in all cases, and for ease
of installation, these should be included when ordering
windows.
When undertaking building renovations, remove all cladding
and wall wrap/sarking from the original wall framing. Ensure
the condition of the framing is in accordance with current
applicable requirements. Install additional studs where
required and prepare framing, wall wrap/sarking and
flashings as per details in this publication.
PAINTING
Cemintel Aspect™ cladding is factory sealed and should
be painted within three months of delivery to site. CSR
recommends a minimum of two coats of exterior grade
acrylic paint be applied to the manufacturer's specifications.
All cut edges should be pre-painted with an exterior sealer
(preferably prior to installation) and then finished as for the
face.
Where Cemintel Aspect™ cladding is exposed to the
elements for more than three months from delivery, CSR
recommends the application of a priming coat before
applying the decorative coatings.
Prior to the application of the external coating, wash down
all walls with clean fresh water to remove salt spray buildup from boards and fixings. Boards must be allowed to dry
before coating.
MAINTENANCE
The durability of Cemintel Aspect™ cladding can be
enhanced by periodic inspection and maintenance.
Inspections should include examination of the coatings,
flashings, and sealants. Any cracked or damaged finish
or sealants which would allow water ingress, must be
repaired immediately by resealing the affected area, or by
replacing the affected area. Any damaged flashings, boards
or sealants must be replaced as for new work.
Regularly inspect board surfaces and follow wash-down
procedures when required. Refer to requirements for
Corrosivity Zones C3 and above detailed in the "Coastal
Areas" section of this guide.
Ensure ventilation and drainage gaps between panels and
flashings are kept clear of any debris.
8
CEMINTEL ASPECT™ CLADDING
COMPONENTS
MATERIAL PROPERTIES
CEMINTEL ASPECT™ CLADDING
Cemintel Aspect™ is a 12mm thick by 300mm high fibre
cement board with a smooth face. Shiplap style overlapping
edges produce a regular 16mm recessed groove.
12mm
10°
40mm
Cemintel Aspect™ is manufactured to AS/NZS2908.2
Cellulose cement products, Part 2: Flat sheets. Aspect™ is
classified as Type A, Category 2.
Specification
Size
Thickness (nominal)
12mm +10%/-0%
Mass (nominal)
4.5 kg/lm
Panel Length
4200mm +0/-2
Overall Height (nominal)
300 +0/-1 mm
Effective Cover (height nominal)
276 ±1
Diagonals (difference max.)
2 mm
Edge Straightness (deviation max.)
1 mm
Thermal Conductivity (at EMC)
300mm
0.25 W/mºC
Thermal (R) Value
10°
0.05
FIRE RESISTANCE
24mm
Order Nº
Pack Qty
Length
130475
1
4200mm
In accordance with the Building Code of Australia, Part
3.7.1.2, Cemintel™ Aspect can be used wherever noncombustible material is required by the code.
Fire Hazard Indices
(Tested in accordance with AS1530.3)
Index
Ignitability
0
Spread of Flame
0
Table 5: Aspect™ Board Coverage Calculator
300mm Full Board Height = 276mm nominal cover per row.
Aspect™ Board Rows
Coverage for Full Boards
(mm nominal)
25
6924
24
6648
23
6372
22
6096
21
5820
20
5544
19
5268
18
4992
17
4716
16
4440
15
4164
NOTE: In high corrosion zones (C4), Class 4 or Stainless Steel fasteners
may be required. Refer to "Coastal Areas". Supplied by others.
Cemintel™ Fibre Cement Nails for fixing Aspect™
Board to timber framing:
• Hand driven nails, flat head, Class 3 hot dip galvanised
for softwood and hardwood frames. For Face or
concealed fixing.
14
3888
3612
Order Nº
12
3336
77258
11
3060
10
2784
9
2508
8
2232
7
1956
1680
5
1404
4
1128
3
852
2
576
1
300
0
0-1
FASTENERS
13
6
Heat Evolved
Smoke Developed
77259
Description
Qty
2.8 x 40mm
(for concealed fixing)
2.8 x 50mm
(for face fixing)
• Machine driven D-head nails,
50mm x 2.80, Class 3
galvanised. For face fixing.
2 kg
2 kg
Order Nº
Qty
127799
3000
• Machine driven Brad Nails, 50mm x 14G stainless steel.
For face fixing. (Supplied by others).
CEMINTEL ASPECT™ CLADDING
Screws for fixing Aspect™ Board to steel framing:
BOND BREAKER TAPE
• Screws, 10G -18 x 30 mm, Phillips drive, Class 4 finish,
self embedding head. For steel framing 0.55mm to
1.0mm BMT.
•
Order Nº
Qty
125614
1000 (loose)
118224
1000 (Collated)
• WingTEK™, 8G - 18TPI x 35mm, Class 3 finish, CSK rib
head, Phillips drive. For framing 1.0 to 1.6mm BMT.
Order Nº
Qty
26626
1000
SEALANT/ADHESIVE
• Sikaflex® 11FC. To be used
at all board end joints and
at corners to seal behind
cladding. Paintable. Apply
to manufacturer's specifications.
Order Nº
Product
39378
Sikaflex® II FC, 310ml tube
FLEXIBLE SEALANT
• Sikaflex®-PRO
polyurethane sealant for
gaps around windows,
doors and other
penetrations. Paintable. Apply to manufacturer's
specifications.
Order Nº
Qty
11378
1 x 310ml Tube (Grey)
Used behind panel joints made
on framing. Tape is applied to
the face of sarking and joints
are filled with sealant. Tesa
Multiform Tape Nº7492, 48 x
3mm polyethylene closed cell
foam tape.
Order Nº
Qty
13172
1 x 25m
CORNER BACKING
ANGLE
• Metal angle flashing used at
some internal and external
corners to assist with
waterproofing. Manufactured
from steel with Galvalume
AZ150 corrosion resistant
coating. Size 50 x 50 x
3030mm.
Order Nº
Length
Qty
111498
3030mm
1
EXTERNAL
CORNER
PROFILE
50mm
50mm
17mm
• Aluminium
extrusion
for external
building
corners.
17mm
Order Nº
Length
Qty
131272
3000mm
1
SEALANT PRIMER
• Sika® Primer-3 N should be applied to
surfaces prior to sealant to improve the
long-term performance of joints. Apply
to manufacturer's specifications.
Order Nº
115227
Product
Sika®
Primer-3 N
250ml
INTERNAL
CORNER
PROFILE
50mm
50mm
17 x 17
• Aluminium
extrusion
for internal
building
corners
Order Nº
Length
Qty
131271
3000
1
9
10
CEMINTEL ASPECT™ CLADDING
CEMINTEL™
EXTERNAL JOINTING
COMPOUND
WALL WRAP/SARKING
• Used to conceal the
countersunk fastener
heads, to prevent moisture
penetration, and to
provide a flat surface for
decorative coating. Filler
products must be installed to the manufacturer’s
recommendations.
Order
Nº
13462
10576
Bradford
Product
Thermoseal™
Wall Wrap
Classification
Nonpermeable
Reflective
Water
Classification
High
108879
108004
Thermoseal™
Resiwrap
Nonpermeable
Reflective
High
120121
Enviroseal
Permeability
120923 ProctorWrap™
High
Residential (RW)
Environseal
ProctorWrap™ Permeability
118593
Commercial
High
(CW)
NonThermoseal™
permeable
81333
733
Reflective
Quantity
1350mm x
20m roll
1350mm x
60m roll
1350mm x
30m roll
1350mm x
60m roll
1500mm x
30m roll
High
1500mm x
50m roll
High
1500mm x
50m roll
High
1350mm x
60m roll
Order Nº
Qty
101548
15kg bucket
101549
6kg bucket
FLASHING TAPE
• Used to seal wall wrap/
sarking and flashing
at various locations.
(Supplied by others).
THERMAL BREAK
• E x tr ude d polyst y re ne str ip to me et R 0.2 BCA
requirement. Required when directly fixing to steel
framing. Contact CSR for details.
INSULATION
• Quality Bradford™
glasswool insulation
to meet regulatory
requirements along with
environmental, energy
and cost efficiency
targets.
FLASHINGS & CAPPINGS*
• Flashings are to be designed and installed in accordance
with SAA-HB39 1997 and good building practice.
(Supplied by others.
Order
Nº
Bradford™ Product
Size
(mm)
Quantity
Batts per
Pack
105209
Gold Wall Batts R2.1 (70mm)
1160 x 430
6
105206
Gold Wall Batts R2.1 (70mm)
1160 x 580
6
105203
Gold Wall Batts R2.5 (90mm)
1160 x 430
8
105202
Gold Wall Batts R2.5 (90mm)
1160 x 580
8
105205
Gold Wall Batts R2.7 (90mm)
1160 x 430
5
105204
Gold Wall Batts R2.7 (90mm
1160 x 580
5
CEMINTEL ASPECT™ CLADDING
11
BUILDER’S INSTALLATION CHECKLIST
The following builder's checklist can assist in making the Cemintel Aspect™ installation process run smoothly.
ACTION
PRE-CLADDING CHECKLIST
1
Confirm that studs are located in
accordance with project specifications.
2
Confirm that double studs are
appropriately located at internal corners
where required for board fixing.
3
Confirm timber framing alignment is in
accordance with AS1684, or steel framing
is in accordance with AS/NZS4600, and
correct if necessary.
4
Confirm bracing is in place.
5
Confirm ground clearance to the bottom
of the first Aspect™ Board in accordance
with Australian Standards. (75mm
minimum).
6
Confirm all window and door flashings are
correctly installed.
7
Confirm that the wall wrap/sarking has
been fully and correctly installed, and
overlapped and taped at joints and
flashings.
8
Confirm windows are front draining type.
9
Confirm that window placement provides
the appropriate clearance for board
installation.
10
Confirm adequate structural support for
fixtures such as pergolas and decks has
been provided. No loads may be carried
by the cladding.
11
Confirm membranes and flashings
for deck areas have been installed
in accordance with manufacturer’s
specifications.
12
Arrange for a pre-cladding inspection by
the appropriate local building authority.
ACTION
COMPLETED
POST-CLADDING CHECKLIST
1
Confirm all joints have been neatly filled
with recommended sealant.
2
Confirm all visible screw heads have been
countersunk and covered with appropriate
compound and finished flush with the
surface.
3
Confirm sealant has been applied to gaps
at openings (where appropriate).
5
Confirm appropriate painting of cladding
and all exposed edges.
COMPLETED
12
CEMINTEL ASPECT™ CLADDING
INSTALLATION PROCEDURE
HANDLING & STORAGE
Cemintel Aspect™ cladding boards must be treated with
care. During handling, avoid damage to edges, ends and
surfaces.
Panels must be carried on edge. Panels must be stacked
flat, clear of the ground, and supported at 400mm maximum
centres on a level platform.
Material must be kept dry, preferably by being stored inside
the building. Panels exposed to moisture prior to installation
may be subject to shrinkage, and voiding of warranty.
Protect from contaminants such as silicone spray. Where it
is necessary to store panels outside, they must be protected
from the weather.
Plan panel layout so that, where possible, a full height board
occurs above and/or below openings. If a board has been
reduced in height, provide a joint to at least one side of the
opening. Refer to Installation Details.
When a window or door opening exceeds 1800mm width, it
is necessary to have a joint above and below the opening for
both full and reduced height boards to allow for movement.
Joints at ends of boards should be located randomly
throughout the wall to reduce visual impact.
Board joints must be formed framing. Depending on the
stud width and fixing method chosen, additional blocking
or studs may be required at joints to provide sufficient edge
distances for fixings.
Panels must be dry prior to fixing, prior to joint sealing and
prior to painting.
BOARD FIXING
FRAMING PREPARATION
Board ends should be cut square. Treat cut ends with a
primer that is compatible with the joint sealant to be used.
Inspect the frame carefully for bowed, warped, or twisted
studs, and for alignment of all framing members. Check
alignment of all framing with a long straight-edge. The
maximum misalignment should not exceed 4mm over
3,000mm, or 3mm over 1,200mm, or 2mm over 600mm,
when checked both horizontally and vertically. Ensure all
noggings are flush.
Studs are to be spaced in accordance with Table 6, (600mm
max. centres).
Fasteners are to be positioned as specified in Table 6.
Refer to FIG 3 for appropriate fixing methods for the chosen
fasteners.
Nail heads must be driven flush with the sheet surface.
Exposed screw fixings should be countersunk/embedded
to allow screw heads to finish up to 2mm below board
surface. Cover screw heads with recommended filler and
finish level with surface.
Studs at board joints must have a minimum fixing face
width of 45mm for timber or 50mm for steel to provide
sufficient support for fixing. Otherwise, additional trimmers
or studs may be used to ensure fasteners have suitable edge
distances. Refer to FIG 1, FIG 11, FIG 12 and FIG 13.
Concealed screws must be driven with the head level with
the surface. Refer to FIG 2.
FIG 1: Framing Detail for Narrow Stud Application
Refer to FIG 3, FIG 4 and FIG 5 for installation procedures.
Bond Breaker Tape is required to the face of the sarking
behind board end joints. Refer to FIG 4.
FIG 2: Fastener Driving & Finishing
Narrow
Stud
✗ ✓
Bond
Breaker
Tape
Sarking
Additional
Stud or
Trimmer
Cemintel Aspect™
Cladding
PANEL & JOINT LAYOUT
Panels must be installed with horizontal shiplap joints. All
edges must be supported at openings and perimeters. Add
extra framing members as required.
✓
✗
Suitable
when fixing
through
tongue only
CEMINTEL ASPECT™ CLADDING
13
Table 6: Maximum Stud Spacing & Fixing Specifications – Timber or Steel Studs
Fixing Specifications (Minimum fixings to each stud)
Maximum Stud Spacing
mm
Wind
Classification
Steel Framing
(0.55mm BMT minimum)
Timber Framing
General Zone
(mm)
➊
Corner Zone
(mm)
➋
Brad Nails
Face Nailing
Hand or Gun
Concealed
Nailing
Hand Only
Face
Fixing
Concealed
Fixing
N1 or N2
600
600
2 x Brad nails
@ 150mm min.
cts through face
2 x 50mm nail @
150mm min. cts
through face
1 x 40mm nail
through tongue
2 x 50mm nail @
150mm min. cts
through face
1 x screw
through tongue
N3/C1
600
450
2 x Brad nails
@ 150mm min.
cts through face
2 x 50mm nail @
150mm min. cts
through face
N/A
2 x screws (1
through tongue +
1 through face
N/A
N3/C1
600
600
N/A
2 x 50mm nail @
150mm min. cts
through face
N/A
2 x screws (1
through tongue +
1 through face
N/A
N4/C2
600
450
N/A
2 x 50mm nail @
150mm min. cts
through face
N/A
2 x screws (1
through tongue +
1 through face
N/A
N5/C3
450
450
N/A
2 x 50mm nail @
150mm min. cts
through face
N/A
2 x screws (1
through tongue +
1 through face
N/A
N6/C4
450
300
N/A
2 x 50mm nail @
150mm min. cts
through face
N/A
2 x screws (1
through tongue +
1 through face
N/A
➊ GENERAL ZONE – Wall areas greater than 1200mm from an External Building Corner.
➋ CORNER ZONE – Wall areas less than 1200mm from an External Building Corner.
FIG 3: Board Fixing Methods
Brad
Nailing
by Gun
50mm
Brad nails
through
face
(finished
level)
Stud
framing
Face
Nailing by
Hand or
Gun
25mm
min.
50mm flat
head nails
through
face
(finished
level)
Concealed
Nailing –
Hand Only
20mm
25mm
min.
150mm
min.
150mm
min.
50mm to
75mm
50mm to
75mm
Stud
framing
Face
Screw
Fixing
40mm flat
head nails
through
tongue
(finished
level)
20mm
Screw
through
tongue
(finished
level)
Screw
(countersunk
and covered)
Stud
framing
Concealed
Screw
Fixing
Stud
framing
20mm
Screw
through
tongue
(finished
level)
50mm to
75mm
Stud
framing
14
CEMINTEL ASPECT™ CLADDING
FIG 4: Installation Procedure
➊ Install wall wrap/sarking.
➋ Install corner profiles, and
fix to framing at 600mm
maximum centres.
➌ Cut board to length allowing
2-3mm gaps each end.
Apply sealer to cut edges.
2
1
4
➍ Apply Bond Breaker Tape
to sarking behind board
junction.
5
➎ Apply 6mm diameter bead
of sealant to corner profile
behind board.
3
FIG 5: Installation Procedure
(continued)
➏ Align boards and bed into
sealant leaving 2-3mm gap
at each end of the board.
7
➐ Firmly tap board downward
to bed into taper of board
below.
➑ Fix board to studs as per
system specification. Refer
to Table 6.
6
10
➒ Fill gap to corner profile with
sealant.
➓ Fill gap between board ends
with sealant.
8
9
CEMINTEL ASPECT™ CLADDING
15
SAFETY
NOTCHING
When cutting, drilling or grinding Cemintel products using
power tools, always ensure the work area is well ventilated.
An approved dust mask (AS1715 and AS1716) and safety
glasses (AS1337) must be worn. CSR recommends that
hearing protection be worn.
Cut the two sides from the back. Score between the cuts
on the front face and snap upwards to remove the piece.
DRILLING
Use high speed masonry drills. Do not use the hammer
action.
HOLE FORMING
Small holes are
formed by using a
Hole Saw:
1. Locate the centre
of the hole.
2. Form hole with
appropriate sized
hole saw with
centre drill.
TOOLS
All saws, drill/drivers, cutting blades, drill bits and hand tools
must be maintained in good and clean condition to ensure
appropriate cutting and drilling.
CSR recommends the use of following tools in conjunction
with appropriate dust reduction methods.
Large holes or openings are formed
by using a Jig Saw fitted with masonry blade:
1. Mark the
required
opening.
2. Drill holes in
all corners.
3. Cut along
marked lines.
SCREW HEAD COVERING FOR
COUNTERSUNK SCREWS
All countersunk screw heads must be covered with
Cemintel™ External Jointing Compound and flush finished
with the board surface. Compound is to be used in
accordance with the manufacturers instructions. Avoid
over filling holes, and level off before compound hardens.
FIG 6: Covering Countersunk Screw Heads
FESTO TS 55 EBQ Plunge Cut Saw with guide rail
Product
FESTO TS 55 EBQ Plunge Cut Saw with
1400mm Guide Rail
FESTO Diamond Tipped Blade for TS55 (for
cutting CDS Panel, fibre cement sheet, etc.)
Cemintel
Aspect™
cladding
Order Nº
121400
112647
Steel stud framing
Countersunk/
embedded
screw
Screw head covered
with Cemintel™
External Jointing
Compound
16
CEMINTEL ASPECT™ CLADDING
INSTALLATION DETAILS
FIG 7: Typical Base & Concealed Fixing –
Timber Framing – Recessed Concrete Slab Foundation
20mm
FIG 8: Typical Base & Concealed Fixing –
Steel Framing – Flat Concrete Slab Foundation
Fixing to studs
in accordance
with system
specification
20mm
Fixing to studs
in accordance
with system
specification
Stud
framing
Stud
framing
Cemintel Aspect™
Cladding
Cemintel Aspect™
Cladding
Sarking
Sarking
Thermal Break
(where required)
Fixings spaced
in accordance
with system
specification
Pre-countersink
face fixings and
cover head with
recommended filler
50mm to
75mm.
50mm to
75mm
Dampcourse
Dampcourse
Concrete slab
Fixings spaced
in accordance
with system
specification
Clearance to
regulatory
requirements
(75mm min.)
Concrete slab
Clearance to
regulatory
requirements
(75mm min.)
CEMINTEL ASPECT™ CLADDING
FIG 9: Typical Base & Brad Nail Face Fixing – Timber
Sub-floor
17
FIG 10: Typical Second Storey Junction with Hebel
Panels, Brick Veneer or Masonry Wall – Cantilevered
Framing & Face Fixing – Timber Sub-floor
Fixing to studs
in accordance
with system
specification
Fixing to studs
in accordance
with system
specification
Stud
framing
Stud
framing
CAUTION:
Vertical shrinkage of
framing must be
addressed
Cemintel Aspect™
Cladding
Cemintel Aspect™
Cladding
Sarking
Sarking
Upper Storey
Floor Joist or
Blocking
Floor Joist or
Blocking
50mm to
75mm
50mm to
75mm
20mm min.
Dampcourse
Termite barrier to
regulatory
requirements
Foundation
Termite barrier
alternative
location
Metal
Flashing
(by others)
Hebel Panel,
PGH Brick or
masonry wall
18
CEMINTEL ASPECT™ CLADDING
FIG 11: Vertical Joint Detail with Trimmer or Double
Studs – Timber Framing – Hand Nailing
FIG 14: External Corner with Aluminium Profile
Cemintel
Aspect™
Cladding
Stud framing
Narrow
Stud
Sarking
overlapped
and taped
at corners
Bond
Breaker
Tape
Sarking
Aluminium
External Corner
fixed to framing
at 600mm max
centres through
flanges
Additional
Stud or
Trimmer
Cemintel Aspect™
Cladding
20mm
min.
3mm
nom.
20mm
min.
Joint filled with
approved sealant
20-50mm
Apply 6mm continuous
bead of sealant to corner
profile and bed board
FIG 12: Vertical Joint with 45mm min. Timber Stud
Framing – Face Fixing with Brad Nails (skewed)
2-3mm gap filled
with sealant
FIG 15: External Corner with Mitred Boards
Stud framing
Bond
Breaker
Tape
Sarking
Cemintel
Aspect™
Cladding
Sarking
overlapped
and taped
at corners
Stud
(45mm min. width)
Corner Backing
Angle fixed at
600mm max. cts
through each
flange
Brad nailing
through face
(skewed)
Cemintel Aspect™
Cladding
20mm
min.
3mm
nom.
20mm
min.
Joint filled with
approved sealant
20-50mm
Apply 6mm continuous bead of
sealant to face of Backing
Angle and bed board
FIG 13: Vertical Joint Detail with Double Studs or
Trimmer – Steel Framing – Face Fixing
2-3mm gap filled
with sealant
FIG 16: External Corner with Timber Moulding
Double studs or trimmer at panel joints
where fixing face is less than 50mm
Steel
stud in
normal
position
Stud framing
Additional
steel
stud or
trimmer
Thermal Break
Bond
Breaker
Tape
Specified Screws
(pre-countersink
face fixing
screws and fill)
Sarking
Sarking
overlapped
and taped
at corners
Cemintel
Aspect™
Cladding
Corner Backing
Angle fixed at
600mm max. cts
through each
flange
20-50mm
Cemintel Aspect™
Cladding
20mm
min.
3mm
nom.
20mm
min.
Joint filled with
approved sealant
Apply 6mm continuous bead
of sealant to face of Backing
Angle and bed board
2-3mm gap filled
with sealant
CEMINTEL ASPECT™ CLADDING
FIG 17: Internal Corner with Aluminium Profile
19
FIG 20: External Corner – Obtuse Angle
Cemintel Aspect™ Cladding
Sarking overlapped at corners
Sarking overlapped and
taped at corners
Aluminium Internal Corner
Profile fixed to framing
Metal flashing (by others)
Apply 6mm continuous
bead of sealant to corner
profile and bed board
Skew nail or supply additional
studs where appropriate
6mm bead of Sealant
on metal flashing
Stud framing
2-3mm gap filled with sealant
Bond Breaker Tape
20-50mm
2-3mm gap filled
with Sealant
Stud
framing
20-100mm
Blocking
to suit
FIG 18: Internal Corner with Mitred Boards
Sarking overlapped at corners
Metal Corner Backing
Angle fixed to framing
Apply 6mm continuous bead
of sealant to Backing Angle
and bed board
Skew nail or supply additional
studs where appropriate
FIG 21: Junction of Aspect™ Cladding System with
Alternative Fibre Cement Cladding – Plan View
15-20mm gap with Rondo
P35 Control Joint
10mm Gyprock
plasterboard
Gap and packing
Stud
framing
2-3mm gap filled with sealant
Cladding
material
20-50mm
Sarking
Sarking
Cemintel Aspect™
Cladding trimmed
to suit
Stud
framing
Bond breaker
tape and sealant
Finishing Trim fixed to
framing (by others)
Backing Rod
3-6mm
Fill gap with Sealant
FIG 19: Internal Corner with Timber Moulding
Sarking overlapped at corners
Apply 6mm continuous
bead of sealant to corner
flashing and bed board
FIG 22: Junction of Aspect™ Cladding System with
Offset or In-line Masonry Wall – Plan View
10mm Gyprock
plasterboard
15-20mm gap with Rondo
P35 Control Joint
Dampcourse
6mm gap and packing
Skew nail or supply additional
studs where appropriate
Timber moulding to suit
2-3mm gap filled with sealant
Stud
framing
20-50mm
In-line masonry wall
Stud
framing
Corner Backing
Angle fixed at
600mm max. cts
through each
flange
Cemintel Aspect™
Cladding trimmed
to suit
Fill gap with
Sealant
Off-set masonry wall
Backing Rod
3-6mm
20
CEMINTEL ASPECT™ CLADDING
WINDOW & DOOR INSTALLATION
FIG 23: Window Detail – Trend Quantum XP Aluminium
Sliding Window with Weatherboard Reveal Clip E482
FIG 24: Window Detail – A&L Aluminium Sliding
Window with Weatherboard Trim
Sarking over
flashing
Cemintel Aspect™
Cladding
Cemintel Aspect™
Cladding
Clearance to
window
manufacturer’s
requirements
Sarking over
flashing
Lintel
Sealant bead
Lintel
Clearance to
window
manufacturer’s
requirements
Window trim
by installer
Pre-coat cut edges
with exterior sealer
No packing
Pre-coat cut edges
with exterior sealer
No packing
Head
Trend Quantum XP
Aluminium Sliding Window
Frame (or similar)
70x19mm nom.
reveal shown
A&L Aluminium
Sliding Window
Frame
85x19mm nom.
reveal shown
Sill weather flap
(by window
manufacturer)
Packer (by
installer)
Packer (by
installer)
Metal Flashing
(by installer)
Head
Metal Flashing
(by installer)
Sill
Sill weather flap
(by window
manufacturer)
Sill
Sill drainage
Window trim
by installer
Cemintel Aspect™
Cladding
Stud framing
(90mm shown)
Flashing over
sarking (by installer)
10mm Gyprock
plasterboard
Cemintel Aspect™
Cladding
Stud framing
(90mm shown)
Flashing over
sarking (by
installer)
10mm Gyprock
plasterboard
Sarking
Sarking
100mm nom.
100mm nom.
Stud framing
(90mm shown)
Sarking wrapped
around corners
12mm nom.
Sarking wrapped
around corners
12mm nom.
85x19mm nom.
reveal shown
70x19mm nom.
reveal shown
Stud
Flashing
recommended
(by window
manufacturer)
Stud framing
(90mm shown)
Flashing
recommended
(by window
manufacturer)
Stud
Packer (by
installer)
Packer (by
installer)
Jamb
Jamb
Cemintel Aspect™
Cladding
Sealant
Trend Quantum XP Aluminium
Window Frame with Weatherboard
Reveal Clip E482 (or similar)
Cemintel Aspect™
Cladding
Window trim
by installer
A&L Weatherboard Reveal
Trim reversed (special order)
Sealant if
required
A&L Aluminium Sliding
Window Frame
CEMINTEL ASPECT™ CLADDING
FIG 25: Bradnams Essential Sliding Window
Installation – 70mm Framing and 80mm Reveal Shown
21
FIG 26: Bradnams Essential Sliding Door Installation –
70mm Framing and 80mm Reveal Shown
10mm Gyprock
plasterboard
Stud framing
(70mm shown)
Sarking over
flashing
Cemintel Aspect™
Cladding
Sarking over
flashing
Lintel
Clearance to
window
manufacturer’s
requirements
Lintel
Cemintel Aspect™
Cladding
Sealant bead
Window trim
by installer
No packing
12mm nom.
No packing
Pre-coat cut
edges with
exterior sealer
Pre-coat cut edges
with exterior sealer
Metal Flashing
(by installer)
Head
Bradnams Essential
Aluminium Sliding Window
Frame (or similar)
80x19mm nom.
reveal shown
Packer (by
installer)
80mm nom.
Clearance to
door
manufacturer’s
specifications
Head
80x19mm
reveal shown
Bradnams Essential
Sliding Door Frame
installed to
manufacturer’s
specifications
Sill weather flap
(by window
manufacturer)
Sill
Window trim
by installer
Dampcourse and
flashing or subsill
assembly to door
manufacturer’s
specifications
Sill
Recess and extend
slab locally or
provide sill support
Cemintel Aspect™
Cladding
Stud framing
(70mm shown)
Flashing over
sarking (by installer)
10mm Gyprock
Plasterboard
Sarking
80mm nom.
Clearance to
regulatory
requirements
12mm nom.
Sarking wrapped
around corners
80x19mm nom.
reveal shown
Packer (by
installer)
Sarking wrapped
around corners
80x19mm
reveal shown
Packer (by
installer)
Stud
Stud framing
(70mm shown)
Metal Flashing
(by installer)
Stud
Jamb
Cemintel Aspect™
Cladding
Flashing
recommended
(by window
manufacturer)
Bradnams Essential
Sliding Door Frame
Stud framing
(70mm shown)
Cemintel Aspect™
Cladding
Flashing recommended
(by window manufacturer)
Jamb
Sealant in 3mm min. gap
22
CEMINTEL ASPECT™ CLADDING
FIRE RATED EXTERNAL WALL SYSTEMS
BUSHFIRE PRONE AREAS
FRAMING
In accordance with AS3959, Aspect™ cladding is suitable
as an external wall lining for buildings assessed as BAL-19
or lower, and where the wall includes sarking, for buildings
up to BAL-29.
In addition to the standard structural framing, fire rated
systems require minimum 70 x 35mm H3 timber battens
to be fixed to the face of studs in accordance with Table 7.
Vermin proofing which also allows cavity drainage, such as
a cavity baffle, is required at the base of the battens.
Cemintel Aspect™ has been tested to AS1530.3 and can
achieve BAL-40 or FZ (with 10m vegetation set-back) when
used in conjunction with Gyprock Fyrchek MR plasterboard
and installation methods in accordance with Gyprock fire
rated system specifications and details. For more detailed
fire system information, please refer to Gyprock publication,
GYP500 – The Red Book™ Fire & Acoustic Design Guide.
Table 7: Batten Fixing Specifications for Studs at
600mm max. centres
Wind Classification
Spacing of Batten Fixing to Studs
(mm max.)
N1, N2
500
For additional bush fire requirements, refer to AS3959
Construction of buildings in bushfire prone areas, and to the
BCA Volume 1 Part 3.7.4.
N3, C1
400
N4, C2
300
N5, C3
200
N6, C4
150
NOTE: Loads based on AS4055 with Net Cpi = -1.3 & 0.7
FIG 27: Typical Aspect™ Cladding and Gyprock Plasterboard Fire Rated External Wall System
➊
➒
➑
Timber or steel stud framing at
600mm maximum centres
➋
One or two layers of Gyprock
Fyrchek MR plasterboard as
per system specification
➌
➍
Building
Wrap
Timber battens (70 x 35mm H3
minimum) fixed over studs
Gyprock
plasterboard
internal
lining as per
system
specification
➎
CSR Cavity
Insulation as
per system
specification
➏
➐
Sealant and corner
profiles at corners as per
standard installations
Aspect™ Cladding (full length
where possible – up to 4.2 metres)
On-batten joints with Bond Breaker
Tape and filled with Sealant
Fyrchek Fixing Specifications
1st LAYER – Horizontal Sheeting
Nails
Screws
2.8x40mm gal clout
6-18x30mm needle pt
Location
Fixing Spacing
Recessed
Edges
Fix at each stud
Field,
Corners &
Openings
Fix at 600mm max.
centres
Butt Joints
(on framing)
Fix at 600mm max.
cts
NOTE: Butt joints and recessed joints
must be offset between layers by
600mm minimum.
2nd LAYER – Horizontal Sheeting
Nails
Screws
2.8x50mm gal clout
6-18x45mm needle pt
Location
Fixing Spacing
Field
Fix at 300mm max.
centres
Sheet Width
900mm
5 Fixings
1200mm
5 Fixings
1350mm
6 Fixings
Recessed
Edges
Fix at each stud
Corners &
Openings
Fix at 300mm max.
centres
Butt Joints
(on framing)
Fix at 200mm max.
centres
CEMINTEL ASPECT™ CLADDING
23
Timber or Steel Frame External Wall Systems – Cladding on Battens
SYSTEM SPECIFICATION
ACOUSTIC
OPINION
TYPICAL LAYOUT (CSR 900a shown)
• External cladding material on battens.
PKA-055
• Sarking.
• Lining material as per system table to external side of
studs.
• Timber or Steel studs at 600mm maximum centres.
• Cavity insulation as per system table.
• Lining material as per system table to internal side.
NOTES:
*ACR = Axial Capacity Reduction. (Refer to Notes).
Acoustic performance valid for 35mm wide timber studs or
0.80 BMT steel studs at 600mm centres.
TIMBER FRAMING
FRL
Report/Opinion
SYSTEM
Nº
WALL LININGS
Rt(SUM)
(a) Nil
36
0.7
0.7
• 1 x 16mm Gyprock
Fyrchek MR plasterboard.
(b) 75 Gold Batts™ 1.5
39
2.1
2.0
INTERNAL WALL SIDE
(c) 70 Soundscreen™ 2.0
40
2.7
2.4
• 1 x 10mm Gyprock
Standard Plasterboard.
FAR 2303
CSR 907
from outside only
FAR 2303
TYPICAL WALL THICKNESS mm
(based on 35mm depth batten)
163
(a) Nil
38
0.8
0.7
• 2 x 13mm Gyprock
Fyrchek MR plasterboard.
(b) 75 Gold Batts™ 1.5
41
2.2
2.0
INTERNAL WALL SIDE
(c) 70 Soundscreen™ 2.0
42
2.7
2.5
EXTERNAL WALL SIDE
90/90/90
THERMAL
Rt(WIN)
EXTERNAL WALL SIDE
(from outside
only)
* ACR Group 2
90
Rw
CSR 900
60/60/60*
STUD DEPTH mm
CAVITY INFILL (Refer to Section ‘A’)
• 1 x 10mm Gyprock
Standard Plasterboard.
TYPICAL WALL THICKNESS mm
(based on 35mm depth batten)
173
STEEL FRAMING
FRL
Report/Opinion
SYSTEM
Nº
WALL LININGS
FAR2357
Rt(SUM)
(a) Nil
36 – 40
0.7
0.7
• 1 x 16mm Gyprock
Fyrchek MR plasterboard.
(b) 75 Gold Batts™ 1.5
39 – 43
2.1
2.0
INTERNAL SIDE
(c) 70 Soundscreen™ 2.0
40 – 44
2.7
2.4
• 1 x 10mm Gyprock
Standard Plasterboard.
CSR 119
(from outside only)
FAR2357
TYPICAL WALL THICKNESS mm
(based on 18mm depth batten)
132
(a) Nil
37 – 41
0.8
0.7
• 2 x 13mm Gyprock
Fyrchek MR plasterboard.
(b) 75 Gold Batts™ 1.5
43 – 47
2.2
2.0
INTERNAL SIDE
(c) 70 Soundscreen™ 2.0
44 – 48
2.7
2.5
EXTERNAL SIDE OF STUD
90/90/90
THERMAL
Rt(WIN)
EXTERNAL SIDE OF STUD
60/60/60*
76
Rw
CSR 121
(from outside only)
*ACR 5%
STUD DEPTH mm
CAVITY INFILL (Refer to Section ‘A’)
• 1 x 10mm Gyprock
Standard Plasterboard.
TYPICAL WALL THICKNESS mm
(based on 18mm depth batten)
NOTES: *ACR Group 2 Timber Studs: 90 x 45mm = 0%; 90 x 35mm = 10%; 70 x 45 = 25%; 70 x 35mm = 35%.
142
Cemintel™ is a trademark of CSR Limited
WWW.CEMINTEL.COM.AU
FC:555
ASPECT™ CLADDING
HEALTH & SAFETY
WARNING
Fibre Cement products contain crystalline silica. Repeated inhalation of
fibre cement dust may cause lung scarring (silicosis) or cancer. Do not
breathe the dust. When cutting sheets, use the methods recommended
in this brochure to minimise dust generation. If power tools are used,
wear an approved dust mask (respirator). These precautions are not
necessary when stacking, unloading or handling fibre cement products.
For further information and for a Material Safety Data Sheet, phone
1800 678 068.
WARRANTY
CSR Building Products Limited (“CSR”) warrants its Cemintel Aspect™
cladding (“Product”) to remain free of defects in material and manufacture
for the usual lifetime of the Product (up to 15 years).
In the event of any failure of the Product caused by the direct result of a
defect in the material or manufacture of the Product, CSR will at its option
replace or repair, supply an equivalent product, or pay for doing one of these.
This warranty does not apply where the Product has been used in any
manner not in accordance with the manufacturer’s instructions, nor the
reuse of the Product after its initial installation. This includes installation
and maintenance in accordance with the relevant Cemintel technical
manual, current copies are available at cemintel.com.au/installation or by
contacting 1300 CEMINTEL. CSR recommends that only those products,
components and systems recommended by it be used and the project
must be designed and constructed in strict compliance with all relevant
provisions of the current Building Code of Australia, regulations and
standards. All other products, including coating systems, applied to or
used in conjunction with the Product must be applied or installed and
maintained in accordance with the relevant manufacturer’s instructions
and good trade practice. CSR will need to be satisfied that any defect in its
Product is attributable to material or manufacture defect (and not another
cause) before this warranty applies.
Without limiting the foregoing, CSR will not be liable for any claims,
damages or defects arising from or in any way attributable to poor
workmanship, poor design or detailing, settlement or structural movement
and/or movement of materials to which the Product is attached, incorrect
design of the structure, high levels of pollution, acts of God including
but not limited to earthquakes, cyclones, floods or other severe weather
conditions or unusual climatic conditions, efflorescence or performance
of paint/coatings applied to the Product or normal wear and tear.
Other than as expressly set out in this warranty, and the guarantees that
can not be excluded under The Australian Consumer Law (Schedule 2 of
the Competition and Consumer Act 2010 (Cth)) (and any other law), CSR
excludes all other warranties and guarantees with regard to the Product
including all guarantees and warranties that may apply at law.
To the extent that it is able to do so, CSR excludes all liability for loss and
damage (including consequential loss) in connection with the Product.
This exclusion does not apply where the Product is sold to a consumer and
is a good of a kind ordinarily acquired for personal, domestic or household
use or consumption.
The following statement is provided where the Product is supplied to
a buyer who is a “consumer” under the Australian Consumer Law:
Our goods come with guarantees that cannot be excluded under the
Australian Consumer Law. You are entitled to a replacement or refund for
a major failure and for compensation for any other reasonably foreseeable
loss or damage. You are also entitled to have the goods repaired or
replaced if the goods fail to be of acceptable quality and the failure does
not amount to a major failure. The benefits of this warranty are in addition
to other rights or remedies of the consumer under law in relation to the
goods or services to which the warranty relates.
Notification of a warranty claim must be made to CSR prior to any return
of the Product. Failure to allow CSR to examine an alleged faulty Product
in-situ may result in the voiding of this warranty.
To make a claim under this warranty, you must contact CSR on 1300
CEMINTEL, or write to one of our state offices, cemintel.com.au/contactus. All expense of claiming the warranty will be borne by the person
making the claim. CSR may require documentation supporting the claim
to be provided.
Cemintel™, Aspect™ and CSR™ are trademarks of CSR Limited.
FC555.BMS1096.0215
CONTACT DETAILS
FEBRUARY 2015
Queensland
768 Boundary Road,
Coopers Plains QLD 4108
Western Australia
19 Sheffield Road,
Welshpool WA 6106
CSR designLINK®
Technical Support Service
Tel: 1800 621 117
Emaill: [email protected]
Victoria
277 Whitehall Street,
Yarraville VIC 3013
11 Farley St,
Derwent Park, TAS 7009
New South Wales and ACT
376 Victoria Street,
Wetherill Park NSW 2164
South Australia
Lot 100 Sharp Court,
Mawson Lakes SA 5095
Northern Territory
Cnr Stuart Hwy & Angliss St,
Berrimah NT 0828
CSR Cemintel™ Sales Support
Tel: 13 17 44 Fax: 1800 646 364
Tasmania


© Copyright 2026