FLASH RGB 400 Manual
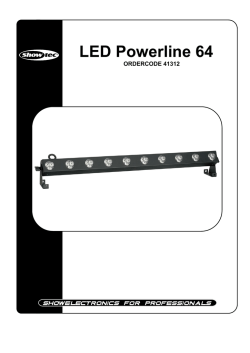
FLASH RGB 400 USER GUIDE Service and repair The Laser Show equipment has no major serviceable parts. Repair of electronic-‐ components (transistors, IC´s) or changing other parts are not allowed by untrained persons. If there is a problem with the Laser Show equipment, your local service engineer will help you with repair or replacement. We recommend shipping the Laser Show equipment to the manufacturer for reparation. Attachments: 1. Laser Light: 1PCS 2. Power Cable: 1PCS 3. User Guide: 1PCS 4. Remote 1PCS WARNINGS ! Visible and invisible laser-‐light, direct beam can damage the human eye and the eyes of animals. Do not look at any Laser light directly. ! Do not touch the laser aperture with the hand. When cleaning the laser aperture, please use a soft cloth with alcohol or camera lens paper. ! Do not take apart or modify the equipment. Fire or electrical shock may result. ! In the unlikely event that you hear unusual noise, see smoke, feel excessive heat or smell anything unusual, immediately unplug the power source and contact your retailer. Continued use may result in fires or electrical shock. ! Do not use flammable sprays near this equipment. Also do not spill water, liquids, or flammable liquids on the equipment. If fluids enter this equipment and contact the electrical parts, fires or electrical shock may result. If anything enters the equipment, immediately unplug the power supply and contact your retailer. Installation 1. Carefully inspect your Laser Show equipment after you unpack it. If any damage is evident, such as dents or scratches on the covers or broken knobs, etc., immediately notify your carrier and your local sales distributor. 2. Hang up the equipment in a safe place. Ensure there are no barriers in front of the laser aperture. Features of the product: 1. Scanner system: 15K scanner 3. Working Modes: Sound Active, Auto run, DMX512 (11 CH), Master/slave mode 4. Interface: 3 pins XLR jack for DMX or Maser-‐Slave linking; 5. Input power: AC 100V~240V, 50/60Hz. Rated power: 15W. 6. Packing size: L*W*H=21.6*16*7cm; Weight: 1.5KG Front and Rear panel view: 1 2 3 4 5 6 7 8 1. Remote signal receiving 2. Laser Aperture 3. DMX linking 4. LED function setting screen 5. Sound sensitivity knob 6. Microphone 7. Power jack and ON/OFF switch 8. Key lock LED FUNCTION SETTING LED D ISPLAY MODE UP DOWN ENTER Press “MODE” to choose functions. In “d***” mode, press “UP” or “DOWN” to select DMX address. Press “ENTER” to save the current working mode or DMX address. Working mode Display Working mode Description AUTO Auto running mode Auto running program SOUD Sound active mode Sound active running d*** DMX mode SLAV Slave mode OFF Off Turn off the machine Laser power of each model: 200mW red laser@650nm, 50mW green laser@532nm, 150mW blue laser@447nm Remote control instruction: Power ON/Off Sound active mode Auto mode 0~63 Manual adjust the horizontal movement 64~255 Dynamic effect of horizontal moving, each 32 value for a different moving effect 0~63 Manual adjust the vertical movement 64~255 Dynamic effect of vertical moving, each 32 value for a different moving effect 0~63 Manual adjust the Y rolling 64~255 Dynamic effect of Y rolling , each 32 value for a different rolling effect 0~63 Manual adjust the X rolling 64~255 Dynamic effect of X rolling , each 32 value for a different rolling effect 0~127 Manual drawing 128~255 Auto drawing from slow to fast Scan speed 0~127 Choose sanning speed from slow to fast Display dot 128~255 The larger the value, the sharper the dot. 0~127 Manual choose the color, each 16 value for a different color 128-‐191 Every single color changing one by one automatically, from slow to fast 192~255 Original pattern colors rolling change from slow to fast CH5 X axis moving CH6 Y axis moving CH7 Y rolling CH8 X rolling CH9 Drawing CH10 CH11 Color setting TROUBLE SHOOTING 1. If the power indicator is off and the laser doesn't work, please check the power supply and the input. 2. In Stand-‐Alone operation, if the power supply indicator is ON and sound active indicator is OFF, but the laser doesn't work. A. Because sound is too small and cannot activate laser running, please increase the music volume or increase audio sensitivity on rear panel. B. Please check if unit has been set up in slave mode, or DMX mode. 3. In Master-‐Slave operation, slave units don't function, please check as below. A. Make sure there's only one master in the chain, and the others are set in slave mode. B. Make sure to use a good quality power cable and XLR connector. 4. In DMX operation, the unit can’t be controlled by the DMX console, but the DMX signal indicator is flashing, please make sure the DMX console and unit have the same channel. 5. If the output beam direction above is unusual, please restart the unit. 6. If the unit is fail, please turn off the unit, and then turn on again after 5 minutes. After trying the above solution you still cannot sort out the problem, please contact your dealer or our company for service. Universal DMX Operation (DMX mode) This mode allows you to use universal DMX-‐512 console to operate. 1. Install the units in a suitable position. 2. Use standard XLR cable to connect your units together via the XLR connector on the rear of the units. For longer cable we suggest a terminator at the last fixture. 3. Assign a DMX address to each the unit using dipswitches. 4. Turn on all units. Use DMX console to control your units. DMX signal Instruction for DMX channels 0 1~49 50~99 CH1 Mode select 100~149 150~199 Black out Manual mode, dynamic patterns running out-‐of-‐bounds; when the value is less than 5, the pattern size will shrink Manual mode, dynamic patterns running back-‐and-‐forth; when the value is less than 55, the pattern size will shrink. Manual and sound mode, dynamic patterns running out-‐of-‐bounds; when the value is less than 105, the pattern size will shrink. Manual and sound mode, dynamic patterns running back-‐and-‐forth; when the value is less than 155, the pattern size will shrink. 200~229 Auto running each pattern (use CH2 to choose patterns) 230~255 Sound mode each pattern (use CH2 to choose patterns) CH2 Pattern 0~127 Selecting built-‐in 127 patterns select 128~255 Random changing the patterns 0~63 Manual adjust the size, from large to small 64~255 dynamic size effect, each 32 value for a different zooming effect 0~63 Manual adjust the rotating position 64~255 dynamic rotating effect, each 32 value for a different rotating effect CH3 Pattern size CH4 Rotation
© Copyright 2026
