
The Scout Handbook - Baden Powell Scouts Association
The Scout
Handbook
All you need to know to grow from
Tenderfoot to 1st Class Scout
and to gain your Scout Cord
Throughout the text, the word “him” or “he” shall be taken to infer both male or female.
1|Page
Copyright B-PSA 2012
Welcome to Scouting, an adventure that will take you from being a ten or eleven year
old Tenderfoot to becoming a First Class Scout and beyond.
The Baden-Powell Scouts’ Association is proud to maintain the Traditional Scouting
skills and values that our founder believed in, but we are equally proud of our ability to
mix those skills and values with some thoroughly modern adventures.
This handbook will guide you through your progression and development in Scouting
and will give you links to other resources that will help you. You have probably just
come from the Wolf Cub Pack - you are now at the start of a journey of fun, adventure
and learning and maybe you will end up being a Patrol Leader and wearing the Scout Cord, the highest
award a Scout can get before they are fifteen – I hope that’s what you are going to aim for.
There are tests to be completed at each stage as you progress to gaining your Scout Cord, but they are not
like school tests - your Patrol Leader, fellow Scouts and your leaders will help you learn the skills and when
you can show that you have mastered them they will sign off your record card.
The tests are grouped like this:
•
•
•
•
Tenderfoot – some simple tests to complete before you are invested as a Scout – if you have gained
your Leaping Wolf you have already completed all the Tenderfoot tests.
Second Class – these are the basic skills that you will need to enjoy the wonderful outdoor life of a
Scout
First Class – these skills prepare you for adventures where you take far more personal responsibility,
until you can go on your first class journey
Scout Cord – the highest award, to be gained before you are 15 and move to Senior Scouts.
Baden-Powell wrote a series of articles called Scouting for Boys which excited young people over 100 years
ago, and they started to form Scout Patrols and Troops. He wrote those articles under eight headings and we
still use similar headings today, and you will see them throughout this handbook:
•
•
•
•
•
•
•
•
Scoutcraft and Chivalry
Exploration
Camp Skills
Observation
Woodcraft
Health and Fitness
Saving Life
Citizenship
Enjoy Scouting, I look forward to meeting you during your adventures
Jay
Headquarters Commissioner for Scouts
2|Page
Copyright B-PSA 2012
Tenderfoot
This is the most important badge you will ever be awarded as a Scout.
There will be other badges that prove that you have learned more skills and had more
adventures, but this badge shows that you have made a solemn promise in front of
other Scouts, and you are going to do your best to obey the Scout Law.
Scoutcraft and Chivalry
1. Understand the history of Scouting, the Baden-Powell Scout Association and the World
Federation of Independent Scouts. Know about the life and achievements of Lord BadenPowell, our Founder.
Page
4
2. Know about the Scout section progressive award scheme and how it is structured.
5
3. Know the Scout Law and Promise, and their meaning in accordance with age.
6
4. Know the use and demonstrate the salute, sign, handshake and motto as explained in Camp
Fire Yarn 3 of ‘Scouting for Boys'.
6
5. Take part in a Patrol or Troop activity.
Camp Skills
6. Demonstrate with ropes how to tie the following knots: Reef knot, Sheet bend, Clove hitch,
Bowline, Round turn and two half hitches, Sheepshank. Explain their uses.
6
7
8
7. Whip the end of a rope.
Observation
8. Demonstrate and follow the woodcraft signs given in Camp Fire Yarn 4 of ‘Scouting for
Boys'.
9
Citizenship
9. Know the history and composition of the Union Flag and demonstrate how to hoist, break
and fly it.
10
3|Page
Copyright B-PSA 2012
Robert Stephenson Smyth Baden-Powell was the founder of Scouting. He was Born on
22 Febuary 1857.
B-P’s father died when he was three years old, and his early education was at home,
where his mother encouraged him to learn about animals, plants and birds. B-P soon
discovered he could draw very well using either hand, and he became expert at imitating
bird calls.
After school, at the age of 19 B-P, joined the army and did so well in his entrance exams that he was
immediately posted as an officer with the 13th Hussars in India. He gained rapid promotion and had
many famous victories, making him a hero to the British public.
During the Boer War in Africa, Colonel Baden-Powell decided to tie up large numbers of Boer Troops by
holding the strategically important town of Mafeking in South Africa, and the Siege of Mafeking
became one of the most important actions of the war. B-P’s book called 'Aids to Scouting' sold well both
to the military and public at large, and particularly appealed to teenage boys.
In 1907 B-P re-wrote 'Aids to Scouting', to aim it at a younger audience and called it 'Scouting for Boys'.
Later that year he ran an experimental camp with 22 boys from different backgrounds, on Brownsea
Island, Poole Harbour, Dorset to try out his ideas. In 1908 B-P republished his book as “Scouting for
Boys”, in 6 fortnightly instalments, boys started to buy this and create their own Patrols. Troops were
then formed and Scouting began. From there it spread all over the world. B-P ran a camp for another
group of Boy Scouts in Humshaugh, Northumbria - this was the first true Scout camp.
In the next ten years Girl Guides, Wolf Cubs and Rover Scouts started, and Scout Rallies were held in the
major cities of Great Britain. In 1920 the first international Scout Jamboree was held and B-P was named
Chief Scout of the world.
In the following ten years B-P visited many countries to establish Scouting across the
world. Gilwell Park was presented to the Movement for the Woodcraft training of
Scouters.
B-P died on January 8th 1941 and was buried in Nyeri at the base of Mount Kenya.
He had the remarkable experience of seeing the movement grow from the tiny acorn of
a small group of children camped on Brownsea Island into a Brotherhood and
Sisterhood which embraces almost the whole world.
The Baden-Powell Scout's Association was formed in 1970, following moves by the Scout Association in
the mid 1960s to modernise their image. Founders of our Association felt that rest of the Scout
Movement was abandoning the traditions and intentions set out by B-P. The Baden-Powell Scouts retain
4|Page
Copyright B-PSA 2012
Scoutcraft – 1. History of Scouting
B-P attended Rose Hill School, in Tunbridge Wells and then won a Scholarship to Charterhouse School in
London. It was here that he explored his interest of wood-craft and learned lots of his scouting skills.
Although officially off limits, he would sneak out into the wood surrounding his school where he learned
to move silently to avoid detection. He also caught and cooked rabbits and other animals, being careful
not to give his position away with smoke.
Tenderfoot
1. Understand the history of Scouting, the Baden-Powell Scout Association and the World Federation
of Independent Scouts. Know about the life and achievements of Lord Baden-Powell, our Founder.
It is a voluntary, educational charity movement for young people. It is independent, non-political, nonmilitary, and open to all without distinction of origin, race, creed or gender, in accordance with the purpose,
principles and method conceived by Robert Baden-Powell.
As an independent Scout Association, B-PSA are members of the the World Federation of
Independent Scouts (WFIS). The WFIS was formed in 1996 and is a world body that recognises
Independent Scouts Associations which teach traditional Scouting values, in countries across the
globe.
Tenderfoot
the belief that essence of the movement should be based on outdoor activities related to the skills of
explorers and backwoodsmen.
Notable Scouting Dates
1916
1918
1919
1920
1924
1929
1931
1932
1933
1937
1941
1946
1957
1970
1982
2007
2008
Brownsea Island – Experimental Camp
Scouting for Boys. First Scout Camp - Humshaugh
Boy Scouts of America. An American businessman, William Boyce, was visiting London, and lost his
way in the fog. A small boy offered to show him the right way. Mr. Boyce wanted to pay him for his
trouble, but the boy refused to accept the money, saying “A Scout does not take money for doing a
Good Turn”. Mr. Boyce was amazed that the boy should refuse, and wanted to find out more about
Scouts. Next day he sought out the office and took back books about Scouting to his home in
America. He thought it was such a good way of training boys that he started the movement over
there.
Crystal Palace Rally
Wolf Cubs formed.
Rover Scouts formed.
Gilwell Park opened.
The first World Jamboree at Olympia.
The Second World Jamboree at Copenhagen.
The Third World Jamboree at Birkenhead (Liverpool) (B-P created Lord Baden-Powell of Gilwell)
First World Rover Moot
The First Gang Show
The Fourth World Jamboree at Godollo (Hungary)
The Fifth World Jamboree at Vogelensang (Netherlands)
Death of Baden-Powell. 8th January.
Senior Scouts formed.
Bi-Centenary Jamboree, Sutton Park, Birmingham.
Baden-Powell Scouts Association formed.
Beaver Scouts officially formed in the UK.
B-PSA celebrate 100 years of Scouting at Camp Cricket and visit Brownsea Island
B-PSA celebrate the 100th anniversary of the Humshaugh camp, by camping near the original site
5|Page
Copyright B-PSA 2012
Scoutcraft – 1. History of Scouting
1907
1908
1909
There are tests to be completed at each stage as you progress through the Scout section, but they are not
like school tests - your Patrol Leader, fellow Scouts and your leaders will help you learn the skills and when
you can show that you have mastered them they will sign off your record card.
Tenderfoot
2. Know about the Scout section progressive award scheme and how it is structured.
The tests are grouped like this, and are described in detail later in this handbook:
Tenderfoot – some simple tests to complete before you are invested as a Scout – if you have gained
your Leaping Wolf you have already completed all the Tenderfoot tests. You should normally
complete these within three months of starting in the Scout Section.
•
Second Class – these are the basic skills that you will need to enjoy the wonderful outdoor life of a
Scout. It will probably take you a year or so to gain these skills, but you will of course also be going
on camps and outings at the same time, and working on proficiency badges for your favourite
activities.
•
First Class – these skills prepare you for adventures where you take far more personal responsibility,
until you can go on your first class journey. It may well take you a while to gain all these skills, and at
the same time you will be helping younger Scout’s gain their skills. You will start to be given more
freedom to take care of yourself on camp and expeditions and take even more proficiency badges.
•
Scout Cord – the highest award before you go to Senior Scouts, and must be completed before your
15th birthday. It will need you to complete proficiency badges from a special list, and to have your 1st
Class.
6|Page
Copyright B-PSA 2012
Scoutcraft – 2. Progressive Award Scheme
•
The Scout Law & Promise are very important in the move from being someone who goes along to Scout
meetings, to becoming a Scout. There are ten Laws which you will need to learn, however, is not enough just
to be able to repeat the Laws, you are going to promise to do your best to obey them, and that is a big
undertaking.
Behind each Law lies a great depth of meaning, talk to other Scouts, Senior Scouts and Rover Scouts, to
Akela and your Scout Leaders about what the Laws mean to them, and how they try to live by them – they
have all promised to obey the same Laws as you.
2. A Scout is loyal to The Queen, His Country, His Scouters, His Parents, His Employers and to those
under Him
Loyalty means that you don’t let people down, and they can rely on you, and that doesn’t just apply to
people that you look up to. If you become a Patrol Leader, you will have to earn the respect of the
members of your Patrol, and be faithful to them especially.
3. A Scouts' duty is to be useful and help others
A Scout should do their duty first. In order to understand their duty, B-P suggested that a Scout should
consider,
"Which is my duty?" that is, "Which is best for other people?" - and do that one.
A Scout should Be Prepared to do a good turn every day and help people, without seeking reward for
being helpful.
4. A Scout is a friend to all, and a brother to every other Scout, no matter to what Country, Class or
Creed the other may belong
When meeting another Scout, we should treat each other as we would expect to be treated. A Scout
should offer help & support and must never look down upon the other. A Scout accepts the other as
they find them.
Start by practising this in your Patrol, then your Troop, then with Scouts you meet from other Troops,
and eventually if you are lucky with Scouts from other countries. Nearly 50 million people in almost 200
countries are involved in Scouts and Guides. You are now part of that worldwide brotherhood for peace
and good.
5. A Scout is courteous
A Scout should be polite to everyone, no matter how the other person treats you, or speaks to you.
6. A Scout is a friend to animals
A Scout should be kind to all animals and save them as far as possible from pain, and should not kill any
animal unnecessarily.
7. A Scout obeys orders of His parents, Patrol Leader, or Scout Master without question
7|Page
Copyright B-PSA 2012
Scoutcraft – 3. Law and Promise
The Law:
1. A Scouts' honour is to be trusted
A true Scout can be recognised because he lives this Law, he can be trusted to speak the truth, and never
go back on his word. He can always be trusted to carry out any job to the best of his ability.
Tenderfoot
3. Know the Scout Law and Promise, and their meaning in accordance with age.
8. A Scout smiles and whistles under all difficulties.
You will find that life throws all sorts of difficulties at you, things that you don’t want to do, or make you
feel frightened or uncomfortable. Moaning and grumbling about these will just make you miserable, and
will probably make those around you miserable or angry. See what happens when you tackle every day
with a smile on your face – you’ll find it’s infectious.
10. A Scout is clean in thought, word and deed.
Scouts should not let themselves give way to temptation, either to think, talk or do anything which
would be considered unacceptable.
There is a useful little rhyme to help you remember the key words for each Law their order:
Trusty, Loyal, Helpful,
Brotherly, Courteous, Kind,
Obedient, Smiling, Thrifty,
Clean in word, deed and mind.
The Scout Promise
On My Honour I promise,
That I will do my best,
To do My Duty to God and The Queen,
To help other people at all times, and to obey The Scout Law.
This is the solemn promise that you make when you are invested, and is the same promise that all Senior
Scouts, Rover Scouts and Leaders make. You will make this promise in front of the other Scouts in your
Troop, and they will trust you to do your best to keep it. Later when you are present for a new Scout being
invested you should take the opportunity to remind yourself of the things you promised to do.
You are at an age now, when you can make up your own mind about what the word God means to you, it
may be a religious deity, or it may be a set of personal values and beliefs – the important thing is that you
hold true to your beliefs, and respect the beliefs of others.
8|Page
Copyright B-PSA 2012
Scoutcraft – 3. Law and Promise
9. A Scout is thrifty
Thrift means carefulness to avoid waste – it applies to money, property and time. Think carefully in a
world where we are wasting valuable resources how you can make a difference.
Tenderfoot
A Scout should carry out reasonable orders given to him immediately, even if he is unsure about the
intention. He can later discuss or query those orders. That is discipline.
This does not mean that a Scout should break the law of the land or carry out an act which would
contravene a moral or ethical code, or endanger his safety.
If you become a Patrol Leader you will expect the members of your Patrol to work to your orders, but
remember that they also need to trust and respect you, so make sure you don’t abuse your position.
The three fingers held up like the three points of the Scout badge remind a Scout of the three parts of his
promise:
•
•
•
His duty to God and the Queen (his country)
To help others
To obey the Scout Law
Tenderfoot
4. Know the use and demonstrate the salute, sign, handshake and motto as explained in Camp Fire Yarn
3 of ‘Scouting for Boys'.
The thumb over the little finger reminds a Scout that the strong, protect the weak.
The salute and the badge also look like the arrow head on an old compass – always pointing in the right
direction.
The salute is made with the right hand, which is brought to a position just in front and above the right ear,
when a hat or beret is worn the fingers should just touch the edge of the hat. For a smart salute the hand is
brought up into position slowly, in a wide arc and then at the end of the salute straight down by your side
(longest way up, shortest way down).
When parading with a Scout stave, the salute is made with the left hand and the stave in the right hand.
Bend the left elbow at a right angle, and with the palm downwards just touch the fingertips to the stave.
Sign
The Scout sign is identical to the salute, but instead of touching the hat, it is made next
to your right shoulder, with the palm facing forward. The sign is used by all invested
Scouts who are present at the investiture ceremony of a new Scout, it is also used
when Scouts great each other – especially if they aren’t wearing hats.
Handshake
When Scouts shake hands they use their left hands. This is a sign of trust and friendship. Warriors used to
carry their spears in their right hand and their shields in their left hand. To offer your shield hand to another
person leaves you open to attack, and to do so is a great sign of trust.
It is also said that your left hand is closer to your heart, and that may also be a
sign of friendship.
9|Page
Copyright B-PSA 2012
Scoutcraft – 4. Salute, Sign, Handshake
Salute
Motto
The Scout Motto is Be Prepared. You can see these words under the Scout symbol
of the fleur de Lys – the three points of this also remind us of the three parts of
our Promise. The words are contained in an upturned scroll, which might remind
you of a smile - how your mouth should look as you do your duty.
Tenderfoot
Scouts all over the world shake with their left hands, in some places they also bend their little finger into the
palm, as a secret sign of Scouting friendship.
B-P chose this motto, because he believed that through observation, training and
awareness a Scout should always be prepared to tackle any situation – nothing
should catch you by surprise.
This is your opportunity to experience the fun of Scouting and get to know your Patrol before you are
invested.
This may be arranged by Akela, Skip or by your Patrol Leader. Ideally it should be more than just coming to a
weekly Scout meeting, it should involve working together with your new Patrol in something like a hike, a
short camp, or on a pioneering project.
10 | P a g e
Copyright B-PSA 2012
Scoutcraft – 5. Patrol or Troop Activity
5. Take part in a Patrol or Troop activity.
Tying knots is a key skill for Scouts, and you will use your knot tying skills in many Scouting activities
including camping, pioneering, climbing, boating, and fishing. It’s important to know which knot to use
when, as selecting the right one will often be a safety requirement.
Tenderfoot
6. Demonstrate how to tie the following knots: Reef knot, Sheet bend, Clove hitch, Bowline, Round turn
and two half hitches, Sheepshank. Explain their uses.
Let’s start by getting some words right, so that we all have the same understanding, there are some strange
words, but if we all use them to mean the same thing we shouldn’t get confused:
Rope This is the manufactured material, before it is given a specific use.
Now let’s look at the words that describe the parts of a knot:
Bight Any curved section, or slack part between the ends of a line.
Loop A full circle formed by passing the working end over itself.
Elbow Two crossing points created by an extra twist in a loop.
Standing end is the longer end of the line not involved in the knot,
often shown as unfinished. It is often (but not always) the end of the
line under load after the knot is complete. For example, when a clove
hitch ties a boat to a pier, the end going to the boat is the standing end.
The standing part is the section of line between knot and the standing
end.
Turn
A single turn is a single pass behind or through an object (A).
A round turn is the complete encirclement of an object; requires two
passes (B).
Two round turns circles the object twice; requires three passes (C).
Working end is the active end of a line used in making the knot and may also be called the 'running end'.
There are many categories of different knots for different purposes, and some knots may belong to more
than one category.
Bend A knot uniting two lines.
Binding A knot that restricts object(s) by making multiple winds.
11 | P a g e
Copyright B-PSA 2012
Camp Skills – 6. Knots
Line Once rope is purposely sized, cut, spliced, or simply assigned a function, it is referred to as a line.
Tenderfoot
Hitch A knot tied to a post, cable, ring, or spar.
Lashing A knot used to hold (usually) poles together.
Loop A knot used to create a closed circle in a line.
Splice A knot formed by interweaving strands of rope rather than whole lines.
Stopper A knot tied to hold a line through a hole.
Whipping A binding knot used to prevent another line from fraying.
The Reef Knot (or square knot)
It’s great as your first practice knot, and is useful for tying parcels, tying bandages
and slings (because it lies flat) and for its original use which was tying down sails on sailing boats – which is
called reefing.
To see how to tie it click this link Tying a reef knot
Sheet
Bend
The
sheet bend is used for tying two lines of unequal thickness together, but is also actually better than the reef
knot for tying two lines of equal thickness. To make it secure you need to ensure that the two working ends
finish up on the same side of the knot.
This can be made even more secure by converting it to a double sheet bend. Always work with the thinner of
the two lines.
The first place you will need to use this knot in Scouting is when you tie the halyard (that’s the special name
for a line that raises and lowers something, like a flag or a sail) to the loop at the bottom of the Union flag –
but more about this in test 9.
Double Sheet Bend
12 | P a g e
Copyright B-PSA 2012
Camp Skills – 6. Knots
This is the most common Scouting knot, but should never be used as a bend (to tie
two lines together, as it comes undone very easily).
You will use the clove hitch in lots of different applications, for example for starting a square lashing (this is
part of second class), and for tying things to poles, rings or spars. It is very quick to tie, and useful because
the length of the standing part can be adjusted very easily.
It is used very widely in sailing and boating as well as pioneering.
This is widely regarded as the best knot for forming a secure loop in a line, which can be untied easily even
after it has been under great pressure. It is commonly used for tying boats to quaysides, and if you imagine
the weight of a heavy boat, constantly tugging at it’s mooring you need a knot that can be untied easily
afterwards. The bowline used to be common in mountaineering and as a rescue knot, and it is useful for you
to learn to tie it around your waist, but other better knots are more commonly used for these purposes now.
The structure is actually the same as the sheet bend, the bowline just makes a loop in the end of one line. If
you can tell what a sheet bend looks like when you have tied it correctly, you will be able to recognise a
correctly tied bowline too.
13 | P a g e
Copyright B-PSA 2012
Camp Skills – 6. Knots
Bowline
Tenderfoot
Clove Hitch
Tenderfoot
Round turn and two half hitches
Another really useful knot for tying things to poles, spars
or rings. You will remember that the round turn is shown
in this picture as B.
Adding the two half hitches is a simple way of making it secure.
There are times when a piece of line needs to be shorter, but we don’t want to cut it and make it
permanently shorter. A good example of this is shortening the guy line for a tent – we may want it short this
time, but need the whole length the next time we put the tent up.
The sheepshank can also be used to protect a weak part of the line temporarily, before we get round to
repairing or replacing it.
To start with, the rope must be folded into three layers. (If the knot is used for protection of a weak part, the
weak part should be in the centre of the middle layer).
Next, a "half hitch" is put round the end of the knot, so as to hold the remaining two ropes tightly together.
The same is repeated at the other end.
The two ends are then pulled tight, and the knot is finished.
14 | P a g e
Copyright B-PSA 2012
Camp Skills – 6. Knots
Sheepshank
Ropes are traditionally made by twisting smaller strands together – this gives the finished rope greater
strength and reliability. Whipping is a method of ensuring that the end of the rope doesn’t fray and become
useless – it is best used on ropes made of natural materials like hemp, sisal or jute.
We are showing three different methods here, but as long as you can do one correctly that is fine – you may
like to experiment with the others in the future. The important thing for all three is that the final whipping is
tight and neat, it will then have a very long useful life.
Tenderfoot
7. Whip the end of a rope
Common or Simple
be longer
enough
Next, the twine is wrapped round the rope, so as to make the finished
whipping only slightly larger in diameter than the rope itself. A good
whipping should not be more than about 10mm long as otherwise it will
tend to open up, and eventually come undone. As the twine is wound
round the rope, each turn must lie hard against the previous one.
When enough of the twine has been wound round the rope, tightly to your satisfaction, the loose end is
pushed through the loop at the end of the rope.
Finally the end of the loop is pulled, pulling the other end actually into the
whipping. When the knot has reached the centre point of the whipping,
both ends are cut off, and the whipping is finished.
Sailmaker’s Whipping
1. Open lay of the rope and place loop of twine round one strand. Re-lay rope.
2. Hold loop down with left hand, leaving short end free. With the long end
whip towards rope end.
3. Raise loop and slip it over end of strand it embraces. Pull short end to
tighten. Join ends of twine with reef knot.
4. Trim end of rope with sharp knife and rub with wax if desired.
West Country Whipping
This is probably the simplest form of whipping.
15 | P a g e
First tie a thumb knot a few cm from the end of the rope. Then tie thumb knot
at back. Continue to within 5mm of the end. Finish off with a reef knot. Trim
end with sharp knife.
Copyright B-PSA 2012
Camp Skills – 7. Whip the end of a rope
The whipping twine is laid on the rope in the form of a loop. This loop must
than the intended length of the whipping, and the end must be left long
to be able to pull.
Scout trail signs should be made on or close to the ground. If they are made on a road or track they should
be laid close to the edge on the right hand side.
They should never be made where they will damage or disfigure private property.
Woodcraft signs are a great way for you to communicate secretly with other members of your Patrol or
Troop, but you will need to practice your observation skills so that you get the whole message.
Tenderfoot
8. Demonstrate and follow the woodcraft signs given in Camp Fire Yarn 4 of ‘Scouting for Boys'.
Observation 8. Woodcraft Signs
16 | P a g e
Copyright B-PSA 2012
The first flag representing Britain was introduced on the proclamation
of King James I in 1606 and was made up of just the Scottish and
English flags, when he became King of both nations. The Welsh
dragon does not appear on the flag because Wales was already united
with England from the 13th century. This meant that Wales was a
Principality instead of a Kingdom and as such could not be included.
The Union Flag is normally twice as long as it is wide
and has very precise specifications about the size of
each element, these are shown here. As you can see
this means that the broad white diagonal is wider in
some places than others. The flag is the right way up
when the broad white stripe is at the top, on the
side closest to the flagpole.
Right way up if the flagpole is assumed to be on the left.
Upside down if the flagpole is assumed to be on the left. This is normally
regarded as a sign of distress, or assistance being required.
When someone of national importance has died, the flag is flown at half mast. This doesn’t literally mean
half way down the flagpole. The flag should be hoisted slowly to the top of the pole, and then lowered to
leave a gap the same height as the flag itself. When the flag is taken down, it should first be hoisted to the
top of the pole, and then reverently lowered.
Remember never to let the flag touch the ground – that is considered to be very disrespectful.
17 | P a g e
Copyright B-PSA 2012
Citizenship 9. Union Flag
In 1800 during the rule of King George III, Acts of Parliament united the Kingdom of Great Britain and the
Kingdom of Ireland to create the United Kingdom of
Great Britain and Ireland. The union came into
effect on 1 January 1801 and the Union Flag as we
now know it was created.
Tenderfoot
9. Know the history and composition of the Union Flag and demonstrate how to hoist, break and fly it.
When preparing a flag for breaking, remember to fold it in such a way that it can be broken.
One method of folding the flag is to begin by laying the flag open on a flat surface, or held between two
Scouts. The flag is then folded into three in such a manner that both the original top and bottom edges are
still visible i.e. they are folded onto opposite sides of the centre.
The flag is then folded in half length-wise.
Next, concertina or roll the flag to the stage where enough is left at the hoist end to wrap round once. This is
then done.
Lastly, the line attached to the bottom of the flag is wrapped round the flag, and tucked under itself, in the
form of a loop, to secure the folded flag.
There are many different ways to fold the flag, you may use a different one to this in your Group.
When hoisting the flag up to the top of the pole, the halyard is fastened to the flag in two different ways.
First, there will be a loop in one end of the halyard, and this is placed over the toggle on the flag. The other
end of the halyard is then fastened to the loop of the rope on the flag with a sheet bend, or double sheet
bend. The flag is then hoisted to the top of the pole, and the halyard secured to the bottom of the pole to
prevent the flag from falling.
If the flag has been folded properly, it will, when the halyard is given a pull, unfold in the required manner. If
this does not happen, the flag will have to be brought down, broken by hand and hoisted.
18 | P a g e
Copyright B-PSA 2012
Congratulations you have completed your Tenderfoot and are now ready
to be invested in to the Troop.
After you are invested you can use the diagram below to help you to sew your badges in to the correct
places on your uniform. Be careful not to sew your shirt pockets shut.
Metal Beret Badge
Leaping Wolf (until First Class
achieved)
Group and Area Name Tapes
Patrol Shoulder Knot
Promise Badge
Area Badge
Baden Powell Strip
WFIS membership badge
19 | P a g e
Copyright B-PSA 2012
Second Class
When you are awarded this badge you have learnt the basic skills of Scouting,
you will need them to enjoy the wonderful outdoor life. Once you have these
skills, you will start to be given more and more responsibility for looking after
yourself, and helping your younger Scouting brothers.
Scoutcraft and Chivalry
1. Know the Patrol sign, call and colours for the Patrol into which they are invested.
Page
2. Take responsibility for a weekly duty within the Patrol for a minimum of 3 months
3. Discuss with Patrol Leader or Second how the Scout Law and Promise applies to their
daily life
Exploration
4. Know how to use a compass and how to set a map.
5. Using OS 1:50,000 or 1:25,000 maps show an understanding of conventional map
signs, scales and the use of map references.
6. Show that you understand the Highway Code (particularly the sections for pedestrians,
cyclists and sign and markings).
7. Show the ability to use a telephone and demonstrate knowledge of your locality by:
•
•
using local bus and railway timetables.
knowing local landmarks, through-road routes, public transport facilities and utilities
serving your area.
8. If you have the use of a bicycle, demonstrate that it is kept properly maintained and
you are able to effect minor repairs.
9. Know where to find up to date weather forecasts, whilst at home and in camp.
10. Go by day, on foot, with other Scouts on a journey of 10 – 15 kms. The journey will
have a route laid down by the Scout Officer and a simple objective will be given.
Take responsibility for leading and navigating at least 2 km of the journey. A verbal
report, from notes, must be made on your return. (Normally to be taken toward the
20 | P a g e
Copyright B-PSA 2012
end of 2nd Class)
Camp Skills
11. Tie the following knots and know their uses: Timber hitch, Killick hitch, Fisherman's
knot and Harvester's hitch.
12. Demonstrate square and diagonal lashings by constructing a trestle of scout staves.
13. At camp, construct a useful gadget using natural materials, and demonstrating good
use of knots and lashings.
14. Know the safety rules and care of a hand-axe, bow saw and knife. Demonstrate how to
sharpen a knife and hand-axe.
15. Demonstrate how to make and store firewood.
16. Lay and light a fire out of doors with natural materials.
17. Cook over an open fire a simple meal, make a hot drink and wash up afterwards.
18. With another Scout, pitch, strike and pack a hike tent within a reasonable time.
19. Camp for a minimum of 5 nights as a Scout
Observation
20. Kim's game. A test in observation to remember 16 out of 24 well assorted articles,
following 1 minutes observation, or, Follow a trail containing not less than 30
woodcraft signs.
Woodcraft
21. Be able to recognise and name 6 common trees and know the value of their wood for
burning
22. Know and follow the Country code
Health and Fitness
23. Know the general rules for healthy living.
21 | P a g e
Copyright B-PSA 2012
25. Treat shock. (not electric).
26. Know how to deal with the following common minor ailments:
• Minor cuts and scratches
• Bleeding from the nose.
• Stings and bites.
• Burns and scalds.
• Know how to avoid sunburn.
28. Know how to choose items of suitable personal clothing and equipment for outdoor
activities, including camps.
Citizenship
29. Have no less than nine months service as a Scout.
30. Make regular contact with a Scout from a different Group, and share Scouting
experiences.
Re-pass the Tenderfoot tests. This test will be taken last.
1. Know the Patrol sign, call and colours for the Patrol into which they are invested.
Camp Fire Yarn No 4 in Scouting for Boys gives a full list of Patrol names, calls and colours. The colours are
represented in the shoulder knot you wear on your left shoulder.
You should know about your Patrol and it’s history, but firstly you need to know a little bit about why Scout
Troops are formed of two or more Patrols.
In Scouting for Boys, B-P said:
“Each Troop is divided into Patrols of about eight boys, and the main object of the Patrol system is to give
real responsibility to as many boys as possible, with a view to developing their character. If the Scoutmaster
gives his Patrol Leader real power, expects a great deal from him and leaves him a free hand in carrying out
his work, he will have done more for that boy’s character expansion than any amount of school training
could ever do.”
22 | P a g e
Copyright B-PSA 2012
Scoutcraft – 1. Patrol sign, call and colours
27. Know how to suitably dress and support minor cuts and sprains.
Second Class
Saving Life
24. Demonstrate a knowledge of and how and when to summon adult help
Every Troop is named after the place where it belongs, and within it each Patrol is named after a native
animal or bird – it’s best to make that name relevant to the place where you live too. So a Troop near the
sea may have a Seagull Patrol and a Gannet Patrol, and a city Troop may have a Bulldog and a Fox Patrol.
Each Patrol Leader should carry a stave of straight natural wood (Hazel is good), on top of which is the Patrol
Pennant. Pennants can be made in cotton, canvas or leather, and are normally made in one of the heraldic
shapes shown here. They always carry a silhouette design of your Patrol name, and may be in your Patrol
colours – the ones you wear on your shoulder knot.
At some Area and National events your Patrol may be awarded a small trophy in a tournament, this can be
attached to your Patrol pennant, and becomes part of the history which will be passed on from one Patrol
Leader to the next.
You may want to have a Patrol motto – something that links to your Patrol name, like “Alert and Wise” for
the Owl Patrol, or “Soar high” for the Owl Patrol. You should also have a call that is similar to the call of the
bird or animal your Patrol is named after – this could be a useful secret call in Patrol games.
23 | P a g e
Copyright B-PSA 2012
You should be proud of the Patrol of which you are a member, and want it to be the best it can be. That
means that from the moment you join your Patrol you should be taking some small responsibility for making
it work as a team.
Your Patrol Leader is your team leader, and he is responsible for the smartness and effectiveness of your
Patrol, he will select a Second to help him and take over when he is not there.
Your PL will try to find a job for you that suits your age, knowledge and skills – one that suits your talents.
The jobs which need to be done each week in the Patrol vary between Troops, but here are some ideas of
jobs that might need doing:
•
•
•
•
•
•
•
Look after all the Patrol’s equipment and make sure it is always ready for any eventuality (Patrol
Quartermaster)
Collect the subs each week, record who has paid and pass the money to the PL or Skip (Patrol
Treasurer)
Record the decisions made by the Patrol in Council, that’s a meeting where everyone in the Patrol
gets to discuss important issues (Patrol Secretary)
Keep a Patrol register of who attends each week
Be responsible for communicating messages from your PL to every member of the Patrol in between
meetings, that could be by email or phone
Train other Scouts in a skill which you are really good at
Check the uniform of all members of your Patrol before inspection, to make sure that it is complete
and smart
3. Discuss with Patrol Leader or Second how the Scout Law and Promise applies to their daily life
I suggest you leave this until you have nearly completed your Second Class, by then you will have had some
experience of trying to keep the Promise you made when you were invested.
Your Patrol Leader and Second should have been setting you an example by their actions as Scout’s this is a
chance to discuss what you have learned from them, and what you think you could do differently to become
a better Scout.
But remember none of us are perfect, you have made a promise to do your best, and that is all anyone can
ask of you.
24 | P a g e
Copyright B-PSA 2012
Second Class Scoutcraft – 2. Patrol responsibility 3. Promise & Law
2. Take responsibility for a weekly duty within the Patrol for a minimum of 3 months
Second Class
4. Know how to use a
compass and how to set a
map.
Baseplate
Dial
Direction of travel
arrow
The compass has three main parts, a
baseplate, dial and magnetic needle.
W
E
S
Magnetic needle
As well as the four cardinal points you know well, the compass dial is
marked with the degrees of a circle, with every 200 numbered, and every 20
marked with a white line. The ones you should remember are:
North = 00 or 3600
East = 900
South = 1800
West = 2700
North East = 450
South East = 1350
South West = 2250
North West = 3150
When using a compass, keep it well clear of magnetic metallic objects like knives, belt buckles, cars or
overhead power lines (magnetic fields) as this will affect the direction in which the compass points.
Setting a map
To set or orient the map, turn the map around until the North or top of the map is pointing towards the actual
North, and so that the features on the map are shown in relation to their position on the ground, you can set
the map by either using a compass of looking at features around you.
In the right hand margin of every Ordnance Survey map are three arrows. One points to magnetic North, one
to true North (the north pole) and one to grid North. The angle between magnetic North and grid North is
known as magnetic variation – which will be covered in more detail in First Class.
25 | P a g e
Copyright B-PSA 2012
Exploration – 4. Use Compass / Set Map
The first thing to remember is that
your compass is a very important
piece of safety equipment, and it is
worth buying a good reliable brand.
That doesn’t mean that you have to
spend a lot of money. Silva make
very good compasses designed for
schools and youth organisations that
cost between £10 and £20.
You can set the map without using a compass by simply turning the map till it coincides with the ground
before you. This may mean that the map is sideways, or upside down, to you – do not worry. You can still
read it like that, and it means that the objects on the ground, which can not move, will still appear in the
correct place and where you expect them. Many people go wrong when map reading because they hold the
map like a book, with the writing the right way up, and turn left when they should be turning right, or spend
hours looking in the wrong direction for landmarks. Get the map set on your position and, as you move, keep
it that way.
Second Class
To set your map, using the compass, firstly line up the red arrow on the dial with the direction of travel arrow.
Then place the compass on the map with the edge of the baseplate running along one of the blue gridlines,
with the direction of travel arrow pointing to the top of the map. Now rotate the map until the red magnetic
needle lines up with the red arrow on the dial . Now you know which way you are facing, the direction of
North, and you can start to try and identify points on the ground from the map, or vice-versa.
Exploration – 4. Use Compass / Set Map
26 | P a g e
Copyright B-PSA 2012
All maps have a key, which tells you what all the symbols on the map are. Here is an example of how different
rights of way are shown on an OS 1:25,000 map. You will need to learn the most common symbols, and you
can play all sorts of games with the Scouts in your Patrol to help you remember them.
Maps are designed to show you in symbolic form all the things that you would see on the ground if you were
looking down at it, like transferring an aerial photograph into a set of shapes and symbols. See if you can find
a satellite view of your home on the internet, and then match that up to an OS map of the same
Scale
To get all that detail onto a piece of paper, everything has to be shrunk down in proportion to the real world.
When we say the map is made on the scale of 1:50 000 (one to fifty thousand) it means that one unit on the
map represents 50,000 units on the ground – that means 1cm on the map will equal 50,000cms (or 500
metres) on the ground.
All maps have scales but the maps you will use most commonly during your time at Scouts are Ordnance
Survey maps with either a 1:25,000 or 1:50,000 scale. On these maps one grid square is equal to one
kilometre and the scale is printed on the bottom of the map.
Map References
Map or grid references are usually given in six-figure numbers, representing the grid square, and a particular
point within that square.
1:25 000 and 1:50 000 maps are divided into 1km grid squares by horizontal and vertical lines; each line is
identified by a two-figure number, and these give you the first of the numbers for the six-figure reference –
two vertical numbers and two horizontal numbers.
The vertical lines are known as “Eastings”, for although they run, individually, up and down the map, they
advance across the map from left to right, or heading from West to East – hence “Eastings”. The same applies
to the horizontal lines which advance in series up the map, from South to North, and are called “Northings”.
Where the two lines intersect you have a grid point, and you can express this by giving the numbers of the
grid lines, first the easting and then the northing, for example the highlighted square containing the church will
have the four figure reference 04 88. That defines a one kilometre square.
27 | P a g e
Copyright B-PSA 2012
Exploration – 5. Map Signs, Scales & References
area.
Second Class
5. Using OS 1:50,000 or 1:25,000 maps show an understanding of conventional map signs, scales
and the use of map references.
90
Second Class
If you wanted to give the position of the church more accurately to find the point you require within that square
you divide the “Easting” and “Northing” lines into ten imaginary lines and pinpoint the spot by referring to the
intersection of the imaginary lines which would cut it. So the church is located at grid reference 042 883, and
that gives a far more accurate 100 metre square. Use the scale on the side of your compass to estimate these
imaginary lines quickly and accurately.
89
88
01
02
28 | P a g e
03
04
04
Copyright B-PSA 2012
Exploration – 5. Map Signs, Scales & References
88
The Highway Code covers all users of public highways not just people who are driving cars or other vehicles.
In this section are a few of the rules that apply to pedestrians and cyclists but you can get more information by
visiting www.highwaycode.gov.uk or going to your local library and looking at a copy of the Highway Code.
Walking
•
•
Be Safe, Be Seen
•
It is difficult for a driver to see you in the dark or in bad weather. When you have to be out then,
always wear light-coloured or bright clothing. Fluorescent materials show up in daylight and at dusk.
Always wear or carry something reflective at night.
The Green X Code
First find a safe place to cross, then stop.
•
•
•
•
•
•
It is safer to cross at subways, footbridges, islands, Zebra and Pelican crossings, or where there is a
police officer, school crossing patrol or traffic warden.
If you cannot find any good crossing places like these, choose a place where you can see clearly
along the roads in all directions. Try not to cross between parked cars. Move to a clear space and
always give drivers a chance to see you clearly.
Always STOP at the kerb and give yourself lots of time to have a good look all round.
o Stand on the pavement near the kerb.
o Do not stand too near the edge of the pavement. Stand a little way back from the kerb - where
you will be away from traffic, but where you can still see if anything is coming. If there is no
pavement, stand back from the edge of the road but where you can still see traffic coming.
o Look all round for traffic and listen.
o Traffic may be coming from any direction, so take care to look along every road, and listen
too, because you can sometimes hear traffic before you can see it.
If traffic is coming, let it pass. Look all round again.
When there is no traffic near, walk straight across the road.
o Do not cross unless there is a safe gap and you are sure there is plenty of time. If you are not
sure, don't cross. Always walk across quickly, don't run.
Keep looking and listening for traffic while you cross.
Crossing at a Pelican crossing
•
When there is a Pelican crossing, use it. Do not cross on the zigzag lines. At these crossings, traffic
lights control the traffic. Press the button and wait. When the red man signal is showing, do not cross.
29 | P a g e
Copyright B-PSA 2012
Exploration – 6. Highway Code
•
Where there is a pavement or footpath, walk on it. Keep as far away from traffic as possible.
Where there is no footpath, walk on the right hand side of the road to face the traffic coming towards
you. Walk one behind the other at bends in the road or at night or if there is a lot of traffic. Take
special care at right hand bends.
If you are looking after somebody younger than you are, always hold their hand when using the road.
Second Class
6. Show that you understand the Highway Code (particularly the sections for pedestrians, cyclists
and sign and markings).
•
•
Crossing at a Zebra crossing
•
•
•
•
Crossing where there is an island in the road
•
Use the Green Cross Code to cross to the island. Stop there and use the Code again to cross the
second half of the road. Remember to look all round and listen.
Crossing at a junction
•
If you have to cross at a road junction, look out and listen for traffic turning the corner, especially from
behind you.
Crossing at traffic lights
•
At some traffic lights there are red and green signals for pedestrians that tell you when to cross.
Always obey them.
Crossings controlled by police, traffic wardens or school crossing patrols
•
When school crossing patrols, police officers or traffic wardens are controlling the traffic, wait until
they signal to you to cross the road. Always cross in front of them.
Crossing one-way streets
•
Use the Green Cross Code. Check which way the traffic is going. Remember that in one-way streets
there will usually be more than one traffic lane going in the same direction. Do not cross until it is safe
to cross all the lanes of traffic.
Parked vehicles
30 | P a g e
Copyright B-PSA 2012
Exploration – 6. Highway Code
•
If there is a Zebra crossing, use it. Do not cross on the zigzag lines - only on the black and white
stripes.
Drivers need plenty of time to slow down and stop. Wait on the pavement near the kerb until all the
traffic has stopped before you start to cross.
Remember, vehicles need more time to slow down if the road is wet or slippery.
After traffic has stopped, walk across. Keep looking all round and listening in case a driver has not
seen you. Watch out for overtaking vehicles.
If there is an island in the middle of the crossing, stop on it. Look all round and listen, and after the
traffic has stopped, walk across.
Second Class
•
The lights will soon change and a green man signal will appear. Look to make sure the traffic has
stopped, then cross carefully.
When the green man signal begins to flash, you should not start to cross. However, if you have
already started, you will have time to finish crossing safely.
Pelican crossing which goes straight across the road is one crossing, even if there is a central island.
Traffic must stop for you when the green man is showing. Some crossings do not go straight across
the road. Here you must press the button again on the central island to get the green man signal.
At some Pelicans, there is a bleeping sound to tell blind people when the green man signal is
showing.
•
Try not to cross between parked cars. However, if there is nowhere else to cross, choose a place
where there is a space between two cars. Make sure neither car is about to move off. Walk to the
outside edge of the cars and stop.
Here you can be seen by drivers and you can look all round for traffic. Use the Green Cross Code.
When it is clear, cross, still looking and listening as you go.
Crossing bus lanes
•
In these lanes, buses may go faster than other traffic. Sometimes they go in the opposite direction.
Cyclists and taxis may also be using them so take special care when crossing.
Guard rails
•
Guard rails are there to protect you. If you need to cross the road walk to the gap in the guard rails
and use the Green Cross Code. Never climb over or walk outside them.
•
•
There are many kinds of crossings - all can be dangerous. They may have gates, barriers, or even no
barriers at all. There may also be warning lights or bells. You must never cross when red lights flash
or when you can hear warning sounds. Always stop behind the STOP line. Never go past a barrier
that is down. Remember, if the lights continue to flash after a train has gone, another train is coming.
It is not safe to cross until the lights go out.
If there are no flashing red lights, warning sounds or gates, you should still stop, look and listen to
make sure it is safe to cross.
You must always obey the instructions shown at crossings.
Cycling
•
•
•
•
•
•
•
•
•
Riding a cycle which is too big or too small for you can affect your balance – make sure yours is the
right size for you.
Make sure your cycle is safe to ride. The brakes must work properly and tyres should be in good
condition and pumped up. The chain should be correctly adjusted and oiled and a bell should be
fitted. Wear a cycle helmet - it will help to protect you if you have an accident.
When you have to carry anything on your cycle, use a bike bag or panniers. Carrying things on your
handlebars makes steering difficult - they could also catch in the front wheel. Make sure that your
clothing does not get caught in the chain or wheels.
Make sure that other road users can see you. Wear fluorescent materials in daylight and at dusk, and
something reflective at night. A cycle spacer may be helpful as a warning to other drivers. At night you
must have front and rear lights which work well, and a clean rear reflector. Spoke and pedal reflectors
are also useful.
You should not ride on the pavement unless there are special signs allowing you to do so.
Wheel your cycle to the edge of the kerb and, if safe, place it in the road. Get on your cycle and look
all round for traffic even if you have a mirror fitted. When it is safe to move off, signal with your right
arm if necessary. Then, with both hands on the handlebars, cycle away.
Ride far enough from the edge of the road to avoid drains and gutters.
Always keep both hands on the handlebars unless you are signalling.
If riding with others on busy or narrow roads, you should ride one behind the other. Never ride more
than two side by side on any road.
31 | P a g e
Copyright B-PSA 2012
Exploration – 6. Highway Code
Railway level crossings
•
Second Class
•
•
•
•
•
•
•
•
•
•
•
•
•
•
•
Recommended route for pedal
cycles
•
•
Cycles only
Shared with
pedestrians
Separate cycle and
pedestrians
Roundabouts can be difficult for cyclists to use safely. If you are not sure it is safe, get off your cycle
and walk. When riding into a roundabout you must give way to traffic coming from your right. Look out
for vehicles which may turn in front of you.
When cycling in the dark or at dusk, you must have a white front lamp, a red rear lamp and a red
reflector. Wear something reflective and fit spoke reflectors. If you have dynamo lighting, remember
the lights go out when you stop. When other vehicles are using their lights, use yours too.
32 | P a g e
Copyright B-PSA 2012
Exploration – 6. Highway Code
•
Even if you are wheeling your cycle in the road, you must still obey traffic light signals and road signs.
You must also obey the signals made by police officers, traffic wardens or school crossing patrols.
Never hold onto any vehicle or another cyclist.
You must not carry a passenger on your cycle.
You should never lead an animal whilst cycling.
Before starting off, turning right or left, overtaking, or stopping, you must look behind and make sure it
is safe. Give a clear arm signal to show what you intend to do.
When turning from one road into another, look out for pedestrians who are crossing that road. Give
way to them.
If you want to turn right from a busy road, moving to the middle of the road may be difficult and
dangerous. It is often safer to stop on the left hand side before or after the junction and wait for a safe
gap in the traffic before walking with your cycle across the road. This is especially important in the
dark.
Watch out for traffic that may suddenly stop, turn left in front of you, emerge from a side turning or pull
away from the kerb. Long vehicles need room to turn so do not ride up beside them when they do so.
Only overtake when you are certain it is safe to do so. If you are overtaking parked vehicles, watch
out for them starting off while you are doing so. Look for car doors opening and for pedestrians
darting out into the road in front of you.
You should not wear a personal stereo whilst cycling. You can't hear the other traffic if you do, and
riding on the road needs your full attention.
Always park your cycle sensibly so that it is not in the way of other people. Lock it to prevent it being
stolen and have the frame stamped with your postcode.
You must stop for pedestrians on Zebra crossings.
Be ready to stop for the red light at Pelican crossings. When the amber light flashes, you may
continue if there is no body on the crossing.
Only ride in bus lanes if there is a cycle shown on the sign.
Be careful when cycling near horses and other animals. Give them plenty of room as you go by.
Animals are easily frightened by sudden noises so do not use your bell.
In some areas special cycle routes and paths are provided. You will see the following signs to show
the different paths. Always use them.
Second Class
•
•
If you want to turn right, it is more difficult and dangerous to move to the middle of the road when it is
dark.
Stop on the left hand side and wait for a gap in the traffic before you turn.
Riding in Cars
•
•
•
•
Using Buses
•
•
•
•
When you wait for a bus, stand on the pavement well back from the traffic. Make sure there is room
for other people to walk along. It is dangerous to play around at bus stops.
Wait for people to get off the bus before you get on.
Drivers are responsible for your safety. Always do what they tell you and do not distract them with bad
behaviour.
If you have to cross the road after getting off a bus, wait for it to move away. You will then be able to
see traffic clearly and drivers will be able to see you.
33 | P a g e
Copyright B-PSA 2012
Exploration – 6. Highway Code
•
When you get in or out of the car, use the door nearer the pavement. Make sure the doors are shut
properly. Only get out when you are told to do so and when you are sure it is safe.
Seat belts or safety harnesses must be worn at all times. Lap belts must only be used of all other seat
belts are in use.
Keep your hands away from door handles while the car is moving. Only open doors or windows after
being given permission.
Never lean or wave out of the window or do anything to distract or offend other drivers. Do not throw
or hang anything out either.
A driver uses the mirror to see the traffic behind. Do not block the view.
Second Class
•
Many of you will have a landline telephone in your house and you may well have your own mobile phone. The
main difference when dialling a number from these two different phones is that when;
•
•
•
Dialling from a mobile you always have to insert the area code first.
Whereas if you make a call from a landline you only insert an area code before the phone number
if you are making a telephone call to someone living in a different area.
U.K. area and international codes are found in the front of your local phone book and you just dial
this number before the number of the person you want to phone.
•
•
•
•
If you wish to call Manchester from London the code is 0161
Birmingham is 0121
Glasgow is 0141
If however you wanted to call the U.K. from abroad you would have to insert 00 or + (the
international access code) then 44 for the U.K. and drop the 0 from the area code.
Remember if you are using your phone to contact the emergency services:
•
•
•
The UK number of 999 doesn’t work abroad – you will need to check what the code is in the
country you are in
You don’t need to have any credit on your mobile phone to call the emergency services
A call to the emergency services will hunt across all networks to give you the best possible signal,
and will often work even if your phone shows that it has no signal.
Bus and rail time tables
•
You will be able to get hold of a copy of these by going to your local bus, train station or library or
by looking on the internet.
•
You should know where the major roads go from and to, and their names. Where the nearest
railway stations are, and the services that operate, and the destinations of the buses that pass
through your town or village, and their respective bus stops.
•
Know the whereabouts of the police, fire and ambulance stations, the local library and telephone
boxes, and the nearest hospital, doctor, dentist and vets. A good Scout would also know places of
local interest, such as museums, parks, cinemas and other leisure sites.
34 | P a g e
Copyright B-PSA 2012
Exploration – 7. Local Knowledge
Here are some examples;
Second Class
7. Show the ability to use a telephone and demonstrate knowledge of your locality by:
• using local bus and railway timetables.
• knowing local landmarks, through-road routes, public transport facilities and utilities
serving your area.
Saddle
Frame
Handle Bars
Second Class
8. If you have the use of a bicycle, demonstrate that it is kept properly maintained and you are
able to effect minor repairs.
Brake Lever
Front Brake Cable
Rear Brake Pad
Front Brake Pad
Pedals
Derailleur
Front Spoke
Chain
Front Wheel Nut
When using a bike it is important that you follow the Highway Code and that you wear a helmet and visible
clothing at all times.
When riding your bike at dusk, dawn in the dark you need to have a white front light and red rear light fixed to
your bike and you need to wear reflective clothing.
It is also vital that you keep your bike well maintained so it is safe to ride. You need to make sure that:
•
•
•
•
•
•
The chain is well oiled.
Tyres are inflated to the correct pressure.
Brake cables are undamaged and tight enough to be effective.
The saddle and handle bars are fixed securely and at the right height for you to ride the bike.
Front and rear wheel nuts are securely fastened.
Front (white) and rear (red) reflectors are attached to bike and clean.
The most common repair you will need to carry out on your bike is repairing punctures. Puncture repair kits
are available from most petrol stations and bike shops.
35 | P a g e
Copyright B-PSA 2012
Exploration – 8. Bicycle Maintainance
Rear Brake Cable
•
•
•
•
•
•
•
36 | P a g e
Copyright B-PSA 2012
Exploration – 8. Bicycle Maintainance
•
•
•
Remove the wheel from the bike by turning both wheel nuts anti-clockwise at the same time in
opposite directions.
Then remove the tyre using tyre levers, being careful not to cause any more damage to the inner
tube.
Unscrew nut holding inner tube valve in place and remove inner tube.
Inflate inner tube and place in bowl of water to locate the hole, mark with a wax crayon.
Follow manufactures instructions for applying repair patch to inner tube.
Check repair has worked by checking for leaks with a bowl of water.
Check the inside of tyre for any sharp objects still lodged in rubber that may have caused the
puncture, and remove them.
Replace deflated inner tube back into wheel and screw valve back into place.
Attach tyre back to wheel using tyre levers, again being careful not to damage inner tube.
Attach wheel to bike and inflate tyre to the correct pressure.
Second Class
To repair a puncture you need to:
The Norwegians have a saying “There is no such thing as bad weather, just the wrong sort of clothes”, and
believe me the Norwegians experience all sorts of weather, so they should know.
This also applies to us as Scouts, as long as we are prepared and dress correctly we should be able to carry
on with most Scouting activities whatever the weather. So knowing what the weather forecast is, will help us
be prepared:
•
•
To wear the right clothing
To keep our wood dry for the fire
To pack the right kit for a hike
To close up our tents before it rains
To build our fire in the right place so the
smoke blows away from our sleeping tent
To pitch our tents in an area that won’t flood
To wear sunscreen and a hat
For Second Class you don’t need to be able to understand weather maps – you just need to know what is
forecast for the area that you are in.
The main sources of forecasts are:
•
•
•
•
•
TV – look for the regional forecasts not the national ones
Radio – tend to be more general than TV, unless you listen to local radio
Newspapers – these don’t normally go into much detail
The internet – the BBC website gives excellent forecasts by time of day for most major towns, and
this is probably the best source if you have internet access.
Phone weather services – normally premium rate, but good local detail
At camp it is obviously more difficult to get reliable information, and phone, radio and newspapers may be
your best – in some tourist areas the tourist information office or other shops will display a forecast, as do
some campsites.
37 | P a g e
Copyright B-PSA 2012
Exploration – 9. Weather Forecasts
•
•
•
•
•
Second Class
9. Know where to find up to date weather forecasts, whilst at home and in camp.
nd
Your journey should be taken when you have done most of the rest of your 2 Class training, that means that
you will have already learned about how to navigate with a map and compass safely, and that you know
enough first aid to treat any small injuries.
This may be the first time that you have ever walked this far without an adult with you. Enjoy the adventure,
and make sure that you follow your Scout Master’s instructions about where they will meet you at checkpoints
to make sure you are safe. Normally you will agree a time that you will meet at a checkpoint, if you get there
early just wait until the adult that is meeting you arrives – it’s a good chance to have a rest and snack and plan
the next bit of your route. If you are running late for some reason, keep going and get to your checkpoint as
soon as you can – it won’t be the first time that Skip has had to wait for Scouts who have got a bit lost.
Don’t worry if you do get a little bit lost – the important thing is to realise quickly, and work out how to get back
on route. You should be able to do that by using all the clues on your map – its normally far more reliable than
asking a nice person out walking their dog!
Even though you are taking turns at being the leader and doing the navigating, that doesn’t mean that you can
just be a “follower” for the rest of the time. Keep track of where you are, and check that you are going in the
right direction – and if you think that you are going wrong, speak up – have a team discussion and agree on
what to do next. Every one will be happy if you help them avoid walking 2 kms in the wrong direction.
You will have arranged with Skip how to make contact if you have a problem, and you will also have agreed
that in some situations you may return to your last checkpoint, or to a road where you can be easily found.
Whatever arrangements you have made – stick to them, and stick together.
When you return, and give your report to your Scout Master, try to make it interesting; don't forget that he may
have to listen to several in quick succession, and they can get boring, do not miss anything out. If you fell in
the river, instead of crossing it by the bridge, put it into the report, and give your Scout Master a laugh. If you
lose your woggle, make another one, and tell your Scout Master how you came to lose it, how long you looked
for it, and what you did about it when you could not find it. It makes the report more realistic and do not forget
to take notes of the objective.
Remember to take along a compass, the correct map of the area, emergency rations and a first-aid kit.
38 | P a g e
Copyright B-PSA 2012
Exploration – 10. Journey
For this, you will have to ask your Scout Master for the route you are to follow, and sort
out who is going with you (there must be at least four of you in the group, but probably
no more that six). You will have an objective to go to, or do, and this must be completed
to the best of your ability. Sometimes it will be a church, on which you will be asked
questions, or a good turn, which you will have to prove that you have done. Either way,
the questions you will be asked will not be the obvious ones for the situation, so keep
your eyes and ears open. Take photos – you may discover some fascinating things as
you walk.
Second Class
10. Go by day, on foot, with other Scouts on a journey of 10 – 15 kms. The journey will have a route
laid down by the Scout Officer and a simple objective will be given. Take responsibility for
leading and navigating at least 2 km of the journey. A verbal report, from notes, must be made
on your return. (Normally to be taken toward the end of 2nd Class)
Harvester's hitch.
Timber Hitch & Killick Hitch
This is one of the few classical hitches that is truly useful and reliable. Its security is
admirable and it always unties without trouble after use. Just remember that a true
timber hitch must have at least three tucks trapped against the object.
The one bad thing about this hitch is that it is so simple, that some do not take the time to really study and
memorise it, and will sometimes wrap the rope around the wrong leg, which will not result in anything but
junk. Remember to wrap the rope back around the leg from where it just came (left side as shown above). If
you did, it should form an eye for the standing part to run through.
The knot, as with the clove hitch, can be used for fastening the rope to a spar. The official use, however, is for
tying together a bundle of poles, so as to be tight enough for transportation. Also, when the knot is undone, it
can be easily pulled out, which is not always the case with other knots.
Firstly, the rope is pulled under the bundle of poles. It then takes a turn round itself, to go back the way it
came. However, instead of going straight back round the bundle, it wraps round and round itself.
Killick hitch
The rope can then be laid along the wood in the direction of eventual pull,
and a half hitch is thrown round the end of the poles. The knot is then known
as a killick hitch.
When the bundle of poles is consequently either lifted, or pulled, the knot pulls tight against the poles, trapping
the twisted part of the rope between the wood, and the original turn round it. The knot will easily fall apart
when need be.
39 | P a g e
Copyright B-PSA 2012
Camp Skills – 11. Knots
Beware of using this hitch around a very large object that might keep the tucks from
being clamped down securely. In such case you might have to put tucks of rope
further back to ensure that three tucks stay clamped no matter what happens. Of
course, if you decide to use the timber hitch for any lengthwise pull, you should make sure that any sliding
motion will cause your tucks to tighten, not loosen.
Second Class
11. Tie the following knots and know their uses: Timber hitch, Killick hitch, Fisherman's knot and
Double Fisherman’s Knot
Second Class
Fisherman’s knot
This is a very simple knot also known as the angler’s knot, English knot, Englishman’s knot or bend, truelover’s bend or knot, halibut knot or waterman’s knot but should not be confused with the fisherman’s bend.
To tie the knot lay the two lines parallel to each other, with the working ends facing in opposite directions.
Pick up the lower working end and tie an overhand knot around the other line.
Then take the upper working end and tie an overhand knot around the lower line.
The two overhand knots can now be pulled together.
For a more secure knot the double fisherman’s knot is also illustrated here.
Harvester’s hitch
This hitch is also known as the trucker’s or
waggoner’s hitch. It is used to lash down loads
securely and is still used by truck drivers,
wherever rope lashings have not been
superseded by webbing straps and mechanical
tensioning and locking devices.
Attach one end of the rope to an anchorage point
on the far side of the vehicle/ trailer, then bring it
over the load to the nearside.
Cast an anticlockwise over hand loop in the rope.
Make a bight in the standing part of the rope and tuck it up, from the back to the front, through the over hand
loop.
Then pass the standing part of the rope through an anchorage point on the nearside of the vehicle and back
through the loop resulting from the tucked bight.
Tie off with two half hitches.
40 | P a g e
Copyright B-PSA 2012
Camp Skills – 11. Knots
It can be used to join two lines of equal thickness, but it is not suitable for two ropes of large or uneven
diameter. It is widely used by anglers to join fishing line.
When joining two or more spars together this is the way to do it – at this stage
you only need to know two lashings to open up the possibility to have great fun
building all sorts of things. Practice making your lashings really tight, and really
neat and tidy – lashings that look no good, generally are no good. As you build
bigger and bigger pioneering projects you will learn that the quality of your
lashings is what will keep you safe.
Square lashing
So called because the turns of the rope make a square and it is used to
fasten any two spars crossing one another, whether they are at right
angles or not, so long as they are in contact with each other.
Start with a clove hitch round one spar at the place where the other spar
will be crossing it and on the side which the strain will come when the
spars are in use.
Twist the end of your lashing rope or cord round the standing part to
prevent the clove hitch slipping and to avoid having a loose end hanging down.
Start binding the two spars by winding the lashing round; being sure each turn is tight. Continue until you have
completed three turns. Then you bind these together by making three complete frapping turns between the
spars.
These frapping turns must be very tight, and then finish off with a clove hitch on the opposite spar to which
you started. If you still have some cord over do not cut it off, but "lose it" by continuing to make half hitches
round the same spar until it is all used up.
Diagonal lashing
This lashing is used when two spars have to be pulled together; it gets its name from the fact that the
lashing makes a diagonal form at the intersection of the two spars which it joins together.
Start with a timber hitch round both spars, pull against the loop, and make three turns round the two spars
opposite to the line of the timber hitch. Then round the spars on the other diagonal, as before, seeing that
each turn is tight, although you will not be able to make it as tidy as you did with the square lashing.
41 | P a g e
Copyright B-PSA 2012
Camp Skills – 12. Lashings
The other thing to remember is to use natural rope materials rather than
synthetic – they will grip the wood tighter, and for most projects sisal is perfectly
adequate – you don’t need to use massive ropes, they are just more difficult to
get tight. The assault course shown in this picture only used sisal.
Second Class
12. Demonstrate square and diagonal lashings by constructing a trestle of scout staves.
If it has been properly put on, you should find it almost impossible to twist or slide the spars in any direction.
That is the test of a good lashing.
The most important thing to remember about lashings is that they must hold tight and not slacken off in use,
so it is better to take a little longer in making, if by doing so we are sure they will hold. When using heavy
timber it will be necessary to use some form of lever to pull each turn tight and to have a special kind of mallet
to use on the frapping turns, but you will not have to use these tools for a light trestle such as you are now
going to make.
Gear required is six Scout staffs and nine light lashings, about 3 metres in length. The latter are better too
long than too short.
Take the two stoutest for the legs and make the thicker ends the butts or bottoms.
Decide on the positions for the transom and ledgers and make both legs. The sketch shows the transom 20 25cm down from the tips and the ledgers 20 - 25cm from the butts.
Then mark the transom and ledgers so that when they are lashed each leg will slope inwards 1 in 6, that is
5cm for every 30cm of its length.
Use the next strongest staff for the transom as it would have to take most of the weight if it were used in
constructing a bridge.
These can now be lashed together, using square lashings, then add the diagonal braces fastening them to the
legs, exactly as shown in the sketch below. All these are fastened with square lashings and finally the
diagonal braces are lashed together using a diagonal lashing.
42 | P a g e
Copyright B-PSA 2012
Camp Skills – 12. Lashings
Trestle
Second Class
Then apply three frapping turns, weaving them between the two spars, each turn as tight as possible, as the
safety of the lashing depends on this. Finish off with a clove hitch, as you did with the square lashing, and use
up the end of the cordage with half hitches.
Square Lashing
Tip
Transom
Square
Square
Leg
Leg
Diagonal
Lashing
Square
Square Lashing
Square Lashing
Butt
43 | P a g e
Butt
Copyright B-PSA 2012
Camp Skills – 12. Lashings
Square
Square Lashings
Second Class
Tip
Baden-Powell once said “Any fool can be uncomfortable at camp” but he also said “A Scout is no fool”.
Camp gadgets are a way of us creating useful things that will make our life more comfortable, and they can
include all sorts of things:
A tripod to hang a cooking pot over a fire, or to hang a lamp on
A mug tree
A stand to hold a washing up bowl
A table and seats
A draining board and billie rack
A covered wood store
A rubbish sack holder
A clothes line
And just for fun we also like to build camp gateways, so that you can welcome visitors to your campsite in
style.
Here are some photos of gadgets made by Scouts – what can you make?
44 | P a g e
Copyright B-PSA 2012
Camp Skills – 13. Camp Gadgets
•
•
•
•
•
•
•
•
Second Class
13. At camp, construct a useful gadget using natural materials, and demonstrating good use of
knots and lashings.
a knife and hand-axe.
Axes, saws and knifes can be very dangerous if you don’t use them and look after them properly, but they are
absolutely essential tools which will help you enjoy Traditional Scouting. Use them properly and they will be
your best friends.
Safety when using a hand-axe
Common Sense
Clothing
This is also important, especially with regard to footwear, and any loose clothing you may be wearing.
FOOTWEAR; should be of a strong nature (i.e. boots, or strong shoes), so that, should the axe slip, it will not
penetrate the foot.
LOOSE CLOTHING; must be either fastened, or removed, so that things like neckerchiefs don’t get tangled
up and affect your control.
Branches
Don’t chop in an area where overhanging branches could get caught in the axe and affect your control.
Weather
This is an important factor in axemanship, especially when it is wet. A wet axe on wet wood will invariably slip;
if you use the axe when it is raining, you cannot properly see what you are doing; if the haft is wet, you will
lose your grip; on the other hand, if the weather is too hot, you will sweat, and again tend to lose your grip; if
you face the sun you will tend to be blinded.
Others
When you are using an axe, it is MOST important that you are not disturbed by conversation, or distractions of
any kind, as this will cause lack of concentration, and consequently accidents.
Also, there should be nobody at all in front of you, or within two axe-lengths to the side, or behind you. The
reason is that should you by accident let go of the axe, or the head fly off the haft, there is less chance that
anyone will be hit. AN AXE LENGTH is the distance from your neck to the eye of the axe when the arm is held
out straight, holding the axe haft at the foot end.
Your Body
Do not use an axe when you are tired or feeling unwell.
These are some of the safety rules; but if you want to add some more of your own, by all means do, so long
as you remember these.
45 | P a g e
Copyright B-PSA 2012
Camp Skills – 14. Hand Axe, Saw and Knife
This is the most important rule to remember — if what you are doing with the axe, or what someone is doing
in the vicinity of the axe is dangerous, or does not make sense, then the axe should not be used UNDER ANY
CIRCUMSTANCES.
Second Class
14. Know the safety rules and care of a hand-axe, bow saw and knife. Demonstrate how to sharpen
Always use your common sense.
Check the axe before you start
Tighten or discard loose clothing
Wear strong shoes or boots
Clear overhanging, or protruding branches
Never chop in the rain
Do not chop when the wood is wet
Do not chop facing the sun
Always concentrate on the axe while in use
Don't talk while chopping
Keep other people at TWO axe lengths distance
When you are tired, stop.
If you're ill, don't start!!!
Aim the axe and use it properly
Never chop live timber, without permission
Use a chopping block
Mask the axe in it when you finish
Never chop in poor light
Never mask an axe in the floor
Second Class
An axe can be a camper's most prized possession, and one of his most useful tools, but, like fire, it is a good
slave, but poor master!
There is just one rule that I have so far left out, and it is perhaps, the most important of all:
NEVER PLAY AROUND WITH AN AXE
An axe is a lethal weapon, and because of its weight and momentum, once
you have started your swing at the log, you will not be able to stop the axe in
mid air. Also, should you let go of the axe in mid swing, it will travel a long,
long way, before it eventually lands in the earth or tree, or other obstruction.
So NEVER wield an axe at anybody, play with one, leave it un-masked, or
even run when carrying one, as that is asking for trouble.
When you have finished with the axe, even for a short period, you must mask
it, so that other people cannot hurt themselves on it.
46 | P a g e
Copyright B-PSA 2012
Camp Skills – 14. Hand Axe, Saw and Knife
•
•
•
•
•
•
•
•
•
•
•
•
•
•
•
•
•
•
•
Second Class
Now look at the picture above, and you will it see that it portrays a large log lying on the ground. The axe is
pictured on it in two different positions. In the first it has landed straight down on the log, while in the second it
has come down at a slight angle. You will waste an awful lot of time, effort and energy, by using the axe in the
first of the two, as it will never cut very deep or remove the wood chippings in the cut.
To use the axe as in the second part, the axe will easily cut the wood (providing the axe is sharp), and when
reversed for the second stroke, will not only chop easily again, but will also clear the chip from between the
two cuts. Remember though that if the angle of the axe is too shallow, it will tend not to bite into the wood at
all, but slide along the top. A blunt axe will cut flesh but perhaps not wood.
You should always be a comfortable distance away from the wood to be cut, but not so far as to miss the
wood, and hit your foot as this could be rather painful!
47 | P a g e
Copyright B-PSA 2012
Camp Skills – 14. Hand Axe, Saw and Knife
The right hand picture above shows what not to do. Just use your imagination for a minute, and imagine that
the axe has come to the end of its downward travel, and has landed on the piece of wood. There is nothing
under the wood to stop the axe from carrying on any further, which it promptly does. It twists as it hits the
wood, so breaking it instead of cutting it. However, because you are holding the grip of the axe tightly, it
cannot turn as easily as the head, so the haft can easily break (usually by the shoulder). Also, as the wood
breaks, the end which is resting against the wood leaves the block under the force of the axe, and will fly
away in the direction of the arrow. Just imagine what would happen if your head was in the way at that time!
When handing over an axe to your friend, hold the head on your upturned palm, and rest the haft along your
arm. Your friend will then be able to pick it up off your hand, and will have a good hold of it.
Knife
Now, your knife. If used incorrectly, or when blunt, can be just as dangerous as an axe.
Second Class
As for the swing, and the way to hold the axe, it is best to get your Scout Master, or one of the other Scouters
to show you how, and for them to watch you as you use the axe for the first few times until you have passed
your test. But still take the same care after you have passed, as you used before! Also, do not forget that the
more you use it, the better you will get.
Firstly, if you use a knife, be it a clasp knife, or a sheath knife, always cut away from you, and anybody else
who might be near you. This is in case you slip, it will do far less harm that way.
A clasp knife, you hand over CLOSED.
Saws
The bush saw is a rather less messy method of cutting wood and the less mess that is left the less there is to
clear up afterwards.
When using a saw always keep your hand, which is not holding the saw well away from the saw cut as they
have springy blades and give you a nasty cut.
Do not try to sharpen saw blades when they become blunt, replace them with a new one.
Sharpening Knives and Axes
There are various recognised methods of sharpening both, but these are the ways that I use for the knife and
the axe respectively.
48 | P a g e
Copyright B-PSA 2012
Camp Skills – 14. Hand Axe, Saw and Knife
When you hand over a sheath knife, you hold the blade between the thumb and fore finger (at the hilt), with
the rest of the blade in your palm, the sharp edge overhanging your fingertips.
With the axe, the system is very similar, although it will need grinding by an experienced person to get a
decent edge on it in the first place, or if the edge has been left to get really bad (which, of course, it should
not). However, your axe being usually much harder than your knife, will take a lot more work.
Second Class
First the knife. This will have a reasonable edge on it when you buy it, but will soon have to be re-sharpened.
This will never be too difficult, providing that you do not let it become too blunt in the first place!! You hold the
knife firmly in one hand, and the stone in the other. The stone should have a fine layer of oil or water on it.
Then firmly rub the stone over the blade of the knife, until a partial edge has been formed on the blade. Next,
turn the blade over, and do the same on the other side. This should leave you with a reasonable edge to your
knife, and a quick rub across the other side of the blade will remove any burr there might be. The stone should
always be moved in a circular direction, as otherwise you will sharpen grooves into the blade, and also
sharpen the blade un-evenly.
It is always advisable to re-sharpen both immediately after use, as then it is ready for when you need it next.
Camp Skills – 14. Hand Axe, Saw and Knife
49 | P a g e
Copyright B-PSA 2012
Having a fire at camp is one of the delights of Scouting – it will keep you warm, it allows you to cook fabulous
meals (if you get it right, it’s a lot easier than using a gas stove), and at the end of the day it is great to sit
round the fire with your Patrol and chat, to remember the wonderful things the day has brought, and look
forward to tomorrow.
But to have a great fire you must first learn how to collect, chop and store firewood so that it’s always ready
when you need it.
First collect enough wood to last you all day, and for breakfast tomorrow – its far better to be prepared.
When you have collected the wood, you can chop, saw or break it to size. You will need four different piles, for
different purposes:
•
Firstly you will need tinder, in many ways this is the most important material – it’s what catches first
and allows your fire to grow. You will need a ball of tinder about the size of a grapefruit to get your fire
started – it must be absolutely dry. Keep your eyes open and stuff your pockets with good tinder
whenever you see it. Natural materials include really dry grass, dry dead bracken, sheep’s wool, the
fluffy seed down from clematis plants and birch bark. Also keep any little bits of sisal that you trim –
this needs to be un-wound and fluffed up, and of course bits of paper, the ends of candles and
anything else that will light from a match.
•
Your second pile will be kindling, this is dead brittle dry wood no thicker than a pencil. If it doesn’t
snap easily then it isn’t dry enough! Look under hedges where little twigs stay dry even in wet
weather, and look for dead twigs on trees – particularly hawthorn – if it snaps off easily it is dead, and
you won’t harm the tree. But remember never cut live wood from trees – it won’t burn anyway.
•
Your third pile will be small fuel, thicker than a pencil but not much thicker than your thumb. This
should also be dead and dry and easy to snap. This will be the fuel that establishes your fire, or gives
you a quick burst if you need to revive the fire from embers.
•
Your fourth and biggest pile will be main fuel, this should be no wider than the palm of your hand. It is
best to split branches and logs so that you have more flat surfaces and edges, than rounds – these
are better for burning
Make you wood pile between your chopping area and fire. Not
too close to either you need to keep it safe from people using
axes, and away from the fire so it doesn’t catch by accident.
This wood MUST be kept dry, so overnight cover it with a
tarpaulin or build a covered wood pile. Its also a good idea to
keep your prepared wood off the ground, so stack it across a
couple of small logs.
50 | P a g e
Copyright B-PSA 2012
Camp Skills – 15. Make and store firewood
As you work your way through Scouting, you will find out that certain woods burn far better than others –
section 21 will give you more information about recognising trees, and understanding which woods are good
in different situations.
Second Class
15. Demonstrate how to make and store firewood.
There are all sorts of different styles of fire, and you can practice them and see which you like best for
different jobs, bust first some basics:
As you are a Scout, you DO NOT DO lay a fire on top of grass, as you have to leave the site the way you
found it, or better.
Look after the turf you have removed and water it from time to time, so
that it will grow back just as good when you replace it at the end of camp.
The fire-trench is then dug out, to no more than half a spade's depth, and
sloping up at the ends. The trench lies along the direction of the prevailing
wind, to help the fire to burn. Be sure the landowner will allow you to dig a
fire trench. If not you will need to raise your fire off the ground on an altar
fire, or lay your fire on a spec ially provided concrete base.
Lighting your fire
Start with a ball of tinder – grapefruit size – and cover this with some of your smallest kindling wood in the
centre of the fireplace, with the driest, and most combustible material at the bottom, so that, when you light
the fire, the flames have to go through the rest before showing themselves.
On top of the kindling, you place some of the smallest pieces from the small fuel pile. These are stood up on
end, to form a pyramid shape. Around this, in the same manner, you put some of the larger bits from that pile.
You can now apply a match. This, when it has been lit, is placed as
near to the centre of the fire as is possible, so it is wise to leave a
passage-way to the centre when you start to build.
Once the Kindling has caught, it will set the twigs on fire, and so on.
Now you can start putting some of the bigger wood from the small fuel
pile on, again in the Pyramid shape. All the time build up the size of
the wood, but do it slowly. Leave the fire for a while without putting
more wood on, so that it has a chance to catch light properly.
When the fire is burning, put some more wood on, this time from the
thinner end of the main fuel pile, and eventually just from your main
fuel pile.
51 | P a g e
Copyright B-PSA 2012
Camp Skills – 16. Lay and light a fire
Therefore, the first thing you have to do is remove the
grass. This you do with a spade, by cutting a pattern in
the grass two spades wide, and three spades long. The
spade is then pushed for 5 to 10 cms down, then
underneath the grass, until the turf has been completely
loosened, then you lift it off, and lay it down in a safe
place until you put it back in place. You keep doing this
until a large enough area has been uncovered for your needs. You will find that it is advisable to cut the turf
back from the actual fire for a short distance, so that the edges of what you leave do not burn, or you can line
the pit with cut logs like shown here.
Second Class
16. Lay and light a fire out of doors with natural materials.
17. Cook over an open fire a simple meal, make a hot drink and wash up afterwards.
And so on to the cooking . . . trust me some of the best food you have ever tasted will be cooked over an open
fire at camp, and there is almost nothing that you can cook at home, that you can’t cook on an open fire. I’ve
even made ice cream at camp – but that’s another story.
I trust that while the fire was being made, somebody thought to prepare the meat, and peel the spuds, as
otherwise, you're going to waste both time and wood. Now, when cooking, the various foods take different
times to cook – you’ll soon get the hang of what needs to go on first, but if you are not sure an older Scout or
adult will give you some help.
Flapjacks, Dampers and Twists
To find out about these you can read Scouting for Boys, Camp Fire Yarn 9.
To make the mixture you need self-raising flour, salt and water.
Make a little mountain of about a handful of flour, put your finger in the centre
(after washing your hands please), and make a small hole. Add a pinch of salt.
Now add the water a small amount at a time; you can mix it with your hands, a little messy, but great fun.
You'll find it helps to stop the mixture sticking to your hands if you cover them lightly with flour first. When the
mix is just firm and not tacky it is ready to cook.
Flapjacks
Shape the mixture into flat cakes about 80mm across and 20mm thick. Heat some oil or butter or lard in a
frying pan and wait until the fat is smoking hot. Drop (carefully) your cakes into the hot fat and sizzle them until
golden brown. Serve with butter and jam. You could try sprinkling them with brown sugar or currants.
Twists
Take a green stick thinner than your little finger (this is the only time you can cut live wood from a tree) and 1
metre long, peel off the bark. Roll your mixture into a snake and wind it around the stick, leaving a space
between each turn for it to cook and expand. Hold your stick closely over a fire of glowing embers (not
flames). Keep rotating the stick until your snake has gone a dark golden brown. You can test to see if it is
cooked by sticking a knife blade into the snake, if it drags or comes out sticky, more cooking is needed. When
cooking is complete, your twist will slide off the stick, cut it open, spread with butter and jam and keep eating.
Baden-Powell used this recipe. Firstly it saved in weight, just carrying a small bag of each of the ingredients
and secondly he could enjoy hot fresh bread every day.
Dampers
Use the same mixture and cook on a hot stone next to the fire.
52 | P a g e
Copyright B-PSA 2012
Camp Skills – 17. Cook a meal on an open fire
If you cut your potatoes fairly small and just cover them with boiling water, they
will cook quicker than putting them on whole. Sausages will cook quicker than a
pork chop, which needs to be cooked slowly. Find out at home, from your Patrol
Leader or Scout Master how long the various items you intend to prepare are
going to take.
Second Class
After a while the fire will settle down to good hot embers — the fire is now ready for cooking.
For the pitching and striking of a hike tent you will get the best advice from your Patrol Leader or Scoutmaster,
because they will be able to show you with the type of tents which are used in your troop.
Hike tents come in different shapes and sizes. They may also be used with sewn in groundsheets or separate
groundsheets. Some may be used with external poles, often called 'A' poles or with poles inside the tent.
Generally speaking, you unpack the tent and lay out the parts, canvas and groundsheet, poles and pegs, on
dry ground.
Put in the remaining pegs and then go round tightening up the guys and adjusting the angle and position of
the pegs.
When you are more experienced, you will probably get them right first time. Remember, do not over tighten
the guys and make sure they run in line or parallel with the seams. If it rains heavily, you will need to slacken
the lines, particularly if they are not nylon, because they shrink and thus would tighten more and could
eventually tear your tent.
When you are using the tent make sure that you store the tent and peg bags away in the tent in the dry ready
for when you strike. Try not to touch the walls of the tent especially when it is raining as this may permit water
to enter. If the tent has a sewn-in groundsheet, take your shoes or boots off before you go stomping about,
the groundsheet is to keep water out from below, not to be used as a doormat.
When you come to strike the tent try to do so when it has dried out either from the morning dew or overnight
rain. This of course is not always possible.
Striking
Reverse the procedure outlined above and try to wash or scrape clean all the pegs before you pack them
away and count them to make sure you have got them all.
If you have had to pack the tent away wet, ensure that you set it up again or hang it up to dry before it is finally
put back in store.
If there is any problems or things missing from the tent tell your Quarter Master before returning the tent to the
store.
53 | P a g e
Copyright B-PSA 2012
Camp Skills – 18. Hike Tent
Make sure the doors of the tent are zipped or fastened together, then if you have a separate groundsheet, lay
it on the ground and peg it down securely. This establishes the base and shape. Fit together the poles and
suspend the tent from them. You should now peg out the main guy-lines, usually with the heaviest duty pegs
provided. Do not worry too much about the shape of the tent or the tautness of the guys at this time.
Second Class
18. With another Scout, pitch, strike and pack a hike tent within a reasonable time.
2. Dome tent
3. Ridge tent
19. Camp for a minimum of 5 nights as a Scout
Second Class
1. Hoop tent
For most Scouts camping is the most special part – it is a chance to live in harmony with nature, and prove
that you can be happy and comfortable away from all the luxuries of a modern house.
Some different Scout Camps are:
•
Troop camp – often for a week, and normally in the summer holidays. Most Troops will camp with
each Patrol in a separate area, looking after their own cooking
•
Patrol camp – just your Patrol camping on their own, working together to have fun
•
Activity camps – quite often a weekend camp, where the main focus is on a special activity, and
sometimes cooking will be done centrally by Scoutmasters or a duty Patrol
•
Hike camps – normally when you are working on your First Class, carrying all your gear for more than
a day, and camping overnight in a hike tent
•
Area camps – sometimes these are competitions, and sometimes they are based around activities
•
National camps – every Troop is invited to two national camps each year, one is a fun competition to
see who has got the best camping skills, and the other is a badge bonanza where you can take
badges that you can’t always do in the Troop. Look for details on the B-PSA website
•
International camps – we are very lucky to be members of the World Federation of Independent
Scouts, WFIS, and once every four years they hold a European Jamboree – the next Eurocamp is in
Italy in 2014 it’s your chance to meet thousands of traditional Scouts from all over Europe, and make
new friends from overseas – look for details on the WFIS website
For this test, the five
that you have
with Scouts (not Cub
your family don’t
great fun, but they
54 | P a g e
nights need to be camps
undertaken under canvas
camps), and camps with
count either – they can be
are not quite the same.
Copyright B-PSA 2012
Camp Skills – 19. Camp 5 nights
You may go to different sorts of camp, and it would be good if you could get a variety of different experiences
to pass this test.
20. Kim's game. A test in observation to remember 16 out of 24 well assorted articles, following 1
minutes observation, or, Follow a trail containing not less than 30 woodcraft signs.
The thing to remember is that most of the objects will have a pair. By this, we mean that there will be common
items, like a pen, and a pencil, where if you can remember one, it will help you to remember the other. In
some cases a whole series can be formed, like Pen, Pencil, Rubber, Pencil Sharpener, Paper, Biro, Ink, etc.
All these have the same common root — they are used when writing. So the more you can connect, the
easier it should be.
Read the stories of Kimball O'Hara and the Elsdon murder at the beginning of Scouting for Boys.
You may not be good at this test to start with because you have to train yourself. Remember you also have
other senses which need training.
Alternatively follow a trail containing not less than 30 woodcraft signs.
You will have learnt several woodcraft signs for your Tenderfoot test and you probably followed a short trail.
Now for Second Class this should be a test of observation. The trail may be marked by leaves or twigs placed
in strange positions i.e. an oak leaf may be stuck among some horse chestnut leaves, or pieces of coloured
wool may be draped over bushes or on the bark of trees.
Remember that the trail should only be obvious to Scouts and should be cleared away once it is finished with.
55 | P a g e
Copyright B-PSA 2012
Observation 20. Kim’s Game
One of the best ways of getting used to Kim's game, is to walk slowly past a shop window, looking at all there
is on display. Go past, write it down (or describe it to a friend who is looking in the window at the time), and go
back and check the list. The more you do it, the easier it will become.
Second Class
•
Wherever you live in this country, you will find that there are far more than just six types of tree around, quite a
number of which, you will find that you can name.
A lot you will know by just thinking; such trees as the Holly, Oak, Beech, Birch, Pine, Ash, Hawthorn, Horse
Chestnut -there, in fact, are more than six already!
So you see, there is nothing particularly difficult about that part of the test. The next part, though, is slightly
more difficult, as you have probably not come across the need to know the burning qualities of them.
Second Class
21. Be able to recognise and name 6 common trees and know the value of their wood for burning
Here, you will find a list of trees, and the burning qualities of their woods, and in some cases, their barks.
Excellent for starting the fire, as both the wood, but especially the bark burns very
easily. However, it burns very quickly.
Conifers
Very good for taking over after Birch, but again, burns fairly quickly.
The logs usually make the basis of the centre of the campfire.
Holly
This makes a good fuel for really getting the fire going.
Crab Apple & Cherry
Good burners, useful for the preparation of the cooking fire.
Ash & Beech
These are perhaps one of the best woods to use as they are easy to prepare, and
burn well for a reasonable time.
Yew, Hazel, Hawthorn Very good for cooking, dry twigs on bushes are excellent for starting a fire on a wet
day. These burn very well, especially when dry.
Lime, Sycamore &
Plane
Difficult to light, but once burning gives off a good heat, which is useful for items
which do not require a lot of flame.
Oak
Another wood difficult to light, but again, when once alight, will give a good heat, and
last a long time. Useful when bedding down the fire at night, to keep it until morning.
Hornbeam
Very hard to split and prepare, but will burn well.
Horse chestnut, Elder
All woods to be avoided, as they either do not burn well
You may find this rhyme useful.
These hard woods burn well and slowly,
Ash, Beech, Hawthorn, Oak and Holly,
Soft woods blaze up quick and fine,
Birch, Fir, Hazel, Larch and Pine,
Elder and Willow you'll regret
Chestnut green and Sycamore wet.
56 | P a g e
Copyright B-PSA 2012
Woodcraft 21. Trees – burning properties
Birch bark
Be Safe – Plan Ahead and Follow Any Signs
Refer to up-to-date maps or guidebooks.
You're responsible for your own safety and for others in your care, so be prepared for changes in weather and
other events.
Part of the appeal of the countryside is that you can get away from it all. You may not see anyone for hours
and there are many places without clear mobile-phone signals, so let someone else know where you are
going and when you expect to return.
Footpath waymark
Bridleway waymark
Byeway waymark
National trails
57 | P a g e
Copyright B-PSA 2012
Woodcraft 22. Country Code
Check weather forecasts before you leave, and do not be afraid to turn back, it shows good leadership
qualities to do this and to know the limitations of your party.
Second Class
22. Know and follow the Country code
Please respect the working life of the countryside, as our actions can affect people's livelihoods, our heritage,
and the safety and welfare of animals and ourselves.
Second Class
Leave Gates and Property as You Find Them
A farmer will normally leave a gate closed to keep livestock in, but may sometimes leave it open so they can
reach food and water. Leave gates as you find them or follow instructions on signs; if walking in a group,
make sure the last person knows how to leave the gates.
Follow paths across land that has crops growing on it, wherever possible.
Use gates and stiles wherever possible - climbing over walls, hedges, gates and fences can damage them
and increase the risk of farm animals escaping.
Our heritage belongs to all of us - be careful not to disturb ruins and historic sites. Leave machinery and
livestock alone - do not interfere with animals even if you think they are in distress. Try to alert the farmer
instead.
Protect Plants and Animals, and Take Your Litter Home
We have a responsibility to protect our countryside now and for future generations, so make sure you do not
harm animals, birds, plants or trees.
Litter and leftover food does not just spoil the beauty of the countryside, it can be dangerous to wildlife and
farm animals and can spread disease - so take your litter home with you. Dropping litter and dumping rubbish
are criminal offences.
Discover the beauty of the natural environment and take special care not to damage, destroy or remove
features such as rocks, plants and trees. They provide homes and food for wildlife, and add to everybody's
enjoyment of the countryside.
Wild animals and farm animals can behave unpredictably if you get too close, especially if they are with their
young - so give them plenty of space.
Fires can be as devastating to wildlife and habitats as they are to people and property - so be careful not to
drop a match or smouldering cigarette at any time of the year. Sometimes, controlled fires are used to
manage vegetation, particularly on heaths and moors between October and early April, so please check that a
fire is not supervised before calling 999.
Keep Your Dog Under Close Control
The countryside is a great place to exercise dogs, but it is every owner’s duty to make sure their dog is not a
danger or nuisance to farm animals, wildlife or other people.
58 | P a g e
Copyright B-PSA 2012
Woodcraft 22. Country Code
In fields where crops are growing, follow the paths wherever possible.
You do not have to put your dog on a lead on public paths as long as it is under close control. But as a
general rule, keep your dog on a lead if you cannot rely on its obedience. By law, farmers are entitled to
destroy a dog that injures or worries their animals.
If a farm animal chases you and your dog, it is safer to let your dog off the lead – don’t risk getting hurt by
trying to protect it.
Take particular care that your dog does not scare sheep and lambs or wander where it might disturb birds that
nest on the ground and other wildlife – eggs and young will soon die without protection from their parents.
You can also find out more by phoning the Open Access Helpline on 0845 100 3298.
Consider Other People
Showing consideration and respect for other people makes the countryside a pleasant environment for
everyone - at home, at work and at leisure.
Busy traffic on small country roads can be unpleasant and dangerous to local people, visitors and wildlife - so
slow down and, where possible, leave your vehicle at home, consider sharing lifts and use alternatives such
as public transport or cycling. For public transport information, phone Traveline on 0870 608 2608.
Respect the needs of local people - for example, do not block gateways, driveways or other entry points with
your vehicle.
By law, cyclists must give way to walkers and horse riders on bridleways.
Keep out of the way when farm animals are being gathered or moved and follow directions from the farmer.
Support the rural economy - for example, buy your supplies from local shops.
59 | P a g e
Copyright B-PSA 2012
Woodcraft 22. Country Code
Everyone knows how unpleasant dog mess is and it can cause infections – so always clean up after your dog
and get rid of the mess responsibly. Also, make sure your dog is wormed regularly.
Second Class
By law, you must control your dog so that it does not disturb or scare farm animals or wildlife. You must keep
your dog on a short lead on most areas of open country and common land between 1 March and 31 July, and
at all times near farm animals.
The important rules to remember for healthy living are:
•
•
•
A healthy diet
Good personal hygiene
Lots of exercise
Diet
A healthy diet contains lots of fruit and vegetables; is based on starchy foods such as wholegrain bread,
pasta and rice; and is low in fat (especially saturated fat), salt and sugar.
Meat such as bacon and salami, and meat products such as sausages, beef burgers and pâté are all
relatively high fat choices, so try to keep these to a minimum.
Beans, such as tinned baked beans and pulses, are a good low-fat source of protein.
Aim to eat at least two portions of fish a week because fish are a good source of protein, vitamins and
minerals, and they are low in saturated fat. You can choose from fresh, frozen or canned fish.
Oily fish are a healthy choice because they also contain omega 3 fatty acids. These include mackerel,
salmon, pilchard, herring, trout, sardines and fresh tuna. Canned tuna does not count as an oily fish, but it is
still a good source of protein and some vitamins.
Fats and sugars Fats and sugars;
A healthy diet means consuming less of these sorts of food.
What's included?
Food containing fat:
Margarine, butter, other spreading fats and low fat spreads, cooking oils, oil-based salad dressings,
mayonnaise, cream, chocolate, crisps, biscuits, pastries, cakes, puddings, ice cream, rich sauces and gravies.
Food and drinks containing sugar:
Soft drinks, sweets, jam and sugar, as well as foods such as cakes, puddings, biscuits, pastries and ice
cream.
What are the main nutrients?
As well as fat, including some essential fatty acids, foods containing fat also provide some vitamins. Some
products also contain salt or sugar.
Some food and drinks containing sugar also provide minerals and some provide fat.
How much should I be eating?
Eat foods containing fat sparingly and look out for the low fat alternatives. Foods and drinks containing sugar
should not be eaten too often as they can contribute to tooth decay.
60 | P a g e
Copyright B-PSA 2012
Health & Fitness 23. Healthy Living
Meat, fish, eggs and pulses;
For most people, a healthy diet means eating only moderate amounts of meat, fish and alternatives such as
lentils, nuts, beans and eggs, and choosing lower fat versions when you can.
Second Class
23. Know the general rules for healthy living.
You can choose from fresh, frozen, tinned, dried or juiced, but remember that potatoes do not count because
they are a starchy food.
Salt;
We all need to eat some salt, but most of us are eating too much. Salt is present naturally in food and we also
use it to flavour and preserve foods.
Second Class
Fruit and Vegetables;
Most people know that we should be eating more fruit and vegetable, but most of us aren’t eating enough. Did
you know that we should be eating at least five portions of fruit and vegetables every day?
We tend to add more salt at the table or when we are cooking. But on average, three-quarters of the salt we
eat comes from processed food.
Try to eat a variety and remember you can choose from all these: bread, breakfast cereals, chappattis, oats,
pasta, noodles, rice, potatoes, sweet potatoes, yams, dishes made from maize millet and cornmeal, plantains,
green bananas, beans and lentils.
Choose wholegrain, wholemeal, brown or high fibre varieties wherever possible.
How much do I need?
Lots! Eat more of this food group, because we eat less than we should. These foods should make up a big
part of our diet. Try serving larger portions of these foods at mealtimes by, for example, having more rice or
potatoes.
Can eating these foods make me fat?
People often think that starchy foods are particularly fattening. This is not true, but starchy foods can become
fattening if they are either served or cooked with fat. For example, it is the margarine or butter we spread on
bread, the cream or cheese sauce we add to pasta or the oil that we use for frying that makes them fattening.
So try cutting down on added fats.
Dairy foods;
For a healthy diet, most people should eat dairy foods such as milk, cheese, yoghurt and fromage frais in
moderate amounts. If you want to cut down on fat, choose lower fat versions whenever you can.
Personal hygiene
Body Odour
Our bodies produce two kinds of sweat: eccrine and apocrine. Actually, neither of these liquids has an odour.
Eccrine is found all over our bodies. It helps to regulate the body's temperature. Apocrine is the body-odour
culprit. It is found in the groin and underarm areas. That well-known sweaty smell occurs only after apocrine
reacts with the bacteria on our skin.
61 | P a g e
Copyright B-PSA 2012
Health & Fitness 23. Healthy Living
Bread and cereals;
Base your meals on these sorts of foods, which should make up about a third of your diet.
Some of us are cursed with bigger and more active apocrine glands than others, and some of us simply are
not as successful as others in getting rid of the bacteria on our skin.
Try these tips:
Bath or shower at least once daily with an antibacterial soap.
If the problem does not soon clear up, you could try a prescription soap.
Some people recommend using benzoyl peroxide or an antibacterial ointment. There should be no problem
with short term use of such remedies except perhaps some drying of the skin.
Second Class
Controlling Body Odour
Use a deodorant with aluminium or zinc. Either of these metals should kill odour-causing bacteria.
Wash clothing regularly.
Dental hygiene
It is important to clean your teeth at least twice a day. Once in the morning after your breakfast and before you
go to bed at night, and it does no harm to brush after every meal.
You need to brush your teeth thoroughly with toothpaste to prevent tooth decay and smelly breath.
62 | P a g e
Copyright B-PSA 2012
Health & Fitness 23. Healthy Living
Extremely heavy sweaters should use an antiperspirant or deodorant containing aluminium chloride.
It is very important to remember the 3 basic principles of 1st Aid – sometimes known as the 3Ps
•
•
•
Preserve Life
Prevent deterioration
Promote cure
st
The 1 Aid training you will do at Scouts can help with all three of these, but you must remember that it
doesn’t qualify you as a paramedic, a doctor or a nurse. So for anything more serious than the minor ailments
we look at in test 26, your first priority should be to get adult help, and if in doubt call the emergency services.
•
•
•
•
•
•
•
•
You will be asked which service you require – if there are casualties always ask for
ambulance, they will automatically ask for fire or police service assistance if needed.
Keep calm and try to be clear and concise
You will be asked for the number you are calling from, this will enable them to call you
back if you get cut off
It will help if you have a full address and postcode to give – the call centre may well not
be in your town, so using local slang names like “cemetery junction” will not help them
If you don’t have full details stay on the line, your call can be traced
They will ask you for details of the suspected injury, make sure that if the injuries you
suspect include head or spine, or possible heart attack that you make this clear very early
– that will make your call a priority. The operator may well give you advice on what to do
next with the casualty
You will also be asked for the number, age and gender of casualties and a description of
the incident – this will help them to assess their response
You may also be asked if there are any hazards – like gas, fuel leaks from vehicles or
adverse weather
While you wait for the emergency services to arrive, you should concentrate on the first two Ps – the
ambulance operator may help you with advice.
25. Treat shock. (not electric).
When people are injured they often go into shock – their bodies send the blood supply to the vital organs, and
they may appear pale, sweaty and feel giddy.
If none of their injuries prevent you from moving them, help them to lie down on something warm like a
blanket if possible, raise and support their legs above the level of their heart – just popping a rucsac under
their ankles would do.
Keep the casualties head low, and undo tight clothing around the neck, chest and waist.
Keep the casualty warm – put a blanket or more clothes over them.
Do not give the casualty anything to eat or drink, and don’t try to warm them with any direct heat like a hot
water bottle.
63 | P a g e
Copyright B-PSA 2012
Saving Life 24 / 25. Summon Help / Treat Shock
Call 999 (or 112)
You can get to all the emergency services by calling 999 – they include: fire, police, ambulance, coastguard,
mine, mountain and cave rescue.
Second Class
24. Demonstrate a knowledge of and how and when to summon adult help
Second Class
26. Know how to deal with the following common minor ailments:
• Minor cuts and scratches
• Bleeding from the nose.
• Stings and bites.
• Burns and scalds.
• Know how to avoid sunburn.
Cuts and scratches
Prompt fist aid can help nature heal small wounds and prevent infection. But you must seek medical advice if:there is an object embedded in the wound
the wound is at special risk of infection such as a dog bite or a puncture by a dirty object
an old wound shows signs of becoming infected
Before treating the wound, wash your hands well in soap and water. Put on disposable non powdered latex
gloves.
If the wound is dirty, clean it by rinsing lightly under running water pat dry with a clean gauze swab.
Temporarily cover the wound with sterile gauze.
Elevate the wounded part above the level of the heart if possible avoid touching the wound directly with
fingers. Support the affected limb
Clean the surrounding area with water, pat dry and remove the covering apply an adhesive dressing.
Once the dressing has been placed in position, it should be kept clean and renewed periodically, especially in
camp, until the wound has healed.
Bleeding from the nose
These most commonly occur when blood vessels inside the nostrils are ruptured, either by a blow to the nose
or as a result of sneezing, or picking or blowing the nose. Infection such as a cold or flu makes the blood
vessels in the nose more fragile. Nosebleeds may also occur as a result of high blood pressure. Nosebleeds
are usually merely unpleasant, but they can be dangerous if the casualty loses a lot of blood. Where a
nosebleed follows a head injury, the blood may appear thin and watery, if this is the case seek medical advice
immediately.
•
•
•
•
•
Sit the patient down with head well forward.
Advise patient to breath through mouth and not to sniff
Get the patient to pinch nose at joint of hard and soft parts.
Release pressure on nose after about 10 minutes, if the bleeding
persists for more than 30 minutes take the casualty to hospital
Gently clean around the nose with warm water, rest quietly and
avoid exertion and blowing nose for 2-3 hours.
64 | P a g e
Copyright B-PSA 2012
Saving Life 26. Minor Ailments
•
•
•
Bee, wasp, and hornet stings are usually painful rather than dangerous. An initial sharp pain is followed by
mild swelling and soreness, which first aid can relieve. Some people are allergic to stings and can rapidly
develop the serious condition (anaphylactic shock), medical assistance must be sought immediately in this
case. Multiple stings can also be dangerous. Stings in the mouth or throat are serious, as the swelling they
cause can obstruct the airway.
If the sting is still in the wound pluck out firmly with fine tweezers. Apply a cold compress to relieve pain and
minimise swelling.
Second Class
Stings and bites
For a sting in the mouth give the casualty ice to suck or cold water to sip to minimise the swelling. If the pain
and swelling persist seek medical help.
Dog and animal bites need to be cleaned thoroughly as these wounds are very vulnerable to infection. Wash
with warm water pat dry and cover with an adhesive dressing. Advise the casualty to see a doctor in case
inoculation is needed.
Burns and scalds
When the skin is burned, the small blood vessels within the skin leak fluid. This fluid either gathers in tissue
spaces to form blisters or it leaks through the skins surface. If a burn is over 2-3 cm in diameter, medical
assistance is required. If the burn is on a limb, the fluid may accumulate in the tissues, causing swelling and
pain this is particularly dangerous if the limb is being constricted, for example, by clothing or footwear.
How burns are caused Dry burn
cause
Flames, contact with hot objects, friction (example rope burns)
Scald
cause
Steam, hot liquids such as tea, coffee or fat,
Flood the injured part with cold running water for at least ten minutes to stop the burning and relieve the pain.
Ask the casualty if they can gently remove any jewellery, watches, belts or constricting clothing from the
injured area before it begins to swell.
Cover the area with a sterile dressing or any clean, non-fluffy material and bandage loosely in place. A clean
plastic bag or clean kitchen film makes a good temporary covering.
DO NOT - break blisters or interfere with the injured area
DO NOT - apply adhesive dressings
DO NOT - apply lotions, ointments or creams
65 | P a g e
Copyright B-PSA 2012
Saving Life 26. Minor Ailments
The only poisonous snake native to mainland Britain is the adder and its bite is rarely fatal, however many
exotic snakes are kept as pets. Wash the snake bite well and pat dry with clean swabs. Take the casualty to
hospital, if possible make a note of the snake’s appearance this may help the correct anti venom to be given
to the casualty.
This is caused by overexposure to the sun. Most sunburn is superficial, however in severe cases, the skin is
lobster red and blistered and the casualty may suffer from heat stroke.
To avoid sunburn and heat stroke it is important to cover yourself up when out in the sun for prolonged
periods, always wear a sun hat, apply lots of a high factor sun block regularly and drink plenty of water.
The treatment is to cover the patients skin with a towel or clothes and get him into the shade. You can cool
skin by sponging with cold water or by soaking the affected areas in cold water for 10 minutes.
Second Class
Sunburn
If there is extensive blistering, skin damage or pain then seek medical advice.
Saving Life 26. Minor Ailments
66 | P a g e
Copyright B-PSA 2012
Applying dressings and bandages is an important part of good first aid practice. Wounds usually require a
gauze dressing, and almost all injuries will benefit from the support that bandages can give.
Dressings
Dressings cover a wound, prevent infections from entering it and help the blood clotting process.
•
•
Roller bandage
A roller bandage may be used to hold a dressing in place or to provide support to wrists, elbows, knees or
ankles that have been sprained or strained. Support bandages should extend well beyond the joint to provide
pressure over the injured area.
These are made of cotton, gauze or linen and applied in spiral turns.
There are three main types:
1. Open-weave bandages, which are used to hold light dressings in place; because of their loose
weave, they allow good ventilation, but cannot be used to exert pressure on the wound or to give
support to joints.
2. Conforming bandages, which mould to the body shape, are used to secure dressings and lightly
support injuries.
3. Crepe bandages, which are used to give firm support to joints.
There are several ways in which to secure a roller bandage; specialised clips, safety pins or adhesive tape
and if you have none of those a simple tuck should keep the end of the bandage in place.
To apply a roller bandage there are some general rules to follow:
•
•
•
•
When the bandage is partly unrolled, the roll is called the head, and the unrolled part the
tail. Keep the head of the bandage uppermost when bandaging
Position yourself towards the front of the casualty, at the injured side.
While you are working, ask the casualty to support the injured part in the position in which
it will remain after bandaging.
Check the circulation beyond the bandage; especially when using conforming and crepe
bandages; these mould to the shape of the limb, and may become tighter if the limb
swells.
Tubular bandages can sometimes be useful to hold dressings into place or provide support.
67 | P a g e
Copyright B-PSA 2012
Saving Life 27. Dressings and bandages
•
•
The dressing pad should always extend well beyond the wounds edges
Place dressings directly on a wound, do not slide them on from the side, and replace any that
slip out of place
If blood seeps through a dressing, do not remove it instead apply another dressing over the top
If there is only one sterile dressing use this to cover the wound and use other clean materials as
top dressings
Second Class
27. Know how to suitably dress and support minor cuts and sprains.
These are sold in sterile packs, but can also be made by cutting or folding a square metre of fabric diagonally
in half or by using your neckerchief. They can be used:
•
•
•
•
Folded into broad-fold bandages; to immobilise and support limbs and bulky dressings.
Folded into narrow-fold bandages; to immobilise feet and ankles and hold dressings in
place.
Straight from the pack as an improvised sterile dressing.
Open, as slings to support an injured limb, or to hold a hand, foot, or scalp dressing in
place.
Second Class
Triangular Bandages
There are two types of sling:
•
Arm sling, which supports the arm with the forearm horizontal or slightly raised, used for
injured upper arm, wrist or forearm, or a simple rib fracture.
Elevation sling, which supports the upper limb with the hand in a well raised position. It is
used for some fractures, to help control bleeding from wounds in the forearm, to reduce
swelling in burn injuries and for complicated rib fractures.
Improvised Slings
As well as using a square of cloth or your neckerchief as an improvised sling you can also use other various
items of clothing such as:
•
•
•
•
•
Jacket, undo the jacket, and turn the hem up and over the injured arm. Pin the hem to the
jacket breast with a large safety pin.
Button-up Jacket, undo a button of the jacket or coat and place the injured arm inside
the fastening.
Long-Sleeved Shirt, pin the cuff of the casualties sleeve, of the injured arm, to the
opposite breast of his shirt.
Short-Sleeved Shirt, use a belt, tie or a pair of braces or tights to make a collar and cuff
sling.
The patient can also hold the injured limb in a comfortable position if he is happy to do so.
Circulation
You must check the circulation in the hand or foot immediately after bandaging a limb or using a sling, and
again every ten minutes until you reach medical help.
Rechecking the circulation is vital because limbs swell following an injury, and a bandage can quickly become
too tight and impede the circulation. The symptoms will change, as first the veins in the limb, and then the
arteries supplying the limb, become impeded.
After bandaging there may be:
•
•
•
68 | P a g e
A swollen limb.
Blue skin with prominent veins.
An increased feeling of pain.
Copyright B-PSA 2012
Saving Life 27. Dressings and bandages
•
•
•
•
Pale, waxy skin and a cold numbness.
Tingling, followed by deep pain.
Inability to move fingers or toes.
To check the circulation you press one of the nails, or skin of the hand or foot, until it is pale. If, on releasing
the pressure, the colour does not return, or returns slowly, the bandage may be too tight.
Second Class
Later there may be:
Loosen tight bandages by unrolling just enough for warmth and colour to return to the extremity. The casualty
may feel a tingling sensation. Re-apply the bandage as necessary and keep rechecking for circulation.
Saving Life 27. Dressings and bandages
69 | P a g e
Copyright B-PSA 2012
Clothing
The best way to protect your self from the elements is by using a layer system. This works on the principle
that air is an excellent insulator, therefore the more layers of air you trap the greater the degree of insulation.
This is why two thin jumpers are better then one thick one.
Thermal Layer – The purpose of this layer is to form an insulating barrier between you and the outside
elements. Wool again is a good choice, which as the added advantage of being a good insulator even when
wet. (Wet wool can actually emit a small amount of heat due to a chemical reaction). However wool is heavy
and bulky and becomes even heavier when wet and takes a long time to dry. Wool has now been largely
replaced by fleece materials, which too retains its insulation properties when wet, but they are weight for
weight warmer than wool, and generally less bulky.
Outer Shells/ Coats – Gone are the days where it is necessary to carry a separate wind proof and water proof
coats as nowadays a single garment can comfortably perform both functions. When looking for a coat it is
important to make sure it has taped seams and a strip of material (baffle) to cover the zips to prevent wind
blowing straight through them. If it has a detachable hood make sure that when it is attached there is no way
of wind or water running down your neck. Whichever type of coat you choose the water proofing will not last
forever so they will need reproofing.
Footwear
There are many types of footwear available for various outdoor activities.
The most important thing is that they are the right size and comfortable. They can be made of leather or
material, both of which can be waterproof so long as you treat them in the correct manner. Whether you wear
one pair of socks or two is up to you and whatever you feel most comfortable with.
The thing you need to remember is to use your common sense and choose the correct footwear for the
activity you are undertaking.
Sleeping bag
There are hundreds of different types of sleeping bags available in the shops today ranging from a £10 in a
super market to £250 + in an outdoors shop. In general, as with most things, you get what you pay for. So you
need to decide what time of year you do your camping and what the temperature is going to be like. In
outdoor shops most sleeping bags are labelled with a number of “seasons”, a one season sleeping bag being
suitable for summer use (providing it is warm or you are sleeping in a hut or caravan) and a four season
sleeping bag being suitable for all year round use. You can also purchase a liner to increase the warmth of
your sleeping bag and it saves you from washing your sleeping bag so often.
70 | P a g e
Copyright B-PSA 2012
Saving Life 28. Clothing and Equipment
Inner Layer – The major role of the layer that comes into contact with your skin is to wick (draw) moisture
away from the skin to leave a dry layer next to the body. Of the modern materials available at the moment the
best is probably 100% polypropylene, which is what most good quality thermal underwear is currently made
of. Of the more traditional materials wool and silk are unbeatable, although most people find wool to itchy to
wear in direct contact with the skin.
Second Class
28. Know how to choose items of suitable personal clothing and equipment for outdoor activities,
including camps.
Here, again, there are many types to choose from. Rucksack capacity is measured in litres so you need to
decide how much you want to carry and then look at rucksacks in that size range. If you are planning on
walking a long way carrying your rucksack it is important that it has adjustable waist and chest loops and
adjustable padded straps so that you can fit it to you comfortably and distribute the weight evenly.
Good outdoor shops will help you choose and fit a rucksack, it is worth taking time to get something that fits
your body properly, as it will make carrying loads on hikes very much easier.
This area closest to your centre of gravity should be filled with objects of greatest density.
White Zone
This middle area further away from your centre of gravity, should be filled with the medium density objects.
Shaded Zone
This area, the furthest away from your centre of gravity, should be filled with the lightest things as this is the
place where any excess weight tries to pull you over backwards.
When loading your bag, place it in a horizontal position leaning forward at the top. Black Zone is now on the
bottom. Place the most dense objects in the bag, keeping them up towards the mouth of the bag. When you
have filled Black Zone, fill White Zone with the next most dense objects. Last, fill Shaded Zone with the
lightest things.
71 | P a g e
Copyright B-PSA 2012
Saving Life 28. Clothing and Equipment
Black Zone
Second Class
Rucksack
Before you buy any of these expensive items talk to other Scouts in your patrol and to your Scoutmaster.
Sometimes you might be able to get a better buy second hand. Study the catalogues issued by the
manufacturers. Try testing the warmth in various sleeping bags by putting somebody inside with a
thermometer. Try carrying someone’s rucksack when it is loaded.
Whilst on camp or on outdoor activities denim or other loose weave materials should be avoided. These
become very heavy when wet and allow the wind to blow through them.
72 | P a g e
Copyright B-PSA 2012
Saving Life 28. Clothing and Equipment
Lined trousers should be avoided near water as if you fall in wearing these the water gets trapped between
the layers and can pull you down.
Second Class
General Advice
Gaining your second class isn’t something to be rushed through, just to get the badge – these are the basic
skills of Scouting, that will last you a lifetime and you may need to practice some of them a few times before
your Scoutmaster feels that you have enough knowledge and experience.
I’ve often heard Scouts say “oh we’ve done that before” but then when asked to demonstrate the skill they
can’t remember how to do it – having a tick in a box won’t be much help when you need to tie a bowline in an
emergency!
30. Make regular contact with a Scout from a different Group, and share Scouting experiences.
You are part of the largest worldwide youth organisation – and you share the same values as over 30 million
people. You may make friends and contacts for life within your own Patrol and Troop, but it is always nice to
extend that to other Groups – either in your own Area or further afield.
You will get an opportunity to meet other Scouts at Area events, and National events – take the chance to
chat to them.
Talk to your Scoutmaster and parents about the best way to keep in contact – it may be through emails,
facebook, SMS, or letters and postcards.
And finally:
Re-pass the Tenderfoot tests. This test will be taken last.
73 | P a g e
Copyright B-PSA 2012
Second Class Citizenship 29. 9 months Service 30. Share Scouting
29. Have no less than nine months service as a Scout.
First Class
Wearing the First Class badge shows that you have achieved the skills of a true Scout. Many
more adventures await you.
Scoutcraft and Chivalry
1. Discuss with a Scouter the behaviours and attitudes that make a good Scout, and
how to set an example to younger Scouts, and demonstrate them consistently
for a period of not less than 6 months.
2.
Page
Understand the role of The Court of Honour, and contribute to its running for a
period of 3 months.
Exploration
3. Use improvised equipment to estimate 3 distances and 3 heights not more than
30 metres. In each case, the estimate to be within ten per cent error above or
below the actual distance or height.
4.
Be able to estimate distance walked by time, or pacing over distances up to and
including 1 km, both on roads / tracks and open countryside.
5.
Be able to read and use Ordnance Survey maps. Explain spot heights, contours
and trig points. Be able to use an OS 1:25,000 map to correctly locate a point
described by a six figure grid reference.
6.
Understand and demonstrate the uses of a compass. Point out compass
directions by day and night without the aid of a compass. Undertake a short
compass journey by night.
7.
Understand how to prepare a route card and use it in conjunction with an OS
map as an aid to navigation.
8.
Describe how different weather conditions may impact on the planning of a
journey, and what actions may need to be taken if weather conditions change
during a journey.
9.
Go on foot, with other Scouts on a 24 hour journey of at least 25 kilometres. In
the course of the journey, cook your own meals (one of which must include meat
(or substitute). This test is to be completed last.
The Scout is responsible for planning the journey. All aspects of the journey to be
checked at least 28 days prior to the expedition taking place by a person holding
a Safety on The Hills Certificate (examiner) issued by The B-PSA. A completed log
74 | P a g e
Copyright B-PSA 2012
of the journey will be submitted to the examiner within 28 days of the completion
of the journey. The log, along with the recommendations of the examiner to be
passed to the Area Council, to enable the badge to be awarded.
Camp Skills
10. Have camped as a Scout, for a total of ten nights, which need not be
consecutive.
11. Demonstrate the following: Sheer-lashing, Back and Eye splice, Rolling hitch and
a Handy billy.
12. Tie the following knots and know their uses:- Figure of eight, Prussick.
13. Use a suitable axe for felling or trimming light timber. Log up a piece of timber
and demonstrate the theory of felling a tree. Use a bush saw, wedges or log
splitter safely and correctly to prepare timber for burning. Demonstrate the use
and care of this equipment.
14. Know how to care for and maintain camping equipment. This should include
storage and simple repairs. Assist the Group Quartermaster for a period of not
less than 3 months.
15. Know how to select, plan and set up a campsite for a Patrol, where possible
acting as Patrol Leader during a Troop or Patrol camp.
16. Plan a balanced menu for a Patrol for 24 hours, and prepare a budgeted
shopping list.
17. Be able to operate and maintain stoves and lamps, identify different fuels, and
know the safety requirements.
18. Cook a two course meal on a camping stove.
19. Build and sleep out in a bivouac and cook a backwoods meal.
Observation
20. Read a series of simple tracks made in sandy or other suitable ground.
Woodcraft
21. Be able to recognise and name 8 common plants, 8 common birds and 8 native
wild animals.
22. Describe three endangered native plants, birds or animals in the UK, and what
practical actions can be taken to assist in the survival of one of them.
Health and Fitness
75 | P a g e
Copyright B-PSA 2012
23. Swim 50metres and know the water safety code and the use of the buddy
system for swimming.
24. Explain the principles of good nutrition and a balanced diet and how these
should be modified in adventurous activities.
Saving Life
25. Know what to do in the following emergencies: fire, drowning, ice breaking and
electric shock
26. Know precautions necessary before undertaking adventurous activities. This
must include exposure and mountain safety.
27. Gain the Scout First Aid proficiency badge.
Citizenship
28. Have no less than two years experience as a Scout.
29. Make regular contact with a Scout from a different Area or Country, and share
Scouting experiences
The First Class Badge is granted by the Area Council on the recommendation of the A.C.
(in accordance with area policy)The Scout Master is responsible for seeing that the Scout
is examined in all the tests other than the journey.
76 | P a g e
Copyright B-PSA 2012
Scout Cord
This is the highest award that you can earn as a Scout.
Before reaching the age of 15, and before being
invested as a Senior Scout, the Scout will be required to
have completed:
•
•
•
The First Class
The Citizenship badge
At least 3 proficiency badges from the list
below:
o Backwoodsman
o Camper
o Camp Cook
o Explorer
o Pioneer
o Tracker
o Starman
o Weatherman
o Woodcraftsman
77 | P a g e
Copyright B-PSA 2012
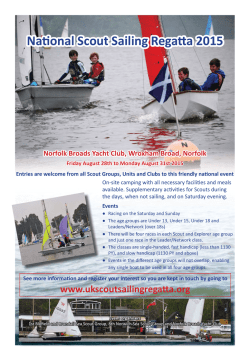

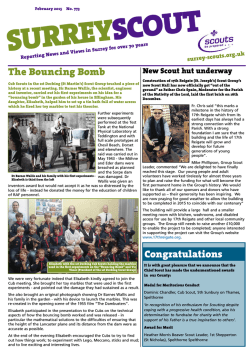
© Copyright 2026