
AVVERTENZE GENERALI - HomeSource 4U Appliance Centre
AVVERTENZE GENERALI
Vi ringraziamo per aver scelto uno dei nostri prodotti, per ottenere da questo elettrodomestico le migliori prestazioni consigliamo di:
• Leggere attentamente le avvertenze contenute nel presente libretto.
• Conservare con cura questo libretto per ogni ulteriore consultazione.
Durante l’uso il forno diventa caldo, fare attenzione a non toccare gli elementi riscaldanti all’interno del forno.
Alla prima accensione del forno può svilupparsi fumo di odore acre, causato dal primo riscaldamento del collante dei pannelli d’isolamento avvolgenti il forno. Si tratta di un fenomeno assolutamente normale e, in caso si verificasse, occorre attendere la cessazione
del fumo prima di introdurre le vivande.
Il forno è per sua natura un apparecchio che diventa caldo, in modo particolare in corrispondenza del cristallo porta. È buona norma
quindi impedire che i bambini possano avvicinarsi al forno quando è in funzione, in particolare quando funziona il grill.
DICHIARAZIONE DI CONFORMITÀ
IMPORTANTE
Per garantire un buon funzionamento dell’apparecchio da incasso
è necessario che il mobile sia di caratteristiche adatte.
I pannelli dei mobili adiacenti il forno dovranno essere in materiale
resistente al calore. In particolare nel caso di mobili in legno
impiallicciato le colle dovranno essere resistenti alla temperatura
di 120°C: materiali plastici o collanti non resistenti a questa
temperatura sono causa di deformazioni o scollature. In conformità
alle norme di sicurezza, una volta incassato l’apparecchio, non
debbono essere possibili eventuali contatti con le parti elettriche.
Tutte le parti che assicurano la protezione debbono essere fissate
in modo tale da non poter essere tolta senza l’aiuto di qualche
utensile.
Per garantire una buona areazione è necessario eliminare
la parete posteriore del vano; inoltre il pianale di appoggio
deve avere una luce posteriore di almeno 45 mm.
Questa apparecchiatura nelle parti destinate a venire a
contatto con sostanze alimentari, è conforme alla prescrizione
della dir. CEE 89/109 e al D.L. di attuazione N° 108 del
25/01/92.
Apparecchio conforme alle Direttive Europee 73/23/CEE e
89/336/CEE, sostituite rispettivamente da 2006/95/CE e
2004/108/CE, e successive modifiche.
INFORMAZIONI SULLA SICUREZZA
•
•
•
•
•
Questo apparecchio dovrà essere destinato solo all’uso per
il quale è stato espressamente concepito, e cioè per la cottura
di alimenti.
Ogni altro uso (ad esempio riscaldamento ambiente) è da
considerarsi improprio e quindi pericoloso. Il costruttore non
può essere considerato responsabile per eventuali danni
derivanti da usi impropri, erronei ed irragionevoli.
L’uso di un qualsiasi apparecchio elettrico comporta
l’osservanza di alcune regole fondamentali.
In particolare:
non tirare il cavo di alimentazione per staccare la spina dalla
presa di corrente
non toccare l’apparecchio con mani o piedi bagnati o umidi
non usare l’apparecchio a piedi nudi
non permettere che l’apparecchio sia usato dai bambini
o da incapaci, senza sorveglianza
in generale è sconsigliabile l’uso di adattatori, prese multiple
e prolunghe.
In caso di guasto e/o di cattivo funzionamento dell’apparecchio,
spegnerlo e non manometterlo.
In caso di danneggiamento del cavo, provvedere tempestivamente alla sua sostituzione secondo le seguendi indicazioni:
aprire il coperchio morsettiera, togliere il cavo di alimentazione
e sostituirlo con uno corrispondente,(tipo H05RR-F, H05VVF,H05V2V2-F) e adeguato alla portata dell’apparecchio.
Tale operazione dovrà essere eseguita da personale professionalmente qualificato. Il conduttore di terra (giallo-verde), deve
obbligatoriamente essere più lungo di circa 10 mm rispetto
ai conduttori di linea.
Per l’eventuale riparazione rivolgersi solamente ad un centro
di assistenza tecnica autorizzato e richiedere l’utilizzo di
ricambi originali.
Il mancato rispetto di quanto sopra può compromettere la
sicurezza dell’apparecchio.
Questo apparecchio non è destinato ad essere usato da
bambini e persone incapaci o inesperte all'uso del prodotto,
a meno che non vengano sorvegliate o istruite riguardo all'uso
dell'apparecchio da una persona responsabile della loro
sicurezza.
Sorvegliare i bambini in modo tale da assicurarsi che non
giochino con l'apparecchio.
ALLACCIAMENTO ELETTRICO
Inserire la spina in una presa di corrente munita di un terzo
contatto corrispondente alla presa di terra, che deve essere
collegata in modo efficiente.
Per i modelli sprovvisti di spina, montare sul cavo una spina
normalizzata che sia in grado di sopportare il carico indicato in
targa. Il conduttore di messa a terra e contraddistinto dai colori
giallo - verde. Tale operazione dovrà essere eseguita da personale
professionalmente qualificato.
In caso di incompatibilità tra la presa e la spina dell’apparecchio
fare sostituire la presa con altra di tipo adatto, da personale
professionalmente qualificato. Si può effettuare anche l’allacciamento alla rete interponendo tra l’apparecchio e la rete un
interruttore omnipolare dimensionato al carico e rispondente alle
norme in vigore. Il cavo di terra giallo-verde non deve essere
interrotto dall’interruttore. La presa o l’interruttore omnipolare
usati per l’allacciamento devono essere facilmente accessibili
ad elettrodomestico installato.
Importante: in fase di installazione, posizionare il cavo di
alimentazione in modo che in nessun punto si raggiungano
temperature superiori di 50 °C alla temperatura ambiente.
L’apparecchio è conforme ai requisiti di sicurezza previsti dagli
istituti normativi. La sicurezza elettrica di questo apparecchio è
assicurata soltanto quando lo stesso è correttamente collegato
ad un efficace impianto di messa a terra come previsto dalle
vigenti norme di sicurezza elettrica, (in caso di dubbio, richiedere
un controllo accurato dell’impianto da parte di personale
professionalmente qualificato).
Importante: la ditta costruttrice resta sollevata da ogni
responsabilità per eventuali danni a persone o cose, derivanti
dal mancato allacciamento della linea di terra.
ATTENZIONE: la tensione e la frequenza di alimentazione
sono indicate in targa matricola (figura in ultima pagina).
Verificare che la portata elettrica dell’impianto e delle prese
di corrente siano adeguate alla potenza massima dell’apparecchio indicate in targa. In caso di dubbio rivolgersi ad una
persona professionalmente qualificata.
INSTALLAZIONE
L’installazione è a carico dell’acquirente e la Casa Costruttrice
è esonerata da questo servizio; gli eventuali interventi richiesti
alla Casa Costruttrice che dipendono da una errata installazione
non sono compresi nella garanzia.
L’installazione deve essere effettuata secondo le istruzioni da
personale professionalmente qualificato. Una errata installazione
può causare danni a persone, animali o cose, nei confronti dei
quali il costruttore non può essere considerato responsabile.
DOTAZIONE DEL FORNO (secondo modello)
Prima di utilizzare gli accessori del forno per la prima volta
è necessario pulirli. Per questa operazione si consiglia di
utilizzare una spugna. Successivamente risciacquare ed
asciugare gli accessori.
INSERIMENTO DEL MOBILE
La griglia semplice serve da supporto
per teglie, pirofile, stampi per i dolci.
La griglia porta-piatto serve in particolare
per le grigliate di carne poiché sostiene
anche la leccarda che raccoglie i grassi
che colano.
Grazie ai loro profili speciali, le griglie
restano sempre in orizzontale, anche
quando vengono estratte verso l'esterno.
Non c'é nessun rischio quindi che i tegami
scivolino o si ribaltino.
Inserire l’apparecchio nel vano del mobile (sottopiano o in
colonna). Il fissaggio si esegue con 2 viti attraverso i fori della
cornice, visibili aprendo la porta.(vedere ultima pagina).
Per consentire la migliore aerazione del mobile, i forni devono
essere incassati rispettando le misure e le distanze indicate nella
figura in ultima pagina.
Nota: per i forni da abbinamento con piano cottura è indispensabile
rispettare le istruzioni contenute nel libretto allegato all’apparecchiatura da abbinare.
1 IT
La leccarda serve a raccogliere i grassi che colano durante la cottura con il grill. Deve essere utilizzata solamente con il grill, il girarrosto o il turbo girarrosto, secondo il modello.
Attenzione: in tutti gli altri modi di cottura, la leccarda deve essere tolta dal forno.
Non usare mai la leccarda per cuocere gli arrosti perché ne risulterebbe un eccessivo sviluppo di fumo e
vapori e il forno si sporcherebbe inultimente.
Pizza set é l'idéale per la cottura delle
pizze. Il set deve essere utilizzato in
abbinamento alla funzione Pizza.
La griglia piatta da combinare con la leccarda
per tutti i tipi di grigliate. Una presina è fornita per
permettere di estrarre l’insieme dal forno senza
scottarsi.
Non lasciare mai la presina nel forno.
Gli accessori devono essere tolti dal forno se non vengono utilizzati.
CONSIGLI UTILI
TEMPI DI COTTURA
GRIGLIE FORNO - SISTEMA DI ARRESTO
Alle pagine 8-9 riportiamo una tabella indicativa dove sono indicati
tempi e temperature consigliati per le prime cotture. Ad esperienza
acquisita potrete variare a vostro piacimento i valori riportati nella
tabella stessa.
Il forno è dotato di un nuovo sistema di
arresto griglie. Questo sistema consente
di estrarre le griglie quasi completamente
senza che queste fuoriescano dal forno
mantenendole perfettamente in piano,
consentendo di verificare e mescolare il
cibo con la massima tranquillità e
sicurezza.
Per estrarre le griglie è sufficiente, come indicato sul disegno,
alzarle, prendendole dalla parte anteriore e tirarle.
FORNO AUTOPULENTE CATALITICO
Speciali pannelli autopulenti ricoperti da uno smalto a struttura
microporosa, offerti come accessori opzionali per tutti i modelli,
eliminano la pulizia manuale del forno.
I grassi proiettati sulle pareti durante la cottura, vengono decomposti
dallo smalto, mediante un processo catalitico di ossidazione e
trasformati in prodotti gassosi.
Schizzi eccessivi di grasso possono ostruire i pori e quindi impedire
l’autopulizia. Tale caratteristica può essere ripristinata mediante
un riscaldamento per circa 10-20 minuti del forno vuoto impostando
la manopola forno in corrispondenza della massima temperatura.
Non usare prodotti abrasivi, pagliette metalliche, oggetti appuntiti,
panni ruvidi, prodotti chimici o detersivi che possono danneggiare
irrimediabilmente lo smalto.
Si consiglia inoltre di utilizzare pentole a bordi alti nel caso di
cotture di vivande particolarmente grasse (arrosti, ecc.) e di usare
la leccarda quando si esegue la cottura al grill.
Qualora, per particolari condizioni di sporco, non fosse sufficiente
l’azione precedente, si consiglia di intervenire asportando i grassi
con un panno morbido od una spugna inumiditi con acqua calda.
La porosità dello smalto è fondamentale per garantire l’azione
autopulente.
N.B.: Tutti i pannelli autopulenti in commercio hanno un’efficacia
di rendimento di circa 300 ore di funzionamento forno. Dopo tale
limite i pannelli dovrebbero essere sostituiti.
LA COTTURA AL GRILL
Questo tipo di cottura consente la doratura rapida dei cibi.
A questo scopo consigliamo di inserire la griglia generalmente nel
3° o 4° ripiano, secondo le dimensioni dei cibi (Fig. pag. 8).
Quasi tutte le carni possono essere cotte al grill, fanno eccezione
alcun e carni m ag re d i selva ggina ed i p olpettoni.
La carne ed il pesce da cucinare al grill vanno leggermente unti
con olio.
Secondo modello pacchetto di funzioni
del sistema
I forni
sono dotati di controllo elettronico della
ventilazione di cottura, brevettato VarioFan; il sistema cambia
automaticamente la velocità della ventola del multifunzione per
ottimizzare le correnti d’aria e la temperatura interna della cavità
mentre il forno sta cucinando.
Tutti i forni
sono dotati di funzione
,
permettendo una gestione della distribuzione di umidità
e temperatura. Riduce la perdita degli alimenti fino al
50%, donando morbidezza e fragranza alle pietanze.
Una cottura cosí delicata è indicata sopratutto per il pane
e la pasticceria.
PULIZIA E MANUTENZIONE
Riduce il tempo di preriscaldamento dei forni: sono
sufficienti solo 8 minuti per raggiungere i 200°C.
Per la pulizia dei vetri della porta del forno non utilizzare materiali
abrasivi raschietti o oggetti che possono graffiare la superficie del
vetro.
Non utilizzare getti di vapore per la pulizia dell’apparecchio.
Pulire le superfici in acciaio inox e smaltate con acqua tiepida e
sapone, oppure con appositi prodotti in commercio, evitando
assolutamente l’uso di polveri abrasive che danneggerebbero le
superfici e le parti estetiche.
La pulizia del forno è molto importante e deve essere effettuata
ogni volta che questo viene usato. Infatti, sulle pareti si depositano
grassi sciolti durante la cottura che potrebbero, alla successiva
accensione, produrre odori sgradevoli che nuocerebbero al buon
esito della cottura. Per la pulizia usare acqua calda e detersivo,
sciacquando accuratamente.
Per eliminare questo fastidioso intervento, su tutti i modelli possono
essere inseriti pannelli autopulenti, offerti come accessori opzionali:
vedere apposito paragrafo «FORNO AUTOPULENTE CATALITICO».
Usare detersivi e pagliette d’acciaio per le griglie inox. La pulizia
delle superfici in cristallo temperato deve essere eseguita quando
le superfici sono fredde. Eventuali rotture dovute alla non
osservanza di questa regola elementare non rientrano nei termini
di garanzia.
La lampada forno può essere sostituita disinserendo elettricamente
l’apparecchio e svitando l’ampolla che la racchiude, sostituendo
la lampada non funzionante con una analoga resistente alle alte
temperature.
Offre la possibilità di personalizzare il livello e l’intensità
di grigliatura, fino al 50% in più rispetto ad un forno
multifunzione tradizionale.
La nuova porta WIDE DOOR ha un’ampia superficie in vetro
che assicura una più facile pulizia e un miglior isolamento termico.
SECONDO MODELLO
E’ un sistema che si sostituisce all’illuminazione con tradizionali
lampadine ad incandescenza; nella controporta del forno,
completamente in vetro temprato, sono stati inseriti 14 Led, di
altissima qualità a luce bianca, che illuminano l’interno del forno
con una luce diffusa permettendo una visione della cottura senza
ombre, su più livelli.
Il design creato per il supporto dei 14 Led regala un elegante
effetto high-tech.
Vantaggi del sistema
:
• Visibilità forno ottimale,
• Durata prolungata nel tempo,
• Consumo energetico estremamemente
basso -95% dei tradizionali sistemi
di illuminazione forni,
• Elevato rendimento,
• Design high tech.
“Apparecchio con luce LED bianca di classe 1M secondo la IEC 608251:1993 + A1:1997 + A2:2001 (equivalente a EN 60825-1: 1994 + A1:2002
+ A2:2001) ; massima potenza ottica emessa =459nm < 150uW. Non
osservare direttamente con strumenti ottici.”
2 IT
Questo elettrodomestico è marcato conformemente
alla Direttiva Europea 2002/96/CE sui rifiuti da
apparecchiature elettriche ed elettroniche (WEEE).
Assicurandovi che questo prodotto sia smaltito
correttamente, aiuterete ad evitare possibili
conseguenze negative all’ambiente e alla salute delle
persone, che potrebbero verificarsi a causa di un
errato trattamento di questo prodotto giunto a fine vita. Il simbolo
sul prodotto indica che questo apparecchio non può essere
trattato come un normale rifiuto domestico; dovrà invece essere
consegnato al punto più vicino di raccolta per il riciclo delle
apparecchiature elettriche ed elettroniche. Lo smaltimento deve
essere effettuato in accordo con le regole ambientali vigenti per
lo smaltimento dei rifiuti. Per informazioni più dettagliate sul
trattamento, recupero e riciclo di questo prodotto, per favore
contattare l’ufficio pubblico di competenza (del dipartimento
ecologia e ambiente), o il vostro servizio di raccolta rifiuti a
domicilio, o il negozio dove avete acquistato il prodotto.
SERVIZIO ASSISTENZA CLIENTI
CERTIFICATO DI GARANZIA CONVENZIONALE: cosa fare?
Il Suo prodotto è garantito, alle condizioni e nei termini riportati
sul certificato inserito nel prodotto ed in base alle previsioni del
decreto legislativo 24/02, nonché del decreto legislativo 6 settembre
2005, n. 206, per un periodo di 24 mesi decorrenti dalla data di
consegna del bene.
Così come riportato nei testi dei Decreti Legislativi citati, il certificato
di garanzia dovrà essere da Lei conservato, debitamente compilato,
per essere mostrato al Servizio Assistenza Tecnica Autorizzato,
in caso di necessità, unitamente ad un documento fiscalmente
valido rilasciato dal rivenditore al momento dell’acquisto (bolla di
consegna, fattura, scontrino fiscale, altro) sul quale siano indicati
il nominativo del rivenditore, la data di consegna, gli estremi
identificativi del prodotto ed il prezzo di cessione.
Resta pure inteso che, salvo prova contraria, poiché si presume
che i difetti di conformità che si manifestano entro sei mesi dalla
consegna del bene esistessero già a tale data, a meno che tale
ipotesi sia incompatibile con la natura del bene o con la natura
del difetto di conformità, il Servizio di Assistenza Tecnica Autorizzato
Gias, verificato il diritto all’intervento, lo effettuerà senza addebitare
il diritto fisso di intervento a domicilio, la manodopera ed i ricambi.
Per contro, nel successivo periodo di diciotto mesi di vigenza della
garanzia, sarà invece onere del consumatore che intenda fruire
dei rimedi accordati dalla garanzia stessa provare l’esistenza del
difetto di conformità del bene sin dal momento della consegna;
nel caso in cui il consumatore non fosse in grado di fornire detta
prova, non potranno essere applicate le condizioni di garanzia
previste e pertanto il Servizio di Assistenza Tecnica Autorizzato
Gias effettuerà l’intervento addebitando al consumatore tutti i costi
relativi.
ESTENSIONE DELLA GARANZIA FINO A 5 ANNI: come?
Le ricordiamo inoltre che sullo stesso certificato di garanzia
convenzionale Lei troverà le informazioni ed i documenti necessari
per prolungare la garanzia dell’apparecchio sino a 5 anni e così,
in caso di guasto, non pagare il diritto fisso di intervento a domicilio,
la manodopera ed i ricambi.
Per qualsiasi informazione necessitasse, La preghiamo rivolgersi
al numero telefonico del Servizio Clienti 199.12.13.14.
ANOMALIE E MALFUNZIONAMENTI: a chi rivolgersi?
Per qualsiasi necessità il centro assistenza autorizzato è a Sua
completa disposizione per fornirLe i chiarimenti necessari;
comunque qualora il Suo prodotto presenti anomalie o mal
funzionamenti, prima di rivolgersi al Servizio Assistenza Autorizzato,
consigliamo vivamente di effettuare i controlli indicati sopra.
UN SOLO NUMERO TELEFONICO PER OTTENERE
ASSISTENZA.
Qualora il problema dovesse persistere, componendo il “Numero
Utile” sotto indicato, sarà messo in contatto direttamente con il
Servizio Assistenza Tecnica Autorizzato
che opera nella Sua zona di residenza.
Attenzione, la chiamata è a pagamento;
il costo verrà comunicato, tramite
messaggio vocale, dal Servizio clienti
dell’operatore telefonico utilizzato. Dettagli sono presenti sul sito
internet www.candy-group.com
MATRICOLA DEL PRODOTTO. Dove si trova?
E’ indispensabile che comunichi al Servizio Assistenza Tecnica
Autorizzato la sigla del prodotto ed il numero di matricola (16
caratteri che iniziano con la cifra 3) che troverà sul certificato di
garanzia oppure sulla targa matricola del prodotto (figura in ultima
pagina). In questo modo Lei potrà contribuire ad evitare trasferte
inutili del tecnico, risparmiando oltretutto i relativi costi.
3 IT
USO DEL CONTAMINUTI
USO DEL TEMPORIZZATORE
Con questo meccanismo è possibile
programmare la durata espressa in
minuti della cottura e quindi lo
spegnimento automatico del forno al
termine del tempo desiderato (max. 120
minuti).
Allo scadere del tempo prescelto, la
manopola raggiungerà la posizione di
suoneria O in corrispondenza della
quale il forno si spegne
automaticamente.
Per selezionare il tempo prescelto,
ruotare la manopola di un giro completo,
quindi ritornare con l’indice nella
posizione corrispondente al tempo
desiderato. Allo scadere del tempo,
entrerà in azione la suoneria per alcuni
secondi.
Il forno può essere acceso solo impostando un tempo di
cottura o girando la manopola in posizione
.
Lettura tempo
selezionato
Per regolare l’ora, premere la manopola e ruotare a sinistra fino a leggere l’ora esatta.
Per l’impiego come contaminuti, selezionare la durata del tempo ruotando la manopola
in senso antiorario (senza premere) fino a leggere nella finestrella il tempo desiderato
(max. 180’). Allo scadere del tempo entrerà in funzione la suoneria ed occorrerà spegnere
il forno; per farla cessare ruotare la manopola su
.
USO DEL PROGRAMMATORE ELETTRONICO
FUNZIONE
CONTAMINUTI
COME SI ATTIVA
COME SI SPEGNE
• Premere e tenere premuto il tasto
• Premere i tasti o
per
regolare la durata
• Lasciare i tasti
• Al termine della durata impostata la funzione si spegne da sola ed avvisa con
un segnale sonoro (il segnale sonoro si ferma da
solo; per fermarlo subito
premere il tasto )
COSA FA
A COSA SERVE
• Da un segnale sonoro al • Permette di utilizzare il
termine di un tempo sta- programmatore del forno
bilito
come una sveglia (può
• Per visualizzare il tempo essere usato con forno
rimanente premere il funzionante o spento.
tasto
• Premere tasto
• Riportare manopola com- • Permette il funzionamen- • Realizzare le cotture
FUNZIONAMENTO • Selezionare la funzione di mutatore in posizione to del forno
volute
MANUALE
cottura con la manopola
O.
commutatore
DURATA
COTTURA
• Premere e tenere premu- • Al termine della durata • Permette di impostare la • Al termine della durata
im postata il forno si durata della cottura del impostata il forno si speto il tasto TIMER
• Premere i tasti o per spegne da solo; se deve cibo inserito nel forno gne automaticamente ed
essere fermato prima si • Per visualizzare il tempo avvisa con un segnale
regolare la durata
deve portare la manopola rimanente premere il ta- sonoro.
• Lasciare i tasti
• Selezionare la funzione commutatore in posi- sto TIMER.
di cottura con la manopo- zione O oppure portare • Per modificare il tempo
a 0:00 la durata della cot- rimanente premere il tala commutatore
tura (tasti TIMER e o ). sto TIMER + o
• Premere e tenere premu- • All’ora impostata il forno • Permette di memorizzare • Tipicamente si utilizza
to il tasto END
si spegne da solo; se de- l’ora di fine cottura
questa funzione con la
• Premere i tasti o per ve essere fermato prima • Per visualizzare l’ora pro- funzione DURATA COTregolare l’ora di fine è necessario portare la gramm ata premere il TURA – ad esempio il
FINE
cottura
manopola commutatore tasto END
cibo desiderato deve cuoCOTTURA
• Lasciare i tasti
in posizione O.
• Per modificare l’ora pro- cere per 45 minuti e desi• Selezionare la funzione di
g ram m a ta pr em er e i dero che sia pronto per le
cottura con la manopola
tasti END + o
ore 12:30; in tal caso:
commutatore
Selezionare la funzione di
cottura desiderata
Impostare la durata cottura
REGOLAZIONE ORA
a 45 minuti (Timer + o )
Impostare la fine cottura alle
ATTENZIONE: la prima operazione da eseguire dopo l’installazione ore 12:30 (End + o )
o dopo una interruzione di corrente (tali situazioni si riconoscono
La cottura avrà automaticaperchè sul dispay lampeggia l’ora
) è la regolazione dell’ora, mente inizio alle 11:45
come di seguito descritto.
(12:30 meno 45 minuti),
• Premere e tenere premuto i tasti TIMER e END (oppure e TIMER all’ora impostata come fine
cottura il forno si spegne
su alcuni modelli)
automaticamente.
• Premere i tasti
o
per regolare l’ora
• Lasciare i tasti
ATTENZIONE: impostando
ATTENZIONE: il forno funziona solo se impostato in manuale
o cottura programmata
N.B.: per regolare le varie funzioni del forno, in alcuni modelli compaiono i simboli
altri modelli abbiamo + o -
4 IT
o
in
solo la fine cottura e non la
durata della cottura, il
forno si accenderà subito e
si spegnerà all’ora di fine
cottura impostata
USO DEL PROGRAMMATORE ANALOGICO
(F)
(E)
REGOLAZIONE ORA
Per regolare l’orologio premere e girare in senso anti-orario
la manopola fino a leggere l’ora esatta dopodiché rilasciare
la manopola
FUNZIONE
ATTENZIONE: il forno funziona solo se impostato in manuale
o cottura programmata
COME SI ATTIVA COME SI SPEGNE
COSA FA
A COSA SERVE
• Girare la manopola in sen- • Riportare manopola com- • Permette il funzionamen- • Realizzare le cotture
FUNZIONAMENTO so anti-orario (senza pre- mutatore in posizione to del forno
volute
MANUALE
mere) fino ad avere il sim- O.
bolo
nel quadrante (E)
DURATA
COTTURA
FINE
COTTURA
(Non disponibile
sul modello 2D 364)
• Prima dell’impostazione • Al termine della durata • Permette di impostare la • Al termine della durata
selezionare la temperatura e im postata il forno si durata della cottura del impostata il forno si spela funzione desiderata spegne automaticamente cibo inserito nel forno gne automaticamente ed
avvisa con un segnale
• Selezionare la durata della e viene emesso un
sonoro.
cottura girando la mano- segnale sonoro.
pola in senso antiorario • Per fermare la funzione
impostata girare la manofino a far coincidere il
tempo selezionato nel pola fino a fare coincidere
con l’indice del
quadrante (E).
• L’inizio cottura parte im- quadrante (E)
mediatamente e termina
automaticamente allo scadere del tempo selezionato
• Durata max. cottura 180
minuti (3 ore)
• Permette di programmare
• Prima dell’impostazione • All’ora impostata la
selezionare la temperatura funzione si spegne auto- una cottura in modo che il
cibo sia pronto all’ora
e la funzione desiderata maticamente e viene
• Selezione ora inizio cot- segnalata da una suoneria. desiderata.
tura: tirare e girare la • Per fermare prima la
manopola in senso anti- funzione impostata girare
orario fino a far coincidere la manopola in senso antila lancetta (F) con l’ora di orario fino a far coincidere
inizio cottura desiderata.
con l’indice del qua• Selezione durata
drante (E)
cottura:
• La suoneria deve essere
girare, senza premere, la interrotta manualmente,
manopola in senso orario girando la manopola fino
fino a far coincidere il a fare coincidere
con
tempo selezionato con l’indice del quadrante (E)
l’indice del quadrante (E).
5 IT
• Esempio: il cibo desiderato
deve cuocere per 45 minuti
e desidero che sia pronto
per le ore 12:30; in tal caso:
- Selezionare la funzione di
cotture desiderata
- Impostare l’ora di inizio
cottura alle 11:45 (12:30
meno 45 minuti)
- Impostare la durata della
cottura a 45 minuti
Al termine della cottura il
forno si spegne automaticamente.
UTILIZZO DEL PROGRAMMATORE ELETTRONICO (Type A)
1 Luce: Timer /
Modalità automatica
6
Display per
temperatura o orologio
8 Manopola di selezione funzione
/
*
7 Bottoni di regolazione
9 Manopola di selezione
programmatore
Luce:
2
Funzione con ventola 3
Funzione con ventola a sistema variabile
Modalità scongelamento
4
1.Luce: Timer / Modalità automatica
2.Luce
3.Funzione con ventola
4.Funzione con ventola a sistema
variabile
5.Modalità scongelamento
6.Display per temperatura o
orologio
7.Bottoni di regolazione
8.Manopola di selezione funzione
9.Manopola di selezione
programmatore
5
* secondo modello
Attenzione! La prima operazione da fare dopo l’installazione o dopo l'interruzione di corrente (situazioni di questo tipo
possono essere riconosciute in quanto il display è acceso e lampeggia 12:00) è l'impostazione del tempo.
Il Led " ° " della temperatura lampeggia fino a che la temperatura visualizzata non è stata raggiunta.
Quando un programma è finito, se il forno è ancora caldo, il display mostra "HOT", in alternanza con il tempo e anche se le
maniglie sono posizionate su "OFF"
FUNZIONI
COME SI UTILIZZANO? COME SI DISATTIVANO?
COSA FA
A COSA SERVE?
Modalità silenziosa • Ruotare la manopola del • Ruotare la manopola sulla • Permette di spegnere il • Questa funzione è
prog ramm atore sulla posizione off
suono del timer
utilizzata per spegnere il
“M odalità Silenziosa”
suono del timer
Impostazione
dell’orologio
• Impostare la manopola • Ruotare la manopola sulla • Permette di regolare l’ora
sulla posizione
posizione off
che appare sul display
“impostazione
dell’orologio”
• Usare i tasti + e per impostare l'ora.
• Selezionare una funzione • Una volta che il tempo è
trascorso, il forno viene
di cucina
• Impostare la manopola del automaticamente disattivato. Per fermare la
programmatore sulla
cottura prima, si deve
durata di cottura
Durata di cottura • Regolare il tempo di
impostare la manopola
delle funzioni su OFF, o
cottura utilizzando
regolare il tempo di cottura
i tasti + e -.
su 00:00, posizionando la
• Auto display si illumina.
manopola sulla Durata
della cottura e utilizzando
il tasto + e -.
• Selezionare una funzione • Quando la cottura è
di cottura.
term inata, il forno si
• Regolare la manopola sul- spegne automaticamente.
Per bloccare la cottura
la posizione Fine di cotanticipatamente, ruotare
tura.
la manopola delle funzioni
• Regolare l’ora di fine
Fine di cottura
su OFF.
cottura utilizzando i
tasti + e -.
• Auto display si illumina
TIMER
Sicurezza
bambini
• Questa funzione vi
permette di regolare l’ora
utilizzando i tasti + e –
Nota: impostare l’ora al
momento dell'installazione del vostro forno o
subito dopo un’interruzione di corrente (12:00
lampeggia sullo schermo).
• Permette di regolare il • Quando il tempo di cottempo di cottura.
tura è finito, la cottura si
• Quando il tempo di cottura arresta automaticamente
è regolato, posizionare la e l'allarme suona per
manopola su OFF per
qualche secondo.
ritornare alla visualizzazione dell’ora attuale.
• Per visualizzare l’ora
selezionata, posizionare il
selettore delle funzioni di
sinistra su Durata di cottura.
• Permette di regolare l’ora • Questa funzione è anche
di fine cottura.
utilizzata per le cotture
• Quando l’ora di fine cottura che possono essere
programmate
è regolata, ruotare il
in anticipo. Ad esempio,
selettore di funzione su
se il tuo piatto deve essere
OFF per ritornare all’ora
cucinato per 45 minuti e
attuale.
deve essere pronto alle
• Per vedere il tempo di
cottura selezionato, ruotare 12.30: impostare sempliil selezionatore di funzione cemente la durata
di sinistra sulla posizione di 45 minuti e l'ora di Fine
cottura alle 12:30.
Fine di cottura.
La cottura inizierà automaticamente alle 11:45 (12:30
meno 45 min) e proseguirà fino
a che l'ora di fine cottura è
stata raggiunta.
• Regolare la manopola del • Regolare il tempo su • Questa funzione attiva un A questo punto il forno si
program matore sulla 00:00, posizionando la allarme sonoro di qualche spegnerà automaticamente.
posizione TIMER.
• Regolare il tempo di
cottura utilizzando i tasti
+ e -.
manopola del programmatore sulla posizione
TIMER, ed utilizzando i
tasti + e -.
secondo alla fine del • Utile per ricordare,
tempo impostato.
l’allarme sonoro funziona
indipendentemente dal
fatto che il forno sia acceso.
•Regolare la manopola del • Riposizionare la manopola • Il forno non può essere • Questa funzione è utile
prog ramm atore sulla sulla funzione Sicurezza
utilizzato.
quando ci sono dei
p os iz io ne S ic ur ez z a bambini e premere il tasto
bambini in casa.
Bambini.
– per 3 secondi.
• Premere sul tasto + per 3
• L’indicazione sul display
secondi.
• La sicurezza bambini è in sparisce.
funzione quando sul
display appare STOP.
6 IT
ISTRUZIONI PER L’USO
Manopola
commutatore
Temperatura
proposta
e regolazione
(Type A)
Manopola
termostato
Funzione
Accende la luce interna.
MAX
MAX
Convezione naturale
Sono in funzione le resistenze superiore e inferiore.
È la cottura tradizionale, ottima per arrostire cosciotti, selvaggina, ideale per biscotti, mele al
forno e per rendere i cibi molto croccanti.
220
Forno ventilato
L’aria calda, viene ripartita sui diversi ripiani; è l’ideale per cuocere contemporaneament e
diversi tipi di cibo (carne, pesce), senza miscelare sapori e odori. Cottura delicata - indicata
per pan di Spagna, torte Margherita, pasta sfoglia, ecc...
200
200
160
Scongelamento
Questa posizione permette di far circolare l’aria a temperatura ambiente intorno al cibo surgelato
facendolo così scongelare in pochi minuti senza modificare od alterare il contenuto proteico.
Sprinter
Questa posizione permette un preriscaldamento rapido del forno. Una volta impostata questa
funzione consente un'immediato riscaldamento del forno (ad es. 8 minuti per raggiungere
200°C), la temperatura desiderata puó essere impostata tramite l'apposita manopola. Il termine
della fase di preriscaldamento è indicato tramite la spia del termostato "°C" che si spegne. Una
volta conclusa questa fase è possibile selezionare la funzione di cottura desiderata ed inserire
le pietanze da cucinare. Prestare attenzione a non inserire alimenti nel forno durante la fase
di preriscaldamento rischierebbero di subire danni.
-
SOFT COOK (a)
Soft cook è la funzione ideale per la pasticceria ed il pane. Grazie alla velocità ridotta della
ventola, questa funzione aumenta l'umidità presente all'interno del forno. Una maggiore umidità
crea le condizioni di cottura ideali per quegli alimenti che hanno bisogno di mantenere una
consistenza elastica mentre cuociono (es. torte, pane, biscotti) e, di conseguenza, per non
sbriciolarsi.
Suola ventilata
Adatta per cotture delicate (torte-soufflè).
Livello 4
Grigliatura tradizionale a porta chiusa
In questa posizione viene inserita la resistenza del grill. Ottima nella cottura di carni di medie
e piccolo spessore (salsicce, costine, bacon).
Livello 4
SUPER GRILL: il forno ha due posizioni Grill
Grill : 2200 W
Grill Super : 3000 W
190
Livello 4
220
TURBO-GRILL (a) : l'utilizzo del turbo-grill richiede la porta chiusa.
Utilizzando la ventilazione e la resistenza cielo contemporaneamente.
Si cuociono perfettamente grandi pezzi di cibo, come arrosti, pollame, ecc.. Mettete la griglia
a metà del forno e posizione la leccarda sotto di essa per raccogliere i grassi. Assicuratevi
che il cibo non sia troppo vicino al grill. Girate la carne a metà cottura.
Grill più girarrosto
Inserimento resistenza grill e motorino girarrosto.
Serve per effettuare cotture allo spiedo.
Funzione pizza
Il calore avvolgente in questa funzione ricrea un ambiente simile a quello
dei forni a legna di pizzeria.
(a) SU ALCUNI MODELLI - Funzione con VARIO FAN : Vario Fan é l'esclusivo sistema di funzionamento sviluppato da Candy per ottimizzare i
risultati di cottura, la gestione della temperatura e la gestione dell'umidità. Il sistema Vario Fan modifica automaticamente la velocità di rotazione
della ventola per tutte le cotture in multifunzione. Questo sistema si attiva automaticamente tutte le volte che viene selezionata una funzione
all'interno dell'area tratteggiata sul pannello di controllo.
7 IT
TABELLA TEMPI DI COTTURA
I tempi suggeriti nelle seguenti tabelle sono indicativi, infatti possono variare secondo la qualità, la freschezza, la dimensione e lo
spessore degli alimenti e secondo il vostro gusto. Lasciare sempre riposare per alcuni minuti prima di servire, perché tutti gli alimenti
continuano a cuocere dopo averli tolti dal forno.
CONSIGLIO UTILE: Per non rendere le superfici troppo secche
è consigliato abbassare la temperatura e allungare i tempi di
cottura.
Posizione ripiani
Forno elettrico statico
Pietanza
Quantità
Ripiano
Tempo
di cottura
in minuti
Lasagne
Kg 3,5
2
70 ÷ 75
220
Cannelloni
Kg 1,8
2
50 ÷ 60
Pasta al forno
Kg 2,5
2
55 ÷ 60
Forno elettrico ventilato
Tempe- Ripiano
ratura
forno
Tempo
di cottura
in minuti
Temperatura forno
Osservazioni
2
60 ÷ 65
200
Inserire le lasagne nel forno freddo
220
2
40 ÷ 50
200
Inserire i cannelloni nel forno freddo
220
2
45 ÷ 50
200
Inserire la pasta al forno nel forno freddo
• Pasta
• Paste salate
Pane
Kg 1
di pasta
2
35
prerisc.10
200
2
30 ÷ 35
prerisc.10
180
Preparate la pasta a forma di pagnotta e
incidere con un coltello una croce sulla parte
superiore della forma. Lasciare lievitare
a temperatura ambiente almeno 2 ore,
ungere la leccarda e posizionate la forma
bene al centro della stessa.
Pizze
Kg 1
1
25 ÷ 35
190
1
20 ÷ 25
190
Preriscaldate per 15 min. il forno e preparate
le pizze nella leccarda smaltata con pomodori, mozzarella e prosciutto, olio, sale,
origano
Vol au vent
(Surgelati)
n° 24
1
30 ÷ 35
220
2
25 ÷ 30
200
Disponete 24 vol au vent nella leccarda
e cuocete.
Focaccia
(n° 4)
gr. 200
di pasta cad.
2
25 ÷ 30
200
2
20 ÷ 25
180
Preriscaldate per 15 min., ungere la teglia
del forno, disporre le 4 focacce oliate e
salate prima di infornare, lasciare lievitare
a temperatura ambiente per almeno 2 ore.
Pasta sfoglia
• Carne
Tutte le carni possono essere cotte in recipiente con bordo basso o bordo alto.
È consigliabile coprire il recipiente a bordo basso con un coperchio per evitare di sporcare il forno con schizzi del condimento.
Le carni coperte risultano più morbide e succose, mentre quelle scoperte risultano più croccanti.
I tempi indicati valgono per cotture con recipiente coperto o scoperto.
Roastbeef
intero
Kg 1
3
70 ÷ 80
220
3
50 ÷ 60
200
Disporre la carne in una teglia Pirex a bordo
alto con sale pepe. Voltare a metà cottura
Arrosto di maiale
arrotolato
Kg 1
2
100 ÷ 110
220
2
80 ÷ 90
200
Cuocere come sopra
Arrosto di vitello
arrotolato
Kg 1,3
1
90 ÷ 110
220
2
90 ÷ 100
200
Cuocere come sopra
Arrosto di manzo
filetto
Kg 1
2
80 ÷ 90
220
2
80 ÷ 90
200
Cuocere come sopra
Trota
3 intere / Kg 1
2
40 ÷ 45
220
2
35 ÷ 40
200
Cuocere le trote coperte con olio, sale e
cipolle in teglia Pirex.
Salmone
700 g a fette
2,5 cm s.p.
2
30 ÷ 35
220
2
30 ÷ 25
200
Cuocere il salmone non coperto in teglia
Pirex con sale, pepe e olio.
Sogliola
Filetti / Kg 1
2
40 ÷ 45
220
2
35 ÷ 40
200
Cuocete la sogliola con sale e un cucchiaio
d’olio.
2 intere
2
40 ÷ 45
220
2
35 ÷ 40
200
Cuocere in recipiente coperto le orate con
olio e sale
• Pesci
Orata
8 IT
TABELLA TEMPI DI COTTURA
Forno elettrico statico
Pietanza
Quantità
Ripiano
Tempo
di cottura
in minuti
Kg 1-1,3
2
60 ÷ 80
220
Kg 1,5-1,7
2
110 ÷ 120
Kg 1-1,2
2
Torta cacao
scatola
Torta margherita
Forno elettrico ventilato
Tempe- Ripiano
ratura
forno
Tempo
di cottura
in minuti
Temperatura forno
Osservazioni
2
60 ÷ 70
200
Sistemare la faraona in teglia Pirex o
ceramica a bordo alto condita con aromi
naturali e pochissimo olio.
220
2
100 ÷ 110
200
Come per la faraona
55 ÷ 65
220
2
50 ÷ 60
200
Mettete i pezzi di uguali dimensioni nella
leccarda smaltata, condite con aromi
naturali. Se necessario voltate i pezzi.
1
55
180
1
50
160
In teglia per torte Ø 22. Prerisc. per 10 min.
scatola
1
55
175
1
40 ÷ 45
160
In teglia per torte Ø 22. Prerisc. per 10 min.
Torta di carote
scatola
1
65
180
1
50 ÷ 60
160
In teglia per torte Ø 22. Prerisc. per 10 min.
Torta crostata
albicocca
700 gr
1
40
200
2
30 ÷ 35
180
In teglia per torte Ø 22. Prerisc. per 10 min.
Finocchi
800 gr
1
70 ÷ 80
220
1
60 ÷ 70
200
Zucchine
800 gr
1
70
220
1
60 ÷ 70
200
Patate
800 gr
2
60 ÷ 65
220
2
60 ÷ 65
200
Carote
800 gr
1
80 ÷ 85
220
1
70 ÷ 80
200
Tagliate le carote a fettine, copritele e
cuocetele in teglia Pirex.
Mele intere
Kg 1
1
45 ÷ 55
220
2
45 ÷ 55
200
Cuocere la frutta in teglia di Pirex o ceramica
non coperta. Lasciare raffreddare in forno.
Pere
Kg 1
1
45 ÷ 55
220
2
45 ÷ 55
200
Come sopra
Pesche
Kg 1
1
45 ÷ 55
220
2
45 ÷ 55
200
Come sopra
• Pollame, Coniglio
Faraona
Pollo
Coniglio a pezzi
• Dolci, Torte
• Verdura
Disponete i finocchi tagliati in 4 parti e
coperti in teglia di Pirex con burro e sale e
possibilmente con la parte interna verso
l’alto
Affettate le zucchine e cuocete in teglia
Pirex coperte con burro e sale
Tagliate le patate in parti uguali e cuocetele
coperte con olio, sale e origano o rosmarino
in teglia Pirex.
• Frutta
• Cottura a grill
La cottura con il grill deve essere eseguita ponendo il cibo sotto il grill elettrico. Attenzione: durante il funzionamento il grill diventa di colore
rosso vivo. La leccarda deve essere inserita sotto la griglia per raccogliere i sughi.
Pane carrè
tostato
Toasts farciti
4 fette
4
5 (5 prerisc.)
grill
4
5 (10 prerisc.)
grill
Inserire il pane carrè sulla griglia supporto.
Dopo la 1° cottura capovolgere fino a cottura
ultimata.
4
3
10 (5 prerisc.)
grill
3
5/8
(10 prerisc.)
grill
Inserire i toasts sulla griglia supporto
lec carda; do po la prima b ru nitura
capovolgere i toasts fino a brunitura ultimata.
grill
Tagliare le salsiccie a metà e disporle sulla
griglia, con la parte interna verso l’alto. A
metà cottura capovolgere le salsiccie fino
a cottura ultimata. Avvertenza: ogni tanto
controllate visivamente l’uniformità di
cottura. Nel caso di disuniformità intercambiare quelle cotte con quelle meno cotte.
grill
Disporre le fette bene sotto l’azione del grill
e voltarle due volte.
grill
Condite con aromi naturali e voltatele ogni
tanto.
Salsiccie
n°6 / Kg 0,9
4
Costate di manzo
n°4 / Kg 1,5
4
Coscie di pollo
n°4 / Kg 1,5
3
25/30
(5 prerisc.)
25
(5 prerisc.)
50/60
(5 prerisc.)
grill
4
grill
4
grill
3
9 IT
15/20
(10 prerisc.)
15/20
(10 prerisc.)
50/60
(10 prerisc.)
BUILT-IN OVENS
USER MANUAL
EN
GENERAL WARNINGS
Thank you for choosing one of our products. To get the most out of your oven we recommend that you:
• Read the notes in this manual carefully: they contain important instructions on how to install, use and service this oven safely.
• Keep this booklet in a safe place for easy, future reference.
All accessible parts are hot when the appliance is in operation, take care to not touch these elements.
When the oven is first switched on it may give out acrid smelling fumes. This is because the bonding agent for insulating panels around
the oven has been heated up for the first time.
This is a completely normal, if it does occur you merely have to wait for the fumes to clear before putting the food into the oven.
An oven by its very nature becomes very hot. Especially the glass of the oven door.
Do not allow children to go near the oven when it is hot, especially when the grill is on.
DECLARATION OF COMPLIANCE
•
The parts of this appliance that may come into contact with
foodstuffs comply with the provisions of EEC Directive 89/109.
Appliance complies with European Directives 73/23/EEC
and 89/336/EEC, replaced by 2006/95/EC and 2004/108/EC,
and subsequent amendments.
When you have unpacked the oven, make sure that it has not
been damaged in any way. If you have any doubts at all, do
not use it: contact a professionally qualified person.
Keep packing materials such as plastic bags, polystyrene, or
nails out of the reach of children because they are dangerous
for children.
SAFETY HINTS
•
•
–
–
–
–
–
–
•
•
•
The oven must be used only for the purpose for which it was
designed: it must only be used for cooking food.
Any other use, e.g. as a form of heating, is an improper use
of the oven and is therefore dangerous.
The manufacturers cannot be held responsible for any damage
caused by improper, incorrect or unreasonable use.
When using any electrical appliance you must follow a
few basic rules.
Do not pull on the power cable to remove the plug from the
socket.
Do not touch the oven with wet or damp hands or feet.
Do not use the oven unless you are wearing something on
your feet.
Do not allow children or irresponsible people to use the oven
unless they are carefully supervised.
It is not generally a good idea to use adapters, multiple sockets
for several plugs and cable extensions.
If the oven breaks down or develops a fault switch it off at the
mains and do not touch it.
If the cable is at all damaged it must be replaced promptly.
When replacing the cable, follow these instructions.
Remove the power cable and replace it with one of the HO5RRF, H05VV-F, H05V2V2-F type. The cable must be able to bear
the electrical current required by the oven. Cable replacement
must be carried out by properly qualified technicians.
The earthing cable (yellow-green) must be 10 mm longer than
the power cable.
Use only an approved service centre for repairs and ensure
that only original parts are used. If the above instructions are
not adhered to the manufacturers cannot guarantee the safety
of the oven.
This appliance is not intended for use by persons (including
children) with reduced physical, sensory or mental capabilities,
or lack of experience and knowledge, unless they have been
given supervision or instruction concerning use of the appliance
by a person responsible for their safety.
Children should be supervised to ensure that they do not play
with the appliance.
INSTALLATION
Installation is the customer’s responsibility. The manufacturers
have no obligation to carry this out. If the assistance of the
manufacturer is required to rectify faults arising from incorrect
installation, this assistance is not covered by the guarantee.
The installation instructions for professionally qualified personal
must be followed. Incorrect installation may cause harm or injury
to people, animals or belongings. The manufacturer cannot be
held responsible for such harm or injury.
FITTING THE OVEN INTO THE KITCHEN UNIT
Fit the oven into the space provided in the kitchen unit; it may be
fitted underneath a work top or into an upright cupboard.
Fix the oven in position by screwing into place, using the two fixing
holes in the frame.(Fig.on last page).
To locate the fixing holes, open the oven door and look inside.
To allow adequate ventilation, the measurements and distances
indicated in the diagram on last page must be adhered to when
fixing the oven.
Note: For ovens that are combined with a hob unit the instructions
contained in the manual for the hob unit must be followed.
IMPORTANT
If the oven is to work properly, the kitchen housing must be suitable.
The panels of the kitchen unit that are next to the oven must be
made of a heat resistant material. Ensure that the glues of units
made of veneered wood can withstand temperatures of at least
120 °C. Plastics or glues that cannot withstand such temperatures
will melt and deform the unit. Once the oven has been lodged
inside the unit, the electrical parts must be completely insulated.
This is a legal safety requirement. All guards must be firmly fixed
into place so that it is impossible to remove them without using
special tools.
Remove the back of the kitchen unit to ensure an adequate
current of air circulates around the oven. The hob must have
a rear gap of at least 45 mm.
CONNECTING TO THE POWER SUPPLY
Plug into the power supply. Ensure first that there is a third contact
that acts as earthing for the oven. The oven must be properly
earthed.
If the model of oven is not fitted with a plug, fit a standard plug
to the power cable. It must be able to bear the power supply
indicated on the specifications plate. The earthing cable is yellowgreen. The plug must be fitted by a properly qualified person.
If the socket and the plug are incompatible the socket must be
changed by a properly qualified person. A properly qualified person
must also ensure that the power cables can carry the current
required to operate the oven.
An ON/OFF switch may also be connected to the power supply.
The connections must take account of the current supplied and
must comply with current legal requirements. The yellow-green
earthing cable must not be governed by the ON/OFF switch. The
socket or the ON/OFF switch used for connecting to the power
supply must be easily accessible when the oven has been installed.
Important: During installation, position the power cable in such a
way that it will not be subjected to temperatures of above 50°C
at any point.
The oven complies with safety standards set by the regulatory
bodies. The oven is safe to use only if it has been adequately
earthed in compliance with current legal requirements on wiring
safety. You must ensure that the oven has been adequately
earthed.
The manufacturers cannot be held responsible for any harm
or injury to persons, animals or belongings caused by failure
to properly earth the oven.
WARNING: the voltage and the supply frequency are showed
on the rating plate (fig. on last page).
The cabling and wiring system must be able to bear the maximum
electric power required by the oven. This is indicated on the
specifications plate. If you are in any doubt at all, use the services
of a professionally qualified person.
OVEN EQUIPMENT (according to the model)
It is necessary to do an initial cleaning of the equipment
before the first use of each of them. Wash them with a sponge.
Rinse and dry off.
The simple shelf can take moulds
and dishes.
The tray holder shelf is especially good
for grilling things. Use it with the drip
tray.
The special profile of the shelves
means they stay horizontal even when
pulled right out. There is no risk of a
dish sliding or spilling.
10 GB
The drip tray catches the juices from grilled foods. It is only used with the Grill, Rotisserie, or Fan Assisted Grill ;
remove it from the oven for other cooking methods.
Never use the drip tray as a roasting tray as this creates smoke and fat will spatter your oven making it dirty.
The pizza set is designed for pizza
cooking. In order to obtain the best
results the set must be used together
with Pizza function.
The tray holder
The tray holder shelf is ideal for grilling. Use it in
conjunction with the drip tray. A handle is included to
assist in moving the both accessories safely. Do no
leave the handle inside the oven.
USEFUL TIPS
SHELF SAFETY SYSTEM
The oven features a new shelf safety
system.
This allows you to pull out the oven shelves
when inspecting the food without danger
of food spillages or shelves falling
accidentally out of the oven.
To remove the shelves pull out and lift.
GRILLING
Grilling makes it possible to give food a rich brown colour quickly.
For browning we recommend that you insert the grill onto the
fourth level, depending on the proportions of the food (see fig.
page 16).
Almost all food can be cooked under the grill except for very lean
game and meat rolls.
Meat and fish that are going to be grilled should first be lightly
doused with oil.
The
MODELS
ovens have an electronic control of the fan speed,
called and patented VARIOFAN. During the cooking, this system
changes automatically the speed of the fan (in multifunction mode)
in order to optimize the air flow and the internal temperature in
the cavity of the oven.
All
ovens feature the
function.
This allows a management of the distribution of moisture
and temperature. It reduces the loss of humidity of the
50 %, which guarantees the food remains tender and
tastes better. This a delicate cooking is recommended
for the baking of the bread and pastry.
It reduces the time of preheating of ovens: only 8 minutes
to reach 200 degrees Celsius.
It gives the possibility of setting level and intensity of
grilling, up to 50 % more power in comparison with a
traditional multifunction oven.
Some ovens are equipped with the new door " WIDE DOOR "
which has a bigger window area, this allows better maintenance
and a improved thermal insulation.
According to the model
Is an illumination system which replaces the traditional « light bulb ».
14 LED lights are integrated within the door. These produce white
high quality illumination which enables to view the inside of the
oven with clarity without any shadows on all the shelves.
Advantages :
system, besides providing excellent illumination inside
the oven, lasts longer than the traditional light bulb its easier and
to maintain and most of all saves energy.
• Optimum view
• Long life illumination
• Very low energy consumption, -95% in
comparison with the traditional
illumination High
“Appliance with white light LED of the 1M Class according to IEC 608251:1993 + A1: 1997 + A2: 2001 (equivalent to EN 60825-1: 1994 + A1:
2002 + A2: 2001); the maximum light power emitted 459nm < 150uW.
Not observed directly with optical instruments. "
COOKING TIME
SELF-CLEANING OVEN WITH CATALYTIC
Special self-cleaning panels covered in a micro-porous coating
are available as optional extras for all models. If they are fitted,
the oven no longer needs to be cleaned by hand.
The fat that is splattered onto the sides of the oven during roasting
is eliminated by the microporous coating which breaks the fat
down by catalysis and transforms it into gas.
Excessive splattering may nevertheless block the pores and
therefore hinder self-cleaning. The self-cleaning capacity may be
restored by switching on the empty oven to maximum for about
10-20 minutes.
Do not use abrasive products, metal cleaning wads, sharp objects,
rough cloths, or chemical products and detergents that may
permanently damage the catalytic lining.
It is a good idea to use deep roasting trays to roast fatty foods
such as joints of meat etc. and to put a tray underneath the grill
to catch surplus fat.If the walls of the oven are so thickly coated
in grease that the catalytic lining is no longer effective remove
surplus grease with a soft cloth or sponge soaked in hot water.
The lining must be porous for self-cleaning to be effective.
N.B.: All catalytic linings currently on the market have a working
life of about 300 hours. They should therefore be replaced after
about 300 hours.
CLEANING AND MAINTENANCE
Never use a steam or high pressure spray to clean the appliance.
Never use abrasive cleaners, wire wool or sharp objects to clean
the glass oven door.
Clean the stainless steel and enamelled surfaces with warm,
soapy water or with suitable brand products. On no account use
abrasive powders that may damage surfaces and ruin the oven’s
appearance. It is very important to clean the oven each time that
it is used. Melted fat is deposited on the sides of the oven during
cooking. The next time the oven is used this fat could cause
unpleasant odours and might even jeopardise the success of the
cooking. Use hot water and detergent to clean; rinse out thoroughly.
To make this chore unnecessary all models can be lined with
catalytic self-cleaning panels: these are supplied as an optional
extra (see the section SELF-CLEANING OVEN WITH CATALYTIC
LINING).
Use detergents and abrasive metal pads like «brillo pads» for the
stainless steel grills.
The glass surfaces as the top, oven door and warming compartment
door must be cleaned when they are cold. Damage that occurs
to them because this rule was not adhered to are not covered by
the guarantee.
To replace the interior light:
. switch off the mains power supply and unscrew bulb.
Replace with an identical bulb that can withstand very high
temperatures.
SERVICE CENTRE
Before calling the Service Centre
If the oven is not working, we recommend that:
you check that the oven is properly plugged into the power supply.
If the cause of the fault cannot be detected:
disconnect the oven from the mains, do not touch the oven and
call the after sales service.
Before calling the Service Centre remember to make a note
of the serial number on the specifications plate (see fig. on
last page).
The oven is supplied with a guarantee certificate that ensures that
it will be repaired free of charge by the Service Centre.
For recommended cooking times and temperatures the first time
you use the oven, refer to the tables on pages 16, 17. You may
then wish to vary these times and settings in the light of your own
experience.
11 GB
USING THE MINUTE TIMER
USING THE END OF COOKING TIMER
To set the cooking time, turn dial one
complete revolution and then position
the index to the required time. When
the time has lapsed, the signal will ring
for a few seconds.
Reading of the
time selected
This control enables to set the desired
cooking time (max. 120 min.) the oven
will automatically switch off at the end
of the set time.
The timer will count down from the set
time return to the O position and switch
off automatically.
For normal use of oven set the timer to
the
position.
To set the oven ensure the timer is not on the O position.
To set the time, push the control knob and turn anti-clockwise to position at the correct time.
To set as minute minder, set the cooking time by turning anticlockwise the knob without pushing,
until the desired time is shown at the small window on the left of the clock (max. 180 minutes).
When the preset time is elapsed the alarm will ring and the oven must be switched off manually.
To stop the alarm turn the knob until
appears in the window.
USE OF THE ELECTRONIC PROGRAMMER
FUNCTION
HOW TO ACTIVATE IT HOW TO SWITCH IT OFF
• Press and hold the
button
• Press the buttons or
MINUTE MINDER to set the required time
• Release all the buttons
WHAT IT DOES
WHAT IT IS FOR
• When the set time as
• Sounds an alarm at the
elapsed an audible alarm end of the set time.
is activated (this alarm will • To check how long is
stop on its own, however
left to run press the
it can be stopped
button
immediately by pressing
the button)
• Allows to use the oven as
alarm clock (could be
activated either with
operating the oven or
with out operating the
oven)
• Turn the oven function
selector to position O.
• For cooking the desired
recipes
MANUAL
FUNCTION
• Press the button
• Set the cooking function
with the oven function
selector
COOKING
TIME
• When the time is elapsed • It allows to preset the
• Press and hold the
cooking time required
the oven will switch off
TIMER button
automatically. Should you for the recipe chosen
• Press the buttons or
• To check how long is
wish to stop cooking
to set the lenght of cooleft to run press the
earlier either turn the
king required
TIMER button.
function selector to 0, or
• Release all buttons
• To alter/change the
• Set the cooking function with set time to 0:00
buttons) preset time press
the oven function selector (TIMER and
TIMER and
buttons
• Press and hold the END • At the time set, the oven
will switch off. To switch
button
off manually, turn the
• Press the buttons
to set the time at which you oven function selector
wish the oven to switch off to position O.
• Release the buttons
• Set the cooking function
with the oven function
selector
• Enables you to operate
the oven.
• Enables you to set the
end of cooking time
• To check the preset
time press the END
button
• To modify the preset
time press buttons
END +
• At the end of the
cooking set time,
the oven will switch
off automatically and an
audible alarm will ring.
• This function is typically
used with “cooking time”
function. For example
if the dish has to be cooked
END OF
for 45 minutes and needs
COOKING
to be ready by 12:30,
simply select the required
function, set the cooking
time to 45 minutes and the
end of cooking time to
12:30.
• Cooking will start automaSETTING THE CORRECT TIME
tically at 11:45 (12:30
minus 45 mins) and will
WARNING : the first operation to carry out after the oven has been continue until the pre-set
installed or following the interruption of power supply (this
end-of-cooking-time, when
is recognizable the display pulsating and showing
)
the oven will switch itself
is setting the correct time. This is achieved as follows
off automatically.
• Press and hold the TIMER and END buttons ( and TIMER on some WARNING.
models
If the END of cooking is
• Set time with
buttons
selected without setting
• Release all buttons
the length of cooking time,
the oven will start cooking
ATTENTION the oven only operates if set on manual function
or preset time.
immediately and it will
s top at t he EN D of
N.B.: on some models the symbols
are replaced by + and - .
cooking time set.
12 GB
USE OF ANALOGUE CLOCK/PROGRAMMER
(F)
(E)
SETTING THE CORRECT TIME
To set the correct time push and turn anti-clockwise the knob
until the clock shows the correct time. Once this is done
release the control.
FUNCTION
ATTENTION : the oven only operates if set on manual function
or preset time.
HOW TO ACTIVATE IT HOW TO SWITCH IT OFF
WHAT IT DOES
• Enables you to operate
the oven.
WHAT IT IS FOR
• For cooking the desired
recipes
MANUAL
FUNCTION
• Turn the control knob anti- • Turn the oven function
clockwise, without pushing, selector to position O.
until the symbol appears
in the window (E)
COOKING
TIME
• First of all select the
• At the end of the set time • It allows you to preset the • At the end of the cooking
cooking function and the
the oven switches off
cooking time required for time set, the oven will
switch off automatically
temperature required
automatically, this is
the recipe chosen.
and an audible alarm will
• Set the length of cooking indicated by an audible
required by turning the
ring.
alarm.
control knob anticlockwise • To cancel the setting turn
until the time matches the the control knob until the
length of time shown in the symbol appears in the
window (E)
window (E)
• The oven will start
immediately and it will
switch off automatically at
the end of the preset time
• Max time 180 minutes
(3 hours)
END OF
COOKING
• At the end of cooking time • Enables to program the
• First of all select the
set the oven will switch off oven so that the recipe is
cooking function and the
ready at the desired time
temperature required. automatically and an
• To set the cooking start audible alarm will ring.
• To cancel the set function
time pull and turn the
control knob anticlockwise turn the control knob anticlockwise until the symbol
until the hand F is in the
appears in the window
position indicating the start
(E)
time required.
• The alarm have to be
• To set the length of
stopped by turning the
cooking required turn
clockwise the control knob control knob until the
without pushing it, until the symbol appears in the
window (E)
time required appears in
the window (E).
(Not available
on model 2D 364.)
13 GB
• Example: if the dish has
to be cooked for 45
minutes and needs to be
ready by 12:30;
- Select the required
function
- Set start cooking time at
11:45 (12:30 minus 45
minutes)
- Set cooking time at 45
minutes
At the end of cooking the
oven will automatically
switch off.
USE THE ELECTRONIC PROGRAMMER (Type A)
1 Lights:
Minute Minder or
Auto light
8
Display for
6
Temperature or Time
Function selector knob
*
/
7 Setting buttons
9
Function
Timer knob
Lights:
2
WARNING !
3
Function with fan
Function with VARIOFAN 4
Defrost
5
1. Minute Minder or Auto light
2. Lights
3. Function with fan
4. Function with VARIOFAN
5. Defrost
6. Display for Temperature or Time
7. Setting buttons
8. Function selector knob
9. Function Timer knob
* according to the model
The first operation to carry out after the oven has been installed or following the interruption of power supply (this
is recognizable the display pulsating and showing12:00) is setting the correct time.
The Led “°” of the temperature indicator pulsates until the pre-set temperature is not reached.
HOT : When a cooking program is finished, if the oven is still hot, « HOT » appears on the display, alternately with the time
displays, even if the two function selectors are switched on OFF.
FUNCTION
HOW TO ACTIVATE
IT?
SILENCE MODE • Rotate the left function
WHAT IT DOES ?
WHAT IT IS FOR ?
• Rotate the function
selector to the position
OFF.
• Enables you to turn off the • To turn off the sound of the
sound of the minute
minute minder
minder
• Rotate the left function
• Rotate the function
selector to the position selector to the position
OFF.
“Set the time”.
• Use the buttons " + " or
" - " to set the time
• To set the time
• Enables you to set the
time which appears on the
NB : Set the time when
display
you first install your oven
or just after a black out
(the clock is showing a
pulsating 12.00)
selector to the position
" Silence mode "
SET THE TIME
HOW TO SWITCH
IT OFF?
•When the cooking time has
elapsed, the oven switch off
automatically and the alarm
rings for few seconds
To stop the cooking
functions early, turn the
function control to OFF or
set the time on 00.00 ; by
rotating the function selector
to Cooking Time Duration
and by using the buttons "
• Lighting Auto appears
+ " and " - "
• Turn the right function • When the cooking time
selector to a cooking
has elapsed, the oven
function
switch off automatically.
• Rotate the left function
• To stop the cooking
selector to the position functions early, turn the
END OF
function control to OFF
COOKING TIME "End of cooking"
• Set the end time of
cooking by using buttons
" + " and " - "
• Turn the right function
selector to a cooking
function
COOKING TIME • Rotate the left function
selector to the position
DURATION
" Cooking Time Duration"
• Set the time of cooking
by using buttons " + " and
"-"
• It allows to preset the
• For cooking the desired
cooking time required for recipes
the recipe chosen.
• When the cooking time is
set, turn the function
selector to OFF to go back
to actual time.
• To view the cooking time
selected, turn the left
function selector to
Cooking Time duration.
• It allows to preset the end
of cooking time you want.
• When the cooking time is
set, turn the function
selector to OFF to go back
to actual time.
• To view the cooking time
selected, turn the left
function selector to End of
cooking Time
• This function is used for
cooking we want to program
in advance. For example,
your recipe needs to be
cooked 45 min and to be
ready at 12.30pm ; simply
se t th e coo kin g tim e
duration on 45 min and the
end of cooking time on
12.30pm.
The cooking will start
automatically at 11.45
• Lighting Auto appears.
(12.30 minus 45 min) and
will continue until the preset end of cooking time,
then the oven will switch
itself off automatically
• Turn the left function
• Set the time on 00.00 by • Sounds an alarm at a few
turning the left function
selector to the position
seconds at the end of the • Allow to use the oven as
MINUTE MINDER Minute Minder
alarm even if the oven is
selector to the position
set time
switch off
• Set the time of cooking Minute Minder, and using
by using buttons " + " and the button " - "
"-"
CHILD LOCK
• Turn the left function
selector to the position
Child lock.
Press the button " + "
during 3 seconds
• Child lock is available
when " STOP " appears
on display
• Turn back the left function • The oven cannot be used • Useful especially when
selector to Child lock and
children are at home
press button " + " during 3
seconds
• Indication STOP
disappears
14 GB
OPERATING INSTRUCTIONS
Function
dial
Temperature
pre-set and
setting.
Thermostat
(Model with
dial
electronic
programmer)
(Type A)
Function
Turns on the oven light
This will automatically activate the cooling fan (on fan cooled models only)
Defrosting
When the dial is set to this position. The fan circulates air at room temperature around the,
frozen food so that it defrosts in a few minutes without the protein content of the food being
changed or altered.
MAX
MAX
Natural convection
Bottom and top oven elements are used. This is the traditional form of baking and roasting. It
is ideal for roasting joints of meat and game, baking biscuits and apples and making the food
nice and crunchy.
220
Fan cooking
Both top and bottom heating elements are used with the fan circulating the air inside the oven.
We recommend you use this method for poultry, pastries, fish and vegetables. Heat penetrates
into the food better and both the cooking and preheating times are reduced. You can cook
different foods at the same time with or without the same preparation in one or more positions.
This cooking method gives even heat distribution and the smells are not mixed. Allow about
ten minutes extra when cooking foods at the same time.
200
200
-
160
Level 4
Level 4
190
Level 4
220
Super Grill
This function allows to set food crunchiness. The Super Grill function is characterized by a
50% power increase in comparison to the standard grill.
Soft Cook (a)
Soft Cook is the function for the confectionery and the bread. Thanks to its reduced fan speed,
this function increases oven internal damp. The increased damp creates the ideal conditions
of cooking for those foods that need to maintain an elastic consistence while they are cooking
(ex. cakes, bread, biscuits) avoiding surface breakages.
Fan plus lower element
This function is ideal for delicate dishes (pies-souffle).
GRILL: use the grill with the door closed.
The top heating element is used alone and you can adjust the temperature. Five minutes
preheating is required to get the elements red-hot. Success is guaranteed for grills, kebabs
and gratin dishes. White meats should be put at a distance from the grill; the cooking time is
longer, but the meat will be tastier. You can put red meats and fish fillets on the shelf with the
drip tray underneath.
SUPER GRILL: the oven has two grill positions
Grill : 2200 W
Grill SUPER : 3000 W
FAN ASSISTED GRILL (a): use the turbo-grill with the door closed.
The top heating element is used with the fan circulating the air inside the oven. Preheating
is necessary for red meats but not for white meats. Ideal for cooking thick food items, whole
pieces such as roast pork, poultry, etc. Place the food to be grilled directly on the shelf centrally,
at the middle level. Slide the drip tray under the shelf to collect the juices. Make sure that the
food is not too close to the grill. Turn the food over halfway through cooking.
Grill/spit element.
This is used for roasting on the spit.
Function Pizza
This function with hot air circulated in the oven ensure perfect result for
dishes such as pizza or focaccia.
(a) on some models : function with “Vario Fan” is the exclusive system developed by Candy to optimize the cooking results, temperature
management and damp management. The Vario Fan system is a self-activating system that changes automatically fan speed when a fan function
is chosen: the fan functions are the one inside the outlined area on control panel.
* Tested in accordance with the CENELEC EN 50304.
** Tested in accordance with the CENELEC EN 50304 used for definition of energy class.
15 GB
TABLES OF COOKING TIMES
The overall suggested cooking times set out below are intended as a rough guide only. They may in fact vary according to the quality,
the freshness, the size and the thickness of the food cooked and of course cooking time is also partly a matter of taste. Let the food
stand for a few minutes before serving because the ingredients continue cooking after they
have been removed from the oven.
Shelf position
HANDY TIP: Lower the temperature so as to avoid the
surface of the food becoming hard and dry.
Static electric oven
Food
Electric fan oven
Quantity
Shelf
Time
of cooking
in minutes
Oven
temperature
Shelf
Time
of cooking
in minutes
Oven
temperature
Remarks
Lasagne
Kg 3,5
2
70 ÷ 75
220
2
60 ÷ 65
200
Put the lasagne into an unheated oven
Cannelloni
Kg 1,8
2
50 ÷ 60
220
2
40 ÷ 50
200
Put the cannelloni into an unheated oven
Oven baked pasta
Kg 2,5
2
55 ÷ 60
220
2
45 ÷ 50
200
Put the oven baked pasta into an unheated oven
180
Form the dough into a loaf and make a
cross with a knife on top of the dough leave
the dought to rise for at least 2 hours.
Grease the baking tin and put the dough in
the middle of it.
• Pasta
• Baking (not cakes)
Bread
Kg 1
di pasta
2
Pizza
Kg 1
1
Pastry (frozen)
vol au vents
n° 24
1
Focaccia
(n° 4)
gr. 200
of dough each
2
35
30 ÷ 35
200
2
25 ÷ 35
190
1
20 ÷ 25
190
Warm the oven for 15 minutes and place
the pizzas on the greased baking tray.
Garnish them with tomatoes, mozzarella,
ham, oil, salt and origano.
30 ÷ 35
220
2
25 ÷ 30
200
Place 24 vol au vents in the oven and
bake.
10 (pre-heating)
25 ÷ 30
200
2
10 (pre-heating)
20 ÷ 25
180
Warm the oven for 15 minutes, grease the
baking tray, season the 4 focaccia with oil
and salt and leave them to
rise at room temperature for at least 2 hours
be fore put tin g the m in the o ve n.
• Meat
All meats can be roasted in shallow or deep roasting trays.
It is advisable to cover the shallow trays to avoid splattering the sides of the oven with grease.
The roasting times are the same whether the meat has been covered up or not.
Whole joint of
beef
Kg 1
3
70 ÷ 80
220
3
50 ÷ 60
200
Put the meat into a deep Pyrex dish and
season with salt and pepper; turn the meat
half way through cooking.
Joint of
deboned
Kg 1
2
100 ÷ 110
220
2
80 ÷ 90
200
Cook the meat in a covered Pyrex dish with
herbs, spice, oil and butter.
Kg 1,3
1
90 ÷ 110
220
2
90 ÷ 100
200
Cook as indicated above.
Kg 1
2
80 ÷ 90
220
2
80 ÷ 90
200
Cook as indicated above.
3 whole trout
or / Kg 1
700 g
2,5 cm slice
2
40 ÷ 45
220
2
35 ÷ 40
200
Cover the trout with salt, oil and onions and
cook in a Pyrex dish.
2
30 ÷ 35
220
2
30 ÷ 25
200
Cook the salmon in an open Pyrex dish with
salt, pepper and oil.
Kg 1
2
40 ÷ 45
220
2
35 ÷ 40
200
Cook the sole with salt and a spoonful of
oil.
2 whole ones
2
40 ÷ 45
220
2
35 ÷ 40
200
Cook the bream in oil and salt in a covered
dish.
Joint of
deboned veal
Joint of
fillet of beef
• Fish
Trout
Salmon
Sole
Bream
16 GB
TABLES OF COOKING TIMES
Static electric oven
Food
Quantity
Electric fan oven
Shelf
Time
of cooking
in minutes
Oven
temperature
Shelf
Time
of cooking
in minutes
Oven
temperature
Remarks
Kg 1-1,3
2
60 ÷ 80
220
2
60 ÷ 70
200
Place the guinea fowl in a deep Pyrex or
pottery dish with very little oil and season with
herbs and spices.
Kg 1,5-1,7
2
110 ÷ 120
220
2
100 ÷ 110
200
Follow the procedure for cooking the guinea
fowl.
Kg 1-1,2
2
55 ÷ 65
220
2
50 ÷ 60
200
Put all the pieces of the same size in the
glazed tray. Season with herbs and spices.
Turn the pieces as and when required.
1
55
180
1
50
160
1
55
175
1
40 ÷ 45
160
1
65
180
1
50 ÷ 60
160
700 gr
1
40
200
2
30 ÷ 35
180
Fennel
800 gr
1
70 ÷ 80
220
1
60 ÷ 70
200
Courgettes
800 gr
1
70
220
1
60 ÷ 70
200
Potatoes
800 gr
2
60 ÷ 65
220
2
60 ÷ 65
200
Carrots
800 gr
1
80 ÷ 85
220
1
70 ÷ 80
200
Slice the carrots, place in a Pyrex dish and
cook.
Kg 1
1
45 ÷ 55
220
2
45 ÷ 55
200
Bake the fruit in an open Pyrex or earthenware dish. Leave it to cool inside the oven.
• Rabbits and Poultry
Guinea fowl
chicken
Rabbit pieces
• Cakes
Coconut cake
baked in a tin
Sponge cake
Carrot cake baked
in a tin
Apricot pie
Use a tin that is 22 cm deep. Pre-heat for
10 mins.
Use a tin that is 22 cm deep. Pre-heat for
10 mins.
Use a tin that is 22 cm deep. Pre-heat for
10 mins.
Use a tin that is 22 cm deep. Pre-heat for
10 mins.
• Vegetable
Cut the fennel into four pieces, add butter,
salt and potatoes if required and place in
a Pyrex face up. Cover the dish.
Slice the courgettes, place in a Pyrex
dish and add butter and salt.
Cut the potatoes into equal parts and place
in a Pyrex dish. Season with salt, origano
and rosemary. Cook in oil.
• Fruit
Whole apples
Pears
Kg 1
1
45 ÷ 55
220
2
45 ÷ 55
200
Follow procedure above.
Peaches
Kg 1
1
45 ÷ 55
220
2
45 ÷ 55
200
Follow procedure above.
• Grilling
Place the food to be grilled underneath the infra-red grill. Warning: When the grill is on it takes on a bright red colour. Place the tray
underneath the grill to collect juices and fat from the food being grilled.
Squares of bread
for toasting
Toasted
sandwiches
5
4 pieces
4
(5 to heat up grill)
4
3
(10 to heat up grill)
10
25/30
Sausages
n°6 / Kg 0,9
4
(5 to heat up grill)
Ribs of beef
n°4 / Kg 1,5
4
(5 to heat up grill)
Chicken legs
n°4 / Kg 1,5
3
25
50/60
(5 to heat up grill)
5
grill
4
(10 to heat up grill)
grill
3
(10 to heat up grill)
5/8
15/20
grill
4
(10 to heat up grill)
grill
4
(10 to heat up grill)
grill
3
(10 to heat up grill)
15/20
50/60
grill
Lay the bread on the grill tray. When one
side of the bread has been toasted, turn
over and toast the other side. Remember:
keep the toast warm at the bottom of the
oven until you are ready to serve it.
grill
Lay the bread on the grill tray. When one
side of the sandwich has been toasted, turn
over and toast the other side.
grill
Cut the sausages in half and lay them face
down on the grill. Half way through grilling
turn them over. Every so often, check that
they are being cooked equally all over. (If
this is not happening, turn and reposition
the ones being cooked ether less or more
than the others.
grill
Make sure that the ribs of beef are exposed
to the full effect on the main grill.
grill
Turn them over twice during grilling.
This appliance is marked according to the European directive 2002/96/EC on Waste Electrical and Electronic Equipment (WEEE).
By ensuring this product is disposed of correctly, you will help prevent potential negative consequences for the environment and
human health, which could otherwise be caused by inappropriate waste handling of this product.
The symbol on the product indicates that this product may not be treated as household waste. Instead it shall be handed over tothe applicablecollection
point for the recycling of electrical and electronic equipment Disposal must be carried out in accordance with local environmental regulations for
waste disposal. For more detailed information about treatment, recovery and recycling of this product, please contact your local city office, your
household waste disposal service or the shop where you purchased the product.
17 GB
INSTRUCTIONS GENERALES
— Lire attentivement les instructions contenues dans cette brochure, elles fournissent d’importantes indications sur la sécurité d’installation,
l’emploi du four et son entretien.
— Conserver soigneusement cette notice d’utilisation pour toutes consultations ultérieures.
— Après avoir déballé votre four, vérifier que l’appareil est complet.
— Les emballages comme le plastique, le polystyrène, peuvent constituer un danger pour les enfants. Ne pas les laisser à leur portée.
ATTENTION
Lors de la première utilisation du four, il peut se produire un dégagement de fumée âcre provoqué par la premier échauffement du
collant des panneaux d’isolation enveloppant le four. Ce phénomène est normal. Attendez que la fumée cesse avant de cuire des
aliments.
Lorsque le four est en fonctionnement, la porte en verre est particulièrement chaude, les éléments chauffants sont brûlants ; nous
recommandons donc de ne pas toucher. Eloigner les jeunes enfants.
ATTENTION: La tension et la fréquence d’alimentation sont indiquées sur la plaque signalétique (illustration dernière page).
Faites appel à un professionnel pour l’installation de votre four.
DE CL ARAT ION DE CONF ORM ITÉ :
• Les parties de cet appareil pouvant être en contact avec des
substances alimentaires sont conformes à la prescription de
la Dir. CEE 89/109.
Produit compatible avec les Directives Européennes 73/23/EEC
et 89/336/EEC, remplacées par 2006/95/EC et 2004/108/EC,
et les modifications successives.
CONSIGNES DE SECURITE
Cet appareil est conçu pour cuire des aliments. Tout autre
utilisation (ex. chauffage d’appoint) doit être considéré
comme impropre.
Le constructeur ne peut être tenu comme responsable en cas
de dommages liés à une mauvaise utilisation ou à des modifications
techniques du produit.
L’emploi d’un appareil électrique nécessite quelques règles de
sécurité.
— Ne pas tirer sur le fil électrique pour débrancher la prise.
— Ne pas toucher l’appareil avec les pieds ou les mains mouillés.
— Evitez d’utiliser l’appareil pieds nus.
— Veillez à ne pas laisser les enfants en bas âge manipuler le
four.
L’utilisation de multiprises et de rallonges pour raccorder votre
appareil est fortement déconseillé. En cas de panne ou de mauvais
fonctionnement il faut éteindre le four avant de le démonter. En
cas de détérioration du fil électrique, remplacez-le rapidement en
suivant les indications suivantes: ôtez le fil d’alimentation électrique
et remplacez-le par un (du type H05RR-F, H05VV-F, H05V2V2F)
adapté à la puissance de l’appareil. Vous veillerez à ce que cette
opération soit effectuée par un centre technique agréé. Pour
l’utilisateur c’est la certitude d’obtenir des pièces de rechange
d’origine. Le non-respect de ces règles peut compromettre la
sécurité de l’appareil.
Cet appareil n’est pas destiné à être utilisé par des personnes
(notamment les enfants) incapables, irresponsables ou sans
connaissance sur l’utilisation du produit, à moins qu’elles ne
soient surveillées, ou instruites sur l’utilisation de l’appareil, par
une personne responsable de leur sécurité.
Surveillez les enfants pour être sûr qu’ils ne jouent pas avec
l’appareil.
EQUIPEMENT DU FOUR
INSTALLATION
EQUIPEMENT DIFFERENT SELON LE TYPE DE FOUR
La mise en service de l’appareil est à la charge de l’acheteur, le
constructeur est dégagé de ce service. Les pannes liées à une
mauvaise installation ne seront pas couvertes par la garantie.
Une mauvaise installation peut provoquer des dommages aux
personnes, aux animaux domestiques; dans ce cas la responsabilité
du constructeur ne peut être engagée.
MISE EN PLACE DU FOUR DANS SON
MEUBLE
Une fois le four inséré dans son meuble, I’ancrage se fait par 2
vis visibles en ouvrant la porte du four, voir illustration sur dernière
page.
Pour permettre une meilleure aération du meuble, les fours doivent
être encastrés conformément aux mesures et distances indiquées
sur l’illustration de la dernière page.
N.B.: Pour les fours à associer avec des plaques de cuisson, il
est indispensable de respecter les instructions contenues dans
la brochure jointe à l’appareil à associer.
Avant la première utilisation des différents accessoires, nous
recommandons un nettoyage avec une éponge additionnée
de produit lessiviel, suivi d'un rinçage et d'un séchage.
La grille simple sert de support aux
moules et aux plats.
La grille porte-plat sert plus particulièrement à recevoir les grillades.
Elle est à associer au plat récolte sauce.
Grâce à leur profil spécial, les grilles
restent à l'horizontale jusqu'en butée.
Aucun risque de glissement ou de
débordement du plat.
Le plat récolte-sauce est destiné à
recevoir le jus des grillades. Il n'est à
u t il is e r q u ' e n m o d e g r il lo i r,
Tournebroche ou Turbogril (selon
modèle de four).
Attention : en cuisson autre que les modes Grilloir,Tournebroche,
et Turbo-gril, le plat récolte-sauce doit être retiré du four.
Ne jamais utiliser le plat récolte-sauce comme plat à rôtir, il en
résulterait des dégagements de fumée, des projections de graisse
et un encrassement rapide du four.
42 FR
Le set Pizza est l'idéal pour la
cuisson de pizza. Le set doit être
utilisé avec le mode de cuisson
Pizza.
Le gril plat
Il est à combiner avec le plat récoltesauce pour tous types de grillades.
Une poignée est fournie, pour
permettre de retirer l’ensemble sans
se brûler.
Ne pas stocker la poignée dans l’enceinte du four.
Pendant l'utilisation du four, les accessoires non utilisés doivent être retirés du four.
CONSIGNES UTILES
TEMPS DE CUISSON
GRILLES DU FOUR, NOUVEAU SYSTÈME
D’ARRÊT
Tous les fours bénéficient d’un
nouveau système d’arrêt des
grilles. Ce système permet de
sortir complètement la grille en
totale sécurité. Parfaitement
bloquée elle ne peut pas
basculer vers l’avant malgré la
présence d’un poids important.
Plus stables, ces grilles assurent
une plus grande sécurité et
tranquillité.
LA CUISSON AU GRIL
Le préchauffage est superflu. La cuisson peut se faire porte close
et les aliments doivent être placés par rapport au gril en fonction
des résultats que l’on souhaite obtenir.
— Plus près pour les aliments dorés en surface et saignants.
— Plus loin pour les aliments bien cuits à l’intérieur.
Le lèchefrite permet la récupération du jus.
Ne jamais utiliser le lèchefrite comme plat à rotir, il en résulterait
dégagements de fumée, des projections de graisse et un
encrassement rapide du four.
Dans les pages 48, 49 un tableau récapitulatif indique les temps
de cuisson et les températures selon les préparations.
FOUR AUTONETTOYANT PAR CATALYSE
Les panneaux autonettoyants à émail microporeux disponibles
en option évite le nettoyage manuel du four.
Pendant la cuisson les projections de graisse sont “l’absorbées”
par les parois catalytiques. La graisse est ensuite détruite par
oxydation en devenant de la poussière. En cas de cuisson
particulièrement grasse, il peut arriver que la graisse bouche les
pores de l’émail. Pour détruire un surplus de graisse mettez en
fonctionnement votre four à vide sur la position maximale de
température pendant environ 10 à 20 minutes.
Ne jamais utiliser de grattoir, de produit chimique pour nettoyer
la catalyse. Utilisez plutôt de l’eau chaude et une éponge.
Si jamais vous cuisinez un plat très gras ou une viande au gril,
utiliser un plat avec de grands rebords pour limiter les projections
de graisse.
La porosité de la catalyse est primordiale pour vous assurer un
nettoyage optimal.
N.B.: Les panneaux autonettoyants ont une durée de
fonctionnement d’environ 300 heures. En cas de baisse d’efficacité
il est alors possible de les changer.
Selon modèle Le PACK
Les fours
sont dotés de contrôle électronique de la
turbine de cuisson, breveté “VARIO FAN”. Le Système change
automatiquement la vitesse de la turbine en multifonction pour
optimiser la distribution de l’air et de la température dans l’enceinte
du four pendant la cuisson.
Tous les fours
sont dotés de la fonction
permettant une gestion de l’humidité et de la température.
Elle réduit la perte d’humidité des aliments jusqu’à 50%
ce qui garantit une douceur et une meilleure saveur du
mets. Une cuisson aussi délicate est recommandée pour
la cuisson du pain et des pâtisseries,
selon modèle, elle réduit le temps de préchauffage des
fours : seulement 8 minutes pour atteindre les 200°C.
Donne la possibilité de personnaliser le niveau et
l’intensité de grillade, jusq’à 50% en plus par rapport à
un four multifonction traditionnel.
Certains fours sont équipés de la nouvelle porte WIDE DOOR
a une plus ample superficie en verre qui permet un meilleur
entretien et un meilleur isolement thermique.
Selon modèle
CONSEILS DE NETTOYAGE ET D’ENTRETIEN
Ne jamais utiliter de produits abrasifs, d’éponges métalliques ou
d’objets tranchants pour le nettoyage des verres de porte de four.
Ne jamais utiliser de nettoyeur vapeur ou à haute pression pour
le nettoyage de l’appareil.
Pour nettoyer les surfaces en inox et en émail, utilisez de l’eau
tiède légèrement savonneuse. Vous pouvez utiliser un produit
adapté au nettoyage de ce type de surface. Eviter absolument
les produits abrasifs qui pourraient endommager la surface du
four. En cas de salissures tenaces, évitez d’utiliser des ustensiles
susceptibles de rayer irrémédiablement la surface de votre four.
Il est conseillé de nettoyer régulièrement l’intérieur de votre four
après chaque cuisson.
Si vous ne respectez pas le nettoyage de votre four après chaque
cuisson vous aurez une odeur désagréable, et les projections de
graisse seront encore plus difficiles à enlever. Pour l’intérieur du
four utiliser de l’eau chaude avec une éponge grattoir. Il existe
dans le commerce des produits adaptés au nettoyage du four. Le
nettoyage du four est fastidieux. Il existe en option des panneaux
autonettoyants spéciaux avec un émail microporeux qui peuvent
s’adapter sur les fours (voir paragraphe four autonettoyant par
catalyse).
Pour nettoyer les grilles inox, utilisez une éponge avec grattoir.
La vitre intérieure du four peut se démonter pour en faciliter le
nettoyage.
Attendre que la surface soit froide avant de la nettoyer. L’utilisation
d’eau froide au contact de la vitre chaude peut briser la vitre. Si
cela devait arriver la garantie ne couvrirait pas ce dommage.
Pour changer l’ampoule d’éclairage du four veillez à débrancher
électriquement le four. Les ampoules de four sont spécifiques,
elles sont conçues pour résister à une température élevée.
ASSISTANCE TECHNIQUE
« Les appareils dotés de LED blanches de classe 1M selon la norme
IEC 60825-1:1993 + A1: 1997 + A2: 2001 (équivalente à la norme EN
60825-1: 1994 + A1: 2002 + A2: 2001); la puissance maximale lumineuse
émise est de 459nm < 150uW. Donnée non observée directement avec
des instruments optiques. »
En cas de de mauvais fonctionnement, vérifier si la prise est
branchée. Après ces vérifications, adressez vous à votre revendeur
ou prévenez directement notre service technique qui interviendra
dans les plus brefs délais. Veiller à ce que le coupon de garantie
fourni avec le produit soit correctement rempli, avec la date d’achat
du four.
43 FR
UTILISATION DU MINUTEUR SONORE
UTILISATION DU MINUTEUR COUPE-CIRCUIT
Pour sélectionner le temps de cuisson
tournez le bouton sur le temps désiré.
Dès que le temps de cuisson est écoulé
une sonneriere retentit. Il ne vous reste
plus qu’à couper manuellement le four.
Lecture temps
sélectionné
Il est possible de programmer la durée
de la cuisson et l’extinction automatique
du four (max. 120 minutes).
À l’expiration du temps désigné, la
manette sera en position O, une
sonnerie retentira et le four s’arrêtera
automatiquement.
Si l’on souhaite utiliser le four sans
programmer d’arrêt automatique,
positionner la manette en position
.
Le four peut être allumé seulement en sélectionnant un temps
de cuisson ou en tournant le bouton en position .
Pour la mise à l’heure, appuyer sur la manette et tourner sur la droite jusqu’à lire l’heure exacte.
Pour son utilisation comme minuteur, sélectionner une durée en tournant la manette dans le
sens contraire des aiguilles d’une montre (sans appuyer)
jusqu’à lire dans la fenêtre le temps désiré (max. 180’). A la fin du temps, une sonnerie retentit
et il vous faudra éteindre le four ; pour stopper la sonnerie tourner la manette sur
UTILISATION DU PROGRAMMATEUR ÉLECTRONIQUE
FONCTION
MINUTEUR
COMMENT
L’UTILISER
COMMENT
L’ARRETER
• Appuyer et maintenir ap• A la fin de la durée
puyé sur la touche
sélectionnée, le minuteur
• Appuyer sur les touches
ou pour régler la dureé se coupe et un signal
sonore retentit (il s’arrête
• Relâcher les touches.
automatiquement, mais
pour le stopper de suite,
appuyer sur la touche )
BUT
•Em issio n d’un signal •Il permet d’utiliser le
sonore à la fin d’un temps programmateur du four
sélectionné
comme un rêveil-mémoire
• Pour visualiser le temps (il peut être utilisé avec le
restant appuyer sur la four allumé ou éteint).
touche
• Appuyer sur la touche
• Ramener le bouton de • Faire fonctionner le four
FONCTIONNE- • Sélectionner la fonction de sélection en position
MENT MANUEL cuisson avec le bouton de O.
sélection
TEMPS
DE CUISSON
• A p p uy e r et m a in t en ir • A la fin du temps de cuisappuyer sur la touche son, le four sera automatiquement mis hors fonction.
TIME R
• Appuyer sur les touches Si vous souhaitez arreter
ou pour régler la durée la cuisson avant, vous
pouvez soit positionner
• Relâcher les touches le bouton de selection sur
• Choisir la fonction de O, soit régler le temps de
cuisson avec le bouton de cuisson à 0:00. (touches
sélection
TIMER+ et
)
À QUOI
SERT-IL ?
• Réalise r les cuisson
dé sirées
• Sélectionner la durée de • Q ua n d le tem p s de
la cuisson des alimentes cuisson est écoulé, la
dans le four
cuisson s’arrête automati• Pour visualiser le temps quement et l’alarme sonne
restant appuyer la touche q u el q ue s s e c on d e s .
TIMER.
• Pour modifier le temps
restant appuyer la touche
TIMER + ou
• A l’heure sélectionnée le • Mémoriser l’heure de fin • Cette fonction est utilisée
four s’éteint tout seul; pour de cuisson
pour des cuissons que
l’arrêter en avant il est • Pour visualiser l’heure l’on peut programmer à
nécessaire de porter le appuyer sur la touche END l’avance. Par exemple,
HEURE DE FIN
bouton
de sélection en • Pour m odifier l’heure votre plat doit cuire 45 mn
DE CUISSON
sélectionnée appuyer sur et être prêt à 12:30;
position O.
les touche END + ou
réglez alors simplement la
durée sur 45 mn et l’heure
de fin de cuisson sur
12:30.
La cuisson commencera
a u to m at iq u e me n t à
REGLAGE DE L’HEURE
11:45 (12:30 moins 45
mn) et continuera
ATTENTION: la première opération à exécuter après l’installation
jusqu’à ce que l’heure de
ou après une coupure de courant (de telles situations se reconfin de cuisson soit
naissent parce que le afficheur est sur
et clignote)est
atteinte.
réglage de l’heure, comme décrit ci-dessus
A ce moment, le four
• Appuyer et maintenir appuyer sur les touches TIMER et END. (
s’arrêtera automatiet TIMER sur quelques modèles)
quement
• Appuyer sur les touches
ou
pour régler l’heure
• Relâcher les touches
ATTENTION: le four fonctionne seulement s’il est sur la position manuelle
ou cuisson
programmée
• Appuyer et maintenir
appuyer sur la touche END
• Appuyer sur les touches
ou pour régler la durée
• Relâcher les touches
• Choisir la fonction de
cuisson avec le bouton de
sélection
N.B.: pour régler les différentes fonctions du four, sur quelques modèles apparaissent les
symboles ou , pour les autres modèles nous avons + o -
44 FR
UTILISATION DU PROGRAMMATEUR A AIGUILLE
(F)
(E)
REGLAGE DE L’HEURE
Pour la mise à l’heure, appuyer et tourner dans le sens
contraire des aiguilles d’une montre la manette jusqu’à lecture
de l’heure exacte et relâcher la manette.
FONCTION
FONCTIONNEMENT MANUEL
TEMPS
DE CUISSON
HEURE DE FIN
DE CUISSON
(Non disponible sur
le modèle 2D 364)
COMMENT
L’UTILISER
ATTENTION: le four fonctionne seulement s’il est sur la
position manuel ou cuisson programmée
COMMENT
L’ARRETER
• Tourner la manette dans • Ramener le bouton de
le sens contraire des
sélection en position O.
aiguilles d’une montre
(sans appuyer)jusqu’à
visualiser le symbole
dans le cadran (E)
BUT
• Faire fonctionner le four
À QUOI
SERT-IL ?
• Réaliser les cuissons désirées
• Avant de commencer • A la fin de la durée réglée, • Sélectionner la durée de • Quand le temps de
choisir la température et le four s’arrête automati- cuisson des alimentes
cuisson est écoulé, la
la f on ctio n d és irée s quement et une sonnerie
cuisson s’arrête automati• Sélectionner la durée de retentit.
quement et la sonnerie
cuisson en tournant la • Pour arrêter la fonction
sonne quelques seconmanette dans le sens réglée, tourner la manette
des.
contraire des aiguilles jusqu’à faire coïncider
d’une montre jusqu’à faire Avec l’indice du cadran (E)
coïncider le temps sélectionné dans le cadran (E).
• La cuisson part immédiatement et termine automatiquement à la fin du temps
sélectionné
• Durée max cuisson 180
minutes (3 heures)
• Avant le réglage, sélec- • A l’heure programmée, la • Permet de programmer
tionner la température et
fonction s’arrête automati- une cuisson de manière à
la fonction désiré
quement et est signalée ce que le mets soit prêt à
l’heure désirée.
• Sélectionner l’heure de par une sonnerie.
début de cuisson: tirer et • Pour arrêter avant la
tourner la manette dans le fonction réglée, tourner la
sens contraire des aiguil- manette dans le sens
les d’une montre jusqu’à contraire des aiguilles
faire coïncider l’aiguille (F) d’une montre jusqu’à faire
avec l’heure de début de coïncider
avec l’indice
cuisson désirée
du cadran (E)
• Sélectionner la durée de • La sonnerie doit être
cuisson: tourner, sans interrompue manuellement
appuyer, la manette dans en tournant la manette
le sens horaire jusqu’à jusqu’à faire coïncider
faire coïncider le temps avec l’indice du cadran (E)
sélectionner avec l’indice
du cadran (E)
45 FR
• Exemple : le mets désiré
doit cuire 45 minutes et je
désire qu’il soit prêt pour
12:30, dans ce cas
- Sélectionner la fonction
- Régler l’heure de début de
cuisson à 11:45 (12:30
moins 45 minutes)
- Régler la durée de cuisson
à 45 minutes
A la fin de la cuisson, le
four s’arrête automatiquement.
UTILISATION DU PROGRAMMATEUR ÉLECTRONIQUE (Type A)
1 Voyants :
Minuteur / Auto
6
Heure /
Température
8 Manette des fonctions*
/
1.
2.
3.
4.
*
7 Touches de réglage
9
Manette du
programmateur
Voyants :
2
Fonction avec turbine 3
Fonction avec turbine à système variable
Décongélation
4
5
5.
6.
7.
8.
9.
Voyant Auto ou Voyant Minuteur
Voyants
Fonction avec turbine
Fonction avec turbine à système
variable
Mode Décongélation
Display Température ou horloge
Boutons de réglage
Manette des fonctions
Manette du programmateur
* selon modèle
La première opération à exécuter après l’installation ou après une coupure de courant (de telles situations
ATTENTION ! se reconnaissent parce que l’afficheur est sur 12:00 et clignote) est le réglage de l’heure.
Le led “ ° ” de la température clignote tant que la température affichée n’est pas atteinte.
Lorsqu’un programme est terminé, si le four est encore chaud, le display affiche “HOT”, en alternance avec l’heure du moment,
et ce même si les manettes sont positionnées sur “OFF”
FONCTION
Mode silence
Mise à l’heure
Durée de
cuisson
Fin de cuisson
COMMENT
L’UTILISER?
Sécurité enfant
BUT
À QUOI SERT-IL?
• Positionner la manette du • Tourner la manette sur la • Permet de couper la
programmateur sur la
sonnerie.
position off.
position “Mode silence”.
• Cette fonction est utile
pour couper la sonnerie.
• Régler la manette du
• Tourner la manette sur la • Permet de régler l’heure
programmateur sur la
position off.
qui apparaît sur le display
position Mise à l’heure.
• Utiliser les touches + et pour régler l’heure.
• Cette fonction vous permet
de régler l’heure en utilisant
les touches + et -.
• Sélectionner une fonction • Une fois le temps écoulé,
le four est automatiquede cuisson
ment mis hors fonction.
• Régler la manette du
programmateur sur la Pour arrêter la cuisson
avant, il faut positionner la
position Durée de
manette des fonctions sur
cuisson
off, ou régler le temps de
• Régler le temps de cuisson cuisson sur 00:00, en
en utilisant les touches plaçant la manette sur la
+ et -.
position Durée de
cuisson, et en utilisant la
• Le voyant Auto s’affiche. touche “ - ” .
• Sélectionner une fonction • À la fin de la cuisson, le
four s’arrête automatiquede cuisson
• Régler la manette sur la ment.
position Fin de cuisson. Pour arrêter la cuisson
• Régler l’heure de fin de avant, positionner la
cuisson en utilisant les manette des fonctions sur
off.
touches + et - .
• Le voyant Auto s’affiche.
Minuterie
COMMENT
L’ÉTEINDRE?
• Régler la manette du
programm at eur sur
la position Minuterie.
• Régler le temps de cuisson en utilisant les touches
+ et - .
NB: Régler l’heure lors de
l’installation de votre four
ou juste après une coupure de courant (12:00
clignote alors à l’écran).
• Permet de régler un temps • Q uan d le tem ps d e
de cuisson.
cuisson est écoulé, la
• Quand le temps de cuisson cuisson s’arrête automaest réglé, positionner la tiquement et l’alarme
manette sur off pour
sonne quelques seconrepasser à l’heure du jour. des.
• Pour visualiser le temps
de cuisson sélectionné,
tourner la manette sur la
position Durée de
cuisson.
• Permet de régler l’heure • Cette fonction est aussi
utilisée pour des cuissons
de fin de cuisson.
que l’on peut programmer
• Quand l’heure de fin de
cuisson est réglée, rame- à l’avance. Par exemple,
ner la manette sur off pour votre plat doit cuire 45 mn
et être prêt à 12:30; réglez
revenir à l’heure du jour.
alors simplement la durée
• Afin de visualiser l’heure
sur 45 mn et l’heure de fin
de fin de cuisson, poside cuisson sur 12:30.
tionner la manette sur la
La cuisson commence
position Fin de cuisson. a u to m a ti q ue m e n t à
11:45 (12:30 moins 45
mn) et continuera jusqu’à
ce que l’heure de fin de
cuisson soit atteinte.
A ce moment, le four
s’arrêtera automatiquement
• Régler le tem ps sur • Cette fonction déclenchera
00:00, en plaçant la
une alarme sonore de • Utile comme “aide mémanette du programmaquelques secondes à la fin moire”, l’alarme sonore
teur sur la position
du temps programmé. f o n c ti o n n e i n d é p e n Minuterie, et en utilisant
damment du four, même
la touche “ - ” .
si celui-ci est éteint.
• Régler la manette du
• Remettre la manette du • Le four est hors fonction. • Cette fonction est utile
programmateur sur la
programmateur sur la
surtout en présence de
position Sécurité enfant. position Sécurité Enfant
jeunes enfants.
• Appuyer sur la touche +
et appuyer sur la touche +
pendant 3 secondes. pendant 3 secondes.
• La sécurité enfant est en
fonction quand le display • L’indication Stop disparaît.
affiche “Stop”.
46 FR
INSTRUCTIONS POUR L’UTILISATION
Bouton de
sélection
Fonction selon modèle
(Type A)
Allumage de l’éclairage du four.
Décongélation:
fonctionnement de la turbine de cuisson qui brasse l'air dans l'enceinte du four. Idéale pour
réaliser une décongélation avant une cuisson.
MAX
MAX
Convection naturelle: utilisation simultanée de la résistance de sole et de voûte. Préchauffer
le four une dizaine de minutes. Idéale pour toutes les cuissons à l'ancienne, pour saisir les
viandes rouges, les rosbifs, gigots, gibiers, le pain, les papillotes, les feuilletages. Placer le
mets à cuire à un niveau de gradin moyen.
220
Chaleur brassée (a): Fonction recommandée pour les volailles, les pâtisseries, les poissons,
les légumes... La chaleur pénètre mieux à l'intérieur du mets à cuire et réduit le temps de
cuisson, ainsi que le temps de préchauffage. Vous pouvez réaliser des cuissons combinées
avec préparations identiques ou non sur un ou deux gradins. Ce mode de cuisson assure en
effet une répartitionhomogène de la chaleur et ne mélange pas les odeurs. Prévoir une dizaine
de minutes de plus, pour la cuisson combinée.
200
200
-
Soft Cook (a)
Soft cook est la fonction idéale pour la pâtisserie et le pain. Grâce à la vitesse réduite de la
turbine, cette fonction augmente l’humidité présente dans l’enceinte du four. Une humidité
supplémentaire crée des conditions de cuisson idéale pour les aliments qui ont besoin de
maintenir une consistance élastique pendant leur cuisson (ex: tourtes, pain, biscuit) et de ce
fait évite une surcuisson.
160
Sole brassée (a): Idéale pour les tartes à fruits juteux, les tourtes, les quiches, les pâtés. Elle
évite le dessèchement des aliments et favorise la levée pour les cuissons de cakes, pâte à pain
et autres cuissons par le dessous. Placer la grille sur le gradin inférieur. Avec ce mode de
cuisson, un préchauffage est nécessaire en Chaleur Brassée pendant une dizaine de minutes.
Niveau 4
Gril: l'utilisation du grilloir se fait porte fermée. Un préchauffage de 5 mins est nécessaire
pour le rougissement de la résistance. Succès assuré pour les grillades, les brochettes et les
gratins. Les viandes blanches doivent être écartées du grilloir ; le temps de cuisson sera alors
plus long, mais la viande sera plus savoureuse. Les viandes rouges et filets de poissons peuvent
être placés sur la grille avec le plat récolte sauce glissé dessous.
Niveau 4
190
Niveau 4
220
SUPER GRILL: le four a deux positions de gril
Gril : 2200 W
Super Gril : 3000 W
Turbo-Gril (a): l'utilisation de la position turbo-gril se fait porte fermée. Un préchauffage
est nécessaire pour les viandes rouges et inutile pour les viandes blanches. Idéal pour les
cuissons de volume épais, des pièces entières telles que rôti de porc, volailles etc... Placer
le mets à cuire directement sur la grille au centre du four, à un niveau moyen. Glisser le récoltesauce sous la grille de façon à récupérer les graisses. S'assurer que le mets ne soit pas trop
près du grilloir. Retourner la pièce à cuire à mi-cuisson.
Gril plus tournebroche
Mise en marche du gril et du moteur du tournebroche.
Pour cuire à la broche, ou pour gratiner.
Pizza (a)
La forte chaleur produite par la fonction Pizza est très proche de celle d’un feu de bois dans
un four traditionnel
(a) sur certains modèles “Fonction avec turbine à système variable” : système de fonctionnement du four pour optimiser les résultats de cuisson,
la gestion de la température ainsi que la gestion de l’humidité. Le système “Turbine à vitesse variable” modifie automatiquement la vitesse de rotation
de la turbine pour toutes les cuissons multifonctions. Ce système s’active automatiquement toutes les fois qu’une fonction est sélectionnée à l’intérieur
de la partie représentée en pointillé sur le tableau de bord.
* Programme testé selon le CENELEC, norme européenne EN 50304
** Programme testé selon le CENELEC, norme européenne EN 50304 qui définit la classe énergétique.
47 FR
TEMPS DE CUISSON
Les temps de cuisson sont donnés à titre indicatif et peuvent varier selon la nature de l’aliment son poids, son volume, et bien entendu
selon votre goût.
CONSIGNES UTILES:
Sur les temps donnés, vous pouvez arrêter votre four 10 minutes
avant la fin de la cuisson afin de bénéficier de la chaleur résiduelle
pour continuer à cuire tout en économisant de l’énergie.
Four en convection naturelle
Préparations
Temps de
cuisson en
minutes
Niveau de gradin
Four en chaleur tournante
Tempé- Niveau
rature
four
Temps de
cuisson en
minutes
Température
four
Quantité
Niveau
Observations
Roastbeef
Kg 1
3
220
3
200
Disposer la viande dans un plat pyrex à
hauts rebords, salé et poivré.
Rôti de porc
Kg 1
2
220
2
200
Disposer le rôti de porc dans un plat pyrex
avec de l’huile et du beurre.
Rôti de veau
Kg 1,3
1
220
2
200
Pour le rôti de veau idem.
Rôti de boeuf
Kg 1
2
220
2
200
Pour le rôti de boeuf idem.
Kg 1
2
220
2
200
Truite: cuire la truite couverte, avec du sel
et du poivre dans un plat pyrex.
700 g 2,5 cm
épaisseur
2
220
2
200
Saumon: même type de cuisson non
couverte.
Sole
filet / kg 1
2
220
2
200
Sole: cuire avec du sel + cuillère d’huile.
Dorade
2 entières
2
220
2
200
Daurade: cuire avec couvercle de l’huile
et du sel.
Pintade
Kg 1/1,3
2
220
2
200
Volailles et pintade: plat pyrex ou en terre,
assaisonné avec très peu d’huile.
Poulet
kg 1,5-1,7
2
220
2
200
Pour le poulet idem.
Lapin
kg 1/1,2
2
220
2
200
Lapin: le couper en morceau. Les mettre
dans le lèchefrite avec des aromates.
160
Moule à tarte de 22 cm de diamètre.
Préchauffage de 10 minutes.
180
Moule à tarte de 22 cm de diamètre.
Préchauffage de 10 minutes
• Viandes
• Poissons
Truite
Saumon
• Volailles, lapin
• Gateaux
Gâteau au
chocolat
1
55
180
1
Tarte aux abricots
1
40
200
2
50
• Légumes
220
1
200
Disposer le fenouil coupé en 4 dans un plat
en pyrex, avec un couvercle. Ajoutezy du beurre et du sel. Faites revenir le
fenouil en retournant les morceaux dans le plat.
220
1
200
Pour les courgettes, coupez les en tranches.
2
220
2
200
Pour les pommes de terre, coupez les de
façon égale et faites les cuire dans un plat
en pyrex avec du sel, de l’origan, et du
romarin.
1
220
1
200
Pour les carottes coupez les en rondelles
puis les disposer dans un plat pyrex non
couvert.
Fenouil
800 gr.
1
Courgettes
800 gr.
1
Pommes de terre
800 gr.
Carottes
800 gr.
70
48 FR
TEMPS DE CUISSON
Four en convection naturelle
Préparations
Temps de
cuisson en
minutes
Four en chaleur tournante
Quantité
Niveau
Tempé- Niveau
rature
four
Pommes entières
Kg 1
1
220
2
200
Poires
Kg 1
1
220
2
200
Pêches
Kg 1
1
220
2
200
Temps de
cuisson en
minutes
Température
four
Observations
• Fruits
Mettez les fruits dans un plat pyrex sans
les recouvrir. Une fois cuits laissez-les
refroidir dans le four.
• Cuisson gril
Pendant la cuisson au gril la résistance devient rouge vive. Ce phénomène est normal.
Mettre les tranches de pain de mie sous le
gril. Dès que les tranches sont dorées
retournez les. Eteignez le gril pour les
maintenir au chaud.
4 tranches
4
5 (5 Préchauf.)
gril
4
5 (5 Préchauf.)
gril
n. 4
3
5 (5 Préchauf.)
gril
3
5/8
(5 Préchauf.)
gril
Saucisses
n. 6/kg 0,9
4
25/30
(5 Préchauf.)
gril
4
15/20
(5 Préchauf.)
gril
Couper les saucisses en deux disposées
sous le gril. Retournez les saucisses pour
les cuire de l’autre côté.
Côte de boeuf
n. 4/kg 1,5
4
25
(5 Préchauf.)
gril
4
15/20
(5 Préchauf.)
gril
Disposez la côte de boeuf sous le gril et
retournez la jusqu’à la cuisson désirée.
Aromatiser selon votre goût.
Cuisses de poulet
n. 4/kg 1,5
3
50/60
(5 Préchauf.)
gril
3
50/60
(5 Préchauf.)
gril
Cuisses de poulet: aromatisez selon votre
goût.
Toasts
Croques monsieur
Cet appareil est commercialisé en accord avec
la directive européenne 2002/96/CE sur les
déchets des équipements électriques et
électroniques (DEEE).
En vous assurant que ce produit est correctement
recyclé, vous participez à la prévention des
conséquences négatives sur l’environnement et
la santé publique qui pourrait être causé par une
mise au rebut inappropriée de ce produit.
Le symbole sur ce produit indique qu’il ne doit pas être traité
comme un déchet ménager. Il doit être rapporté jusqu’à un point
de recyclage des déchets électriques et électroniques.
La collecte de ce produit doit se faire en accord avec les
réglementations environnementales concernant la mise au rebut
de ce type de déchets.
Pour plus d’information au sujet du traitement, de la collecte et
du recyclage de ce produit, merci de contacter votre mairie, votre
centre de traitement des déchets ou le magasin où vous avez
acheté ce produit.
49 FR
ALLGEMEINE HINWEISE
Herzlichen Glückwunsch! Sie haben ein hochwertiges Qualitätsprodukt erworben. Damit Ihr Gerät stets zu Ihrer Zufriedenheit arbeitet,
raten wir Ihnen folgendes:
• Lesen Sie dieses Heft aufmerksam durch: es enthält wichtige Hinweise zur korrekten Benutzung Ihres Gerätes
• Bewahren Sie diese Bedienungsanleitung zur späteren Benutzung sorgfältig auf.
Bei der ersten Inbetriebnahme kann es zu Rauchentwicklung und beißendem Geruch kommen. Hierbei handelt es sich um einen ganz
normalen Vorgang, der auf die erste Erwärmung des Isolierplattenklebers zurückzuführen ist, welcher zur Verkleidung des Backofens
ve rw en d et w urd e . Wa rten Sie m it de m Ein sc hie be n d er S p eis en , bis k ein R au ch m e hr v or ha nd en ist.
Die Backofentür wird während des Betriebes naturgemäß heiß. Achten Sie bitte darauf, daß Kinder sich nicht in der Nähe des Backofens
aufhalten, besonders wenn der Grill in Betrieb ist.
Hinweis: Bei Backöfen, die in Kombination mit Kochmulden
oder Ceranfeldern eingebaut werden, sind unbedingt die
KONFORMITÄTSERKLÄRUNG:
Montageanweisungen zu beachten, die mit den Kochfeldern
Dieses Gerät entspricht der EU-Vorschrift 89/109 für die
mitgeliefert sind.
Bereiche, die mit Lebensmitteln in Berührung kommen.
Das Gerät entspricht den Europäischen Richtlinien 73/23/CEE
WICHTIG:
und 89/336/CEE, ersetzt durch 2006/95/CE bzw. 2004/108/CE,
Damit
eine einwandfreie Funktion des Einbaugerätes gewährleistet
und deren nachträglichen Veränderungen.
ist, muß der Umbauschrank unbedingt über entsprechende
Eigenschaften verfügen. Die Wände der am Backofen
SICHERHEITSHINWEISE
angrenzenden Schränke müssen aus hitzebeständigem Material
Dieses Gerät darf ausschließlich für den Zweck eingesetzt
sein. Insbesondere bei Schränken aus Furnierholz müssen die
werden, für den es hergestellt wurde, nämlich die Zubereitung
verwendeten Klebstoffe Temperaturen bis zu 120°C widerstehen
von Speisen.
können: halten die Kunststoffe oder die Kleber solche Temperaturen
Jede andere Anwendung (beispielsweise das Heizen von
nicht stand, so sind Verformungen und Entleimungen die Folge.
Räumen) ist deshalb als zweckentfremdet zu betrachten und
Gemäß der Sicherheitsnormen dürfen nach dem Einbau eventuelle
demzufolge gefährlich. Der Hersteller kann für eventuelle
Berührungen mit elektrischen Teilen nicht möglich sein.
Schäden, die auf einen ungeeigneten, fehlerhaften und
Sämtliche der Sicherheit dienende Teile müssen so befestigt sein,
unvernünftigen Einsatz zurückzuführen sind, nicht verantwortlich
daß sie sich ohne Werkzeuge nicht entfernen lassen.
gemacht werden.
Die Verwendung jedes elektrischen Gerätes erfordert die
Zur Gewährleistung einer guten Belüftung ist die hintere
Beachtung einiger grundsätzlichen Regeln. Das sind
Wand der Einbaunische zu entfernen. Außerdem muß die
insbesondere:
Auflagefläche über einen hinteren Freiraum von mindestens
- das Gerät nicht mit nassen oder feuchten Händen oder Füßen
45 mm verfügen.
berühren.
- das Gerät nicht barfuß bedienen
ELEKTRISCHER ANSCHLUß
- verhindern Sie, daß Kinder oder unfähige Personen
In
der Bundesrepublik Deutschland ist der Backofen direkt an die
unbeaufsichtigt am Gerät hantieren
Herdaschlussdose anzuschließen. Der elektrische Anschluß darf
- bei Ausfällen und/oder Funktionsstörungen ist das Gerät
ausschließlich durch qualifiziertes Fachpersonal (Elektroinstallateur)
abzuschalten. Versuchen Sie nicht, den Fehler auf eigene
erfolgen.
Faust zu beheben.
- Bei Beschädigung des Zuleitungskabels ist dieses so schnell
Beim direkten Anschluß ans Netz ist darauf zu achten, daß
wie möglich auszutauschen. Dies ist ausschließlich durch
zwischen dem Gerät und dem Versorgungsnetz ein der Last
qualifiziertes Fachpersonal durchzuführen, unter Beachtung
entsprechender, genormter Mehrfachschalter eingebaut wird.
folgender Hinweise: Blechschutzdeckel abnehmen, Kabel
Der Netzanschluß muß bei dem eingebauten Gerät jederzeit leicht
abschrauben und durch ein anderes (Typ HO5RR-F, H05VVzugänglich sein.
F, H05V2V2-F) ersetzen. Das Kabel muß der Leistung des
Wichtig: Bei der Installation ist darauf zu achten, daß das
Gerätes entsprechen. Der Erdleiter (gelb-grün) muß
Versorgungskabel an keiner Stelle einer Temperatur von über
vorschriftsgemäß 10 mm länger sein als die Hauptleiter.
50°C ausgesetzt wird.
Bei einer erforderlichen Reparatur wenden Sie sich bitte an
Das Gerät entspricht den Sicherheitsvorschriften der Normanstalten.
Ihren zuständigen Werkskundendienst und verlangen Sie die
Verwendung von Original-Ersatzteilen.
Die elektrische Sicherheit dieses Gerätes ist nur dann gewährleistet,
Die Mißachtung der vorgenannten Hinweise kann die Sicherheit
wenn es vorschriftsgemäß an einen einwandfrei funktionierenden
des Gerätes beeinträchtigen.
Erdleiter angeschlossen ist, in Übereinstimmung mit den für die
Kinder oder Personen mit eingeschränkten körperlichen oder
elektrische Sicherheit geltenden Normen.
geistigen Fähigkeiten oder mit ungenügenden Kenntnissen
Diese für die Sicherheit grundsätzliche Voraussetzung muß
und Erfahrung dürfen nur dann das Gerät benutzen, wenn sie
überprüft werden, und im Zweifelsfall ist eine sorgfältige Kontrolle
beaufsichtigt werden oder hinreichend Anweisungen zur
der Anlage durch geschultes Fachpersonal vorzunehmen. Es ist
sicheren Behandlung des Gerätes durch eine für ihre Sicherheit
die elektrische Belastung der Anlage und Steckdose zu überprüfen,
verantwortliche Person erhalten haben.
um festzustellen, ob diese für die auf dem Leistungsschild
Kinder sind zu beaufsichtigen, um sicher zu stellen, dass sie
nicht mit dem Gerät spielen.
angegebene maximale Leistung geeignet sind. Im Zweifelsfall
einen Elektroinstallateur zu Rate ziehen.
INSTALLATION
Wichtig: Der Hersteller kann für eventuelle Schäden, die auf
eine fehlende oder fehlerhafte Erdung zurückzuführen sind,
Der Einbau erfolgt auf Kosten des Endverbrauchers. Der Hersteller
nicht zur Verantwortung gezogen werden.
ist von diesem Dienst entbunden. Eventuell an den Hersteller
ACHTUNG:
herangetragene Ansprüche, die auf einen falschen Einbau
Die Spannung und die Versorgungsfrequenz sind auf dem
zurückgehen, sind von jeder Garantieleistung ausgeschlossen.
Matrikelschild angegeben (Abbildung auf der letzten Seite).
Der Einbau muß entsprechend der Anleitung und durch qualifiziertes
Fachpersonal erfolgen. Durch einen falschen Einbau können
OFENAUSSTATTUNG (Je nach Modell)
Schäden an Personen, Tieren oder Sachen verursacht werden,
Vor
der ersten Benutzung des Zubehörs, reinigen Sie jedes
für die der Hersteller nicht verantwortlich gemacht werden kann.
Teil mit einem feuchten Schwamm und trocknen Sie es dann
mit einem Tuch.
EINBAU IN DEN SCHRANK
Der einfache Rost dient als Unterlage für
Das Gerät in den Schrank an den vorgesehenen Platz einsetzen
Bleche und Backformen.
(unterhalb der Kochfläche bzw. einzeln in separater Nische). Die
Der Grillrost ist vorrangig zum Ablegen
Befestigung erfolgt durch 2 Schrauben, die in die entsprechenden
von Grillstücken vorgesehen. Er wird
Bohrungen des Rahmens eingesetzt werden, welche beim Öffnen
zusammen mit dem Soßenfänger
verwendet. Dank ihres speziellen Profils
der Backofentür sichtbar werden.(Abbildung aufder Letzten Seite).
bleiben die Roste immer waagerecht, auch
Damit eine gute Belüftung gewährleistet ist, muß der Backofen
wenn sie bis zum Anschlag herausgezogen werden. Die Gerichte
unter Einhaltung der auf letzten Seite angegebenen Abstände
können nicht herunterrutschen oder überlaufen
installiert werden.
34 DE
Der Soßenfänger ist zum Auffangen des Saftes der Grillstücke bestimmt.
Er kann auf den Rost gestellt, unter ihn geschoben oder auf die Bodenplatte gestellt werden. Den Soßenfänger
niemals als Unterlage zum Braten verwenden.
Dies würde Rauchentwicklung und Fettspritzer und damit eine schnelle Verschmutzung des Ofens verursachen.
Das Pizza-Set ist ideal zum
Pizzabacken. Das Set muss
zusammen
mit
dem
Backprogramm
Gitter mit Aufnahme
Das Gitter mit Aufnahme für die Fettpfanne ist ideal
zum Grillen. Verwenden Sie es hierzu in Kombination
mit der Fettpfanne. Ein Griff ist mit dem Gitter mitgeliefert,
damit beide Zubehörteile sicher ein- und ausgezogen
werden können. Lassen Sie bitte den Griff nicht im
Backofen, wenn dieser im Betrieb ist.
EINIGE NÜTZLICHE HINWEISE
KIPPGESICHERTE GITTERROSTE
Ihr Backofen ist mit besonders geformten
Gleitschienen ausgestattet. Die Gitterroste
können fast vollständig aus dem Back
ofen herausgezogen werden, ohne daß
sie nach unten kippen.
Dank der speziellen Gleitschienen bleiben
die Roste sicher in der Waagerechten, und
Sie können die Speisen umrühren oder deren Garpunkt
feststellen. Um die Gitterroste ganz herauszunehmen, müssen
diese leicht angehoben und an der Vorderseite herausgezogen
werden, wie in der nebenstehenden Abbildung dargestellt.
GRILLEN
Zum Grillen empfehlen wir, das Grillgut je nach Größe auf den 3.
Oder 4. Gitterrost von unten zu schieben (s. Abb. 2 Seite 40).
Fast alle Fleischsorten eignen sich zum Grillen, mit Ausnahme
von sehr magerem Wild. Vor dem Grillen sollte das Grillgut ein
wenig mit Öl oder Fett bestrichen werden.
Modelle
Die Modelle
verfügen über ein patentiertes System
zur elektronischen Steuerung des Umluftventilators, das so
genannte VARIOFAN. Während des Backens wählt das System
automatisch die geeignete Geschwindigkeit für den Ventilator (im
Multifunktionsbetrieb), um die Umwälzung der Umluft und somit
die Temperatur im Garraum zu optimieren.
Alle
Modelle verfügen über die Funktion
Softcook
. Diese ermöglicht ein optimales
Verhältnis zwischen Temperatur und Feuchtigkeit. Der
Feuchtigkeitsverlust wird um 50% reduziert, so dass die Speisen
zarter und saftiger gelingen. Diese sanfte Art zu garen ist besonders
empfehlenswert zum Backen von Brot, Kuchen und Gebäck.
Dank dieser Funktion wird die Dauer des Vorheizens r
eduziert: der Backofen erreicht in nur 8 Minuten 200°C.
Diese Eigenschaft ermöglicht es, den Leistungsgrad und
die Intensität des Grills zu wählen, wobei bis zu 50%
mehr Leistung im Vergleich zu herkömmlichen
Multifunktionsbacköfen erreicht werden kann.
Einige Backöfen sind mit der neuen Tür WIDE DOOR ausgestattet,
welche ein größeres Sichtfenster besitzt und somit eine leichtere
Wartung und bessere Wärmeisolierung gewährleistet.
Beleuchtungssystem
- je nach Modell
Das ist ein Beleuchtungssystem, das die traditionelle Glühbirne
ersetzt. 14 LED-Leuchten sind in der Backofentür integriert. Das
erzeugte Licht ist sehr hell und ermöglicht eine fast schattenfreie
Sicht auf allen Ebenen im Backofeninneren.
Die Vorteile:
neben der herausragenden Qualität und Intensität der Beleuchtung,
bietet das System
auch eine längere Lebensdauer im
Vergleich zu herkömmlichen Backofenlampen, ist außerdem leicht
zu reinigen und vor allem sehr sparsam im Energieverbrauch.
- optimale Übersicht auf allen Backofenebenen
- zuverlässige Funktion und lange Lebensdauer
- hohe Helligkeit bei sehr niedriger
Energieverbrauch, bis zu 95% weniger als
herkömmliche Backofenbeleuchtung
- leicht zu reinigen
“ Das Gerät ist ausgestattet mit weißem LED-Licht der Klasse 1M gemäß IEC
60825-1:1993 + A1:1997 + A2:2001 (entspricht EN 60825-1: 1994 + A1:2002 +
A2:2001): max. optische Ausgangsleistung 459nm < 150µW. Nicht mit optischen
Instrumenten direkt anschauen."
GARZEITEN
KATALYTISCHES SELBSTREINIGUNGSSET
Der Reinigungsset ist als Zubehör für alle Backöfen erhältlich.
Dank der selbstreinigenden Einsätze für die Innenwände des
Backofens wird das mühselige Reinigen von Hand überflüssig.
Die Fett-, Öl-, Fleischsaft- und Soßenspritzer im Backraum werden
durch ein katalytisches Verfahren während des Backens zersetzt
und in gasförmige Verbindungen umgewandelt. Die MikroporenBeschichtung der Einsätze kann durch größere Fettspritzer verstopft
und die selbstreinigende Wirkung dadurch vermindert werden.
Dies läßt sich jedoch sehr einfach beheben, indem der leere
Backofen auf höchste Hitze eingestellt und ca. 10 bis 20 Minuten
lang aufgeheizt wird. Benutzen Sie keine scheuernden oder
ätzenden Mittel, auch keine Stahlwolle, Schaber oder spitzen
Gegenstände. Chemische Reinigungsmittel können die Poren
des Emailüberzugs verstopfen und so die Reinigungswirkung
verhindern. Zum Braten von besonders großen bzw. fetthaltigen
Bratenstücken ist es ratsam, einen hohen Bräter zu benutzen.
Beim Grillen empfiehlt es sich, die Fettpfanne zum Auffangen der
Bratflüssigkeit zu benutzen.Entfernen Sie eventuelle Überlaufreste
oder Fettrückstände mit einem feuchten Lappen oder Schwamm.
Die Emailbeschichtung muß immer porös bleiben, damit die
Reinigungswirkung optimal gewährleistet ist.
HINWEIS: Alle handelsüblichen Selbstreinigungssysteme haben
eine begrenzte Leistungsdauer. Nach ca. 300 Betriebsstunden
des Backofens sollte Ihr Reinigungsset ausgetauscht werden.
REINIGUNG UND WARTUNG
DICHTUNG DER OFENTÜR
Wenn es notwendig ist, sie zu reinigen, benutzen Sie dabei einen
feuchten Schwamm, den Sie vorher in heiße Seifenlösung
eingetaucht haben. Spülen Sie die Dichtungen mit klarem Wasser
und trocknen Sie sie. Der Grillrost ist vorrangig zum Ablegen von
Grillstücken vorgesehen. Benutzen Sie niemals Dampf- oder
H oc hd ruc kv orr ich tun ge n z um R ein ige n d es Of en s!
Reinigen Sie alle emaillierten Oberflächen oder Teile aus Edelstahl
mit einfachem Seifenwasser oder mit den handelsüblichen
Reinigungsmitteln. Vermeiden Sie unbedingt den Gebrauch von
scheuernden Reinigungsmitteln in Pulverform, da diese die Emaille
des Backofens und die äußeren Zierteile beschädigen können.
Der Backofen sollte nach jedem Gebrauch sorgfältig gereinigt
werden, da die Fettpartikeln, die beim Backen und Braten sich
auf den Innenwänden abgesetzt haben, unangenehme Gerüche
hervorrufen und somit das Backergebnis beeinträchtigen können.
Zur Reinigung benutzen Sie bitte warmes Wasser und einen
milden Reiniger.
Für alle unseren Backöfen ist ein besonderes Reinigungsset als
Zubehör erhältlich, der Ihnen das mühselige Reinigen von Hand
erspart. Es besteht aus selbstreinigende Einsätzen, die mit einer
speziellen Emaille beschichtet sind und an den Innenwänden des
Backofens befestigt werden. Siehe hierzu den Absatz “Katalytisches
Selbstreinigungsset” Für die Gitterroste benutzen Sie ein
h a n d e ls ü b li c he s R e i n ig u n g s m it te l u nd S t a h lw o l le .
Die Oberflächen aus Spiegelglas dürfen erst dann gereinigt werden,
wenn sie vollständig abgekühlt sind. Eventuelle Schäden, die auf
die Mißachtung dieser grundsätzlichen Regel zurückzuführen
sind, fallen nicht unter die Garantie.
Zum Austauschen der Innenlampe ist der Backofen von der
Stromversorgung zu trennen. Schrauben Sie die Glasschutzhülle
der Lampe ab und ersetzen Sie die Birne mit einer ähnlichen
Typs, die ebenfalls hitzebeständig ist.
TECHNISCHER KUNDENDIENST
Sollte Ihr Backofen einmal nicht richtig funktionieren, prüfen
Sie zuerst, ob die Stromversorgung gewährleistet ist. Ist die
Uhrsache der Fehlfunktion nicht ausfindig zu machen, wenden
Sie sich bitte an Ihren zuständigen Werkskundendienst unter
Angabe des Modells und der Seriennummer, die auf dem
Typenschild angegeben sind (s. Abb. 4 letzten Seite). Auf Ihr Gerät
gewähren wir eine Garantie von 24 Monaten ab Kaufdatum.
Bewahren Sie Ihre Kaufrechnung sorgfältig auf und legen Sie sie
bei Bedarf als Garantienachweis dem Kundendienst vor. Die
Garantiebedingungen sind im beigefügten Serviceheft angegeben.
Auf Seite 40 bis 41 finden Sie eine Tabelle, in der Richtzeiten und
Temperaturen zum Braten und Backen verschiedener Speisen
angegeben sind. Durch Ihre persönliche Erfahrung werden Sie
diese Angaben entsprechend Ihrem Geschmack und Ihren
Gewohnheiten anpassen können.
35 DE
MINUTENZÄHLER
Um den Minutenzähler einzustellen,
drehen Sie den Knopf einmal im
U h rze ig e rs inn um e in e g an ze
Umdrehung bis zum Anschlag und
stellen Sie diesen dann zurück auf die
gewünschte Zeit. Wenn die Zeit
abgelaufen ist, ertönt einige Sekunden
lang ein akustisches Signal.
Backzeit
eingestellt.
BENUTZUNG DES TIMERS FÜR
BACKZEITENDE
Diese Funktion ermöglicht es, die
benötigte Garzeit einzustellen (maximal
120 Minuten). Ist die eingestellte Garzeit
abgelaufen, schaltet sich der Backofen
automatisch ab. Der Timer zählt die Zeit
rückwärts, geht auf O zurück und
schaltet den Backofen automatisch aus.
Der Ofen setzt sich erst in Betrieb, wenn
die Backzeit eingestellt ist, oder wenn
der TIMER auf manuelle Funktion
eingestellt ist .
Um die Uhrzeit einzustellen, drücken Sie den Drehknopf und drehen Sie ihn nach links, bis die
richtige Uhrzeit erscheint. Um die Uhr als Minutenzähler zu benutzen, stellen Sie die gewünschte
Zeit durch Drehen des Drehknopfs (ohne zu drücken) gegen den Uhrzeigersinn, bis die Minutenzahl
(max. 180 Minuten) im Fensterchen erscheint. Ist die Zeit abgelaufen, ertönt das akustische Signal,
und der Backofen muss ausgeschaltet werden. Um das akustische Signal auszuschalten, drehen
Sie den Drehknopf auf
GEBRAUCH DES ELEKTRONISCHEN PROGRAMMIERERS
FUNKTION
MANUELLER
BETRIEB
EINSCHALTEN
• Den Knopf drücken und •
gedrückt halten.
• Die Knöpfe
drücken,
um die erforderliche
Backzeit einzustellen.
• Alle Knöpfe loslassen.
AUSSCHALTEN
FUNKTION
NÜTZLICH FÜR
Wenn die eingestellte • Aktiviert einen Alarm am • Es ermöglicht Ihnen, das
Backzeit abgelaufen ist, Ende der eingestellten Signal als Erinnerungswird ein akustisches Signal Backzeit.
funktion zu benutzen (auch
aktiviert (dieser Alarm hört • Um die Restzeit zu
wenn den Ofen nicht zum
von alleine auf, er kann
erfahren,
drücken
Sie
den
Backen verwendet wird)
jedoch sofort ausgeschaltet
Knopf
.
werden, wenn man auf
drückt).
• Drücken Sie den Knopf . • Drehen Sie den
• Wählen Sie die Backfunk- Kontrollknebel für die
tion mit dem entsprechenden Kontrollknebel für die Backfunktio n bis zur
gewünschten Position O.
Backofenfunktion.
Wenn
die eingestellte Zeit
• Den Knopf TIMER drücken
und gedrückt halten. abgelaufen ist, schaltet sich
• Die Knöpfe
drücken, der Ofen automatisch ab.
um d ie erforde rliche Wenn Sie den Backvorgang
Backzeit einzustellen. vorzeitig ab- bzw. unterbreBACKDAUER
• Alle Knöpfe loslassen. chen möchten, drehen Sie
• Stellen Sie die Backfunk- den Knebel zum Auswählen
tion mit dem entsprechen- der Ofenfunktion bis zur
den Kontrollknebel für die Position O oder stellen Sie
Backfunktion.
die programmierte Zeit auf
0.00 (Knöpfe TIMER und
.
• Den Knopf END drücken • Zum eingestellten Zeitund gedrückt halten. punkt wird der Ofen sich
• Die Knöpfe
drücken, automatisch abschalten.
um den Zeitpunkt zu • We nn Si e de n O f en
wählen, wenn Sie möchBACKZEITENDE ten, dass der Ofen sich m a n ue ll au s sc h a lte n
möchten, drehen Sie den
abschaltet.
Knebel zur Einstellung der
• Knöpfe loslassen.
• Wählen Sie die Backfunk- Ofenfunktion auf Position
tion mit dem entspre- O.
chenden Kontrollknebel für
die Backofenfunktion.
MANUELLE
FUKTIONSEINSTELLUNG
• Es ermöglicht den
Gebrauch des Ofens.
• Zum Zubereiten der
gewünschten Rezepte.
• Es ermöglicht Ihnen, • Bei Erreichen der
die für das gewählte eingestellten Backzeit
R ezep t erfo rderliche
Backzeit vorzuprogram- schaltet sich der Ofen
mieren.
automatisch ab und ein
• U m d ie R estz eit zu akustisches Signal ertönt.
erfahren, drücken Sie den
Knopf TIMER.
• Um die eingestellte Zeit
zu ändern, drücken Sie
den Knopf TIMER und
nehmen Sie die neue
Einstellung durch Betätigung der Knöpfe
vor.
• Es ermöglicht die Einstel- • D ies e Fu nk tion w ird
lung der Backendzeit. zusammen mit der Back• Um die voreingestellte Zeit dauer benutzt. Z.B. soll
zu überprüfen, drücken Sie Ihre Speise 45 Minuten
den Knopf END.
backen und um 12:30
• Um die voreingestellte Zeit fertig sein. Wählen Sie
zu ändern, drücken Sie den zuerst die Backfunktion,
Knopf END und die Knöpfe dann Backzeitdauer 45
gleichzeitig.
Minuten einstellen, dann
Backzeitende 12:30
eingeben. Der Backofen
startet automatisch um
11:45 (12:30 minus 45
EINSTELLUNG DER RICHTIGEN UHRZEIT
Min.) und schaltet sich
HINWEIS: Das erste, was nach der Installation des Ofens oder nach dann zu der eingestellten
der Unterbrechung der Stromversorgung (die am blinkenden Display Zeit ab.
mir der Anzeige
zu erkennen ist) gemacht werden muss, ist die ACHTUNG:
Einstellung der korrekten Uhrzeit.
Wenn nur die BackendDazu müssen Sie wie folgt vorgehen:
zeit, nicht jedoch die
• Die Knöpfe TIMER + END drücken und gedrückt halten. ( + TIMER bei
D aue r d er Ba ckze it
einigen Modellen)
eingestellt worden ist,
• Die Zeit mit den Knöpfen und
einstellen.
setzt sich der Ofen sofort
• Alle Knöpfe loslassen.
in Betrieb und schaltet
ACHTUNG: Der Ofen arbeitet nur, wenn er auf manuelle Funktion eingestellt ist oder eine
sich bei Erreichen der
bestimmte Backzeit programmiert worden ist.
eingestellten BackendHINWEIS: Bei einigen Modellen stehen anstelle der Symbole
die Zeichen + und - .
zeit ab.
36 DE
GEBRAUCH DER ANALOGEN UHR/ PROGRAMMIERER
(F)
(E)
EINSTELLUNG DER RICHTIGEN UHRZEIT
Um die Uhr einzustellen, drücken Sie den Drehknopf und
drehen Sie ihn gegen den Uhrzeigersinn, bis die aktuelle
Uhrzeit erscheint, danach Knopf loslassen.
FUNKTION
MANUELLE
FUNKTIONSEINSTELLUNG
BACKDAUER
EINSCHALTEN
ACHTUNG: Der Ofen arbeitet nur, wenn er auf manuelle
Funktion eingestellt
oder eine bestimmte Backzeit
programmiert worden ist.
AUSSCHALTEN
FUNKTION
• Drehen Sie den Drehknopf • Bringen Sie den
• Es ermöglicht den
(ohne zu drücken) gegen Kontrollknebel zur Auswahl Gebrauch des Ofens.
den Uhrzeigersinn, bis das Backofenfunktion auf
Symbol
im Fenster (E) Position O.
erscheint.
NÜTZLICH FÜR
• Zum Zubereiten der
gewünschten Rezepte
• Wählen Sie zunächst die • Nach Ablauf der
• Es ermöglicht Ihnen, • Bei Erreichen der
Backfunktion und die erfor- e i n g e s t e l l t e n D a u e r die für die Zubereitung des eingestellten Backzeit
derliche Temperatur aus. schaltet sich der Backofen gewünschten Gerichts schaltet sich der Ofen
• Stellen Sie die
automatisch ab, und ein erforderliche Backzeit automatisch ab und ein
Backzeitdauer ein durch Signalton ertönt.
vo rzup rogra mm iere n. akustisches Signal ertönt.
Drehen des K nopfes • Um die gewählte
gegen den Uhrzeigersinn, Backfunktion manuell
bis die gewählte Zeit im abzuschalten, drehen Sie
Fensterchen (E) erscheint. den Drehknopf, bis das
• Der Ofen wird sich sofort
in Betrieb setzen und sich Symbol mit der Anzeige
am Ende der voreingestell- im Fensterchen
ten Zeit autom atisch übereinstimmt.
abschalten. (Max. 180
Minuten / 3 Stunden).
• Zu der eingestellten Uhrzeit
• Bevor Sie die Zeit
einstellen, wählen Sie die schaltet sich die gewählte
gewünschte Temperatur Funktion automatisch ab,
u n d B a ck b e tri e bs a rt was durch einen Signalton
• Gewünschte Startzeit angezeigt wird.
einstellen: Ziehen Sie den • Um die Funktion vorher
Drehknopf und drehen Sie abzuschalten, drehen Sie
ihn gegen den Uhrzeiger- den Drehknopf gegen den
sinn, bis der Zeiger (F) mit Uhrzeigersinn, bis das
mit der Anzeige
der gewünschten Koch- Symbol
BACKZEITENDE startzeit übereinstimmt. im Fensterchen (E)
Beim Modell 2D 364 • Gewünschte Kochzeit- übereinstimmt.
nicht verfügbar.
dauer einstellen: Drehen • D e r S i g n a l to n m u s s
Sie, ohne zu drücken, den m anu ell ab gesc haltet
Drehknopf im Uhrzeiger- werden. Drehen Sie hierzu
sinn, bis die gewünschte den Drehknopf, bis das
mit der Anzeige
Zeitdauer mit der Anzeige Symbol
im F en s t e rc h e n (E ) im Fensterchen (E)
übereinstimmt.
übereinstimmt.
37 DE
• Diese Funktion ermöglicht
es Ihnen, die Kochzeit so
zu programmieren, dass
Ihre Speise zum gewünschten Zeitpunkt fertig ist.
• Beispiel: Ihre Speise
muss 45 Minuten garen.
Sie möchten, dass sie
um 12:30 fertig ist. In
diesem Fall müssen Sie:
- die gewünschte Backbetriebsart einstellen
- die Kochstartzeit auf
11:4 5 U hr e inste lle n
(d.h. 12:30 minus 45
Minuten)
- die Kochdauer auf 45
Minuten einstellen
Am Ende der Garzeit
schaltet sich der Backofen
automatisch ab.
BEDIENUNG DER ELEKTRONISCHEN PROGRAMMIEREINHEIT (Type A)
1
Anzeige
Minutenzähler bzw.
Anzeige AUTO
Anzeige für
6
Temperatur bzw.
Uhrzeit
8
/
Wahlschalter für Betriebsarten
*
7 Einstelltasten
Wahlschalter
9
Funktionen und Backzeit
Anzeigen:
2
WICHTIG!
Umluft mit Ventilator
Umluft mit VARIOFAN
Abtauen
3
4
5
1. Anzeige Minutenzähler bzw.
Anzeige AUTO (automatischer Betrieb)
2. Anzeigen
3. Umluft mit Ventilator
4. Umluft mit VARIOFAN
5. Abtauen
6. Anzeige für Temperatur bzw. Uhrzeit
7. Einstelltasten
8. Wahlschalter für Betriebsarten
9. Wahlschalter Funktionen und
Backzeit
* je nach modell
Nach der Installation des Gerätes und nach einem eventuellen Stromausfall (erkennbar durch die blinkende
Anzeige 12:00 im Display) muss zuerst die aktuelle Uhrzeit eingestellt werden.
Die LED-Leuchte “ ° “ der Temperaturanzeige blinkt im Display, bis die eingestellte Temperatur erreicht worden ist.
Wenn der Backofen nach dem Ende eines Backprogramms noch heiß ist, erscheint im Display die Aufschrift HOT abwechselnd
zu der Uhrzeit, selbst wenn die beiden Wahlschalter auf OFF eingestellt sind.
FUNKTION
Signal aus
Uhrzeit
ZUM AKTIVIEREN
ZUM AUSSCHALTEN
AUSWIRKUNG
DIENT ZU:
• Drehen Sie linken den • Drehen Sie den
Wahlschalter der
Wahlschalter der
Funktionen auf „Signal aus“ Funktionen au OFF
• Schaltet den Signalton • Zum Ausschalten des
des Minutenzählers aus Signaltons des
Minutenzählers
• Drehen Sie den linken • Drehen Sie den
Wahlschalter für die das Wahlschalter der
Symbol „Zeitvorwahl“ Funktionen au OFF
• Drücken Sie die
Einstelltasten “+“ bzw. “-“
um die Zeit einzustellen
• Stellt die im Display • Zum Einstellen der Uhrzeit
angezeigte Uhrzeit
HINWEIS:
Die Uhrzeit muss nach der
Erstinstallation und nach
einem Stromausfall
(Anzeige 12:00 blinkt)
eingestellt werden
dauer des
backvorgangs
• Drehen Sie den rechten
Wahlschalter auf die
gewünschte Betriebsart
• Drehen Sie den linken
Wahlschalter auf das
S ym b ol „ Ba ck da u er“
• Stellen Sie die Dauer
du rch B etätigen der
Tasten “+“ bzw. “-“ ein
• Die Anzeige „AUTO“
(automatischer Betrieb)
leuchtet auf
• I s t d i e B a c k d a u e r • Ermöglicht die
• Zum Backen mit
abgelaufen, schaltet sich Voreinstellung der
festgelegter Backdauer
der Backofen automatisch Backdauer für das
aus und der Summer ertönt ausgewählte Rezept.
einige Sekunden lang. Um • Nach erfolgter Einstellung
d en B a c ko fe n vo rh e r drehen sie den
auszuschalten, drehen Sie Funktionsschalter auf OFF
den linken Schalter auf OFF um zur aktuellen Uhrzeit
oder stellen Sie die Zeit auf • zurückzukehren.
U m di e e in ge s te llte
00.00 durch Drehen des Backzeit anzuzeigen,
Schalters auf das Symbol drehen Sie den linken
„Backdauer“ und durch Funktionsschalter auf das
Betätigen der Einstelltaste “-“ S y m b o l B a c k d a u e r
Backzeitende
• Drehen Sie den rechten • Wenn die Backzeit zu • Ermöglicht die Einstellung • Diese Funktion dient zur
Wahlschalter auf die Ende ist, schaltet sich der des Backzeitendes nach Programmierung einer
gewünschte Betriebsart Backofen automatisch aus Wunsch
Startzeitvorwahl. Wenn Ihr
und der Summer ertönt • Nach erfolgter Einstellung Rezept z.B. 45 Min
• Drehen Sie den linken
einige Sekunden lang. Um drehen sie den
gebacken werden soll und
Wahlschalter auf das
den Backofen vorher Funktionsschalter auf OFF um 12:30 Uhr fertig sein
Symbol „Backzeitende“
• Stellen Sie die Zeit durch auszuschalten, drehen Sie um zur aktuellen Uhrzeit soll, stellen Sie einfach die
den linken Schalter auf zurückzukehren.
Backdauer auf 45 Min und
Betätigen der Tasten “+“
OF
• U m d ie ei n g es t e llt e das Backzeitende auf
bzw. “-“ ein
Backzeit anzuzeigen, 12:30 Uhr. Der Backofen
• Die Anzeige „AUTO“
drehen Sie den linken wird um 11:45 Uhr
(automatischer Betrieb)
Funktionsschalter auf das automatisch starten und
leuchtet auf
Sym bol Backzeitende sich nach 45 Minuten
automatisch ausschalten.
• Drehen Sie den linken • Stellen Sie die Zeit auf • Es ertönt ein kurzer • Ermöglicht die Nutzung
Wahlschalter auf das 00.00 durch Drehen des Signalton am Ende der des Timers als
Minutenzähler Symbol Minutenzähler Schalters auf das Symbol eingestellten Zeit
Minutenzähler selbst wenn
der Backofen
• Stellen Sie die Zeit durch „ Minutenzähler“ und durch
Betätigen der Einstelltaste
ausgeschaltet ist
Betätigen der Tasten “+“
“-“
bzw. “-“ ein
• Drehen Sie den linken • Drehen Sie den linken
• Der Backkofen kann nicht • Nützlich vor allem wenn
Wahlschalter auf das Wahlschalter auf das
eingesch altet werden Kinder im Haus sind
Kindersicherung Symbol Kindersicherung Symbol Kindersicherung
• Drücken Sie die Taste “+“ und drehen Sie die Taste
3 Sekunden lang.
“+“ 3 Sekunden lang
• Die Kindersicherung ist • Die Anzeige STOP im
aktiv, wenn im Display die Display erlischt
Aufschrift „STOP“ erscheint
32
38DE
DE
BEDIENUNGSANLEITUNG
Voreingestellte
Temperatur
Kontrollknebel und Regelung ThermostatModell mit
Backfunktion
knebel
Elektronischen
zeitschaltuhr
(Type A)
Funktion
Damit wird die Innenbeleuchtung eingeschaltet.
Damit wird das Kühlgebläse aktiviert (nur bei Backöfen mit Kühlungssystem)
Auftauen
In die se r Eins tel lung erfo lgt ein e L uftz irku lati on bei Raumtempe ratur zum
A uf t au e n v on Ti e fk ü h lk o s t in we n i g en Mi n u te n , o h n e e i n e Ve rä n d e ru n g
des Proteingehalts herbeizuführen.
MAX
MAX
Ober-/Unterhitze
Es sind die obere und die untere Heizung eingeschaltet. Es ist die traditionelle
Art zu garen, ausgezeichnet geeignet zum Braten von Keulen, Wildbret, ideal
für Plätzchen und Kekse, und für alle Speisen, die knusprig werden sollen.
220
Umluft
Die zwischen 50°C und 240°C heiße Luft wird gleichmäßig in den Backofen
verteilt. Ideal für das gleichzeitige Braten von verschiedenen Arten von Speisen
(Fleisch, Fisch), ohne dabei eine Vermis chung von Geschmack und Geruch
zu verursachen. Geeignet auch für schonendes Backen, z.B. für Blätterteig,
Biskuitteig o.Ä.
200
200
160
Libelle 4
Libelle 4
190
Libelle 4
220
Sprinter - Diese Einstellung beschleunigt das Vorheizen des Backofens. Wenn die Funktion
eingestellt ist, wird der Backofen sofort aufgeheizt (er braucht z.B. 8 Minuten bis 200°C). Die
gewünschte Temperatur kann mit dem Temperaturwahlschalter eingestellt werden. Das Ende
der Vorheizphase wird durch das Erlöschen der Thermostatleuchte "°C" angezeigt. Nach Ende
der Vorheizphase kann die gewünschte Backfunktion gewählt und die Speise in den Backofen
gegeben werden. Vermeiden Sie es, die Speise bereits während der Aufheizphase in den
Backofen zu geben, da sonst das Gericht nicht gelingen würde.
-
Soft Cook
Soft Cook ist die ideale Funktion für Backwaren und Brot. Dank der reduzierten Geschwindigkeit
des Ventilators wird die Feuchtigkeit im Backraum erhöht. Das bietet optimale Backverhältnisse
für alle Speisen, die beim Garen eine geschmeidige Konsistenz bewahren sollen und nicht
zerbröseln dürfen (wie z.B. Kuchen, Brot, Gebäck).
Umluft mit Unterhitze (a): Erfolgt unter Verwendung des unteren Heizelementes sowie des
Gebläses, das die heiße Luft im Ofen umwälzt. Diese Funktion eignet sich insbesondere für
Kuchen mit saftigen Früchten, Gebäck, Quiches und Pasteten. Sie verhindert das Austrocknen
der Lebensmittel und fördert das "Aufgehen" des Teigs, der Kuchen, des Brotes und jeder
Speise, die mit Unterhitze gebacken werden soll. Bei dieser Betriebsart schieben Sie die Ablage
in die untere Ebene ein und wärmen Sie den Ofen 10 Minuten lang vor.
Grill: Wenn Sie den Grill benutzen, muss die Ofentür geschlossen sein. Es wird nur das obere
Heizelement verwendet. 5 Minuten Vorwärmezeit sind notwendig, bis das Heizelement zu
glühen anfängt. Diese Betriebsart garantiert ausgezei chnete Ergebnisse beim Grillen von
Fleisch oder Fisch, Spießchen; auch zum Gratinieren wird sie vorzugsweise verwendet. Weißes
Fleisch sollte nicht allzu nahe am Grillelement gelegt werden, dadurch verlängert sich zwar
die Grillzeit, das gereicht jedoch dem Geschmack der Gerichte zum Vorteil. Rotes Fleisch und
Fischfilets können auf den Grillrost gelegt werden, mit der Auffangschale darunter.
Der Ofen hat zwei Positie Grill:
Grill 2200 W
Super Grill : 3000 W
Turbogrill (a): Wenn Sie den Turbogrill benutzen, muss die Ofentür geschlossen sein. Erfolgt
unter Verwendung des oberen Heizelementes sowie des Gebläses, das die heiße Luft im
Ofen umwälzt. Vorheizen ist bei rotem, nicht jedoch bei weißem Fleisch erforderlich. Diese
Betriebsart empfiehlt sich für das Grillen von ganzen Fleischstücken, beispielsweise
Schweinebraten, Geflügel usw. Legen Sie das Grillgut direkt auf den Rost in der Mitte des
Ofens auf mittlerer Höhe und schieben Sie die Fettauffangschale darunter ein. Achten Sie
darauf, dass sich das Grillgut nicht zu dicht am Grillelement befindet, und drehen Sie es nach
Ablauf der Hälfte der Grillzeit.
Grill mit Drehspieß
Einschaltung der Grillheizung und des Bratspießmotors.
Dient zum Braten am Spieß.
Pizza backen
Die umfassende Hitze dieser Funktion reproduziert im Backofen ähnliche
Bedingungen wie im Holzofen einer Pizzeria
(a) Je nach Modell : Funktion mit Vario Fan. Vario Fan ist das exklusive, von Candy entwickelte Backsystem, das die Backergebnisse, die Temperatur
und die Feuchtigkeit im Backofen optimiert. Das System Vario Fan verändert automatisch die Drehgeschwindigkeit des Ventilators bei allen MultifunktionsBackprogrammen. Das System wird automatisch aktiviert, sobald eine Funktion aus dem gestrichelten Bereich des Schaltbretts gewählt wird.
* Prüfprogramm gemäß CENELEC EN 50304
** Prüfprogramm gemäß CENELEC EN 50304 zur Feststellung der Energieeffzienzklasse
39 DE
GARZEITEN
Die in dieser Tabelle angegebenen Garzeiten dienen als Richtwerte. Diese können je nach Qualität, Frische und Größe der zuzubereitenden
Speisen sowie nach Ihrem persönlichen Geschmack variieren.
EIN RATSCHLAG:
Schalten Sie den Backofen etwa 10 Minuten vor der angegebenen
Zeit aus und lassen Sie die Speisen bei ausgeschaltetem Ofen
weiter garen. So sparen Sie nicht nur Strom, sondern Sie können
den Garpunkt nach Ihrem Geschmack bestimmen.
KONVENTIONELLER BACKOFEN
Speise
Menge
Gltterrost
Garzeit
Min.
Lasagne
Kg 3,5
2
70 - 75
220
Cannelloni
Kg 1,8
2
50 - 60
Nudelauflauf
Kg 2,5
2
Brot
Kg 1
Pizza
Stellung der Schienen
MULTIFUNKTIONSBACKOFEN
Tempera- Glttertur °C
rost
Garzeit
Min.
Temperatur °C
Anmerkungen
2
60 - 65
200
Kein Vorheizen
220
2
40 - 50
200
Kein Vorheizen
55 - 60
220
2
45 - 50
200
Kein Vorheizen
2
35 + 10
vorheizen
200
2
30 - 35
10 vorheizen
180
Schneiden Sie ein Kreuz in den zum Laib
geformten Teig. Mindestens 2 Stunden
gehen lassen. Teig in die Mitte des gut
gefetteten Backblechs legen
Kg 1
1
25 - 35
190
1
20 - 25
190
Backofen 15 Min. vorheizen
24 Stk
1
30 - 35
220
2
25 - 30
200
Rührteig
(Marmorkuchen)
1
55
180
1
50
160
Form mit 22 cm Ø: 10 Minuten vorheizen
Mürbeteig
(Obstkuchen)
1
40
200
2
30-35
180
Form mit 22 cm Ø: 10 Minuten vorheizen
• Nudeln
• Teigwaren
Blätterteig
• Fleisch
Fleisch können Sie sowohl in hohen Brätern als auch in niedrigen Bratpfannen
braten. Niedrige Bräter sollten abgedeckt werden, damit keine Soßen- und Fettspritzer den Backofeninnenraum übermäßig verschmutzen.
So bleibt das Fleisch außerdem saftig und zart. Ohne Deckel ist das Fleisch dagegen kroß und knusprig. Die angegebene Zeiten gelten
fürs Braten mit oder ohne Deckel.
Roastbeef
Kg 1
3
70 - 80
220
3
50 - 60
200
Fleisch in einem hohen Bräter braten.
Einmal wenden.
Schweinebraten
Kg 1
2
100 - 110
220
2
80 - 90
200
Bratform abdecken.
Kalbsrollbraten
Kg 1,3
1
90 - 110
220
2
90 - 100
200
s. oben
Kg 1
2
80 - 90
220
2
80 - 90
200
s. oben
Kg 1
2
40 - 45
220
2
35 - 40
200
Abgedeckt backen.
700 gr.
2,5 cm dick
2
30 - 35
220
2
30 - 25
200
Nicht abdecken.
Schollenfilet
Kg 1
2
40 - 45
220
2
35 - 40
200
Goldbrasse
2 Stk.
2
40 - 45
220
2
35 - 40
200
Rinderbraten
• Fisch
Forelle
Lachsfilet
40 DE
Abgedeckt backen.
GARZEITTABELLE
KONVENTIONELLER BACKOFEN
Speise
Menge
Gltterrost
Garzeit
Min.
Ente/Gans
1,3 Kg.
2
60 - 80
220
Huhn
1,5 Kg.
2
110 - 120
220
MULTIFUNKTIONSBACKOFEN
Tempera- Glttertur °C
rost
Garzeit
Min.
Temperatur °C
2
60 - 70
200
2
100 - 110
200
Anmerkungen
• Geflügel
• Grillen
Legen Sie das Grillgut unter den Infrarotgrill. Achtung: die Grillheizung wird glühend rot. Zum Auffangen von Fett und Bratensaft schieben
Sie die Fettpfanne unter das Grillgut.
Toastbrot
4 Sch
4
5
5 vorheizen
grill
4
5
10 vorheizen
grill
Bratwurst
5 St.
4
25 - 30
5 vorheizen
grill
4
15 - 20
10 vorheizen
grill
Kotelett
4 St.
4
25
5 vorheizen
grill
4
15 - 20
10 vorheizen
grill
Toastbrot auf den Rost legen. Von beiden
Seiten grillen. Vor dem Servieren auf dem
Backofenboden warmhalten.
Beim Grillen ab und zu wenden.
Dieses Elektrohaushaltsgerät ist entsprechend
der EU-Richtlinie 2002/96/CE über Elektro- und
Elektronik-Altgeräte (WEEE) gekennzeichnet.
Bitte sorgen Sie dafür, dass das Gerät
ordnungsgemäß entsorgt wird, damit mögliche
negative Auswirkungen auf Umwelt und
Gesundheit vermieden werden, die bei einer
unsachgemäßen Entsorgung des Altgerätes
entstehen könnten.
Das Symbol auf dem Produkt bedeutet, dass dieses Gerät nicht
in den normalen Hausmüll gehört, sondern den jeweiligen
kommunalen Rücknahmesystemen für Elektro- und ElektronikAltgeräte übergeben werden muss. Die Entsorgung muss im
Einklang mit den geltenden Umweltrichtlinien für die
Abfallentsorgung erfolgen.
Für nähere Informationen über Entsorgung und Recycling dieses
Produktes wenden Sie sich bitte an Ihre kommunalen
Einrichtungen (Umweltamt) oder an die
Abfallentsorgungsgesellschaft Ihrer Stadt bzw. an Ihren Händler.
41 DE
INSTRUCCIONES GENERALES
Le agradecemos que haya elegido uno de nuestros productos. Para obtener de este electrodoméstico las mejores prestaciones
aconsejamos:
• Leer atentamente las advertencias contenidas en el presente manual.
• Conservar con cuidado este manual para cualquier consulta posterior.
Cuando el aparato està en funcionamento todos sus elementos assessibles, estan calientes. Por ello, tenga cuidado de no tocar estos
elementos.
Durante la primera puesta en funcionamiento del horno puede producirse un humo de olor acre causado por el primer calentamiento
del pegamento de los paneles de aislamiento que envuelven el horno. Se trata de un fenómeno absolutamente normal y, en caso de
verificarse, es preciso esperar a la extinción del humo antes de introducir los alimentos.
Por su naturaleza el horno es un aparato que se calienta, de modo particular el cristal de la puerta. Es aconsejable pues impedir que
los niños puedan acercarse al horno cuando se encuentre en funcionamiento, especialmente cuando está en márcha el grill.
DECLARACIÓN DE CONFORMIDAD.
•
IMPORTANTE
Este aparato, en las partes destinadas a estar en contacto
con los alimentos cumple la Directiva CEE 89/109.
Aparato confrome a la Directiva Europea 73/23/CEE e
89/336/CEE , sustituida respectivamente de 2006/95/CE
y 2004/108/CE , y sucesivas modificaciones.
INFORMACIÓN SOBRE SEGURIDAD
Este aparato deberá destinarse únicamente al uso para el
cual ha sido especialmente concebido, es decir, para la cocción
de alimentos.
Cualquier otro uso (por ejemplo, calentamiento a temperatura
ambiente) debe considerarse impropio, y por lo tanto peligroso.
El fabricante declina toda responsabilidad por los posibles
daños causados por el uso impropio, erróneo e irracional del
aparato.
El uso de cualquier aparato eléctrico comporta la observación
de algunas reglas fundamentales. En particular:
— No tire del cable de alimentación para desenchufar el aparato.
— No toque el aparato con las manos o los pies húmedos o
mojados.
— No utilice el aparato si no lleva calzado.
— No deje que los niños o las personas incapacitadas usen el
aparato sin vigilancia.
— No utilice adaptadores, ladrones ni alargadores.
— En caso de avería o de mal funcionamiento del aparato,
apáguelo y no lo manipule.
En caso de deterioro del cable, sustitúyalo inmediatamente
con arreglo a las siguientes indicaciones:
— saque el cable de alimentación y sustitúyalo por uno (tipo
HO5RR-F, H05VV-F, H05V2V2-F) y adecuado a la potencia
del aparato.
— esta operación deberá realizarla un técnico especializado. El
hilo de tierra (amarillo-verde) debe ser obligatoriamente
10 mm más largo que los conductores de línea.
En caso de que el aparato precise ser reparado, diríjase
únicamente a un centro de asistencia técnica autorizado y
exija piezas de recambio originales.
No observar todo lo mencionado puede comprometer la
seguridad del aparato.
Este aparato no esta destinado a ser usado por niños, personas
discapacitadas o inexpertas en su uso a no ser que sean
vigiladas o instruidas sobre el uso del aparato por una persona
responsable de su seguridad.
Vigile a los niños de manera que se asegure que no juegan
con el aparato.
INSTALACIÓN
La instalación corre a cargo del comprador y el Fabricante queda
exento de este servicio; eventuales intervenciones requeridas a
la Casa Constructora que dependan de una instalación incorrenta
no están incluidas en la Garantia.
La instalación debe ser efectuada según las instrucciones por
personal profesionalmente cualificado. Una instalación errónea
puede causar daños a personas, animales o cosas, de los cuales
el fabricante no puede ser considerado responsable.
INTRODUCCIÓN DEL MUEBLE
Introduzca el aparato en el hueco del mueble (bajo encimera o
en columna). El horno se fija introduciendo 2 tornillos en los
agujeros del marco, visibles al abrir la puerta.
Con el objeto de permitir una mejor ventilación del mueble, empotre
el horno respetando las medidas y las distancias indicadas en la
última página.
Nota: Para los hornos que deban acoplarse a una encimera,
resulta indispensable respetar las instrucciones contenidas en el
manual adjunto al aparato a acoplar.
Para garantizar un correcto funcionamiento del aparato encastrable,
es necesario que el mueble tenga las características adecuadas.
Los paneles de los muebles adyacentes al horno deberán ser de
un material resistente al calor. En el caso de los muebles de
madera chapada, el encolado deberá resistir una temperatura de
120°C: los materiales plásticos o encolados que no resistan esta
temperatura pueden deformarse o despegarse.
De acuerdo con las normas de seguridad, una vez empotrado el
aparato no deben existir contactos con las piezas eléctricas. Todas
las piezas protectoras deben fijarse de manera que no puedan
sacarse sin la ayuda de un utensilio.
Para garantizar una buena ventilación debe eliminarse la
pared posterior del hueco, y el panel de apoyo debe tener
una apertura mínima de 45 mm.
CONEXIÓN ELÉCTRICA
Enchufe la clavija en una base provista de un tercer contacto
correspondiente a la toma de tierra, la cual deberá conectarse
correctamente.
En los modelos desprovistos de clavija, monte una clavija estándar
en el cable capaz de soportar la carga indicada en la placa de
características. El hilo de tierra es de color amarillo-verde. Esta
operación deberá realizarla un técnico especializado.
En caso de que la base y la clavija del aparato sean incompatibles,
haga que un técnico especializado le cambie la base por otra
adecuada.
También puede efectuar la conexión a la red intercalando entre
el aparato y la red un interruptor omnipolar, preparado para la
carga y con arreglo a las normas vigentes. El hilo de tierra amarilloverde no debe quedar interrumpido por el interruptor.
La base o el interruptor omnipolar utilizados para la conexión
deben estar situados en un lugar fácilmente accesible y cerca del
electrodoméstico instalado.
Importante: en la fase de instalación, coloque el cable de
alimentación de manera que en ningún punto alcance una
temperatura superior a los 50 °C a temperatura ambiente.
El aparato cumple los requisitos de seguridad previstos por los
institutos normativos. Sólo se garantiza la seguridad eléctrica de
este aparato si ha sido conectado correctamente a una instalación
de toma de tierra eficaz, con arreglo a lo dispuesto en las normas
vigentes de seguridad eléctrica, (en caso de duda, exija un control
exhaustivo de la instalación por parte de un técnico especializado).
El fabricante declina toda responsabilidad por los posibles daños
causados por la falta de conexión a tierra de la instalación.
Importante: el fabricante queda exento de cualquier
responsabilidad por los posibles daños personales o materiales
causados por la falta de conexión a tierra.
ATENCIÓN: La tensión y frecuencia de alimentación están
indicadas en la tarjeta de matrícula (en la última página).
Compruebe que la capacidad eléctrica de la instalación de las
bases sean adecuadas para la potencia máxima del aparato,
indicada en la placa de características. En caso de duda, diríjase
a un técnico cualificado.
EQUIPAMIENTO DEL HORNO - según el
modelo Es necesario limpiar el equipamiento del horno antes de su
primer uso. Limpie con una esponja, y séquelo.
La rejilla simple sirve de soporte para
los moldes y las fuentes.
La rejilla para sostener las fuentes
sirve más especialmente para colocar
las parrilladas. Debe utilizarse junto
con la bandeja que recoge el jugo de
cocción (grasera).
Gracias a su perfil especial, las rejillas permanecen en horizontal
hasta el tope. No hay ningún riesgo de deslizamiento o de
desbordamiento de la fuente.
18 ES
La grasera sirve para recoger el jugo
de las parrilladas. Sólo se debe utilizar en modo Grill, Asador o Turbogrill (según el modelo). Para los otros
modos de cocción, retírela del horno. No utilice nunca la grasera como fuente para asar. Ello provocaría
emanación de humos, salpicaduras de grasa y un ensuciamiento rápido
El Set para Pizza es ideal para
cocinar pizzas. El set debe utilizarse
de forma combinada con la función
Pizza.
La bandeja del horno.
La bandeja del horno es ideal para asar. Úselo
junto con la bandeja de goteo.
Un pomo o manivela viene incluido para ayudar a
mover los accesorios de manera segura. No deje
este pomo o manivela dentro del horno.
Durante la utilización del horno, los accesorios que no utilice deben ser retirados del mismo.
CONSEJOS ÚTILES
HORNO AUTOLIMPIANTE CATALÍTICO
REJILLAS HORNO - SISTEMA DE SUJECIÓN
El horno está dotado de un nuevo sistema
de sujeción de las rejillas.
Este sistema permite extraer las rejillas
casi por completo sin que caigan
y manteniéndolas perfectamente en plano,
permitiendo verificar y mezclar los
alimentos con la máxima tranqu-ilidad y
seguridad.
Para extraer las rejillas es suficiente, como se indica en el dibujo,
levantarlas, cogiéndolas por la parte anterior y tirar de ellas.
LA COCCIÓN AL GRILL
Este tipo de cocción permite el dorado rápido de los alimentos.
Con este fin, le aconsejamos introducir la rejilla generalmente en
el 3° o 4° estante, según las dimensiones de los alimentos.
(pág. 24) Casi todas las carnes pueden ser cocidas al grill, excepto
algunas carnes tiernas de caza y albóndigas.
La carne y el pescado para cocinar al grill deben ser ligeramente
untados con aceite.
Los modelos
Los hornos
tienen un control electrónico de la
velocidad del ventilador que está patentado por Candy y que se
llama VARIOFAN. Durante la cocción, este sistema cambia
automáticamente la velocidad del ventilador (en el modo
multifunción) para optimizar el flujo de aire y la temperature interna
del horno.
Todos los hornos
tienen la función
.
Esta función permite la distribución de la humedad y
de la temperatura. Reduce la perdida de humedad en
un 50 %, lo que garantiza un alimento más sabroso y
tierno. Esta función es recomendada para cocinar
pasteles y pan.
La función Sprinter reduce el tiempo de calentamiento
del horno; en sólo 8 minutos alcanza 200°.
La función Supergrill dá la posibilidad de aumentar la
intensidad del tostado. La potencia Supergrill se
incrementa un 50% respecto a un grill convencional.
Algunos hornos vienen equipados con la nueva contrapuerta de
cristal la cual tiene una mayor área de cristal y permite un mejor
aislamiento.
Segùn modelos
Es un sistema de iluminación que reemplaza a la tradicional
lámpara. 14 luces LED´s están integrados en el interior de la
puertas. Estas producen una luz blanca de calidad la cual permite
ver el interior del horno con claridad sin ningún tipo de sombra
en las diferentes alturas o baldas del horno.
Ventajas:
, además de ofrecer una excelente iluminación
El sistema
dentro del horno, dura mucho más tiempo que la bombilla tradicional
y consume mucho menos, por lo que ahorra energía.
- Visión óptima
- Gran vida útil
- Consumo muy bajo de energía, -95 %
en comparación con la tradicional
iluminación.
El electrodoméstico que lleva un LED blanco de la 1M Clase según IEC
60825-1:1993 + A1: 1997 + A2: 2001 (equivalente a EN 60825-1: 1994
+ A1: 2002 + A2: 2001); la potencia de luz máxima que emite 459nm
<150uW. No observado directamente con los instrumentos ópticos.
TIEMPOS DE COCCIÓN
Los paneles especiales autolimpiantes recubiertos por un esmalte
con estructura microporosa (ofrecidos como accesorios opcionales
en unos modelos o de serie en otros) eliminan la limpieza manual
del horno.
Las grasas proyectadas sobre las paredes durante la cocción,
son descompuestas por el esmalte, mediante un proceso catalítico
de oxidación y son transformados en productos gasos.
Salpicaduras excesivas de grasa pueden obstruir los poros y por
consiguiente impedir la autolimpieza, tal característica puedé ser
restablecidá mediante un calentamiento de unos 10-20 minutos
del horno vacío programándo el horno a la máxima temperatura.
no usar productos abrasivos, barillas metálicas, objetos de punta,
paños rugosos, productos químicos o jabones que puedieran
dañar irremediablemente el esmalte.
LIMPIEZA Y MANTENIMIENTO
No utilice productos abrasivos, estropajo u objetos dentados para
limpiar los cristales de la puerta del horno.
No utilice vapor o pulverizadores de alta presión para limpiar el
aparato.
Limpiar las superficies de acero inox y esmaltadas con agua
templada y jabón, o con productos específicos de comercios
especializados, evitando absolutamente el uso de polvos abrasivos
que dañarían las superficies y partes estéticas.
La limpieza del horno es muy importante y debe ser efectuada
cada vez que éste es utilizado. En las paredes se depositan
grasas derretidas durante la cocción que podrían, en el sucesivo
encendido, producir olores desagradables que afectarían a la
cocción. Para la limpieza utilizar agua caliente y jabón, aclarando
cuidadosamente.
Para eliminar esta tarea, las paredes del horno pueden ser
revestidas con paneles autolimpiantes especiales, accesorios
opcionales en algunos modelos: ver parágrafo específico
«HORNO AUTOLIMPIANTE CATALÍTICO».
Utilizar jabón y barillas de acero para las rejillas inox. La limpieza
de las superficies de cristal templado debe ser efectuada cuando
las superficies estén frias. Eventuales roturas debidas a la no
observación de esta regla elemental no están cubiertos por la
garantia.
La bombilla del horno puede ser sustituida desconectando
eléctricamente el aparato y destornillando la ampolla que la
encierta, sustituyendo la bombilla por una análoga resistente a
altas temperaturas.
Se aconseja además utilizar fuentes con bordes altos en el caso
de cocciones de alimentos particularmente grasos (asados, etc)
y utilizar la grasera al realizar la cocción al grill.
Para el caso que, por condiciones particulares de suciedad, no
fuera suficiente la acción precedente, se aconseja apartar las
grasas con un paño mullido o una esponja humedecidos con agua
caliente. La porosidad del esmalte es fundamental para garantizar
la acción autolimpiante.
N.B. Todos los paneles autolimpiantes comercializados en el
mercado tienen una eficacia de rendimiento de aproximadamente
300 horas de funcionamiento del horno. Pasado dicho límite los
paneles deberían ser sustituidos.
ASISTENCIA TÉCNICA
En caso de incorrecto funcionamiento del horno le aconsejamos:
— verificar la buena conexión del enchufe en la toma de corriente.
En caso de que no se determine la causa del mal funcionamiento:
apagar el aparato sin manipularlo y llamar al Servicio de
Asistencia Técnica. Antes de llamar al Centro de Asistencia
recuerde tomar nota del número de matrícula situado en la
tarjeta matrícula del producto (Fig. última página).
El aparato está dotado de un certificado de garantía que le permite
disponer del Servicio Asistencia Técnica.
En las págs. 24 y 25 mostramos una tabla indicativa de los tiempos
y temperaturas aconsejados para las primeras cocciones. Con la
experiencia podrá variar a su gusto los valores mostrados en la
tabla.
19 ES
USO DEL MINUTERO
USO DEL TEMPORIZADOR
Para seleccionar el tiempo elegido, gire
el mando una vuelta completa y
después vuelva a ajustar la marca en
la posición correspondiente al tiempo
deseado. Una vez transcurrido el
tiempo seleccionado se emitirá una
señal acústica durante algunos
segundos.
Lectura tiempo
seleccionado
Con este mecanismo es posible
programar la duración exacta en
minutos de la cocción y, por tanto, la
desconexión automática del horno (máx.
120 minutos).
Una vez transcurrido el tiempo
seleccionado el mando alcanzará la
posición de señal acústica O, a partir
de la cual el horno se desconectará
automáticamente. Únicamente se podrá conectar el horno
seleccionando un tiempo de cocción o girando el mando a
la posición
.
Para regular la hora, presionar el mando y girar a la izquierda hasta leer la hora exacta. Para
la utilización como cuentaminutos, seleccionar la duración del tiempo girando el mando en
sentido anti-horario (sin presionar) hasta leer el tiempo deseado (max 180’). Al finalizar el
tiempo entrará en función la alarma y tendrá que apagar el horno; para que cese girar el
mando hasta
USO DEL PROGRAMADOR ELECTRÓNICO
FUNCIÓN
MINUTERO
FUNCIÓN
MANUAL
DURACIÓN DE
LA COCCIÓN
MODO DE
ACTIVACIÓN
• Pulse y mantenga pulsada •
la tecla
• Pulse las teclas o
para ajustar la duración
• Suelte las teclas
MODO DE
DESCONEXIÓN
FUNCIONAMIENTO
FINALIDAD
Cuando transcurre el • Emite una señal acústica • Permite utilizar el progratiempo seleccionado, el fin a liz a do el ti em p o mador del horno a modo
funcionamiento se para establecido
de alarma (puede utilizarse
solo y avisa con una señal
• Para visualizar el tiempo con horno en funcionaacústica (la señal acústica
restante pulse la tecla
miento o desconectado).
se para sola; para interrumpirlo inmediatamente
pulse la tecla )
• Pulse la tecla
• Situar el mando selector • Permite el funcionamien- • Efectúe las cocciones
• Seleccione la función de
de función en la
to del horno
deseadas
cocción con el mando
posición O.
selector de función
• Pulse y mantenga pulsada • Cuando transcurre el • Permite seleccionar el • Cuando termina el tiempo
tiempo seleccionado, el tiempo de cocción del seleccionado, el horno se
la tecla TIMER
horno se desconecta solo; alimento introducido en el desconecta automática• Pulse las teclas o
párelo antes de situer horno.
mente y avisa emitiendo
para el ajuste de la
el mando selector de • Para visualizar el tiempo una señal acústica.
duración
función en la posición O ó restante pulse la tecla
• Suelte las teclas
ajuste a 0:00 el tiempo de TIMER.
• Seleccione la función de la cocción (teclas
• Para modificar el tiempo
cocción con el mando TIMER o ).
restante, pulse la tecla
selector de función
TIMER+ o
• Pulse y mantenga pulsada • A la hora seleccionada el • Permite memorizar la hora • Normalmente se utiliza
horno se desconectará de fin de la cocción. esta función con la finalila tecla END
• Pulse las teclas o para solo; si desea inter- • Para visualizar la hora dad de DURACIÓN DE LA
ajustar la hora del fin de rumpirlo, situer antes programada, pulse la tecla COCCIÓN. A modo de
FIN DE LA
ejemplo: el alimento debe
el mando selector de END
cocción.
COCCIÓN
función en la posición O. • Para modificar la hora cocinarse durante 45
• Suelte las teclas
minutos y deseo que esté
programada, pulse las listo para las 12:30; en tal
• Seleccione la función de
cocción con el mando
teclas END + o
caso
selector de función
Seleccione la función de
cocción deseada.
Ajuste el tiempo de la
cocción en 45 minutos
AJUSTE DE LA HORA
(TIMER + o )
ATENCIÓN: la primera operación que hay que efectuar después Ajuste el fin de la cocción
de la instalación o después de una interrupción de la corriente a las 12:20 h. (END + o )
(este tipo de situaciones se reconocen al observar que en la pan- La cocción comenzará
talla de visualización parpadea la hora
) es el ajuste de la automáticamente a las
11:45 h (12:30, menos 45
hora, como se indica a continuación:
minutos), y a la hora
• Pulse y mantenga pulsadas las teclas TIMER o END ( o TIMER en seleccionada como fin de
alguros modelos)
la cocción el horno se
• Pulse las teclas o para ajustar la hora
desconectará automáti• Suelte las teclas
camente.
ATENCIÓN: Si selecciona
ATENCIÓN: El horno funciona sólo si selecciona en modo manual
o cocción programada
únicamente el fin de
cocción sin el tiempo de
NOTA: Para ajustar las diversas funciones del horno, en algunos modelos aparecen los símbolos
cocción, el horno se
o , en otros modelos aparecen + o - .
conectará inmediatamente y se desconectará
a la hora de fin de la
20 ES
cocción seleccionada.
USO DEL PROGRAMADOR ANALÓGICO
(F)
(E)
AJUSTE DE LA HORA
Para regular el reloj, presionar el mando y girar en sentido
anti-horario hasta leer la hora exacta, para finalizar, bastará
con dejar de presionar el mando.
FUNCIÓN
FUNCIÓN
MANUAL
MODO DE
ACTIVACIÓN
ATENCIÓN: El horno funciona sólo si selecciona en modo
manual
o cocción programada
FUNCTION
MODO DE
DESCONEXIÓN
FUNCIONAMIENTO
FINALIDAD
• Girar el mando en sentido • Posicione el mando
• Permite el funcionamiento • Efectúe las cocciones
deseadas
anti-horario (sin presionar) selector en la posición O. del horno
hasta que aparezca el simbolo en el cuadrante (E)
• Antes del ajuste, selec- • Al finalizar el tiempo
• Permite seleccionar el
cione la temperatura y la introducido, el horno se
tiempo de la cocción del
función deseada
apaga automáticamente
alimento introducido en
• Seleccione el tiempo de la y se activa la alarma
el horno
cocción girando el mando acústica
hacia la izqueierda sin
pulsar hasta hacer coincidir • Para finalizar antes la
el tiempo seleccionado en función introducida, girar
DURACIÓN
el mando hasta hacer
el cuadrante (E).
DE LA COCCIÓN • El inicio de la cocción coincidir
con el indice
comienza inmediatamente del cuadrante (E)
y finaliza automáticamente
al transcurrir el tiempo
seleccionado.
• Tiempo máx. de cocción
180 minutos (3 horas)
• Cuando termina el tiempo
seleccionado, el horno se
desconecta automáticamente y avisa emitiendo
u na s eñ al ac ús tica .
• Antes de la introducción, • A la hora introducida, la • Permite programar una
cocción en modo que los
seleccionar la temperatura función se apaga
alimentos están listos a la
automaticamente y se
y la función deseada
• Selección hora de inicio activa la alarma acústica. hora deseada
Para finalizar antes la
cocción: tirar y girar el
función introducida, girar
mando en sentido antiel mando en sentido antihorario hasta hace coinhorario hasta hacer
cidir la manecilla con la
hora de inicio de cocción coincidir con el indice
del cuadrante (E)
deseada.
• Selección duración
cocción: girar, sin
presionar, el mando en
sentido horario hasta
hacer coincidir el tiempo
seleccionado con el indice
del cuadrante (E)
• Ejemplo: El alimento
deseado se ha de cocinar
durante 45 minutos y
deseo que está listo a las
12:30, en tal caso
- Seleccionar la función de
cocción deseada
- Introducir la hora de inicio
de cocción a las 11:45
(12:30 anterior 45 minutos)
- Introducir la duración de la
cocción a 45 minutos
Al finalizar la cocción el
horno se apaga
automáticamente.
FINAL DE
LA COCCIÓN
(No disponible en
el modelo 2D 364)
21 ES
USO DEL PROGRAMADOR ELECTRONICO (Type A)
1 Luz
Minutero/Auto
6
Display para
temperatura o tiempo
8 Selección de función
/
1.
2.
3.
4.
5.
6.
7.
8.
9.
*
7 Teclas para pulsar
9 Función temporizador
Luz:
2
CUIDADO!
Función con ventilador 3
Función con VARIOFAN
Descongelación 5
4
Luz Minutero/Auto
Luz
Función con ventilador
Función con VARIOFAN
Descongelación
Display para temperatura o tiempo
Teclas para pulsar
Selección de función
Función temporizador
* según modelo
Una vez se realice la instalación, lo primero que hay que hacer es poner la hora correcta (esto lo
podremos reconocer pulsando el Display y viendo 12:00 parpadeando).
El Led ”°” indicador de la temperatura parpadea mientras que no llega a la temperatura programada.
HOT: Cuando el programa de cocción se termina y el horno sigue caliente, en el display aparece la palabra HOT, junto con
el tiempo , aunque los 2 mandos de selección de función están apagados.
FUNCIÓN
MODO
SILENCIO
PONER EN
HORA
DURACIÓN DE
LA COCCIÓN
FIN DE
COCCIÓN
MINUTERO
BLOQUEO
SEGURIDAD
MODO DE
ACTIVACIÓN
MODO DE
DESCONEXIÓN
FUNCIONAMIENTO
FINALIDAD
• Gire el mando del tiempo • Gire el mando del tiempo • Da opción a quitar el • Quitar el sonido del
hasta la posición “Modo hasta la posición OFF sonido del minutero. minutero.
Silencio”
• Gire el mando de tiempo • Gire el mando del tempo- • Da opción a fijar la hora • Poner en hora
hasta la opción de poner rizador hasta la posición que aparece en el Display.
en hora (reloj)
OFF.
NB: ponga la hora una vez
• Utilice los botones “+” o
que instale el horno o
“-” para fijar la hora
antes de apagarlo (el reloj
aparecerá parpadeando
12.00)
• Gire el mando derecho
selector de función hasta
la fu nc ión d es ea da .
• Gire el mando izquierdo
temporizador hasta la
posición “duración de la
cocción”
• Po nga el tie mpo de
c o cc i ón u s an d o lo s
botones “+” y “-”.
• Gire el mando derecho
hasta la fun ción d e
cocción deseada
• Gire el mando izquierdo
hasta la posición fin de
cocción
• Fije la hora final de
c oc ció n u sa nd o lo s
botones “+” y “-”
• Aparece la Luz Auto
• Gire el mando izquierdo
hasta la posición del
m in u te r o (c a m p an a )
• Pon ga el tiem po de
cocinado usando los
botones “+” y “-”.
• Cuando el tiempo de • Permite prefijar el tiempo
cocción ha pasado, el horno cocción requerido para la
se apaga automáticamente receta escogida.
y la alarma suena durante • Cuando se fija la duración
un os se gun dos . P ara de la cocción, gire el
desconectar la función de mando izquierdo para
cocción, gire el mando volver a la hora real.
derecho hasta la opción • Para ver el tiempo de
OFF o ponga el tiempo a cocción que se ha selec00.00; girando el mando cionado, gire el mando
izquierdo o pulsando las
izquierdo hasta la opción
opciones “+” y “-”.
de duración de la cocción
• Cuando finaliza el tiempo • Permite programar el fin
de cocción, el horno se de cocción deseado.
apaga automáticamente. • Cuando se fija la duración
• Pa ra desco nectar la de la cocción, gire el
función de cocción, gire el mando izquierdo para
mando derecho hasta la volver a la hora real.
opción OFF.
• Para ver el tiempo de
cocción que se ha seleccionado, gire el mando
izquierdo hasta la opción
de fin de cocción
• Para cocinar las recetas
deseadas
• Esta función se usa para
programar de antemano lo
que queremos cocinar. Por
eje mplo, si su receta
necesita un cocinado de 45
min y tiene que estar listo
para las 12.30 del mediodía,
simplemente, ponga
duración de la cocción 45
min y que finalice a las
12.30.
De esta forma, el horno
comenzara a cocinar a las
11 . 4 5 y s e g u i r á e n
funcionamiento hasta la
hora final programada,
luego el horno se apagará
automáticamente.
• Ponga la hora en 00.00 • La alarma suena durante
girando el mando izquierdo unos segundos cuando • Permite usar el horno
como alarma incluso si
hasta el minutero, usando llega la hora fijada.
está apagado.
el botón “-”
• Gire el mando izquierdo • Gire el mando izquierdo • El horno no se puede usar • Es una función útil
hasta la posición del hasta la posición del
especialmente cuando hay
candado. Presione el candado. Presione el
niños en casa.
botón “+” durante 3 bo tó n “+” d urante 3
segundos
segundos.
• El horno se habrá
• La palabra STOP
bloqueado cuando en el desaparece
display aparezca “STOP”.
22 ES
INSTRUCCIONES DE USO
Mando
selector
Temperaturas
predeterminadas
y reglaje para el
programador
electrónico
(Type A)
Mando
termostato
FUNCIÓN
Conecta la luz interior
DESCONGELACIÓN
Funcionamiento de la turbina de cocción que hace circular el aire dentro del espacio del horno.
Ideal para realizar una descongelación previa a una cocción.
MAX
MAX
Convección natural
Funcionan la resistencia inferior y la resistencia superior del horno. Es la cocción tradicional,
ideal para cocinar asados, caza, galletas, manzanas al horno y para conseguir alimentos
crujientes.
220
CALOR CIRCULANTE (a)
Utilización simultánea de la resistencia inferior, superior y de la turbina que hace circular el
aire dentro del espacio del horno. Función recomendada para las aves, la repostería, los
pescados, las verduras... El calor penetra mejor dentro del alimento a cocer reduciendo el
tiempo de cocción, así como el tiempo de precalentamiento. Se pueden realizar cocciones
combinadas con preparaciones idénticas o distintas en uno o dos niveles. Este modo de
cocción garantiza una distribución homogénea del calor y no mezcla los olores. Para una
cocción combinada se deben prever unos diez minutos más.
200
200
-
160
Nivel 4
Nivel 4
190
Nivel 4
220
Sprinter
Esta posición permite un precalentamiento rápido del horno. Una vez seleccionada esta
función, se consigue un inmediato calentamiento del horno (p.ej: tarda 8 minutos en alcanzar
200°C), y la temperatura deseada puede seleccionarse mediante el botón correspondiente.
El fin de la fase de precalentamiento se indica al apagarse el piloto del termostato "°C". Una
vez concluida esta fase, es posible seleccionar la función de cocción deseada e introducir los
alimentos que se van a cocinar. Tener cuidado de no introducir alimentos en el horno durante
la fase de precalentamiento, ya que estos podrían resultar dañados.
SOFT COOK (a)
Soft cook es la función ideal para pasteles y pan. Gracias a la reducida velocidad del ventilador,
esta función aumenta la humedad presente en el interior del horno. Una mayor humedad crea
las condiciones de cocción ideales para aquellos alimentos que necesariamente deben mantener
una consistencia elástica mientras están cociendo (ej. tartas, pan, galletas) a fin de no
desmenuzarse.
RESISTENCIA INFERIOR CIRCULANTE (a)
Utilización de la resistencia inferior más la turbina que hace circular el aire dentro del espacio
del horno. Ideal para hacer tartas de frutas jugosas, tortadas, quiches, pasteles. Evita que se
sequen los alimentos y favorece la subida de bizcochos , masa de pan y otras cocciones
realizadas por debajo. Coloque la rejilla en la ranura inferior.
GRILL: El grill debe utilizarse con la puerta cerrada.
Utilización de la resistencia superior con posibilidad de ajustar la temperatura. Es necesario
un precalentamiento de 5 minutos para que la resistencia se ponga al rojo. Éxito seguro con
las parrilladas, las brochetas y los gratinados. Las carnes blancas deben alejarse del grill,
porque aunque así se alargará el tiempo de cocción, la carne quedará más sabrosa. Las
carnes rojas y los filetes de pescado se pueden colocar encima de la rejilla colocando debajo
la grasera.
SUPER GRILL: el horno tiene dos posiciones Grill
Grill : 2200 W
Grill SUPER : 3000 W
TURBOGRILL (a) : La función turbogrill debe utilizarse con la puerta cerrada. Utilización
de la resistencia superior más la turbina que hace circular el aire dentro del espacio del horno.
Se requiere un precalentamiento para las carnes rojas pero no para las carnes blancas. Ideal
para las cocciones de volumen grueso, piezas enteras como cerdo asado, las aves, etc.
Coloque el plato que quiera cocer directamente en la rejilla en el centro del horno, a un nivel
medio. Coloque la grasera debajo de la rejilla para que las grasas caigan dentro.
Asegúrese de que la comida no quede demasiado cerca del grill. En la mitad de la cocción,
gire la pieza que esté cociendo.
Grill asador rotativo
Resistencia grill y motor asador. Sirve para realiz ar asados.
Modalidad pizza
El calor envolvente en esta modalidad genera un ambiente similar al de
los hornos de leña de las pizzerías.
(a) SEGÚN EL MODELO, Función con VARIO FAN : Vario Fan es el exclusivo sistema de funcionamiento desarrollado por C andy para optimizar los
resultados de cocción, la regulación de la temperatura y la regulación de la humedad. El sistema Vario Fan modifica automáticamente la velocidad de
rotación del ventilador para todo tipo de cocciones en multifunción. Este sistema se activa automáticamente cada vez que es seleccionada una función en
el interior del área descrita en el panel de control.
* Programa de prueba según CENELEC EN 50 304
** Programa de prueba según CENELEC EN 50 304 utilizado para la definición de la clase energética
23 ES
TABLAS DE TIEMPOS DE COCCIÓN
Los tiempos sugeridos en las tablas siguientes son indicativos y pueden variar según la calidad, frescura, dimensión y espesor de los
alimentos y según su gusto. Dejar siempre reposar durante unos minutos antes de servir, ya que todos los alimentos siguen cociéndose
tras extraerlos del horno.
Posición de las repisas
CONSEJO ÚTIL: Apagar el horno al menos 10 minutos antes del tiempo indicado dejando los
alimentos en el interior del mismo. Ello le permitirá ahorrar energiá y completar la cocción según
sus gustos. Para no secar demasiado las superficies es indispensable bajar la temperatura.
Horno Eléctrico Estático
Plato
Cantidad Estante
Tiempo de
cocción en
minutos
Horno Eléctrico Ventilado
Tempe- Estante Tiempo de
cocción en
ratura
minutos
horno
Temperatura
horno
Observaciones
• Pasta
Lasañas
Kg 3,5
2
70 ÷ 75
220
2
60 ÷ 65
200
Introduzca la lasaña en el horno frío.
Canelones
Kg 1,8
2
50 ÷ 60
220
2
40 ÷ 50
200
Introduzca la canelones en el horno frío.
Pasta al horno
Kg 2,5
2
55 ÷ 60
220
2
45 ÷ 50
200
Introduzca la pasta en el horno frío.
• Pastas saladas
Pan
Kg 1
pasta
2
35
precal.10
200
2
30 ÷ 35
precal.10
180
Preparar la pasta en forma redonda e incida
con un cuchillo una cruz sobre la parte
superior de la forma. Dejar a temperatura
ambiente al menos 2 horas, untar la grasera
y situar la forma en el centro de la misma.
Pizza
Kg 1
1
25 ÷ 35
190
1
20 ÷ 25
190
Precalentar durante 15 minutos el horno.
Preparar la pizza en la grasera esmaltada
con tomates, mozzarella y jamón, aceite,
sal, orégano.
Hojaldre n. 24
vol au vent
n° 24
1
30 ÷ 35
220
2
25 ÷ 30
200
gr. 200
di pasta cad.
2
25 ÷ 30
200
2
20 ÷ 25
180
Focaccia
(n° 4)
Situar 24 vol au vent en la grasera y cocer.
Precalentar durante 15 minutos el horno.
Dejar a temperatura ambiente al menos 2
horas, untar la grasera y situar la forma en
el centro de la misma.
• Carne
Todas las carnes pueden ser cocidas en recipientes de borde bajo o borde alto.
Es aconsejable cubrir el recipiente de borde bajo con una tapa para evitar ensuciar el horno con salpicaduras del condimento.
Las carnes cubiertas resultan más blandas y jugosas, mientras que las descubiertas resultan más crujientes.
Los tiempos indicados valen para cocciones con recipiente cubierto o descubierto.
Roastbeef
entero
Kg 1
3
70 ÷ 80
220
3
50 ÷ 60
200
Situar la carne en una bandeja Pirex de
borde alto con sal y pimienta. Dele la vuelta
a mitad cocción.
Solomillo de
cerdo enrollado
Kg 1
2
100 ÷ 110
220
2
80 ÷ 90
200
Cocer la carne en bandeja Pirex cubierta
con sal, pimienta, aromas naturales, aceite
y mantequilla.
Solomillo de
ternera enrollado
Kg 1,3
1
90 ÷ 110
220
2
90 ÷ 100
200
Cocer como arriba.
Solomillo de buey
filete
Kg 1
2
80 ÷ 90
220
2
80 ÷ 90
200
Cocer como arriba.
Trucha
3 enteras / Kg 1
2
40 ÷ 45
220
2
35 ÷ 40
200
Cocer las truchas cubiertas aceite, sal y
cebollas en bandejas de Pirex.
Salmon
700 g a rodajas
de 2,5 cm esp.
2
30 ÷ 35
220
2
30 ÷ 25
200
Cocer el salmón no tapado en bandeja
Pirex con sal, pimienta y aceite.
Lenguado
Filetes / Kg 1
2
40 ÷ 45
220
2
35 ÷ 40
200
Cocer el lenguado con sal y una cuchara
de aceite.
2 enteras
2
40 ÷ 45
220
2
35 ÷ 40
200
Cocer las doradas en recipiente cubierto
con aceite y sal.
• Pescado
Dorada
24 ES
TABLAS DE TIEMPOS DE COCCIÓN
Horno Eléctrico Estático
Plato
Cantidad Estante
Tiempo de
cocción en
minutos
Horno Eléctrico Ventilado
Tempe- Estante Tiempo de
ratura
cocción en
horno
minutos
Temperatura
horno
Observaciones
• Aves, Conejo
Kg 1-1,3
2
60 ÷ 80
220
2
60 ÷ 70
200
Coloque la pintada en bandeja Pirex o
cerámica de borde alto condimentado con
aromas naturales y poquísimo aceite.
Kg 1,5-1,7
2
110 ÷ 120
220
2
100 ÷ 110
200
Como para la pintada.
Kg 1-1,2
2
55 ÷ 65
220
2
50 ÷ 60
200
Trocear el conejo en partes iguales y
situarlas en la grasera esmaltada,
condimente con aromas naturales. Si fuera
necesario darle la vuelta.
Pastel cacao en bote
scatola
1
55
180
1
50
160
Pastel Margarita
en bote
Pastel de zanahorias
en bote
Torta crostata
albicocca
scatola
1
55
175
1
40 ÷ 45
160
scatola
1
65
180
1
50 ÷ 60
160
En bandeja para pasteles Ø 22. Prec.
durante 10 min.
En bandeja para pasteles Ø 22. Prec.
durante 10 min.
En bandeja para pasteles Ø 22. Prec.
durante 10 min.
700 gr
1
40
200
2
30 ÷ 35
180
En bandeja para pasteles Ø 22. Prec.
durante 10 min.
Hinojos
800 gr
1
70 ÷ 80
220
1
60 ÷ 70
200
Calabacín
800 gr
1
70
220
1
60 ÷ 70
200
Patatas
800 gr
2
60 ÷ 65
220
2
60 ÷ 65
200
Zanahorias
800 gr
1
80 ÷ 85
220
1
70 ÷ 80
200
Cortar las zanahorias y cocerlas cubiertas
en bandeja Pirex.
Kg 1
1
45 ÷ 55
220
2
45 ÷ 55
200
Cocer la fruta en bandeja de Pirex o
cerámica no cubierta. Dejar enfriar en horno.
Pintada
Pollo
Conejo troceado
• Dulces, Pasteles
• Verdura
Colocar los hinojos cortados en 4 partes y
tapados en bandeja Pirex, con mantequilla
y sal y preferiblemente con la parte interna
hacia arriba.
Rabanar los calabacines y cocer en bandeja
Pirex, cubiertas con mantequilla y sal.
Cortar las patatas en partes iguales y
cocerlas cubiertas con aceite, sal y orégano
o romero en bandeja Pirex.
• Fruta
Manzanas enteras
Peras
Kg 1
1
45 ÷ 55
220
2
45 ÷ 55
200
Como arriba.
Molocotones
Kg 1
1
45 ÷ 55
220
2
45 ÷ 55
200
Como arriba.
• Cocción al grill
La cocción al grill debe ser realizada colocando el alimento bajo el grill eléctrico a rayos infrarrojos. Atención: durante el funcionamiento
el grill está al rojo vivo. La grasera debe ser colocada bajo la rejilla para recoger las salsas.
Pan de molde
tostado
Bikinis
4 rebanadas
4
5 (5 precal.)
grill
4
5 (10 precal.)
grill
Introducir el pan de molde sobre la parrilla
soporte. Tras la 1a cocción dar la vuelta
hasta ultimar la cocción. Advertencia:
mantener el pan de molde en calinete en
el fondo del horno antes de servir.
4
3
10 (5 precal.)
grill
3
5/8
(10 precal.)
grill
Introducir los bikins sobre la parrilla soporte
grasera; tras la 1a bruñidura dar la vuelta
al bikini hasta ultimar la bruñidera.
Salchichas
n°6 / Kg 0,9
4
Costillas de buey
n°4 / Kg 1,5
4
Muslos de pollo
n°4 / Kg 1,5
3
25/30
(5 precal.)
25
(5 precal.)
50/60
(5 precal.)
grill
4
grill
4
grill
3
15/20
(10 precal.)
15/20
(10 precal.)
50/60
(10 precal.)
grill
Cortar las salchichas por la mitad y
disponerlas sobre la parrilla, con la parte
interna hacia arriba. A mitad cocción dar la
vuelta a las salchichas hasta ultimar la
cocción. Advertencia: De vez en cuando
controlar visualmente la uniformidad de la
cocción. En caso de desuniformidad
intercambiar las cocidas con las menos
cocidas.
Disponer las piezas debajo de la acción
del grill grande y darles la vueltas dos veces.
grill
Condimente con aromas naturales y darles
la vuelta de vez en cuando.
grill
Este electrodomestico está marcado conforme a la directiva Europea 2002/96/CE sobre los residuos de aparatos eléctricos y
electrónicos (WEEE). Asegurándose que este producto ha sido eliminado correctamente, ayudará a evitar posibles consecuencias
negativas en el ambiente y la salud de las personas, que pudiera verificarse por causa de un anómalo tratamiento de este
producto El simbolo sobre el producto indica que este aparato no puede ser tratado como un residuo doméstico normal, en su
ligar deberá ser entregado al centro de recogidas para reciclaje de aparatos eléctricos y electrónicos.
La eliminación debe ser efectuada de acuerdo con las reglas medioambientales vigentes para el tratamiento de los residuos.
Para informacion más detallada sobre el tratamiento, recuperación y reciclaje de este producto, por favor contacte con la oficina compentente
(del departamento de ecología y mediomabiente), o su servicio de recogida a domicilio si lo hubiera o el punto de venta donde compró el producto.
25 ES
01-2008 • Cod. 41021178
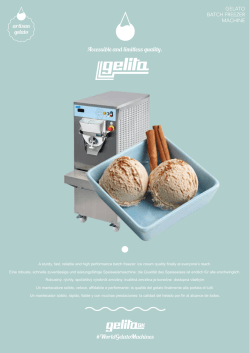
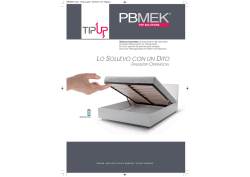

© Copyright 2026