
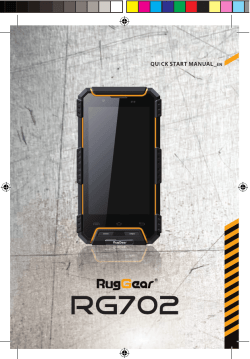
The SwannView Plus Mobile App EN Setting up your Handset A
The SwannView Plus Mobile App
EN
Using SwannView Plus
Have a Smartphone or Tablet? With the free SwannView Plus app, you can turn your iOS or Android mobile device into a monitoring centre for your
NVR. Have the peace of mind that you can monitor your home at any time from any place. With “SwannLink” Peer to Peer technology connecting
your mobile device to your NVR is so easy - there’s no need to fiddle around with complicated network configurations. Best of all, it only takes
minutes to get it up and running!
1
1. Menu - Gives you access to a number of options
such as live view mode, remote playback, adding
or editing a device and enabling and changing your
password. You can also access the built-in manual
and disable or enable auto live view timeout.
2
Scan one of the QR codes to download the relevant app for your mobile device.
Channel: 1 (Home)
3
Channel: 3 (Home)
iOS (Handset)
iOS (Tablet)
2. Camera List - Gives you access to the camera
list which allows you to enable or disable the
cameras available.
Channel: 2 (Home)
3. Live View - Tap an available camera to select it.
Selecting a camera gives you the option of taking
a snapshot directly to your mobile device. You can
also control a PTZ camera and change video quality settings. Double tapping a camera gives you
the ability to view it full screen. Double tap again
to return.
Channel: 4 (Home)
Android
4
5
You can also go to your relevant app store and type in the following - “SwannView Plus” for
Handsets, “SwannView Plus HD” for Tablets. Follow the on-screen instructions for installation
and accept any license requirements that may appear. Although the screenshots used on this
page are from the iOS version of SwannView Plus, the functions, buttons and overall look and
feel are identical for the Android version. After downloading and installing the app on your
Handset or Tablet, go to the location the app is stored and tap the icon to run.
6
8
9
7
10
C
11
12
Setting up your Tablet
Tap “Alias” to name your NVR, for example Home,
Office, etc. Enter the user name (default admin) and
password (default 12345) or the one that you created
earlier in the NVR setup wizard.
7. Extended Menu - Tap this to extend the menu
so you can access additional options.
8. Stream Settings - Tap this to access the video
quality menu. This changes the live view image
only. You can change the resolution, frame rate
and bitrate for a higher picture quality or smoother
movement. Tap “Confirm” to save your settings.
Selecting the highest settings will consume more
of your Internet bandwidth.
Tap the “Save” button at the top-right to save and
verify the connection.
3
Tap the “Live View” button located top-left to return
to the main viewing screen.
9. Stop all playback - Tap this to stop the live view
of all cameras.
10. Enable/Disable Audio - Tap this to enable/
disable audio. The audio function requires a
microphone connected to the NVR’s audio input.
4. Group Indicator - When viewing a single camera
or 4 cameras, the white dot shows which camera
or group of cameras you are currently viewing.
Swipe the live view screen left or right to change.
11. Alarm Output Control - Tap this to enable or
disable the alarm outputs on the NVR. If you have
an alarm or siren connected, you can control them
from here.
5. Snapshot - Takes a snapshot of the currently
selected camera and saves it directly to your
mobile device.
12. Close Extended Menu - Tap this to close the
extended menu.
4
Channel: 1 (Home)
Channel: 2 (Home)
Channel: 3 (Home)
Channel: 4 (Home)
1
Setting up your Handset
2
2
4
A
SwannView Plus: Remote Playback
3
3
1
2
D
1. Tap the “Menu” button.
3. Tap the “Camera List” icon to select the start
and end time & date and the camera that you
would like to remotely playback. You will see
the following screen.
7
3
Using SwannView Plus HD
3. Enable/Disable Audio - Tap this to enable/disable
audio. The audio function requires a microphone
connected to the NVR’s audio input.
7. Tap “Start playback” to play video that
matched your search criteria.
You will see the following screen.
Channel: 1 (Home)
Tap the “+” button to add your NVR. If
you are adding an additional device to
the app, follow the same steps.
Tap the blue QR code icon to open the
scanning page, and then hold your
Handset over the QR code sticker
located on top of your NVR to scan.
9
10
4
5
5. Favorite(s) - Tap this to add a camera or if you
have PTZ camera, a particular position or view to the
favorite(s) list.
6
4. Select the start time & date that you would
like to search from.
5. Select the end time & date that you would
like to search to.
6. Tap to select the camera that you would like
to remotely playback. Only one camera can be
selected when searching.
8. Tap and drag the timeline to skip to a specific part of the recording. The yellow vertical line
indicates the starting point and the blue bars
indicate that a recording has occurred at that
particular time.
6. Stop all playback - Tap this to stop the live view of
all cameras.
7. Full-screen Mode - Tap this to hide the menu and
control buttons. The control buttons will appear onscreen. Tap and hold the controls to move them.
9. Snapshot - Takes a snapshot and saves it
directly to your mobile device.
1
Channel: 3 (Home)
10. Pause/Play - Tap this to pause playback
and tap again to resume.
1. Close/Open Camera List - Tap this to
open and close the camera list. Closing
the camera list will enlarge the live view
window(s).
11. Stop playback - Tap this to stop remote
playback.
B
Setting up your Tablet
6
E
3
4
5
6
Channel: 4 (Home)
7
The following instructions and screenshots are for
the Tablet version of “SwannView Plus HD”. If you
have a Handset, you should use “SwannView Plus”
so jump over to section “A” for assistance.
8. PTZ Control - Tap this to control any PTZ camera
that is connected.
2. Snapshot - Takes a snapshot of the
currently selected camera and saves it
directly to your mobile device.
SwannView Plus HD has a built-in manual
that explains in detail the various options in
available. To access this tap “Configuration”
(looks like a small gear”, then tap the “Help” button.
6
8
1. Select the start time &
date that you would like
to search from and the
end time & date that you
would like to search to.
When you first run the app, you will be presented
with a tutorial. Swipe each screen to complete the
tutorial then tap “Let’s start”.
2. You will see the name of
your NVR. Tap and hold the
icon to view all cameras
connected or click the
drop-down menu and
select a single camera to
view.
Tap the blue QR code icon to open the scanning page,
and then hold your Tablet over the QR code sticker
located on top of your NVR to scan.
3. Close/Open Camera
List - Tap this to open
and close the camera list.
Closing the camera list
will enlarge the live view
window(s).
2
Tap the “Save” button at the top-right
to save and verify the connection. To
view your cameras tap the “Start live
view” button.
8
6
H
1
8. Tap and drag the timeline
to skip to a specific part
of the recording. The
blue bars indicate that a
recording has occurred at
that particular time.
2
Channel: 1 (Home)
Channel: 2 (Home)
7. Full-screen Mode - Tap
this to hide the menu and
control buttons. The control buttons will appear
on-screen. Tap and hold
the controls to move them.
3
Channel: 3 (Home)
4
5
6
7
Channel: 4 (Home)
8
4. Snapshot - Takes a snapshot of the currently selected camera and saves it directly
to your mobile device.
7
3
8
SwannView Plus HD: Remote Playback
Tap the “Configuration” button located at the bottom
of the icon list on the left, then tap the “+” button
located top-right as shown in this screenshot.
Tap “Alias” to name your NVR. Enter
the user name (default admin) and
password (default 12345) or the one
that you created in the NVR setup
wizard.
2
5
1
The UID of your NVR will automatically
be entered similar to the one shown in
the above screenshot.
Channel: 2 (Home)
11
4
2
Setting up your Handset
4. Stream Settings - Tap this to access the video
quality menu. This changes the live view image only.
You can change the resolution, frame rate and bitrate
for a higher picture quality or smoother movement.
Tap “Confirm” to save your settings. Selecting the
highest settings will consume more of your Internet
bandwidth.
8
5
You may notice when playing video files
remotely, that playback is not as smooth
when compared to playing files on your
local network. The playback quality is dependent on your Internet connection as well as the
encoding settings that you have selected on
the NVR. Lowering the bitrate may help with
this.
G
7
2. Tap the “Remote Playback” button.
4
When you first run the app, you will be
presented with a tutorial. Swipe each
screen to complete the tutorial then
tap “Let’s start”. Tap “Menu” top-left,
and then tap the “Devices” button as
shown in the above screenshot.
The name of your NVR will appear in the device list.
Simply tap and hold the icon, then drag it to the Live
View window to automatically start viewing all the
cameras connected to your NVR. To view a single
camera, tap the drop-down menu, and then drag
one of the cameras to the Live View window.
6. PTZ Control - Tap this to control any PTZ camera
that is connected.
QS3MPNVRH150914E | © Swann 2014
1
F
6. Stop all playback Tap this to stop remote
playback of all cameras.
5. Pause/Play - Tap this to pause playback
and tap again to resume.
9
SwannView Plus for Windows
EN
Configuring SwannView Plus
Want to view your cameras from your PC? The SwannView Plus software that is available for download, allows you to access and control your NVR
from the comfort of your computer. Best of all, it only takes minutes to get it up and running!
C
Configuring SwannView Plus
SwannView Plus will now contact your NVR to check
the connection; this might take a few seconds. If the
connection is successful, the serial number of your
NVR will be displayed. If you don’t see the serial
number appear, check that you have entered the
correct UID and that your NVR is correctly connected
to your network and the Internet. Once you see the
serial number click “Next”.
When you first run SwannView Plus you will be presented with a login screen, as shown below.
Super User: This allows you to create an admin level user account. Enter a name here that will be easy to remember.
Password: The password doesn’t have to be the same as your NVR password.
1. To download the SwannView Plus software from our website, go to
(www.swann.com/swann_app), scroll down until you see “SwannView
Plus” then click on the “For Windows” link.
Confirm: Re-enter the password you created to confirm it.
08-11-2014 Mon 10:30:15 (W)
08-11-2014 Mon 10:30:15 (W)
2. When the file has finished downloading, navigate to your downloads
folder or the location you saved the file. The name of the file is called
“SwannView_Plus_Win.zip”.
3. Double-click the file, a new window will open. Double-click the
program to commence installation. Follow the instructions as outlaid in
this quick start guide.
Camera 01
08-11-2014 Mon 10:30:15 (W)
3
Enable Auto-login: After creation of an admin account, enabling this option will mean that you don’t have to enter the password each time you run
SwannView Plus.
If you tick “Enable Auto-login” you will not be
prompted to enter the password each time you
run SwannView Plus. If you leave this option
blank, you will have to enter the “Super User” password
each time you run the software. Whether you use this
feature or not depends on how secure you would like
your system to be.
Camera 02
08-11-2014 Mon 10:30:15 (W)
Camera 03
F
At the “Add Group” screen, click “Next” again.
At the “Import” screen click the “Import All” button to
add all of your cameras, or select which cameras you
would like to remotely monitor and click “Import” to
add them one by one. When finished click “Next”.
4
Camera 04
You will now see the “Completed” screen. Click the
“Finished” button to go to the “Control Panel” screen.
QS3MPNVRH150914E | © Swann 2014
10
Installing SwannView Plus
A
11
Configuring SwannView Plus
D
Using SwannView Plus
Each time you start SwannView Plus you will start
at the “Control Panel” screen. To view your NVR and
cameras, double click on the “Main View” icon which
will take you to the Live View screen.
1
3
Click “Next” to begin.
2
12
08-11-2014 Mon 10:30:15 (W)
1. To view your cameras,
click on the name of your
NVR and drag that into the
Live View window.
SwannView Plus has a built-in manual that
explains what each button does and how the
various screens and options work in more detail
than this guide. To access this click “Help” > “User
Manual” (you will need Adobe Reader installed to read
this).
08-11-2014 Mon 10:30:15 (W)
1
Camera 01
08-11-2014 Mon 10:30:15 (W)
Camera 02
08-11-2014 Mon 10:30:15 (W)
Un-tick all except “Client” then click “Next”.
4
Select a language then click “Next”.
4 5
2
A plug-in will be installed. Click “Next”.
13
Installing SwannView Plus
B
Camera 03
7 8
9 10 11
12
13
2. Alarm/Event Controls
5. Screen Layout Mode
9. Previous Group
3. Clear Info/Enable Alarm
Pop-up Image/Enable audio
6. Stop & Start View
10. Next Group
4. Full Screen
7. Snapshot
11. Auto Switch
8. Capture to PC
12. Volume
13. Open & Close Alarm/Event List
E
15
SwannView Plus: Remote Playback
1. Select one or more
cameras that you would like
to playback.
1
01-08-2014 Fri 11:11:51 (W)
1
01-08-2014 Fri 11:21:24 (W)
Click “Install”, allow desktop shortcut creation, click “Next”.
To run SwannView Plus, double click the
icon placed on your desktop or click “Start”
> “All Progams” > “SwannView Plus+” >
“SwannView Plus+ Client”.
6
Camera 02
01-08-2014 Fri 11:19:17 (W)
Nickname: Give your NVR a familiar name.
Click “Finish” to complete the installation.
2
UID: Copy & Paste or type in the UID from the email
that was sent during the setup wizard or from the
sticker on top of your NVR.
2
Password: Enter the password (default 12345) or the
one that you created earlier in the NVR setup wizard.
Camera 04
3
4.
On-screen
controls
allow you to pause or stop
playback,
slowdown
or
increase playback speed,
perform a smart search, take
a snapshot, start recording
and download video to your
computer.
3. Orange indicates captured footage for
each camera. Use the mouse to select
footage located on the timeline and scroll
left or right to select the desired time.
Leave “Export To Group”, click “Add” to finish.
Click “Install”, click “Finish”.
16
4
Camera 03
2. Select a day, month and
year range to search then
click the “Search” button.
User Name: Enter the username of your NVR (default
admin).
H
01-08-2014 Fri 11:14:13 (W)
Camera 01
Click “Next”, click “I Agree”.
Camera 04
14
Configuring SwannView Plus
7
6
3
Click “Add” to begin. The “Add Device” screen will
open. Tick “P2P” to enable and follow the instructions
below.
5
G
17
18


© Copyright 2026