
Get the Jan 2015 Issue!
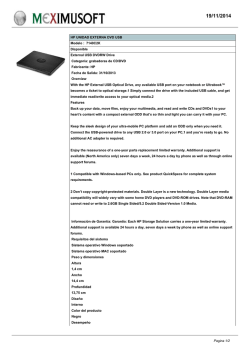
MaUsE DoubleClick - January 2015 2014 MaUsE Executive • President : Michael Shaw [email protected] •Vice President: Ian Winton Secretary & Apple Liaison: Marcel Dufresne [email protected] • Treasurer: Ken Jansen • Director: Stan Wild • Director: Stephen Wood • Director: Brian Elston MaUsE Contact Information: The MaUsE c/o Michael Shaw 237 Huntingwood Drive Oshawa, Ontario, Canada L1J 7C6 w w w. m a u s e . c a DoubleClick Produced and Edited by Michael Shaw Photographs by Irma Shaw and others Don’t forget to pay your MaUsE Membership fee. Still only $45 per year. From The Editor What you are looking at is the January 2015 edition of the MaUsE DoubleClick, the online publication of the Macintosh Users East, (MaUsE), a motley collection of mostly harmless cranks who reside in Southern Ontario with their motley collection of old and new Macintosh,Hackentosh & MacClone computers. The DoubleClick is published using a 2.8 GHz iMac Extreme and QuarkXPress 10. An antique Kodak DX7590 is STILL being used for all pictures. Everything not specifically attributed to someone else can probably be blamed on the Editor. Back issues can be downloaded from the MaUsE website: < www.mause.ca >. Submissions from MaUsE Club members are almost always welcome. Maybe that last bit is an exaggeration. Send your submissions and articles to me at: < [email protected] >, especially if there are files or pictures attached. I have never refused a submission yet. Because we care about the environment, the MaUsE DoubleClick is created using only recycled electrons: matter was neither created nor destroyed in the process of creating this issue. There is always room for another piece on any Mac-related topic and Iʼll make room if there isnʼt. I would like your submissions. But I won't beg. About MaUsE Macintosh Users East. also known as MaUsE, is the most active Apple-authorised MUG (Mac User Group) in Southern Ontario. MaUsE is here for users of all Apple products, including Apple computers, iPods, iPhones, and iPads. Apple, Macintosh, and the Apple logo are trademarks of Apple Computer, Inc., registered in the U.S. and other countries. The MaUsE (Macintosh Users East) is an Appleauthorised Macintosh user group Michael Shaw, Editor MaUsE Meetings are held in Room 1 at the new Whitby Public Library on the south-east corner of Henry and Dundas West in Whitby, Ontario on the fourth Wednesday of each month except December, July and August. Meetings start at 7:00 PM but there is an early session from 6:30 for people who wish to discuss hardware or software issues or problems. Macintosh virus problem are discussion from 6:58 to 7:00 PM On behalf of the President and Executive of MaUsE: Happy New New Year Year Happy NuGuard GripStand 3 From OWC The GripStand functions as a protective case, q display stand, and a hand grip for the Apple iPad 2nd, 3rd & 4th Gen (Black). I have reviewed many cases for the iPad over the years. My absolute favourite iPad case is the GripStand from OWC which I reviewed in the July 2012 DoubleClick. I have been happily using this case for over two and a half years. This is what you see me with at the meetings. There are quite a few features about this unique case that sets it way above any other. Read on to find out why I strongly recommend it. The NuGuard GripStand 3 is made up of a protective case and a handle which acts as the grip/stand. The protective case has a 2.5 inch hole in the back that allows the stand to be attached. The outside shell consists of a hard plastic with several parts sculpted out to permit access to all the ports and buttons on your iPad as well as a spot to connect your Apple Smart Cover, if you have one. I like that there are large slots and spaces on the sides of the case to insert any plugs. Some cases have too tight a fit and plugs like the Apple iPad Camera Connection kit don't fit. This results in the iPad having to be removed from the case before the plug can be used. The inside of the shell is a rubberized material with symmetric holes. The instructions pertaining to inserting the iPad into the case are straight forward. First insert the iPad with the ports correctly oriented. Then push the opposite corners of the iPad into the case and press down firmly with your thumbs. This should create a good suction fit to hold the iPad in place. Don't attach the handle until you have the iPad secured in the case. I found that the insertion process worked better when the large space at the back was open. It probably helped to create the proper suction, allowing the air to be squeezed out from behind the iPad. This also explains the purpose of all those holes on the rubberized interior of the case. It is advisable to check that the iPad is securely attached. This is my only concern with this case. Most cases wrap around not only the back and sides but also a bit on the front so that the iPad can't slip out of the case. There is no overlapping front face grip. I can understand why it was built this way. This construction allows the Smart Cover to lie flat over the face. To remove any doubts I had about the suction hold of the case, I have held the iPad upside down over a couch and tried to shake it free. The suction has held every time I tried to get it to fall free. I guess if you are worried about how secure it is, you can periodically test the grip. Once the stand is clicked into place, you are done. The handle can be swiveled 360° or positioned at virtually any angle for viewing and typing needs. It kind of locks in the four main positions for landscape or portrait viewing with the home button on the right or left. It is also a highly effective one hand grip so you can use your iPad while standing or walking. I was surprised at how handy this was. It was a lot easier carrying the iPad while holding on to the grip and it kept my oily hands away from the screen. The handle can be rotated to use as a hook to hang your iPad on a wall. The handle allows you to carry the iPad like a briefcase. There is also a nylon strap included to securely mount the iPad to a vehicle headrest. One of the drawbacks of using the iPad as an eReader is the weight of the device, especially for any length of time. The stand makes reading with my iPad undemanding. Because it has that handle on the back, I can use the iPad for reading anywhere, whether lying in bed or on a couch or sitting on a bench. I simply set the angle that best suits my position and I can rest my hand on the handle. I don't have to grip anything since the stand is supporting the iPad. My hands and thumbs don't have to do much work at all. I measured the weight of the various parts and found the iPad 2 to be about 650 g, the case 350 g, and the handle 150 g. So, using the GripStand will increase the weight of the iPad about the same as most of the other cases I reviewed. I need to mention one other fact that I was thrilled with. The GripStand handle is quite stiff when you attempt to change the viewing angle. This means that whatever angle you decide on, the iPad stays right there. So many other cases I have tried were either limited in the angles or tended to slip and change their angle as you touched and tapped away at them. This is why it is a great aid for using and typing on the iPad. And the stiffness has not decreased in the two and half years I have been using it. I keep the GripStand at about a 60° angle when not in use. This makes it really easy to pick up. I found with other cases that the easiest way to pick them up was to slide the iPad over the edge of whatever it was lying on. I was always afraid I might slide it too far and, if I was not paying enough attention, I would drop the iPad on the floor. I don't have this fear with the GripStand since I am picking it straight up. As far as protecting my iPad, I did once accidentally knock it off a table onto a carpeted floor with absolutely no damage done. The plastic case did its job and cushioned the fall/l. Another factor not apparent when you first buy a case is how well it does with a year or more of use. All my other cases show their age. They are frayed at the edges. Cracks and scratches appear in the shell. They don't hold their position properly. None of these age factors have shown up on my GripStand. There are few scratches in the plastic. The stiffness of the grip is the same as it has always been. It does not look brand new but it has held up well to the continual abuse I have put it through. Whenever I have my iPad in use, someone is always commenting on the GripStand case. My students see me with it in class and they are impressed with it. They see how versatile it is and ask where they can buy one. The answer is online at www.eshop.macsales.com. The best part of this case is the cost, $34.99. This is by far the best case for the money, especially when you factor in its versatility and durability. Because Apple kept the size of the iPad fairly consistent, this grip works on quite a few generations of iPads. In any case, whatever iPad you do have, OWC will have a Nuguard GripStand that will fit your gadget. Have a look at this case and, while there, peruse the other items that OWC has for your computer. Like many other OWC and NewerTech brand products, the GripStand comes backed with a no risk, no hassle 30-day Money back guarantee. Should you need to contact them for any questions or issues, I have always found them to be very prompt in these matters. This case will continue to be a permanent fixture at our monthly MaUsE meetings. Have a look for it there! Submitted by Marcel Dufresne 2014 In Review The 2014 G5 / iMac Giveaway 2014 G5 / iMac Giveaway Early in the year Our Bruce got a line on a load of obsolete Macintosh computers that were “surplus to needs” at the office of the Globe and Mail in Toronto. With a helping hand from Michael, a van-load of iMacs, G5 towers, keyboards, mice and Apple Cinema Displays were brought back to Oshawa and prepped for their new homes. Some appeared in MaUsE Meeting raffles. Others went to members who asked, and the last of them went to strangers who expressed a need. One of them even wound up here in the DoubleClick office and has become our official back-up server. Interesting Old Tech AirPort Express 802.11g and Griffin AirBase As a general rule, there are not very many Apple products that are simply poorly designed. The AirPort Express 802.11g, First Generation from 2004, unfortunately, was one of them. Basically, it looks like an over-sized iBook power supply. (see pictures) and has all of that devices failings, plus a few more. Firstly, something as heavy as a ethernet repeater should not be held into a wall receptacle by the plug prongs if it weighs enough to make it probable that it will simply fall off the wall at the slightest provocation. Secondly, the device should have a mobile base or anchor that is stable enough to make it possible to set the repeater up on top of something solid where it can be easily accessed. The AirPort Express 802.11g, First Generation is designed to be connected into your DSL router via a standard RJ-45 ethernet cable. Besides an ethernet port it has a USB port so you can connect a printer to it in order to wirelessly access a networked printer, and a headphone jack for accessing audio. This is a dual speed device capable of a data transfer rate of up to 54 Mbps for AirPort Extreme-enabled and other Wi-Fi Certified 802.11g and Up to 11 Mbps for AirPort -enabled and other Wi-Fi 802.11b-enabled computers. Range is up to 50foot from the base station in typical use at 54 Mbps data rate and 150-foot from the base station in typical use at 11 Mbps data rate. In terms of utility and ease of use, the AirPort Express is a treat. It comes with an excellent little manual: I was given it as a used item with no proper provenance and, by using the instructions provided, within ten minutes of plugging it into our DSL router I had located and cleared the device of its previous owners account name and security password, reset the device to factory settings, put in my own network name, password and security prefs, and connected to the internet. I did not even have to load software: The Airport Utility built into Mac OSX 10.10 Yosemite recognised the AirPort Express as a new device and joined it seamlessly into our existing networks. Fortunately, when I got the AirPort Express base station I was given a Griffin AirBase with it. In the picture, above right, the AirPort Express is firmly bedded in the Griffin product. The Griffin Technology’s AirBase functions as a visually presentable stand for Apple’s AirPort Express 802.11g and is also actually quite useful at overcoming some of the AirPort Express’s several faults. The bottom of the AirBase is a weighted metal piece (the entire unit weighs a hefty 9 ounces) with a 3.25" x 2.75" grippy rubber “foot” to keep the unit from sliding around a desk or shelf. The Airport Express weighs about 7 ounces on its own so combined they weigh in at about one pound. The top of the AirBase is made of white plastic and provides an AC connector that takes the place of the AirPort Express’ removable plug—you slide your AirPort Express onto the connector and to seat it snugly and securely in the AirBase. You then connect the AirBase to an AC outlet using the included cable. Benefits: By letting you place your AirPort Express up high on a desk or shelf— the AirBase helps improve reception. By placing the AirBase in an accessible location, it’s much easier to quickly connect or disconnect Ethernet, USB, and audio cables Having the Express’ indicator light in a visible location is useful for diagnosing connection problems. The rear of the AirBase has a metal “cable management” loop that does exactly what it says: By threading Ethernet/USB/audio cables through the loop before plugging them in, your cable clutter is reduced. Submitted by Michael Shaw Jewel 32GB USB 3.0 Flash Drive from Silicon Power I have reviewed a number of thumb drives and external hard drives in the past. There is relatively little that I can add to why you should have a couple of thumb drives handy. The main question, with so many choices available, is which one to buy? There are a few properties I look for in a thumb drive. Besides the size of the drive, I want it to be fast, rugged, and look good. The Jewel 06 series of thumb drives from Silicon Power comes in four sizes: 8, 16, 32 and 64 GB. It is up to you to determine the correct size for your needs, but remember, you can partition the drive any number of ways. The blue strip on the interior of the USB slot indicates that it is USB 3.0 which is super fast. I have tested the speed of various ports on my computer and hub with both USB 3.0 and 2.0. The speed of transfer from my iMac to this drive was around 20-25 seconds per GB. The speed difference is very noticeable. The J06 is backward compatible with any USB 2.0 port so you can use it with your older technology. The Jewel (J06) from Silicon Power is definitely the smallest drive I have tested. It is the size of a thumbnail. The J06 measures 24 x 16 x 8.5 mm and weighs in at 3.6 g. Most of the drive is composed of the silver USB connector. The USB slot is covered with a black plastic rubber cap. The cap pulls off to expose the slot. This cap provides protection for the USB slot so that it does not get damaged while sitting in your pocket or elsewhere. Lastly, you will appreciate the look of the drive. The J06 has a modern appearance with its stylish, streamlined shape design and dark blue colour. The plastic surface prevents scratches, fingerprints and dirt from sticking to it. The Jewel J06 is the perfect storage item for travelling. It takes up so little space. And the use of the high-density plastic housing offers complete waterproof, vibration-proof and dust proof protections. It supports Windows 8 / 7 / Vista / XP / 2000, Mac OS 10.3.x and higher, and Linux 2.6.x. It also comes with a lifetime warranty. My only concern with this drive is its size. I am worried that I might misplace it. There is a built-in strap slot so you can attach it to something else and I may want to take advantage of this. I am surprised that it does not come with a suitable strap in the first place. Maybe the change compartment of my wallet will be a safe place for now. The durable design and cover should provide adequate protection wherever I decide to carry it. And, it is also waterproof so I don't have to worry about spills. Go to www.silicon-power.com/ and read more about this minuscule drive. If this small drive can hold 32GB of data then what is taking up all the extra space on those other drives? Search online for this drive. It is available at numerous places such as Newegg or Amazon for about $16. The larger 64GB drive is around $30. With a lifetime warranty, you can't go wrong picking up this minuscule flash drive. Submitted by Marcel Dufresne Control + Command + D What Does It Mean ? Here is an interesting bit of MacTrivia for you Mac Book users: if you hover your mouse over any word you can tap three fingers on the track pad to see the definition, as well as Thesaurus and Wikipedia entries for that word. You don’t have to select the word. You just have to hover your I-beam cursor over it. And you don't need a Macbook to do this. On a regular desktop Mac, whenever you move your cursor over text that is potentially copiable the pointer will turn into the I-beam that you would use for selecting text to copy. Instead of selecting text, you can just hover your cursor over the target word, and press Control+Command+D to get the same definition and other information. The target word will be outlined in yellow to indicate and acknowledge that it has been selected and a box will appear over top the text on the page replete with dictionary definitions, alternative words, and Wikipedia information. Mark January 28th on your calendar and bring a friend. There will be a Special Presentation and fun for all ! Next MaUsE Meeting: January 28th 2015 If you find yourself wanting to listen to more books, you can pay and add book credits to your subscription as you go. The next book that month can be had for an additional $10.00. One of the lesser used advantages of iDevices is listening to books and podcasts. Sure, music is stored on it from your own library and radio stations can be accessed through the Internet but I prefer to listen to audio books and podcasts whenever I have my earplugs in use. With the longer distances that we travel we find ourselves caught in transit more and more and this time waiting can be put to better use with audio books. Exercising while listening to music is a choice, but again, I prefer a good book. I find that I am much more likely to go out for a walk if I have the next chapter of a book that I want to listen to. Wanting to know what happens next is a great incentive to improve my exercise regime. Finding good books to listen to may be a chore for some of us. Fortunately there are sources out there (besides your city's library). Audiobooks.com is an audio book service that allows members to stream and download audio books. Audiobooks.com delivers access to any Internet-enabled smartphone or computer, including Apple iPhones and iPads and Android smartphones or tablet devices. The company uses its own technology that synchronizes the users' last listened-to bookmark position across all devices. As long as you have an Internet connection for your devices, it will sync your last position. Read on to find out more about Audiobooks.com. The first thing to do in order to get an audio book is to sign up for an account from Audiobooks.com. The first book is on them. You can sign up for a 30 day free trial and get one book credit. You could of course listen to the audio book from your laptop or computer, but it makes more sense to use your iDevice. So the next step is then to download the 'Audio Books by Audiobooks' app (a mainly orange icon) from the iTunes store. At the present time, this app is only available for iPhone/iPad or Android devices. Now you can listen to your book on whatever device is handy, and, as long as you are connected to the Internet, your progress will be in sync over any device. For computer use Audiobooks.com supports the latest versions of Chrome, Internet Explorer, Firefox and Safari. The basic cost of a membership is $14.95 per month which entitles you to one book credit (one audio book). One book credit allows you to listen to any audio book from their library. Audio books are more expensive than ebooks because they are really a performance. It is more like a movie than just a book. They often have sound effects to improve the listening experience. Also, many best sellers would cost the same and you can’t read a best seller when stuck in traffic. The quality of an audio book lies totally in the voice and the ability of the narrator. An accomplished narrator can make the audio book come alive. To help you decide if you should get that particular book from Audiobooks.com, you can listen to a preview which is usually a three minute clip of the book. I am glad to have this short preview to the audio book. It gives me a feel for the ability of the narrator. Pushing the 'Continue' button will automatically purchase the book. When you stream an audio book, you're able to instantly listen to the book over your internet connection. The great thing about streaming is that you don't need to download the audio book first to listen to it, and it doesn't take up space on your device. Downloading is a great option when you have an Internet connection and want to keep the book on your device for offline listening, especially if you're heading somewhere with poor reception. You can always delete the book from your device, but it stays in your library. Audiobooks.com has been around for a number of years. As such they have over 40,000 audio books available in their library. The browsing set up lets you find what you want by quickly using advanced sorting techniques. You can choose from a pre-determined booklist such as New York Bestsellers or the National Book Award 2014 Finalists. I prefer searching by genre of which they have 25 listed. Once you have decided on a genre, this is then broken down into sub-categories to again help you to pinpoint exactly what you are looking for. The Science Fiction and Fantasy area has seven sub-headings. Once there, you can sort the many books through publication date or highest rated or other categories. If you know exactly what book or author you want then just search for it from the search field provided and bypass all this other stuff. Some of these books are free, which will not cost you a book credit. At other times, some books go on sale, and can be purchased for $5 or $10. Whatever your interests, you will find something to listen to every month. The Audiobooks.com app is relatively easy to use. On the left hand side you find a menu listing ‘Search’, ‘Featured’, ‘Your Books’, ‘Browse’, ‘Settings’, ‘Messages’, and ‘Now Playing’. Most of these need no explanation. It defaults to ‘Featured’ when you first open it. The currently playing audio book is listed at the bottom of the window and is ready to play at the tap of your finger. Going to 'Now Playing' is the best way to control the audio book. It has a slidable button to quickly move forward or back through the book along with a timer showing the present progress of the book as well as the total length of the book. Another couple of buttons let you jump ahead or back in 30 s intervals. For those of use who like to read (listen) to a book just before falling asleep there is a timer option that will shut off the audio book after a certain length of pre-determined time (5, 10, up to 90 minutes). You can thus listen to a book as you are dozing and not worry about the story playing away while you are asleep. Another function is the narrator's reading speed. You can up this from normal to four times faster. An audio book is also a great battery saver for your iDevice. Listening to a book takes very little battery life as the screen goes to black as you listen. Reading an ebook uses up the battery a lot faster. The "save" function allows you to add unpurchased books to a saved list. This is separate from your library, and acts like a wish list or "to-read" list. You can save any titles that you don't want to purchase right now, but want to keep bookmarked for later. For now, the subscription service is only available to listeners in the United States and Canada. International users can always listen to the free books by downloading the app. No account is necessary for the free books. If you're an Audiobook.com member and you'll be traveling outside of the USA or Canada, make sure to claim a credit on any book you want to listen to on your trip before you leave. Once you've claimed the credits and the books are part of your library, you can download, delete or stream them as required no matter where you are. The 'Audio Books by Audiobooks' requires iOS 6.1 or later. I have a really old iPod Touch which unfortunately tops out at iOS 4 and cannot use the app to listen to audio books. However, if I have the Internet available, I can stream the audio book through my iPod’s browser. Otherwise, I will simply load up my iPad and away I go, listening during walks or driving. Do yourself a healthy favour and get some audio books for your device. If you want quality books then get a subscription from www.Audiobooks.com. Try it out with that first free book. This is the perfect additional gift for yourself or for others once that iPad has been purchased. Submitted by Marcel Dufresne Mio FUSE is a sleek all-in-one performance wristband that combines patented Mio continuous optical heart rate monitoring technology with the features of a sports watch and activity tracker. Designed for all-day use, Mio FUSE tracks heart rate, distance, pace, steps, calories, and goal progress to provide athletes with a more comprehensive look at exertion, recovery, and overall fitness than any other product on the market. Bluetooth Smart (4.0) and ANT+ transmission In-workout communication to Mio GO app, third-party fitness apps, or sport devices Built-in accelerometer to capture steps, calories, distance, and pace Optical heart rate measurement and display in ‘workout mode’ Multi-Color LED to indicate current heart rate zone Automatic wireless syncing to Mio GO app Offline storage of 2 weeks of daily activity data and 30 hours of workout data Customizable display, activity goals, and heart rate zones (through Mio GO app) Chronograph timer Vibration and LED Color Alerts Clock Rechargeable LiPoly battery (charged by USB charger) Water resistant to 30 meters (3ATM) Available for Holiday Season 2014 Mio FUSE (Crimson) 59P-LRG STRAP: LARGE Mio FUSE (Aqua) 59P-REG STRAP: SMALL / MEDIUM Take Control: Yosemite DoubleClick features an ebook from Take Control Books every month. These ebooks have been published in PDF format and cover issues related to Mac OS. Because they are in PDF format, these ebooks have a lot of advantages over the traditional paper books. Electronic books are a new experience for many people, but they provide you with a good deal of flexibility that isn't available with printed books. With your purchase of the ebook you get expert advice on various topics but with an Apple perspective. These are the same expert authors of some best-selling print books. The download is immediate and you don't have to leave your house to get it. Because it is paperless it can be purchased for much less than a paper edition. Also, if a new edition of the book comes out, your original purchase of the book allows you to easily update your current copy for free. There are clickable links right in the text so that your book immediately leads to other sources on the same topic. It is readable onscreen which means you can control the size of the print. If you use Preview you can even highlight sections without messing up the book (use a copy of the original if you are worried). You can even print up a paper copy of the book if you feel the need. The catalog is very extensive and can be accessed from http://www.takecontrolbooks.com/catalog. They offer free sample sections of all their ebooks and a money-back guarantee, so try one out anytime. As readers of the DoubleClick, you also now have access to this coupon (CPN90219MUG) which entitles you to a 30% discount on the purchase of a book. The book featured this month is Yosemite: A Take Control Crash Course by Scholle McFarland. Read this ebook to get more out of your Mac as you go about your everyday activities. This book introduces Yosemite's new interface and discusses new features like iCloud Drive, Handoff, iPhone voice/SMS relay, and Notification Center's Today view. You'll learn about key changes in core Apple apps with chapters about Safari, Mail, Messages, and Calendar. You'll also find answers to questions brought on by recent additions to OS X, such as how to control notifications, tips for using Finder tags, and working with tabbed Finder windows. This 77 page ebook closes with two under-the-hood topics: setting up a new user account (for a child, guest, or troubleshooting) and troubleshooting (with techniques including Safe Boot and OS X Recovery). The book kicks off with an overview of the major changes in Yosemite, so you can come to grips with what's new before you dip into any of the longer topics: The look: Find out what's important about Yosemite's new look, plus discover how to toggle Translucency and Dark Mode. You'll also learn tips for working with the new close, minimize, and full-screen buttons on the windows. Spotlight: Spotlight can now do more than ever before, so make sure you aren't missing out, and make sure you've customized Spotlight to match your needs. iCloud Drive: Find out what it’s for, where it works, how to turn it on, and more. Handoff: Discover how to use Handoff to move from one device to another (say, from your iPad to your laptop) and pick up where you left off in. Use your Mac as a speakerphone: Learn how to make and answer telephone calls from your iPhone on your Mac (even if your iPhone is in a bag on the other side of your house). AirDrop: Get the latest on Apple's odd AirDrop feature, which now lets you transfer files between an iOS devices and a Mac, instead of just between iOS devices or just between Macs. Notifications: Get more practical (or fun) use from Notification Center by making use of the new Today view, which you can customize with third-party widgets. Also find directions for getting rid of annoying or distracting notifications. Safari: You'll notice that Safari is new right away because the toolbar and URL/address field are so different, but it's really worth reading this chapter because quite a lot has changed and you can surf more efficiently if you know about the new capabilities. Mail: If you use Apple Mail, you should know about Mail’s two major new features: Mail Drop and Markup. Mail Drop makes it possible to send large attachments easily. Markup lets you annotate PDFs and images inside of Mail by adding your signature, comments, arrows, and more. Chat and SMS: Messages in Yosemite is far more useful now, due to its beefed up group chats and capability to send and receive SMS messages relayed through your iPhone. Read all about it so you don't miss out on all that's now possible. Calendar: Learn about Calendar's new intelligent autocomplete, calendar overlays, and updated Today view. Plus, discover key tips for working effectively with recurring events, alerts, and multiple calendars. Finally, the book offers help with aspects of using Yosemite that haven't changed much since 10.9 Mavericks, but which many people either haven't yet started or need help with: Finder tabs: De-clutter your Desktop by using Finder tabs to bring multiple windows into one. Finder tags: Flexibly organize and find your files with tags rather than relying solely on old-fashioned standard folders. Accounts: Avoid problems by setting up user accounts for kids and guests, and for troubleshooting unexpected problems. Problem solving: Make sure you have a copy of this book on an iOS device or secondary Mac so you can pull it out if you need to troubleshoot a serious problem, like an app that won't launch, a login item that's gone bad, or a Mac that won't boot. Learn OS X 10.10 Yosemite's new features quickly!! This ebook costs $10.00 normally but using the coupon will make a difference. Check this ebook out and a lot others at www.takecontrolbooks.com. Submitted by Marcel Dufresne HooToo TripMate Nano Wireless Wi-Fi Mini Router and Bridge Last month I did a review of the HooToo TripMate Elite. HooToo actually makes four different TripMates. This month I would like to review the Elite's little brother, the TripMate Nano. It has fewer functions than the Elite but it might be a better fit for your pocketbook. The Nano can act as either a Wi-Fi router that turns both an existing wired or wireless Internet connection into a local Wi-Fi hot spot that can be shared by multiple devices. It can also be used as a Wi-Fi USB storage file sharing device for your mobile phones, tablets, or laptops by turning either an inserted memory stick, an SD card or a portable hard drive into a Network Attached Storage device. Read on to find out about these handy functions. As a travel router, it will turn an existing network, such as at a hotel, into a handy, secure, local hotspot that can be shared by the multiple devices you might be using in your room. By connecting up to the hotel network through the TripMate, you will be able to set your own password and not have to use the generic password that the hotel hands out to anyone staying there (if in fact they have a password). The TripMate does have an Ethernet slot which could be used to turn an existing wired network into a wireless one. The key word here is that you will have increased security by using the TripMate. Because the TripMate is now the source of the Internet for your room, you should find an increase in the strength of the signal. Secondly, there is my favourite use for this device. The TripMate creates its own wireless network that enables you to transfer and share media for Wi-Fi enabled devices. I have been looking for a gadget that would save me precious storage space on my iPad while still pro- viding fairly clear video. We like to load up the iPad with either a TV series or a couple of movies when we go travelling to a foreign country. The language on the local television is not always English and it is convenient to have something to watch when we have idle time. The TripMate allows you to stream videos directly from your USB external storage without having to download them directly to the iPad. This works anywhere because it is creating its own Wi-Fi signal. Now my iPad is directly linked to an external USB drive enabling me to transfer documents, photos or movies. There are few buttons and slots on this device, making it very easy to use. On one side there is a reset button and the USB 2.0 port. On another side, there is an Ethernet port, the micro USB charging cable slot and a button to switch from wired to wireless input. The Wi-Fi network is controlled through a special TripMate app which can be downloaded for free from the iTunes store. Setting this up for use is relatively simple. Plug in the TripMate Nano. This starts the WiFi signal. Next, go into the iPad settings and choose the TripMate Nano as the source of your Wi-Fi network. Insert the USB stick into the USB slot of the Nano. It will detect the USB device and create a share folder on it which has 4 subfolders: Documents, Music, Pictures, Videos. Now, when you run the TripMate app, you will see a folder that contains your external drive. The app will also detect similar data from your iDevice. This easy to use app lets you control the transfer of files as well as the playing of music or videos with the tap of your finger. You can now read, listen, and view those items stored on the USB drive without them being stored on the iPad. In the future, while travelling, I will be transferring some of my photos from my iPad directly to that external USB stick. I know that the photos are also in iCloud, but I prefer to have multiple storage areas for some special pictures (just in case). There are some limitations to the Nano. The biggest difference between the Nano and the Elite TripMate is the power source. The Nano does not have one built in as does the Elite. This is also why it is so light. It is very much suited for travel. To run it, you will need to plug the Nano in using the iPad's charging plug and the micro USB cable that comes with it. I have also used an external battery pack, one that can charge up my iPad, as an energy source so that I can use the Nano even if a wall plug is not handy. This will require you to travel with an iPad charging plug. Lastly, and most important for our purposes, the TripMate will not support MAC formatted disks. It works with NFTS / FAT 16 / FAT 32. When I first tried out the Nano I was wondering why some of my thumb drives were not showing up in the TripMate app. The reason was that I had reformatted the drives with a MAC format. The Nano is a light addition to your travel baggage. It is 56 X 51 X 17 mm (2.2 X 2 X 0.7 in) is size. With no battery component, it weighs in at a paltry 80 g (2.8 oz). However, you will have to have an external charging plug. It does come with a Micro USB cable that would let you plug it into the charging plug. By combining the functions of a personal cloud and a travel router, the TripMate Nano is a welcome travel companion. Go to www.hootoo.com/ and have a look at this great device. Read about it or watch a video showing it in action. With its small size and weight, it is a great travel companion. I don't need any additional items other than my charging cable and plug. And the price for this great device? I found that Amazon.ca had it listed at around $25 (cheaper at Amazon.com), which is about half the price of the Elite. If the main purpose of getting a TripMate device is to connect a USB thumb drive to your iPad, then this is the better buy. Now I can easily transfer photos or watch movies without having to use up my meager iPad's memory. This is exactly what I have been hoping to have while travelling with my iPad. For my purposes, this is the TripMate model that I will probably take when abroad. Submitted by Marcel Dufresne www.hootoo.com [] facebook.com/HooTooOfficial Apple Hardware Test Older Macs Only If your Mac starts behaving badly, there are several possible causes, but usually it is related to software, hardware, or environmental issues. (By environmental, I mean hygiene or heat related. The performance of your Mac can be adversely affected by inhaling dust and cigarette smoke to the point where it becomes unstable or noisy.) For older Macs, the ones that shipped with the operating system on one or more CDs or DVDs, there is help at hand for diagnosing possible hardware problems if you can locate your original system disks. Some models shipped with a separate Hardware Test disk but for a lot of models Apple simply created a 50 MB partition on the first system software install disk that contained a minimal operating system and the Apple Hardware Test utility specific to that model. To see if you have one of these, dig out your system disks and see if it has a little notice on the Mac OSX Install Disk 1 that says, “To use Apple Hardware Test, hold down the Option key as the computer starts up.” To use the Apple Hardware Test, insert your system software Install Disk 1 into your computer and restart it while holding down the Option key. When you start up your computer while holding down the Option key you will get a gray Startup screen that shows an icon for every volume and every device connected to your computer that holds a possible valid system capable of running your computer. Because there are two valid systems on your system install disk, the system install disk will show up twice, both as an installer and as the Apple Hardware Test. After a short wait, about a minute or so, you will be able to select the Hardware Test icon and click on the Arrow button to continue the Startup. The Apple Hardware Test has a singularly inelegant interface. It offers the user the barest information about the hardware in his or her Mac but is still a quick way to rule out serious hardware faults. For instance, it has an information / profile chart that shows how many and how fast your processors are, how much RAM you have installed, and indicates the presence of optional equipment like modems, Bluetooth and AirPort devices. If any of this information indicates a problem, like missing RAM, or your computer actually having two processors but only one of them showing up, or the Test indicating the absence of a modem when you know you have one, then this is valuable information. The Hardware Test can verify the integrity of your logic board and RAM modules. If it finds no problems, it will simply indicate a pass. If it finds errors it will give an error code and suggest solutions. Unfortunately, I have never had a computer fail the Hardware Test, so I have no pictures of that. If the tests determine there is an error with your system, they will display an error code. The codes may be a bit cryptic, but you can contact Apple Support to see what they mean. As a general reference, here are some of the breakdowns for what the error codes mean, so if you see an error that begins with one of these identifying sequences, then it means the specified component listed at the end of the code is not working properly: 4ETH: Ethernet controller 4IRP: Main Logic board 4MLB: Logic board controller 4PRC: Processor 4HDD: Hard disk 4MHD: External disk 4YDC: Video card 4SNS: System sensor 4MOT: Fan motor 4MEM: Memory module 4AIR: AirPort wireless card n the case of a sensor error (4SNS), to determine what type of sensor is being referenced, check its first letter, which should either be "I" for current, "T" for temperature, or "V" for voltage. Then check the second letter against the following list to see what component it refers to: A: Ambient air sensor B: Battery C: Central processors (CPU) D: DC (direct current) e: PCI-express slot F: FireWire port G: Graphics processor (GPU) H: Hard disk h: Heat pipe (heat sink) L: LCD display M: Memory or memory riser boards m: Misc. (i.e., battery chargers) N: North bridge (motherboard controller) O: Optical drives P: Power bus p: Power supply W: Airport Wi-Fi card If you get an error that deals with an Ethernet controller, the main logic board, a logic board controller, processors, or sensors, then try rebooting the system and resetting the system PRAM to see if the problem clears. The system's PRAM contains a number of variables that are passed to the firmware when the system starts up, some of which are acted upon by the firmware (such as the default boot volume) and others of which are passed to the kernel and system software (such as boot options like Safe Mode). It is possible that corruption in these variables could result in the firmware being instructed to show the boot volume, so resetting the PRAM may help. When it comes to addressing the error code situation, unfortunately many times there's not much that you can do. In most cases if a hardware component is not working then you will need to get it replaced; however, there are some instances where you can try another step or two before having your system serviced. To reset the PRAM, restart the system and immediately hold the Option-Command-P-R keys. Hold the keys and let the system reboot a couple of times, and then release the keys and allow the system to boot normally. Resetting the PRAM will not harm anything on the system, and might only require some settings to be adjusted like mouse speed or system volume. After you have reset your PRAM, go to the "Startup Disk" system preferences and ensure your default boot drive is chosen as the startup disk. There are some good best practices to perform before running off and resetting your Mac at the first sign of strange behavior. This isn’t a step-by-step list; try each and all of the below separately when you’re having trouble: Quit (Command+Q) or even Force Quit (Command+Option+Esc) any and all running applications. Log off and then log back on to all logged on user accounts. Put the Mac to sleep and wake it up again. Restart the Mac. Shut down and unplug the Mac (and remove any battery if you have access) for at least thirty seconds before powering back on. If you are getting a problem with the fan speeds or any sensors then you can also try resetting the system management controller , but in addition to these resets do check the fans for physical obstructions (dust and dirt) or for mechanical issues. If you see a memory or AirPort card error code, then your best bet would be to first try resetting them in their connections on the motherboard, but ultimately replace them if you cannot get the errors to go away on subsequent tests. If you are unable to perform these tasks yourself, then you should be able to have it done at an Apple Store. Submitted by Michael Shaw New From AKVIS: Neon In last month’s issue I wrote about AKVIS Sketch and the month before that it was an article marking the debut of AKVIS Chalk. For this month’s issue, I have another brand new offering from AKVIS: Neon. The interface for Neon is very similar to the interface for all of the other AKVIS programs and it functions in much the same way so you can expect to be up and running with Neon in a very short time. It has two modes - Express and Advanced. In Express mode all you get is the 35 Presets - the ones shown here at right and a simplified interface for modifying blur and intensity. In Advanced mode you get a lot more interaction with the program - including extra controls for colour correction and additional parameter control sliders for the chosen Preset. You also get text overlay in the Advanced mode, and a choice of background textures and canvases. Neon, as the name implies, puts a glow and a sparkle into your images. Like the other AKVIS programs, Neon will dazzle the user with a wide range of possible treatments. Each of the 35 Presets is, in its own way, a distinct filter package that differs subtly or vividly from the rest. And, like the other AKVIS programs, Neon is available for Mac and Windows systems, available as either a stand-alone application or a plug-in to Adobe Photoshop (and other image editing suites), and can be downloaded from AKVIS for free and used for 10 days as a fully functional demo mode before any commitment to purchase is required. Go to : http://akvis.com/en/download-macintosh-software.php to see everything AKVIS has for Mac users. After 10 days the Neon demo expires but that time period will give plenty of opportunities to explore the capabilities of Neon to determine if it should become a permanent part of your software library. Some few of the Neon effects are barely discernible and many others create wildly fanciful abstract renderings but whether you are looking for the surreal or the subtle, somewhere in the Presets selection AKVIS Neon has you covered. As with the other AKVIS programs, the better part is using the software, not reading about it. The program shows a floating pallet sample of your image that responds instantly to Preset selections so you can preview effects with or without the Advanced adjustments before rendering and applying them to your entire image. Using the Tools pallet it is possible to localize the effects to portions of the foreground or the background. Anyone who knows how to click on a button already has the skills required to start using Neon. In order to use Neon as a stand-alone application you will need an Intel Mac with at least 4 Gigs of RAM. To use the plugin you must also have a photo editor supporting plugins installed on your computer: many of the Corel programs and any version of Photoshop or Photoshop Elements will be fine. For a full list of compatible image editors check the AKVIS website. If you decide that you want Neon, you can order directly from AKVIS at: http://akvis.com/en/neon/price.php. You can pay for AKVIS Neon online via the Cleverbridge store. It offers different payment methods: credit card, PayPal, WebMoney, wire transfer, or purchase order. When the payment is effected you will get a license key delivered to your e-mail within minutes. To get a full version of Neon just register the trial version using this number. The cost of AKVIS Neon is US $40 for either the plugin or stand-alone version, or US $50 if you want both. Commercial licensing is slightly more. Submitted by Michael Shaw SpeakaLegend and SpeakOrTreat Interactive Speaking Apps from ToyTalk ToyTalk is a family entertainment company with the goal of educating through cartoon characters and conversation. Their motto is imagination + conversation. At the moment they have four apps available at the iTunes store. Two of these are free, which will give you a chance to try them out and get a feel for what they are trying to do. The company's aim is to have kids speak and then respond to what was said. ToyTalk's apps intend to engage children in conversational stories. This is a large undertaking when you consider how much more difficult it is to analyze and understand what kids are saying compared to adults. There are many translation apps out there that have difficulty understanding the various accents of the people using them. Perfect translations are hard to come by. As part of their toolkit, ToyTalk has created a method for writing character dialogue that contains a considerable library of possible responses to the types of things kids might say or answers to the questions they may ask. I found that it worked quite well with my four year old grandson. Sometimes his answer was too short and did not register in the data base. A couple of times he was asked the same question over again in order to elicit a different, more understandable response. ToyTalk was founded in 2011 by former Pixar employees. Their products target 4-to-8-yearolds. My grandson got right into the Halloween SpeakOrTreat app. The two year old of course also wanted to get in on the act and contributed to some of the answers. The games are playable in touch-only mode, but enabling speech recognition is recommended in order for kids to gain the full experience. To enable speech recognition, the app needs to capture audio recordings, for which parental permission is required. This is done via email when the app first launches. After granting permission, parents can access and control their child's recordings from the website at www.toytalk.com. The ToyTalk's system collects the children's speech patterns to feed into a continually updated database. The more they talk to the characters, the better the app understanding what they are saying. A weekly email is sent out notifying you that something has been recorded and can be listened to by going to the web site and logging in. The storage space at the web site is unlimited and parents have as much as is needed for their recordings. Parents are responsible as to what to delete and when. There is an Editor's Picks section at the website that is dedicated to the top audio recordings. Permission must be granted to have your child's recording available for others to listen to and they do remain completely anonymous. I only mention this spot because it is a good way to listen to some questions and responses. It will give you a brief look into what the app is trying to accomplish. In SpeakOrTreat, your child gets to visit a scary neighbourhood as they go trick or treating from one house to the next collecting candies. From the Werewolf, who sounds very much like Jimmy Stewart, to the Vampire, Count Dracula, they will talk with and entertain some colourfully eerie characters. This app provides an hour of dialogue as your child goes to five different houses. Each house, with a different figure, will attempt to engage them in some sort of conversation, or possibly some singing. The recorded answers can be accessed from the ToyTalk web site. This app is perfect for the Halloween season. There is plenty of additional animation in the background. Singing Jack'o'Lanterns, a black cat, and skeletal hands are all part of the fun atmosphere which hides the intended educational nature of the game. Each reasonable answer to a question provides the speaker with a candy which gets placed at the top in a type of candy meter. When this is full, they are ready to move to the next house in the block. Collecting the candies was a great incentive for my grandson to keep playing the game. Unfortunately, other than deleting the app and reinstalling it, there is no way to reset the candy meter to zero once the level is complete. I would like to see this added in an upgrade at some time. There are no additional in-app purchases nor third-party advertising. This is a great little app to have around near the end of October. Apple's First Ever Automatic Security Update Patches Critical Bug SpeakaLegend is similar. In this case, they meet mythical creatures on a quest to find the elusive Unicorn. From the Mermaid to BigFoot, they will talk with some fantastical friends. There is the Loch Ness monster, a Mermaid that speaks in rhyme, a Fairy to listen to their wishes, a Dragon with an overactive tummy, a Sphinx with some riddles, and more. There are a total of ten creatures to interact with, having about two hours of dialogue to dispense. There is a Happiness Meter that indicates how far they’ve gotten in their quest to find the Unicorn. In this game, they can visit the creatures in any order. It is not sequential. However, each one has to be visited before they get to meet the Unicorn. There are plenty of additional touch activities going on with all the characters. Tapping around will reveal some surprises. If you would like to see what ToyTalk is all about then download SpeakaZoo or The Winston Show which are both free at the iTunes store. SpeakOrTreat ($1.99) or SpeakaLegend ($2.99) have more game play. Depending on when you intend to have them played, SpeakOrTreat is great around Halloween. SpeakaLegend is fun anytime. Get those youngsters of yours not only speaking but thinking and answering more in depth questions. It is less embarrassing for them to speak to an iPad than to have to answer to an adult. Submitted by Marcel Dufresne Apple has issued its first ever automatic security update for Macs computers, fixing a security flaw that the company felt was too dangerous to wait for users to patch. The update is seamless. It doesn’t even require a restart. The vulnerability that the update fixes is found in a common software component known as NTP or network time protocol. NTP is used for synchronizing clocks between computer systems and across the global internet, and has previously been exploited by hackers to pull off substantial attacks on other systems. The flaw was identified by Carnegie Mellon University’s Software Engineering Institute and was made public in a security bulletin issued by the Department of Homeland Security in December. The vulnerability affects dozens of technology tech companies’ products as well as Apple’s. Although Apple has had the capability to install software fixes automatically for more than two years it has previously preferred to prompt users to authenticate the updates. (Microsoft has been automatically updating vulnerabilities in its Windows software for years.) Check the App Store to see if this update is waiting for you. To Speed Up Your Mac... Add RAM I wish I had a dollar for every time I have heard or read that the best way to speed up performance on your Mac is to add RAM. This is especially true if you have one of the older Macs that came with barely enough RAM to run the system that it came with and you have updated your OS without increasing the RAM. Those of us with antique 2007 Intel iMacs that are restricted to 4 gigs of RAM know the pain of waiting for Yosemite to do anything. Most new computers come with the bare minimum of memory (RAM) so you can perform basic tasks like checking e-mail or watching videos online. Trying to multitask or even run a typical application can slow your sytem to a crawl. By upgrading your computer with more RAM, you can quickly and easily speed up web surfing, printing, transferring files, video editing, gaming, downloading, multitasking, starting programs, and booting up. Right now the back-up Mac in the DoubleClick office is a wonderful dual 2.3 GHz PowerPC G5 tower Mac. I recently found an opportunity to get a pair of 2-gigabyte PC4200 RAM chips (4 gigabyte total) to upgrade the memory in this computer for what I considered to be very little money. There are lots of ways to buy PC4200 RAM and I explored a few of them to make sure I was getting the best deal. Unfortunately, when it comes to shopping for memory for obsolete Mac computers, its is common to find that big box stores like Best Byte and Future Shop do not stock what you need. Specialty shops online (like Other World Computing) may have exactly what you need, but unfortunately many of the American online stores ship via UPS Ground. That works fine for shipments within the USA but UPS has a license to assess duty charges on international shipments and they charge heavily for the assessments. Even if there is no actual duty payable, as is the case with computer parts, UPS may decide to put a C.O.D charge of half the declared value, or more, just for checking off the “No Duty” box. Anyway, I checked with OWC and they wanted US 54.99 for 4 gigs of PC4200 RAM guaranteed to be specific to this G5 tower plus a charge of from $3 to $30 for shipping via various methods (USPS, UPS, FedEx, DHL). Then I checked eBay, where to best deal I could find for a pair of 2-gig PC4200 RAM chips was about US $42 plus $10 shipping. Two big problem with buying RAM are ignorance of the user and complexity of the product. There is no end of confusion about RAM that is high vs low density, ECC vs non-ECC, buffered vs unbuffered, DDR2 vs DDR1 or 3, desktop RAM vs server RAM, number of pins, latency, noise and compliance to JEDEC standards, whatever that means. What this means in practical terms is that unless the seller assures you that the memory actually came out of a Mac very much like yours, it might work and it might not, which is too much of a gamble if you have to pay up front and then hope the delicate RAM shows up in one piece and is the right kind. Then there’s the local Oshawa Kijiji and Craigslist. There was nothing around here on CL but on Kijiji I found a local fellow Mac user selling off pieces from his 2.3 GHz G5 tower that had died. Among the parts he was selling were two 2-gigabyte and two 512-megabyte PC4200 RAM chips. He wanted $35 for all of it, with no tax, no shipping, and no ridiculous UPS duty assessment fees, which beats the crap out of US $52 on eBay. Getting his G5 tower going again was beyond him but by selling it off in pieces he was creating an opportunity for me to grab some RAM that came right out of a computer identical to mine. In terms of RAM upgrades, the aluminum Apple G5 towers are ridiculously easy to upgrade. The side of the box folds down and detaches and the plastic fan housings slide out like drawers. This exposes the RAM slots. In my G5 tower, shown at right, there are 8 RAM slots in two banks of 4 located behind the fan shroud and slot each can hold a 256 MB, 512MB, 1-Gig or a 2-Gig module for a maximum total of 16 Gigs of RAM. This type of computer can only accept RAM in matched pairs and they must be arranged properly. The computer shipped from Apple with 512 MB total RAM, configured as a pair of 256MB modules in the middle slots (1). Starting at the middle the two slots closest to the middle are addressed together and must have identical modules. Then the next two outward slots from the next paired unit, then the next pair and so on. Since we started using iMacs and the MacBook Pro there have been almost no articles in the DoubleClick about hardware upgrades. When the DC office had the old Quadra 950 and the Daystar Genesis 800 MP clones, and then the G3 and G4 towers, there was no end of opportunities to rotate processor upgrades, PCI add-ons, and video cards and other neat pieces of hardware through here but lately there has been nothing until now. I know there are lots of MaUsE Members with older systems. If you have upgraded your Mac please feel free to document the upgrade and share your experience. Even if we don’t have the same same setup as you do, I sure we would like to hear about your adventures. Optical Drive Fans RAM Submitted by Michael Shaw Although I did not get the RAM for this upgrade from OWC, I have no hesitation recommending OWC as a good place to look for and buy upgrades for Mac computers. OWC knows Macs and they have a wide selection of guaranteed high quality Mac compatible hardware. They also have terrific support and a series of videos that show how to perform upgrades to all user-accessible components. For my own G5 tower OWC had these little videos showing how to do the common major upgrades that any Mac user can handle. OWC Video: RAM Upgrade http://eshop.macsales.com/installvideos/powermac_g5_mem_h/ OWC Video: Hard Drive Install http://eshop.macsales.com/installvideos/powermac_g5_hd_h/ OWC Video: PCI Card Install http://eshop.macsales.com/installvideos/powermac_g5_pci_h/ OWC Video: Optical Drive Replacement http://eshop.macsales.com/installvideos/powermac_g5_opt_h/ Hard Drive 1 1 2 2 Processor 3 3 4 4 Lo-Fi : Flash From The Past: I found this little program from Alien Skin while cleaning some stuff off an old hard drive and thought I better share it. The program is called Alien Skin Lo-Fi and what you see at above is the application window full size on my 24-inch iMac. The window looks like the back of a camera and it can be re-sized (and re-shaped) by dragging the lower right corner. Basically, Lo-Fi is a filter package designed to apply a variety of “low fidelity” treatments to digital images. Under three headings, Film, Mood and Frame the program provides the user with 35 filters arranged in three classes of picture treatments that can only be used as they are: there are no fine-tuning sliders or settings to manipulate any any of the effects. You just bring in an image and pick from the selection of Films, Moods, Frames to select any one of over 1,700 possible combinations. Whatever your choice, the end result will be an image with a flaw or series of flaws that will create the illusion that there was something off, cheap, or deficient in the image capture process. That’s what “low fidelity” is all about: carefully creating the illusion of the results of careless or amateur photography. Alien Skin Lo-Fi has: 12 Film treatments: Bypass, Desaturated, Faded, Yellowed, Teal, Velvet, Oldachrome, Flash Oldachrome, Ultra Contrast, Over Exposed, Flash Blue, Inflamed, Emerald, or Off. 11 Moods: Crisp, Crunchy, Fine Grain, Gritty, Pushed , Glamour, Dreamy, Cheap Lens, Plastic Lens, Light Leak, Enlargement, or Off 12 Frame styles: Vignette, Coffee, Viewfinder, Dirty, Film Code, Grunge, Portrait, Negative, Peeled, Crumpled, Scallop , Burn or Off. Check out Alien Skin Lo-Fi. Use the link below. It costs $15, less than a medium pizza with two Cokes, and might be just what you want for your next big photo-essay or travel blog. Submitted by Michael Shaw https://app.alienskin.com/store/product/?id=1388 New From Prosoft Engineering Drive Genius 4 with Bootwell In the November 2014 issue we looked at the latest version of Prosoft’s Data Rescue 4 program, the version that comes optionally on a 16 Gig USB stick and includes Bootwell and the option of creating a bootable drive that you can use to rescue files off your main hard drive. Now the people at Prosoft have updated Drive Genius 4, their premium disk and file repair program for Macintosh in the same way. Drive Genius 4 now ships on a USB drive and the program includes the same Bootwell utility for turning the stick into a drive capable of booting your computer so you can more easily use Drive Genius to repair the system on your main drive. Although I referred to Drive Genius as a program, it is really a suite of discrete utilities that are designed to work either together or individually to either solve or prevent problems you may run into on your Mac. Like Apple’s Disk Utility, the Consistancy Check and Repair components of Drive Genius can repair most kinds of logical file and folder errors and corruption on a drive to prevent future critical problems and potential data loss and repair your files. Find Duplicates and Find Large Files are designed to reduce the number of large forgotten files that may bog down your computer. The Physical Check, Speed and Instant Drive Pulse components measure and monitor the health and performance of your hard drives. The Speed component also provides a defragger utility. The Active Files component alerts you to files that are in use in the background that may prevent you from shutting down your Mac or ejecting a drive. Icon Genius allows you to set a custom icon for a drive or folder: very handy now that Copy & Paste no longer works for changing icons. Fix Permissions looks after Permission inconsistencies can result from bad application installers and lead to applications failing to open or randomly crashing.Rebuild is handy in circumstances where a file name is lost and the data is still there but not accessible. Rebuild may be able to list lost file names to the file data again. Drive Genius's NEW BootWell™ Technology creates a special secondary startup drive that can be used to maintain or repair your main startup drive. Drive Genius 4 can be used for offline maintenance and repair of drives that have older, unsupported versions of OS X installed. For maintenance purposes, most Drive Genius 4 utilities work on the primary startup drive “live” with no need for a secondary startup drive. However all repair and recovery utilities require starting your computer from a secondary drive so they can have exclusive access to your primary drive. More about BootWell: Drive Genius 4 is the first version of the program to include Bootwell. Previous versions of Drive Genius shipped on bootable DVDs (dual bootable for use on both PowerPC and Intel Macs) that had a specific version of Mac OSX on them. An advantage of BootWell is that the operating system on the BootWell drive can be updated to keep it current with your future Macs. As described in the Prosoft Data Rescue 4 article in the November 2014 issue of the DoubleClick (q.v.) Bootwell technology is the component of Data Rescue 4 and Drive Genius 4 that allows the user to create a minimal Mac OS on a secondary, or flash drive in order that it can then be used to boot the computer so that the internal hard drive can be taken off line for repairs. The Drive Genius utilities that require a secondary startup drive are: The advanced Physical Check options, Repair, Rebuild, Defragment, and the whole drive Secure Erase option. More needs to be said about using the BootWell drive for defragging your hard drive, (something many of you have not done since the demise of Nortons Utilities for Macintosh). Drive Genius' Defrag tool is the number one selling, most-used Defrag tool for the Mac OS. Apple has been using it at the Genius Bar for over 7 years now. Drive Genius 4 Defrag operation will reorganize large files, compact them to be saved without fragmentation and consolidate the file into one contiguous file. Defrag will also improve the overall performance, shorten boot time, and speed up application launch and access to your large files. Defragging your drive will also reduce wear on the drive because the read/write heads do not need to travel as much across the drive when searching for a file. Drive Genius also compacts the larger files to allow them to be saved without fragmentation. In order to defrag or repair your main hard drive, the OS requires that you boot from a secondary source. Drive Genius' new BootWell tool makes it easy and convenient. BootWell creates a special bootable secondary drive, which can be used by Drive Genius 4 to speed up or repair your main hard drive. Submitted by Michael Shaw

© Copyright 2026