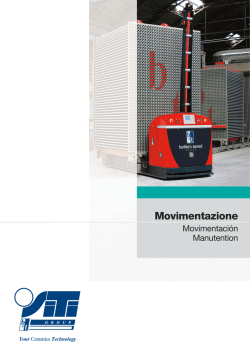
istruzioni di montaggio assembly instructions
PREPARAZIONE FORI - HOLES PREPARATION - PREPARACIÓN DE LOS FOROS
Pulire da residui di sporco la superficie del portellone nella zona
Posizionare la mascherina adesiva al centro dei due portelloni e
Eseguire i fori Ø5 mm nelle posizioni precedentemente segnate.
1 selezionata.
2 segnare i fori con martello e punzone. Per la miglior tenuta adotta-
Clean the surface of the door panels in the selected area.
Place the adhesive template in the middle of the two doors and mark
the holes position with hammer and pin. For the best resistance choose
Make holes Ø5 mm in the previously marked positions. If the fastening
with screw + nut is not possible due to door panels shape, make holes
Ø6 mm to use blind rivets (sequence 7-8-9).
Coloque la plantilla adhesiva en el centro de las dos puertas y marque los agujeros con un martillo y un punzón. Para la mejor fijación
Hacer agujeros de Ø5 mm de diámetro en las posiciones previamente
marcadas. Si el montaje con tornillos + tuercas no es posible debido a
la forma de las puertas, hacer agujeros Ø6 mm para el montaje con los
remaches (secuencia 7-8-9).
re il fissaggio vite + dado almeno in 4 punti per lato.
the fastening with screw + nut, at least in 4 points per side.
Limpie la suciedad de la superficie de la puerta en el área seleccionada.
Step 1
prefieren el montaje con tornillos + tuercas, por lo menos en 4 puntos
por lado.
Step 2
m Attention
3 Nel caso non sia possibile utilizzare vite e dado a causa della
forma dei portelloni, eseguire fori Ø6 mm per usare i rivetti filettati
(sequenza 7-8-9).
m Attention
Step 3
Per evitare la ruggine si raccomanda di applicare sui fori una vernice
protettiva antiruggine al fosfato di
zinco.
To prevent rust, it is recommended
to apply over the holes an anti-rust
protective paint with zinc phosphate.
Para prevenir la oxidación, se recomienda aplicar la pintura de
protección contra óxido sobre los
agujeros.
Ove possibile preferire sempre il fissaggio vite e dado.
Where possible choose always the
fastening whit screw and nut.
Si es posible siempre prefieren el
montaje con tornillos y tuercas
FISSAGGIO STAFFE - HALF-FLANGES ASSEMBLY - MONTAJE DE LAS MEDIAS LUNAS
Controllare il disallineamento dei portelloni quando chiusi: è tolle-
Usare sempre due piastre di compensazione. Se il disallineamento
Fissare le due semi-flange e le eventuali piastre di compensazione
4 rato fino a un massimo di 2 mm.
5 è maggiore di 2 mm usare una o due piastre aggiuntive sul lato
6 con viti, dadi e rondelle, adoperando una normale chiave a bru-
Check the doors gap when closed: it must be not more than 2 mm.
Always use two adapter plates. If the gap is more than 2 mm, use one
or two more adapter plates on the deeper side.
Fix the two half-flanges, and the adapter plates, when needed, with screws,
nuts and washers, by using a normal allen key (hexagonal).
Check that the mounting is well tight.
Compruebe la alineación de las dos puertas cerradas: debe haber
una distancia máxima de 2 mm entre las dos puertas.
Utilizar siempre dos placas supletorias. Si el desajuste es mayor de 2
mm, utilice una o dos placas adicionales en el lado más profundo.
Fije las dos medias lunas junto con las chapas de protección laterales (y
las placas supletorias en caso de necesidad) con los tornillos, tuercas y
arandelas, utilizando una llave hexagonal tipo Allen.
Compruebe que los tornillos estén bien apretados.
meno sporgente.
m Attention
Step 4
Step 5
gola esagonale. Controllare che il fissaggio sia ben saldo.
m Attention
Step 6
Su alcuni veicoli l’applicazione delle viti può causare deformazione
della lamiera. Non eccedere col
serraggio.
On some vehicles the application of
the screws can cause sheet metal deformation. Do not exceed in tightening.
En algunos vehículos apretar los tornillos de fijación puede provocar la
deformación de la hoja. No exceder
en el apretar.
Utilizzare tutti i 12 punti di fissaggio.
Use all the 12 fixing points.
Utilizar todos los 12 puntos de fijación
SISTRU80_0E_IT-EN-SP
Rev. 02-2015
FISSAGGIO RIVETTI - RIVETS FASTENING - FIJACIÓN DE LOS REMACHES
solo su lamiere sottili (max 2,5 mm) - only for thin sheet metal (max 2,5 mm) - solo para chapa fina metal (max 2,5 mm)
Controllare che dopo la foratura non vi siano bave sporgenti sul
Posizionare i rivetti filettati sui fori precedentemente realizzati (solo
Fissare i rivetti filettati adoperando una pinza di montaggio appo-
7 bordo dei fori.
8 nelle posizioni laterali come da dettaglio allegato)
9 sita (non fornita). Usare un inserto M4 e controllare che il rivetto
Check that the holes’ edge is free of burrs.
Place the blind rivet nuts on the previously made holes (only on side
position as attached detail)
Fix the blind rivet nuts by using a proper setting tool (not included). Use
a M4 insert and check that the rivet is well tight, following the sequence
shown in the picture.
Compruebe, que después de la perforación no haya rebabas salientes o
entrantes en el borde de los agujeros.
Coloque los remaches en los agujeros previamente taladrados (solo
en los foros laterales, según dibujo anejo)
Asegure los remaches con una herramienta especial de montaje de rosca (no suministrada). Utilice un inserto roscado M4 y compruebe, que el remache roscado esté
bien sujeto, siguiendo la secuencia mostrada.
Step 7
Step 8
NO
filettato sia ben fissato, seguendo la sequenza in figura.
Step 9
NO
OK
APPLICAZIONE - POSITIONING - APLICACIÓN
Ruotare la chiave in senso orario per aprire il sistema di fissaggio
Ruotare la chiave in senso anti-orario, fino a fine corsa, per chiu-
10 interno della calotta UFO e posizionarla nella sua sede.
11 dere il sistema di fissaggio interno della calotta UFO.
Turn the key clockwise to open the internal closure device of the UFO
defender and place it into its seat.
Turn the key anti-clockwise completely to close the internal closure
device of the UFO defender. Pull-out the key in vertical position.
Para abrir UFO, gire la llave en sentido horario. Colóquelo encima de
las dos medias lunas en su posición.
Para cerrar el sistema de fijación de UFO, gire la llave hacia la izquierda hasta el final del recorrido. Retire la llave en posición vertical.
Step 10
Estrarre la chiave in posizione verticale.
Step 11
ISTRUZIONI DI MONTAGGIO
ASSEMBLY INSTRUCTIONS
INSTRUCCIONES DE MONTAJE
SERRATURE MERONI SpA
via Valsorda, S.P. 40
22044 Inverigo (CO) - Italy
tel. +39 031 6949301
fax.+39 031 698707
E-mail: [email protected]
WWW.UFOMERONI.COM
WWW.SERRATUREMERONI.COM
PRÉPARATION DES TROUS - ПОДГОТОВКА ОТВЕРСТИЯ - VORBEREITUNG FÜR BOHRUNGEN
Nettoyez la surface de la porte à l’endroit où vous souhaitez instal-
1 ler le dispositif afin qu’elle soit bien propre.
Placez le gabarit adhésif en position centrale par rapport aux deux
2 portes et indiquez l’emplacement des trous à l’aide d’un marteau
Percez des trous de 5 mm de diamètre sur les marques que vous
3 avez effectuées. Si vous ne pouvez pas utiliser de vis et d’écrous à
et d’un poinçon. Pour une excellente tenue, optez pour la fixation
vis + écrou sur chaque côté en 4 points minimum.
cause de la forme des portes, percez des trous de 6 mm de diamètre pour utiliser des rivets filetés (séquence 7-8-9).
Очистить от грязи поверхность двери в выбранной зоне.
Наложить самоклеющийся шаблон в центр двух дверей и наметить отверстия молотком и кернером.
Сделать отверстия в предварительно отмеченных местах сверлом 5 mm. Если вы не можете использовать винты и гайки из-за
форму дверей, сверление отверстий диаметром 6 мм для использования резьбовые заклепки (7-8-9 последовательности).
Die Oberfläche der Klappe an der ausgewählten Stelle reinigen.
Die Klebeschablone in der Mitte zwischen den beiden Klappen anbringen und die Bohrungen mit Hammer und Punze markieren. Für eine
sichere Befestigung die Schrauben + Mutter mindestens an 4 Stellen
pro Seite einsetzen.
Bohrungen Ø 5 mm an den zuvor markierten Stellen anbringen. Falls
aufgrund der besonderen Form der Klappen keine Schrauben und
Muttern verwendet werden können, Bohrungen Ø 6 mm für Gewindenieten (Sequenz 7-8-9) anbringen.
Step 1
Step 2
m Attention
Step 3
Pour éviter les problèmes de rouille,
nous vous conseillons d’appliquer
sur les trous un vernis de protection
contre la rouille au phosphate de
zinc.
Чтобы избежать коррозии проблемы,
мы рекомендуем обратиться лака над
отверстиями для защиты от фосфата
цинка ржавчины.
Zur Vermeidung von Rostbildung
empfiehlt es sich, auf den Bohrungen einen Rostschutzlack auf Zinkphosphatbasis aufzubringen.
m Attention
Si possible, préférez toujours le
mode de fixation vis + écrou.
Если это возможно, всегда предпочитаю способ крепления винта и гайки.
Wo möglich der Befestigung mit
Schrauben und Muttern den Vorzug
geben.
FIXATION DES PATTES - КРЕПЕЖНЫЕ СКОБЫ - BEFESTIGUNG DER HALTERUNGEN
Contrôlez le désalignement des portes lorsqu’elles sont fermées: la
Utilisez toujours deux plaques de compensation. Si le désaligne-
Fixez les deux demi-brides et les éventuelles plaques de compensa-
4 tolérance maximale est de 2 mm.
5 ment dépasse les 2 mm, utilisez une ou deux plaques supplémen-
6 tion à l’aide d’une clé Allen hexagonale, des vis, des écrous et des
Проверить выравнивание дверей в закрытом положении: максимальный допуск – 2 мм.
Если расстояние больше 2 мм, использовать компенсационные
пластины с менее выдающейся стороны.
Закрепить два полуфланца (и возможные компенсационные пластины) винтами,гайками и шайбами, используя обычный шестигранный
ключ. Проверить, чтобы крепление было прочным.
Die geschlossenen Klappen auf Abweichung bei der Ausrichtung überprüfen, es sind maximal 2 mm zulässig.
Immer zwei Ausgleichsplatten verwenden. Wenn die Abweichung mehr
als 2 mm beträgt, eine oder mehr Platten auf der weniger herausstehenden Seite verwenden.
Die zwei Halbflansche und mögliche Ausgleichsplatten mit Schrauben,
Muttern und Unterlegscheiben befestigen, dabei einen normalen sechskantigen Inbusschlüssel verwenden. Überprüfen, dass alles gut fest sitzt.
taires sur le côté le moins saillant.
m Attention
Step 4
rondelles. Assurez-vous de fixer solidement le tout.
Step 5
Step 6
Sur certains véhicules, l’application des vis peut déformer la tôle.
N’exagérez pas lorsque vous les
serrez.
На некоторых транспортных средств с
применением винтов может привести к
деформации листового металла. Не превышать в процессе затяжки.
Auf einigen Fahrzeugen kann das
Anbringen der Schrauben zu Verformungen des Blechs führen. Nicht zu
fest anziehen.
m Attention
Utilisez les 12 points de fixation.
Используйте все 12 точек крепления.
Alle 12 Befestigungspunkte verwenden.
SISTRU80_0E_FR-RU-TE
Rev. 02-2015
FIXATION DES RIVETS - КРЕПЛЕНИЕ ОСОБОЕ НА ЗАКЛЕПКАХ - BEFESTIGUNG DER NIETEN
uniquement sur les tôles fines (2,5 mm maxi) - Только на тонких пластинах (максимум 2,5 mm) - nur auf dünnem Blech (max. 2,5 mm)
Après avoir percé les trous, contrôlez que le bord est exempt de
Placez les rivets filetés sur les trous que vous avez percés (unique-
Fixez les rivets filetés à l’aide d’une pince d’assemblage spéciale
7 bavures.
8 ment dans les positions latérales - voir détail ci-joint).
9 (non fournie). Utilisez un insert M4 et contrôlez que le rivet fileté est
Проверить, чтобы после сверления не осталось выступающих заусенец на краях отверстий. В противном случае, их нужно загнуть
вовнутрь.
Поставить нарезные заклепки в ранее просверленных отверстиях
(только в боковых позициях - см. фото прилагается).
Закрепить нарезные заклепки при помощи специальных плоскогубцев (не в комплекте). Использовать насадку М4 и проконтролировать, чтобы заклепка была хорошо закреплена. Для прочности
рекомендуется делать 4 центральных отверстия и 4 по бокам.
Überprüfen, dass nach dem Bohren keine Grate am Rand der Bohrungen
hervorstehen.
Die Gewindenieten auf den zuvor ausgeführten Bohrungen platzieren
(nur auf den seitlichen Positionen, wie aus der beiliegenden Detailzeichnung hervorgeht)
Die Gewindenieten mit einer speziellen Montagezange befestigen (nicht
mitgeliefert). Einen Einsatz M4 verwenden und überprüfen, dass die Gewindeniete gut befestigt ist, dazu in der abgebildeten Reihenfolge vorgehen.
Step 7
Step 8
NO
bien fixé, en suivant la séquence indiquée.
Step 9
NO
OK
APPLICATION - ПРИМЕНЕНИЕ - ANWENDUNG
Tournez la clé dans le sens des aiguilles d’une montre pour ouvrir
Tournez la clé dans le sens contraire des aiguilles d’une montre
10 le système de fixation interne de la calotte UFO et placez-la dans
11 jusqu’en fin de course pour fermer le système de fixation interne de
Повернуть ключ по часовой стрелке, чтобы открыть систему
внутреннего крепления верхней крышки UFO и вставить ее на свое
место.
Повернуть ключ против часовой стрелки, чтобы закрыть систему внутреннего крепления верхней крышки UFO. Достать ключ в
вертикальном положении.
Den Schlüssel im Uhrzeigersinn drehen, um das Befestigungssystem in
der Kappe UFO zu öffnen, und auf seiner Aufnahme platzieren.
Den Schlüssel bis zum Anschlag gegen den Uhrzeigersinn drehen, um
das Befestigungssystem in der Kappe UFO zu schließen. Den Schlüssel
vertikal herausziehen.
son logement.
Step 10
la calotte UFO. Retirez la clé en position verticale.
Step 11
INSTRUCTIONS POUR L’INSTALLATION
Инструкция по установке
MONTAGEANLEITUNGEN
SERRATURE MERONI SpA
via Valsorda, S.P. 40
22044 Inverigo (CO) - Italy
tel. +39 031 6949301
fax.+39 031 698707
E-mail: [email protected]
WWW.UFOMERONI.COM
WWW.SERRATUREMERONI.COM
© Copyright 2026

