
Space Expedition Manual
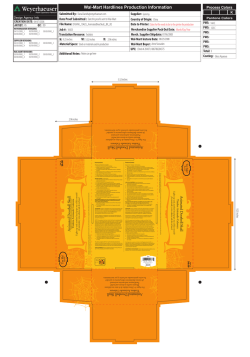
Uncle Milton Industries, Inc.
29209 Canwood St., Suite 120
Agoura Hills, CA 91301
Phone: 818.707.0800
MANUAL
SPECS
BLACK
®
FILE NAME: 2044_0250_VR Space.MAN_IP_V01.AI
ITEM #: 2044
DESCRIPTION: VR Space manual
DATE RELEASED: 04/29/16
Age:
8+
DESIGNER/LAYOUT ARTIST: Kt
DIMENSIONS:
17” W x 11” H
PRINT SPECS: Black
PRINTED AT: 100%
MATERIAL:
Wood free paper
OTHER:
English on front, Spanish on back
CS APPROVAL:
MS APPROVAL:
8+
SPACE EXPEDITION
2044
MANUAL
TM
4
TM
Activity Guide
Read the first activity
from the Explorer
Activity Guide
POL
AR
h StarIS
Nort
URS
1
2
3
Star Planetarium Set Up
App Download
AAA/LR03
not included
x3 Batteries
Requires 3 x 1.5V AAA/LR03 batteries
AA/LR6
not included
x3 Batteries
Requires 3 x 1.5V AA/LR6 batteries
THE VE APP IS AVAILABLE FOR FREE
Before using your Virtual Explorer, you will
need to download the free app onto your
smartphone. Search “Virtual Explorer”.
On/Off
Align
Battery
Module
Horizon Ring
Works best with the
• iPhone 6+
following Smartphones: • iPhone 6
• iPhone 5s
Funciona mejor con los
• iPhone 5c
siguientes teléfonos
• iPhone 5
inteligentes :
ANDROID APP ON
5
Battery
Module
On/Off
• Motorola Moto X (2014)
• Motorola Droid Turbo
• LG G4
• LG G3
• HTC One®
• Nexus 5
TM
T
M
• Samsung Galaxy S®6
• Samsung Galaxy S®5
• Samsung Galaxy S®4
“LittleA MINO
Dippe R
r”
Goggles Set-up
Use the planetarium to Find the star
or constellation on the star sphere
specified in the activity
OPERATION
1. Place planetarium on a table in the center of the room. A room with smooth,
light-colored walls and ceiling works best. A room that is roughly square and
no larger than 12 x 12 feet provides the best projection quality. Star Theater
works best when it is located two to six feet from the projection surface.
2. Date selector is located on the light wand. Rotate light wand until
“AUTUMN” lines up with pointer on the base. (The month and date settings
and the time ring will be used after the audio tour to set your planetarium
for a specific date and time of day.)
CAUTION: Do not look directly into the light source.
Time Ring
Date
Selector
Setting the date: With projection lamp off, turn light wand
until the month you want lines up with the pointer on date
selector. Below the month, there are markings indicating
the 1st, 10th and 20th of the month. Turn light wand to the
left until the date you want lines up with the pointer. For
example, if you want to project the night sky the way it is
on July 4th, first select July, then turn further to the left, to
just past the mark for the first day of the month.
Setting the time: Once you have selected the month and
date, rotate the time ring— without turning the light
wand—so that the time at which the sun sets lines up with
the pointer. (The time at sunset can be found in the local
newspaper or on the Internet.) Now turn the light wand to
the exact time you want. (Note: The months and dates will
change on the date selector as you select the time; once
you’ve selected the date and set the time ring for sunset,
the time selection function takes over.) You can set your
planetarium to project the stars for any time of the night.
You can even see what stars are up during the day, when
they are not visible.
The horizon ring is an important part
of your planetarium. It divides the sky
into two halves, the visible and the
nonvisible. In the course of 24 hours,
all of the objects visible from a given
location on Earth seem to rise in the
east and set in the west.
Your planetarium projects stars that
are visible from the northern
hemisphere. To see all the stars that
are visible from the northern
hemisphere, slowly rotate the light
wand to the left (westward) while the
projection lamp is on. Do you notice
that some stars around Polaris never
set while some of the stars that can
be seen from the southern
hemisphere (at the opposite pole of
the Star Sphere from Polaris) never
rise in the northern hemisphere?
Find Virtual Reality card (note: start with the
card that relates to activity #1 in the Explorer
Activity guide. VR mission cards will only
unlock in the order they are specified in the
activity guide. Once unlocked, you can
return to this VR mission at any time.)
Find the VR card with the matching
constellation that matches the one you
located on the Star Planetarium. Then,
use your VR goggles to scan the VR card,
and unlock and begin your first VR space
mission through our solar system.
Not compatible with some large
screen smartphones.
Hold goggles up to face, pointed directly at
VR card to unlock and begin VR mission
Make sure app is on virtual reality mode
No compatible con ciertas pantallas
grandes de Smartphones.
6
Augmented Reality Models
THE MOVING SKY
Star Planetarium Use
Go on Virtual Reality Space Missions!
Virtual Reality Experence
Projection
Lamp
Projection
Lamp
Collar
Wand
Push a paper clip into this
hole to release Star Sphere
Now, turn the card over to the 3D side
and use your VR goggles to scan view the
AR card and unlock an amazing 3D space
model related to what you learned from
the activity in the Explorer Guide.
See amazing space models
in 3D!
Find Augmented Reality card
(note: start with the card that
relates to activity #1 in the
Explorer Activity guide. AR
3D cards will only unlock in
the order they are specified in
the activity guide. Once
unlocked, you can return to
this AR model at any time.)
Make sure app is on
augmented reality
mode
Hold goggles up to
face, pointed directly
at AR card to unlock
and reveal the 3D
model image. Look
at model from all
angles and sides.
7
Continue to Explore
Continue to Activities 2 through 9
Note: VR missions and 3D models will only unlock in the order they are
specified in the revealed by the Activity Guide. Once unlocked, you can
return to them at any time.
CARE AND MAINTENANCE
Remove batteries when not in use for extended periods. Keep Star
Sphere clean with a soft cloth and quality anti-static cleaner/polish.
Never use abrasive cleaners.
Replacement bulbs are available at most electronics retailers.
Halogen bulb, Voltage: 3.6 V, Current: 500 – 600 mA. Part No.
LR00001.
1. Remove Star Sphere and light wand from base.
2. Push a paper clip into the small hole directly above the on/off
button. At the same time, rotate light wand counterclockwise to
Star Sphere. Remove it from Star Sphere.
3. Carefully pull old projection lamp out of tip of light wand.
4. Insert replacement bulb into tip of light wand. (Important: Be
careful not to bend prongs of the bulb.) Switch light wand on to
make sure bulb lights up, then switch it off.
®
MANUFACTURED BY UNCLE MILTON INDUSTRIES, INC.
P.O. Box 6281 THOUSAND OAKS, CA 91359 USA
©2016 UMI. All rights reserved. ® and TM designate
trademarks of Uncle Milton Industries, Inc.
PRINTED IN CHINA
KEEP THESE INSTRUCTIONS FOR FUTURE
REFERENCE — DO NOT DISCARD
Questions? Visit unclemilton.com
GUARDE ESTAS INSTRUCCIONES PARA
FUTURAS REFERENCIAS - NO LO DESECHE
¿Preguntas? Vaya a unclemilton.com
BATTERY SAFETY INFORMATION
• Only adults should install and replace batteries.
• Non-rechargeable batteries are not to be recharged.
• Rechargeable batteries are to be removed from the toy before being charged.
• Rechargeable batteries are only to be charged under adult supervision.
• Different types of batteries or new and used batteries are not to be mixed.
• Batteries are to be inserted with the correct polarity.
• Exhausted batteries are to be removed from the toy.
• The supply terminals are not to be short-circuited
• Do not mix old and new batteries.
• Do not mix alkaline, standard (carbon-zinc) or rechargeable (nickel-cadmium) batteries.
• Do not dispose of batteries in fire. Battery may explode or leak.
• Batteries should be recycled or disposed of as per state and local guidelines.
INFORMACIÓN DE SEGURIDAD SOBRE LAS PILAS
• Solo los adultos deben insertar y reemplazar las pilas.
• Las pilas no recargables no se deben recargar.
• Se deben quitar las pilas recargables del juguete antes de recargarse.
• Las pilas recargables se deben cargar bajo la supervisión de un adulto.
• No se deben mezclar distintos tipos de pilas o pilas nuevas y usadas.
• Las pilas se deben insertar con la polaridad correcta.
• Las pilas gastadas se deben quitar del juguete.
• No se debe provocar un cortocircuito en los polos.
• No se deben mezclar pilas nuevas con pilas viejas.
• No se deben mezclar pilas alcalinas, comunes (de zinc-carbono) y recargables (de
níquel-cadmio).
• No se deben arrojar las pilas al fuego. Esto puede ocasionar fugas o explosiones.
• Las pilas se deben reciclar o desechar de acuerdo con los procedimientos locales o estatales.
This product and its batteries must be disposed of
separately at your local waste recycling centre. Do
not dispose them in your household waste bin.
Este producto y las pilas se deben desechar por
separado en el centro local de reciclaje de desechos.
No los arroje al cesto de basura de su casa.
2044-350-0416-v01
2044-350-0416-v01
© Copyright 2026