
Manuel d`utilisation
USER´S MANUAL
BEDIENUNGSANLEITUNG
MANUEL D`UTILISATION
MANUAL DE USUARIO
INSTRUKCJA OBSŁUGI
MANUALE D‘ USO
ROADJACK 8 / 10
BATTERY POWERED BLUETOOTH LOUDSPEAKER WITH MIXER
LDRJ8 / LDRJ10
ENGLISH
DEUTSCH
You‘ve made the right choice!
FRANCAIS
Introduction
FRANCAIS
POLSKI
Please read this User‘s Manual carefully, so that you can begin making optimum use of your LD Systems product
quickly.
ESPAÑOL
We have designed this product to operate reliably over many years. LD Systems stands for this with its name and
many years of experience as a manufacturer of high-quality audio products.
You can find more information about LD SYSTEMS at our Internet site WWW.LD-SYSTEMS.COM
The active 2-way systems from the Road Jack series are equipped for easy transportation with integrated
wheels and a pull-out handle. The built-in battery provides for a period of up to 20 hours of continuous operation.
The mixer provides three separately controllable input channels, a 2-band EQ, an adjustable echo and a controller
for the overall volume. Through the combo-, 6.3 mm jack, RCA and 3.5 mm TRS mini jacks, a variety of input
sources can be connected.
The outstanding feature is the built-in Bluetooth player that allows wireless streaming of audio content to the
system. In addition, USB memory and SD cards can be used as storage media.
FRANCAIS
ITALIANO
Both systems are supplied with a handy IR remote control and a convenient tripod adapter.
2
DEUTSCH
FRANCAIS
BATTERY POWERED BLUETOOTH SPEAKERS WITH MIXER
LDRJ8 / LDRJ10
FRANCAIS
ENGLISH
ROADJACK 8 / 10
FRANCAIS
ESPAÑOL
POLSKI
ITALIANO
3
FRANCAIS
ITALIANO
FRANCAIS
POLSKI
ESPAÑOL
FRANCAIS
DEUTSCH
ENGLISH
PREVENTIVE MEASURES:
4
1. Please read these instructions carefully.
2. Keep all information and instructions in a safe place.
3. Follow the instructions.
4. Observe all safety warnings. Never remove safety warnings or other information from the equipment.
5. Use the equipment only in the intended manner and for the intended purpose.
6. Use only sufficiently stable and compatible stands and/or mounts (for fixed installations). Make certain that wall
mounts are properly installed and secured. Make certain that the equipment is installed securely and cannot fall down.
7. During installation, observ e the applicable safety regulations for your country.
8. Never install and operate the equipment near radiators, heat registers, ovens or other sources of heat. Make certain
that the equipment is always installed so that is cooled sufficiently and cannot overheat. Avoid direct sunlight!
9. Never place sources of ignition, e.g., burning candles, on the equipment.
10. Ventilation slits must not be blocked.
11. Do not use this equipment in the immediate vicinity of water (does not apply to special outdoor equipment in this case, observe the special instructions noted below. Do not expose this equipment to flammable materials,
fluids or gases.
12. Make certain that dripping or splashed water cannot enter the equipment. Do not place containers filled with
liquids, such as vases or drinking vessels, on the equipment.
13. Make certain that objects cannot fall into the device.
14. Use this equipment only with the accessories recommended and intended by the manufacturer.
15. Do not open or modify this equipment.
16. After connecting the equipment, check all cables in order to prevent damage or accidents, e.g., due to
tripping hazards.
17. During transport, make certain that the equipment cannot fall down and possibly cause property damage and
personal injuries.
18. If your equipment is no longer functioning properly, if fluids or objects have gotten inside the equipment or
if it has been damaged in anot her way, switch it off immediately and unplug it from the mains outlet (if it is a
powered device). This equipment may only be repaired by authorized, qualified personnel.
19. Clean the equipment using a dry cloth.
20. Comply with all applicable disposal laws in your country. During disposal of packaging, please separate
plastic and paper/cardboard.
21. Plastic bags must be kept out of reach of children.
FOR EQUIPMENT THAT CONNECTS TO THE POWER MAINS:
22. CAUTION: If the power cord of the device is equipped with an earthing contact, then it must be connected to
an outlet with a protective ground. Never deactivate the protective ground of a power cord.
23. If the equipment has been exposed to strong fluctuations in temperature (for example, after transport), do
not switch it on immediately. Moisture and condensation could damage the equipment. Do not switch on the
equipment until it has reached room temperature.
24. Before connecting the equipment to the power outlet, first verify that the mains voltage and frequency match
the values specified on the equipment. If the equipment has a voltage selection switch, connect the equipment to
the power outlet only if the equipment values and the mains power values match. If the included power cord or
power adapter does not fit in your wall outlet, contact your electrician.
25. Do not step on the power cord. Make certain that the power cable does not become kinked, especially at the
mains outlet and/or power adapter and the equipment connector.
26. When connecting the equipment, make certain that the power cord or power adapter is always freely
accessible. Always disconnect the equipment from the power supply if the equipment is not in use or if you want
SAFETY:
FRANCAIS
ENGLISH
DEUTSCH
FRANCAIS
to clean the equipment. Always unplug the power cord and power adapter from the power outlet at the plug or
adapter and not by pulling on the cord. Never touch the power cord and power adapter with wet hands.
27. Whenever possible, avoid switching the equipment on and off in quick succession because otherwise this
can shorten the useful life of the equipment.
28. IMPORTANT INFORMATION: Replace fuses only with fuses of the same type and rating. If a fuse blows repeatedly, please contact an authorised service centre.
29. To disconnect the equipment from the power mains completely, unplug the power cord or power adapter
from the power outlet.
30. If your device is equipped with a Volex power connector, the mating Volex equipment connector must be
unlocked before it can be removed. However, this also means that the equipment can slide and fall down if
the power cable is pulled, which can lead to personal injuries and/or other damage. For this reason, always be
careful when laying cables.
31. Unplug the power cord and power adapter from the power outlet if there is a risk of a lightning strike or
before extended periods of disuse.
CAUTION
CAUTION:
Never remove the cover, because otherwise there may be a risk of electric shock. There are no user serviceable
parts inside. Have repairs carried out only by qualified service personnel.
The exclamation mark within an equilateral triangle is intended to alert the user to the presence of
important operating and maintenance instructions.
ITALIANO
To prevent possible hearing damage, avoid listening at high volume levels over long periods of time.
Even exposure to short bursts of loud noise can result in hearing loss. Please keep the volume
constantly at a comfortable level.
POLSKI
CAUTION – HIGH VOLUME LEVELS WITH AUDIO PRODUCTS!
This equipment is intended for professional use. Therefore, commercial use of this equipment is subject to the
respectively applicable national accident prevention rules and regulations. As a manufacturer, Adam Hall is
obligated to notify you formally about the existence of potential health risks.
Hearing damage due to high volume and prolonged exposure: When in use, this product is capable of producing
high sound-pressure levels (SPL) that can lead to irreversible hearing damage in performers, employees, and
audience members. For this reason, avoid prolonged exposure to volumes in excess of 90 dB.
ESPAÑOL
The lightning flash with arrowhead symbol within an equilateral triangle is intended to alert the user
to the presence of uninsulated “dangerous voltage” within the product’s enclosure that may be of
sufficient magnitude to constitute a risk of electrical shock.
FRANCAIS
RISK OF ELECTRIC SHOCK
DO NOT OPEN
5
ENGLISH
CONNECTIONS, CONTROLS, AND INDICATORS:
5
1
3
6
FRANCAIS
DEUTSCH
5
8
2
4
7
-6
+6
ESPAÑOL
1 INPUT CH 1
Balanced microphone input (XLR / 6.3 mm jack combo) It is also possible to use an unbalanced microphone
cable (mono jack).
2 LEVEL CH 1
Volume controller for channel 1 (CH 1). Turning the knob to the right increases the volume and turning it to
the left decreases it.
FRANCAIS
POLSKI
3 INPUT CH 2
Unbalanced instrument/microphone input with 6.3 mm jack.
4 LEVEL CH 2
Volume controller for channel 2 (CH 2). Turning the knob to the right increases the volume and turning it to
the left decreases it.
FRANCAIS
ITALIANO
5 INPUT CH 3 (CINCH)
Unbalanced line input (RCA) for connecting an external audio source (e.g., CD player, MP3 player). An incoming
stereo signal is mono summed internally. To activate the RCA input, switch 8 (MP3 / AUX) on the control panel
must be depressed, the incoming signal is now on channel 3 (CH 3). If the socket of the mini-jack input is in
use, the RCA jacks of channel 3 (CH 3) are muted.
LOW
6
1
2
3
-6
CONNECTIONS, CONTROLS, AND INDICATORS:
Unbalanced line input with 3.5mm jack for connecting an external audio source (e.g. laptop, MP3 player).
An incoming stereo signal is mono summed internally. To activate the mini-jack input, switch 8 (MP3 / AUX)
on the control panel must be depressed, the incoming signal is now on channel 3 (CH 3). If the socket of the
mini-jack input is in use, the RCA jacks of channel 3 (CH 3) are muted.
FRANCAIS
ENGLISH
6 INPUT CH 3 (MINI-JACK)
7 LEVEL CH 3
8 MP3 / AUX
Select the input source for channel 3 (CH 3). When the switch is not pressed, the MP3 player is selected as a
signal source, when the switch is pressed, the RCA or mini-jack input is selected.
DEUTSCH
FRANCAIS
Volume controller for channel 3 (CH 3). Turning the knob to the right increases the volume and turning it to
the left decreases it.
9 LOW
10 HIGH
Equalizer high band for the summing channel. When turned to the left, levels are lowered, when turned to the
right, they are raised. In the centre position (resting point), the equalizer is inactive.
Echo effect for the microphone channel 1 (CH 1). When the control knob is turned to the left, the effect is
disabled, when turned to the right, it raises the volume of the echo effect.
12 MASTER VOL
Volume control for the summing channel. When turned to the left, levels are lowered, when turned to the
right, they are raised.
ESPAÑOL
11 ECHO
FRANCAIS
Equalizer low band for the summing channel (Master). When turned to the left, levels are lowered, when
turned to the right, they are raised. In the centre position (resting point), the equalizer is inactive.
13 POWER LED
-6
10
+6
-6
11
+6
12
ITALIANO
13
9
POLSKI
Lights up when the device is properly connected to a power supply and is turned on, or is operated with the
built-in rechargeable battery.
7
-6
+6
LOW
1 18 2
3
ESPAÑOL
FRANCAIS
DEUTSCH
ENGLISH
CONNECTIONS, CONTROLS, AND INDICATORS:
17
FRANCAIS
ITALIANO
FRANCAIS
POLSKI
16
8
15
14
-6
+6
CONNECTIONS, CONTROLS, AND INDICATORS:
Switch for setting the operating voltage. The mains voltage of your power supplier and the operating voltage
of the device must be the same!
15 IEC POWER SOCKET WITH INTEGRAL FUSE HOLDER
16 POWER ON / OFF
On / Off switch for the power supply of the device.
DEUTSCH
FRANCAIS
Used to power the device. An appropriate power cord is included in the delivery.
IMPORTANT INFORMATION: BEFORE using this equipment, make certain that the mains voltage of your
energy supplier and the operating voltage of the device match! Always replace the fuse with a fuse of the
same type and rating according to the supply voltage (see label on the rear panel)!
If the fuse blows repeatedly, please contact an authorised service centre.
FRANCAIS
ENGLISH
14 115 V / 230 V
17 CHARGE-LED
18 BATTERY LEVEL LEDS
4-segment LED meter displays the charge status of the built-in battery. When all three green LEDs are lit, the
battery is fully charged. The battery is discharged when the red LED is lit.
ESPAÑOL
NOTE TO BATTERY CARE (LEAD BATTERY)
Recharge the battery fully at every opportunity. Never completely discharge a rechargeable lead battery or store
it in discharged or semi-charged condition. During extended periods of disuse and storage, the battery must be
recharged fully at regular intervals.
FRANCAIS
Lights up while charging the internal battery. When the battery is fully charged, the CHARGE LED goes out. To
charge the battery, an appropriate power cord must be connected to the power socket (No. 24) of the device.
POLSKI
ITALIANO
9
ENGLISH
CONNECTIONS, CONTROLS, AND INDICATORS:
26
DEUTSCH
27
25
19
FRANCAIS
20
21
22
23
24
24
ESPAÑOL
19 SD
-6
Slot for SD memory card up to 32 GB capacity. Please make sure you insert the card in the right direction:
the contact row of the SD memory card should be to the right. The choice of signal source for the MP3 player
is made using the MODE button.
20 MODE
+6
Choice of
the signal source for the MP3 player (SD card / USB memory stick / Bluetooth), and other system settings.
FRANCAIS
POLSKI
21
Press the PLAY / PAUSE button to start playback of a track. Pressing again places the player in the pause
mode, playback is stopped. .
22
Playback of the current track is stopped by pressing the STOP button.
23
FRANCAIS
ITALIANO
Six different playback modes are available for selection (Normal / Random / Browse / All / Repeat One /
Repeat Folder).
10
24
Press briefly to select the previous or next track. By pressing and holding (> 1 sec) the volume of the MP3
player can be changed (
= quieter,
= louder).
CONNECTIONS, CONTROLS, AND INDICATORS:
Slot for USB memory stick up to 32 GB capacity. The choice of signal source for the MP3 player is made
using the MODE button.
26 IR
FRANCAIS
ENGLISH
25 USB IN
Infrared interface. In order to control the MP3 player via the supplied remote control, be sure to position the
infrared port of the remote control in direct visual contact with the infrared port of the Road Jack speaker.
Multifunctional LC display with backlight.
DEUTSCH
FRANCAIS
27 DISPLAY
FRANCAIS
ESPAÑOL
POLSKI
ITALIANO
11
ENGLISH
DISPLAY MAIN SCREEN:
2
1
0003
0006
3
4
DEUTSCH
8
B A S5 2 6 5 6
MP3
7
00 : 33 / 03 : 29
10
9
Hey Joe. mp3
FRANCAIS
11
1 PLAYBACK STATUS
ESPAÑOL
Play = , Stop = , Pause =
2
PLAYBACK MODE
N = Normal. All the tracks on the storage medium will be played back in sequence. After the last track has
finished, playback stops.
FRANCAIS
POLSKI
R = Random. All the tracks on the storage medium will be played back in random order.
I = Browse. The first 10 seconds of each track contained on the storage medium are played in sequence.
A = All. All the tracks on the storage media will be repeated. If an SD memory card and a USB memory
stick are both inserted in their slots, after all tracks have finished on one storage medium, the other storage
medium is accessed automatically.
1 = Repeat One. The selected track is played back continuously.
FRANCAIS
ITALIANO
F = Repeat Folder. All tracks in a folder on the storage medium are repeated.
12
3 TRACK NUMBER
Track number of the currently playing track.
4 NUMBER OF TRACKS
Number of tracks on the selected storage medium.
DISPLAY MAIN SCREEN:
Displays the currently selected equalizer presets.
6 FILE FORMAT
Displays the file format of the currently playing track.
FRANCAIS
ENGLISH
5 EQUALIZER
7 STORAGE MEDIUM
8 PLAY TIME
Display of time elapsed for the currently playing track in minutes and seconds.
9 TRACK LENGTH
Display of total track duration for the currently playing track in minutes and seconds.
Displays the track name (if identified) and the file format for the currently playing track.
11 AUDIOANALIZER
FRANCAIS
10 TRACK NAME
DEUTSCH
FRANCAIS
Displays the currently selected storage medium (SD memory card or USB memory stick).
ESPAÑOL
POLSKI
ITALIANO
13
FRANCAIS
ITALIANO
FRANCAIS
POLSKI
ESPAÑOL
FRANCAIS
DEUTSCH
ENGLISH
OPERATION:
14
EQUALIZER (Eq)
To select one of seven equalizer presets, press and
hold the MODE button for about 1 second. Using the
and
buttons, select the menu item "Eq"
(bright background) and confirm by pressing the PLAY
/ PAUSE button
. Now you can activate one of
seven equalizer presets by selecting it using the keys
and
and confirm with the PLAY / PAUSE
button
.
PLAYBACK MODE (Play Mode)
Six different playback modes are available for selection
(Normal / Random / Browse / All / Repeat One /
Repeat Folder). Press and hold the MODE button for
about 1 second. Using the
and
buttons,
select the menu item "Play Mode" (bright background)
and confirm by pressing the PLAY / PAUSE button
. Now you can activate one of six playback
modes by selecting it using the keys
and
and confirm with the PLAY / PAUSE button
.
Music
Eq
Music
Play Mode
Eq
Change Device
Play Mode
Change Device
Music
Eq
Music
Play Mode
Eq
Change Device
Play Mode
Change Device
NOR
00 : 00
: 00
BT NOT
LINK
Sm
B T NOT
N O :T00
L I:N00
K
00
BT
LINK
Sm
NOR
SOURCE SELECTION (Change Device)
Choice of signal source for the MP3 player.
1. Press and hold the MODE button for about 1
second. Using the
and
buttons, select the
menu item "Change Device" (bright background) and
confirm by pressing the PLAY / PAUSE button
.
Now you can select "SD Card" for SD memory card,
or "UDISK" for USB memory stick using the keys
and
as a signal source, and press the PLAY /
PAUSE button
to confirm.
2. By briefly pressing the MODE button, the MP3
player changes its signal source (SD card slot / slot for
USB memory sticks / Bluetooth). The activated signal
source is shown on the display.
Music
Bluetooth
BT NOT LINK
Bluetooth
Music
Eq
Play Mode
Change Device
Eq
Play Mode
Change Device
Music
Music
Play Mode
Change Device
Exit
Eq
Play Mode
Change Device
Music
Eq
Play Mode
Change Device
M
M uu ss ii cc
EE qq
M oo dd ee
PP ll aa yy M
D eevviiccee
OPERATION:
CC hh aa nn gg ee D
N O R 00 : 00 : 00
Smartphone
M
i c : 00
00u :s00
BT NOT
LINK
P l aS ym aMr ot pd he o n e
BT NOT LINK
Change Device
Exit
Bluetooth
00 : 00
: 00
BT NOT
LINK
Bluetooth
Bluetooth
Bluetooth
Sm
00 : 00 : 00
Smartphone
NOR
Smartphone
Bluetooth
ESPAÑOL
BT NOT LINK
NOR
FRANCAIS
00u :s 00
BT NOT
LINK
M
i c : 00
E qB T N O T L I N K
Play Mode
Change Device
NOR
BLUETOOTH
The MP3 player is equipped with Bluetooth, meaning
that audio files from another Bluetooth device (e.g.
Smartphone) can be played back on the Road Jack
Speaker (maximum distance between the two devices
is about 10 metres).
To pair the MP3 player with a Bluetooth device and
connect to it, press briefly on the MODE button until
"Bluetooth" and "BT NOT LINK" appears in the display.
Activate Bluetooth on your Bluetooth device and search
on the user
N O Rinterface for available devices. Select "LD
SYSTEMS" and pair your Bluetooth device with the MP3
player. In the MP3 player display, "Connecting" appears
and your Bluetooth device is then displayed (e.g.
smartphone), and is therefore paired and connected.
The playback can now start.
DEUTSCH
FRANCAIS
EE qq
PP ll aa yy M
M oo dd ee
C
C hh aa nn gg ee D
D ee vv ii cc ee
M uu ss ii cc
M
EP ql a y M o d e
PC lhaayn gMeo dDee v i c e
CE hx iatn g ee DD eevviiccee
FRANCAIS
ENGLISH
EXITING THE MENU (Exit)
1. To exit the menu, using the buttons
and
select the menu item "Exit" and confirm using the
PLAY / PAUSE button
.
2. After about 8 seconds, the menu is automatically
exited and the display will change to the main display.
.
M uu ss ii cc
M
POLSKI
ITALIANO
15
FRANCAIS
ITALIANO
FRANCAIS
POLSKI
ESPAÑOL
FRANCAIS
DEUTSCH
ENGLISH
OPERATION OF THE BLUETOOTH MODE:
16
BT DISCONNECT
To terminate the connection to a Bluetooth device, in
order to connect the MP3 player to another Bluetooth
device, for example, press the MODE button for
approx. 1 second, while the MP3 player is in Bluetooth
mode, and use the
and
buttons to select
the "BT Disconnect" (light background) menu item
and confirm with the PLAY / PAUSE button. The display
will show "BT NOT LINK" and you can now connect
another Bluetooth device to the MP3 player.
RECENTLY RECONNECTION
To reconnect the Bluetooth device, which was last
connected to the MP3 player, press the MODE button for
approx. 1 second, while the MP3 player is in Bluetooth
mode, and use the
and
buttons to select the
"Recently reconnection" (light background) menu item
and confirm with the PLAY / PAUSE button.
Bluetooth
BT Disconnect
Eq
Delete paired in
EQUALIZER (Eq)
To select one of seven equalizer presets, press and
hold the MODE button for about 1 second.
Using the
and
buttons, select the menu
item "Eq" (bright background) and confirm by pressing
the PLAY / PAUSE button. Now you can activate one
of seven equalizer presets by selecting it using the
and
buttons and confirming with the PLAY /
PAUSE button.
Bluetooth
BT Disconnect
Eq
Delete paired in
Bluetooth
Eq
Delete paired in
Device Informat
Bluetooth
BT Disconnect
Eq
Delete paired in
Bluetooth
B T BBDll uui seecttooonoontt hhe c t
EBRqTe cDe inst cl yo nr en ce oc nt n e
Eq
D
E qe l e t e p a i r e d i n
Delete paired in
Delete paired in
Bluetooth
luetooth
Eq B
Bluetooth
BT Disconnect
D
B eT l eDti es cpoani nr ee dc t i n
Eq
D
E qe v i c e I n f o r m a t
Delete paired in
Delete paired in
Bluetooth
Eq
Delete paired in
Device Informat
Bluetooth
BT Disconnect
Eq
Delete paired in
Bluetooth
Eq
Delete paired in
Device Informat
Eq
Delete paired in
Device Informat
ESPAÑOL
NOTE:
The playback of the connected Bluetooth device can
be interrupted by pressing the PLAY / PAUSE button of
the MP3 player and started again.
Bluetooth
FRANCAIS
DEVICE INFORMATION
Press the MODE button for approx. 1 second, while
the MP3 player is in Bluetooth mode, and use the
and
buttons to select the "Delete paired"
menu item and confirm by pressing the PLAY / PAUSE
button. The display now shows "Name: LD SYSTEMS“.
This name appears on the MP3-player of the Road
Jack speakers on your Bluetooth device (smartphone,
tablet).
Bluetooth
B T BDl ui se ct oo on tnhe c t
BE Tq D i s c o n n e c t
EDqe l e t e p a i r e d i n
Delete paired in
DEUTSCH
FRANCAIS
DELETE PAIRED INFO
A paired Bluetooth device can be unpaired (remove
pairing), while the MP3 player is in Bluetooth mode, by
pressing the MODE button for approx. 1 second, then
using the
and
buttons to select the "Delete
paired info" menu item. Confirm by pressing the PLAY
/ PAUSE button.
NOTE: As long as a Bluetooth device is connected to
the MP3 player, the paired device cannot be unpaired.
FRANCAIS
ENGLISH
Bluetooth
Bluetooth
BT Disconnect
R e Bc el unet lt yo or tehc o n n e
BE Tq D i s c o n n e c t
Eq
OPERATION OF THE
MODE:
EDqe lBLUETOOTH
Delete paired in
ete paired in
Delete paired in
POLSKI
ITALIANO
17
ENGLISH
INFRARED REMOTE CONTROL (USB, SD-CARD):
3
1
DEUTSCH
4
2
FRANCAIS
POLSKI
ESPAÑOL
FRANCAIS
5
7
6
Point the infrared remote control directly at the infrared sensor installed on the USB slot infrared
sensor. The maximum range is about 8 metres.
1 PLAY / PAUSE
Press the PLAY / PAUSE button to start playback of a track. Pressing again places the player in the pause
mode, playback is stopped.
2 EQ
Seven different equalizer settings are available and can be accessed by repeatedly pressing the button.
3 VOL- / VOL+
Volume of the MP3 player (0 to 15). Pressing VOL- lowers the volume, pressing VOL+ increases it.
FRANCAIS
ITALIANO
4 PREV / NEXT
18
To select the previous track, press briefly on the PREV button; to select the next track, press briefly on the
NEXT button. By pressing and holding the buttons, fast rewind and fast forward are activated.
5 DIRECT TRACK SELECTION
To select a track directly, use the numeric keys 0 to 9
For example: If you want to select track number 29, press briefly the button with the number 2, and then the
button with the number 9 (the display shows "0029" for a short time).
INFRARED REMOTE CONTROL (USB, SD-CARD):
Press the ENTER button to enter the menu to select the equalizer, the playback mode and the signal source.
EQUALIZER (Eq)
To select one of the seven equalizer presets, press the ENTER button, and using the PREV and NEXT buttons,
select the menu item "Eq" (bright background) and confirm by pressing the PLAY / PAUSE button. Now you
can activate one of seven equalizer presets by selecting it using the PREV and NEXT buttons, and confirm by
pressing the PLAY / PAUSE button.
ESPAÑOL
EXITING THE MENU (Exit)
1. To exit the menu, using the PREV and NEXT buttons, select the menu item "Exit" and confirm by pressing
the PLAY / PAUSE button.
2. After about 8 seconds, the menu is automatically exited and the display will change to the main display.
FRANCAIS
SOURCE SELECTION (Change Device)
Choice of the signal source for the MP3 player.
1. Press the ENTER button, and using the PREV and NEXT buttons, select the menu item "Change Device"
(bright background) and confirm by pressing the PLAY / PAUSE button. Now you can select "SD Card" for SD
memory card, or "UDISK" for USB memory stick using the PREV and NEXT buttons, and confirm by pressing
the PLAY / PAUSE button.
2. By briefly pressing the MODE button, the MP3 player changes its signal source (SD card slot / slot for USB
memory sticks / Bluetooth). The activated signal source is shown on the display.
DEUTSCH
FRANCAIS
PLAYBACK MODE (Play Mode)
Six different playback modes are available for selection (Normal / Random / Browse / All / Repeat One /
Repeat Folder). Press the ENTER button, and using the PREV and NEXT buttons, select the menu item "Play
Mode" (bright background) and confirm by pressing the PLAY / PAUSE button. Now you can activate one of
six playback modes by selecting it using the PREV and NEXT buttons, and confirm by pressing the PLAY /
PAUSE button.
FRANCAIS
ENGLISH
6 ENTER
7 MODE
POLSKI
1. By briefly pressing the MODE button, the MP3 player changes its signal source (SD card slot / slot for USB
memory sticks / Bluetooth). The activated signal source is shown on the display.
2. Press this button for about 2 seconds, and the MP3 player is turned on or off.
The MP3 player may be turned on and off only by means of infrared remote control, not on the device itself
NOTE: The CHANNEL (CH-, CH+) and PICK SONG buttons have no function.
ITALIANO
19
ENGLISH
INFRARED REMOTE CONTROL (BLUETOOTH):
2
1
ESPAÑOL
FRANCAIS
DEUTSCH
3
5
4
1 PLAY / PAUSE
Press the PLAY / PAUSE button to start the playback of a track. Pressing again places the player in the pause
mode, playback is stopped.
FRANCAIS
POLSKI
2 VOL- / VOL+
Volume of the MP3 player (0 to 15). Pressing VOL- lowers the volume, pressing VOL+ increases it.
3 PREV / NEXT
To select the previous track on an album, press the PREV button briefly, or the NEXT button to select the next
track.
FRANCAIS
ITALIANO
4 ENTER
20
Pressing the ENTER button will take you to the Bluetooth menu. Operation and adjustment are carried out as
described in detail in the chapter "OPERATING IN THE BLUETOOTH MODE".
INFRARED REMOTE CONTROL (BLUETOOTH):
1. By briefly pressing the MODE button, the MP3 player changes its signal source (SD card slot / slot for USB
memory sticks / Bluetooth). The activated signal source is shown on the display.
2. Press this button for about 2 seconds, and the MP3 player is turned on or off.
The MP3 player can only be turned on or off by using the infrared remote control, not by the MP3 player
itself, but is activated automatically when the Road Jack speaker is switched on.
DEUTSCH
FRANCAIS
NOTE: The buttons CHANNEL (CH-, CH+), EQ, PICK SONG and the digit buttons 0-9 have no function in the
Bluetooth mode.
FRANCAIS
ENGLISH
5 MODE
FRANCAIS
ESPAÑOL
POLSKI
ITALIANO
21
FRANCAIS
ITALIANO
FRANCAIS
POLSKI
ESPAÑOL
FRANCAIS
DEUTSCH
ENGLISH
SPECIFICATIONS:
22
Model name
Product Type:
Type:
Woofer Size:
Woofer Size:
Woofer Magnet:
Woofer Brand:
HF Driver Size:
HF Driver Size:
HF Driver Magnet:
HF Driver Brand:
Amplifier:
Power Output (RMS):
Power Output (Peak):
Frequency Response:
SPL (1 W/1 m):
Max SPL:
Protection:
Controls:
Indicators:
Line Inputs:
Line Input Connectors:
Mic Inputs:
Mic Input Connectors:
Instrument Inputs:
Instrument Input Terminals:
Power Socket:
Power Supply:
Operating Voltage:
Power Consumption (max.):
Rechargeable Batteries:
Cabinet Material:
Cabinet Type:
Width:
Height:
Depth:
Weight:
Other Features:
LDRJ8
portable PA speaker
active
8"
203.2 mm
ferrite
custom made
3" (wide range)
76.2 mm
ferrite
custom made
class D
25 W
100 W
90 - 18,000 Hz
94 dB
113 dB
short circuit, overvoltage, overload protection
Mic 1 Level, Mic 2 Level, CD / Tape IN Level, Low, High, Echo,
Master Volume, AUX / MP3 switch
power, charge/battery status
1
2 x RCA, 3.5 mm jack
2 (1x alternative to instrument input CH 2)
XLR, 6.3 mm jack
1 (alternative to Mic input CH 2)
6.3 mm jack
IEC power socket
switching power supply
100 V AC - 120 V AC / 60 Hz, 220 V AC - 240 V AC / 50 Hz
50 W
12 V / 5 Ah
15 mm MDF
bass reflex
385 mm
450 mm
298 mm
13.8 kg
36 mm pole mount, transport wheels, pull-out handle, carrying
handle, IR remote control for Media Player
SPECIFICATIONS:
ESPAÑOL
POLSKI
ITALIANO
415 mm
525 mm
328 mm
16.2 kg
36 mm pole mount, transport wheels, pull-out handle, carrying
handle, IR remote control for Media Player
FRANCAIS
Width:
Height:
Depth:
Weight:
Other Features:
DEUTSCH
FRANCAIS
Indicators:
Line Inputs:
Line Input Connectors:
Mic Inputs:
Mic Input Connectors:
Instrument Inputs:
Instrument Input Terminals:
Power Socket:
Power Supply:
Operating Voltage:
Power Consumption (max.):
Rechargeable Batteries:
Cabinet Material:
Cabinet Type:
LDRJ10
portable PA speaker
active
10"
254 mm
ferrite
custom made
3" (wide range)
76.2 mm
ferrite
custom made
class D
25 W
100 W
65 - 18,000 Hz
96 dB
117 dB
short circuit, overvoltage, overload protection
Mic 1 Level, Mic 2 Level, CD / Tape IN Level, Low, High, Echo,
Master Volume, AUX / MP3 switch
power, charge/battery status
1
2 x RCA, 3.5 mm jack
2 (1x alternative to instrument input CH 2)
XLR, 6.3 mm jack
1 (alternative to Mic input CH 2)
6.3 mm jack
IEC power socket
switching power supply
100 V AC - 120 V AC / 60 Hz, 220 V AC - 240 V AC / 50 Hz
50 W
12 V / 5 Ah
15 mm MDF
bass reflex
FRANCAIS
ENGLISH
Model Name:
Product Type:
Type:
Woofer Size:
Woofer Size:
Woofer Magnet:
Woofer Brand:
HF Driver Size:
HF Driver Size:
HF Driver Magnet:
HF Driver Brand:
Amplifier:
Power Output (RMS):
Power Output (Peak):
Frequency Response:
SPL (1 W/1 m):
Max SPL:
Protection:
Controls:
23
FRANCAIS
ITALIANO
FRANCAIS
POLSKI
ESPAÑOL
FRANCAIS
DEUTSCH
ENGLISH
SPECIFICATIONS:
24
Media Player
Media Player
Supported Media:
Supported Formats:
Media Player Controls:
Media Player Display Elements:
LDRJ8 / LDRJ10
Bluetooth, USB stick, SD card
MP3 file, WAV, WMA
Mode (Menu / Bluetooth /SD / USB) , Play / Pause, Stop, Repeat,
Previous Track, Next Track)
lit multifunctional LC display
MANUFACTURER´S DECLARATIONS:
This warranty extends to the LD SYSTEMS branded product you purchased from Adam Hall. The statutory warranty
rights against the vendor shall not be affected by this warranty. Rather, this warranty gives you additional independent
claims against Adam Hall.
In the unlikely event that a product acquired from Adam Hall, repeatedly exhibits a defect, Adam Hall may decide,
at its discretion, to replace this product with a comparable product of at least the same performance.
POLSKI
This warranty does not extend to:
- wearing parts (eg battery, tubes).
- devices that have had their serial number removed or damaged, or failed as a result of an accident
- inappropriate or abusive use or other external causes
- devices that were not used in accordance with the operating parameters defined in the user documentation
shipped with the product
- devices that have been repaired using parts not made or distributed by Adam Hall
- devices that have been serviced, modified or repaired by someone other than Adam Hall or an authorised service partner.
These terms and conditions constitute the complete and exclusive warranty agreement between you and Adam
Hall regarding the Adam Hall branded product you have purchased.
ESPAÑOL
Adam Hall does not guarantee that the operation of this product will be uninterrupted or error-free. Adam Hall
accepts no responsibility for any damage due to incorrect compliance with the instructions received in the delivery.
FRANCAIS
This warranty applies only to the original purchaser of the products supplied by Adam Hall and is not transferable
to any person to whom the property is transferred by the original purchaser.
Within the warranty period, the defective parts or the product from Adam Hall will be repaired or replaced. Under
the terms of this warranty, all the replaced or removed components become the property of Adam Hall.
DEUTSCH
FRANCAIS
With this warranty, Adam Hall ensures that products you have purchased from Adam Hall or Adam Hall partners,
under normal use, are free of defects in material or workmanship for a period of 2 years from the date of purchase.
The warranty period begins on the date of purchase. In order to assert a claim for warranty service, the proof of
date of purchase is provided by the receipt bearing the date of purchase or the date of purchase on the delivery
note. You are entitled to warranty service under the conditions and provisions set out in this document, if a repair
within the warranty period is required.
FRANCAIS
ENGLISH
MANUFACTURER‘S WARRANTY
This warranty is valid only within Europe. Outside of Europe please contact our official distributors.
ITALIANO
25
ENGLISH
Adam Hall is not liable for any damages caused by the product or the failure of the product, including any lost
profits or savings or special, incidental, or consequential damages. Adam Hall is not liable for any claim made by
a third party or made by you for a third party.
ESPAÑOL
FRANCAIS
LIMITATION OF LIABILITY
DEUTSCH
MANUFACTURER´S DECLARATIONS:
If your Adam Hall branded hardware product fails to work as warranted above, your sole and exclusive remedy
shall be repair or replacement. Adam Halls’ maximum liability under this limited warranty is expressly limited to
the lesser of the price you have paid for the product or the cost of repair or replacement of any components that
malfunction under conditions of normal use.
This limitation of liability applies whether damages are sought, or claims are made, under this Limited Warranty
or as a tort claim (including negligence and strict product liability), a contract claim, or any other claim, and
cannot be rescinded or changed by anyone. This limitation of liability will be effective even if you have advised
Adam Hall or an authorized representative of Adam Hall of the possibility of any such damages, but not, however,
in the event of claims for damages in connection with personal injuries.
This manufacturer‘s warranty grants you specific rights; depending on jurisdiction (nation or state), you may be
be entitled to additional claims. You are advised to consult applicable state or national laws for a full determination of your rights.
REQUESTING WARRANTY SERVICE
To request warranty service for the product, contact Adam Hall or the Adam Hall authorized reseller from which
you purchased the product.
FRANCAIS
ITALIANO
FRANCAIS
POLSKI
EC DECLARATION OF CONFORMITY
26
The equipment marketed by Adam Hall complies (where applicable) with the essential requirements and other
relevant specifications of Directives 1999/5/EC (R&TTE), 2004/108/EC (EMC) und 2006/95/EC (LVD). Additional
information can be found at www.adamhall.com.
MANUFACTURER´S DECLARATIONS:
(Valid in the European Union and other European countries with waste separation)
This symbol on the product, or the documents accompanying the product, indicates that this appliance may not
be treated as household waste. This is to avoid environmental damage or personal injury due to uncontrolled
waste disposal. Please dispose of this product separately from other waste and have it recycled to promote
sustainable economic activity.
DEUTSCH
FRANCAIS
Household users should contact either the retailer where they purchased this product, or their local government
office, for details on where and how they can recycle this item in an environmentally friendly manner.
Business users should contact their supplier and check the terms and conditions of the purchase contract. This
product should not be mixed with other commercial wastes for disposal .
FRANCAIS
ENGLISH
PROPER DISPOSAL OF THIS PRODUCT
ENVIRONMENTAL PROTECTION AND ENERGY CONSERVATION
FRANCAIS
Energy conservation is an active contribution to environmental protection. Please turn off all unneeded electrical
devices. To prevent unneeded devices from consuming power in standby mode, disconnect the mains plug.
ESPAÑOL
POLSKI
ITALIANO
Adam Hall GmbH, all rights reserved. The technical data and the functional product characteristics can be subject
to modifications. The photocopying, the translation, and all other forms of copying of fragments or of the integrlity
of this user’s manual is prohibited.
27
ENGLISH
DEUTSCH
Sie haben die richtige Wahl getroffen!
FRANCAIS
POLSKI
ESPAÑOL
FRANCAIS
Dieses Gerät wurde unter hohen Qualitätsanforderungen entwickelt und gefertigt, um viele Jahre einen reibungslosen Betrieb zu gewährleisten. Dafür steht LD Systems mit seinem Namen und der langjährigen Erfahrung als
Hersteller hochwertiger Audioprodukte.
Bitte lesen Sie diese Bedienungsanleitung sorgfältig, damit Sie Ihr neues Produkt von LD Systems schnell optimal
einsetzen können.
Mehr Informationen zu LD SYSTEMS finden Sie auf unserer Internetseite WWW.LD-SYSTEMS.COM
Einführung
Die aktiven 2-Wege-Systeme aus der Road Jack Serie sind für einen einfachen Transport mit integrierten Rollen und einem
ausziehbaren Griff ausgestattet. Der integrierte Akku sorgt für eine Laufzeit von bis zu 20 Stunden im Dauerbetrieb.
Der Mixer bietet drei separat aussteuerbare Eingangskanäle, einen 2-Band-EQ, ein regelbares Echo sowie einen Regler
für die Gesamtlautstärke. Über die Combo-, 6,3 mm Klinken-, Cinch- und 3,5 mm TRS-Miniklinkenbuchsen lassen sich
verschiedenste Eingangsquellen anschließen.
Das herausragende Merkmal ist der integrierte Bluetooth-Player, der ein kabelloses Streamen von Audioinhalten auf
das System ermöglicht. Darüber hinaus können USB-Speicher und SD-Karten als Speichermedien genutzt werden.
FRANCAIS
ITALIANO
Beide Systeme werden mit einer handlichen IR-Fernbedienung und einer praktischen Stativaufnahme geliefert.
28
DEUTSCH
FRANCAIS
BATTERIEGESPEISTER BLUETOOTH-LAUTSPRECHER MIT MIXER
LDRJ8 / LDRJ10
FRANCAIS
ENGLISH
ROADJACK 8 / 10
FRANCAIS
ESPAÑOL
POLSKI
ITALIANO
29
FRANCAIS
ITALIANO
FRANCAIS
POLSKI
ESPAÑOL
FRANCAIS
DEUTSCH
ENGLISH
SICHERHEITSHINWEISE:
30
1. Lesen Sie diese Anleitung bitte sorgfältig durch.
2. Bewahren Sie alle Informationen und Anleitungen an einem sicheren Ort auf.
3. Befolgen Sie die Anweisungen.
4. Beachten Sie alle Warnhinweise. Entfernen Sie keine Sicherheitshinweise oder andere Informationen vom Gerät.
5. Verwenden Sie das Gerät nur in der vorgesehenen Art und Weise.
6. Verwenden Sie ausschließlich stabile und passende Stative bzw. Befestigungen (bei Festinstallationen). Stellen
Sie sicher, dass Wandhalterungen ordnungsgemäß installiert und gesichert sind. Stellen Sie sicher, dass das
Gerät sicher installiert ist und nicht herunterfallen kann.
7. Beachten Sie bei der Installation die für Ihr Land geltenden Sicherheitsvorschriften.
8. Installieren und betreiben Sie das Gerät nicht in der Nähe von Heizkörpern, Wärmespeichern, Öfen oder
sonstigen Wärmequellen. Sorgen Sie dafür, dass das Gerät immer so installiert ist, dass es ausreichend gekühlt
wird und nicht überhitzen kann. Direkte Sonneneinstrahlung vermeiden!
9. Platzieren Sie keine Zündquellen wie z.B. brennende Kerzen auf dem Gerät.
10. Lüftungsschlitze dürfen nicht blockiert werden.
11. Betreiben Sie das Gerät nicht in unmittelbarer Nähe von Wasser. Bringen Sie das Gerät nicht mit brennbaren
Materialien, Flüssigkeiten oder Gasen in Berührung.
12. Sorgen Sie dafür, dass kein Tropf- oder Spritzwasser in das Gerät eindringen kann. Stellen Sie keine mit
Flüssigkeit gefüllten Behältnisse wie Vasen oder Trinkgefäße auf das Gerät.
13. Sorgen Sie dafür, dass keine Gegenstände in das Gerät fallen können.
14. Betreiben Sie das Gerät nur mit dem vom Hersteller empfohlenen und vorgesehenen Zubehör.
15. Öffnen Sie das Gerät nicht und verändern Sie es nicht.
16. Überprüfen Sie nach dem Anschluss des Geräts alle Kabelwege, um Schäden oder Unfälle, z. B. durch
Stolperfallen zu vermeiden.
17. Achten Sie beim Transport darauf, dass das Gerät nicht herunterfallen und dabei möglicherweise Sach- und
Personenschäden verursachen kann.
18. Wenn Ihr Gerät nicht mehr ordnungsgemäß funktioniert, Flüssigkeiten oder Gegenstände in das Geräteinnere
gelangt sind, oder das Gerät anderweitig beschädigt wurde, schalten Sie es sofort aus und trennen es von der
Netzsteckdose (sofern es sich um ein aktives Gerät handelt). Dieses Gerät darf nur von autorisiertem Fachpersonal repariert werden.
19. Verwenden Sie zur Reinigung des Geräts ein trockenes Tuch.
20. Beachten Sie alle in Ihrem Land geltenden Entsorgungsgesetze. Trennen Sie bei der Entsorgung der Verpackung bitte Kunststoff und Papier bzw. Kartonagen voneinander.
21. Kunststoffbeutel müssen außer Reichweite von Kindern aufbewahrt werden.
BEI GERÄTEN MIT NETZANSCHLUSS:
22. ACHTUNG: Wenn das Netzkabel des Geräts mit einem Schutzkontakt ausgestattet ist, muss es an einer
Steckdose mit Schutzleiter angeschlossen werden. Deaktivieren Sie niemals den Schutzleiter eines Netzkabels.
23. Schalten Sie das Gerät nicht sofort ein, wenn es starken Temperaturschwankungen ausgesetzt war (beispielsweise nach dem Transport). Feuchtigkeit und Kondensat könnten das Gerät beschädigen. Schalten Sie das
Gerät erst ein, wenn es Zimmertemperatur erreicht hat.
24. Bevor Sie das Gerät an die Steckdose anschließen, prüfen Sie zuerst, ob die Spannung und die Frequenz
des Stromnetzes mit den auf dem Gerät angegebenen Werten übereinstimmen. Verfügt das Gerät über einen
Spannungswahlschalter, schließen Sie das Gerät nur an die Steckdose an, wenn die Gerätewerte mit den Werten
des Stromnetzes übereinstimmen. Wenn das mitgelieferte Netzkabel bzw. der mitgelieferte Netzadapter nicht in
Ihre Netzsteckdose passt, wenden Sie sich an Ihren Elektriker.
25. Treten Sie nicht auf das Netzkabel. Sorgen Sie dafür, dass spannungsführende Kabel speziell an der Netz-
SICHERHEITSHINWEISE:
Das gleichschenkelige Dreieck mit Ausrufungszeichen kennzeichnet wichtige Bedienungs- und
Wartungshinweise.
ITALIANO
Um eine mögliche Schädigung des Hörsinns zu verhindern, vermeiden Sie das Hören bei großem
Lautsärkepegel über lange Zeiträume.
Lauter Schalleinfluss kann selbst bei kurzer Dauer zu Hörschäden führen. Bitte halten Sie die
Laustärke immer auf einem angenehmen Level.
POLSKI
ACHTUNG HOHE LAUTSTÄRKEN BEI AUDIOPRODUKTEN!
Dieses Gerät ist für den professionellen Einsatz vorgesehen. Der kommerzielle Betrieb dieses Geräts unterliegt
den jeweils gültigen nationalen Vorschriften und Richtlinien zur Unfallverhütung. Als Hersteller ist Adam Hall
gesetzlich verpflichtet, Sie ausdrücklich auf mögliche Gesundheitsrisiken hinzuweisen.
Gehörschäden durch hohe Lautstärken und Dauerbelastung: Bei der Verwendung dieses Produkts können
hohe Schalldruckpegel (SPL) erzeugt werden, die bei Künstlern, Mitarbeitern und Zuschauern zu irreparablen
Gehörschäden führen können.
ESPAÑOL
Das gleichschenkelige Dreieck mit Blitzsymbol warnt vor nichtisolierten, gefährlichen Spannungen
im Geräteinneren, die einen elektrischen Schlag verursachen können.
FRANCAIS
ACHTUNG:
Entfernen Sie niemals die Abdeckung, da sonst das Risiko eines elektrischen Schlages besteht. Im Inneren des
Geräts befinden sich keine Teile, die vom Bediener repariert oder gewartet werden können. Lassen Sie Reparaturen ausschließlich von qualifiziertem Servicepersonal durchführen.
DEUTSCH
FRANCAIS
CAUTION
RISK OF ELECTRIC SHOCK
DO NOT OPEN
FRANCAIS
ENGLISH
buchse bzw. am Netzadapter und der Gerätebuchse nicht geknickt werden.
26. Achten Sie bei der Verkabelung des Geräts immer darauf, dass das Netzkabel bzw. der Netzadapter stets frei
zugänglich ist. Trennen Sie das Gerät stets von der Stromzuführung, wenn das Gerät nicht benutzt wird, oder
Sie das Gerät reinigen möchten. Ziehen Sie Netzkabel und Netzadapter immer am Stecker bzw. am Adapter und
nicht am Kabel aus der Steckdose. Berühren Sie Netzkabel und Netzadapter niemals mit nassen Händen.
27. Schalten Sie das Gerät möglichst nicht schnell hintereinander ein und aus, da sonst die Lebensdauer des
Geräts beeinträchtigt werden könnte.
28. WICHTIGER HINWEIS: Ersetzen Sie Sicherungen ausschließlich durch Sicherungen des gleichen Typs und
Wertes. Sollte eine Sicherung wiederholt auslösen, wenden Sie sich bitte an ein autorisiertes Servicezentrum.
29. Um das Gerät vollständig vom Stromnetz zu trennen, entfernen Sie das Netzkabel bzw. den Netzadapter aus
der Steckdose.
30. Wenn Ihr Gerät mit einem verriegelbaren Netzanschluss bestückt ist, muss der passende Gerätestecker
entsperrt werden, bevor er entfernt werden kann. Das bedeutet aber auch, dass das Gerät durch ein Ziehen am
Netzkabel verrutschen und herunterfallen kann, wodurch Personen verletzt werden und/oder andere Schäden
auftreten können. Verlegen Sie Ihre Kabel daher immer sorgfältig.
31. Entfernen Sie Netzkabel und Netzadapter aus der Steckdose bei Gefahr eines Blitzschlags oder wenn Sie das
Gerät länger nicht verwenden.
31
ENGLISH
ANSCHLÜSSE, BEDIEN- UND ANZEIGEELEMENTE:
5
1
3
6
FRANCAIS
DEUTSCH
5
8
2
4
7
-6
+6
ESPAÑOL
1 INPUT CH 1
Symmetrischer Mikrofoneingang (XLR / 6,3 mm Klinke Combo). Die Nutzung eines unsymmetrischen Mikrofonkabels (Mono-Klinke) ist ebenfalls möglich.
2 LEVEL CH 1
Lautstärkeregler für den Kanal 1 (CH 1). Nach links gedreht verringert sich, nach rechts gedreht erhöht sich
die Lautstärke.
FRANCAIS
POLSKI
3 INPUT CH 2
Unsymmetrischer Instrumenten- / Mikrofoneingang mit 6,3 mm Klinkenbuchse.
4 LEVEL CH 2
Lautstärkeregler für den Kanal 2 (CH 2). Nach links gedreht verringert sich, nach rechts gedreht erhöht sich
die Lautstärke.
FRANCAIS
ITALIANO
5 INPUT CH 3 (CINCH)
Unsymmetrischer Line-Eingang mit Cinch-Buchsen zum Anschließen eines Zuspielgeräts (z.B. CD-Spieler, MP3Spieler). Ein anliegendes Stereo-Signal wird intern Mono summiert. Zur Aktivierung des Cinch-Eingangs muss Schalter
8 (MP3 / AUX) auf dem Bedienfeld heruntergedrückt sein, das anliegende Signal liegt nun auf Kanal 3 (CH 3). Ist die
Buchse des Mini-Klinken-Eingangs belegt, sind die Cinch-Buchsen des Kanals 3 (CH 3) stumm geschaltet.
LOW
32
1
2
3
-6
ANSCHLÜSSE, BEDIEN- UND ANZEIGEELEMENTE:
Unsymmetrischer Line-Eingang mit 3,5 mm Klinken-Buchse zum Anschließen eines Zuspielgeräts (z.B. Laptop, MP3Spieler). Ein anliegendes Stereo-Signal wird intern Mono summiert. Zur Aktivierung des Mini-Klinken-Eingangs muss
Schalter 8 (MP3 / AUX) auf dem Bedienfeld heruntergedrückt sein, das anliegende Signal liegt nun auf Kanal 3 (CH 3).
Ist die Buchse des Mini-Klinken-Eingangs belegt, sind die Cinch-Buchsen des Kanals 3 (CH 3) stumm geschaltet.
FRANCAIS
ENGLISH
6 INPUT CH 3 (MINI-KLINKE)
7 LEVEL CH 3
8 MP3 / AUX
Wahl der Signal-Quelle für Kanal 3 (CH 3). Ist der Schalter nicht heruntergedrückt, ist der MP3-Spieler als
Signal-Quelle ausgewählt, ist der Schalter heruntergedrückt, der Cinch- bzw. Mini-Klinken-Eingang.
DEUTSCH
FRANCAIS
Lautstärkeregler für den Kanal 3 (CH 3). Nach links gedreht verringert sich, nach rechts gedreht erhöht sich
die Lautstärke.
9 LOW
FRANCAIS
Equalizer Bassband für den Summenkanal (Master). Nach links gedreht werden Bässe abgesenkt, nach
rechts gedreht angehoben. In Mittelstellung (Rastpunkt) ist der Equalizer inaktiv.
10 HIGH
Equalizer Höhenband für den Summenkanal. Nach links gedreht werden Höhen abgesenkt, nach rechts
gedreht angehoben. In Mittelstellung (Rastpunkt) ist der Equalizer inaktiv.
Echo-Effekt für den Mikrofonkanal 1 (CH 1). Befindet sich der Regler auf Linksanschlag, ist der Effekt deaktiviert, nach rechts gedreht wird die Lautstärke des Echo-Effekts angehoben.
12 MASTER VOL
Lautstärkeregler des Summenkanals. Nach links gedreht wird die Lautstärke abgesenkt, nach rechts gedreht
angehoben.
ESPAÑOL
11 ECHO
13 POWER-LED
-6
10
+6
-6
11
+6
12
ITALIANO
13
9
POLSKI
Leuchtet, wenn das Gerät korrekt am Stromnetz angeschlossen und eingeschaltet ist, bzw. mit dem integrierten
Akku betrieben wird.
33
-6
+6
-6
LOW
1 18 2
3
ESPAÑOL
FRANCAIS
DEUTSCH
ENGLISH
ANSCHLÜSSE, BEDIEN- UND ANZEIGEELEMENTE:
17
FRANCAIS
ITALIANO
FRANCAIS
POLSKI
16
34
15
14
+6
ANSCHLÜSSE, BEDIEN- UND ANZEIGEELEMENTE:
Schalter für die Einstellung der Betriebsspannung. Die Netzspannung Ihres Energieversorgers und die
Betriebsspannung des Geräts müssen übereinstimmen!
15 IEC NETZBUCHSE MIT INTEGRIERTEM SICHERUNGSHALTER
16 POWER ON / OFF
Ein- / Ausschalter für die Stromzufuhr des Geräts.
DEUTSCH
FRANCAIS
Dient der Spannungsversorgung des Geräts. Ein geeignetes Netzkabel befindet sich im Lieferumfang.
WICHTIGE HINWEISE: Stellen Sie VOR Inbetriebnahme sicher, dass die Netzspannung Ihres Energieversorgers
und die Betriebsspannung des Geräts übereinstimmen! Ersetzen Sie die Sicherung ausschließlich durch eine
Sicherung des gleichen Typs und mit gleichen Werten entsprechend der Versorgungsspannung (siehe Aufdruck)!
Sollte die Sicherung wiederholt auslösen, wenden Sie sich bitte an ein autorisiertes Servicezentrum.
FRANCAIS
ENGLISH
14 115V / 230V
17 CHARGE-LED
18 BATTERY LEVEL-LEDS
FRANCAIS
Leuchtet während des Ladevorgangs des internen Akkus. Ist der Akku voll geladen, erlischt die CHARGE-LED.
Um den Akku aufladen zu können, muss ein geeignetes Netzkabel an der Netzbuchse (Nr. 24) des Geräts
angeschlossen sein.
4-Segment LED-Kette zeigt den Ladestatus des integrierten Akkus an. Leuchten alle 3 grünen LEDs, ist der
Akku voll geladen, ist der Akku entladen, leuchtet die rote LED.
ESPAÑOL
HINWEIS ZUR AKKU-PFLEGE (BLEI-AKKU)
Bei jeder möglichen Gelegenheit den Akku voll aufladen. Niemals einen Blei-Akku völlig entladen, leer oder
halbvoll lagern. Bei längerer Nichtbenutzung und Lagerung muss der Akku in regelmäßigen Abständen voll
aufgeladen werden.
POLSKI
ITALIANO
35
ENGLISH
ANSCHLÜSSE, BEDIEN- UND ANZEIGEELEMENTE:
26
DEUTSCH
27
25
19
FRANCAIS
20
21
22
23
24
24
ESPAÑOL
19 SD
-6
Steckplatz für SD-Speicherkarten bis 32 GB Kapazität. Beim Einstecken bitte auf die Einsteckrichtung achten:
Kontaktreihe der SD-Speicherkarte nach rechts. Die Wahl der Signal-Quelle des MP3-Spielers erfolgt mit Hilfe
des MODE-Tasters.
20 MODE
+6Signal-Quelle des MP3-Spielers (SD-Karte / USB-Stick / Bluetooth) und weitere Systemeinstellungen.
Wahl der
FRANCAIS
POLSKI
21
Drücken Sie die PLAY / PAUSE-Taste um die Wiedergabe eines Titels zu starten. Erneutes Drücken stellt den
MP3-Spieler in den Pause-Modus, die Wiedergabe wird angehalten. .
22
Durch Drücken der STOP-Taste wird die Wiedergabe des laufenden Titels gestoppt.
23
FRANCAIS
ITALIANO
Sechs verschiedene Wiedergabemodi stehen zur Auswahl (Normal / Random / Browse / All / Repeat One /
Repeat Folder).
36
24
Durch kurzes Drücken wählen Sie den vorherigen bzw. nächsten Titel aus. Durch langes Drücken (> 1 Sek.)
kann die Lautstärke des MP3-Spielers verändert werden (
= leiser,
= lauter).
ANSCHLÜSSE, BEDIEN- UND ANZEIGEELEMENTE:
Steckplatz für USB-Speichersticks bis 32 GB Kapazität. Die Wahl der Signal-Quelle des MP3-Spielers erfolgt mit
Hilfe des MODE-Tasters.
26 IR
27 DISPLAY
Multifunktionales LC-Display mit Beleuchtung.
DEUTSCH
FRANCAIS
Infrarot-Schnittstelle. Um den MP3-Spieler über die mitgelieferte Fernbedienung steuern zu können, achten Sie
darauf, die Infrarot- Schnittstelle der Fernbedienung in direktem Sichtkontakt zu der Infrarot-Schnittstelle des
Road Jack Lautsprechers zu positionieren.
FRANCAIS
ENGLISH
25 USB IN
FRANCAIS
ESPAÑOL
POLSKI
ITALIANO
37
2
1
0003
0006
3
4
8
B A S5 2 6 5 6
MP3
7
00 : 33 / 03 : 29
10
9
Hey Joe. mp3
11
FRANCAIS
DEUTSCH
ENGLISH
DISPLAY HAUPTANZEIGE:
1 WIEDERGABSTATUS
ESPAÑOL
Play = , Stop = , Pause =
2 WIEDERGABEMODUS
N = Normal. Alle auf dem Speichermedium befindlichen Titel werden nacheinander abgespielt. Nachdem
der letzte Titel abgelaufen ist, stoppt die Wiedergabe.
FRANCAIS
POLSKI
R = Random. Die auf dem Speichermedium befindlichen Titel werden in zufälliger Reihenfolge abgespielt.
I = Browse. Die ersten 10 Sekunden jedes auf dem Speichermedium befindlichen Titels werden nacheinander
angespielt.
A = All. Alle auf dem Speichermedium befindlichen Titel werden wiederholt. Befinden sich eine SD-Speicherkarte und ein USB-Speicherstick in deren Steckplätzen, wird nach Ablauf aller Titel eines Speichermediums
automatisch auf das jeweils andere Speichermedium zugegriffen.
1 = Repeat One. Der angewählte Titel wird fortlaufend wiederholt.
FRANCAIS
ITALIANO
F = Repeat Folder. Alle Titel eines Ordners auf dem Speichermedium werden wiederholt.
38
3 TITELNUMMER
Titelnummer des aktuell wiedergegebenen Titels.
4 TITELANZAHL
Anzahl der auf dem ausgewählten Speichermedium befindlichen Titel.
DISPLAY HAUPTANZEIGE:
Anzeige des aktuell ausgewählten Equalizer-Presets.
6 DATEIFORMAT
Zeigt das Dateiformat des aktuell wiedergegebenen Titels an.
FRANCAIS
ENGLISH
5 EQUALIZER
7 SPEICHERMEDIUM
8 ABSPIELZEIT
Anzeige der bereits abgespielten Zeit des aktuell wiedergegebenen Titels in Minuten und Sekunden.
9 TITELLÄNGE
DEUTSCH
FRANCAIS
Anzeige des aktuell ausgewählten Speichermediums (SD-Speicherkarte bzw. USB-Speicherstick).
Anzeige der Länge des aktuell laufenden Titels in Minuten und Sekunden.
Zeigt den Titelnamen (sofern benannt) und das Dateiformat des aktuell laufenden Titels an.
11 AUDIOANALIZER
FRANCAIS
10 TITELNAME
ESPAÑOL
POLSKI
ITALIANO
39
FRANCAIS
ITALIANO
FRANCAIS
POLSKI
ESPAÑOL
FRANCAIS
DEUTSCH
ENGLISH
BEDIENUNG:
40
EQUALIZER (Eq)
Um eines der sieben Equalizer-Presets auszuwählen,
halten Sie die MODE-Taste für ca. 1 Sekunde gedrückt.
Wählen Sie dann mit Hilfe der
und
Tasten
den Menüpunkt „Eq“ aus (hell hinterlegt) und bestätigen
mit der PLAY- / PAUSE-Taste
. Nun können Sie
eines der sieben Equalizer-Presets aktivieren, indem Sie
es durch Drücken der Tasten
und
auswählen
und die Auswahl mit der PLAY- / PAUSE-Taste
bestätigen.
WIEDERGABEMODUS (Play Mode)
Sechs verschiedene Wiedergabemodi stehen zur
Auswahl (Normal / Random / Browse / All / Repeat
One / Repeat Folder). Halten Sie die MODE-Taste für
ca. 1 Sekunde gedrückt. Wählen Sie dann mit Hilfe
der
und
Tasten den Menüpunkt „Play
Mode“ aus (hell hinterlegt) und bestätigen mit der
PLAY- / PAUSE-Taste
. Nun können Sie einen
der sechs Wiedergabemodi aktivieren, indem Sie ihn
durch Drücken der Tasten
und
auswählen
und die Auswahl mit der PLAY- / PAUSE-Taste
bestätigen.
SIGNALQUELLE AUSWÄHLEN (Change Device)
Wahl der Signal-Quelle des MP3-Spielers.
1. Halten Sie die MODE-Taste für ca. 1 Sekunde gedrückt. Wählen Sie dann mit Hilfe der
und
Tasten den Menüpunkt „Change Device“ aus (hell
hinterlegt) und bestätigen mit der PLAY- / PAUSE-Taste
. Nun können Sie „SD Card“ für SD-Speicherkarte, oder „UDISK“ für USB-Speicherstick mit Hilfe
der Tasten
und
als Signalquelle auswählen
und die Auswahl mit der PLAY- / PAUSE-Taste
bestätigen.
2. Durch kurzes Drücken der MODE-Taste wechselt der
MP3-Spieler seine Signal-Quelle (SD-Karten-Steckplatz
/ Steckplatz für USB-Speichersticks / Bluetooth). Die
aktivierte Signal-Quelle wird im Display angezeigt.
Music
Eq
Play Mode
Change Device
Music
Eq
Play Mode
Change Device
Music
Eq
P l a y MMuosdi ec
EC qh a n g e D e v i c e
Play Mode
C h a nMg eu sDi ce v i c e
Eq
P l a y MMuosdi ec
EC qh a n g e D e v i c e
Play Mode
OaRn g e D e v i c e
C hNBT
00 : 00
: 00
NOT
LINK
Sm
BT NOT LINK
00 : 00
: 00
BT NOT
LINK
Sm
Bluetooth
NOR
BT NOT LINK
Music
Eq
Play Mode
Change Device
Bluetooth
Music
Play Mode
Change Device
Exit
Music
Eq
Play Mode
Change Device
00 : 00
: 00
BT NOT
LINK
Music
BT NOT LINK
Eq
Play Mode
Change Device
00 : 00 : 00
Smartphone
NOR
M
u :s00
i c : 00
00
BT
S mNOT
a r t pLINK
hone
Play Mode
BT NOT LINK
Change Device
Exit
00 : 00
: 00
BT NOT
LINK
00 : 00 : 00
Smartphone
Bluetooth
BT NOT LINK
Bluetooth
NOR
Bluetooth
Bluetooth
Sm
NOR
Smartphone
Bluetooth
ESPAÑOL
NOR
BLUETOOTH
Der MP3-Spieler ist mit Bluetooth ausgestattet,
was bedeutet, dass Audio-Dateien eines anderen
Bluetooth-Geräts (z.B. Smartphone) auf dem Road
Jack Lautsprecher wiedergegeben werden können
(maximale Entfernung zwischen beiden Geräten ca.
10 Meter).
Um den MP3-Spieler mit einem Bluetooth-Gerät zu
koppeln und zu verbinden, drücken Sie jeweils kurz
so oft die MODE-Taste, bis im Display „Bluetooth“
und „BT NOT LINK“ erscheint. Aktivieren Sie
Bluetooth auf Ihrem Bluetooth-Gerät und suchen auf
NOR
der Benutzeroberfläche nach verfügbaren Geräten.
Wählen Sie den Eintrag „LD SYSTEMS“ und koppeln
damit Ihr Bluetooth-Gerät mit dem MP3-Spieler. Im
Display des MP3-Spielers erscheint „Connecting“
und Ihr Bluetooth-Gerät wird daraufhin angezeigt (z.B.
Smartphone), ist somit gekoppelt und verbunden. Die
Titelwiedergabe kann nun gestartet werden.
FRANCAIS
Music
P l a y MMuosdi ec
EC qh a n g e D e v i c e
PE lxai yt M o d e
C h a n g ee DD eevviiccee
DEUTSCH
FRANCAIS
Music
Eq Music
EP ql a y M o d e
PC lhaayn gMeo dDee v i c e
Change Device
FRANCAIS
ENGLISH
VERLASSEN DES MENÜS (Exit)
1. Um das Menü zu verlassen, wählen Sie mit Hilfe
der Tasten
und
den Menüpunkt „Exit“
aus und bestätigen den Vorgang mit Hilfe der PLAY- /
PAUSE-Taste
.
2. Nach ca. 8 Sekunden wird das Menü automatisch
verlassen und das Display wechselt zur Hauptanzeige.
Music
Eq Music
EP ql a y M o d e
g eo BEDIENUNG:
PC lhaayn M
dDee v i c e
Change Device
POLSKI
ITALIANO
41
FRANCAIS
POLSKI
ESPAÑOL
FRANCAIS
DEUTSCH
ENGLISH
BEDIENUNG IN DER BLUETOOTH BETRIEBSART:
BT DISCONNECT
Um die Verbindung mit einem Bluetooth-Gerät zu beenden, um beispielsweise ein anderes Bluetooth-Gerät
mit dem MP3-Spieler zu verbinden, drücken Sie, während sich der MP3-Spieler in der Bluetooth-Betriebsart
befindet, die MODE-Taste für ca. 1 Sekunde und wählen
mit Hilfe der Tasten
und
den Menüpunkt „BT
Disconnect“ (hell hinterlegt) und bestätigen mit der PLAY
/ PAUSE Taste. Im Display erscheint „BT NOT LINK“ und
Sie können nun ein anderes Bluetooth-Gerät mit dem
MP3-Spieler verbinden.
Bluetooth
BT Disconnect
Eq
Delete paired in
RECENTLY RECONNECTION
Um das Bluetooth-Gerät, welches als letztes mit dem
MP3-Spieler verbunden war, wieder zu verbinden,
drücken Sie, während sich der MP3-Spieler in der
Bluetooth-Betriebsart befindet, die MODE-Taste für
ca. 1 Sekunde und wählen mit Hilfe der Tasten
und
den Menüpunkt „Recently reconnection“
(hell hinterlegt) aus und bestätigen mit der PLAY /
PAUSE-Taste.
Bluetooth
BT Disconnect
Eq Bluetooth
DR e Blceel tuneet ltpyoaori ter hec do ni nne
BE Tq D i s c o n n e c t
EDqeBl el ut ee t po ao itrhe d i n
ED qe l e t e p a i r e d i n
Bluetooth
BT Disconnect
Eq
Delete paired in
Bluetooth
BT Disconnect
Eq
Delete paired in
EQUALIZER (Eq)
Um eines der sieben Equalizer-Presets auszuwählen,
halten Sie die MODE-Taste für ca. 1 Sekunde gedrückt.
Wählen Sie dann mit Hilfe der Tasten
und
den Menüpunkt „Eq“ aus (hell hinterlegt) und bestätigen
mit der PLAY / PAUSE-Taste. Nun können Sie eines der
sieben Equalizer-Presets aktivieren, indem Sie es durch
Drücken der Tasten
und
auswählen und die
Auswahl mit der PLAY / PAUSE-Taste bestätigen.
DeB
l el tuee tpoaoi tr he d i n
c ta t
DB eT Bv Dil cui se ct Iononf tnoher m
BE Tq D i s c o n n e c t
EDqe l e t e p a i r e d i n
Delete paired in
FRANCAIS
ITALIANO
Bluetooth
42
Eq
Delete paired in
Device Informat
Bluetooth
Eq
Delete paired in
Device Informat
FRANCAIS
ESPAÑOL
POLSKI
HINWEIS:
Die Wiedergabe des verbundenen Bluetooth-Geräts
kann durch Drücken der PLAY / PAUSE-Taste des MP3Spielers unterbrochen und wieder gestartet werden.
DEUTSCH
FRANCAIS
(Smartphone, Tablet).
FRANCAIS
ENGLISH
Bluetooth
Bluetooth
BT Disconnect
Recently reconne
ooth
BEDIENUNG IN DER BLUETOOTH
Eq
E q B l u e t BETRIEBSART:
BD Te l D
Delete paired in
e ti es cpoaninr ee dc t i n
DELETE PAIRED INFO
Eq
Ein gekoppeltes Bluetooth-Gerät wird entkoppelt
Delete paired in
(Pairing aufheben), indem Sie, während sich der
B linudereBluetooth-Betriebsart
tooth
Bluetooth
MP3-Spieler
befindet, die
MODE-Taste für ca. 1 Sekunde drücken, dann mit Hilfe
T D i und
s c o ndenn Menüpunkt
e c t „Delete
BT Disconnect
derB
Tasten
paired info“ auswählen und durch Drücken der PLAY /
Eq
E qB l u e t o o t h
PAUSE-Taste bestätigen.
Hinweis:
BDTe l De it sec po an inreecdt i n
D e lSolange
e t e einpBluetooth-Gerät
a i r e d mit
i ndem MP3Spieler verbunden ist, kann das gekoppelte Gerät
Eq
nicht entkoppelt werden.
Delete paired in
Bluetooth
DEVICE INFORMATION
E q Sie, während sich der MP3-Spieler in der
Drücken
Bluetooth-Betriebsart befindet, die MODE-Taste für
Bluetooth
Delete paired in
ca. 1 Sekunde, wählen dann mit Hilfe der Tasten
Eq
undD e v
deni Menüpunkt
Information“
c e I n„Device
form
a t aus
und bestätigen durch Drücken der PLAY / PAUSEDelete paired in
Taste. Das Display zeigt nun „Name: LD SYSTEMS“.
Unter diesem Namen erscheint der MP3-Spieler des
Device Informat
Road Jack Lautsprechers auf Ihrem Bluetooth-Gerät
ITALIANO
43
ENGLISH
INFRAROT FERNBEDIENUNG (USB, SD-CARD):
3
1
DEUTSCH
4
2
ESPAÑOL
FRANCAIS
5
7
6
Richten Sie die Infrarot-Fernbedienung in Sichtverbindung direkt auf den über dem USB-Steckplatz
verbauten Infrarot-Sensors. Die maximale Reichweite beträgt ca. 8 Meter.
FRANCAIS
POLSKI
1 PLAY / PAUSE
Drücken Sie die PLAY / PAUSE-Taste um die Wiedergabe eines Titels zu starten. Erneutes Drücken stellt den
MP3-Spieler in den Pause-Modus, die Wiedergabe wird angehalten.
2 EQ
Sieben verschiedene Equalizer-Einstellungen stehen zur Verfügung und können durch wiederholtes Drücken der
Taste abgerufen werden.
3 VOL- / VOL+
FRANCAIS
ITALIANO
Lautstärkeneinstellung des MP3-Spielers (0 bis 15). Drücken auf VOL- verringert, Drücken auf VOL+ erhöht die
Lautstärke.
44
4 PREV / NEXT
Um den vorherigen Titel anzuwählen, drücken Sie kurz die PREV-Taste, um den nächsten Titel anzuwählen
die NEXT-Taste. Halten Sie die Tasten gedrückt, werden schneller Rück- und schneller Vorlauf aktiviert.
INFRAROT FERNBEDIENUNG (USB, SD-CARD):
Um einen Titel direkt anwählen zu können, verwenden Sie die Zifferntasten 0 bis 9.
Beispiel: Wollen Sie Titelnummer 29 anwählen, drücken Sie einmal kurz die Taste mit der Ziffer 2 und dann die Taste
mit der Ziffer 9 (im Display wird „0029“ für kurze Zeit angezeigt).
FRANCAIS
ENGLISH
5 TITELDIREKTWAHL
6 ENTER
EQUALIZER (Eq)
Um eines der sieben Equalizer-Presets auszuwählen, drücken Sie die ENTER-Taste und wählen dann mit Hilfe der
PREV- und NEXT-Tasten den Menüpunkt „Eq“ aus (hell hinterlegt) und bestätigen mit der PLAY / PAUSE-Taste. Nun
können Sie eines der sieben Equalizer-Presets aktivieren, indem Sie es durch Drücken der Tasten PREV und NEXT
auswählen und die Auswahl durch Drücken der PLAY / PAUSE-Taste bestätigen.
POLSKI
VERLASSEN DES MENÜS (Exit)
1. Um das Menü zu verlassen, wählen Sie mit Hilfe der Tasten PREV und NEXT den Menüpunkt „Exit“ aus und
bestätigen den Vorgang mit Hilfe der PLAY / PAUSE-Taste.
2. Nach ca. 8 Sekunden wird das Menü automatisch verlassen und das Display wechselt zur Hauptanzeige.
ESPAÑOL
SIGNALQUELLE AUSWÄHLEN (Change Device)
Wahl der Signal-Quelle des MP3-Spielers.
1. Drücken Sie die ENTER-Taste und wählen dann mit Hilfe der PREV- und NEXT- Tasten den Menüpunkt „Change
Device“ aus (hell hinterlegt) und bestätigen mit der PLAY / PAUSE- Taste. Nun können Sie „SD Card“ für SD-Speicherkarte, oder „UDISK“ für USB- Speicherstick mit Hilfe der Tasten PREV und NEXT als Signalquelle auswählen und die
Auswahl durch Drücken der PLAY / PAUSE-Taste bestätigen.
2. Durch kurzes Drücken der MODE-Taste wechselt der MP3-Spieler seine Signal-Quelle (SD-Karten-Steckplatz /
Steckplatz für USB-Speichersticks / Bluetooth). Die aktivierte Signal-Quelle wird im Display angezeigt.
FRANCAIS
WIEDERGABEMODUS (Play Mode)
Sechs verschiedene Wiedergabemodi stehen zur Auswahl (Normal / Random / Browse / All / Repeat One / Repeat
Folder). Drücken Sie die ENTER-Taste und wählen dann mit Hilfe der PREV und NEXT Tasten den Menüpunkt „Play
Mode“ aus (hell hinterlegt) und bestätigen die Auswahl mit der PLAY / PAUSE-Taste. Nun können Sie einen der sechs
Wiedergabemodi aktivieren, indem Sie ihn durch Drücken der Tasten PREV und NEXT auswählen und die Auswahl
durch Drücken der PLAY / PAUSE-Taste bestätigen.
DEUTSCH
FRANCAIS
Durch Drücken der Taste ENTER gelangen Sie in das Menü für die Auswahl des Equalizers, des Wiedergabemodus
und der Signalquelle.
7 MODE
HINWEIS: Die Tasten CHANNEL (CH-, CH+) und PICK SONG haben keine Funktion.
ITALIANO
1. Durch kurzes Drücken der MODE-Taste wechselt der MP3-Spieler seine Signal-Quelle (SD-Karten-Steckplatz / Steckplatz für USB-Speichersticks / Bluetooth). Die aktivierte Signal-Quelle wird im Display angezeigt.
2. Drücken Sie diese Taste für ca. 2 Sekunden, wird der MP3-Spieler aus- bzw. angeschaltet.
Der MP3-Spieler kann ausschließlich mit Hilfe der Infrarot Fernbedienung ein- und ausgeschaltet werden,
nicht am Gerät selbst.
45
ENGLISH
INFRAROT FERNBEDIENUNG (BLUETOOTH):
2
1
ESPAÑOL
FRANCAIS
DEUTSCH
3
5
4
1 PLAY / PAUSE
Drücken Sie die PLAY / PAUSE-Taste um die Wiedergabe eines Titels zu starten. Erneutes Drücken stellt den
MP3-Spieler in den Pause-Modus, die Wiedergabe wird angehalten.
FRANCAIS
POLSKI
2 VOL- / VOL+
Lautstärkeneinstellung des MP3-Spielers (0 bis 15). Drücken auf VOL- verringert, Drücken auf VOL+ erhöht die
Lautstärke.
3 PREV / NEXT
Um den vorherigen Titel eines Albums anzuwählen, drücken Sie kurz die PREV-Taste, um den nächsten Titel
anzuwählen die NEXT-Taste.
FRANCAIS
ITALIANO
4 ENTER
46
Durch Drücken der Taste ENTER gelangen Sie in das Bluetooth-Menü. Bedienung und Einstellung erfolgen wie im
Kapitel „BEDIENUNG IN DER BLUETOOTH BETRIEBSART“ ausführlich beschrieben.
INFRAROT FERNBEDIENUNG (BLUETOOTH):
1. Durch kurzes Drücken der MODE-Taste wechselt der MP3-Spieler seine Signal-Quelle (SD-Karten-Steckplatz / Steckplatz für USB- Speichersticks / Bluetooth). Die aktivierte Signal-Quelle wird im Display angezeigt.
2. Drücken Sie diese Taste für ca. 2 Sekunden, wird der MP3-Spieler aus- bzw. eingeschaltet.
Der MP3-Spieler kann ausschließlich mit Hilfe der Infrarot Fernbedienung ein- und ausgeschaltet werden,
nicht am MP3-Spieler selbst, wird aber beim Einschalten des Road Jack Lautsprechers automatisch mit
eingeschaltet.
DEUTSCH
FRANCAIS
HINWEIS: Die Tasten CHANNEL (CH-, CH+), EQ, PICK SONG und die Ziffern-Tasten 0 - 9 haben in der BluetoothBetriebsart keine Funktion.
FRANCAIS
ENGLISH
5 MODE
FRANCAIS
ESPAÑOL
POLSKI
ITALIANO
47
FRANCAIS
ITALIANO
FRANCAIS
POLSKI
ESPAÑOL
FRANCAIS
DEUTSCH
ENGLISH
SPEZIFIKATIONEN:
48
Modellbezeichnung
Produktart:
Typ:
Größe Tieftöner:
Größe Tieftöner:
Magnet Tieftöner:
Marke Tieftöner:
Größe HF Treiber:
Größe HF Treiber:
Magnet HF Treiber:
Marke HF Treiber:
Verstärker:
Leistung (RMS):
Leistung (Peak):
Frequenzgang:
SPL (1 W/1 m):
Max. SPL:
Schutzschaltungen:
Bedienelemente:
Anzeigeelemente:
Line-Eingänge:
Line-Eingangsanschlüsse:
Mic-Eingänge:
Mic-Eingangsanschlüsse:
Instrumenteneingänge:
Instrumenteneingangsanschlüsse:
Netzanschluss:
Stromversorgung:
Betriebsspannung:
Leistungsaufnahme (Max.):
wiederaufladbare Batterien:
Gehäusematerial:
Gehäusebauart:
Breite:
Höhe:
Tiefe:
Gewicht:
Weitere Eigenschaften:
LDRJ8
Mobiler PA Lautsprecher
Aktiv
8"
203,2 mm
Ferrit
Custom Made
3" (Breitband)
76,2 mm
Ferrit
Custom Made
Class D
25 W
100 W
90 - 18.000 Hz
94 dB
113 dB
Kurzschluss, Überspannung, Überladungsschutz
Mic 1 Level, Mic 2 Level, CD / Tape IN Level, Low, High, Echo,
Master Volume, AUX / MP3 Schalter
Power, Lade- / Batteriestatus
1
2 x Cinch, 3,5 mm Klinke
2 (1x alternativ zu Instrumenteneingang CH 2)
XLR, 6,3 mm Klinke
1 (alternativ zu Mic-Eingang CH 2)
6,3 mm Klinke
IEC Netzbuchse
Schaltnetzteil
100 V AC - 120 V AC / 60 Hz, 220 V AC - 240 V AC / 50 Hz
50 W
12 V / 5 Ah
15 mm MDF
Bassreflex
385 mm
450 mm
298 mm
13,8 kg
Stativflansch 36 mm, Transportrollen, Ausziehgriff, Tragegriff, IR
Fernbedienung für Media Player
SPEZIFIKATIONEN:
ESPAÑOL
POLSKI
ITALIANO
415 mm
525 mm
328 mm
16,2 kg
Stativflansch 36 mm, Transportrollen, Ausziehgriff, Tragegriff, IR
Fernbedienung für Media Player
FRANCAIS
Breite:
Höhe:
Tiefe:
Gewicht:
Weitere Eigenschaften:
DEUTSCH
FRANCAIS
Anzeigeelemente:
Line-Eingänge:
Line-Eingangsanschlüsse:
Mic-Eingänge:
Mic-Eingangsanschlüsse:
Instrumenteneingänge:
Instrumenteneingangsanschlüsse:
Netzanschluss:
Stromversorgung:
Betriebsspannung:
Leistungsaufnahme (Max.):
wiederaufladbare Batterien:
Gehäusematerial:
Gehäusebauart:
LDRJ10
Mobiler PA Lautsprecher
Aktiv
10"
254 mm
Ferrit
Custom Made
3" (Breitband)
76,2 mm
Ferrit
Custom Made
Class D
25 W
100 W
65 - 18.000 Hz
96 dB
117 dB
Kurzschluss, Überspannung, Überladungsschutz
Mic 1 Level, Mic 2 Level, CD / Tape IN Level, Low, High, Echo,
Master Volume, AUX / MP3 Schalter
Power, Lade- / Batteriestatus
1
2 x Cinch, 3,5 mm Klinke
2 (1x alternativ zu Instrumenteneingang CH 2)
XLR, 6,3 mm Klinke
1 (alternativ zu Mic-Eingang CH 2)
6,3 mm Klinke
IEC Netzbuchse
Schaltnetzteil
100 V AC - 120 V AC / 60 Hz, 220 V AC - 240 V AC / 50 Hz
50 W
12 V / 5 Ah
15 mm MDF
Bassreflex
FRANCAIS
ENGLISH
Modellbezeichnung
Produktart:
Typ:
Größe Tieftöner:
Größe Tieftöner:
Magnet Tieftöner:
Marke Tieftöner:
Größe HF Treiber:
Größe HF Treiber:
Magnet HF Treiber:
Marke HF Treiber:
Verstärker:
Leistung (RMS):
Leistung (Peak):
Frequenzgang:
SPL (1 W/1 m):
Max. SPL:
Schutzschaltungen:
Bedienelemente:
49
FRANCAIS
ITALIANO
FRANCAIS
POLSKI
ESPAÑOL
FRANCAIS
DEUTSCH
ENGLISH
SPEZIFIKATIONEN:
50
Media-Player
Media Player
unterstützte Medien:
unterstützte Formate:
Bedienelemente Media Player:
Anzeigeelemente Media Player:
LDRJ8 / LDRJ10
Bluetooth, USB-Stick, SD Card
MP3-Datei, WAV, WMA
Mode (Menu / Bluetooth /SD / USB) , Play / Pause, Stop, Repeat,
Vorheriger Titel, Nächster Titel)
Beleuchtetes Multifunktions-LC-Display
HERSTELLERERKLÄRUNGEN:
Diese Garantie erstreckt sich auf das von Ihnen erworbene Adam Hall Produkt der Marke LDSYSTEMS. Die gesetzlichen
Gewährleistungsrechte gegenüber dem Verkäufer werden von dieser Garantie nicht berührt. Vielmehr begründet diese
Garantie zusätzliche selbständige Ansprüche gegenüber Adam Hall.
Adam Hall übernimmt keine Garantie für einen störungs- oder fehlerfreien Betrieb dieses Produkts. Adam Hall
übernimmt keine Verantwortung für Schäden die auf eine inkorrekte Befolgung der im Lieferumfang erhaltenen
Anweisungen zurückzuführen sind.
ITALIANO
Diese Garantie ist nur innerhalb von Europa gültig. Außerhalb von Europa wenden Sie sich bitte an unsere offiziellen
Vertriebspartner.
POLSKI
Diese Garantie erstreckt sich nicht auf:
- Verschleißteile (z.B. Akkumulator, Röhren).
- Geräte deren Seriennummer entfernt wurde oder die beschädigt oder fehlerhaft wurden als Folge eines Unfalls
- nicht sachgerechter oder missbräuchlicher Verwendung oder anderer äußerer Ursachen
- Geräte die nicht entsprechend den Betriebsparametern betrieben wurden, die in den im Lieferumfang des Produkts
enthaltenen Benutzerunterlagen festgelegt sind
- Geräte die aufgrund der Verwendung nicht von Adam Hall hergestellter oder vertriebener Teile repariert wurden
- Geräte die durch jemand anderen als Adam Hall oder durch einen autorisierten Servicepartner gewartet, geändert
oder repariert wurden.
Diese Bestimmungen und Bedingungen stellen die vollständige und ausschließliche Garantievereinbarung zwischen
Ihnen und Adam Hall für das von Ihnen erworbene Adam Hall Produkt dar.
ESPAÑOL
In dem unwahrscheinlichen Fall, dass bei dem von Ihnen erworbenen Adam Hall Produkt ein Fehler wiederholt auftritt, kann Adam Hall nach eigenem Ermessen entscheiden, Ihnen dieses Produkt durch ein vergleichbares Produkt
mit mindestens derselben Leistung zu ersetzen.
FRANCAIS
Diese Garantie gilt nur für den ursprünglichen Käufer des von Adam Hall vertriebenen Produkts und ist nicht an
Personen übertragbar, denen vom ursprünglichen Käufer das Eigentum am Adam Hall Produkt übertragen wird.
Innerhalb des Garantiezeitraums werden die fehlerhaften Komponenten oder das Produkt von Adam Hall repariert
oder ersetzt. Alle im Rahmen dieser Garantie ausgetauschten bzw. entfernten Komponenten gehen in das Eigentum
von Adam Hall über.
DEUTSCH
FRANCAIS
Mit dieser Garantie stellt Adam Hall sicher, dass das von Ihnen bei Adam Hall oder einem Adam Hall Partner erworbene
Produkt, bei normalem Gebrauch während des Zeitraums von 2 Jahren ab Kaufdatum frei von Material- oder Verarbeitungsfehlern ist. Der Garantiezeitraum beginnt mit dem Datum des Kaufs. Der Geltendmachung eines Anspruchs
auf Garantieleistungen erforderliche Nachweis des Kaufdatums, erfolgt durch die mit dem Kaufdatum versehene
Quittung oder den mit dem Kaufdatum versehenen Lieferschein. Sie haben Anspruch auf den Garantieservice zu den
in diesem Dokument aufgeführten Bedingungen und Bestimmungen, falls eine Reparatur innerhalb des Garantiezeitraums erforderlich ist.
FRANCAIS
ENGLISH
GARANTIEBESTIMMUNGEN
51
FRANCAIS
ITALIANO
FRANCAIS
POLSKI
ESPAÑOL
FRANCAIS
DEUTSCH
ENGLISH
HERSTELLERERKLÄRUNGEN:
52
HAFTUNGSBESCHRÄNKUNG
Falls an Hardware-Produkten von Adam Hall innerhalb der Garantiezeit Material- oder Verarbeitungsfehler
(gemäß der Garantieerklärung oben) auftreten, besteht Ihr alleiniger und ausschließlicher Anspruch aus dieser
Garantie in der Reparatur oder dem Austausch des Geräts. Die maximale Haftung der Firma Adam Hall ist entsprechend dieser Garantie ausdrücklich auf den Kaufpreis oder die Kosten für eine Reparatur oder Ersatz – und
zwar den jeweils niedrigeren Betrag – der bei üblichem Gebrauch fehlerhaften Komponenten begrenzt.
Adam Hall ist nicht haftbar für jegliche durch das Produkt oder das Versagen des Produkts verursachte Schäden,
einschließlich Gewinneinbußen und unterbliebener Einsparungen sowie besonderer, indirekter oder Folgeschäden.
Des Weiteren ist Adam Hall nicht haftbar gegenüber Rechtsansprüchen Dritter oder durch Sie im Namen Dritter
angemeldeten Forderungen.
Diese Haftungsbeschränkung gilt unabhängig davon, ob Schäden gerichtlich verfolgt oder Schadensersatzansprüche im Rahmen dieser Garantie oder aufgrund unerlaubter Handlungen (einschließlich Fahrlässigkeit
und Gefährdungshaftung) oder aufgrund vertraglicher oder sonstiger Ansprüche gestellt werden, und kann von
niemandem aufgehoben oder verändert werden. Diese Haftungsbeschränkung ist auch dann gültig, wenn Sie die
Firma Adam Hall oder einen autorisierten Vertreter von Adam Hall auf die Möglichkeit solcher Schäden aufmerksam
gemacht haben, nicht jedoch bei Schadensersatzansprüchen in Zusammenhang mit Personenschäden.
Diese Herstellergarantie räumt Ihnen bestimmte Rechte ein; je nach Gerichtsbarkeit (Staat oder Land) stehen
Ihnen möglicherweise weitere Ansprüche zu. Es ist ratsam, in solchen Fällen die entsprechenden Gesetze heranzuziehen, um Ihre Rechte umfassend zu ermitteln.
INANSPRUCHNAHME DER GARANTIE
Wenden Sie sich im Garantiefall direkt an Adam Hall oder den von Adam Hall autorisierten Händler, bei dem Sie
das Produkt erworben haben.
EG-KONFORMITÄTSERKLÄRUNG
Die von Adam Hall vertriebenen Geräte entsprechen (soweit zutreffend) den grundlegenden Anforderungen und
weiteren relevanten Spezifikationen der Richtlinien 1999/5/EC (R&TTE), 2004/108/EC (EMC) und 2006/95/EC
(LVD). Weitere Informationen finden Sie unter www.adamhall.com.
HERSTELLERERKLÄRUNGEN:
(Gültig in der Europäischen Union und anderen europäischen Ländern mit Mülltrennung)
Als Privatkunde erhalten Sie Informationen zu umweltfreundlichen Entsorgungsmöglichkeiten über den Händler,
bei dem das Produkt erworben wurde, oder über die entsprechenden regionalen Behörden.
Als gewerblicher Nutzer kontaktieren Sie bitte Ihren Lieferanten und prüfen die ggf. vertraglich vereinbarten
Konditionen zur Entsorgung der Geräte. Dieses Produkt darf nicht zusammen mit anderen gewerblichen Abfällen
entsorgt werden.
Energiesparen ist ein aktiver Beitrag zum Umweltschutz. Schalten Sie bitte alle nicht benötigten elektrischen
Geräte aus. Um zu verhindern, dass nicht benötigte Geräte im Standby-Modus Strom verbrauchen, ziehen Sie
den Netzstecker.
FRANCAIS
UMWELTSCHUTZ UND ENERGIESPAREN
DEUTSCH
FRANCAIS
Dieses Symbol auf dem Produkt oder dazugehörigen Dokumenten weist darauf hin, dass das Gerät am Ende der
Produktlebenszeit nicht zusammen mit dem normalen Hausmüll entsorgt werden darf, um Umwelt- oder Personenschäden durch unkontrollierte Abfallentsorgung zu vermeiden. Bitte entsorgen Sie dieses Produkt getrennt von anderen
Abfällen und führen es zur Förderung nachhaltiger Wirtschaftskreisläufe dem Recycling zu.
FRANCAIS
ENGLISH
KORREKTE ENTSORGUNG DIESES PRODUKTES
ESPAÑOL
POLSKI
ITALIANO
Adam Hall GmbH, alle Rechte vorbehalten. Die technischen Daten und die funktionalen Produkteigenschaften
können Änderungen und Irrtümer vorbehalten. Das Kopieren, die Übersetzung, und alle anderen Formen des
Kopierens von Fragmenten oder der Vollständigkeit dieser Bedienungsanleitung ist untersagt.
53
ENGLISH
DEUTSCH
Vous avez fait le bon choix !
FRANCAIS
POLSKI
ESPAÑOL
FRANCAIS
Cet appareil a été développé et fabriqué en appliquant des exigences de qualité très élevées : il garantit des
années de fonctionnement sans problème. Grâce à de nombreuses années d‘expérience, LD Systems est un nom
connu dans le domaine des produits audio haut de gamme.
Veuillez lire attentivement ce Manuel Utilisateur : vous apprendrez rapidement à utiliser votre appareil LD
Systems de façon optimale.
Pour plus d‘informations sur LD Systems, visitez notre site Web, WWW.LD-SYSTEMS.COM
Introduction
Les enceintes actives 2 voies de la Série Road Jack sont d'une grande mobilité, grâce à leurs roulettes intégrées
et à leur poignée télescopique. L'accumulateur incorporé assure une autonomie allant jusqu'à 20 heures.
Le mixeur possède trois canaux d'entrée réglables séparément, un égaliseur 2 bandes et un écho réglable, ainsi
qu'un potentiomètre de niveau global. Grâce à sa connectique variée (Combo, jack 6,35 mm, RCA/cinch et mini-jack
stéréo 3,5 mm), le mixeur accepte les sources d'entrée les plus variées.
La particularité la plus intéressante de l'appareil est son récepteur Bluetooth intégré, autorisant le streaming
audio sans fil. Il est également équipé de slots pour carte SD et clé USB, pour lecture de fichiers audio stockés
sur ces supports mémoire.
FRANCAIS
ITALIANO
Les deux modèles Road Jack sont livrés avec une télécommande infrarouge facile à utiliser et possèdent une
embase pour pied.
54
DEUTSCH
FRANCAIS
ENCEINTE BLUETOOTH SUR BATTERIE AVEC MIXEUR INTÉGRÉ
LDRJ8 / LDRJ10
FRANCAIS
ENGLISH
ROADJACK 8 / 10
FRANCAIS
ESPAÑOL
POLSKI
ITALIANO
55
FRANCAIS
ITALIANO
FRANCAIS
POLSKI
ESPAÑOL
FRANCAIS
DEUTSCH
ENGLISH
MESURES PRÉVENTIVES :
56
1. Veuillez lire attentivement ce manuel.
2. Rangez tous les documents d‘information et d‘instructions en lieu sûr.
3. Veuillez suivre toutes les instructions
4. Observez tous les messages d‘avertissement N‘enlevez pas de l‘appareil les étiquettes de sécurité ou autres informations.
5. N‘utilisez l‘appareil que pour des applications et de la façon appropriées.
6. Utilisez exclusivement des pieds et des dispositifs de fixation stables et adaptés lorsque l‘appareil est utilisé en
installation fixe. Assurez-vous que les fixations murales ont été montées correctement, et qu‘elles sont sécurisées.
Vérifiez que l‘appareil est installé en toute sécurité, et qu‘il ne peut pas tomber.
7. Lors de l‘installation, observez les règlementations de sécurité en vigueur dans votre pays.
8. N‘installez et n‘utilisez pas l‘appareil à proximité de radiateurs, d‘accumulateurs de chaleur, de fours ou de toute
autre source de chaleur. Vérifiez que l‘appareil est installé de façon à bénéficier en permanence d‘un refroidissement
efficace et qu‘il ne peut pas chauffer de façon excessive. Éviter toute exposition directe aux rayons du soleil !
9. Ne placez aucune source de flamme sur l‘appareil – par exemple, une bougie allumée.
10. Ne bloquez pas les ouïes d‘aération.
11. N‘utilisez pas l‘appareil à proximité immédiate d‘eau (à moins qu‘il ne s‘agisse d‘un appareil conçu pour une
utilisation en extérieur – dans ce cas, respectez les instructions correspondantes ci après) Ne mettez pas l‘appareil
en contact avec des matériaux, des liquides ou des gaz inflammables.
12. Vérifiez qu‘aucune projection ou liquide ne puisse s‘introduire dans l‘appareil. Ne posez sur l‘appareil aucun
objet renfermant du liquide : vase, verre d‘eau...
13. Vérifiez qu‘aucun petit objet ne puisse tomber à l‘intérieur de l‘appareil.
14. N‘utilisez avec cet appareil que des accessoires recommandés et approuvés par le fabricant.
15. N‘ouvrez pas l‘appareil, et n‘essayez pas de le modifier.
16. Lors du branchement de l‘appareil, sécurisez le passage du câble secteur, afin d‘éviter tout dommage ou
accident, par exemple quelqu‘un qui trébuche sur le câble.
17. Lors du transport, vérifiez que l‘appareil ne peut tomber, ce qui pourrait provoquer des dommages matériels et/ou corporels.
18. Si votre appareil ne fonctionne plus correctement, que de l‘eau ou des objets ont pénétré à l‘intérieur, ou qu‘il
a été endommagé de quelque façon que ce soit, éteignez-le immédiatement et débranchez sa prise secteur (s‘il
s‘agit d‘un appareil alimenté). Cet appareil ne doit être réparé que par un personnel autorisé.
19. Pour le nettoyage de l‘appareil, utilisez un chiffon sec/
20. Observez toutes les réglementations en vigueur dans votre pays pour mettre l‘appareil au rebut. Lorsque vous
jetez l‘emballage de l‘appareil, veuillez séparer plastique, papier et carton.
21. Les films plastique doivent être mis hors de portée des enfants.
APPAREILS RELIÉS AU SECTEUR :
22. ATTENTION : Si le câble de l‘appareil est muni d‘un fil de terre, il doit être relié à une prise murale avec terre.
Ne désactivez jamais la mise à la terre d‘un appareil.
23. N‘allumez pas l‘appareil immédiatement s‘il a subi une grande différence de température ambiante (par exemple, lors du transport). L‘humidité et la condensation pourraient l‘endommager. Ne mettez l‘appareil sous tension
que lorsqu‘il est parvenu à la température de la pièce.
24. Avant de relier l‘appareil à la prise murale, vérifiez que la valeur et la fréquence de tension secteur sur laquelle
il est réglé correspondent bien à la valeur et à la fréquence de la tension secteur locale. Si l‘appareil possède un
sélecteur de tension, ne le branchez sur la prise murale qu‘après avoir vérifié que la valeur réglée correspond à la
valeur effective de la tension secteur. Si la fiche du cordon secteur ou du bloc adaptateur livré avec votre appareil
ne correspond pas au format de votre prise murale, veuillez consulter un électricien.
25. Ne piétinez pas le câble secteur. Assurez-vous que le câble secteur n‘est pas trop pincé, notamment au niveau
de l‘arrière de l‘appareil (ou de son adaptateur secteur) et de la prise murale.
SÉCURITÉ :
Le pictogramme en forme de triangle équilatéral renfermant un point d’exclamation signal eà
l’utilisateur la présence d’instructions importantes concernant l’utilisation ou l’entretien de l’appareil.
ITALIANO
Pour éviter tout risque de traumatisme auditif, évites d'écouter à fort volume sonore pendant de
longues périodes.
Un niveau d'écoute trop élevé, même bref, peut provoquer des dommages aux oreilles. Veuillez
maintenir le niveau d'écoute à un niveau raisonnable.
POLSKI
ATTENTION NIVEAUX SONORES ÉLEVÉS SUR LES PRODUITS AUDIO
Cet appareil a été conçu en vue d’une utilisation professionnelle. L’utilisation commerciale de cet appareil est
soumise aux réglementations et directives en vigueur dans votre pays en matière de prévention d’accident. En
tant que fabricant, Adam Hall est tenu de vous avertir formellement des risques relatifs à la santé.
Risques provoqués par une exposition prolongée à des niveaux sonores élevés : Lors de l’utilisation de ce
produit, il est possible d’atteindre des niveaux de pression sonore (exprimés en dB SPL) élevés, susceptibles de
provoquer des dommages auditifs irréparables chez les artistes, les techniciens et le public. Évitez toute exposition prolongée à des niveaux de pression sonore élevés (supérieurs à 90 dB SPL).
ESPAÑOL
Le pictogramme en forme de triangle équilatéral renfermant un éclair signale à l’utilisateur la
présence à l’intérieur de l’appareil d’une tension dangereuse non protégée, suffisamment élevée
pour présenter un risque pour les personnes.
FRANCAIS
ATTENTION :
Ne démontez jamais le couvercle de l’appareil, vous risquez de recevoir un choc électrique. L’appareil ne
renferme aucune pièce ni composant réparable ou remplaçable par l’utilisateur Ne confiez sa réparation qu’à un
personnel technique qualifié.
DEUTSCH
FRANCAIS
CAUTION
RISK OF ELECTRIC SHOCK
DO NOT OPEN
FRANCAIS
ENGLISH
26. Lors du branchement de l‘appareil, vérifiez que l‘accès au câble secteur ou au bloc adaptateur reste facile.
Sortez la fiche secteur de la prise murale dès que vous n‘utilisez pas l‘appareil pendant un certain temps, ou si vous
désirez nettoyer l‘appareil. Pour ce faire, tirez toujours sur la fiche elle-même, ou sur le bloc secteur lui-même ; ne
tirez jamais sur le câble. Ne manipulez jamais le câble secteur ou l‘adaptateur secteur avec des mains mouillées.
27. N‘éteignez/rallumez pas l‘appareil rapidement plusieurs fois de suite : vosu risquez de réduire la longévité de
ses composants internes.
28. CONSEIL IMPORTANT : Ne remplacez le fusible que par un fusible de même type et du même calibre. Si le
fusible fond de façon répétée, veuillez consulter un centre de réparations agréé.
29. Pour séparer complètement l‘appareil du secteur, débranchez le cordon secteur ou l‘adaptateur de la prise murale.
30. Si votre appareil est muni d‘un connecteur secteur verrouillable (Volex), il faut d‘abord déverrouiller le mécanisme avant d‘enlever le cordon secteur. Attention, lorsque vous retirez le câble secteur, à ne pas faire bouger
l‘appareil, ce qui pourrait se traduire par un risque de chute, de blesser quelqu‘un, ou tout autre dommage.
Manipulez toujours le cordon secteur avec soin.
31. Débranchez la fiche secteur ou l‘adaptateur de la prise murale en cas d‘orage, ou si vous n‘utilisez pas
l‘appareil pendant une longue période.
57
ENGLISH
CONNECTEURS, CONTRÔLES ET INDICATEURS :
5
1
3
6
FRANCAIS
DEUTSCH
5
8
2
4
7
-6
+6
ESPAÑOL
1 ENTRÉE CH 1
Entrée micro symétrique (connecteur Combo, mixte XLR/jack 6,35 mm) Cette entrée est compatible avec un
signal asymétrique (issu d'un microphone possédant un connecteur jack mono).
2 POTENTIOMÈTRE LEVEL CH 1
Réglage de volume du signal reçu sur le canal 1 (CH1). Tournez le potentiomètre vers la droite pour augmenter
le volume sonore, vers la gauche pour le baisser.
FRANCAIS
POLSKI
3 ENTRÉE CH 2
Entrée asymétrique instrument/micro sur jack 6,35 mm.
4 POTENTIOMÈTRE LEVEL CH 2
Réglage de volume du signal reçu sur le canal 2 (CH2). Tournez le potentiomètre vers la droite pour augmenter
le volume sonore, vers la gauche pour le baisser.
FRANCAIS
ITALIANO
5 ENTRÉE CH 3 (CINCH)
Entrée ligne asymétrique (sur connecteur RCA/cinch), pour raccord d'une source de signal externe (par
exemple, lecteur de CD, baladeur MP3...). Ce signal stéréo est sommé en mono en interne. Pour activer l'entrée
sur RCA/cinch, il faut appuyer sur la touche 8 (MP3/AUX) du panneau utilisateur. Le signal est alors assigné à
l'entrée 3. L'entrée mini-jack 3,5 mm est prioritaire par rapport aux entrées RCA/cinch.
LOW
58
1
2
3
-6
CONNECTEURS, CONTRÔLES ET INDICATEURS :
Entrée ligne asymétrique (sur connecteur RCA/cinch), pour raccord d'une source de signal externe (par
ordinateur portable, lecteur MP3...). Ce signal stéréo est sommé en mono. Pour activer l'entrée sur mini-jack,
il faut appuyer sur la touche 8 (MP3/AUX) du panneau utilisateur. Le signal est alors assigné à l'entrée 3.
L'entrée mini-jack 3,5 mm est prioritaire par rapport aux entrées RCA/cinch.
FRANCAIS
ENGLISH
6 ENTRÉE CH 3 (MINI-KLINKE)
7 POTENTIOMÈTRE LEVEL CH 3
8 SÉLECTEUR MP3 / AUX
Permet de choisir le signal reçu sur le canal 3 (CH 3) Si la touche n'est pas enfoncée, c'est le lecteur MP3
intégré qui est sélectionné ; si elle est enfoncée, c'est l'entrée RCA/cinch ou l'entrée mini-jack.
DEUTSCH
FRANCAIS
Réglage de volume du signal reçu sur le canal 3 (CH3). Tournez le potentiomètre vers la droite pour augmenter
le volume sonore, vers la gauche pour le baisser.
9 LOW
10 HIGH
Correcteur d'aigus s'appliquant au signal mixé (Master). Tourner vers la gauche pour baisser les aigus, vers
la droite pour les monter. En position centrale (crantée), le correcteur est inactif.
Effet d'écho s'appliquant à l'entrée micro (CH 1). Si vous tournez le potentiomètre à fond vers la gauche,
l'effet est désactivé ; plus vous le tournez vers la droite, plus l'effet d'écho est audible.
12 MASTER VOL
Potentiomètre de réglage du volume général. Tourner vers la gauche pour baisser le volume sonore, vers la
droite pour le monter.
ESPAÑOL
11 ECHO
FRANCAIS
Correcteur de graves s'appliquant au signal mixé (Master). Tourner vers la gauche pour baisser les graves,
vers la droite pour les monter. En position centrale (crantée), le correcteur est inactif.
13 LED POWER
-6
10
+6
-6
11
+6
12
ITALIANO
13
9
POLSKI
Cet indicateur s'allume lorsque l'appareil est correctement relié au secteur et sous tension, ou alimenté par
l'accumulateur intégré.
59
-6
+6
-6
LOW
1 18 2
3
ESPAÑOL
FRANCAIS
DEUTSCH
ENGLISH
CONNECTEURS, CONTRÔLES ET INDICATEURS :
17
FRANCAIS
ITALIANO
FRANCAIS
POLSKI
16
60
15
14
+6
CONNECTEURS, CONTRÔLES ET INDICATEURS :
Sélecteur de réglage de tension secteur La valeur sélectionnée doit évidemment correspondre à celle de
votre tension secteur !
15 EMBASE SECTEUR IEC AVEC PORTE-FUSIBLE INTÉGRÉ
16 POWER ON / OFF
DEUTSCH
FRANCAIS
Reçoit le cordon secteur d'alimentation de l'appareil. Le cordon secteur correspondant est livré avec
l'appareil.
AVERTISSEMENT IMPORTANT : Assurez-vous AVANT la mise en service que la tension secteur disponible
correspond à celle de l'appareil. Remplacez exclusivement le fusible par un fusible neuf du même format et
du même calibre (valeurs indiquées sur le panneau arrière de l'appareil).
Si le fusible fond de façon répétée, veuillez consulter un centre de réparations agréé.
FRANCAIS
ENGLISH
14 115V / 230V
Interrupteur marche/arrêt.
Cet indicateur s'allume pour indiquer que l'accumulateur interne est en cours de charge. Lorsqu'il est complètement
chargé, l'indicateur CHARGE s'éteint. Pour pouvoir charger l'accumulateur, un câble secteur adapté doit être branché
dans l'embase secteur (n°24) de l'appareil.
FRANCAIS
17 LED CHARGE
18 LED BATTERY LEVEL
CONSEIL POUR LE SOIN DES ACCUS (PLOMB)
Dès que c'est possible, rechargez les accus à fond. Ne déchargez jamais complètement un accumulateur au
plomb, et ne le laissez jamais déchargé ou même à moitié chargé. En cas de longue période de non-utilisation
ou de stockage, l'accumulateur doit être chargé à fond à intervalles réguliers.
ESPAÑOL
Cette échelle de 4 LED montre l'état de charge des accumulateurs intégrés. Si les 3 LED vertes sont allumées,
l'accumulateur est complètement chargé ; s'il est déchargé, la LED rouge s'allume.
POLSKI
ITALIANO
61
ENGLISH
CONNECTEURS, CONTRÔLES ET INDICATEURS :
26
DEUTSCH
27
25
19
FRANCAIS
20
21
22
23
24
24
ESPAÑOL
19 SD
-6
Port pour carte mémoire au format SD (capacité jusqu'à 32 Go). Lors de l'introduction de la carte, veuillez
respecter la bonne direction : rangée de contacts de la carte SD vers la droite. Le choix de la source de
signal du lecteur MP3 s'effectue via la touche MODE.
20 MODE
Choix de+6
la source de signal du lecteur MPS (carte SD / clé USB / récepteur Bluetooth) et autres réglages système.
FRANCAIS
POLSKI
21
Appuyez sur la touche PLAY/PAUSE pour lancer la lecture d'un titre. Un nouvel appui place le lecteur MP3 en
mode Pause, et la lecture est suspendue .
22
Appuyez sur la touche STOP pour arrêter la restitution du titre en cours.
23
FRANCAIS
ITALIANO
Six modes de lecture différents sont à votre disposition (Normal / Random / Browse / All / Repeat One /
Repeat Folder).
62
24
Appuyer brièvement permet de passer du titre précédent au titre suivant. En appuyant plus longuement (> 1
s), vous pouvez modifier le volume du lecteur MP3 (
= moins fort,
= plus fort).
CONNECTEURS, CONTRÔLES ET INDICATEURS :
Port pour clé USB, capacité maximale 32 Go. Le choix de la source de signal du lecteur MP3 s'effectue via la
touche MODE.
26 IR
FRANCAIS
ENGLISH
25 USB IN
Port infrarouge Pour pouvoir commander le lecteur MP3 avec la télécommande livrée, assurez-vous que le port
infrarouge de la télécommande se trouve en contact visuel direct avec le port infrarouge de l'enceinte Road Jack.
Écran multifonctions rétro-éclairé
DEUTSCH
FRANCAIS
27 AFFICHEUR
FRANCAIS
ESPAÑOL
POLSKI
ITALIANO
63
ENGLISH
ÉCRAN PRINCIPAL :
2
1
0003
0006
3
4
DEUTSCH
8
B A S5 2 6 5 6
MP3
7
00 : 33 / 03 : 29
10
9
Hey Joe. mp3
FRANCAIS
11
1 FONCTION DE LECTURE
ESPAÑOL
Lecture = , Stop = , Pause =
2
MODE DE LECTURE
N = Normal. Tous les morceaux se trouvant sur le support mémoire sont lus, l'un à la suite de l'autre. À la
fin du dernier titre, la lecture s'arrête.
FRANCAIS
POLSKI
R = Random (aléatoire). Tous les morceaux se trouvant sur le support mémoire sont lus, selon un ordre
aléatoire (au hasard).
I = Introduction. Les 10 premières du morceau sont lues, puis l'appareil passe au titre suivant sur le
support mémoire.
A = All (tous les titres). Tous les titres se trouvant sur le support mémoire sont répétés. Si vous disposez
simultanément d'une carte SD et d'une clé USB dans les ports respectifs, une fois tous les titres lus sur un
support, la lecture passe automatiquement à l'autre support.
1 = Repeat One (répétition d'un morceau plage). Le titre sélectionné est lu en boucle.
FRANCAIS
ITALIANO
F = Repeat Folder (répétition de tout le dossier). Tous les titres du dossier sélectionné sont répétés.
3 NUMÉRO DU TITRE
Numéro du morceau en cours de lecture.
4 NOMBRE DE TITRES
Nombre de morceaux se trouvant sur le support mémoire sélectionné.
64
ÉCRAN PRINCIPAL :
Visualisation du nom du Preset en cours de sélection.
6 FORMAT DES DONNÉES
Indique le format des données audio du titre en cours de lecture.
FRANCAIS
ENGLISH
5 ÉGALISEUR
7 SUPPORT MÉMOIRE
8 DURÉE ÉCOULÉE
Visualisation de la durée écoulée en lecture depuis le début du morceau en cours, en minutes et secondes.
9 DURÉE DU TITRE
Visualisation de la durée totale du morceau en cours de lecture, en minutes et secondes.
Indique le nom du titre (s'il existe) et le format des données audio du titre en cours de lecture.
11 ANALYSEUR AUDIO
FRANCAIS
10 NOM DU TITRE
DEUTSCH
FRANCAIS
Indique le support mémoire en cours de sélection (carte SD ou clé USB).
ESPAÑOL
POLSKI
ITALIANO
65
FRANCAIS
ITALIANO
FRANCAIS
POLSKI
ESPAÑOL
FRANCAIS
DEUTSCH
ENGLISH
UTILISATION :
66
ÉGALISEUR (EQ)
Pour choisir l'un des sept presets d'égalisation disponibles,
maintenez enfoncée la touche MODE pendant environ
1 seconde. Choisissez avec les touches
et
l'élément de menu "Eq" (en surbrillance), puis
validez en appuyant sur la touche PLAY / PAUSE
. Vous pouvez à présent choisir un des sept presets
d'égaliseur, en appuyant sur la touche
ou
puis en validant votre choix en appuyant sur la touche
PLAY / PAUSE
.
MODE LECTURE (Play)
Six modes de lecture différents sont à votre disposition :
Normal / Random / Browse / All / Repeat One / Repeat
Folder. Maintenez enfoncée la touche MODE pendant
environ 1 seconde. Choisissez avec les touches
et
l'élément de menu "Play Mode" (en
surbrillance) puis validez en appuyant sur la touche
PLAY / PAUSE
. Vous pouvez à présent activer
l'un des six modes de lecture, en appuyant sur la
touche
ou
puis en validant votre choix en
appuyant sur la touche PLAY / PAUSE
.
Music
Eq
P l a y MMuosdi ec
EC qh a n g e D e v i c e
Play Mode
C h a nMg eu sDi ce v i c e
Eq
P l a y MMuosdi ec
EC qh a n g e D e v i c e
Play Mode
OaRn g e D e v i c e
C hNBT
00 : 00
: 00
NOT
LINK
Sm
BT NOT LINK
00 : 00
: 00
BT NOT
LINK
Sm
Bluetooth
NOR
CHOIX DE LA SOURCE DE SIGNAL (Change Device)
Permet de sélectionner la source de signal du lecteur MP3.
1. Maintenez enfoncée la touche MODE pendant
environ 1 seconde. Choisissez avec les touches
et
l'élément de menu "Change Device" (en
surbrillance) puis validez en appuyant sur la touche
PLAY / PAUSE
. Vous pouvez à présent choisir
comme source de signal "SD Card" pour la carte
SD ou "UDISK" pour la clé USB, en appuyant sur la
touche
ou
puis en validant votre choix en
appuyant sur la touche PLAY / PAUSE
.
2. Appuyer brièvement sur la touche MODE change la
source de signal du lecteur MP3 (carte SD / port USB
/ récepteur Bluetooth). Le nom de la source de signal
activée apparaît dans l'affichage.
Music
Eq
Play Mode
Change Device
Music
Eq
Play Mode
Change Device
BT NOT LINK
Music
Eq
Play Mode
Change Device
Bluetooth
Music
Play Mode
Change Device
Exit
Eq
Play Mode
Change Device
Eq
Music
Play Mode
Eq
Change Device
:
P l a y M oUTILISATION
de
Change Device
Music
Play Mode
Music
Change Device
Eq
Exit
Play Mode
C h a n g ee DD eevviiccee
NOR
00 : 00 : 00
Smartphone
QUITTER LE MENU (Exit)
1. Pour quitter le menu, sélectionnez avec les touches
et
l'élément de menu "Exit" puis validez
votre choix en appuyant sur la touche PLAY / PAUSE
.
2. Au bout d'environ 8 secondes, le menu est quitté
.automatiquement, et l'affichage revient sur l'écran
principal.
Music
Eq
Music
Play Mode
Eq
Change Device
Play Mode
Change Device
NOR
BLUETOOTH
00MP3:est00
: 00
BTlecteur
NOT
LINK
Le module
équipé d'un récepteur
M
ihc o:n00
00
S mNOT
a rut:sp00
e
BT
LINK
Play Mode
BT NOT LINK
Change Device
Exit
00 : 00
: 00
BT NOT
LINK
00 : 00 : 00
Smartphone
Bluetooth
BT NOT LINK
Bluetooth
NOR
Bluetooth
Bluetooth
NOR
Smartphone
Bluetooth
Sm
ESPAÑOL
u sT i cL I N K
BT M
NO
Eq
Play Mode
Change Device
FRANCAIS
Bluetooth permettant de diffuser sur l'enceinte amplifiée
Road Jack les données audio provenant d'un autre
appareil Bluetooth (par exemple, un smartphone). La
distance maximale séparant l'émetteur du récepteur est
d'environ 10 mètres.
Pour appairer le récepteur MP3 à un appareil Bluetooth,
il faut appuyer plusieurs fois brièvement sur la touche
MODE, jusqu'à ce que la mention "Bluetooth" puis "BT
NOT LINK" apparaisse à l'affichage. Activez le mode
Bluetooth sur votre appareil Bluetooth puis cherchez,
sur l'interface
N O R utilisateur, les autres appareils Bluetooth
disponibles. Choisissez l'entrée "Bluetooth", puis couplez
votre appareil Bluetooth avec le module lecteur MP3.
Dans l'affichage du lecteur MP3 apparaît alors la mention
"Connecting", suivie du nom de votre appareil Bluetooth
(par exemple, un smartphone). Le couplage est alors
effectif. Vous pouvez alors lancer la lecture du titre.
DEUTSCH
FRANCAIS
Music
FRANCAIS
ENGLISH
Music
POLSKI
ITALIANO
67
FRANCAIS
ITALIANO
FRANCAIS
POLSKI
ESPAÑOL
FRANCAIS
DEUTSCH
ENGLISH
UTILISATION EN MODE BLUETOOTH :
DÉCONNEXION DU BLUETOOTH (BT DISCONNECT)
Pour désactiver le couplage avec un appareil Bluetooth,
par exemple pour passer à un autre appareil Bluetooth
pour l'écoute du lecteur MP3, appuyez, alors que le
lecteur MP3 se trouve en mode Bluetooth, sur la touche
MODE pendant environ 1 seconde, et choisissez, avec
les touches
et
, l'élément de menu "BT
Disconnect" (qui passe en surbrillance). Validez par la
touche PLAY / PAUSE. Dans l'affichage apparaît alors la
mention "BT NOT LINK" ; vous pouvez alors coupler un
autre appareil Bluetooth au lecteur MP3.
RECONNEXION À L'APPAREIL PRÉCÉDENT
Pour se reconnecter à l'appareil auquel le lecteur MP3
était précédemment connecté, appuyez, alors que le
lecteur MP3 se trouve en mode Bluetooth, sur la touche
MODE pendant environ 1 seconde, et choisissez, avec
les touches
et
, l'élément de menu "Recently
reconnection". Validez par la touche PLAY / PAUSE.
Bluetooth
BT Disconnect
Eq
Delete paired in
ÉGALISEUR (Eq)
Pour choisir l'un des sept presets d'égalisation disponibles,
maintenez enfoncée la touche MODE pendant environ 1
seconde.
Choisissez avec les touches
et
l'élément
de menu "Eq" (il passe en surbrillance), puis validez
en appuyant sur la touche PLAY / PAUSE. Vous pouvez
à présent choisir un des sept presets d'égaliseur, en
appuyant sur la touche
ou
puis en validant
votre choix en appuyant sur la touche PLAY / PAUSE .
Bluetooth
BT Disconnect
Eq
Delete paired in
Bluetooth
B T BDl ui sectoonont he c t
ERqe Bc el unet lt yo or tehc o n n e
DE Tqe l eDti es cpoani nr ee dc t i n
B
EDqe l e t e p a i r e d i n
D e Bl el ut ee tpoaoitrhe d i n
Eq Bluetooth
DB eT Bl eDl tuiese ctpoaoni tnr heedc t i n
DE Tqe vDi ci sec Ionnfnoer cmt a t
B
EDqe l e t e p a i r e d i n
Delete paired in
Bluetooth
Eq
Delete paired in
Device Informat
SUPPRIMER LES INFORMATIONS DE COUPLAGE
68
Bluetooth
BT Disconnect
Eq
Delete paired in
Bluetooth
Eq
Delete paired in
Device Informat
BT Disconnect
Eq
Delete paired in
Bluetooth
Eq
Delete paired in
Device Informat
Eq
Delete paired in
Device Informat
ESPAÑOL
PRÉCISION :
La lecture de l'appareil Bluetooth couplé se lance et
s'arrête en appuyant sur les touches PLAY / PAUSE du
lecteur MP3.
Bluetooth
FRANCAIS
INFORMATION APPAREIL (DEVICE INFORMATION)
Pour "dé-coupler" un appareil Bluetooth, appuyez,
alors que le lecteur MP3 se trouve en mode Bluetooth,
sur la touche MODE pendant environ 1 seconde, et
choisissez, avec les touches
et
l'élément
de menu "Device Information" (qui passe en
surbrillance), puis validez en appuyant sur la touche
PLAY / PAUSE. L'affichage indique alors "Name: LD
SYSTEMS". C'est sous ce nom qu'apparaît le nom
du lecteur MP3 de l'enceinte Road Jack sur votre
appareil Bluetooth (smartphone, tablette...).
BT Disconnect
E qB l u e t o o t h
BDTe l De it sec po an inreecdt i n
Eq
Delete paired in
DEUTSCH
FRANCAIS
touche MODE pendant environ 1 seconde, et choisissez,
avec les touches
et
, l'élément de menu
"Delete paired info" (qui passe en surbrillance), puis
validez en appuyant sur la touche PLAY / PAUSE.
Attention : Tant qu'un autre appareil Bluetooth est
couplé au lecteur MP3, vous ne pouvez pas rétablir
l'ancien couplage.
FRANCAIS
ENGLISH
Bluetooth
Bluetooth
BT Disconnect
Recently reconne
Eq
E qB l u e t o o t h
EN
BD Te MODE
D e l e t e p a i r e d iUTILISATION
n
lD
e ti es cpoBLUETOOTH
aninr e dc t i n :
Eq
Pour "dé-coupler" un appareil Bluetooth, appuyez, alors
DeB
l el tuee tpoaoi tr he d i n
que le lecteur
B lMP3
u esettrouve
o o ent hmode Bluetooth, sur la
POLSKI
ITALIANO
69
ENGLISH
TÉLÉCOMMANDE INFRAROUGE (USB, SD-CARD) :
3
1
DEUTSCH
4
2
FRANCAIS
POLSKI
ESPAÑOL
FRANCAIS
5
7
6
Dirigez la télécommande infrarouge, en contact visuel direct, vers le port récepteur infrarouge situé
au-dessus du port infrarouge. Sa portée maximale est d'environ 8 mètres.
1 PLAY / PAUSE
Appuyez sur la touche PLAY/PAUSE pour lancer la lecture d'un titre. Appuyer de nouveau sur la touche place
le lecteur de MP3 en mode Pause, la lecture est alors suspendue.
2 EQ
Sept presets d'égalisation différents sont alors à votre disposition ; pour les faire défiler, appuyez plusieurs
fois sur la touche.
3 VOL- / VOL+
FRANCAIS
ITALIANO
Réglage de volume du lecteur MP3 (de 0 à 15). Appuyez sur VOL- pour réduire le volume, sur VOL+ pour
l'augmenter.
70
4 PREV / NEXT
Pour revenir au morceau précédent, appuyez brièvement sur la touche PREV ; pour passer au morceau
suivant, appuyez sur la touche NEXT. Si vous maintenez PREV ou NEXT enfoncée, vous activez la lecture
rapide arrière/avant.
TÉLÉCOMMANDE INFRAROUGE (USB, SD-CARD) :
Pour appeler directement un morceau en lecture, utilisez les touches 0 à 9.
Par exemple : Si vous voulez lire directement le morceau numéro 29, appuyez brièvement sur la touche "2"
puis, rapidement derrière, sur la touche "9" (à l'écran, la mention "0029" apparaît brièvement).
FRANCAIS
ENGLISH
5 SÉLECTION DIRECTE D'UN MORCEAU
6 ENTER
ÉGALISEUR (EQ)
Pour choisir l'un des sept presets d'égaliseur, appuyez sur la touche ENTER puis sélectionnez avec les
touches PREV et NEXT l'élément de menu "EQ". Vous pouvez alors activer l'un des sept presets d'égaliseur
disponibles : il suffit de choisir celui désiré avec les touches PREV et NEXT, puis de valider ce choix en
appuyant sur la touche PLAY / PAUSE.
POLSKI
QUITTER LE MENU
1. Pour quitter le menu, choisissez avec les touches PREV et NEXT l'élément de menu "EXIT", puis validez
avec la touche PLAY / PAUSE.
2. Au bout d'environ 8 secondes, le menu est quitté automatiquement, et l'affichage revient sur l'écran
principal.
ESPAÑOL
CHOIX DE LA SOURCE DE SIGNAL (Change Device)
Permet de sélectionner la source de signal du lecteur MP3.
1. Appuyez sur la touche ENTER puis choisissez avec les touches PREV et NEXT l'élément de menu "Change
Device" (en surbrillance) puis validez en appuyant sur la touche PLAY / PAUSE. Vous pouvez à présent choisir
"SD Card" (carte SD) ou UDISK" (clé USB) comme source de signal avec les touches PREV et NEXT ; validez
votre choix en appuyant sur la touche PLAY / PAUSE.
2. Appuyer brièvement sur la touche MODE change la source de signal du module lecteur MP3 (carte SD / clé
USB / récepteur Bluetooth). Le nom de la source active apparaît dans l'affichage.
FRANCAIS
MODE DE LECTURE (Play Mode)
Six modes de lecture différents sont à votre disposition : Normal / Random / Browse / All / Repeat One / Repeat Folder. Appuyez sur la touche ENTER puis choisissez avec les touches PREV et NEXT l'élément de menu
"Play Mode" (en surbrillance) puis validez en appuyant sur la touche PLAY / PAUSE. Vous pouvez à présent
activer l'un des six modes de lecture, en appuyant sur la touche PREV ou NEXT puis en validant votre choix
en appuyant sur la touche PLAY / PAUSE.
DEUTSCH
FRANCAIS
Appuyer sur la touche ENTER valide la sélection de menu lors du choix du preset d'égaliseur, de mode de
lecture et de choix de source de signal.
7 MODE
ITALIANO
1 Appuyer brièvement sur la touche MODE change la source de signal du module lecteur MP3 (carte SD / clé
USB / récepteur Bluetooth). Le nom de la source active apparaît dans l'affichage
2. Maintenez enfoncée cette touche pendant environ 2 secondes pour allumer/éteindre le module lecteur
MP3.
Le module lecteur MP3 ne peut être allumé/éteint que par l'intermédiaire de la télécommande infrarouge , et
non sur l'appareil lui-même.
PRÉCISION : Les touches CHANNEL (CH-, CH+) et PICK SONG ne possèdent aucune fonction.
71
ENGLISH
TÉLÉCOMMANDE INFRAROUGE (BLUETOOTH) :
2
1
ESPAÑOL
FRANCAIS
DEUTSCH
3
5
4
1 PLAY / PAUSE
Appuyez sur la touche PLAY / PAUSE pour lancer la lecture d'un titre. Appuyer de nouveau sur la touche place
le lecteur de MP3 en mode Pause, la lecture est alors suspendue.
FRANCAIS
POLSKI
2 VOL- / VOL+
Réglage de volume du lecteur MP3 (de 0 à 15). Appuyez sur VOL- pour réduire le volume, sur VOL+ pour
l'augmenter.
3 PREV / NEXT
Pour revenir au morceau précédent, appuyez brièvement sur la touche PREV ; pour passer au morceau
suivant, appuyez sur la touche NEXT.
FRANCAIS
ITALIANO
4 ENTER
72
Appuyer sur la touche ENTER fait passer dans le menu Bluetooth. L'utilisation et le paramétrage sont décrits
de façon détaillée dans le chapitre "UTILISATION EN MODE BLUETOOTH".
TÉLÉCOMMANDE INFRAROUGE (BLUETOOTH) :
1. Appuyer brièvement sur la touche MODE change la source de signal du module lecteur MP3 (carte SD / clé
USB / récepteur Bluetooth). Le nom de la source active apparaît dans l'affichage
2. Maintenez enfoncée cette touche pendant environ 2 secondes pour allumer/éteindre le module lecteur
MP3.
Le lecteur MP3 ne peut être allumé/éteint que par l'intermédiaire de la télécommande infrarouge, et non au
niveau du lecteur lui-même. À l'allumage de l'enceinte Road Jack, il s'allume automatiquement.
DEUTSCH
FRANCAIS
PRÉCISION : En mode Bluetooth, les touches CHANNEL (CH-, CH+), EQ, PICK SONG et les touches numériques
0 - 9 ne possèdent aucune fonction.
FRANCAIS
ENGLISH
5 MODE
FRANCAIS
ESPAÑOL
POLSKI
ITALIANO
73
FRANCAIS
ITALIANO
FRANCAIS
POLSKI
ESPAÑOL
FRANCAIS
DEUTSCH
ENGLISH
CARACTÉRISTIQUES :
74
Référence modèle :
Type de Produit :
Type :
Diamètre Boomer :
Diamètre Boomer :
Aimant Boomer :
Marque Boomer :
Diamètre Tweeter :
Diamètre Tweeter :
Aimant Tweeter :
Marque Tweeter :
Module Amplificateur :
Puissance (eff.) :
Puissance (crête) :
Réponse en Fréquence :
Sensibilité (1 W/ 1 m) :
Niveau Maximal de Pression Sonore :
Fonctions de Protection :
Contrôles :
Indicateurs :
Nombre d'Entrées Ligne :
Connecteur Entrée Ligne :
Nombre d'Entrées Micro :
Connecteur Entrée Micro :
Entrée Instrument :
Connecteur Entrée Instrument :
Embase Secteur :
Alimentation :
Tension Secteur :
Consommation Électrique (maxi) :
Batteries rechargeables :
Matériau Boîtier :
Type de Coffret :
Largeur :
Hauteur :
Profondeur :
Masse :
Divers :
LDRJ8
Enceinte de Sono Portable
Actif
8"
203,2 mm
ferrite
OEM
3" (large bande)
76,2 mm
ferrite
OEM
Classe D
25 W
100 W
90 - 18000 Hz
94 dB SPL
113 dB SPL
court-circuit, surcharge, limiteur
Potentiomètres Mic 1 Level, Mic 2 Level, CD / Tape IN Level,
Low, High, Echo, Master Volume, touche AUX / MP3
Power, Indicateur de charge / état de la batterie
1
2 x RCA/cinch, jack 3,5 mm
2 (dont 1 partagée avec l'entrée instrument CH 2)
XLR et jack 6,35 mm
1 (partagée avec l'entrée micro CH 2)
jack 6,35 mm
Format IEC
à découpage
100 V - 120 V / 60 Hz, 220 V - 240 V / 50 Hz
50 W
12 V / 5 Ah
MDF, épaisseur 15 mm
bass reflex
385 mm
450 mm
298 mm
13,8 kg
Embase diamètre 36 mm pour pied enceinte, roulettes de transport,
poignée télescopique, poignée de transport, télécommande infrarouge
pour lecteur MP3/Bluetooth.
CARACTÉRISTIQUES :
ESPAÑOL
POLSKI
ITALIANO
415 mm
525 mm
328 mm
16,2 kg
Embase diamètre 36 mm pour pied enceinte, roulettes de transport,
poignée télescopique, poignée de transport, télécommande infrarouge
pour lecteur MP3/Bluetooth.
FRANCAIS
Largeur :
Hauteur :
Profondeur :
Masse :
Divers :
DEUTSCH
FRANCAIS
Indicateurs :
Nombre d'Entrées Ligne :
Connecteur Entrée Ligne :
Nombre d'Entrées Micro :
Connecteur Entrée Micro :
Entrée Instrument :
Type de connecteur entrée Instrument :
Embase Secteur :
Alimentation :
Tension Secteur :
Consommation Électrique (maxi) :
Batteries rechargeables :
Matériau Boîtier :
Type de Coffret :
LDRJ10
Enceinte de Sono Portable
Actif
10"
254 mm
ferrite
OEM
3" (large bande)
76,2 mm
ferrite
OEM
Classe D
25 W
100 W
65 - 18000 Hz
96 dB SPL
117 dB SPL
court-circuit, surcharge, limiteur
Potentiomètres Mic 1 Level, Mic 2 Level, CD / Tape IN Level,
Low, High, Echo, Master Volume, touche AUX / MP3
Power, Indicateur de charge / état de la batterie
1
2 x RCA/cinch, jack 3,5 mm
2 (dont une partagée avec l'entrée Instrument CH 2)
XLR et jack 6,35 mm
1 (partagée avec l'entrée Micro CH 2)
jack 6,35 mm
Format IEC
à découpage
100 V - 120 V / 60 Hz, 220 V - 240 V / 50 Hz
50 W
12 V / 5 Ah
MDF, épaisseur 15 mm
bass reflex
FRANCAIS
ENGLISH
Référence modèle :
Type de Produit :
Type :
Diamètre Boomer :
Diamètre Boomer :
Aimant Boomer :
Marque Boomer :
Diamètre Tweeter :
Diamètre Tweeter :
Aimant Tweeter :
Marque Tweeter :
Module Amplificateur :
Puissance (eff.) :
Puissance (crête) :
Réponse en Fréquence :
Sensibilité (1 W/ 1 m) :
Niveau Maximal de Pression Sonore :
Fonctions de Protection :
Contrôles :
75
FRANCAIS
ITALIANO
FRANCAIS
POLSKI
ESPAÑOL
FRANCAIS
DEUTSCH
ENGLISH
CARACTÉRISTIQUES :
76
Module lecteur MP3
Lecteur de médias
Supports reconnus :
Formats audionumériques reconnus :
Éléments de contrôle lecteur médias :
Indicateurs lecteur médias :
LDRJ8 / LDRJ10
Bluetooth, clé USB, carte SD
MP3, WAV, WMA
Mode (Menu / Bluetooth /SD / USB) , Play / Pause, Stop, Repeat,
titre précédent/suivant)
Écran LCD rétro-éclairé multifonctions
DECLARATIONS DECLARATIONS :
Cette garantie s‘applique au produit Adam Hall de marque LD SYSTEMS que vous avez acheté. Les droits de garantie
légaux à l‘égard du vendeur ne sont pas remplacés par cette garantie. Cette garantie confère au contraire des droits
supplémentaires distincts à l‘égard d‘Adam Hall.
FRANCAIS
Cette garantie n‘est valable que pour l‘acheteur initial du produit Adam Hall ; elle n‘est pas transférable à l‘acheteur
ultérieur du produit.
Tout au long de la période couverte par la garantie, les composants ou le produit défectueux Adam Hall seront
réparés ou remplacés gratuitement. Tous les composants échangés dans le cadre de cette garantie restent la
propriété de Adam Hall.
DEUTSCH
FRANCAIS
Par cette garantie, Adam Hall assure une garantie de 2 ans à partir de la date d‘achat du produit (auprès d‘Adam
Hall ou d‘un de ses partenaires) contre tout défaut de pièce ou de fabrication, dans le cadre d‘une utilisation
normale. La période de garantie court à partir de la date d‘achat. Pour faire valoir vos droits à la garantie, il faut
justifier de la date d‘achat, soit par une facture datée, soit par un bon de livraison daté. Vous êtes éligible aux droits
relatifs à cette garantie, selon les termes et conditions mentionnés dans ce document , au cas où une réparation
devrait intervenir dans le cadre de la garantie.
FRANCAIS
ENGLISH
GARANTIE FABRICANT LIMITÉE
Dans le cas improbable où le produit Adam Hall que vous avez acheté présenterait une défaillance répétée Adam
Hall peut décider, de son propre chef, de remplacer ce produit par un autre, identique ou comparable (au moins
de la même puissance).
ITALIANO
Cette garantie ne s‘applique qu‘en Europe. Hors Europe, veuillez vous adresser à notre représentant commercial officiel.
POLSKI
Cette garantie ne s‘applique pas dans les cas suivants :
- pièces d‘usure (par exemple, accumulateur, lampe...)
- appareils dont le numéro de série a été supprimé, falsifié ou endommagé suite à un accident
- utilisation non appropriée ou abusive ou autres causes extérieures
- appareils utilisés non conformément aux paramètres d‘utilisation normaux, mentionnés dans le manuel
d‘utilisation livré avec l‘appareil.
- appareils utilisés non conformément aux paramètres d‘utilisation normaux, mentionnés dans le manuel
d‘utilisation livré avec l‘appareil.
- appareils modifiés ou réparés par un tiers autre qu‘Adam Hall ou une structure de maintenance autorisée.
Ces termes et conditions constituent l‘accord de garantie complet et exclusif entre cous et Adam Hall, relativement
au produit de marque Adam Hall que vous avez acheté.
ESPAÑOL
Adam Hall ne garantit pas que l‘utilisation de ce produit ne sera sujette à aucune interruption ni défaillance. Adam
Hall ne peut être tenu pour responsable de dommages consécutifs à une mauvaise observation des instructions
d‘utilisation contenues dans le manuel utilisateur.
77
FRANCAIS
ITALIANO
FRANCAIS
POLSKI
ESPAÑOL
FRANCAIS
DEUTSCH
ENGLISH
DECLARATIONS DECLARATIONS :
78
RESPONSABILITÉ LIMITÉE
Si votre appareil de marque Adam Hall présente, pendant la période de garantie, des défaillances au niveau des
composants ou de la fabrication, couvertes par les conditions ci avant, le seul recours, exclusif, est sa réparation
ou son remplacement au titre de cette garantie. Dans le cadre de cette garantie limitée, la responsabilité financière maximale d‘Adam Hall est expressément limitée à la plus faible des deux sommes suivantes : prix d‘achat
payé pour le produit ou coût de réparation ou de remplacement de tout composant matériel ne fonctionnant pas
correctement dans des conditions normales d‘utilisation.
Adam Hall ne peut être tenu pour financièrement responsable de tout dommage causé par le produit ou sa
défaillance – y compris toute perte de recettes ou de bénéfices, ni de tout dommage spécifique, incidentel ou
consécutif. De plus, Adam Hall n‘est pas responsable financièrement en cas de requête émanant d‘une tierce
partie ou de votre part pour le compte d‘une tierce partie.
Cette limitation de responsabilité financière s‘applique en cas de demande de dommages et intérêts ou de
poursuites, dans le cadre de cette garantie limitée ou en cas de procédure (négligence et stricte responsabilité
produit), de non-respect du contrat, ou de toute autre procédure. Cette limitation de responsabilité financière
ne peut être annulée ou amendée par quiconque. Cette limitation de responsabilité financière s‘applique même
si vous avez prévenu Adam Hall ou tout représentant autorisé de Adam Hall de la possibilité de tels dommages.
Toutefois, cette limitation de responsabilité financière ne s‘applique pas en cas de blessures aux personnes.
Cette garantie fabricant limitée vous donne des droits légaux spécifiques. Vous pouvez également avoir d‘autres
droits, variables d‘un état ou d‘un pays à l‘autre. Nous vous conseillons de vous reporter aux lois applicables
dans votre état ou votre pays afin de déterminer l‘étendue exacte de vos droits.
DEMANDE DE RÉPARATIONS SOUS GARANTIE
Pour demander des réparations sous garantie pour votre produit, veuillez contacter Adam Hall ou le revendeur
agréé Adam Hall auprès de qui vous l‘avez acheté.
DÉCLARATION DE CONFORMITÉ CE
Les appareils commercialisés par Adam Hall répondent (à la date actuelle) aux exigences et spécifications applicables des Directives 1999/5/EC (R&TTE), 2004/108/EC (EMC) et 2006/95/EC (LVD). Pour plus d‘informations,
référez-vous au site www.adamhall.com.
DECLARATIONS DECLARATIONS :
(Applicable dans l‘Union Européenne et les autres pays européens dotés de systèmes de collecte sélective)
Nous conseillons aux utilisateurs non professionnels de contacter le revendeur chez qui ils ont acheté le produit,
ou un représentant gouvernemental local, pour plus de détails sur le lieu de collecte et la façon de recycler cet
appareil dans le meilleur respect de l‘environnement possible..
Nous invitons les utilisateurs professionnels à contacter leur fournisseur et à vérifier les termes et conditions de
leur contrat d‘achat. Ce produit ne doit pas être mélangé à d‘autres déchets commerciaux lors de la collecte.
Économiser l'énergie constitue une contribution active efficace à la protection de l'environnement. Pensez à
éteindre tout appareil électrique dès que vous ne vous en servez plus. Pour éviter que les appareils placés en
mode de veille (Standby) ne continuent à consommer de l'électricité, débranchez-les de leur prise secteur.
FRANCAIS
PROTECTION DE L'ENVIRONNEMENT ET ÉCONOMIES D'ÉNERGIE
DEUTSCH
FRANCAIS
La présence de ce logo sur le produit ou son manuel d‘utilisation indique qu‘en fin de vie, il ne doit pas être
jeté avec les autres déchets domestiques. Afin d‘éviter toute atteinte à l‘environnement ou à la santé humaine
pouvant résulter d‘une gestion incontrôlée des déchets, veuillez assurer son recyclage de manière responsable.
Séparez-le des autres types de déchets et recyclez-le, afin de promouvoir la réutilisation durable des ressources
naturelles.
FRANCAIS
ENGLISH
MISE AU REBUT DE CE PRODUIT
ESPAÑOL
POLSKI
ITALIANO
Adam Hall GmbH, tous droits réservés. Les caractéristiques techniques et les fonctions disponibles sur le produit
sont sujettes à modifications. La photocopie, la traduction et toute forme de copie, partielle ou intégrale, de ce
manuel utilisateur sont interdites.
79
ENGLISH
DEUTSCH
¡Gracias por elegir LD-Systems!
FRANCAIS
POLSKI
ESPAÑOL
FRANCAIS
Este equipo está diseñado y fabricado con los estándares de calidad más exigentes, para garantizar un correcto
funcionamiento durante muchos años. Los productos de LD-Systems se caracterizan por su gran calidad, avalada por el prestigio de la marca y una dilatada experiencia como fabricante.
Lea atentamente este manual de usuario para poder aprovechar rápidamente toda la funcionalidad de su nuevo
producto de LD Systems.
Si desea obtener información sobre LD-SYSTEMS, visite nuestro sitio web WWW.LD-SYSTEMS.COM
Introducción
Los sistemas activos de 2 vías de la serie Road Jack están provistos de ruedas y un mango extensible integrados para
transportarlos cómodamente. Están alimentados por una batería que proporciona hasta 20 horas de funcionamiento
continuo.
El mezclador integrado dispone de 3 canales de entrada con control de volumen propio, un ecualizador de
2 bandas, un rever ajustable y un control de volumen principal. Los conectores combo, jack de 6,3 mm, RCA y
minijack estéreo de 3,5 mm permiten conectar una amplia variedad de fuentes de entrada.
La principal característica de estos equipos es su reproductor Bluetooth incorporado, que permite reproducir el
audio de forma inalámbrica en el sistema. Además, se pueden utilizar llaves USB y tarjetas SD como medios de
almacenamiento.
FRANCAIS
ITALIANO
Ambos sistemas cuentan con un cómodo mando a distancia por infrarrojos y un práctico vaso de montaje en soporte.
80
DEUTSCH
FRANCAIS
ALTAVOZ BLUETOOTH ALIMENTADO POR BATERÍA CON MEZCLADOR
LDRJ8/LDRJ10
FRANCAIS
ENGLISH
ROADJACK 8 / 10
FRANCAIS
ESPAÑOL
POLSKI
ITALIANO
81
FRANCAIS
ITALIANO
FRANCAIS
POLSKI
ESPAÑOL
FRANCAIS
DEUTSCH
ENGLISH
MEDIDAS DE SEGURIDAD:
82
1. Lea atentamente las instrucciones de este manual.
2. Guarde toda la información en un lugar seguro para futuras consultas.
3. Siga las instrucciones indicadas.
4. Siga todas las advertencias. No quite las instrucciones de seguridad ni cualquier otra información indicada en el equipo.
5. Utilice el equipo únicamente según la finalidad prevista.
6. Utilice solo soportes y fijaciones que sean robustos y adecuados cuando instale el equipo en instalaciones
fijas. Asegúrese de que los soportes de pared están correctamente instalados y firmemente fijados. Asegúrese de
que el equipo está sólidamente instalado y no se puede caer.
7. Al instalar el equipo, respete las normas de seguridad aplicables en su país.
8. Evite instalar el equipo cerca de radiadores, acumuladores de calor, estufas o cualquier otra fuente de calor. Asegúrese
de que el equipo esté instalado en un lugar con ventilación suficiente para evitar cualquier sobrecalentamiento.
¡Evite la luz solar directa!
9. No coloque sobre el equipo fuentes de llamas sin protección, por ejemplo, velas encendidas.
10. Evite bloquear las rejillas de ventilación.
11. No utilice este equipo cerca del agua (excepto los equipos específicamente diseñados para uso en exterior, en
cuyo caso tenga en cuenta las indicaciones mencionadas a continuación). No exponga este equipo a materiales,
líquidos o gases inflamables.
12. Evite exponer el equipo a gotas o salpicaduras que puedan caer dentro del mismo. No coloque recipientes
llenos de líquido, como floreros o vasos, sobre el equipo.
13. Asegúrese de no dejar caer ningún objeto dentro del equipo.
14. Emplee el equipo únicamente con los accesorios recomendados por el fabricante.
15. No abra el equipo ni intente modificarlo.
16. Una vez conectado el equipo, compruebe que en toda la longitud del cableado no hay peligro de que provoque una caída, por ejemplo.
17. Durante el transporte, asegúrese de que el equipo no se caiga y pueda causar daños personales o materiales.
18. Si el equipo no funciona correctamente, o si se ha vertido líquido sobre él, o si un objeto ha caído en su
interior o si ha sufrido algún desperfecto, apague inmediatamente el equipo y desenchufe el cable eléctrico (si se
trata de un equipo activo). Únicamente un técnico especialista debe reparar el equipo.
19. Para limpiar el equipo utilice un paño seco.
20. Procure seguir las normas vigentes en su país sobre reciclaje de desechos. Separe los componentes de
plástico, papel y cartón del paquete para reciclarlos en sus contenedores respectivos.
21. No deje las bolsas de plástico al alcance de los niños.
PARA LOS EQUIPOS CON TOMA ELÉCTRICA:
22. ADVERTENCIA: Si el cable eléctrico está provisto de un contacto de protección, debe conectarse a una toma
eléctrica con conexión a tierra. No desactivar nunca esta conexión de protección a tierra del cable eléctrico.
23. Si el equipo ha estado expuesto a un cambio brusco de temperatura (por ejemplo, después del transporte),
no lo encienda inmediatamente. La condensación o la humedad podrían dañar el equipo. Deje que el equipo
alcance la temperatura ambiente antes de encenderlo.
24. Antes de conectar el cable eléctrico a la toma de corriente, compruebe si la tensión y la frecuencia del
suministro eléctrico coinciden con las especificaciones de este equipo. Si el equipo dispone de un selector de
tensión, antes de enchufarlo a la red eléctrica, asegúrese de que el valor seleccionado coincide con la tensión de
suministro. Si el enchufe o el adaptador de corriente no encajan en la toma eléctrica, consulte a un electricista.
25. Asegúrese de que el cable eléctrico no está pinzado. Evite que el cable resulte pellizcado, sobre todo en los
extremos de conexión al equipo y en la toma eléctrica.
SEGURIDAD:
FRANCAIS
ENGLISH
DEUTSCH
FRANCAIS
26. Al conectar el equipo, asegúrese de que el cable eléctrico o el adaptador de corriente estén siempre
accesibles. Desconecte el equipo de la toma de corriente cuando no esté en uso o antes de limpiarlo. Para ello,
desconecte el cable eléctrico y el adaptador de corriente del conector del equipo en vez de desenchufar el cable
de la toma eléctrica. No tocar el cable eléctrico ni el adaptador de corriente con las manos húmedas.
27. No encienda y apague el equipo en cortos intervalos de tiempo, ya que se reduce así la vida útil del sistema.
28. NOTA IMPORTANTE: Sustituya los fusibles únicamente por otros del mismo tipo y de las mismas características. Si el fusible se funde continuamente, póngase en contacto con un servicio técnico autorizado.
29. Para desconectar completamente el equipo de la tensión eléctrica, desenchufe el cable eléctrico o el adaptador de corriente de la toma eléctrica.
30. Si el equipo dispone de un enchufe eléctrico Volex, deberá desbloquearse el Volex del equipo para desenchufarlo. Esto implica que un tirón en el cable eléctrico puede desplazar el equipo y provocar daños personales o
materiales. Por tanto, asegúrese de instalar los cables con sumo cuidado.
31. Si es probable que caiga un rayo por una tormenta eléctrica o si no va a emplear el equipo durante mucho
tiempo, desenchufe el cable eléctrico y el adaptador de corriente.
CAUTION
ADVERTENCIA:
Para evitar el riesgo de descarga eléctrica, no retire la tapa. El equipo no contiene piezas que el usuario pueda
reparar o sustituir. Para cualquier tarea de mantenimiento o reparación, acuda a un técnico cualificado.
El símbolo de exclamación dentro de un triángulo equilátero advierte al usuario de la existencia de
importantes instrucciones de uso y mantenimiento.
ITALIANO
Para evitar posibles daños auditivos, evite la exposición a volúmenes altos durante un tiempo
prolongado.
Un volumen alto, incluso durante un breve espacio de tiempo, puede provocar pérdida de audición.
Mantenga siempre el volumen a un nivel que le resulte agradable.
POLSKI
ADVERTENCIA: ¡ALTO VOLUMEN!
Este equipo se destina a un uso profesional. Por consiguiente, si se aplica a un uso comercial, estará sujeto a
las normas y reglamentos de la Asociación para la prevención de accidentes de su sector profesional. Como
fabricante, Adam Hall tiene la obligación de informar formalmente a los usuarios de la existencia de posibles
riesgos para la salud.
Daños auditivos por exposición prolongada a un nivel SPL alto: este equipo puede generar fácilmente un nivel de
presión sonora (SPL) lo suficientemente elevado como para causar daños auditivos permanentes a los artistas, el
personal de producción y el público. Deben tomarse precauciones para evitar la exposición prolongada a un SPL
de más de 90 dB.
ESPAÑOL
El símbolo de rayo dentro de un triángulo equilátero advierte al usuario de la presencia de tensiones
peligrosas sin aislamiento dentro del equipo que pueden causar una descarga eléctrica y suponer un
riesgo para la salud.
FRANCAIS
RISK OF ELECTRIC SHOCK
DO NOT OPEN
83
ENGLISH
CONEXIONES, CONTROLES E INDICADORES:
5
1
3
6
FRANCAIS
DEUTSCH
5
8
2
4
7
-6
+6
ESPAÑOL
1 ENTRADA CH 1
Entrada de micrófono balanceada (combo XLR/jack de 6,3 mm). Es posible usar un cable de micro balanceado
(jack mono).
2 LEVEL CH 1
Control de nivel del canal 1 (CH 1). Gire la izquierda para disminuir el nivel, o a la derecha para aumentarlo.
3 ENTRADA CH 2
FRANCAIS
ITALIANO
FRANCAIS
POLSKI
Entrada de instrumento/micrófono no balanceada por jack de 6,3 mm.
4 LEVEL CH 2
Control de nivel del canal 2 (CH 2). Gire la izquierda para disminuir el nivel, o a la derecha para aumentarlo.
5 ENTRADA CH 3 (RCA)
Entrada de línea no balanceada por RCA para la conexión de un equipo, como un reproductor de CD o un un
reproductor MP3. Internamente, una señal estéreo se pasa a mono. Para activar la entrada RCA, el botón 8
(MP3/AUX) del panel de control debe estar pulsado, así el canal 3 (CH 3) tendrá la señal auxiliar. Si hay algún
conector en el minijack de entrada, se silenciarán los RCA del canal 3 (CH 3).
6 ENTRADA CH 3 (MINIJACK)
Entrada de línea no balanceada por minijack de 3,5 mm para la conexión de un equipo, como un portátil o
un reproductor MP3. Internamente, una señal estéreo se pasa a mono. Para activar la entrada minijack, el
botón 8 (MP3/AUX) del panel de control debe estar pulsado, así el canal 3 (CH 3) tendrá la señal auxiliar. Si
hay algún conector en el minijack de entrada, se silenciarán los RCA del canal 3 (CH 3).
LOW
84
1
2
3
-6
CONEXIONES, CONTROLES E INDICADORES:
Control de nivel del canal 3 (CH 3). Gire la izquierda para disminuir el nivel, o a la derecha para aumentarlo.
8 MP3/AUX
Permite seleccionar la fuente de señal para el canal 3 (CH 3). Si el botón no está pulsado, se seleccionará
el reproductor MP3 como fuente de señal, y si el botón está pulsado, se seleccionará la entrada RCA o la
entrada minijack.
Control de graves para el canal principal. Girar a la izquierda para disminuir los graves y a la derecha para
realzarlos. En la posición central de reposo, el control está inactivo.
10 HIGH
DEUTSCH
FRANCAIS
9 LOW
FRANCAIS
ENGLISH
7 LEVEL CH 3
Control de agudos para el canal principal. Girar a la izquierda para disminuir los agudos y a la derecha para
realzarlos. En la posición central de reposo, el control está inactivo.
Efecto de eco para el canal 1 de micrófono (CH 1). Para desactivar el efecto, girar el control completamente a
la izquierda, y para aumentar el volumen del eco, girar el control a la derecha.
FRANCAIS
11 ECHO
12 MASTER VOL
13 LED POWER
Se ilumina cuando el equipo está encendido y correctamente enchufado a la red eléctrica, o cuando funciona
con la batería incorporada.
ESPAÑOL
Control de volumen del canal principal. Girar a la izquierda para disminuir el volumen y a la derecha para
subirlo.
POLSKI
-6
10
+6
-6
11
+6
12
ITALIANO
13
9
85
-6
+6
LOW
1 18 2
3
ESPAÑOL
FRANCAIS
DEUTSCH
ENGLISH
CONEXIONES, CONTROLES E INDICADORES:
17
FRANCAIS
ITALIANO
FRANCAIS
POLSKI
16
86
15
14
-6
+6
CONEXIONES, CONTROLES E INDICADORES:
Selector de la tensión eléctrica. ¡La tensión del suministro eléctrico debe coincidir con la tensión del equipo!
15 TOMA IEC CON PORTAFUSIBLES INTEGRADO
16 POWER ON/OFF
Interruptor de encendido/apagado del equipo.
17 LED CHARGE
18 LEDS BATTERY LEVEL
La columna de 4 LEDs indica el nivel de carga de la batería integrada. Si los 3 LEDs de color verde están
iluminados significa que la batería está completamente cargada; si el LED rojo se ilumina, la batería está
descargada.
ESPAÑOL
MANTENIMIENTO DE BATERÍAS DE PLOMO
Cargue al 100% las baterías siempre que sea posible. No almacene las baterías de plomo completamente
descargadas ni medio descargadas. Si va a almacenar baterías durante un largo período de tiempo, cárguelas
periódicamente al 100%.
FRANCAIS
Se ilumina durante el proceso de carga de la batería interna. Si la batería está totalmente cargada, el LED
CHARGE estará apagado. Para cargar la batería, deberá conectarse un cable eléctrico adecuado a la toma
(24) del equipo.
DEUTSCH
FRANCAIS
Toma para alimentar el equipo. Se suministra con el cable eléctrico apropiado.
INFORMACIÓN IMPORTANTE: ¡ANTES de encender el equipo, asegúrese de que la tensión del suministro
eléctrico coincide con la tensión del equipo! Sustituya el fusible únicamente por otro del mismo tipo y características
correspondientes a la tensión de suministro (serigrafiadas en el equipo).
Si el fusible se fundiera continuamente, póngase en contacto con un servicio técnico autorizado.
FRANCAIS
ENGLISH
14 115 V/230 V
POLSKI
ITALIANO
87
ENGLISH
CONEXIONES, CONTROLES E INDICADORES:
26
DEUTSCH
27
25
19
FRANCAIS
20
21
22
23
24
24
ESPAÑOL
19 SD
-6
Ranura para tarjetas de memoria SD de hasta 32 GB. Al insertar la tarjeta, asegúrese de que los contactos de
la tarjeta de memoria SD miren hacia la derecha. Para seleccionar el reproductor MP3 como fuente de señal,
utilice el botón MODE.
20 MODE
Permite+6
seleccionar la fuente de señal (tarjeta SD/llave USB/Bluetooth) del reproductor MP3 y otros parámetros
del sistema.
FRANCAIS
POLSKI
21
Pulse el botón REPRODUCIR/PAUSA para iniciar la reproducción de una pista. Pulse de nuevo este botón para
poner en modo Pausa el reproductor MP3; la reproducción se detiene .
22
Pulse el botón DETENER para detener la reproducción de la pista en curso.
23
FRANCAIS
ITALIANO
Permite elegir entre seis modos de reproducción: Normal, Aleatorio, Intro, Todo, Repetir 1, Repetir carpeta.
88
24
Pulse brevemente el botón para seleccionar la pista siguiente o la pista anterior. Mantenga pulsado el botón
(>1 segundo) para cambiar el volumen del reproductor MP3 (
= bajar volumen,
=subir volumen).
CONEXIONES, CONTROLES E INDICADORES:
Entrada para memorias USB de hasta 32 GB. Para seleccionar el reproductor MP3 como fuente de señal,
utilice el botón MODE.
26 IR
27 PANTALLA
Pantalla LCD multifuncional retroiluminada
DEUTSCH
FRANCAIS
Receptor de infrarrojos. Para poder controlar el reproductor de MP3 mediante el mando a distancia suministrado,
asegúrese de que haya una línea visual directa entre el puerto de infrarrojos del mando a distancia y el receptor
del altavoz Road Jack.
FRANCAIS
ENGLISH
25 USB IN
FRANCAIS
ESPAÑOL
POLSKI
ITALIANO
89
ENGLISH
DESCRIPCIÓN DE LA PANTALLA:
2
1
0003
0006
3
4
DEUTSCH
8
B A S5 2 6 5 6
MP3
7
00 : 33 / 03 : 29
10
9
Hey Joe. mp3
FRANCAIS
11
1 ESTADO DE REPRODUCCIÓN
ESPAÑOL
Reproducir = , Detener = , Pausa =
2
MODO DE REPRODUCCIÓN
N = Normal. Se reproducen secuencialmente todas las pistas que contiene el medio de almacenamiento. Al
finalizar la última pista, se detiene la reproducción.
FRANCAIS
POLSKI
R = Random (Orden aleatorio). Las pistas que contiene el medio de almacenamiento se reproducen en
orden aleatorio.
I = Intro. Se reproducen secuencialmente los primeros 10 segundos de cada una de las pistas que contiene
el medio de almacenamiento.
A = All (Todos). Se repiten todas las pistas que contiene el medio de almacenamiento. Si las ranuras
contienen una tarjeta SD y una llave USB, al finalizar de reproducir todas las pistas de uno de los medios de
almacenamiento se continuará automáticamente con el otro medio de almacenamiento.
FRANCAIS
ITALIANO
1 = Repeat One (Repetir 1). La pista seleccionada se reproducirá continuamente.
90
F = Repeat Folder (Repetir carpeta). Se repiten todas las pistas que se encuentran en una carpeta del medio
de almacenamiento.
3 NÚMERO DE PISTA
Número de la pista que se está reproduciendo.
DESCRIPCIÓN DE LA PANTALLA:
Número total de pistas que contiene el medio de almacenamiento.
5 ECUALIZADOR
Muestra el preajuste del ecualizador actualmente seleccionado.
FRANCAIS
ENGLISH
4 TOTAL DE PISTAS
6 FORMATO DE ARCHIVO
7 MEDIO DE ALMACENAMIENTO
Muestra el medio de almacenamiento actualmente seleccionado (tarjeta SD o llave USB).
8 TIEMPO TRANSCURRIDO
DEUTSCH
FRANCAIS
Muestra el formato de archivo de la pista que se está reproduciendo.
Muestra el tiempo transcurrido, en minutos y segundos, de la pista que se está reproduciendo.
Muestra la duración total, en minutos y segundos, de la pista que se está reproduciendo.
10 NOMBRE DE PISTA
Muestra el nombre de la pista (si se ha especificado) y el formato de archivo de la pista que se está reproduciendo.
FRANCAIS
9 DURACIÓN TOTAL DE PISTA
11 ESPECTRO DE AUDIO
ESPAÑOL
POLSKI
ITALIANO
91
FRANCAIS
ITALIANO
FRANCAIS
POLSKI
ESPAÑOL
FRANCAIS
DEUTSCH
ENGLISH
OPERACIÓN:
92
ECUALIZADOR (Eq)
Para seleccionar uno de los siete preajustes del
ecualizador, mantenga pulsado el botón MODE durante
1 segundo aproximadamente. Pulse ahora los botones
y
para seleccionar el menú «Eq» (quedará
resaltado) y confirme con el botón REPRODUCIR/PAUSA
. Pulse los botones
y
para activar uno
de los siete preajustes del ecualizador, y confirme con
el botón REPRODUCIR/PAUSA
.
MODO DE REPRODUCCIÓN (Play Mode)
Permite elegir entre seis modos de reproducción:
Normal, Aleatorio, Intro, Todo, Repetir 1, Repetir carpeta.
Mantenga pulsado el botón MODE durante 1 segundo
aproximadamente. Pulse ahora los botones
y
para seleccionar el menú «Play Mode» (quedará
resaltado) y confirme con el botón REPRODUCIR/PAUSA
. Pulse los botones
y
para activar uno
de los seis modos de reproducción, y confirme con el
botón REPRODUCIR/PAUSA
.
Music
Eq
P l a y MMuosdi ec
EC qh a n g e D e v i c e
Play Mode
Change Device
Music
Eq
P l a y MMuosdi ec
EC qh a n g e D e v i c e
Play Mode
C hN OaRn g e D e v i c e
00 : 00
: 00
BT NOT
LINK
Sm
B T NOT
N O :T00
L I:N00
K
00
BT
LINK
Sm
NOR
SELECCIÓN DE FUENTE (Change Device)
Para seleccionar la fuente de señal del reproductor
MP3:
1. Mantenga pulsado el botón MODE durante 1 segundo
aproximadamente. Pulse ahora los botones
y
para seleccionar el menú «Change Device» (quedará resaltado) y confirme con el botón REPRODUCIR/
PAUSA
. Seleccione como fuente de señal «SD
Card» para la tarjeta SD o «UDISK» para la llave USB
con los botones
y
, y confirme con el botón
REPRODUCIR/PAUSA
.
2. Al pulsar brevemente el botón MODE, el reproductor
MP3 cambia su fuente de señal (tarjeta SD/llave USB/
Bluetooth). La fuente de señal activada se muestra en
la pantalla.
Music
Bluetooth
BT NOT LINK
Bluetooth
Music
Eq
Play Mode
Change Device
Eq
Play Mode
Change Device
Music
Music
Play Mode
Change Device
Exit
Eq
Play Mode
Change Device
Music
Eq
Play Mode
Change Device
Music
Music
Eq
Eq
Play Mode
Play Mode
Change Device
C h a n g e OPERACIÓN:
Device
Smartphone
N O R 00 : 00 : 00
M
i c : 00
00u :s00
BT NOT
LINK
P l aS ym aMr ot pd he o n e
BT NOT LINK
Change Device
Exit
00 : 00
: 00
BT NOT
LINK
00 : 00 : 00
Smartphone
Bluetooth
Bluetooth
Bluetooth
Bluetooth
Sm
NOR
Smartphone
Bluetooth
ESPAÑOL
BT NOT LINK
NOR
FRANCAIS
00 : 00
: 00
BT NOT
LINK
Music
E qB T N O T L I N K
Play Mode
Change Device
NOR
BLUETOOTH
El reproductor MP3 está equipado con Bluetooth, por
lo tanto, los archivos de audio de otros dispositivos
Bluetooth (por ejemplo, smartphones) se pueden
reproducir en el altavoz Road Jack (a una distancia
máxima de 10 metros entre los dispositivos).
Para emparejar el reproductor MP3 con otro dispositivo Bluetooth, pulse repetidamente el botón MODE
hasta que en la pantalla aparezca «Bluetooth» y «BT
NOT LINK». Active Bluetooth en el dispositivo Bluetooth y busque los dispositivos disponibles. Seleccione
N O«LD
R SYSTEMS» para emparejar el dispositivo
la opción
Bluetooth con el reproductor MP3. En la pantalla del
reproductor MP3 se mostrará «Connecting» y luego
aparecerá el dispositivo Bluetooth (por ejemplo,
«Smartphone») emparejado y conectado. Ahora puede
reproducirse la canción.
DEUTSCH
FRANCAIS
Eq
Eq
Play Mode
Play Mode
Change Device
Change Device
Music
Music
Play Mode
Eq
Change Device
Play Mode
Exit
C h a n g ee DD eevviiccee
FRANCAIS
ENGLISH
SALIR DEL MENÚ (Exit)
1. Para salir del menú, seleccione con los botones
y
la opción de menú «Exit» y confirme con
el botón REPRODUCIR/PAUSA
.
2. Al cabo de 8 segundos, el menú se cerrará
automáticamente y se volverá a la pantalla principal.
.
Music
Music
POLSKI
ITALIANO
93
FRANCAIS
ITALIANO
FRANCAIS
POLSKI
ESPAÑOL
FRANCAIS
DEUTSCH
ENGLISH
OPERACIÓN EN MODO BLUETOOTH:
94
BT DISCONNECT
Para desconectar un dispositivo Bluetooth para conectar
otro, como un reproductor de MP3, del reproductor MP3 en
modo Bluetooth, pulse el botón MODE durante 1 segundo
aproximadamente, y con los botones
y
seleccione la opción de menú «BT Disconnect» (quedará
resaltado) y pulse el botón REPRODUCIR/PAUSA. En
la pantalla se mostrará «BT NOT LINK» y ahora podrá
conectar el otro dispositivo Bluetooth al reproductor MP3.
RECENTLY RECONNECTION
Para volver a conectar el último dispositivo Bluetooth
que se conectó al reproductor MP3, ponga el
reproductor MP3 en modo Bluetooth, pulse el botón
MODE durante 1 segundo aproximadamente, y luego
con los botones
y
seleccione la opción de
menú «Recently reconnection» (quedará resaltado) y
confirme con el botón REPRODUCIR/PAUSA.
Bluetooth
BT Disconnect
Eq
Delete paired in
Bluetooth
BT Disconnect
Eq
Delete paired in
ECUALIZADOR (Eq)
Para seleccionar uno de los siete preajustes del
ecualizador, mantenga pulsado el botón MODE durante
1 segundo aproximadamente.
Pulse ahora los botones
y
para seleccionar
el menú «Eq» (quedará resaltado) y confirme con el
botón REPRODUCIR/PAUSA. Pulse los botones
y
para activar uno de los siete preajustes del
ecualizador, y confirme con el botón REPRODUCIR/
PAUSA.
Bluetooth
Eq
Delete paired in
Device Informat
Bluetooth
BT Disconnect
Eq
Delete paired in
Bluetooth
B T BDl ui sectoonont he c t
Bluetooth
ERqe c e n t l y r e c o n n e
BE Tq D i s c o n n e c t
Delete paired in
EDqe l e t e p a i r e d i n
Delete paired in
Bluetooth
Eq Bluetooth
Bluetooth
DB eT l eDties cpoani nr eedc t i n
BE Tq D i s c o n n e c t
Device Informat
EDqe l e t e p a i r e d i n
Delete paired in
Bluetooth
Eq
Delete paired in
Device Informat
Bluetooth
BT Disconnect
Eq
Delete paired in
Bluetooth
B T BDl ui se ct o on tnhe c t
BE Tq D i s c o n n e c t
EDqe l e t e p a i r e d i n
Delete paired in
Bluetooth
Eq
Delete paired in
Device Informat
Eq
Delete paired in
Device Informat
ESPAÑOL
NOTA:
La reproducción del dispositivo Bluetooth conectado
se puede parar o reiniciar con el botón REPRODUCIR/
PAUSA del reproductor MP3.
Bluetooth
FRANCAIS
DEVICE INFORMATION
Con el reproductor MP3 en modo Bluetooth, pulse el
botón MODE durante 1 segundo aproximadamente, y
luego con los botones
y
seleccione la opción
de menú «Device Information» y confirme con el botón
REPRODUCIR/PAUSA. La pantalla mostrará «Name: LD
SYSTEMS». Este es el nombre del reproductor MP3
del altavoz Road Jack que aparecerá en su dispositivo
Bluetooth (smartphone, tableta).
DEUTSCH
FRANCAIS
Para desemparejar un dispositivo Bluetooth, ponga el
reproductor MP3 en modo Bluetooth, pulse el botón
MODE durante 1 segundo aproximadamente, y luego
con los botones
y
seleccione la opción de
menú «Delete paired info» y confirme con el botón
REPRODUCIR/PAUSA.
Nota: No se podrá desemparejar un dispositivo Bluetooth
que esté conectado al reproductor MP3.
FRANCAIS
ENGLISH
Bluetooth
Bluetooth
BT Disconnect
R e Bc el unet lt yo or tehc o n n e
Eq
D i s c oBLUETOOTH:
nnect
OPERACIÓN BEENTq MODO
Delete paired in
EDqe l e t e p a i r e d i n
Delete paired in
DELETE PAIRED INFO
POLSKI
ITALIANO
95
ENGLISH
MANDO A DISTANCIA INFRARROJOS (USB, TARJETA SD):
3
1
DEUTSCH
4
2
FRANCAIS
POLSKI
ESPAÑOL
FRANCAIS
5
7
6
Apunte el mando a distancia por infrarrojos directamente al sensor de infrarrojos situado encima
del puerto USB. El alcance máximo es de 8 metros aprox.
1 PLAY/PAUSE
Pulse el botón REPRODUCIR/PAUSA para iniciar la reproducción de una pista. Pulse de nuevo este botón para
poner en modo Pausa el reproductor MP3; la reproducción se detiene
2 EQ
Pulse repetidamente este botón para seleccionar uno de los siete preajustes de ecualización existentes.
3 VOL-/VOL+
FRANCAIS
ITALIANO
Controles de volumen del reproductor MP3 (de 0 a 15). Pulse VOL- para disminuir el volumen y pulse VOL+
para aumentarlo.
96
4 PREV/NEXT
Pulse brevemente el botón PREV para seleccionar la pista anterior; pulse brevemente el botón NEXT para seleccionar
la pista siguiente. Mantenga pulsados estos botones para activar el retroceso rápido y el avance rápido.
MANDO A DISTANCIA INFRARROJOS (USB, TARJETA SD):
Para seleccionar una pista directamente, utilice los botones numéricos 0 a 9.
Por ejemplo: para seleccionar la pista 29, pulse brevemente el botón 2 y luego el botón 9 (en la pantalla
aparecerá brevemente «0029»).
FRANCAIS
ENGLISH
5 SELECCIÓN DE PISTA
6 ENTER
ECUALIZADOR (Eq)
Para seleccionar uno de los siete preajustes del ecualizador, pulse el botón ENTER, utilice los botones PREV
y NEXT para seleccionar el menú «Eq» (quedará resaltado) y luego confirme con el botón PLAY/PAUSE. Ahora
pulse los botones PREV y NEXT para activar uno de los siete preajustes del ecualizador, y confirme con el
botón PLAY/PAUSE.
7 MODE
NOTA: Los botones CHANNEL (CH-, CH+) y PICK SONG no están operativos.
ITALIANO
1. Al pulsar brevemente el botón MODE, el reproductor MP3 cambia su fuente de señal (tarjeta SD/llave USB/
Bluetooth). La fuente de señal activada se muestra en la pantalla.
2. Pulse este botón durante 2 segundos aproximadamente para encender/apagar el reproductor MP3.
El reproductor MP3 solo se puede encender o apagar mediante el mando a distancia por infrarrojos, no
desde el propio equipo.
POLSKI
SALIR DEL MENÚ (Exit)
1. Para salir del menú, seleccione con los botones PREV y NEXT la opción de menú «Exit», y confirme con el
botón PLAY/PAUSE.
2. Al cabo de 8 segundos, el menú se cerrará automáticamente y se volverá a la pantalla principal.
ESPAÑOL
SELECCIÓN DE FUENTE (Change Device)
Para seleccionar la fuente de señal del reproductor MP3:
1. Pulse el botón ENTER, utilice los botones PREV y NEXT para seleccionar el menú «Change Device»
(quedará resaltado) y luego confirme con el botón PLAY/PAUSE. Ahora pulse los botones PREV y NEXT para
seleccionar la fuente de señal «SD Card» para la tarjeta SD o «UDISK» para la llave USB, y confirme con el
botón PLAY/PAUSE.
2. Al pulsar brevemente el botón MODE, el reproductor MP3 cambia su fuente de señal (tarjeta SD/llave USB/
Bluetooth). La fuente de señal activada se muestra en la pantalla.
FRANCAIS
MODO DE REPRODUCCIÓN (Play Mode)
Permite elegir entre seis modos de reproducción: Normal, Aleatorio, Intro, Todo, Repetir 1, Repetir carpeta.
Pulse el botón ENTER, utilice los botones PREV y NEXT para seleccionar el menú «Play Mode» (quedará
resaltado) y luego confirme con el botón PLAY/PAUSE. Ahora pulse los botones PREV y NEXT para activar uno
de los seis modos de reproducción, y confirme con el botón PLAY/PAUSE.
DEUTSCH
FRANCAIS
Al pulsar el botón ENTER se accede al menú de selección del ecualizador, del modo de reproducción y de la
fuente de señal.
97
ENGLISH
MANDO A DISTANCIA INFRARROJOS (BLUETOOTH):
2
1
ESPAÑOL
FRANCAIS
DEUTSCH
3
5
4
1 PLAY/PAUSE
Pulse el botón PLAY/PAUSE para iniciar la reproducción de una pista. Pulse de nuevo este botón para poner
en modo Pausa el reproductor MP3; la reproducción se detiene.
FRANCAIS
POLSKI
2 VOL-/VOL+
Controles de volumen del reproductor MP3 (de 0 a 15). Pulse VOL- para disminuir el volumen y pulse VOL+
para aumentarlo.
3 PREV/NEXT
Pulse brevemente el botón PREV para seleccionar la pista anterior; pulse brevemente el botón NEXT para
seleccionar la pista siguiente.
FRANCAIS
ITALIANO
4 ENTER
98
Pulse el botón ENTER para entrar en el menú Bluetooth. La operación y los ajustes se describen en el
apartado «OPERACIÓN EN MODO BLUETOOTH».
MANDO A DISTANCIA INFRARROJOS (BLUETOOTH):
1. Al pulsar brevemente el botón MODE, el reproductor MP3 cambia su fuente de señal (tarjeta SD/llave USB/
Bluetooth). La fuente de señal activada se muestra en la pantalla.
2. Pulse este botón durante 2 segundos aproximadamente para encender/apagar el reproductor MP3.
El reproductor MP3 solo se puede encender o apagar mediante el mando a distancia por infrarrojos, no
desde el propio equipo, aunque se enciende automáticamente al encender el altavoz Road Jack.
DEUTSCH
FRANCAIS
NOTA: Los botones de canales (CH-, CH+), EQ, PICK SONG y los botones numéricos 0 a 9 no tienen ninguna
función en el modo Bluetooth.
FRANCAIS
ENGLISH
5 MODE
FRANCAIS
ESPAÑOL
POLSKI
ITALIANO
99
FRANCAIS
ITALIANO
FRANCAIS
POLSKI
ESPAÑOL
FRANCAIS
DEUTSCH
ENGLISH
ESPECIFICACIONES:
100
Nombre del modelo
Tipo de producto:
Tipo:
Tamaño del woofer:
Tamaño del woofer:
Imán del woofer:
Marca del woofer:
Tamaño del motor de agudos:
Tamaño del motor de agudos:
Imán del motor de agudos:
Marca del motor de agudos:
Amplificador:
Potencia (RMS):
Potencia (pico):
Respuesta en frecuencia:
SPL (1 W a 1 m):
SPL máximo:
Circuitos de protección:
Controles:
Indicadores:
Entradas de línea:
Conectores de entrada de línea:
Entradas de micrófono:
Conectores de entrada de micrófono:
Entradas de instrumento:
Conectores de entrada de instrumento:
Toma eléctrica:
Alimentación eléctrica:
Alimentación eléctrica:
Consumo (máx.):
Batería recargable:
Material de la carcasa:
Diseño:
Ancho:
Altura:
Fondo:
Peso:
Otras características:
LDRJ8
Altavoz de PA portátil
Activo
8"
203,2 mm
Ferrita
Custom Made
3" (banda ancha)
76,2 mm
Ferrita
Custom Made
Clase D
25 W
100 W
90 a 18.000 Hz
94 dB
113 dB
Cortocircuito, sobretensión, sobrecarga
Mic 1 Level, Mic 2 Level, CD/Tape IN Level, Low, High, Echo,
Master Volume, botón AUX/MP3
Encendido, batería en carga y estado de batería
1
2 RCA, minijack de 3,5 mm
2 (1 alternativa para instrumento en CH 2)
XLR, jack de 6,3 mm
1 (1 alternativa para micro en CH 2)
Jack de 6,3 mm
IEC
Fuente de alimentación conmutada
100 - 120 VAC, 60 Hz / 220 - 240 VAC, 50 Hz
50 W
12 V, 5 Ah
DM de 15 mm
Bass reflex
385 mm
450 mm
298 mm
13,8 kg
Vaso de soporte de 36 mm, ruedas de transporte, asa telescópica,
asa de transporte, mando a distancia por IR para el reproductor
multimedia
ESPECIFICACIONES:
ESPAÑOL
POLSKI
ITALIANO
415 mm
525 mm
328 mm
16,2 kg
Vaso de soporte de 36 mm, ruedas de transporte, asa telescópica,
asa de transporte, mando a distancia por IR para el reproductor
multimedia
FRANCAIS
Ancho:
Altura:
Fondo:
Peso:
Otras características:
DEUTSCH
FRANCAIS
Indicadores:
Entradas de línea:
Conectores de entrada de línea:
Entradas de micrófono:
Conectores de entrada de micrófono:
Entradas de instrumento:
Conectores de entrada de instrumento:
Toma eléctrica:
Alimentación eléctrica:
Alimentación eléctrica:
Consumo (máx.):
Batería recargable:
Material de la carcasa:
Diseño:
LDRJ10
Altavoz de PA portátil
Activo
10"
254 mm
Ferrita
Custom Made
3" (banda ancha)
76,2 mm
Ferrita
Custom Made
Clase D
25 W
100 W
65 a 18.000 Hz
96 dB
117 dB
Cortocircuito, sobretensión, sobrecarga
Mic 1 Level, Mic 2 Level, CD/Tape IN Level, Low, High, Echo,
Master Volume, botón AUX/MP3
Encendido, batería en carga y estado de batería
1
2 RCA, minijack de 3,5 mm
2 (1 alternativa para instrumento en CH 2)
XLR, jack de 6,3 mm
1 (1 alternativa para micro en CH 2)
Jack de 6,3 mm
IEC
Fuente de alimentación conmutada
100 - 120 VAC, 60 Hz / 220 - 240 VAC, 50 Hz
50 W
12 V, 5 Ah
DM de 15 mm
Bass reflex
FRANCAIS
ENGLISH
Nombre del modelo
Tipo de producto:
Tipo:
Tamaño del woofer:
Tamaño del woofer:
Imán del woofer:
Marca del woofer:
Tamaño del motor de agudos:
Tamaño del motor de agudos:
Imán del motor de agudos:
Marca del motor de agudos:
Amplificador:
Potencia (RMS):
Potencia (pico):
Respuesta en frecuencia:
SPL (1 W a 1 m):
SPL máximo:
Circuitos de protección:
Controles:
101
FRANCAIS
ITALIANO
FRANCAIS
POLSKI
ESPAÑOL
FRANCAIS
DEUTSCH
ENGLISH
ESPECIFICACIONES:
102
Reproductor multimedia
Reproductor
Soportes compatibles:
Formatos compatibles:
Controles del reproductor:
Indicadores del reproductor:
LDRJ8/LDRJ10
Bluetooth, llave USB, tarjeta SD
MP3, WAV, WMA
Modo (Menu/Bluetooth/SD/USB), Play/Pause, Stop, Repeat, pista
anterior, pista siguiente
Pantalla LCD multifuncional y retroiluminada
DECLARACIÓN DEL FABRICANTE:
La presente garantía cubre el producto de la marca LDSYSTEMS que ha adquirido de Adam Hall. No afecta a los
derechos de garantía legal de la que responde el vendedor. De hecho, le concede derechos adicionales ante Adam
Hall, independientes de la garantía legal.
Adam Hall no garantiza el funcionamiento ininterrumpido y sin fallos de este producto. Adam Hall no se hace responsable
de los posibles daños ocasionados por no seguir las instrucciones de uso suministradas con el producto.
ITALIANO
Esta garantía sólo es válida dentro de Europa. Fuera de Europa deberá dirigirse a nuestros distribuidores oficiales.
POLSKI
Esta garantía no cubre:
- los consumibles (baterías, válvulas, etc.)
- los productos cuyo número de serie ha sido borrado, o que han quedado dañados y defectuosos debido a un accidente
- los defectos ocasionados por un uso incorrecto o indebido, o cualquier otra causa ajena
- los equipos que no se utilizan conforme a los parámetros establecidos en la documentación suministrada con
el producto
- los equipos que no fueron reparados con piezas fabricadas o distribuidas por Adam Hall
- los equipos cuyo mantenimiento, modificación o reparación no haya sido realizado por Adam Hall o uno de sus
servicios técnicos autorizados
Estos términos y condiciones constituyen el acuerdo de garantía íntegro y exclusivo entre usted y Adam Hall en
relación con el producto Adam Hall que acaba de adquirir.
ESPAÑOL
En el caso improbable de que se produzca un fallo recurrente en el producto adquirido, Adam Hall, a su entera
discreción, podrá optar por sustituir dicho producto defectuoso por otro de similares características.
FRANCAIS
La presente garantía se aplica únicamente al comprador original del producto comercializado por Adam Hall y no
es transferible a una tercera persona a la que el comprador original haya transferido la propiedad del producto
Adam Hall.
Durante el periodo de garantía, Adam Hall se compromete a reparar o sustituir las piezas defectuosas o el producto
en cuestión. Todos los componentes substituidos o retirados en el marco de la presente garantía pasarán a ser
propiedad de Adam Hall.
DEUTSCH
FRANCAIS
Por la presente, Adam Hall garantiza que el producto que ha adquirido de Adam Hall o de un partner de Adam Hall
estará exento de defectos de material y fabricación, en condiciones normales de uso, durante un período de 2 años
a partir de la fecha de compra. El período de garantía entra en vigor el día de la fecha de compra. Para ejercer su
derecho a la garantía será necesario presentar un justificante de compra válido en el que figure la fecha de compra
del producto, por ejemplo, la factura o el albarán de entrega. Si el producto adquirido necesitara una reparación
dentro del período de garantía, usted tendrá derecho a obtener los servicios de garantía conforme a los términos
y condiciones establecidos en este documento.
FRANCAIS
ENGLISH
GARANTÍA DEL FABRICANTE
103
FRANCAIS
ITALIANO
FRANCAIS
POLSKI
ESPAÑOL
FRANCAIS
DEUTSCH
ENGLISH
DECLARACIÓN DEL FABRICANTE:
104
LIMITACIÓN DE RESPONSABILIDAD
Si durante el período de garantía aparecen defectos de material o de fabricación en su producto Adam Hall (de
acuerdo con las garantías mencionadas en este documento), tendrá derecho exclusivamente a la reparación o
sustitución del mismo. La responsabilidad máxima de Adam Hall en virtud de los términos de esta garantía está
limitada al menor importe que resulte del precio de compra del producto, del coste de la reparación o la sustitución de las piezas que han dejado de funcionar en condiciones normales de uso.
Adam Hall no será responsable de ningún daño causado por el producto o por el mal funcionamiento del
producto, incluidas la pérdida de beneficios, la pérdida de ahorros o cualquier consecuencia derivada de dichas
pérdidas. Además, Adam Hall no se hará responsable de ninguna reclamación presentada por un tercero o por el
comprador original en nombre de un tercero.
Esta limitación de responsabilidad se aplicará con independencia de que se solicite una indemnización por daños
y perjuicios, o se presenten reclamaciones por negligencia, contractuales o de cualquier otra índole, y no podrá
ser derogada o modificada. Esta limitación de responsabilidad será efectiva incluso en el caso de que el comprador hubiese avisado previamente a Adam Hall o a alguno de sus representantes de la posibilidad de reclamar
daños y perjuicios. No obstante, esta limitación de responsabilidad no tendrá efecto en caso de reclamación por
daños personales.
Esta garantía limitada le otorga derechos legales específicos. Puede que posea derechos adicionales conforme a
la legislación del país o Estado en el que se encuentre. Le recomendamos que consulte la legislación vigente en
su país o Estado para conocer el alcance de sus derechos.
APLICACIÓN DE LA GARANTÍA
Para solicitar asistencia técnica en relación con el producto en garantía, póngase en contacto con Adam Hall o
con el distribuidor autorizado donde adquirió el producto.
DECLARACIÓN CE DE CONFORMIDAD
Los productos distribuidos por Adam Hall cumplen (según proceda) los requisitos esenciales de las Directivas
europeas 1999/5/CE (Equipos radioeléctricos y equipos terminales de telecomunicación, R&TTE), 2004/108/
CE (Compatibilidad Electromagnética) y 2006/95/CE (Baja Tensión), así como las correspondientes cláusulas
adicionales. Para más información consulte www.adamhall.com.
DECLARACIÓN DEL FABRICANTE:
(Aplicable en la Unión Europea y en los países europeos que dispongan de un sistema de recogida selectiva)
El símbolo que aparece sobre el producto o en la documentación adjunta indica que al final de la vida útil del
equipo, no deberá desecharlo con los demás residuos domésticos, con el fin de evitar posibles efectos negativos
en el medio ambiente y en la salud humana debidos al vertido incontrolado de desechos. La recogida selectiva
ayuda a su posterior reciclaje y fomenta la reutilización sostenible de los componentes de este equipo.
DEUTSCH
FRANCAIS
Si es un particular, póngase en contacto con el distribuidor donde adquirió este producto, o con el ayuntamiento,
para informarse sobre el reciclaje adecuado de este equipo.
Si es una empresa, póngase en contacto con su proveedor para informarse sobre los términos y condiciones de
su contrato de compra-venta. Este producto no debe mezclarse con otros residuos industriales.
FRANCAIS
ENGLISH
ELIMINACIÓN CORRECTA DE ESTE PRODUCTO
PROTECCIÓN MEDIOAMBIENTAL Y AHORRO ENERGÉTICO
FRANCAIS
Ahorre energía eléctrica para proteger el medio ambiente. Para ello, apague todos los aparatos eléctricos cuando
no estén en uso. Además, para evitar el consumo de energía en modo En espera, desenchufe todo aparato
eléctrico de la toma de corriente cuando no esté en uso.
ESPAÑOL
POLSKI
ITALIANO
Adam Hall GmbH. Todos los derechos reservados. Los datos técnicos y las características funcionales del producto están sujetos a modificaciones. Se prohíbe la fotocopia, traducción y cualquier otra forma de reproducción
parcial o total de este manual de usuario.
105
ENGLISH
DEUTSCH
Gratulujemy wyboru!
FRANCAIS
POLSKI
ESPAÑOL
FRANCAIS
To urządzenie zostało zaprojektowane i wyprodukowane przy zastosowaniu najwyższych kryteriów jakościowych
w celu zapewnienia wieloletniej bezawaryjnej eksploatacji. Firma LD Systems gwarantuje to swoją marką i
wieloletnim doświadczeniem w wytwarzaniu wysokiej jakości produktów audio.
Proszę starannie przeczytać niniejszą instrukcję obsługi, aby móc jak najszybciej zacząć użytkować ten produkt
marki LD Systems.
Dalsze informacje na temat firmy LD SYSTEMS dostępne są na naszej stronie internetowej WWW.LD-SYSTEMS.COM
Wprowadzenie
Aktywne systemy 2-drożne z serii Road Jack wyposażone są w zintegrowane rolki i wyciągany uchwyt w celu
łatwego transportowania. Zintegrowana bateria zapewnia działanie nawet przez 20 godzin pracy ciągłej.
Mikser oferuje trzy oddzielnie sterowane kanały wejściowe, 2-pasmowy korektor, regulowane echo oraz regulator
głośności ogólnej. Przy użyciu połączeń combo, jacków 6,3 mm, cinch i minijacków TRS 3,5 mm można podłączać
różne źródła wejściowe.
Zaletą produktu jest zintegrowany odtwarzacz bluetooth, który umożliwia bezprzewodowy streaming treści audio
w systemie. Oprócz tego pamięć USB i karty SD mogą być używane jako nośniki pamięci.
FRANCAIS
ITALIANO
Obydwa systemy dostarczane są z poręcznym pilotem na podczerwień i praktycznym uchwytem na statyw.
106
DEUTSCH
FRANCAIS
ZASILANY BATERYJNIE GŁOŚNIK BLUETOOTH Z MIKSEREM
LDRJ8/LDRJ10
FRANCAIS
ENGLISH
ROADJACK 8/10
FRANCAIS
ESPAÑOL
POLSKI
ITALIANO
107
FRANCAIS
ITALIANO
FRANCAIS
POLSKI
ESPAÑOL
FRANCAIS
DEUTSCH
ENGLISH
ŚRODKI OSTROŻNOŚCI:
108
1. Należy dokładnie przeczytać niniejszą instrukcję.
2. Wszystkie informacje i instrukcje przechowywać w bezpiecznym miejscu.
3. Należy przestrzegać zaleceń.
4. Należy przestrzegać wszystkich wskazówek ostrzegawczych. Nie wolno usuwać wskazówek bezpieczeństwa
ani innych informacji znajdujących się na urządzeniu.
5. Używać urządzenia wyłącznie w sposób zgodny z jego przeznaczeniem.
6. Stosować wyłącznie stabilne i pasujące statywy, ew. elementy mocujące (w przypadku instalacji stałych).
Należy zadbać o prawidłową instalację uchwytów ściennych i ich odpowiednie zabezpieczenie. Zapewnić
bezpieczną instalację urządzenia i upewnić się, że urządzenie nie spadnie.
7. Podczas instalacji przestrzegać obowiązujących w danym kraju przepisów bezpieczeństwa.
8. Urządzenie instalować i eksploatować z dala od grzejników, zasobników ciepła, pieców i innych źródeł ciepła. Zadbać o
zainstalowanie urządzenia w taki sposób, aby zawsze było ono wystarczająco chłodzone i nie mogło ulec przegrzaniu.
Unikać bezpośredniego działania promieni słonecznych!
9. Nie umieszczać na urządzeniu źródeł zapłonu, takich jak np. palące się świece.
10. Nie wolno blokować szczelin wentylacyjnych.
11. Nie używać urządzenia w bezpośrednim sąsiedztwie wody (nie dotyczy specjalnych urządzeń do stosowania
na zewnątrz – w takim przypadku należy przestrzegać podanych poniżej wskazówek specjalnych). Urządzenie
nie może mieć kontaktu z palnymi materiałami, płynami ani gazami.
12. Zabezpieczyć urządzenie przed wniknięciem kapiącej lub pryskającej wody. Nie wolno stawiać na urządzeniu
pojemników napełnionych płynami, takich jak wazony czy naczynia z piciem.
13. Należy zadbać o to, aby do urządzenia nie wpadały żadne przedmioty.
14. Urządzenie można eksploatować tylko przy użyciu akcesoriów zalecanych i przewidzianych przez producenta.
15. Nie otwierać urządzenia ani nie dokonywać w nim zmian.
16. Po podłączeniu urządzenia sprawdzić wszystkie ciągi kablowe, aby zapobiec szkodom lub wypadkom np. w
wyniku potknięcia.
17. Podczas transportu zadbać o to, aby urządzenie nie upadło, gdyż może to spowodować uszkodzenie mienia i
obrażenia ciała.
18. Jeśli urządzenie nie działa prawidłowo, do jego wnętrza dostały się płyny lub przedmioty lub jeśli urządzenie
zostało uszkodzone w inny sposób, należy je natychmiast wyłączyć i odłączyć od gniazda sieciowego (jeśli
urządzenie jest aktywne). Naprawę takiego urządzenia może wykonać tylko autoryzowany personel specjalistyczny.
19. Do czyszczenia urządzenia stosować suchą ściereczkę.
20. Przestrzegać obowiązujących w danym kraju przepisów dotyczących usuwania odpadów. Podczas utylizacji
opakowania oddzielić tworzywo sztuczne od papieru i tektury.
21. Worki z tworzywa sztucznego należy przechowywać w miejscu niedostępnym dla dzieci.
DOTYCZY URZĄDZEŃ Z ZASILANIEM SIECIOWYM:
22. UWAGA: jeśli kabel sieciowy urządzenia jest wyposażony w zestyk ochronny, należy go podłączyć do gniazda
z przewodem uziemiającym. Nigdy nie wolno dezaktywować przewodu uziemiającego kabla sieciowego.
23. Nie włączać urządzenia bezpośrednio po narażeniu go na silne wahania temperatury (np. po transporcie). Wilgoć
i skropliny mogą uszkodzić urządzenie. Włączyć urządzenie dopiero wtedy, gdy osiągnie temperaturę pokojową.
24. Przed podłączeniem urządzenia do gniazda elektrycznego należy sprawdzić, czy napięcie i częstotliwość sieci elektrycznej odpowiada wartościom podanym na urządzeniu. Jeśli urządzenie jest wyposażone w przełącznik
napięcia, należy podłączyć je do gniazda tylko wówczas, gdy wartości urządzenia odpowiadają wartościom sieci
elektrycznej. Jeśli dołączony kabel sieciowy lub dołączony adapter sieciowy nie pasuje do gniazda elektrycznego, należy skontaktować się z elektrykiem.
BEZPIECZEŃSTWO:
ESPAÑOL
Trójkąt równoramienny z symbolem błyskawicy oznacza niezaizolowane, „niebezpieczne” napięcie w
urządzeniu, które może spowodować niebezpieczne dla zdrowia porażenie prądem.
FRANCAIS
UWAGA:
Nigdy nie wolno zdejmować pokrywy, gdyż grozi to porażeniem prądem. We wnętrzu urządzenia nie ma żadnych
części, które mogłyby zostać naprawione bądź poddane czynnościom konserwacyjnym przez użytkownika.
Naprawy może przeprowadzać wyłącznie wykwalifikowany personel serwisowy.
DEUTSCH
FRANCAIS
CAUTION
RISK OF ELECTRIC SHOCK
DO NOT OPEN
FRANCAIS
ENGLISH
25. Nie stawać na kablu sieciowym. Należy zadbać o to, aby kable przewodzące napięcie nie były zagięte przy
gnieździe sieciowym, przy adapterze sieciowym ani przy gnieździe urządzenia.
26. Przy podłączaniu urządzenia zawsze należy zadbać o to, aby kabel sieciowy lub adapter sieciowy był zawsze
łatwo dostępny. Odłączyć urządzenie od źródła zasilania, gdy nie jest ono używane lub gdy ma zostać poddane
czyszczeniu. Zawsze należy wyjmować kabel sieciowy i adapter sieciowy z gniazda, chwytając za wtyczkę lub
adapter, a nie za kabel. Nigdy nie dotykać kabla sieciowego i adaptera sieciowego mokrymi dłońmi.
9. W miarę możliwości nie włączać i wyłączać urządzenia w krótkich odstępach czasu, gdyż może to mieć
negatywny wpływ na jego żywotność.
28. WAŻNA INFORMACJA: bezpieczniki należy wymieniać wyłącznie na bezpieczniki tego samego typu i o takich samych
wartościach. Jeśli bezpiecznik stale się przepala, należy skontaktować się z autoryzowanym centrum serwisowym.
29. Aby całkowicie odłączyć urządzenie od sieci, należy wyjąć kabel sieciowy lub adapter sieciowy z gniazda.
30. Jeśli urządzenie jest wyposażone w przyłącze sieciowe Volex, konieczne jest odblokowanie odpowiedniej
wtyczki urządzenia Volex, zanim będzie możliwe jej odłączenie. Oznacza to także, iż w wyniku pociągnięcia za
kabel urządzenie może się przesunąć i spaść, co może spowodować obrażenia ciała i/lub inne szkody, dlatego
ważne jest, aby przewody były odpowiednio poprowadzone.
31. W przypadku zagrożenia uderzeniem pioruna lub jeśli urządzenie przez dłuższy czas nie jest używane, należy
wyjąć kabel sieciowy i adapter sieciowy z gniazda.
Trójkąt równoramienny z wykrzyknikiem oznacza ważne wskazówki dotyczące obsługi i wskazówki
ostrzegawcze.
ITALIANO
Aby zapobiec ewentualnemu uszkodzeniu słuchu, unikać słuchania przy dużym poziomie głośności
przez dłuższy czas.
Głośny dźwięk może prowadzić do uszkodzenia słuchu nawet przy krótkim okresie oddziaływania.
Głośność należy zawsze utrzymywać na przyjemnym dla ucha poziomie.
POLSKI
UWAGA NA WYSOKI POZIOM GŁOŚNOŚCI PRODUKTÓW AUDIO!
To urządzenie przewidziane jest do profesjonalnych zastosowań. Komercyjne stosowanie tego urządzenia podlega obowiązującym w danym kraju przepisom i wytycznym dotyczącym zapobiegania wypadkom. Firma Adam
Hall jest jako producent zobowiązana do wyraźnego informowania o potencjalnym zagrożeniu dla zdrowia.
Utrata słuchu w wyniku wysokiego poziomu głośności i długotrwałego narażenia: podczas stosowania tego
produktu może powstać wysoki poziom ciśnienia akustycznego (SPL), który może doprowadzić do nieodwracalnego uszkodzenia słuchu u artystów, pracowników i widzów. Należy unikać długotrwałego narażenia na wysoki
poziom głośności powyżej 90 dB.
109
ENGLISH
PRZYŁĄCZA, ELEMENTY OBSŁUGI I WSKAŹNIKI:
5
1
3
6
FRANCAIS
DEUTSCH
5
8
2
4
7
-6
+6
ESPAÑOL
1 WEJŚCIE CH 1
Symetryczne wejście mikrofonowe (XLR/Combo jack 6,3 mm). Możliwe jest także użycie niesymetrycznego
kabla mikrofonowego (jack mono).
2 POZIOM CH 1
Regulator głośności dla kanału 1 (CH 1). Przekręcenie regulatora w lewo powoduje zmniejszenie, a w prawo
– zwiększenie głośności.
FRANCAIS
POLSKI
3 WEJŚCIE CH 2
Niesymetryczne wyjście na przyrządy/mikrofon z gniazdem jack 6,3 mm.
4 POZIOM CH 2
Regulator głośności dla kanału 2 (CH 2). Przekręcenie regulatora w lewo powoduje zmniejszenie, a w prawo
– zwiększenie głośności.
FRANCAIS
ITALIANO
5 WEJŚCIE CH 3 (CINCH)
Niesymetryczne wejście liniowe z gniazdami cinch do podłączania urządzeń zewnętrznych (np. odtwarzacza
CD, odtwarzacza MP3). Sygnał stereo jest wewnętrznie sumowany do sygnału mono. W celu aktywowania
wejścia cinch należy wcisnąć przełącznik 8 (MP3/AUX) na panelu obsługi; sygnał będzie przekazywany na
kanał 3 (CH 3). Jeśli gniazdko wejścia minijack jest zajęte, gniazda cinch kanału 3 (CH 3) będą wyciszone.
LOW
110
1
2
3
-6
PRZYŁĄCZA, ELEMENTY OBSŁUGI I WSKAŹNIKI
Niesymetryczne wejście liniowe z gniazdami jack 3,5 mm do podłączania urządzeń zewnętrznych (np. laptopa,
odtwarzacza MP3). Sygnał stereo jest wewnętrznie sumowany do sygnału mono. W celu aktywowania wejścia
minijack należy wcisnąć przełącznik 8 (MP3/AUX) na panelu obsługi; sygnał będzie przekazywany na kanał 3
(CH 3). Jeśli gniazdko wejścia minijack jest zajęte, gniazda cinch kanału 3 (CH 3) będą wyciszone.
FRANCAIS
ENGLISH
6 WEJŚCIE CH 3 (MINIJACK)
7 POZIOM CH 3
8 MP3/AUX
Wybór źródła sygnału dla kanału 3 (CH 3). Jeśli przełącznik nie jest wciśnięty, jako źródło sygnału wybrany
jest odtwarzacz MP3; jeśli przełącznik jest wciśnięty, wybrane jest wyjście cinch lub minijack.
DEUTSCH
FRANCAIS
Regulator głośności dla kanału 3 (CH 3). Przekręcenie regulatora w lewo powoduje zmniejszenie, a w prawo
– zwiększenie głośności.
9 LOW
10 HIGH
Korektor tonów wysokich dla kanału sumy. Obrót w lewo powoduje zmniejszenie poziomu tonów wysokich, a
obrót w prawo jego zwiększenie. W pozycji środkowej (kliknięcie) korektor jest nieaktywny.
ESPAÑOL
11 ECHO
FRANCAIS
Korektor tonów niskich dla kanału sumy (Master). Obrót w lewo powoduje zmniejszenie poziomu tonów
niskich, a obrót w prawo jego zwiększenie. W pozycji środkowej (kliknięcie) korektor jest nieaktywny.
Efekt echa dla kanału 1 (CH 1). Jeśli regulator znajduje się w lewym położeniu krańcowym, efekt jest
wyłączny; obrót w prawo powoduje zwiększenie efektu echa.
12 MASTER VOL
Regulator głośności kanału sumy. Obrót w lewo powoduje zmniejszenie głośności, a obrót w prawo jego
zwiększenie.
13 DIODA LED POWER
POLSKI
Świeci się, kiedy urządzenie zostanie prawidłowo podłączone do sieci i włączone lub kiedy jest zasilane
zintegrowaną baterią.
-6
10
+6
-6
11
+6
12
ITALIANO
13
9
111
-6
+6
-6
LOW
1 18 2
3
ESPAÑOL
FRANCAIS
DEUTSCH
ENGLISH
PRZYŁĄCZA, ELEMENTY OBSŁUGI I WSKAŹNIKI
17
FRANCAIS
ITALIANO
FRANCAIS
POLSKI
16
112
15
14
+6
PRZYŁĄCZA, ELEMENTY OBSŁUGI I WSKAŹNIKI
Włącznik napięcia roboczego. Napięcie sieciowe źródła zasilania i napięcie robocze urządzenia muszą być
takie same!
15 GNIAZDO SIECIOWE IEC ZE ZINTEGROWANĄ PODSTAWĄ BEZPIECZNIKA.
16 POWER ON/OFF
Włącznik/Wyłącznik dopływu zasilania do urządzenia
DEUTSCH
FRANCAIS
Służy do zasilania urządzenia. W zestawie znajduje się odpowiedni kabel sieciowy.
WAŻNE WSKAZÓWKI: PRZED włączeniem urządzenia należy sprawdzić, czy napięcie sieciowe źródła zasilania
i napięcie robocze urządzenia są takie same! Bezpiecznik należy wymieniać wyłącznie na bezpiecznik tego
samego typu i o takich samych parametrach zgodnie z napięciem zasilającym (patrz nadruk)!
Jeśli bezpiecznik stale się przepala, należy skontaktować się z autoryzowanym centrum serwisowym.
FRANCAIS
ENGLISH
14 115 V/230 V
17 CHARGE-LED
18 BATTERY LEVEL-LEDS
WSKAZÓWKI UŻYTKOWANIA BATERII (BATERIA OŁOWIOWA)
Przy każdej możliwej okazji maksymalnie ładować akumulatory. Nigdy nie rozładowywać akumulatorów
całkowicie, nie przechowywać w stanie rozładowanym ani w połowie naładowanym. W przypadku dłuższego
okresu przechowywania i nieużywania akumulatorów należy je ładować w regularnych odstępach czasu.
ESPAÑOL
4-segmentowy łańcuch LED pokazuje poziom naładowania zintegrowanej baterii. Jeśli świecą się wszystkie
3 zielone diody LED, oznacza to, że bateria jest całkowicie naładowana; jeśli świeci się czerwona dioda LED,
oznacza to, że bateria jest rozładowana.
FRANCAIS
Świeci się podczas ładowania wewnętrznej baterii. Kiedy bateria zostanie naładowana do pełna, dioda CHARGELED gaśnie. Aby naładować baterię, należy podłączyć odpowiedni kabel sieciowy do gniazda sieciowego (nr 24)
urządzenia.
POLSKI
ITALIANO
113
ENGLISH
PRZYŁĄCZA, ELEMENTY OBSŁUGI I WSKAŹNIKI
26
DEUTSCH
27
25
19
FRANCAIS
20
21
22
23
24
24
ESPAÑOL
19 SD
FRANCAIS
POLSKI
-6
Slot na karty pamięci SD o pojemności do 32 GB. Przy wkładaniu karty należy zachować właściwy kierunek: złącze
karty pamięci SD w prawo. Wyboru źródła sygnału odtwarzacza MP3 dokonuje się przy użyciu przycisku MODE.
20 MODE
Wybór źródła sygnału odtwarzacza MP3 (karta SD/pamięć USB/bluetooth) i inne ustawienia systemowe.
21
+6
Aby rozpocząć odtwarzanie ścieżki, wcisnąć przycisk PLAY/PAUSE. Po ponownym naciśnięciu przycisku
odtwarzacz MP3 przejdzie w tryb pauzy, a odtwarzanie zostanie wstrzymane. .
22
Po naciśnięciu przycisku STOP odtwarzanie bieżącej ścieżki zostanie zatrzymane.
23
Dostępnych jest sześć różnych trybów odtwarzania (Normal/Random/Browse/All/Repeat One/Repeat Folder).
FRANCAIS
ITALIANO
24
114
Krótkie naciśnięcie przycisku umożliwia wybór poprzedniej lub kolejnej ścieżki. Długie naciśnięcie (> 1
sekundy) umożliwia zmianę głośności odtwarzacza MP3 (
= ciszej,
= głośniej).
25 USB IN
Slot na pamięć USB o pojemności do 64 GB. Wyboru źródła sygnału odtwarzacza MP3 dokonuje się przy
użyciu przycisku MODE.
PRZYŁĄCZA, ELEMENTY OBSŁUGI I WSKAŹNIKI
Interfejs podczerwieni Aby można było sterować odtwarzaczem MP3 przy użyciu dołączonego pilota, należy
upewnić się, że interfejs podczerwieni pilota pozostaje w bezpośrednim „kontakcie wzrokowym” z interfejsem
podczerwieni głośnika Road Jack.
FRANCAIS
ENGLISH
26 IR
27 WYŚWIETLACZ
Wielofunkcyjny wyświetlacz LCD z podświetleniem
DEUTSCH
FRANCAIS
FRANCAIS
ESPAÑOL
POLSKI
ITALIANO
115
ENGLISH
WYŚWIETLACZ WYŚWIETLACZ GŁÓWNY:
2
1
0003
0006
3
4
DEUTSCH
8
B A S5 2 6 5 6
MP3
7
00 : 33 / 03 : 29
10
9
Hey Joe. mp3
FRANCAIS
11
1 STATUS ODTWARZANIA
ESPAÑOL
Play = , Stop = , Pauza =
2
TRYB ODTWARZANIA
N = Normal. Wszystkie ścieżki znajdujące się na nośniku pamięci są odtwarzane kolejno. Kiedy zakończy
się ostatnia ścieżka, następuje koniec odtwarzania.
FRANCAIS
POLSKI
R = Random. Ścieżki znajdujące się na nośniku pamięci są odtwarzane w kolejności losowej.
I = Browse. Kolejno odtwarzane jest pierwsze 10 sekund każdej ścieżki znajdującej się na nośniku pamięci.
A = All. Wszystkie ścieżki znajdujące się na nośniku pamięci są powtarzane. Jeśli karta pamięci SD i pamięć
USB znajdują się w swoich slotach, po odtworzeniu wszystkich ścieżek z danego nośnika pamięci automatycznie następuje przełączenie na inny nośnik pamięci.
1 = Repeat One. Wybrana ścieżka jest przez cały czas powtarzana.
FRANCAIS
ITALIANO
F = Repeat Folder. Wszystkie ścieżki z danego folderu na nośniku pamięci są powtarzane.
116
3 NUMER ŚCIEŻKI
Numer aktualnie odtwarzanej ścieżki.
4 ILOŚĆ ŚCIEŻEK
Ilość ścieżek znajdujących się na wybranym nośniku pamięci.
WYŚWIETLACZ WYŚWIETLACZ GŁÓWNY:
Wyświetlanie ustawionej wartości korektora.
6 FORMAT PLIKU
Wyświetla format pliku aktualnie wybranej ścieżki.
FRANCAIS
ENGLISH
5 KOREKTOR
7 NOŚNIK PAMIĘCI
8 CZAS ODTWARZANIA
Czas odtwarzania aktualnej ścieżki w minutach i sekundach.
9 DŁUGOŚĆ ŚCIEŻKI
Wskazanie długości aktualnej ścieżki w minutach i sekundach.
Wyświetla nazwę ścieżki (jeśli jest znana) oraz format pliku aktualnie odtwarzanej ścieżki.
11 AUDIOANALIZER
FRANCAIS
10 NAZWA ŚCIEŻKI
DEUTSCH
FRANCAIS
Wyświetla aktualnie stosowany nośnik pamięci (karta pamięci SD lub pamięć USB).
ESPAÑOL
POLSKI
ITALIANO
117
FRANCAIS
ITALIANO
FRANCAIS
POLSKI
ESPAÑOL
FRANCAIS
DEUTSCH
ENGLISH
OBSŁUGA:
118
KOREKTOR (Eq)
Aby wybrać jedną z siedmiu wartości domyślnych
korektora, należy przytrzymać przez ok. 1 sekundę
wciśnięty przycisk MODE. Korzystając z przycisków
i
, wybrać punkt menu „Eq” (zaznaczony
jasnym kolorem) i potwierdzić, naciskając przycisk
PLAY/PAUSE
. Następnie można aktywować jedną
z siedmiu wartości domyślnych korektora, wybierając
i
i potwierdzając wybór przyciskiem PLAY/
PAUSE
.
TRYB ODTWARZANIA (Play Mode)
Dostępnych jest sześć różnych trybów odtwarzania
(Normal/Random/Browse/All/Repeat One/Repeat
Folder). Przytrzymać wciśnięty przycisk MODE przez
ok. 1 sekundę. Korzystając z przycisków
i
,
wybrać punkt menu „Play Mode” (zaznaczony jasnym
kolorem) i potwierdzić, naciskając przycisk PLAY/
PAUSE
. Następnie można aktywować jeden z
siedmiu trybów odtwarzania, wybierając
i
i
potwierdzając wybór przyciskiem PLAY/PAUSE
.
Music
Eq
P l a y MMuosdi ec
EC qh a n g e D e v i c e
Play Mode
C h a nMg eu sDi ce v i c e
Eq
P l a y MMuosdi ec
EC qh a n g e D e v i c e
Play Mode
OaRn g e D e v i c e
C hNBT
00 : 00
: 00
NOT
LINK
Sm
BT NOT LINK
00 : 00
: 00
BT NOT
LINK
Sm
Bluetooth
NOR
WYBÓR ŹRÓDŁA SYGNAŁU (Change Device)
Wybór źródła sygnału odtwarzacza MP3.
1. Przytrzymać wciśnięty przycisk MODE przez ok.
1 sekundę. Korzystając z przycisków
i
, wybrać punkt menu „Change Device” (zaznaczony
jasnym kolorem) i potwierdzić, naciskając przycisk
PLAY/PAUSE
. Następnie można wybrać jako
źródło sygnału „SD Card” dla karty pamięci SD lub
„UDISK” dla pamięci USB, korzystając przy tym z przycisków
i
, i potwierdzić wybór przyciskiem
PLAY/PAUSE
.
2. Po krótkim naciśnięciu przycisku MODE odtwarzacz
MP3 zmieni źródło sygnału (slot karty SD/slot pamięci
USB/bluetooth). Aktywne źródło sygnału jest wyświetlane
na wyświetlaczu.
Music
Eq
Play Mode
Change Device
Music
Eq
Play Mode
Change Device
BT NOT LINK
Music
Eq
Play Mode
Change Device
Bluetooth
Music
Play Mode
Change Device
Exit
Music
Eq
Play Mode
Change Device
00 : 00
: 00
BT NOT
LINK
Music
BT NOT LINK
Eq
Play Mode
Change Device
00 : 00 : 00
Smartphone
NOR
M
u :s00
i c : 00
00
BT
S mNOT
a r t pLINK
hone
Play Mode
BT NOT LINK
Change Device
Exit
00 : 00
: 00
BT NOT
LINK
00 : 00 : 00
Smartphone
Bluetooth
BT NOT LINK
Bluetooth
NOR
Bluetooth
Bluetooth
Sm
NOR
Smartphone
Bluetooth
ESPAÑOL
NOR
BLUETOOTH
Odtwarzacz MP3 obsługuje technologię Bluetooth, co
oznacza, że pliki audio z innego urządzenia Bluetooth
(np. smartfona) mogą być odtwarzane na głośniku
Road Jack (maksymalna odległość między dwoma
urządzeniami to ok. 10 metrów).
Aby połączyć odtwarzacz MP3 z urządzeniem Bluetooth, należy naciskać przycisk MODE do momentu,
gdy na wyświetlaczu będzie widoczna funkcja
„Bluetooth” i „BT NOT LINK”. Aktywować Bluetooth na
urządzeniu Bluetooth i wyszukać dostępne urządzenia.
Wybrać opcję „LD SYSTEMS” i połączyć w ten sposób
NOR
swoje urządzenie Bluetooth z odtwarzaczem MP3.
Na wyświetlaczu odtwarzacza MP3 wyświetli się
komunikat „Connecting”, a gdy zostanie wyświetlone
urządzenie Bluetooth (np. smartfon), zostanie utworzone połączenie między urządzeniami. Można rozpocząć
odtwarzanie ścieżek.
FRANCAIS
Music
P l a y MMuosdi ec
EC qh a n g e D e v i c e
PE lxai yt M o d e
C h a n g ee DD eevviiccee
DEUTSCH
FRANCAIS
Music
Eq Music
EP ql a y M o d e
PC lhaayn gMeo dDee v i c e
Change Device
FRANCAIS
ENGLISH
OPUSZCZANIE MENU (Exit)
1. Aby opuścić menu, wybrać przyciskami
i
punkt menu „Exit” i potwierdzić wybór,
naciskając przycisk PLAY/PAUSE
.
2. Po ok. 8 sekundach nastąpi automatyczne
zamknięcie menu, a na ekranie znowu będzie widoczny
.główny wyświetlacz.
Music
Eq Music
EP ql a y M o d e
g eo dDeeOBSŁUGA:
vice
PC lhaayn M
Change Device
POLSKI
ITALIANO
119
FRANCAIS
POLSKI
ESPAÑOL
FRANCAIS
DEUTSCH
ENGLISH
OBSŁUGA W TRYBIE BLUETOOTH:
BT DISCONNECT
Aby zakończyć połączenie z urządzeniem Bluetooth,
na przykład w celu połączenia innego urządzenia
Bluetooth z odtwarzaczem MP3, należy nacisnąć
przycisk MODE i przytrzymać go przez ok. 1 sekundę,
gdy odtwarzacz MP3 pozostaje w trybie Bluetooth,
a następnie wybrać przy pomocy przycisków
i
punkt menu „BT Disconnect” (podświetlony
jasnym kolorem) i potwierdzić przyciskiem PLAY/PAUSE.
Na ekranie wyświetli się „BT NOT LINK”, co oznacza, że
użytkownik może podłączyć inne urządzenie Bluetooth
do odtwarzacza MP3.
RECENTLY RECONNECTION
Aby ponownie podłączyć urządzenie, które jako ostatnie
było połączone z odtwarzaczem MP3, należy nacisnąć
przycisk MODE i przytrzymać go przez ok. 1 sekundę,
gdy odtwarzacz MP3 pozostaje w trybie Bluetooth, a
następnie wybrać przy pomocy przycisków
i
punkt menu „Recently reconnection” (podświetlony
jasnym kolorem) i potwierdzić przyciskiem PLAY/PAUSE.
Bluetooth
BT Disconnect
Eq
Delete paired in
Bluetooth
BT Disconnect
Eq
Delete paired in
EQUALIZER (Eq)
Aby wybrać jedną z siedmiu wartości domyślnych
korektora, należy przytrzymać przez ok. 1 sekundę
wciśnięty przycisk MODE.
Korzystając z przycisków
i
, wybrać
punkt menu „Eq” (zaznaczony jasnym kolorem)
i potwierdzić, naciskając przycisk PLAY/PAUSE.
Następnie można aktywować jedną z siedmiu
wartości domyślnych korektora, wybierając
i
i potwierdzając wybór przyciskiem PLAY/PAUSE.
Bluetooth
BT Disconnect
Eq
Delete paired in
Bluetooth
BT Disconnect
Eq Bluetooth
DR ee Blceel tuneet ltpyoaori ter hec do ni nne
BE Tq D i s c o n n e c t
EDqeBl el ut ee t po ao itrhe d i n
ED qe l e t e p a i r e d i n
DeB
l el tuee tpoaoi tr he d i n
DB eT Bv Dil cui se ct Iononf tnoher m
c ta t
BE Tq D i s c o n n e c t
EDqe l e t e p a i r e d i n
Delete paired in
FRANCAIS
ITALIANO
Bluetooth
120
Eq
Delete paired in
Device Informat
Bluetooth
Eq
Delete paired in
Device Informat
DEUTSCH
FRANCAIS
FRANCAIS
ESPAÑOL
WSKAZÓWKA:
Naciskając przycisk PLAY/PAUSE odtwarzacza MP3,
można przerywać i ponownie uruchamiać odtwarzanie
na podłączonym urządzeniu Bluetooth.
FRANCAIS
ENGLISH
Bluetooth
Bluetooth
BT Disconnect
Recently reconne
l u e t oBLUETOOTH:
oth
OBSŁUGA EWq BTRYBIE
Eq
BD Te l D
Delete paired in
e ti es cpoaninr ee dc t i n
DELETE PAIRED INFO
Eq
Podłączone urządzenie Bluetooth zostaje rozłączone
Delete paired in
(anulowanie parowania), gdy użytkownik naciśnie
B l ui przytrzyma
e t o o got hprzez ok. 1 sekundę,
Bluetooth
przycisk MODE
gdy odtwarzacz MP3 pozostaje w trybie Bluetooth,
B T Dwybierze
i s c przyciskami
o n n e c t i punkt
BT Disconnect
a następnie
menu „Delete paired info” i potwierdzi, naciskając
Eq
E qB l u e t o o t h
przycisk PLAY/PAUSE.
Wskazówka:
BDTe l De it sec po an inreecdt i n
D e l e tdopóki
e purządzenie
a i r eBluetooth
d i n jest
połączone z odtwarzaczem MP3 nie można odłączyć
Eq
podłączonego urządzenia.
Delete paired in
Bluetooth
DEVICE INFORMATION
q
GdyEodtwarzacz
MP3 pozostaje w trybie Bluetooth,
nacisnąć przycisk MODE i przytrzymać go przez ok.
Bluetooth
Delete paired in i
1 sekundę, a następnie wybrać przyciskami
Eq
Dpunkt
e vmenu
i c e„Device
I nInformation”
f o r m ai potwierdzić,
t
naciskając przycisk PLAY/PAUSE. Na wyświetlaczu
Delete paired in
ukaże się „Nazwa: LD SYSTEMS“. Pod tą nazwą na
urządzeniu Bluetooth (smartfon, tablet) wyświetla się
Device Informat
odtwarzacz MP3 głośnika Road Jack.
POLSKI
ITALIANO
121
ENGLISH
PILOT NA PODCZERWIEŃ (USB, SD-CARD):
3
1
DEUTSCH
4
2
FRANCAIS
POLSKI
ESPAÑOL
FRANCAIS
5
7
6
Pilota na podczerwień skierować bezpośrednio w stronę czujnika podczerwieni, zamontowanego
nad wejściem USB. Maksymalny zasięg wynosi ok. 8 metrów.
1 PLAY/PAUSE
Aby rozpocząć odtwarzanie ścieżki, wcisnąć przycisk PLAY/PAUSE. Po ponownym naciśnięciu przycisku
odtwarzacz MP3 przejdzie w tryb pauzy, a odtwarzanie zostanie wstrzymane.
2 EQ
Dostępnych jest siedem różnych ustawień korektora, które można wybierać, kilkakrotnie naciskając przycisk.
3 VOL-/VOL+
FRANCAIS
ITALIANO
Regulacja głośności odtwarzacza MP3 (od 0 do 15). Naciśnięcie VOL- zmniejsza, a naciśnięcie VOL+
zwiększa głośność.
122
4 PREV/NEXT
Aby wybrać poprzednią ścieżkę, nacisnąć krótko przycisk PREV; aby wybrać następną ścieżkę, nacisnąć
przycisk NEXT. Przytrzymanie wciśniętego przycisku aktywuje szybkie przewijanie w przód lub w tył.
PILOT NA PODCZERWIEŃ (USB, SD-CARD):
Aby bezpośrednio wybrać ścieżkę, należy posłużyć się przyciskami z cyframi od 0 do 9.
Przykład: w celu wybrania numeru ścieżki 29 nacisnąć krótko przycisk z cyfrą 2, a następnie przycisk z cyfrą
9 (na wyświetlaczu przez krótki czas będzie wyświetlać się „0029”).
FRANCAIS
ENGLISH
5 BEZPOŚREDNI WYBÓR ŚCIEŻKI
6 ENTER
KOREKTOR (Eq)
Aby wybrać jedną z siedmiu wartości domyślnych korektora, nacisnąć przycisk ENTER, a następnie, przy
pomocy przycisków PREV i NEXT wybrać punkt menu „Eq” (zaznaczony jasnym kolorem) i potwierdzić
przyciskiem PLAY/PAUSE. Następnie można aktywować jedną z siedmiu wartości domyślnych korektora,
wybierając ją, naciskając przyciski PREV i NEXT oraz potwierdzając wybór, naciskając przycisk PLAY/PAUSE.
POLSKI
OPUSZCZANIE MENU (Exit)
1. Aby opuścić menu, wybrać przyciskami PREV i NEXT punkt menu „Exit” i potwierdzić wybór, naciskając
przycisk PLAY/PAUSE.
2. Po ok. 8 sekundach nastąpi automatyczne zamknięcie menu, a na ekranie znowu będzie widoczny główny
wyświetlacz.
ESPAÑOL
WYBÓR ŹRÓDŁA SYGNAŁU (Change Device)
Wybór źródła sygnału odtwarzacza MP3.
1. Nacisnąć przycisk ENTER i przy pomocy przycisków PREV i NEXT wybrać punkt menu „Change Device”
(zaznaczony jasnym kolorem) i potwierdzić wybór, naciskając przycisk PLAY/PAUSE. Następnie można wybrać
jako źródło sygnału „SD Card” dla karty pamięci lub „UDISK” dla pamięci USB przy pomocy przycisków PREV i
NEXT i potwierdzić wybór, naciskając przycisk PLAY/PAUSE.
2. Po krótkim naciśnięciu przycisku MODE odtwarzacz MP3 zmieni źródło sygnału (slot karty SD/slot pamięci
USB/bluetooth). Aktywne źródło sygnału jest wyświetlane na wyświetlaczu.
FRANCAIS
TRYB ODTWARZANIA (Play Mode)
Dostępnych jest sześć różnych trybów odtwarzania (Normal/Random/Browse/All/Repeat One/Repeat Folder).
Nacisnąć przycisk ENTER i przy pomocy przycisków PREV i NEXT wybrać punkt menu „Play Mode” (zaznaczony
jasnym kolorem) i potwierdzić wybór, naciskając przycisk PLAY/PAUSE. Następnie można aktywować jeden
z sześciu trybów odtwarzania, wybierając go, naciskając przyciski PREV i NEXT oraz potwierdzając wybór,
naciskając przycisk PLAY/PAUSE.
DEUTSCH
FRANCAIS
Naciśnięcie przycisku ENTER powoduje przejście do menu wyboru korektora, trybu odtwarzania i źródła
sygnału.
7 MODE
WSKAZÓWKA: Przyciski CHANNEL (CH-, CH+) i PICK SONG nie mają przypisanej funkcji.
ITALIANO
1. Po krótkim naciśnięciu przycisku MODE odtwarzacz MP3 zmieni źródło sygnału (slot karty SD/slot pamięci
USB/bluetooth). Aktywne źródło sygnału jest wyświetlane na wyświetlaczu.
2. Przytrzymać wciśnięty przycisk przez ok. 2 sekundy, aby włączyć lub wyłączyć odtwarzacz MP3.
Odtwarzacz MP3 można włączać i wyłączać wyłącznie pilotem na podczerwień, a nie z poziomu samego urządzenia.
123
ENGLISH
PILOT NA PODCZERWIEŃ (BLUETOOTH):
2
1
ESPAÑOL
FRANCAIS
DEUTSCH
3
5
4
1 PLAY/PAUSE
Aby rozpocząć odtwarzanie ścieżki, nacisnąć przycisk PLAY/PAUSE. Po ponownym naciśnięciu przycisku
odtwarzacz MP3 przejdzie w tryb pauzy, a odtwarzanie zostanie wstrzymane.
FRANCAIS
POLSKI
2 VOL-/VOL+
Regulacja głośności odtwarzacza MP3 (od 0 do 15). Naciśnięcie VOL- zmniejsza, a naciśnięcie VOL+
zwiększa głośność.
3 PREV/NEXT
Aby wybrać poprzednią ścieżkę z albumu, nacisnąć krótko przycisk PREV. Aby wybrać następną ścieżkę,
nacisnąć przycisk NEXT.
FRANCAIS
ITALIANO
4 ENTER
124
Po naciśnięciu przycisku ENTER można dostać się do menu Bluetooth. Obsługa i ustawienia zgodnie ze
szczegółowym opisem w rozdziale „OBSŁUGA W TRYBIE BLUETOOTH”.
PILOT NA PODCZERWIEŃ (BLUETOOTH):
1. Po krótkim naciśnięciu przycisku MODE odtwarzacz MP3 zmieni źródło sygnału (slot karty SD/slot pamięci
USB/Bluetooth). Aktywne źródło sygnału wyświetlane jest na wyświetlaczu.
2. Przytrzymać wciśnięty przycisk przez ok. 2 sekundy, aby wyłączyć lub włączyć odtwarzacz MP3.
Odtwarzacz MP3 można włączać i wyłączać wyłącznie przy użyciu pilota na podczerwień, a nie samego
odtwarzacza MP3. Przy każdym włączeniu głośnika Road Jack będzie on włączany automatycznie.
DEUTSCH
FRANCAIS
WSKAZÓWKA: przyciski CHANNEL (CH-, CH+), EQ, PICK SONG i przyciski z cyframi 0–9 nie mają przypisanych
funkcji w trybie Bluetooth.
FRANCAIS
ENGLISH
5 MODE
FRANCAIS
ESPAÑOL
POLSKI
ITALIANO
125
FRANCAIS
ITALIANO
FRANCAIS
POLSKI
ESPAÑOL
FRANCAIS
DEUTSCH
ENGLISH
SPECYFIKACJA:
126
Oznaczenie modelu:
Rodzaj produktu:
Typ:
Wielkość subwoofera:
Wielkość subwoofera:
Magnes subwoofera:
Marka subwoofera:
Wielkość głośnika wysokotonowego:
Wielkość głośnika wysokotonowego:
Magnes głośnika wysokotonowego:
Marka głośnika wysokotonowego:
Wzmacniacz:
Moc (RMS):
Moc (szczytowa):
Charakterystyka częstotliwościowa:
Poziom ciśnienia akustycznego (1 W/1 m):
Maksymalny poziom ciśnienia akustycznego:
Wyłączniki ochronne:
Elementy obsługi:
Wskaźniki:
Wejścia liniowe:
Przyłącza wejściowe liniowe:
Wejścia Mic:
Przyłącza wejść Mic:
Wejścia na przyrządy:
Przyłącza wejść na przyrządy:
Przyłącze zasilania sieciowego:
Zasilanie:
Napięcie robocze:
Pobór mocy (maks.):
Akumulatorki:
Materiał obudowy:
Typ konstrukcji obudowy:
Szerokość:
Wysokość:
Głębokość:
Waga:
Pozostałe cechy:
LDRJ8
Mobilny głośnik PA
aktywny
8”
203,2 mm
ferrytowy
na zamówienie
3” (szerokopasmowy)
76,2 mm
ferrytowy
na zamówienie
klasa D
25 W
100 W
90–18 000 Hz
94 dB
113 dB
zwarcie, przeciążenie, zabezpieczenie przed przeładowaniem
Mic 1 Level, Mic 2 Level, CD/Tape IN Level, Low, High, Echo,
Master Volume, przełącznik AUX/MP3
Power, status ładowania i baterii
1
2 x cinch, jack 3,5 mm
2 (1x alternatywa dla wejścia na przyrządy CH 2)
XLR, jack 6,3 mm
1 (alternatywa dla wejścia Mic CH 2)
jack 6,3 mm
gniazdo sieciowe IEC
zasilacz impulsowy
100 V AC–120 V AC/60 Hz, 220 V AC–240 V AC/50 Hz
50 W
12 V/5 Ah
MDF 15 mm
bass-reflex
385 mm
450 mm
298 mm
13,8 kg
kołnierz na statyw 36 mm, rolki transportowe, wyciągany
uchwyt, uchwyt do noszenia, pilot zdalnej obsługi odtwarzacza
SPECYFIKACJA:
ESPAÑOL
POLSKI
ITALIANO
415 mm
525 mm
328 mm
16,2 kg
kołnierz na statyw 36 mm, rolki transportowe, wyciągany
uchwyt, uchwyt do noszenia, pilot zdalnej obsługi odtwarzacza
FRANCAIS
Szerokość:
Wysokość:
Głębokość:
Waga:
Pozostałe cechy:
DEUTSCH
FRANCAIS
Wskaźniki:
Wejścia liniowe:
Przyłącza wejściowe liniowe:
Wejścia Mic:
Przyłącza wejść Mic:
Wejścia na przyrządy:
Przyłącza wejść na przyrządy:
Przyłącze zasilania sieciowego:
Zasilanie:
Napięcie robocze:
Pobór mocy (maks.):
Akumulatorki:
Materiał obudowy:
Typ konstrukcji obudowy:
LDRJ10
przenośny głośnik PA
aktywny
10”
254 mm
ferrytowy
na zamówienie
3” (szerokopasmowy)
76,2 mm
ferrytowy
na zamówienie
klasa D
25 W
100 W
65–18 000 Hz
96 dB
117 dB
zwarcie, przeciążenie, zabezpieczenie przed przeładowaniem
Mic 1 Level, Mic 2 Level, CD/Tape IN Level, Low, High, Echo,
Master Volume, przełącznik AUX/MP3
Power, status ładowania i baterii
1
2 x cinch, jack 3,5 mm
2 (1x alternatywa dla wejścia na przyrządy CH 2)
XLR, jack 6,3 mm
1 (alternatywa dla wejścia Mic CH 2)
jack 6,3 mm
gniazdo sieciowe IEC
zasilacz impulsowy
100 V AC–120 V AC/60 Hz, 220 V AC–240 V AC/50 Hz
50 W
12 V/5 Ah
MDF 15 mm
bass-reflex
FRANCAIS
ENGLISH
Oznaczenie modelu:
Rodzaj produktu:
Typ:
Wielkość subwoofera:
Wielkość subwoofera:
Magnes subwoofera:
Marka subwoofera:
Wielkość głośnika wysokotonowego:
Wielkość głośnika wysokotonowego:
Magnes głośnika wysokotonowego:
Marka głośnika wysokotonowego:
Wzmacniacz:
Moc (RMS):
Moc (szczytowa):
Charakterystyka częstotliwościowa:
Poziom ciśnienia akustycznego (1 W/1 m):
Maksymalny poziom ciśnienia akustycznego:
Wyłączniki ochronne:
Elementy obsługi:
127
FRANCAIS
ITALIANO
FRANCAIS
POLSKI
ESPAÑOL
FRANCAIS
DEUTSCH
ENGLISH
SPECYFIKACJA:
128
Odtwarzacz audio
Odtwarzacz audio
Obsługiwane nośniki danych:
Obsługiwane formaty:
Elementy obsługi odtwarzacza:
Wskaźniki odtwarzacza:
LDRJ8/LDRJ10
bluetooth, pamięć USB, karta SD
pliki MP3, WAV, WMA
Mode (Menu/Bluetooth/SD/USB), Play/Pause, Stop, Repeat,
Poprzednia ścieżka, Następna ścieżka)
Podświetlany wielofunkcyjny wyświetlacz LC
DEKLARACJE PRODUCENTA:
Niniejsza gwarancja obejmuje zakupiony przez Państwa produkt Adam Hall marki LDSYSTEM. Niniejsza gwarancja nie
narusza ustawowych praw wynikających z rękojmi wobec sprzedawcy. Gwarancja ta określa dodatkowe oddzielne
roszczenia wobec firmy Adam Hall.
Firma Adam Hall nie udziela gwarancji na bezzakłóceniowe lub bezawaryjne działanie niniejszego produktu. Firma
Adam Hall nie ponosi odpowiedzialności za szkody wynikłe z nieprzestrzegania instrukcji objętych zakresem dostawy.
ITALIANO
Niniejsza gwarancja jest ważna tylko na terenie Europy. Poza Europą proszę kontaktować się z naszymi oficjalnymi
dystrybutorami.
POLSKI
Niniejsza gwarancja nie obejmuje:
- części zużywalnych (np. akumulatora, lamp elektronowych);
- urządzeń, z których usunięto numer seryjny lub które zostały uszkodzone w wyniku wypadku;
- nieodpowiedniej lub nieprawidłowej eksploatacji lub innych przyczyn zewnętrznych;
- urządzeń, które były eksploatowane niezgodnie z parametrami pracy określonymi w dokumentacji użytkownika
objętej zakresem dostawy produktu;
- urządzeń, które były naprawiane przy użyciu części, których nie wyprodukowała lub nie sprzedała firma Adam Hall;
- urządzeń, które były serwisowane, modyfikowane lub naprawiane przez inne osoby niż firma Adam Hall lub jej
autoryzowany partner serwisowy.
Niniejsze postanowienia i warunki stanowią kompletną i wyłączną umowę gwarancyjną między klientem a firmą
Adam Hall dotyczącą zakupionego przez klienta produktu Adam Hall.
ESPAÑOL
W mało prawdopodobnym przypadku, gdy w zakupionym przez Państwa produkcie firmy Adam Hall wada wystąpiłaby
wielokrotnie, firma Adam Hall może, według własnego uznania, zadecydować o wymianie tego produktu na porównywalny
produkt o co najmniej takich samych parametrach.
FRANCAIS
Niniejsza gwarancja przysługuje wyłącznie pierwotnemu kupującemu, który nabył produkt oferowany przez firmę
Adam Hall i nie podlega przeniesieniu na osoby, na które pierwotny kupujący przeniósł własność w odniesieniu do
produktu firmy Adam Hall.
W trakcie trwania okresu gwarancji wadliwe komponenty lub produkt firmy Adam Hall podlegają naprawie lub
wymianie. Wszystkie komponenty wymienione lub usunięte w ramach niniejszej gwarancji stają się własnością
firmy Adam Hall.
DEUTSCH
FRANCAIS
Udzielając niniejszej gwarancji, firma Adam Hall zapewnia, że zakupiony przez Państwa w firmie Adam Hall lub u
partnera firmy Adam Hall produkt przy normalnym użytkowaniu w okresie 2 lat od daty zakupu będzie wolny od wad
materiałowych lub wad technologicznych. Okres gwarancji rozpoczyna się z dniem zakupu. Potwierdzenie daty zakupu niezbędne dla dochodzenia roszczenia gwarancyjnego następuje poprzez okazanie paragonu opatrzonego datą
zakupu lub dowodu dostawy opatrzonego datą zakupu. Użytkownik ma prawo do serwisu gwarancyjnego zgodnie
z warunkami i postanowieniami wymienionymi w niniejszym dokumencie, jeśli wymagana jest naprawa w trakcie
okresu gwarancyjnego.
FRANCAIS
ENGLISH
GWARANCJA PRODUCENTA
129
OGRANICZENIE ODPOWIEDZIALNOŚCI
Jeśli w produktach sprzętowych firmy Adam Hall w trakcie trwania okresu gwarancji wystąpią szkody
materiałowe lub technologiczne (zgodnie z powyższym oświadczeniem gwarancyjnym), jedyne i wyłączne
prawo klienta wynikające z niniejszej gwarancji dotyczy naprawy lub wymiany urządzenia. Maksymalna
odpowiedzialność firmy Adam Hall jest zgodnie z niniejszą gwarancją wyraźnie ograniczona do ceny kupna lub
kosztów naprawy lub wymiany (w zależności od tego, która z tych kwot będzie niższa) elementów uszkodzonych
podczas normalnego użytkowania.
FRANCAIS
Adam Hall nie ponosi odpowiedzialności za żadne szkody spowodowane przez produkt lub jego nieprawidłowe
działanie, włącznie z utraconym zyskiem i niepowstałymi oszczędnościami oraz szkodami szczególnymi,
pośrednimi i wynikowymi. Ponadto Adam Hall nie ponosi odpowiedzialności za roszczenia prawne osób trzecich
ani roszczenia zgłoszone przez klienta w imieniu osób trzecich.
Niniejsze ograniczenie odpowiedzialności obowiązuje niezależnie od tego, czy szkody są dochodzone na drodze
sądowej lub czy roszczenia odszkodowawcze wnoszone są w ramach niniejszej gwarancji w wyniku niedozwolonych działań (włącznie z niedbalstwem i odpowiedzialnością z tytułu zagrożenia) lub w wyniku roszczeń
umownych lub innych. Nie może ono zostać także przez nikogo zniesione ani zmienione. Niniejsze ograniczenie
odpowiedzialności obowiązuje także wówczas, gdy klient poinformuje firmę Adam Hall lub autoryzowanego
przedstawiciela firmy Adam Hall o możliwości wystąpienia takich szkód, nie obowiązuje natomiast w przypadku
roszczeń odszkodowawczych związanych ze szkodami na osobie.
ESPAÑOL
DEUTSCH
ENGLISH
DEKLARACJE PRODUCENTA:
Niniejsza gwarancja producenta przyznaje klientowi określone prawa. W zależności od jurysdykcji (państwo lub
kraj związkowy) klientowi może przysługiwać prawo zgłoszenia dalszych roszczeń. W takich przypadkach zaleca
się zastosowanie odpowiednich przepisów umożliwiających skorzystanie z pełni przysługujących danej osobie
praw.
FRANCAIS
ITALIANO
FRANCAIS
POLSKI
SKORZYSTANIE Z GWARANCJI
130
W razie wystąpienia przypadku objętego gwarancją należy zwrócić się bezpośrednio do firmy Adam Hall lub do
autoryzowanego sprzedawcy, u którego produkt został zakupiony.
DEKLARACJA ZGODNOŚCI WE
Sprzedawane przez firmę Adam Hall urządzenia są zgodne z podstawowymi wymogami i pozostałymi
obowiązującymi specyfikacjami określonymi dyrektywami 1999/5/WE (R&TTE), 2004/108/WE (EMC) i 2006/95/
WE (LVD) (o ile mają zastosowanie). Dalsze informacje dostępne są na stronie www.adamhall.com.
DEKLARACJE PRODUCENTA:
(dotyczy Unii Europejskiej i innych krajów europejskich, w których stosuje się segregację odpadów)
Klienci prywatni otrzymują informacje w zakresie przyjaznych dla środowiska możliwości usuwania odpadów od
sprzedawcy, u którego produkt został zakupiony, lub w odpowiednich placówkach regionalnych.
Użytkownicy będący przedsiębiorcami proszeni są o kontakt ze swoimi dostawcami i ewentualne sprawdzenie
uzgodnionych umownie warunków utylizacji urządzeń. Niniejszy produkt nie może być utylizowany razem z
innymi odpadami przemysłowymi.
Oszczędzanie energii stanowi aktywny wkład w ochronę środowiska. Należy wyłączać wszystkie nieużywane
urządzenia elektryczne. Aby zapobiec zużywaniu prądu przez nieużywane urządzenia znajdujące się w trybie
czuwania (standby), należy wyjąć wtyczkę z gniazda sieciowego.
FRANCAIS
OCHRONA ŚRODOWISKA I OSZCZĘDZANIE ENERGII
DEUTSCH
FRANCAIS
Niniejszy symbol na produkcie lub związanych z nim dokumentach wskazuje, iż po zakończeniu okresu
użytkowania urządzenie nie może być utylizowane razem ze standardowymi odpadami domowymi, ponieważ
mogłoby to spowodować szkody w środowisku lub szkody na osobie powstałe w wyniku niekontrolowanego
usuwania odpadów. Niniejszy produkt należy utylizować oddzielnie od innych odpadów i przekazać do punktu
recyklingu w celu wspierania ruchu okrężnego w gospodarce w ramach idei zrównoważonego rozwoju.
FRANCAIS
ENGLISH
PRAWIDŁOWA UTYLIZACJA NINIEJSZEGO PRODUKTU
ESPAÑOL
POLSKI
ITALIANO
Adam Hall GmbH, wszystkie prawa zastrzeżone. Dane techniczne i funkcjonalne produktu mogą podlegać
modyfikacjom. Kopiowanie, tłumaczenie i pozostałe formy reprodukcji fragmentów lub całości tej instrukcji
obsługi są zabronione.
131
ENGLISH
DEUTSCH
Avete fatto la scelta giusta!
FRANCAIS
POLSKI
ESPAÑOL
FRANCAIS
Quest‘apparecchio è stato sviluppato e prodotto secondo elevati standard qualitativi che garantiscono un funzionamento regolare per molti anni. Per questo motivo LD Systems, con il suo nome e la pluriennale esperienza, rappresenta
un‘azienda produttrice di prodotti audio di qualità.
Leggete attentamente questo manuale d‘uso per utilizzare al meglio il vostro nuovo prodotto LD Systems.
Per maggiori informazioni su LD SYSTEMS, consultate la nostra pagina web WWW.LD-SYSTEMS.COM
Introduzione
I sistemi attivi a 2 vie della serie Road Jack sono muniti di rotelle integrate e di una maniglia estraibile che ne
facilitano il trasporto. Grazie alla batteria incorporata possono funzionare fino a 20 ore senza interruzione.
Il mixer dispone di tre canali di ingresso parametrizzabili, un equalizzatore a doppia banda, un Echo regolabile e un
regolatore per il volume generale. Le prese combo, jack da 6,3 mm, RCA e mini jack TRS da 3,5 mm consentono di
collegare diversi tipi di sorgenti di ingresso.
La caratteristica emergente di questi altoparlanti è il lettore Bluetooth che consente uno stream wireless dei
contenuti audio nel sistema. La memoria USB e le schede SD inoltre si possono utilizzare come unità di memoria.
FRANCAIS
ITALIANO
Entrambi i sistemi sono forniti di serie con un telecomando IR manuale e un pratico attacco per lo stativo.
132
DEUTSCH
FRANCAIS
ALTOPARLANTE BLUETOOTH ALIMENTATO A BATTERIA CON MIXER
LDRJ8/LDRJ10
FRANCAIS
ENGLISH
ROADJACK 8 / 10
FRANCAIS
ESPAÑOL
POLSKI
ITALIANO
133
FRANCAIS
ITALIANO
FRANCAIS
POLSKI
ESPAÑOL
FRANCAIS
DEUTSCH
ENGLISH
MISURE PRECAUZIONALI:
134
1. Leggere attentamente il presente manuale di istruzioni.
2. Conservare tutte le indicazioni e le istruzioni in un luogo sicuro.
3. Seguire le istruzioni.
4. Rispettare tutte le avvertenze. Non rimuovere dal dispositivo le indicazioni sulla sicurezza o altre informazioni.
5. Utilizzare il dispositivo solo nei modi previsti dal manuale.
6. Utilizzare esclusivamente stativi e fissaggi stabili e adatti (per installazioni fisse). Verificare che i supporti a parete
siano installati e fissati a regola d‘arte. Verificare che il dispositivo sia installato in modo stabile e non possa cadere.
7. Durante l‘installazione, osservare le normative sulla sicurezza in vigore nel proprio Paese.
8. Non installare né azionare il dispositivo in prossimità di radiatori, accumulatori termici, stufe o altre fonti di
calore. Accertarsi che il dispositivo sia sempre installato in modo che venga raffreddato a sufficienza e non possa
surriscaldarsi. Evitare l'esposizione diretta ai raggi solari.
9. Non appoggiare sul dispositivo fonti di combustione, quali candele accese.
10. Le fessure di areazione non devono essere bloccate.
11. Non attivare il dispositivo nelle immediate vicinanze di acqua (questo punto non interessa i dispositivi specifici per l‘esterno, per i quali valgono le speciali indicazioni riportate di seguito). Non portare mai il dispositivo a
contatto con materiali, liquidi o gas infiammabili.
12. Accertarsi che all‘interno del dispositivo non possa penetrare acqua per gocciolamento o spruzzo. Non collocare sul dispositivo oggetti contenenti liquidi, quali vasi, tazze o bicchieri.
13. Assicurarsi che non sia possibile la caduta di oggetti nel dispositivo.
14. Azionare il dispositivo esclusivamente con gli accessori appositamente consigliati e previsti dal produttore.
15. Non aprire né modificare il dispositivo.
16. Una volta collegato il dispositivo, verificare tutti i cavi per evitare danni o incidenti, ad esempio per inciampo.
17. Durante il trasporto, assicurarsi che il dispositivo non possa cadere e causare possibili danni a cose e/o persone.
18. Se il dispositivo non funzionasse più correttamente, vi fosse caduto sopra del liquido o un oggetto o fosse
stato danneggiato in altro modo, spegnerlo immediatamente e staccare la spina (se si tratta di un dispositivo
attivo). La riparazione del dispositivo deve essere affidata esclusivamente a personale qualificato autorizzato.
19. Per la pulizia del dispositivo utilizzare un panno pulito.
20. Rispettare le leggi sullo smaltimento in vigore nel Paese di installazione. Al momento di smaltire l‘imballo,
separare la plastica dalla carta e dal cartone.
21. I sacchetti di plastica devono essere tenuti lontani dalla portata dei bambini.
DISPOSITIVI CON ALLACCIAMENTO DI RETE:
22. ATTENZIONE: se il cavo di rete è dotato di contatto di protezione, deve essere collegato a una presa di rete
con messa a terra. Non disattivare mai la connessione di messa a terra di un cavo di rete.
23. Non accendere il dispositivo subito dopo essere stato sottoposto a forti variazioni di temperatura (ad esempio
dopo il trasporto). Umidità e condensa potrebbero danneggiare il dispositivo. Accendere il dispositivo solo dopo
che ha raggiunto la temperatura ambiente.
24. Prima di collegare il dispositivo alla presa, controllare innanzitutto se la tensione e la frequenza della rete
elettrica coincidono con i valori indicati sul dispositivo stesso. Nel caso di dispositivo munito di selettore di
tensione, collegarlo alla presa unicamente se i valori del dispositivo coincidono con quelli della rete elettrica. Se il
cavo di rete o l‘adattatore di rete forniti in dotazione non sono compatibili con la presa, rivolgersi a un elettricista.
25. Non calpestare il cavo di rete. Accertarsi che i cavi sotto tensione, in particolare della presa di rete o
dell‘adattatore di rete, non vengano pizzicati.
26. Durante il cablaggio del dispositivo, verificare sempre che il cavo di rete e l‘adattatore di rete siano costantemente accessibili. Staccare sempre il dispositivo dall‘alimentazione di rete quando non è utilizzato o durante la
pulizia. Per staccare dalla presa il cavo di rete e l‘adattatore di rete, tirare sempre dalla spina o dall‘adattatore e
SICUREZZA:
Il triangolo isoscele con il simbolo del fulmine indica la presenza nel dispositivo di tensioni non
isolate, “pericolose”, che possono provocare scosse dannose alla salute.
FRANCAIS
ATTENZIONE:
non togliere mai il coperchio di protezione per evitare il pericolo di scosse elettriche. L’interno del dispositivo
non contiene parti che possono essere riparate o sottoposte a manutenzione da parte dell’utente. Le riparazioni
dovranno essere realizzate esclusivamente da tecnici qualificati.
DEUTSCH
FRANCAIS
CAUTION
RISK OF ELECTRIC SHOCK
DO NOT OPEN
FRANCAIS
ENGLISH
non dal cavo. Non toccare mai il cavo di alimentazione e l’alimentatore con le mani umide.
27. Evitare per quanto possibile di accendere e spegnere velocemente il dispositivo per non pregiudicarne la durata.
28. NOTA IMPORTANTE: Sostituire i fusibili esclusivamente con fusibili dello stesso tipo e valore. Se un fusibile
continua a saltare, rivolgersi a un centro di assistenza autorizzato.
29. Per staccare completamente il dispositivo dalla rete elettrica, rimuovere il cavo di rete o l‘adattatore di rete dalla presa.
30. Per staccare un dispositivo provvisto di presa Volex, è prima necessario sbloccare la relativa spina Volex del
dispositivo stesso. Tirando il cavo di rete, però, il dispositivo potrebbe spostarsi e cadere, provocando danni alle
persone o di altro genere. Prestare quindi la più scrupolosa attenzione durante la posa dei cavi.
31. In caso di pericolo di caduta di fulmine, o se il dispositivo rimane inutilizzato a lungo, staccare sempre il cavo
di rete e l‘adattatore di rete dalla presa.
Il triangolo isoscele con punto esclamativo avverte di importanti
segnalazioni relative all’uso e alla manutenzione.
ESPAÑOL
POLSKI
ATTENZIONE: ELEVATI LIVELLI SONORI NEI PRODOTTI AUDIO!
Questo dispositivo è destinato a uso professionale. Di conseguenza, se viene destinato ad un uso commerciale,
sarà soggetto alle norme e ai regolamenti dell’Associazione per la prevenzione di infortuni del rispettivo settore
professionale. In qualità di produttore, Adam Hall è tenuto per legge a informare espressamente gli utenti degli
eventuali rischi per la salute.
Danni all’udito provocati da un’esposizione prolungata a un livello SPL elevato: dall’utilizzo di questo prodotto si
possono generare elevati livelli di pressione sonora (SPL) che possono provocare danni irreparabili all’udito di
artisti, collaboratori e spettatori. Evitare l’esposizione prolungata a livelli sonori elevati, superiori a 90 dB.
Per evitare possibili danni all'udito, evitare l'ascolto ad un volume elevato per periodi prolungati.
L'esposizione al volume elevato può causare danni all'udito anche se è di breve durata. Mantenere
sempre il volume ad un livello gradevole.
ITALIANO
135
ENGLISH
CONNESSIONI, COMANDO E VISUALIZZAZIONE:
5
1
3
6
FRANCAIS
DEUTSCH
5
8
2
4
7
-6
+6
ESPAÑOL
1 CH 1 (INPUT)
Ingresso microfono bilanciato (combo XLR/jack da 6,3 mm). È anche possibile utilizzare un cavo microfono
non bilanciato (jack mono).
2 CH 1 (LEVEL)
Regolatore di volume del canale 1 (CH 1). Ruotando il pomolo verso sinistra si abbassa il volume, verso
destra si alza.
FRANCAIS
POLSKI
3 CH 2 (INPUT)
Ingresso strumenti/microfono non bilanciato con presa jack da 6,3 mm.
4 CH 2 (LEVEL)
Regolatore di volume del canale 2 (CH 2). Ruotando il pomolo verso sinistra si abbassa il volume, verso
destra si alza.
FRANCAIS
ITALIANO
5 CH 3 (PRESA RCA)
Ingresso di linea non bilanciato con prese RCA per il collegamento di un dispositivo di riproduzione (come lettori
CD, lettori MPR). Internamente, un segnale stereo presente passa a mono. Per attivare l'ingresso della presa
RCA, è necessario che l'interruttore 8 (MP3/AUX) sul pannello di comando sia premuto; il segnale ausiliare
così ora è disponibile sul canale 3 (CH 3). Se la presa dell'ingresso del mini jack è occupata, le prese RCA del
canale 3 (CH 3) sono silenziate.
LOW
136
1
2
3
-6
CONNESSIONI, COMANDO E VISUALIZZAZIONE:
Ingresso di linea non bilanciato con prese jack da 3,5 mm per il collegamento di un dispositivo di riproduzione (come
laptop, lettore MP3). Internamente, un segnale stereo presente passa a mono. Per attivare l'ingresso del mini jack, è
necessario che l'interruttore 8 (MP3/AUX) sul pannello di comando sia premuto, il segnale ora si trova sul canale 3
(CH 3). Se la presa dell'ingresso del mini jack è occupata, le prese RCA del canale 3 (CH 3) sono silenziate.
Regolatore di volume del canale 3 (CH 3). Ruotando il pomolo verso sinistra si abbassa il volume, verso
destra si alza.
8 MP3/AUX
Selezione della sorgente del segnale per il canale 3 (CH 3). Se l'interruttore non è premuto, come sorgente di
segnale viene selezionato il lettore MP3, mentre se l'interruttore è premuto, vengono selezionati la presa RCA
o l'ingresso mini jack.
Equalizzatore bassi per canale di missaggio (master). Ruotare a sinistra per abbassare i bassi e a destra per
alzarli. In posizione intermedia (si sente un clic), l'equalizzatore è disattivato.
10 HIGH
FRANCAIS
9 LOW
DEUTSCH
FRANCAIS
7 CH 3 (LEVEL)
FRANCAIS
ENGLISH
6 CH 3 (INPUT, MINI JACK)
Equalizzatore acuti per canale di missaggio. Ruotare a sinistra per abbassare gli alti e a destra per alzarli. In
posizione intermedia (si sente un clic), l'equalizzatore è disattivato.
Effetto Echo per il canale microfono 1 (CH 1). Girare il regolatore tutto a sinistra, per disattivare l'effetto Echo,
a destra per aumentarlo.
ESPAÑOL
11 ECHO
12 MASTER VOL
Regolatore di volume del canale di missaggio. Ruotare a sinistra per abbassare il volume, a destra per
alzarlo.
POLSKI
13 LED POWER
Si accende quando il dispositivo è correttamente collegato alla rete elettrica o alimentato dalla batteria
integrata.
-6
10
+6
-6
11
+6
12
ITALIANO
13
9
137
-6
+6
LOW
1 18 2
3
ESPAÑOL
FRANCAIS
DEUTSCH
ENGLISH
CONNESSIONI, COMANDO E VISUALIZZAZIONE:
17
FRANCAIS
ITALIANO
FRANCAIS
POLSKI
16
138
15
14
-6
+6
CONNESSIONI, COMANDO E VISUALIZZAZIONE:
Interruttore per l'impostazione della tensione di esercizio. La tensione di rete dell'erogatore di corrente e
dell'apparecchio devono corrispondere.
15 PRESA DI RETE IEC CON PORTAFUSIBILE INTEGRATO
16 POWER ON/OFF
Interruttore di accensione/spegnimento per l'alimentazione di corrente dell'apparecchio.
DEUTSCH
FRANCAIS
Serve per l'alimentazione di tensione del dispositivo. In dotazione viene fornito un cavo di rete idoneo.
NOTE IMPORTANTI: PRIMA della messa in funzione assicurarsi che la tensione di rete dell'alimentatore
elettrico e la tensione di esercizio del dispositivo coincidano! Sostituire il fusibile unicamente con un fusibile
dello stesso tipo e con gli stessi valori secondo la tensione di alimentazione (v. stampigliatura).
Se il fusibile continua a saltare, rivolgersi a un centro di assistenza autorizzato.
FRANCAIS
ENGLISH
14 115V/230V
17 LED CHARGE
18 LED BATTERY LEVEL
FRANCAIS
Si accende durante la procedura di ricarica della batteria interna. Se la batteria è completamente carica, il
LED CHARGE si spegne. Per poter caricare la batteria, è necessario che un cavo di rete adatto sia collegato
alla presa di rete (n. 14) del dispositivo.
La colonna di 4 segmenti LED indica lo stato di ricarica della batteria integrata. Se sono accesi tutti e 3 i LED
verdi, la batteria è completamente carica, mentre a batteria scarica si accende il LED rosso.
ESPAÑOL
NOTA PER LA CURA DELLA BATTERIA (AL PIOMBO)
Appena possibile, caricare sempre completamente la batteria. Non immagazzinare mai una batteria al piombo
completamente scarica, vuota o semiscarica. Se la batteria non viene utilizzata o viene stoccata per un periodo
prolungato, è necessario ricaricarla a intervalli regolari.
POLSKI
ITALIANO
139
ENGLISH
CONNESSIONI, COMANDO E VISUALIZZAZIONE:
26
DEUTSCH
27
25
19
FRANCAIS
20
21
22
23
24
24
ESPAÑOL
19 SD
-6
Slot per la scheda SD con capacità fino a 32 GB. Quando si inserisce la scheda, prestare attenzione al senso
di inserimento: Serie di contatto della scheda di memoria SD a destra. Per selezionare la sorgente segnale
del lettore MP3 si utilizza il tasto MODE.
20 MODE
+6della sorgente di segnale del lettore MP3 (scheda SD/memory stick USB/Bluetooth) e altre impostazioni
Selezione
di sistema.
FRANCAIS
POLSKI
21
Premere il tasto PLAY/PAUSE per avviare la riproduzione di un titolo. Se si preme di nuovo, il lettore MP3
passa in modalità Pause e la riproduzione si sospende .
22
Premendo il tasto STOP, la riproduzione del titolo in esecuzione si arresta.
FRANCAIS
ITALIANO
23
140
Sono disponibili per la selezione sei diverse modalità di riproduzione: Normal/Random/Browse/All/Repeat
One/Repeat Folder (Normale/Casuale/Scorri/Tutti/Ripeti uno/Ripeti cartella).
24
Premendo brevemente si sceglie il titolo precedente o successivo. Premendo più a lungo (> 1 sec.) è possibile
variare il volume del lettore MP3 (
= più basso,
= più alto).
CONNESSIONI, COMANDO E VISUALIZZAZIONE:
Slot per il memory stick USB con capacità fino a 32 GB. Per selezionare la sorgente segnale del lettore MP3
si utilizza il tasto MODE.
FRANCAIS
ENGLISH
25 USB IN
26 IR
27 DISPLAY
Display LCD multifunzione con illuminazione.
DEUTSCH
FRANCAIS
Interfaccia a infrarossi. Per comandare il lettore MP3 tramite il telecomando in dotazione, ricordare che
l'interfaccia a infrarossi del telecomando deve essere orientata direttamente verso l'interfaccia a infrarossi
dell'altoparlante Road Jack.
FRANCAIS
ESPAÑOL
POLSKI
ITALIANO
141
ENGLISH
VISUALIZZAZIONE PRINCIPALE DEL DISPLAY:
2
1
0003
0006
3
4
DEUTSCH
8
B A S5 2 6 5 6
MP3
7
00 : 33 / 03 : 29
10
9
Hey Joe. mp3
FRANCAIS
11
1 STATO DI RIPRODUZIONE
ESPAÑOL
Play = , Stop = , Pause =
2
MODALITÁ DI RIPRODUZIONE
N = Normale. Tutti i titoli presenti sul supporto di memoria vengono riprodotti uno dopo l'altro. Quando
termina l'esecuzione dell'ultimo titolo, la riproduzione si arresta.
FRANCAIS
POLSKI
R = Random (casuale). Tutti i titoli presenti sul supporto di memoria vengono riprodotti in successione
casuale.
I = Scorri. Vengono eseguiti uno dopo l'altro i primi 10 secondi di ogni titolo presente sul supporto di
memoria.
A = All (tutti). Tutti i titoli presenti sul supporto di memoria vengono ripetuti. Se nei relativi slot sono inseriti
una scheda di memoria SD e un memory stick USB, dopo l'esecuzione di tutti i titoli di un supporto di memoria
si accede automaticamente all'altro supporto.
1 = Repeat One. Il titolo selezionato viene ripetuto continuamente.
FRANCAIS
ITALIANO
F = Repeat Folder. Tutti i titoli di una cartella del supporto di memoria vengono ripetuti.
3 NUMERO TITOLO
Numero del titolo in riproduzione.
4 QUANTITÀ TITOLI
Numero di titoli presenti sul supporto di memoria selezionato.
142
VISUALIZZAZIONE PRINCIPALE DEL DISPLAY:
Visualizzazione del preset dell'equalizzatore selezionato.
6 FORMATO FILE
Indica il formato file del titolo in riproduzione.
FRANCAIS
ENGLISH
5 EQUALIZZATORE
7 SUPPORTO DI MEMORIA
8
TEMPO DI ESECUZIONE
Indica in minuti e in secondi il tempo effettivamente trascorso per l'esecuzione del titolo riprodotto.
9 LUNGHEZZA TITOLO
DEUTSCH
FRANCAIS
Visualizza il supporto di memoria attualmente selezionato (scheda di memoria SD o memory stick USB).
Indica la lunghezza in minuti e in secondi del titolo in riproduzione.
Indica il nome del titolo (se esiste) e il formato file del titolo in riproduzione.
11 ANALIZZATORE AUDIO
FRANCAIS
10 NOME TITOLO
ESPAÑOL
POLSKI
ITALIANO
143
FRANCAIS
ITALIANO
FRANCAIS
POLSKI
ESPAÑOL
FRANCAIS
DEUTSCH
ENGLISH
UTILIZZO:
144
EQUALIZZATORE (Eq)
Per selezionare uno dei sette preset dell'equalizzatore,
tenere premuto il tasto MODE per circa 1 secondo.
Con i tasti
e
selezionare quindi la voce di
menu "Eq" (in chiaro) e confermare con il tasto PLAY/
PAUSE
. Ora è possibile attivare uno dei sette preset
dell'equalizzatore premendo i tasti
e
e confermare la selezione con il tasto PLAY/PAUSE
.
MODALITÀ DI RIPRODUZIONE (Play Mode)
Sono disponibili per la selezione sei diverse modalità
di riproduzione: Normal/Random/Browse/All/Repeat
One/Repeat Folder (Normale/Casuale/Scorri/Tutti/Ripeti uno/Ripeti cartella). Tenere premuto il tasto MODE
per circa 1 secondo. Con i tasti
e
selezionare quindi la voce di menu "Play Mode" (in chiaro)
e confermare con il tasto PLAY/PAUSE
. Ora è
possibile attivare una delle sei modalità di riproduzione
premendo i tasti
e
e confermare la selezione
con il tasto PLAY/ PAUSE
.
Music
Eq Music
EP ql a y M o d e
PC lhaayn gMeo dDee v i c e
Change Device
Music
Eq Music
EP ql a y M o d e
PC lhaayn gMeo dDee v i c e
Change Device
NOR
BT
BT
BT
BT
NOR
SELEZIONARE SORGENTE SEGNALE (Change
Device)
Selezione della sorgente di segnale del lettore MP3.
1. Tenere premuto il tasto MODE per circa 1 secondo.
Con i tasti
e
selezionare quindi la voce di
menu "Change Device" (in chiaro) e confermare con
il tasto PLAY/PAUSE
. Ora è possibile selezionare
"SD Card" per la scheda di memoria SD, o "UDISK"
per memory stick USB utilizzando i tasti
e
come fonte di segnale e confermare la selezione con il
tasto PLAY/PAUSE
.
2. Premendo brevemente il tasto MODE, il lettore MP3
cambia la fonte originale del segnale (slot scheda SD/
slot del memory stick USB/Bluetooth). La fonte del
segnale attivata viene visualizzata nel display.
00 : 00
: 00
NOT
LINK
00 : 00
: 00
NOT
LINK
NOT LINK
NOT LINK
Bluetooth
Bluetooth
Music
Music
Eq
Play Mode
Change Device
Eq
Play Mode
Change Device
Music
Music
Play Mode
Change Device
Exit
Eq
Play Mode
Change Device
Sm
Sm
Music
Eq
Play Mode
Change Device
Music
Music
Eq
Eq
Play Mode
PC lhaayn M
g eo dDeeUTILIZZO:
vice
Change Device
00 : 00 : 00
Smartphone
NOR
M
u :s00
i c : 00
00
BT NOT
LINK
P l aS ym aMr ot pd he o n e
BT NOT LINK
Change Device
Exit
00 : 00
: 00
BT NOT
LINK
00 : 00 : 00
Smartphone
Bluetooth
Bluetooth
Bluetooth
Bluetooth
Sm
NOR
Smartphone
Bluetooth
ESPAÑOL
BT NOT LINK
NOR
FRANCAIS
00 : 00
: 00
BT NOT
LINK
Music
E qB T N O T L I N K
Play Mode
Change Device
NOR
BLUETOOTH
Il lettore MP3 è provvisto di Bluetooth, il che significa
che è possibile riprodurre i file audio di un altro
dispositivo Bluetooth (ad esempio di uno Smartphone)
sull'altoparlante Road Jack (distanza massima tra i
due dispositivi circa 10 metri).
Per accoppiare e collegare il lettore MP3 con un dispositivo
Bluetooth, premere brevemente il tasto MODE fino a
quando sul display appare "Bluetooth" e "BT NOT LINK".
Attivare il Bluetooth sul proprio dispositivo Bluetooth e
cercare sull'interfaccia utente i dispositivi disponibili.
NOR
Selezionare
l'inserimento "LD SYSTEMS" e utilizzarlo
per accoppiare il dispositivo Bluetooth con il lettore MP3.
Sul display del lettore MP3 appare "Connecting" e viene
quindi visualizzato il dispositivo Bluetooth (ad esempio
Smartphone), che sarà in tal modo accoppiato e collegato.
Ora è possibile avviare la riproduzione dei titoli.
DEUTSCH
FRANCAIS
Eq
Eq
Play Mode
PC lhaayn gMeo dDee v i c e
Change Device
Music
Music
Play Mode
Eq
Change Device
PE lxai yt M o d e
C h a n g ee DD eevviiccee
FRANCAIS
ENGLISH
USCIRE DAL MENU (Exit)
1. Per uscire dal menu selezionare, con i tasti
e
, la voce di menu "Exit" e confermare la procedura
con il tasto PLAY/PAUSE
.
2. Dopo 8 secondi si esce automaticamente dal menu
e sul display appare la visualizzazione principale.
.
Music
Music
POLSKI
ITALIANO
145
FRANCAIS
ITALIANO
FRANCAIS
POLSKI
ESPAÑOL
FRANCAIS
DEUTSCH
ENGLISH
FUNZIONAMENTO IN MODALITA' BLUETOOTH:
146
BT DISCONNECT
Per chiudere il collegamento con un dispositivo
Bluetooth, ad esempio per collegare al lettore MP3 un
altro dispositivo Bluetooth, premere il tasto MODE per
ca. 1 secondo con lettore MP3 in modalità Bluetooth
e avvalendosi dei tasti
e
selezionare la
voce di menu "BT Disconnect" (evidenziata in chiaro)
e confermare con il tasto PLAY/PAUSA. Sul display
appare "BT NOT LINK" ed è ora possibile collegare un
altro dispositivo Bluetooth al lettore MP3.
RECENTLY RECONNECTION
Per ricollegare l'ultimo dispositivo Bluetooth collegato al
lettore MP3, premere il tasto MODE per ca. 1 secondo
con lettore MP3 in modalità Bluetooth e avvalendosi
dei tasti
e
selezionare la voce di menu
"Recently reconnection" (evidenziata in chiaro) e
confermare con il tasto PLAY/PAUSA.
Bluetooth
BT Disconnect
Eq
Delete paired in
Bluetooth
BT Disconnect
Eq
Delete paired in
EQUALIZZATORE (Eq)
Per selezionare uno dei sette preset dell'equalizzatore,
tenere premuto il tasto MODE per circa 1 secondo.
Con i tasti
e
selezionare quindi la voce di
menu "Eq" (evidenziata in chiaro) e confermare con
il tasto PLAY/PAUSA. Ora è possibile attivare uno dei
sette preset dell'equalizzatore premendo i tasti
e
e confermare la selezione con il tasto PLAY/
PAUSA.
Bluetooth
Eq
Delete paired in
Device Informat
Bluetooth
BT Disconnect
Eq
Delete paired in
Bluetooth
B T BDl ui sectoonont he c t
Bluetooth
ERqe c e n t l y r e c o n n e
BE Tq D i s c o n n e c t
Delete paired in
EDqe l e t e p a i r e d i n
Delete paired in
Bluetooth
Bluetooth
EqBluetooth
BT Disconnect
D Te l eD ti es cpoaninr ee dc t i n
B
DE qe v i c e I n f o r m a t
EDqe l e t e p a i r e d i n
Delete paired in
Bluetooth
Eq
Delete paired in
Device Informat
FRANCAIS
ENGLISH
DEUTSCH
FRANCAIS
FRANCAIS
Bluetooth
Bluetooth
BT Disconnect
Recently reconne
Bluetooth
Eq
E
q
FUNZIONAMENTO IN MODALITA'
B T D i s c oBLUETOOTH:
nnect
Delete paired in
Delete paired in
Eq
DELETE PAIRED INFO
Delete paired in
Un dispositivo Bluetooth accoppiato viene disaccoppiato
(eliminazione
B lpairing)
u e tpremendo
o o t hil tasto MODE per
Bluetooth
ca. 1 secondo con lettore MP3 in modalità Bluetooth,
B T Dconi si tasti
c o n ne e c lat voce di menu
BT Disconnect
selezionando
Bluetooth
"Delete paired info" e confermando la selezione
E q il tasto PLAY/PAUSA.
Eq
premendo
BT Disconnect
Nota: Fino a che il dispositivo risulta collegato con il
D
e
l
e
t
e
p
a
i
r
e
d
i
n
Delete paired in
lettore MP3, il dispositivo accoppiato non potrà essere
Eq
disaccoppiato.
Delete paired in
Bluetooth
DEVICE INFORMATION
q MP3 in modalità Bluetooth, premere
ConElettore
Bluetooth
il tasto MODE per ca. 1 secondo, poi con i tasti
Dee l eselezionare
t e p alaivoce
r edidmenui n"Device
Eq
Information" e confermare la selezione premendo il
D
e
v
i
c
e
I
n
f
o
r
m
a
t
tasto PLAY/PAUSA. Il display mostra ora "Name: LD
Delete paired in
SYSTEMS". Con questo nome appare il lettore MP3
dell'altoparlante Road Jack sul dispositivo Bluetooth
Device Informat
(Smartphone, Tablet).
ESPAÑOL
NOTA:
La riproduzione del dispositivo Bluetooth collegato
potrà essere interrotta e ripresa premendo il tasto
PLAY/PAUSA del lettore MP3.
POLSKI
ITALIANO
147
ENGLISH
TELECOMANDO A INFRAROSSI (USB, SCHEDA SD):
3
1
DEUTSCH
4
2
FRANCAIS
POLSKI
ESPAÑOL
FRANCAIS
5
7
6
Dirigere il telecomando a infrarossi direttamente sul sensore a infrarossi dello slot USB. Il raggio
d'azione è di circa 8 metri.
1 PLAY/PAUSE
Premere il tasto PLAY/PAUSE per avviare la riproduzione di un titolo. Se si preme di nuovo, il lettore MP3
passa in modalità Pause e la riproduzione si sospende.
2 EQ
Sono disponibili sette diverse impostazioni per l'equalizzatore e possono essere richiamate premendo
ripetutamente il tasto.
3 VOL-/VOL+
FRANCAIS
ITALIANO
Impostazioni del volume del lettore MP3 (da 0 a 15). Premendo su VOL- si abbassa il volume, premendo su
VOL+ si alza.
148
4 PREV/NEXT
Per selezionare il titolo precedente, premere brevemente il tasto PREV, per selezionare il tasto successivo premere
NEXT. Se si tiene il tasto premuto, si attivano le funzioni per andare avanti o tornare indietro rapidamente.
TELECOMANDO A INFRAROSSI (USB, SCHEDA SD):
Per poter selezionare un titolo direttamente, utilizzare i tasti numerici da 0 a 9.
Esempio: Se il titolo che si intende selezionare è, ad esempio, il 29 premere una volta brevemente il tasto 2 e
poi il tasto 9 (nel display appare brevemente "0029").
FRANCAIS
ENGLISH
5 SELEZIONE DIRETTA DEI TITOLI
6 ENTER
EQUALIZER (Eq)
Per selezionare uno dei sette preset dell'equalizzatore, premere il tasto ENTER e selezionare quindi la voce
di menu "Eq" (in chiaro) utilizzando i tasti PREV e NEXT e confermare quindi con il tasto PLAY/PAUSE. Ora
è possibile attivare uno dei sette preset dell'equalizzatore premendo i tasti PREV e NEXT e confermare la
selezione con il tasto PLAY/PAUSE.
7 MODE
NOTA: I tasti CHANNEL (CH-, CH+) e PICK SONG sono disabilitati.
ITALIANO
1. Premendo brevemente il tasto MODE, il lettore MP3 cambia la fonte originale del segnale (slot scheda SD/
slot del memory stick USB/Bluetooth). La fonte del segnale attivata viene visualizzata nel display.
2. Premendo questo tasto per circa 2 secondi si accende/spegne il lettore MP3.
Il lettore MP3 si può spegnere e accendere esclusivamente con il telecomando a infrarossi, non dal dispositivo stesso.
POLSKI
USCIRE DAL MENU (Exit)
1. Per uscire dal menu selezionare, con i tasti PREV e NEXT, la voce di menu "Exit" e confermare la procedura
con il tasto PLAY/PAUSE.
2. Dopo 8 secondi si esce automaticamente dal menu e sul display appare la visualizzazione principale.
ESPAÑOL
SELEZIONARE SORGENTE SEGNALE (Change Device)
Selezione della sorgente di segnale del lettore MP3.
1. Premere il tasto ENTER e con i tasti PREV e NEXT selezionare quindi la voce di menu "Change Device"
(in chiaro) e confermare la selezione con il tasto PLAY/PAUSE. Ora è possibile selezionare "SD Card" per
la scheda di memoria SD, o "UDISK" per memory stick USB utilizzando i tasti PREV e NEXT come fonte di
segnale e confermare la selezione con il tasto PLAY/PAUSE.
2. Premendo brevemente il tasto MODE, il lettore MP3 cambia la fonte originale del segnale (slot scheda SD/
slot del memory stick USB/Bluetooth). La fonte del segnale attivata viene visualizzata nel display.
FRANCAIS
MODALITÀ DI RIPRODUZIONE (Play Mode)
Sono disponibili per la selezione sei diverse modalità di riproduzione: Normal/Random/Browse/All/Repeat
One/Repeat Folder (Normale/Casuale/Scorri/Tutti/Ripeti uno/Ripeti cartella). Premere il tasto ENTER e con i
tasti PREV e NEXT selezionare quindi la voce di menu "Play Mode" (in chiaro) e confermare la selezione con
il tasto PLAY/PAUSE. Ora è possibile attivare una delle sei modalità di riproduzione premendo i tasti PREV e
NEXT e confermare la selezione con il tasto PLAY/PAUSE.
DEUTSCH
FRANCAIS
Premendo il tasto ENTER si accede al menu per la selezione dell'equalizzatore, della modalità di riproduzione
e della sorgente del segnale.
149
ENGLISH
TELECOMANDO A INFRAROSSI (BLUETOOTH):
2
1
ESPAÑOL
FRANCAIS
DEUTSCH
3
5
4
1 PLAY/PAUSE
Premere il tasto PLAY/PAUSE per avviare la riproduzione di un titolo. Se si preme di nuovo, il lettore MP3
passa in modalità Pause e la riproduzione si sospende.
FRANCAIS
POLSKI
2 VOL-/VOL+
Impostazioni del volume del lettore MP3 (da 0 a 15). Premendo su VOL- si abbassa il volume, premendo su
VOL+ si alza.
3 PREV/NEXT
Per selezionare il titolo precedente di un album, premere brevemente il tasto PREV, per selezionare il titolo
successivo premere NEXT.
FRANCAIS
ITALIANO
4 ENTER
150
Premere il tasto ENTER entrate nel menu Bluetooth. Funzionamento e regolazioni come dettagliatamente
descritto nel capitolo "FUNZIONAMENTO IN MODALITA' BLUETOOTH".
TELECOMANDO A INFRAROSSI (BLUETOOTH):
1. Premendo brevemente il tasto MODE, il lettore MP3 cambia la fonte del segnale (slot scheda SD, slot della
chiavetta USB, Bluetooth). La fonte del segnale attivata viene visualizzata nel display.
2. Premendo questo tasto per ca. 2 secondi il lettore MP3 viene spento o acceso.
Il lettore MP3 può essere acceso e spento esclusivamente avvalendosi del telecomando a infrarossi, ma si
accende automaticamente accendendo l'altoparlante Road Jack.
DEUTSCH
FRANCAIS
NOTA: I tasti CHANNEL (CH-, CH+), EQ, PICK SONG ed i tasti numerici 0 - 9 non hanno alcuna funzione in modalità
Bluetooth.
FRANCAIS
ENGLISH
5 MODE
FRANCAIS
ESPAÑOL
POLSKI
ITALIANO
151
FRANCAIS
ITALIANO
FRANCAIS
POLSKI
ESPAÑOL
FRANCAIS
DEUTSCH
ENGLISH
SPECIFICHE:
152
Nome del modello
Tipo di prodotto:
Tipo:
Dimensioni woofer:
Dimensioni woofer:
Magnete woofer:
Marca woofer:
Dimensioni driver HF:
Dimensioni driver HF:
Magnete driver HF:
Marca driver HF:
Amplificatore:
Potenza (RMS):
Potenza (picco):
Risposta in frequenza:
SPL (1 W/1 m):
SPL massimo:
Protezioni:
Dispositivi di comando:
Indicatori:
Entrate di linea:
Connessioni di ingresso di linea:
Ingressi Mic:
Connessioni ingressi Mic:
Ingressi strumenti:
Connessioni ingressi strumenti:
Collegamento alla rete:
Alimentazione:
Tensione di esercizio:
Assorbimento di potenza (max):
Batterie ricaricabili:
Materiale cassa:
Design cassa:
Larghezza:
Altezza:
Profondità:
Peso:
Altre caratteristiche:
LDRJ8
Altoparlante PA portatile
Attivo
8"
203,2 mm
Ferrite
Custom Made
3" (banda larga)
76,2 mm
Ferrite
Custom Made
Classe D
25 W
100 W
90 - 18.000 Hz
94 dB
113 dB
Cortocircuito, sovratensione, protezione da sovraccarico
Mic 1 Level, Mic 2 Level, CD/Tape IN Level, Low, High, Echo,
Master Volume, pulsante AUX/MP3
Power, Stato carica/batteria
1
2 prese RCA, jack da 3,5 mm
2 (1 alternativo a ingresso strumenti CH 2)
XLR, jack da 6,3 mm
1 (1 alternativo a ingresso microfono CH 2)
Jack da 6,3 mm
Presa IEC
Alimentatore switching
100 V AC - 120 V AC / 60 Hz, 220 V AC - 240 V AC / 50 Hz
50 W
12 V / 5 Ah
MDF 15 mm
Bass reflex
385 mm
450 mm
298 mm
13,8 kg
Flangia stativo 36 mm, rotelle, maniglia estraibile, maniglia,
telecomando IR per Media Player
SPECIFICHE:
ESPAÑOL
POLSKI
ITALIANO
415 mm
525 mm
328 mm
16,2 kg
Flangia stativo 36 mm, rotelle, maniglia estraibile, maniglia,
telecomando IR per Media Player
FRANCAIS
Larghezza:
Altezza:
Profondità:
Peso:
Altre caratteristiche:
DEUTSCH
FRANCAIS
Indicatori:
Entrate di linea:
Connessioni di ingresso di linea:
Ingressi Mic:
Connessioni ingressi Mic:
Ingressi strumenti:
Connessioni ingressi strumenti:
Collegamento alla rete:
Alimentazione:
Tensione di esercizio:
Assorbimento di potenza (max):
Batterie ricaricabili:
Materiale cassa:
Design cassa:
LDRJ10
Altoparlante PA portatile
Attivo
10"
254 mm
Ferrite
Custom Made
3" (banda larga)
76,2 mm
Ferrite
Custom Made
Classe D
25 W
100 W
65 - 18.000 Hz
96 dB
117 dB
Cortocircuito, sovratensione, protezione da sovraccarico
Mic 1 Level, Mic 2 Level, CD/Tape IN Level, Low, High, Echo,
Master Volume, pulsante AUX/MP3
Power, Stato carica/batteria
1
2 prese RCA, jack da 3,5 mm
2 (1 alternativo a ingresso strumenti CH 2)
XLR, jack da 6,3 mm
1 (1 alternativo a ingresso microfono CH 2)
Jack da 6,3 mm
Presa IEC
Alimentatore switching
100 V AC - 120 V AC / 60 Hz, 220 V AC - 240 V AC / 50 Hz
50 W
12 V / 5 Ah
MDF 15 mm
Bass reflex
FRANCAIS
ENGLISH
Nome del modello
Tipo di prodotto:
Tipo:
Dimensioni woofer:
Dimensioni woofer:
Magnete woofer:
Marca woofer:
Dimensioni driver HF:
Dimensioni driver HF:
Magnete driver HF:
Marca driver HF:
Amplificatore:
Potenza (RMS):
Potenza (picco):
Risposta in frequenza:
SPL (1 W/1 m):
SPL massimo:
Protezioni:
Dispositivi di comando:
153
FRANCAIS
ITALIANO
FRANCAIS
POLSKI
ESPAÑOL
FRANCAIS
DEUTSCH
ENGLISH
SPECIFICHE:
154
Media Player
Media Player
Dispositivi compatibili:
Formati compatibili:
Comandi Media Player:
Elementi di visualizzazione Media Player:
LDRJ8/LDRJ10
Bluetooth, memory stick USB, scheda SD
File MP3, WAV, WMA
Mode (Menu/Bluetooth/SD/USB), Play/Pause, Stop, Repeat, Titolo
precedente, Titolo successivo)
Display LCD multifunzione illuminato
DICHIARAZIONI DEL PRODUTTORE:
Questa garanzia copre il prodotto Adam Hall della marca LDSYSTEMS da Lei acquistato. I diritti legali di garanzia
verso il venditore non sono oggetto della presente garanzia. Questa garanzia costituisce piuttosto la base di altri
diritti verso Adam Hall.
Nell‘improbabile caso in cui il prodotto Adam Hall acquistato presenti ripetutamente un difetto, Adam Hall può decidere,
a propria discrezione, di sostituire il suddetto prodotto con un prodotto simile che offra almeno le stesse prestazioni.
ITALIANO
Questa garanza è valida solo all‘interno del territorio europeo. Fuori dall‘Europa, si prega di rivolgersi ai nostri
partner rivenditori ufficiali.
POLSKI
Questa garanzia non è estesa a quanto segue:
- Parti soggette ad usura (ad es. batteria, tubi)
- Apparecchi di cui sia stato rimosso o danneggiato il numero di serie o sui quali siano insorti difetti in conseguenza
di un incidente
- Utilizzo non conforme o errato o altre cause esterne
- Apparecchi che non siano stati utilizzati conformemente ai parametri di esercizio, stabiliti nei documenti per
l‘utente inclusi nella dotazione del prodotto
- Apparecchi che siano stati riparati a causa dell‘impiego di parti non prodotto
- Apparecchi che siano stati sottoposti a interventi di manutenzione, modifica o riparazione da terzi che non siano
Adam Hall o un partner di assistenza autorizzato
Le presenti disposizioni e condizioni costituiscono l‘accordo di garanzia completo ed esclusivo tra l‘Acquirente e
Adam Hall per il prodotto Adam Hall acquistato.
ESPAÑOL
Adam Hall non garantisce il funzionamento privo di guasti o difetti del prodotto. Adam Hall esclude qualsiasi responsabilità
per danni attribuibili alla mancata osservanza delle istruzioni incluse nella dotazione.
FRANCAIS
Questa garanzia vale solo per l‘acquirente originale del prodotto distribuito da Adam Hall e non è trasferibile a terzi
cui sia stata trasferita la proprietà del prodotto Adam Hall da parte dell‘acquirente originale.
Durante il periodo di validità della garanzia, i componenti difettosi o il prodotto Adam Hall vengono riparati o
sostituiti. Tutti i componenti sostituiti e/o rimossi durante la presente garanzia diventano proprietà di Adam Hall.
DEUTSCH
FRANCAIS
Con la presente garanzia, Adam Hall assicura che il prodotto acquistato presso Adam Hall o un partner di Adam
Hall, in normali condizioni d‘uso resterà privo di difetti di materiale e di lavorazione per un periodo di 2 anni dalla
data di acquisto. Il periodo di garanzia inizia con la data dell‘acquisto. La certificazione della data di acquisto,
necessaria a rendere valido il diritto ai servizi di garanzia, avviene attraverso lo scontrino oppure con la bolla di
spedizione riportanti la data di acquisto. L‘acquirente ha diritto al servizio di garanzia alle condizioni e secondo
le disposizioni riportate in questo documento, qualora sia necessaria una riparazione durante il periodo di durata
della garanzia.
FRANCAIS
ENGLISH
GARANZIA DEL PRODUTTORE
155
FRANCAIS
ITALIANO
FRANCAIS
POLSKI
ESPAÑOL
FRANCAIS
DEUTSCH
ENGLISH
DICHIARAZIONI DEL PRODUTTORE:
156
LIMITAZIONE DI RESPONSABILITÀ
Laddove nei prodotti hardware Adam Hall insorgessero difetti di materiale o di fabbricazione (in conformità con
la dichiarazione di garanzia di cui sopra) durante il periodo di garanzia, il Cliente usufruirebbe, come unico ed
esclusivo diritto previsto dalla presente garanzia, della riparazione o sostituzione dell‘apparecchio. La massima responsabilità di Adam Hall è limitata, come espressamente indicato nella presente garanzia, al prezzo
d‘acquisto o ai costi di riparazione o sostituzione (optando per l‘importo minore) dei componenti che risultano
difettosi nonostante siano stati correttamente utilizzati.
Adam Hall non è responsabile di alcun danno provocato dal prodotto o dal suo malfunzionamento, ivi compresi
mancati guadagni, perdite e danni speciali indiretti o conseguenti. Adam Hall inoltre non è responsabile verso
reclami presentati da terzi né verso richieste avanzate dal cliente a nome di terzi.
La presente limitazione di responsabilità vale indipendentemente dal fatto che i danni siano oggetto di procedimenti giudiziari o che le richieste di risarcimento danni siano presentate ai sensi della presente garanzia o per
atti illeciti (incluse negligenza e responsabilità oggettiva) o per pretese contrattuali o di altra natura, e non può
essere né annullata né modificata da nessuno. La presente limitazione di responsabilità è valida anche nel caso
in cui l‘utente abbia avvisato Adam Hall o un rappresentante autorizzato circa la possibilità di tali danni. Tale
limitazione non è però valevole in caso di richieste per risarcimento danni in relazione a danni a persone.
La garanzia del produttore accorda all‘Acquirente determinati diritti; possono tuttavia competere ulteriori diritti in
funzione della giurisdizione di pertinenza (stato o regione). Si consiglia quindi di consultare le leggi applicabili per
determinare in modo esaustivo i propri diritti.
RICORSO ALLA GARANZIA
Per usufruire della garanzia, rivolgersi direttamente ad Adam Hall o al rivenditore autorizzato Adam Hall, presso il
quale è stato acquistato il prodotto.
DICHIARAZIONE DI CONFORMITÀ CE
I dispositivi distribuiti da Adam Hall ottemperano (ove del caso) ai requisiti essenziali e ad altre specifiche rilevanti delle direttive 1999/5/CE (R&TTE - Apparecchiature radio e apparecchiature terminali di telecomunicazione),
2004/108/CE (EMC - Compatibilità elettromagnetica) e 2006/95/CE (LVD - Materiale elettrico a bassa tensione).
Per ulteriori informazioni, consultare il sito www.adamhall.com.
DICHIARAZIONI DEL PRODUTTORE:
(In vigore nell‘Unione Europea e in altri paesi europei in cui si attui la raccolta differenziata)
I clienti privati possono richiedere informazioni sulle possibilità di smaltimento ecosostenibile al rivenditore
presso il quale è stato acquistato il prodotto o presso le autorità regionali competenti.
I clienti aziendali devono invece contattare il proprio fornitore e controllare le eventuali condizioni contrattuali
inerenti allo smaltimento degli apparecchi. Questo prodotto non deve essere smaltito assieme ad altri rifiuti
industriali.
Il risparmio energetico contribuisce attivamente alla protezione ambientale. Spegnere tutti i dispositivi elettrici
non utilizzati. Staccare la spina dei dispositivi non utilizzati per evitare che consumino corrente in modalità
stand-by.
FRANCAIS
PROTEZIONE DELL'AMBIENTE E RISPARMIO ENERGETICO
DEUTSCH
FRANCAIS
Questo simbolo apposto sul prodotto o sui relativi documenti indica che, per evitare danni all‘ambiente e alle
persone causati da uno smaltimento incontrollato dei rifiuti, alla fine del suo ciclo di vita l‘apparecchio non deve
essere smaltito insieme ai normali rifiuti domestici. Il prodotto deve quindi essere smaltito separatamente da altri
rifiuti e riciclato nell‘ottica dell‘incentivazione di cicli economici sostenibili.
FRANCAIS
ENGLISH
CORRETTO SMALTIMENTO DEL PRODOTTO
ESPAÑOL
POLSKI
ITALIANO
Adam Hall GmbH, tutti i diritti riservati. I dati tecnici e le caratteristiche del prodotto possono essere soggetti a
modifiche. È vietata la copia, la traduzione e qualsiasi altra riproduzione delle presenti istruzioni d‘uso o di parte
di esse senza previa autorizzazione.
157
158
159
WWW.LD-SYSTEMS.COM
Adam Hall GmbH | Daimlerstrasse 9 | 61267 Neu-Anspach | Germany
Tel. +49(0)6081/9419-0 | Fax +49(0)6081/9419-1000
web : www.adamhall.com | e-mail : [email protected]

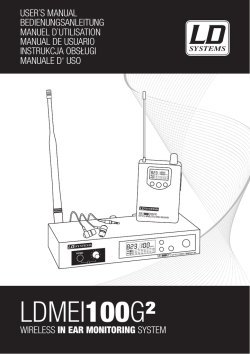


© Copyright 2026