
Advanced Prospect Management (7.97A)
30/01/2015 Advanced Prospect Management (7.97A) Click on the chapter titles below to view them: 1: About Advanced Prospect Management 2: Getting Started 3: Creating A New Prospect 4: Creating and Amending Prospect Details 5: Diary Processing 6: Renewals 7: Keywords 8: Management Statistics Report 9: Electronic Prospect Acquisition / Instream 10: EPALink 11: Instream Open GI 1: About Advanced Prospect Management 1: About Advanced Prospect Management If you have purchased the Regulation Module software then read the Regulation Module User Guide in conjunction with this Advanced Prospect Management guide. The Advanced Prospect Management system allows authorised telesales staff to prepare, issue and record the details of prospective business. The system may store up to 999 prospects for each prospect reference. Each reference may store up to 35 quotations of the same policy type. Advanced Prospect Management is available in two editions: Standard edition and Professional edition. The Professional edition is available as an upgrade once the Standard edition is installed. The Professional edition supports the following additional functionality: Save Across Branches Advanced Prospect Frame Calculations Quoting For Cars Without An ABI Code Force Payment Processing Required The information which the system requests on the Prospect Details screen when generating or amending details of a prospect is determined by the Broker or by Open GI Limited. Advanced Prospect Management can record prospects for Motor, Truck, Home and Bike. For more information on customising the Prospect Details screen, please refer to the section entitled Configuring Advanced Prospect Management For Use. (Advanced Prospect Management Guide) Open GI Limited About This Guide This guide is designed to take you through the process of installing and configuring Advanced Prospect Management for use with the Open-i browser, and then to assist you to use the system as efficiently and easily as possible. Therefore, the manual is designed as a task-oriented document, with each chapter describing a procedure or set of procedures. These chapters are as follows: Getting Started Creating A New Prospect Creating Further Prospects And Amending Prospect Details Advanced Prospect Management Diary Processing Advanced Prospect Management Renewals Advanced Prospect Management Keywords Electronic Prospect Acquisition EPALink (Advanced Prospect Management Guide) Open GI Limited HotKeys There are a number of shortcuts that can be used in Advanced Prospect Management to access certain programs or functions. These are detailed in the following table: Key Combination Function button (F2) (F2) / (F10) Put the displayed screen into Update Mode. When prospect details are displayed on the Prospect Details screen, press (F2) to enter Update Mode and then (F10) to put the cursor into the policy details summary at the bottom of the screen. You can press (F10) from the prospect details screen to access the Diary when not in update mode. buttons (F5/F6) Contact Details When a prospect is displayed on the Prospect Details screen, you can page through the other prospects on the system with these keys. They can also be used to page through a prospects policies when the policy screen is displayed. When the Policy details of a prospect are displayed, button (F8) press details. F9 Press F9 to return to the policy screen from a risk details screen. F10 F11 ESC F1 (F8) to display the Risk Level From the Prospect Details screen, F10 will page backward through any Prospect frames, including any extension pages for prospects. From the Prospect Details screen, F11 will page forward through any client level frames, including any extension pages for prospects. Help menu button (ESC 1) button (ESC 3) Create a new prospect or client. Automatically activates Update Mode. Generates the prospect reference code. Call up the Modules menu. ESC 5 Call MotorForms or TruckWriter to create the necessary documentation and save to Core BackOffice. ESC C Call up the Credit Card Pre-Processing popup from a Policy screen. This option only functions if purchased separately and you are using the Professional edition of Advanced Prospect Management. APM button (ESC F) Load Advanced Prospect Management from within Core Back-Office only. ESC G Save prospect details from Advanced Prospect Management into Core Back-Office. ESC H Call HomeWriter. ESC J Jump to Diary. In Advanced Prospect Management this is used to enter the Policy Diary from the Quote Risk Details display and to enter the Prospect Diary from the Prospect Details or Profile display. Load button (ESC L) Load risk information from Core Back-Office into Advanced Prospect Management. If Open Trader is installed, it is now possible to load an Open Trader policy from Core Back-Office using ESC L. This is to facilitate the Open Trader Renewals processing. After the load, a prompt appears to allow the user to start Open Trader on the PC to finish the load processing. ESC M Call BikeWriter. ESC P Prospect Letter Print. This option allows you to select a letter that has already been created with Document Maintenance. ESC Q/ESC X When generating a prospect, this key combination calls the relevant quote product; eg if you are entering truck details, it calls TruckWriter. ESC R Transfer a selected policy to a new prospect reference. If used at policy level, transfer policy and risk details to a new policy. If Open Trader is installed, it is now possible to copy an Open Trader policy in Advanced Prospect Management using ESC R. This is to facilitate the Open Trader Renewals processing. After the copy, a prompt appears to allow the user to start Open Trader on the PC to finish the copy processing. ESC S Search both Core Back-Office and Advanced Prospect Management records for clients and prospects already created. ESC T Call TruckWriter. ESC Q/W From the diary screen to access the Diary functions OpenAttach button (ESC Y) Calls Open Attach ESC Z Call MotorWriter. ESC % Print Sales Documents (requires Regulation Module software to be installed). From the policy level (only), this allows Sales Documents to be printed, or issued if pre printed. ESC ESC Quit without saving, unless the forced save option in the APM Control menu is activated for new prospects. Optional Functionality Reference is made in this document to some additional modifications Open GI can add to your Advanced Prospect Management system. These allow you to do the following: Save across machines - this allows you to save prospect details to an alternative TRIPOS processor if more than one is available. Calculate commission in cashbook - this function links with Core Back-Office to allow commission to be calculated during Cashbook processing rather than being taken directly from the Commission field on the Transaction screen. Allocate policy numbers to a non-EDI prospect when saved to Core Back-Office. Save Process Control Frame – this function allows you to activate frame calculations during a save to Core Back-Office. For details of how to obtain this functionality, please contact your Open GI Account Manager. (Advanced Prospect Management Guide) Open GI Limited 2: Getting Started 2: Getting Started This chapter describes how to install and prepare the Advanced Prospect Management system for use on your TRIPOS processor. It is divided into the following sections: Configuring Advanced Prospect Management For Use Prospect Control Generate Documents and Letters On Request Creating Prospect Automatic Letters and Diary Entries Advanced Prospect Management Diary Action List and Memo Print The Prospect and Policy History Log Open-R Print Control Other Advanced Prospect Management Facilities Scheme Cross Referencing (Advanced Prospect Management Guide) Open GI Limited Configuring Advanced Prospect Management For Use When Advanced Prospect Management has been installed on your system, enter the menu system on the TRIPOS Processor and locate the Advanced Prospect Management menu. Advanced Prospect Management Main Menu Options on this menu are used to configure the Advanced Prospect Management system for use and allow you to do the following: Client Policy Details Prospect Records Prospect Control Prospect Automatic Letters Prospect Letter Print Database Enquiry Frame Calculations Record Purge Search Control Source Code Maintenance Statistics Report Diary Action List Memo Print Prospect/Policy Audits Open-R Print Control Prospect Master Maintenance The ‘Frame Calculations’ option is only available if you are using the Professional edition of Advanced Prospect Management. (Advanced Prospect Management Guide) Open GI Limited Prospect Control When you select this option, the first Advanced Prospect Control screen is displayed. You can move between the screens by pressing F10 and F11. Use the UP and DOWN ARROW keys to move the cursor through the fields. Prospect Control Screen 1 1. Prospect Details screen This field is used to select the Prospect Details format. If you use Commercial, you can enter DPRC to record Prospect Client details in a Commercial format. For personal enter DPRX. Open-i Format A default Open-i Prospect Master Format can be entered here for Open-i. 2. Policy Details screen This field is used to select the correct frame for the Policy Details screen. DPPX is the standard screen. 3. Transaction Details Screen When a prospect is saved to Core Back-Office, the transaction details for the new policy are taken from the frame specified in this field. NEGX is the standard screen. New screens (Pre / Post Quote) can be created by the user and calculations added with "Professional". 4. Name and Address text Format This field determines the formatting of the name and address of clients, and is especially important when the details are used to generate letters in Core Back-Office. You can select Lower, Upper, Mixed Case or Disabled. “Disabled” means that no text formatting is applied to the name and address fields and data will be left as it was entered. 5. Quote type based on Executive If this field is set to “Yes”, when you select the ‘Advanced Prospect Control’ option from the main menu you will be prompted to enter an executive code. Selecting “Yes” will also call up a pop up box, entitled Exec Code - Policy Link, which allows you to link executive codes to specific policy types. In the Policy Type field, enter the two letter policy code. Enter up to 4 characters in the Exec Code field. For further information on the effects of this field, refer to the section Starting The Prospect Process. 6. Quote type based on policy This is the alternative to the previous field. If this is set to “Yes”, then the system will not request an executive code when you select the ‘Advanced Prospect Control’ option from the main menu. If one of the previous two fields is set to “Yes”, then the other must be set to “No”. 7. Prospect Policy Check Screen If you select “Yes” for this option, a pop up box entitled Policy - Check Screen Link is displayed. In this box, you can enter a policy type code and the screen from the quote product to use when searching through policy details. For example, you can link MotorWriter policies (pc) to the Car Details frame (cf). 8. Prospect Search Criteria Use this field to select whether, when searching for a client’s prospect details, you want to search by name, by postcode, frame or All. If “All” is selected, then when users search the prospect records they will have the choice of searching by postcode, name or frame. 9. Authorisation for entry to Quote Product If you enter “Yes” in this field, then a pop-up box will be displayed. This box is used to specify a key letter for each Quote product. Before a user can access a Quote product, their password must be associated with the relevant key letter. Refer to the Maintaining Passwords section in the System Management Guide for further information. 10. Direct Access to Quote Product as set in BROOMS Policy Type Amendment On every Core Back-Office or Advanced Prospect Management screen where the quote products can be called, use the ESC X keystroke (currently used to call MOTOR) to call the quote product appropriate to the policy type (If there is no associated policy type because the display is at client level, you will be prompted to select the desired Quote Engine). The other quote keystrokes (ESC H etc.) will still work as at present. 11. Direct Access to Update Mode If this field is set to “Yes”, then when users view prospect details the system automatically enters Update mode. If “No”, then they must press F2 to enter Update mode. 12. Pre Quotation Screens If this field is set to “Yes”, then a pop up box of the same name will be displayed. You can assign one or more Pre Quotation screens to a policy type, for example an override screen (OVRD) with MotorWriter policies (PC). Press F2 to edit the list of screens associated with a policy type. Any screens that are specified here will appear after the Prospect Details screen has been completed, but before the Quote process begins. For default screens for policy types that do not have a specific entry in this control record, leave the policy type blank and list the required screens. See the Pre Quotation Screens section. Prospect Control Screen 2 13. Post Quotation Screens This option behaves in the same way as the Pre Quotation Option field, except that it is used to specify extra customised screens that are displayed after the Quote process is complete. For default screens for policy types that do not have a specific entry in this control record, leave the policy type blank and list the required screens. See the Post Quotation Screens section for further details. 14. Forced Save of Prospect Details If you enter “Yes” here, then all new prospect details will be saved, even if the user presses ESC ESC. However, modifications to prospect details can be saved or abandoned as normal. 15. Forced Save of Policy Details This field functions in exactly the same way as Forced Save of Prospect Details field, except that it applies to new policies. 16. Irish/Scottish Name Generation This field is used to determine how reference codes are generated for clients with Irish and Scottish surnames beginning with “Mc” or “Mac”, or “O”. ‘Drop Prefix’ removes these prefixes completely: “Macdonald” and “McDonald” would generate the reference code DOXX01. ‘Include Prefix’ will cause the system to retain the first letter of the prefix. Therefore “Macdonald” and “McDonald” would become MDXX01. ‘Unset’ uses the first two letters of the surname as normal. “Macdonald” and “McDonald” become MAXX01 and MCXX01 respectively. 17. Save to BROOMS Validation Screens This field behaves in much the same way as the ‘Pre’ and ‘Post Quotation Screens’ options. A pop up box is displayed, in which you can link policy types to particular screens. These screens are displayed immediately before prospect details are saved to Core Back-Office, and are used to check that the prospect details are all correct. Press ESC ESC to abandon processing. For default screens for policy types that do not have a specific entry in this control record, leave the policy type blank and list the required screens. The following field is only enabled if you are using the Professional edition of Advanced Prospect Management. 18. Save across Branches If the user enters “Yes”, then when saving details to Core Back-Office, the system will provide you with the option to save to another branch. This process only applies to prospects that are saved to Core Back-Office via the ESC G or ESC 5 hot key combination. The following two fields represent functionality only available if specifically purchased. See Optional APM Functionality for details. 19. Save across Machines If you enter “Yes”, then when saving details to Core BackOffice, the system will display an option to save to another TRIPOS Processor, if more than one is available. This process only applies to prospects that are saved to Core Back-Office via the ESC G hot key combination. 20. Calculate Commission in Cashbook Enter “Yes” if you want commission to be calculated during Cashbook processing in Core Back-Office, or “No” for commission to be taken directly from the Commission field on the Transaction screen. 21. Copy Workings to BROOMS If MotorForms is used to save the details of a MotorWriter prospect to Core Back-Office, then this field must be set to “Yes”. The functionality behind the following field is only available as part of a separately purchased module when you are using the Professional edition of Advanced Prospect Management. See Optional Advanced Prospect Management Functionality for details. 22. Allocate Policy number at Save Enter “Yes” if you want the system to allocate a policy number to a non-EDI prospect when it is saved to Core Back-Office using ESC 5 or ESC G. Please refer to the “Automatic Policy Numbers” and “Policy Numbers Allocation” sections in the Scheme Toolkit Guide for further details on policy numbers. 23. Online Help available via ESC F1 Whether you want the online help window to be displayed when ESC F1 is pressed. If you select “No” here, then a list of hot keys is displayed instead. The following field defaults to ‘Never’ and is only enabled if you are using the Professional edition of Advanced Prospect Management. 24. Force Payment Processing Required This field determines whether the Payment Details screen is displayed when prospect details are saved to Core Back-Office. The options are ‘Always’, ‘Credit Cards Only’, ‘Never’, ‘Optional’. Prospect Control Screen 3 25. Are You Sure? Check Required If this option is set to “Yes”, then after each screen on the system is completed, the system will display the message ‘Are you sure?’ when you press RETURN to move to the next screen. 26. Prevent copy via ESC-R This fields allows you to disable the ESC R copy function at certain points in the system. Press F1 for a list of options. 27. Branch access via APM Search Allows users to search in the current branch only, in the branch of their choice, or across all branches. 28. Claims warning for imported clients If this is set to “Yes” then when a Core Back-Office client is imported via ESC L or ESC S the system displays a warning if the client has made a claim within the last 12 months that has been recorded via ClaimsWriter. 29. Check policy accepted before Save If this is set to “Yes” then the system will not allow operators to save prospect details to Core Back-Office before they have been accepted. The functionality controlled by this is not normally available. The following three fields represent functionality only available if specifically purchased. See Optional Advanced Prospect Management Functionality for details. These fields should only be completed if option 19 on Screen 2, “Save across Machines” is set to “Yes”. See Prospect Control Screen 2 for details. 30. Save across Machines Remote Server Name This field should be set to a host name that exists in the file USER:Z.U.ETHOS. 31. Default Prospect Branch on Remote Server This field must be set to a branch on the remote TRIPOS machine that has Advanced Prospect Management installed. 32. Default BROOMS Branch on Remote Server This field must be set to a branch on the remote TRIPOS machine that has Core Back-Office installed. 33. Disable Prospect Details Save Confirm This field determines whether you will be prompted to save amended Risk Level Frames (if you have pressed F2 and made changes). If you enter “Yes” here, the system will save the changes anyway. If you want the confirmation popup to be displayed, enter “No” here. 34. Action on Requote/Detail Amendment When changes are made to risk level frames, either as a requote or amendment, this field allows you to determine where the changes are saved. You can select one of the following options: Same policy - automatically overwrite the existing policy with the new details. Prompt user - prompt the user to choose whether to overwrite the existing policy or create a new policy. New Policy - if this option is selected, the system will automatically save the details to a new policy. 35. Allow Prospect Transfer Across Branches This option allows you to transfer and save prospects to different branches on your system. Press ESC D from the Policy Details screen and you will be asked to input the destination Branch id (unless you have specified the default branch in the Default Prospect Transfer Branch field). 36. Default Prospect Transfer Branch Enter the default branch that all prospect are to be transferred to or leave blank to allow the user to input the appropriate branch. 37. Save to Existing Brooms Policy Setting this option to “Yes” allows you to save an Advanced Prospect Management quote back to an existing Core Back-Office policy. This is used for MTA and Renewal processing and only the risk level frames are updated. Those frames that will be overwritten on the Core Back-Office policy are converted to history frames first. Although this option appears on screen it can only be accessed if purchased. Prospect Control Screen 4 38. Company style key generation Select “Yes” if you want the system to take the first 4 letters of a company name. The system will determine whether the reference is a company reference. For example, under normal APM referencing Gareth Caffrey Insurance would have the reference CAGX. If you have the Company generation switch on this would become GARE. 39. Display only prospects On search facility Using this option you can include or exclude Core BackOffice entries from your results. 40. Automatic Letter Diary On save Core Back-Officediary entries can be created when the to BROOMS prospect is completed (saved to Core Back-Office) and a letter generated. 41. Reply due days for Auto Letter Diary Enter the number of days from 0 – 9999 to specify when a follow up letter is to be sent to a client. This option is linked to the ‘Automatic Letter Diary On save to BROOMS’ option described above. 42. Default immediate print documents Policy letter print can have default documents defined. Select “Yes” to this option and you can define the documents to be printed by pressing F1. 43. Exclude frames from BROOMS load Specified Core Back-Office Risk Level Frames can be excluded from the ESC L load into Advanced Prospect Management. Select “Yes” to this option and you can define the frames to exclude for each policy type by pressing F2 for a list. The Policy Type field can be left blank. Blank policy types will act as a default for any Policy Types that don’t have a specific entry. 44. Save to BROOMS with Different Policy Type Enter “Yes” or “No” to enable a user to be able to save back to Core Back-Office from Advanced Prospect Management with a different policy type using ESC G processing. 45. Default field entry for new motor quotes Enter “Yes” or “No” to display the Select A Default screen when starting a new car quote. This will only appear for new quotes. 46. Override created Prospect Reference Enter “Yes” or “No”. Enter “Yes” and you will be given the option to over type the automatically generated client reference. If you enter “No” or leave the option blank the client reference will be generated using the normal processing. 47. Save Process Control Frame The following field represents functionality only available if specifically purchased. See Optional Advanced Prospect Management Functionality for details. 48. Prospect – Mandatory Executive Code entry Enter “Yes” to make the Exec field a mandatory entry on the Prospect screen, otherwise enter “No”. 49. Policy - Mandatory Executive Code entry Enter “Yes” to make the Exec field a mandatory entry on the Policy Details screen 50. Diary - Mandatory Executive Enter “Yes” to make the Executive field a mandatory entry Code entry on the Diary screens, otherwise enter “No”. Prospect Control Screen 5 51. Do not set Reply Status to Not Required If Reply Due 0 Enter “Yes” to not set the Reply Status to “Not Required” if the reply due days is set to zero, otherwise enter “No”. 52. Memos to Default to Today's Date Enter “Yes” for memos to default to today’s date, otherwise enter “No”. 53. Effective Date Mandatory on Memos Enter “Yes” to make the effective date mandatory on memos. 54. Default to Make One Off Letters Permanent Enter “Yes” to make One Off Letters permanent by default, otherwise enter “No”. 55. Prospect Diary Authorisation Codes Enter “Yes” and the following window will be displayed for you to enter the required authorisation codes: Advanced Prospect Management diary processing will check at the relevant stages whether the operator has sufficient authority to proceed. If the operator does not have the required authorisation the following message is displayed: Access Denied 56. Diary – Enquire/ Amend Default Enter “Amend” to place the user in the amend mode on the diary screen as default. Enter “Enquire” to place users in the enquire mode as the default to view diary information. The user will still require the correct authorisation to amend the diary fields. 57. Chaser Sequences On Creating Letters and Memos Select from “Always use Defaults”, “Never Use Sequences” and “Prompt For Sequences” when creating letters. 58. Retain Letter/Memo Details on Confirmation Enter “Yes” to retain letters and memos on confirmation in the letters history file, otherwise enter “No”. 59. Exclude items with 0 reply due days from Diary Lists Enter “Yes or “No” to exclude outstanding diary records with 0 reply due days from the diary lists. If this field is left blank then the default “No” is assumed. 60. Save APM Prospect Diaries to BROOMS Client Enter “Yes” to save Advanced Prospect Management Prospect Diaries to a Core Back-Office client, otherwise enter “No”. 61. Save APM Policy Diaries to BROOMS Policy Enter “Yes” to save Advanced Prospect Management Policy Diaries to a Core Back-Office Policy, otherwise enter “No”. 62. Audit Trail of records viewed by operator Enter “Yes” and all access to Advanced Prospect Management Prospect/Policy records will be logged. Press CTRL Q at any of the following screen locations to display a list of current accesses to the current prospect or policy: Prospect Policy Risk level Frames (policy risk details) The Prospect/Policy History Log screen will then be displayed. Prospect Control Screen 6 63. KPI - Exclude quotes with source code 1 Press F1 and select from the list a source code whose related Advanced Prospect Management quote figures will be excluded from the Advanced Prospect Management statistics on the Key Performance Indicators. See the Key Performance Indicator section in the Core Back-Office guide (Part 2) for further information. 64. KPI - Exclude quotes with source code 2 Press F1 and select from the list a source code whose related Advanced Prospect Management quote figures will be excluded from the Advanced Prospect Management statistics on the Key Performance Indicator. 65. KPI - Exclude quotes with source code 3 Press F1 and select from the list a source code whose related Advanced Prospect Management quote figures will be excluded from the Advanced Prospect Management statistics on the Key Performance Indicator. 66. Level 3 Authorisation Enter "Yes” and the Level 3 Authorisation window is displayed. This shows all the available options on the Modules menu. Authorisation codes can be entered to restrict access to these options. 67. Level 3 Frame Browse Display Style Select from “Description & Key field”, “Key Field” or “Standard”. See the Module Menu Summary Key Field Display section. 68. Exclude Chased Letters/Memos from Online Diary Enter “Yes” to exclude automatically chased letters and memo from the Online Diary when viewed onscreen. 69. Display Transaction Screen First Enter “Yes” to display the Transaction screen (NEGX frame) first when viewing the Risk level frames. 70. Extended Policy Display Enter “Yes” and the Policy display will show less of the prospect details and more additional Policy details. See the section Completing The Prospect Process for further details. 71. Amend NEGX Risk Details Enter “Yes” to amend the Transaction screen NEGX details, otherwise enter “No”. See the following section for details on amending the premium via the NEGX frame. 72. Frame Calculations Select from ‘APM’ or ‘BROOMS’ to use for All Frames 73. Prompt to Convert Policies to Live Select from: Never – never display the Convert Policy to Live? prompt Normally Not – prompt will be displayed with the default set to “Neither” Usually Complete Policy - prompt will be displayed with the default set to “Complete Policy” Usually Transfer to BROOMS - prompt will be displayed with the default set to “Transfer to BROOMS” 74. Default Word Processor for One Off Letters Select from ‘APM’ or ‘OpenWord’. 75. Always use Default Word Processor Enter “Yes” to always use the default Word Processor defined in option 74, otherwise enter “No”. 76. Integrated Products – Convert Prospect doc/eml to live Use the option to specify whether integration product files should be converted (Open Print Manager and Open Document Centre) and moved (Open Attach) from the Advanced Prospect Management Prospect reference to the Core Back-Office Client reference when the policy becomes live (ESC 5 / ESC G processing). Press F1 and the following options are available: Always - Always convert integration product files. Never - Never convert integration product files. Normally Not – A prompt will be displayed with the default answer set to “No”. Usually Yes – A prompt will be displayed with the default answer set to “Yes”. On conversion from Prospect to Client, files in the Open Document Centre print queue Prospect directory will only be converted if Prospect directories in the Open Print Manager print queue are converted and this option is set to “Always” or “Usually Yes”. Prospect Control Screen 7 77. Check Insurer field is complete on NEGX frame Select from: Mandatory - the Insurer field must be completed before leaving the NEGX frame No Warning - works as per current processing Warning - the operator is merely prompted to complete the insurer field with the following message: The NEGX Insurer field is Blank; do you wish to complete this field? Yes/No However it can be left blank. For further information see the Advanced Prospect Management Renewals section. 78. Post quote-Validate only Level 1 and level 2 calcs This is a yes/no field with the following functionality: Selecting “Yes” will cause Prospect and Policy frames to be validated. Selecting “No” will result in frames for Prospect, Policy and Risk Level being validated. 79. Update Prospect Contacts Authorisation Enter up to 1 character. This determines the level of authorisation needed to update or create prospect contact information. 80. Prospect - Mandatory Source Code Enter "Yes" to make the Source Code entry mandatory when creating new prospects. 81. Prospect - Mandatory Agent Enter "Yes" to make the Agent Code entry mandatory when creating new prospects. 82. Prospect Profile (Level 1 Frames) Authorisations Enter "Yes" and the following are displayed: Add Module to End Delete Module Change Module Order Insert New Module Display Module Copy Module A security character will restrict entry to these options. 83. New Prospect Level 1 Press F1 for a list of frames. You can enter a maximum of 10 policy frames and these can be repeated entries. 84. Prospect Level 1 Frame Browse Display Style This is useful to aid the selection of the correct prospect details from the Modules menu on the Prospect screen. Press F1 and select from: 85. New Risk Level 3 Frame Pre-fill from Level 1 on create Standard The standard view just lists the modules, as shown in the Modules menu section. Summary Key Field This option will display the summary key field alongside the module name. Description & Key Field The summary key field and the frame description will be displayed alongside the module name. Allow brokers to use the available Fact Find Information as a source of Risk Information for a policy by optionally prefilling new risk level frames from the corresponding Prospect frame. Press F1 and select from: Always Never Normally Not Usually Yes Refer to the page Using Fact Find as Risk Information for a prospect policy for further details. 86. Replace Client Profile on copy to BROOMS This option determines whether to replace the Client Profile on copy to BROOMS using ESC G or ESC 5 processing. Press F1 and select from: 87. Replace Prospect Profile on load from BROOMS Always - Client Profiles will be replaced automatically Never - Client Profiles will not be replaced Normally Not - You will be prompted whether to replace Client Profiles details, with the default selection highlighted to "No" Usually Yes - You will be prompted whether to replace Client Profiles details, with the default selection highlighted to "Yes" This option determines whether to replace the Prospect Profile using ESC L load from Core Back-Office. Press F1 and select from: Always - Prospect Profiles will be replaced automatically Never - Prospect Profiles will not be replaced Normally Not - You will be prompted whether to replace Prospect Profiles details, with the default selection highlighted to "No" 88. Disable update warnings if frame exists in Profile and Risk Details Usually Yes - You will be prompted whether to replace Prospect Profiles details, with the default selection highlighted to "Yes" Enter "No" so that when updating a frame that is held as part of a prospect profile, if there is a frame of the same type held in any of the policy risk details for that prospect, a warning will be displayed informing you that policy risk details may need to be updated. See the Maintaining Fact Find Information for a Prospect page for further details. 89. Overwrite Client on save to BROOMS This option allows you to determine whether the Client is overwritten from the Prospect details when a policy is transferred using ESC 5 or ESC G. This field will have four options: No - Client Details will not be overwritten Yes - Client Details will be overwritten automatically Usually No - You will be prompted whether to overwrite details, with the default selection highlighted to "No" Usually Yes - You will be prompted whether to overwrite details, with the default selection highlighted to "Yes" If no option is entered and the field is blank, processing will not be altered. ESC 5 will continue to overwrite Client details from the Prospect record, whilst ESC G processing will not update the Client.. 90. Use BROOMS (Client) Executive on load to BROOMS When transferring from Advanced Prospect Management to Core Back-Office, this option allows you to select the source of the executive to be retained. Press F1 and select from: Always - Use the Core Back-Office Executive Never - Use the Advanced Prospect Management Executive Normally Not - prompts for confirmation – Default is No (Use Advanced Prospect Management) Usually Yes - prompts for confirmation – default is Yes (Use Core Back-Office) If ‘never’ is selected, but there is no Core Back-Office exec code on the target record, the default will be to use the Advanced Prospect Management exec code. Prospect Control Screen 8 91. Check mandatory fields on Load to BROOMS This option enables you to check that all mandatory fields are populated prior to saving to Core Back-Office (ESC G / ESC 5). Press F1 and select from: Never - Do not check for mandatory fields Always - Check for mandatory fields Normally Not - Prompt user to choose – default will be "No" Usually Yes - Prompt user to choose – default will be "Yes" If any mandatory field is not populated, an error message will be displayed and you will be returned to the originating Advanced Prospect Management Policy. 92. Immediate Print Default Setting for Diary Options Use the Immediate Print Default Setting for Diary Options to pre fill the Immediate Print field on the following screens: 93. Check Exec status active for new Diary request Request (or Enquire/Amend) a Letter, Event or OneOff Letter using Advanced Prospect Management Prospect Diary Menu Options (ESC Q from the Prospect Diary screen, which is accessed by ESC J or F10 from Prospect Master screen). Request (or Enquire/Amend) a Letter, Memo, Event or One-Off Letter using Advanced Prospect Management Policy Diary Menu Options (ESC Q from the Policy Diary screen, which is accessed by F10 from Prospect Policy screen). Advanced Prospect Management Linked Letter Create (ESC Q from Prospect Automatic Letters list for a specific transaction type and process, which is accessed from the APM menu) If the executive code associated with a policy has been marked as “suspended” it should not be used to populate the executive code on requesting a diary entry, letter, memo to all insurers, one-off letter or a new transaction. The system will check whether the Executive associated with the current Prospect/Policy is suspended when creating diary entries as part of a letter print (from Database Enquiry). If the Executive is suspended for the current Prospect/Policy the letter is being printed for, then the Exec field will be left blank. 94. Create Profile Where a set of profile frames is defined in Advanced Prospect Management Control, creating a profile for a new prospect is controlled by this option. Press F1 and select from: 95. Prospect Master - always use default (Open-i only) No - profile is not created for a new prospect Normally Not - you will be prompted whether to create a profile Usually Yes - you will be prompted whether to create a profile Yes - no change to system This option is used to define the behaviour when manually creating a prospect. Enter "Yes" to always use the default specified in Option 1 on the Prospect Control Page 1, otherwise enter "No". If you enter "No" or this field is blank, a New Prospect window will appear when a prospect is created: Leave blank and press the OK button (RETURN) to select the default or click on the button for you to select an existing prospect master format. When a case has been created and converted to live, creating a new client will cause the client to use the client format defined against the Prospect format, unless it's empty where it will use the BROOMS default. 96 - 102 Options 96 - 102 are used for Sanctions Checking. If you do not have this functionality, these fields are displayed but cannot be amended. Refer to the Sanctions Checking guide. 103. Level 3 deletion - confirm prompt required? An optional confirmation dialogue is now offered to users when deleting modules from risk level lists. This dialogue can be enabled or disabled using this option. The dialogue is disabled by default. 104. Sanctions Checking - Match Quality Threshold (%) If you do not have a licence for sanction checking, this field is displayed but cannot be updated. This field allows you to configure the tolerance threshold for a match. Please refer to the Sanctions Checking guide. Prospect Control Screen 9 105. Save across Branches - Use Transferring Operator Code On transfer of a Prospect Policy from one branch to another, the operator code for the originating operator can be copied into the Prospect Policy on the new branch. 106. Enable Batch Sanctions Checking for prospects Enter "Yes to enable batch sanctions checking for prospects, otherwise enter "No". 107. Disable Post Quotation Screen Navigation Enter "Yes" to disable Post Quote Navigation, otherwise enter "No" or leave blank to allow post quote screen navigation. If you enter "Yes", a user cannot navigate to the post quotation screens from the NEGX frame. The buttons (F10 /F11) shown below will be disabled when clicked: 108. Prospect Sticky Notes Authorisation Codes Enter "Yes" and you can enable sticky notes and configure the Authorisation Codes: The following options are available: 109. Check for duplicate Prospects Enable Sticky Notes - enter "Yes" or "No" Create - enter authorisation code required to create a sticky note Amend - enter authorisation code required to amend a sticky note Delete - enter authorisation code required to delete a sticky note When creating a new prospect, the prospect search functionality can now be controlled by this option. You can determine if the search is performed "Always", "Sometimes", or "Never". 110. Include branch in Consolidated On systems where staff members have a common Diary executive code on different branches, it is now possible to see all the items allocated to an executive (consolidated view of their Diary Action Lists for Core Back-Office and Advanced Prospect Management across branches). Branches must be configured to contribute to the Consolidated Executive Diary in Advanced Prospect Management Control and in Broker Amendment for Core Back-Office. 111. Start with Online Diary Enter "Yes" to configured the system to automatically show the Online Diary Initial screen on entering Prospect Details from the Advanced Prospect Management menu. Viewing Current Contact Details for Agents, Insurers, Executives and Prospects Current contact details can be displayed from the following levels by clicking the Contact Details button (ESC 8). The Prospect Details menu can be displayed by clicking on the Contact Details button (ESC 8). The Prospect Summary List can be displayed by selecting the 'Prospect' option from this ESC 8 menu or directly by pressing ESC F8. In this instance the Summary list shows all (active and suspended) contacts for the prospect The default action when a contact is selected is to Display/Amend the Contact Information. Prospect Level For Open-i users, a visual display on the Prospect level screen indicates if there are any contacts available to the Prospect, as highlighted below: At Prospect level, the following contact details can be viewed: Agent Executive Prospect At Prospect Policy level, the following contact details can be viewed: Agent Insurer Executive Prospect It is also available on the following screens: Memo screen – when the ‘Enquire/Amend’ option is selected. Claims Details screen Agent Contact Details The following contact details can be viewed: Agent Code Status SortCode Name & Address Tele No Title Text 1 Text 2 Text 3 Text 4 Postcode Due Days Fax Email Extended Name Contact Insurer Contact Details The following contact details can be viewed: Company Code Company Name Office Agency Address Telephone No Fax Postcode Email Contact Executive Contact Details The following contact details can be viewed: Executive Code Status Name Job Title Email Department Home Tel. No Work Tel. No Mobile Tel. No Notes (Advanced Prospect Management Guide) Open GI Limited Creating/Amending Prospect Contact Details Prospect Contact Details Any Prospect Contact Details are displayed on the Contact Details Summary List screen, as shown below: If there are no contact details to be displayed, the following message will be shown: If the user is authorised to update contact information the message will give the user the option to create a new contact. This is determined by the Advanced Prospect Control option 79. Access From A Letter Or One-Off Letter If you have accessed the Contact Details Summary List screen by pressing F1 in the Attention Of field whilst creating a letter or one-off letter from the diary, the list only shows the active contacts for the prospect. The default action when a contact is selected is to use that Contact Information for the letter. The list of contacts for the prospect, if available, will be shown ordered by surname (the last part of the contact name). The cursor will be positioned within the list of contacts on the contact currently ‘in use’ for this letter. If the Attention Of field was blank or not an exact match for a contact, the cursor will be on the first contact in the list. Move up and down the list to select the required contact. The default action on pressing RETURN is to use the selected contact for this letter. The Diary Letter Request screen will refresh and the selected contact name will appear in the Attention Of field. Access From Prospect / Policy Level If you have accessed the Contact Details Summary List screen by pressing the Contact Details button (ESC 8) or ESC F8 from the prospect, policy or the other applicable screens, the list shows all active and suspended contacts for the client. The default action when a contact is selected is to Display/Amend that Contact Information. The Contact Info Menu A Contact Info menu showing all available actions is available by right clicking the mouse on a selected contact from the Contact Details Summary List screen: The following options are available: Add new Copy to new Display/Amend Use - this option is only displayed when the Contact Details Summary List is accessed from a letter or one-off letter. Changes to client contact information made when selecting a contact for use in a letter permanently change that Contact Information record (there is no facility to make a temporary change to the contact information for a single letter). Users can always ‘Display' and 'Use' contact information. Authorisation may be required for creating or amending contacts, depending on the settings in the Advanced Prospect Control option 79. (Advanced Prospect Management Guide) Open GI Limited Locate Bookmark View/Create/Amend a New Contact You can view, create or amend prospect contacts from the Contact Details Summary List screen. The Prospect Contact Details screen is then displayed as detailed below. The Prospect Contact Details screen This screen allows you to create, view or amend prospect contact details. To amend existing details use F2 if authorised in the Advanced Prospect Control option 79. Use the TAB key to move the cursor through the fields. The Prospect Ref., Prospect Name and Last Amended information (date/time and operator) are display only fields shown when you try and amend/view existing contact information. There can be a maximum of one default contact per prospect. The default contact must be active. Operator Enter up to 2 characters. Status Press F1 and select from "Active" or "Suspended". Suspended Contacts do not appear in the Active Contacts Summary list. However, the contact information is not physically deleted until the client itself is deleted, because there could be diary entries associated with the contact. Default There can be a maximum of one default contact per prospect. The default contact must be active. Name Enter up to 30 characters. The contact Name must not be blank. Ext. Name Enter up to 50 characters. If the Extended Name is blank, the Name will be automatically copied into the Extended Name and stored so that you would not need to re-key these records if you moved these documents to using the extended field. Description Enter up to 40 characters. The contact description must not be blank. Title Enter up to 20 characters Forenames Enter up to 20 characters Tel. Enter up to 20 characters Tel2 Enter up to 20 characters Tel3 Enter up to 20 characters Tel4 Enter up to 20 characters Fax1 Enter up to 20 characters Fax2 Enter up to 20 characters Email Enter up to 50 characters The Contact Pref field is used to establish whether this contact can be sent Open Word email. If the Preference field below is set to "Email”, an email address must specified for this contact. Preference This is used to establish whether this contact can be sent Open Word email. If set to "Email", an email address must be specified for this contact in the Email field above. Address There are four lines. The first three lines are 30 characters, whilst the fourth line is 20 characters. Postcode Enter up to 10 characters Using the buttons (F5 and F6) displays other contacts in the list. The Exit button (RETURN) returns you to the Contacts Details Summary List screen. In amend mode, click the Cancel button (F3), followed by the Exit button (RETURN) to return you to the Contacts Details Summary List screen. Copy to new This option from the Contact Info menu pre-fills the new contact details with the contact information for the selected contact, which can save typing where the new contact details differ little from the original. (Advanced Prospect Management Guide) Open GI Limited Creating Prospect Automatic Letters/Diary Entries Creating Prospect Automatic Letters and Diary Entries This option is used to configure the generation of letters once certain operations are performed with prospect records, for example when a new prospect is generated or when a prospect is saved to Core Back-Office. Documents set up using the ‘Prospect Automatic Letters’ option will produce diary entries if any of the diary parameters have been entered, such as the Reply Status. When you select the ‘Prospect Automatic Letters’ option, the Prospect Automatic Letters screen is displayed. To view the different automatic letters on the system, press F5 and F6, or F10 and F11, to page through them. The first two boxes on this screen contain fields that define the conditions under which a letter or letters are generated. The larger box contains the name of the letter or letters to be printed when these conditions arise. (Advanced Prospect Management Guide) Open GI Limited Configuring Automatic Letter Generation To create the conditions for a new letter, press ESC 1 from the Prospect Automatic Letters screen. The Letter Header Creation pop up box will be displayed. Complete these fields as follows: Process Enter the process that invokes the generation of this letter. Press F1 for a complete list of options. Note that only the options ‘Create Proposal’, ‘New Quotation’ or those options that begin with ‘Pros’. or ‘Prospect’ apply to the Advanced Prospect Management process. Policy Code Enter the policy code to which the letter will apply. Insurer If this letter is only to be generated for a particular insurer then enter the relevant code here. Transaction This is not relevant to Advanced Prospect Management and should be left blank. The specification of the policy code and insurer are only relevant for Advanced Prospect Management processes at the policy level, i.e. all processes except ‘Prospect Create’ and ‘Prospect Update’. Press RETURN when you have completed this screen to complete the first part of the process. The system will redisplay the main screen. Press ESC Q to define which letter or letters will be printed. The system will display a short menu containing the options ‘Create’, ‘Amend’, or ‘Delete’. Select ‘Create’ to display the Linked Letter Create window. Complete these fields as follows: Letter Select the letter to be printed. Press F1 for a list of options. These letters are created and maintained within Core Back-Office. For details on how to create and maintain these letters, please refer to the Word Processing And Document Maintenance chapter in the Core Back-Office User Guide. Reply Due, Reply Stat, Chaser Seq, Save Ltr Ptr These fields are not used by Advanced Prospect Management, and therefore we recommend that they are left blank at this stage. Immediate Print Enter whether or not you want the system to automatically print this letter when the conditions of the Letter Header Creation pop up are fulfilled. Operator Override Set this field to “Yes” if you want to prompt the operator to choose whether a letter will be produced. If you select “No” here, a letter is automatically produced. If you set the ‘Immediate Print’ option to "No”, then you must use the ‘Client Letter Print’ option on the APM Main menu to print the automatically generated letter. For information on how to use the ‘Client Letter Print’ option, please refer to the Client Letter Print section in the Core Back-Office User Guide. Press RETURN once you have completed these screens to redisplay the short menu. Select ‘Create’ again to add another letter to the list, or press ESC ESC to quit this procedure. Each letter is assigned a line number. You may attach as many letters as you require. Amending Automatic Letter Details To amend the details of the letters to be printed, follow these steps: 1. Press ESC Q when the relevant record is displayed. The system will display the ESC Q option box. 2. Select the ‘Amend’ option. If there is more than one letter, the system will display the following message: Select line number to be amended 3. Enter the line number of the letter to be amended, and press RETURN. 4. The system will display the details of the selected letter in the Linked Letter Create pop up. 5. Alter the details as required and press RETURN to save. The system will redisplay the ESC Q option box. 6. Either select ‘Amend’ to make further amendments, or press ESC ESC to return to the main screen (Advanced Prospect Management Guide) Open GI Limited Deleting Automatic Letter Details To stop a letter being printed, display the relevant record and follow this procedure: 1. Press ESC Q when the relevant record is displayed. The system will display the ESC Q option box. 2. Select the ‘Delete’ option. The system will prompt you for the line number of the letter to delete. 3. Enter the line number and press RETURN. The system will display the Linked Letter Delete pop up containing the details of the letter for your information. 4. Press RETURN to display the following message: Confirm deletion ? YES NO 5. Use the cursor keys to select “Yes” or “No” and press RETURN. Whichever option you choose, the system will redisplay the ESC Q options box. 6. Select ‘Delete’ to delete another letter or press ESC ESC to return to the Prospect Automatic Letters screen. Generate Documents and Letters on Request Documents previously generated from the Document Maintenance menu can now be printed from within Advanced Prospect Management for a specific prospect/policy using the following procedure: A diary entry will also be produced. 1. Select the 'Prospect Records' option from the Advanced Prospect Management menu. 2. Enter the Prospect/Policy reference in the Prospect Ref. field and press RETURN. 3. Press ESC P to display the Prospect/Policy Letter Print dialog. 4. Complete the fields as required and press RETURN. If you do not wish to print a letter at this stage, enter "No" in the Immediate Print field. You can print letters at a later date using the Prospect Letter Print menu and selecting 'Print all unprinted letters.' (Advanced Prospect Management Guide) Open GI Limited Diary Action List and Memo Print Diary Action List See the section Advanced Prospect Management Diary Action List and Chaser Sequence. Memo Print See the Insurer Memo Print section in the Core Back-Office User Guide (Part 1). (Advanced Prospect Management Guide) Open GI Limited Prospect/Policy Audits Prospect/Policy Audits The following menu is displayed when the 'Client/Policy Audits' option is selected from the Correspondence/Diary/Insurer Accounts menu: Prospect/Policy History Log The other options refer to Sanctions Checking - please refer to the Sanctions Checking guide for information on these. (Advanced Prospect Management Guide) Open GI Limited Prospect/Policy History Log To use this functionality, set the Audit Trail of records viewed by operator field in the Advanced Prospect Control Screen 5 to “Yes”. The Prospect/Policy History log details all accesses to Advanced Prospect Management Prospect/Policy records. A log entry is created each time a prospect or policy record changes or is accessed. For example, when an Advanced Prospect Management client master (DP0) or policy (DPP) record is created a log entry will be added with the action “Create”, and when an Advanced Prospect Management client master (DP0) or policy (DPP) record is updated a log entry will be added with the action “Update”. This will be in addition to the log entries created when the client master or policy screen is displayed, not a replacement for any of them. The following details are stored and can be viewed, printed or exported: Prospect/Policy Reference Date Timec Operator Code Operator Name VDU Action Displaying The History Log For Open-i users, the log is displayed by pressing Alt F8 or by selecting the 'History Log' option from the Links menu from the following locations: Prospect - the log will display accesses to the prospect plus all the prospect policies. Policy - the log will show the accesses to the current policy. Risk Level frames (policy risk details) - the log will show the accesses to the current policy. Winlink users must press CTRL Q to access the Client/Policy History log. The most recent entry will be displayed at the top of the log: If you have more than 20 accesses use the scroll bar to move backwards and forwards through the pages. (Advanced Prospect Management Guide) Open GI Limited Printing and Exporting the Log You can generate a printed report or export the information showing the history files using the following procedure: 1. Select the 'Prospect/Policy Audits' option from the Advanced Prospect Management menu. 2. Select the ‘Prospect/Policy History Print’ option. The Prospect/Policy History Print screen is displayed: 3. The following fields are available for completion: Prospect/Policy Ref: Enter up to 10 characters. From Date From the drop down calendar, select the From date To date From the drop down calendar, select the To date. Operator Enter up to 2 characters. Export Format Select "Yes" to produce an export file or select "No" to produce as printed report. Leaving all criteria blank produces a printed report or export file listing all log entries, including the action taken if the log entry is for a prospect or policy record change. This allows the list to be restricted to those log entries created by prospect/policy record creation (Action parameter set to “Create”) or amendment (Action parameter set to “Update”) or both (Action parameter set to “Both Create & Update”). The printed report will be sorted in the following order: Prospect Reference Date Time Short Policy Reference Operator Code VDU Action Example Of The Exported Prospect/Policy History Log An example of the printed Prospect/Policy History Log is shown below: An example of the exported Prospect/Policy History Log is shown below: Open-R Print Control Brokers with Open-R installed can print the Prospect profile (Prospect Details, Extension Pages and Fact Find Information only) for a prospect in an Open-R Register. Use the 'Open-R Print Control' option on the Advanced Prospect Management menu to set the configuration options for Advanced Prospect Management Register printing. To print the Prospect profile for a specific prospect in an Open-R Register, press ESC $ with the prospect details displayed in Advanced Prospect Management. (Advanced Prospect Management Guide) Open GI Limited Prospect Master Maintenance Open-i users can design and use Prospect Master (Level 1) formats. It allows creation, deletion and modification of screen formats. When creating a new prospect you can optionally select a Prospect Format. This is controlled by the 95.Prospect Master - always use default (Open-i only) field on the Prospect Control Page 8. A default Open-i Prospect Master Format can also be entered using the 1. Prospect Details screen field on the Prospect Control Page 1. To access Prospect Master Maintenance: 1. Select the 'Prospect Master Maintenance' option from the Advanced prospect Management menu. The Prospect Master Maintenance screen is displayed as shown below, with any existing prospect master formats: 2. Click the Add button to create a new prospect master format or right click on any existing prospect master formats. The following options are displayed: Add - add a new prospect master format Amend Format - amend an existing prospect master format Amend description and BROOMS format - amend the description for the prospect master format and/or the associated BROOMS format Delete - delete an existing prospect master format Add A Prospect Master Format To add a prospect master format: 1. Click the Add button and the following is displayed: Create Prospect Format Enter up to 4 characters for the prospect format. Using Format Click on the button to display a list of existing prospect master formats to base on. Must be an Open-I format. If no format is specified, the system uses the one specified in Option 1 in the Prospect Control Page 1. Description Enter up to 20 characters for the description. Map to BROOMS Client format Select the BROOMS client master format from the list. Select which BROOMS format to apply to a client created from Advanced Prospect Management that uses the format being created. If no format to base on is specified, it defaults to the one specified in the Other 2 screen in Broker Amendment. 2. Click the OK button and the Frame Editor screen is displayed. Amend A Prospect Master Format To amend an existing prospect master format: 1. Select one from the list on the Prospect Master Maintenance screen and right click the mouse. The following options are displayed: 2. Select the 'Amend Format' option. The Frame Editor screen is then displayed: 3. Amend the screen as required. A DPRX.Asnotes field has been added to the Prospect record for use on the Open GI Prospect Master Format. Note that the field is not taken across to corresponding Core Back-Office Client record. The functionality for the Frame Editor is the same as the Core Back-Office Frame Editor tool. Amend Description And BROOMS Format To amend an existing prospect master format description and/or the associated BROOMS format, select one from the list on the Prospect Master Maintenance and right click the mouse. The following options are displayed: Select the 'Amend description and BROOMS format' option. The following window is displayed: Description Enter up to 20 characters for the description. Map to BROOMS Client format Click on the Format button to select an existing BROOMS Delete A Prospect Master Format To delete an existing prospect master format, select one from the list on the Prospect Master Maintenance and right click the mouse. The following options are displayed: Select the 'Delete' option and the following is displayed: Select Yes to delete or No to cancel. Select A Prospect Master Format Each Prospect Master Format can be mapped to a Core Back-Office Client Master Format. New Formats can be applied to existing prospects at prospect level. 1. To select an existing prospect master format, press the Change Format button (ESC Q). The following window is then displayed: 2. Click on the to display a list of existing prospect master formats. 3. Select one and click the OK button to apply the prospect master format, or the Cancel button (ESC ESC) to quit. (Advanced Prospect Management Guide) Open GI Limited Other Facilities There are five options on the Advanced Prospect Management menu that are not covered in detail in this user guide. These are: Client/Policy Details (see below) Prospect Letter Print (see below) Database Enquiry (see below) Frame Calculations Policy Number Maintenance Client/Policy Details This option functions in exactly the same way as the ‘Client/Policy Details’ option on the Client Records and Accounts menu. It includes access to the ESC D Freeform Search. The Freeform Search is detailed in the Core Back-Office guide. FreeForm Search The Freeform Search is detailed in the Core Back-Office guide The 'Freeform Search' option will only appear when ESC D is pressed if it is switched in the Core Back-Office Broker Amendment. Refer to the Client/Policy Details chapter in the Core Back-Office User Guide for further details. Prospect Letter Print The Prospect Letter Print facility is used to print out letters generated by the creation and amendment of prospects. It is identical to the Core Back-Office facility, Client Letter Print. For information on how to use this option, please refer to the Client Letter Print section in the Core Back-Office User Guide. Database Enquiry This option is used to manage the prospect records on the system, and to generate letters and reports from them. It is identical in function to the Database Management facility in Core Back-Office. However, when querying, searching and generating letters it uses keywords specific to Advanced Prospect Management. See the chapter entitled Advanced Prospect Management Keywords for a list of Advanced Prospect Management keywords. For information on how to use this facility, please refer to the Database Enquiry chapter in the Core Back-Office User Guide (Part 2). Frame Calculations This option is only available if you are using the Professional edition of Advanced Prospect Management. The process of creating and configuring frame calculations within Advanced Prospect Management is identical to that used in Core Back-Office. However, Advanced Prospect Management frame calculations are distinct from Core Back-Office frame calculations. For details of how to maintain frame calculations, please refer to the section entitled Performing Calculations In Frames in the Modules (Risk Details) And Registers chapter of the Core BackOffice User Guide. Policy Number Maintenance This option is used to maintain batches of policy numbers for particular schemes. This option is only available if purchased separately. For full details on this option, please refer to the Automatic Policy Numbers chapter in the Scheme Toolkit User Guide. Scheme Cross Referencing If the Insurer is not being filled in when saving to Advanced Prospect Management or Core BackOffice, use the ‘Scheme Cross-Referencing’ option on the Maintenance menu to provide a cross reference between the quotation products. See the section Scheme Cross Referencing in the Core Back-Office Part 1 User Guide for further information. (Advanced Prospect Management Guide) Open GI Limited 3: Creating A New Prospect 3: Creating A New Prospect in Advanced Prospect Management This section describes how to create a new prospect for a new client. It consists of the following sections: Starting The Prospect Process Prospect Profiles - Fact Find The Quote Process Completing The Prospect Process Save To BROOMS Pre Quotation Screens Post Quotation Screens Customising Your System Load From BROOMS Credit Card Payment Processing Configuring Credit Card Details As Open GI provides several quote systems for different kinds of policy, it would be impractical to try to describe the variations on the Advanced Prospect Management screens that apply to each one. This User Guide is a generic guide to the Advanced Prospect Management process. Where relevant, there are references to the Quote product User Guides. All the screens in this chapter are from an Advanced Prospect Management System that is generating a prospect with MotorWriter or TruckWriter. (Advanced Prospect Management Guide) Open GI Limited Starting The Prospect Process To start the prospect process: 1. Select the ‘Prospect Records’ option from the Advanced Prospect menu and press RETURN. If the Quote Type based on Executive field on the Advanced Prospect Control screen is set to “Yes”, then the system will prompt you to enter an executive code. The executive code is attached to all prospect and policy details when they are generated. This system should then display the Prospect Details screen. The following fields are displayed: Agent Press F1 to select an agent from the list. Exec Press F1 to select an executive from the list. Source Press F1 and a list will be provided of the active source codes. No source codes with a status of ‘Suspended’ will be viewable. Name Enter up to 30 characters. Address 3 lines - Enter up to 30 characters. 1 line - Enter up to 20 characters. Post Code Enter up to 10 characters. Home Phone Enter up to 20 characters. Work Phone Enter up to 20 characters. Forenames Enter up to 20 characters. Salutation Enter up to 20 characters. Email Enter up to 50 characters. Dob Enter a date in the format DD/MM/YYYY. Occupation Enter up to 20 characters. Marital Status Press F1 for a list. No of Children Enter a number in the format 99. Sex Enter "Male" or "Female". Invoice Client Press F12 and select from: Composite No Yes Pers. Data Use Agreement Enter "Yes" or "No". See the Using The DPA Wording Dialogue section. 3rd Party Data Use Agreement Enter "Yes" or "No". See the Using The DPA Wording Dialogue section. Contact Pref Select from "Blank" or "Email". This is used by the OpenWord E-mail functionality and in Open Print Manager where the Client contact preferences are represented by an appropriate icon on the Client Node. Notes Enter up to 50 characters Fact Find This date will be populated automatically when the prospect profile is first created. New quote Enter up to 2 characters for the policy type or press F1 for a list. The appearance of this screen depends on the settings of certain fields on the Prospect Control screen, as described in the section entitled Configuring Advanced Prospect Management For Use. 2. To begin the process of creating a new prospect, press the New Prospect button (ESC 1). The Prospect Details screen will enter ‘Update’ mode and the cursor will move to the first field. The New Prospect window will be displayed if option 95, 'Prospect master - always use default (Open-i only)' in Prospect Control Page 8 is blank or set to "No". If you are using an executive code with an associated policy type, this policy type will appear in the New Quote field at the bottom of the screen. You may amend this field if desired. You can only set an Agent, Executive, Policy Type in the Agent, New Quote and Executive fields if their status is “Active” or blank in the 'Agent Amendment', 'Executive Amendment' and 'Policy Type Amendment' options. If you press F1 in the Agent or Executive fields, only those with an “Active” or blank status are listed. 3. Enter all the required client details. At the very least, you must enter the proposer’s name, as this is used to generate the prospect reference code. When preparing a new prospect, if required you can enter the relevant policy type code in the New Quote field. For example: PC for MotorWriter TW for TruckWriter MC for BikeWriter HQ for HomeWriter Alternatively, press F1 for a list of policy types and frames. 4. When you have entered all the necessary details, press RETURN to proceed. If set in the Advanced Prospect Control, the Exec field will be a mandatory field on the Prospect or Policy screens. If you have entered “Yes” to the Broker Amendment option ‘Override created Client Reference’ then the Client Reference window will be displayed. You now have the option to over type the automatically generated client reference. The entered reference must be 4 alpha characters long, otherwise the error message: Invalid Client Reference will be displayed. Press ESC ESC or F3 to abandon the override processing. Press RETURN to confirm the new reference and if it is valid this will be used as the new client reference. 5. If you have entered a Policy Type, the system should start up the relevant Quote product. Otherwise, the Prospect Details screen will be displayed with the details of your new prospect displayed. 6. If you have specified any frames in the Advanced Prospect Control Page 7 option 83, these Client Profile frames will be displayed. If on the Prospect Control screen the ‘Pre-Quotation Screen’ option is set to “Yes”, then the specified screens will appear at this point. Refer to the Pre Quotation Screens section later in this chapter. Understanding The Prospect Reference The system generates a reference code on the completion of the Prospect Details screen. This is derived from the name of the proposer. The system uses the first two letters of the surname and the first two initials. If there is only one initial, then the system uses an X instead. The first four characters of this code are intended to be as close as possible to the client code format used in Core-Back-Office. For example, if you enter “Mr J. L. Smith” in the Name field, the system generates the reference code SMJL001. If however you enter “Mr J Smith”, the reference code will be SMJX001. If the name of the proposer is a company name, then the reference code can be generated differently. Prospect reference codes for companies consist of the first four letters of the company name, substituting X where the company name contains fewer than four letters. For example, Open001 is the code generated for Open GI Limited. The system performs a number of checks on proposer names before generating a reference code, to check whether it is a company name. Some company names may not be detected by these checks, and will be assigned a reference code in the same way as a personal name. In this event, you can either keep the code as it is, or abandon the prospect and generate a new one, this time with a variation on the company name. Sticky Notes Sticky Notes Sticky Notes are initially disabled. Sticky Notes can be enabled and Authorisation Codes can be configured to Create, Amend and Delete Sticky Notes in the Prospect Control using option '108.Prospect Sticky Notes Authorisation Codes'. This facility allows you to add Sticky Notes to Open-i to provide information or warning notices about either the client or policy data being displayed or the screen itself which is displaying the data. The functionality allows you to: Create Notes about a Prospect or a policy. Prospect Level notes are also visible on all of the prospect’s Policies and Risks, and Policy Level Sticky Notes will also be visible on all the policy’s Risks. This could be used to warn operators about a problematic client or policy. Create Notes about a particular screen, such as Prospect, Policy, Client Diary, Policy Diary or Claims. This could be used for training purposes. Close individual Sticky Notes once read, to be re-displayed when the screen is re-displayed, or delete the Sticky Note permanently Setup authorisation codes to allow or prevent operators to create or delete Sticky Notes. The 'Create a Sticky Note' option on the F12 (Control) menu allows Sticky Notes to be created within Prospect/Policy Details. Prospect and Policy level Sticky Notes are purged when their associated Prospect or Policy is purged. Create A Sticky Note Sticky Notes are initially disabled. Sticky Notes can be enabled and Authorisation Codes can be configured to Create, Amend and Delete Sticky Notes in the Prospect Control using option '108.Prospect Sticky Notes Authorisation Codes'. The following sticky note types can be created: Prospect Level Prospect level Sticky Notes are displayed on first display of the Prospect. If the user navigates straight to the Prospect, Policy, Claim or Risk details (including the diary page for any level), the Sticky Notes for the current Prospect Reference are displayed on the screen. To create a prospect level sticky note, follow the procedure below: 1. Display the Prospect Level. 2. Press F12 to display the F12 (Control) menu. 3. Select the 'Create Sticky Note' option, as shown below: 4. The Sticky Note Editor dialog is displayed. 5. From the Type field select "Client". 6. Enter the text for the note. 7. Click the OK button. 8. The Sticky Note appears on the prospect level screen in the middle of the screen: 9. Using the mouse, you can drag the Sticky note to where you want it displayed on the screen. Sticky Notes can be moved but their new location is not stored unless the “Pin Here” option is selected. To do this, right-click on the mouse and select the 'Pin Here' option from contextsensitive menu: Policy Level Policy level Sticky Notes are displayed on first display of the Policy. If the operator navigates straight to the Policy, Claim or Risk details (including the diary page for any of these levels) the Sticky Notes for the current Policy Reference are displayed on the screen. To create a policy level sticky note, follow the procedure below: 1. Display the Policy Level. 2. Press F12 to display the F12 (Control) menu. 3. Select the 'Create Sticky Note' option, as shown below: 4. The Sticky Note Editor dialog is displayed. 5. From the Type field select "Policy". 6. Enter the text for the note. 7. Click the OK button. 8. The Sticky Note appears on the Policy level screen in the middle of the screen: 9. Using the mouse, you can drag the Sticky note to where you want it displayed on the screen. Sticky Notes can be moved but their new location is not stored unless the “Pin Here” option is selected. To do this, right-click on the mouse and select the 'Pin Here' option from contextsensitive menu: Screen Level Screen level Sticky Notes are displayed until the screen changes, even if moving to the next prospect/policy. For example, changing from Policy to Policy Diary shows new screen level Sticky Notes. Changing policy reference on the Policy page does not re-display all the Sticky Notes. Risk Level frames do not support Screen level Sticky Notes because frames may be deleted and renumbered. To create a screen level sticky note, follow the procedure below: 1. Display the required screen. 2. Press F12 to display the F12 (Control) menu. 3. Select the 'Create Sticky Note' option, as shown below: 4. The Sticky Note Editor dialog is displayed. 5. From the Type field select "Screen". 6. Enter the text for the note. 7. Click the OK button. 8. The Sticky Note appears in the middle of the screen. 9. Using the mouse, you can drag the Sticky note to where you want it displayed on the screen. Sticky Notes can be moved but their new location is not stored unless the “Pin Here” option is selected. To do this, right-click on the mouse and select the 'Pin Here' option from contextsensitive menu: Create A Field Level Sticky Note Field level Sticky Notes pop-up when the user enters the field they were created on and disappear on exiting the field. Only one field-level note can be created per field. To create a field level sticky note, follow the procedure below: 1. Display the required screen in Update mode (F2). 2. Press F12 to display the F12 (Control) menu. 3. Select the 'Create Sticky Note' option, as shown below: 4. The Sticky Note Editor dialog is displayed. 5. From the Type field select "Field". 6. Enter the text for the note. 7. Click the OK button. 8. The Sticky Note appears when the field is entered in update mode, as shown below 9. Using the mouse, you can drag the Sticky note to where you want it displayed on the screen. Field Sticky Notes can be moved but their new location is not stored. Field level Sticky Notes cannot be pinned. Close A Sticky Note Sticky Notes can be temporarily closed when they have been read by clicking on the icon (except Field level Sticky Notes cannot be Closed). They will be re-displayed when the appropriate Prospect, Policy or Screen is re-displayed. Edit A Sticky Note Sticky Notes are initially disabled. Sticky Notes can be enabled and Authorisation Codes can be configured to Create, Amend and Delete Sticky Notes in Broker Amendment Password Control Authorisation Codes 5 page. Sticky Notes can be edited by selecting “Edit” from their right-click context-sensitive menu. The Type can be amended during Editing, but not from Prospect to Policy (or vice-versa). To edit a sticky note, follow the procedure below: 1. Click on the sticky note you wish to edit. 2. Select the 'Edit' option The Sticky Note Editor dialog is displayed for amendment: 3. Click the OK button (RETURN) once you have completed your edits. (Advanced Prospect Management Guide) Open GI Limited Locate Bookmark Delete A Sticky Note Sticky Notes are initially disabled. Sticky Notes can be enabled and Authorisation Codes can be configured to Create, Amend and Delete Sticky Notes in Broker Amendment Password Control Authorisation Codes 5 page. Sticky Notes can be permanently deleted by selecting “Deleted” from their right-click contextsensitive menu. To delete a sticky note, follow the procedure below: 1. Click on the sticky note you wish to delete. 2. Select the 'Delete' option. The sticky note is deleted. Amend Colour And Font Of A Sticky Note The colour and font of Sticky Notes are configurable in the Open-i Colour Scheme Colour Editor (System Control menu). Sticky Notes are semi-transparent, but become opaque whilst the mouse pointer is above them Prospect Profiles - Fact Find Prospect Profiles - Fact Find Introduction Prospect Profiles are used to capture Fact Find information such as the type of policies a prospect may require now or in the future along with additional information about the prospect that may not relate to a specific risk. Fact Find information can be included in a Prospect Register of Insurance if you have Open-R installed. Generic Risk information can also be stored within the Profile details and used to pre-fill new Quote Risk Level frames. You can also search for Fact Find Modules in Database Enquiry. (Advanced Prospect Management Guide) Open GI Limited Locate Bookmark Profile Frames (Prospect) The Core system is delivered with a range of standard Profile frames, FF1, FF2, FF3, FF4, FF5, FF6 and FF7, which enable you to record Fact Find information for new and existing prospects. FF1 to FF4 contain fields to record Class of Business details FF5 contains field to record Business Description details FF6 and FF7 are repeatable frames and contain fields to record Premise(s) details. The frames are linked by a Premise Id field which appears on both frames. In addition to or as a replacement of these standard frames, you can design and create your own. Refer to the Frame Module Maintenance section of the ‘Modules (Risk Details) & Registers chapter of the Core Back-Office Part 1 Online Help Guide for further information on creating frames. The system can be configured to present up to 10 Profile frames to appear in a specified sequence when a new Profile is created by entering the Profile frame names in option 83 ‘Profile Frames’ on Page 7 of Advanced Prospect Control. A frame can appear more than once within the sequence and additional frames can be added to the Prospect record to capture additional information at a later stage. TX modules can be used as Client Profile frames within Core Back-Office but cannot be used as Prospect Profile frames in Advanced Prospect Management. (Advanced Prospect Management Guide) Open GI Limited Prospect Profiles (Creating) When a new Prospect is created, either by clicking the New Prospect button or pressing ESC 1, the Profile frames will be presented in the sequence stored in option 83 ‘Profile Frames’ on Page 7 of Advanced Prospect Control to carry out the initial ‘Fact Find’ when the Prospect Details page is saved. If option 94 ‘Create Profile’ on Page 8 of Advanced Prospect Control is set to “Yes”, these will appear automatically. If option 94 is set to “Usually Yes” or “Normally Not” the following dialog box will appear: Select “Yes” to carry out the ‘Fact Find’. Profile frames can be skipped by clicking the Cancel button or by pressing F3. The ‘Fact Find’ can be abandoned entirely by pressing ESC ESC. When the set is complete or the ‘Fact Find’ is abandoned, a list of existing Profile frames is displayed on the Profile Sequence and Types page: The action buttons displayed operate in a similar way to their equivalents on the Risk Details Sequence and Types page. The data captured during the ‘Fact Find’ will be held at Prospect Level, separately from the Quote Risk details. The Fact Find field on the Prospect page will be completed automatically with the system date when the Profile frames are first added to the record. This field can then be used to record the date the details within the Profile frames where last updated. Click the Profile tab, Right Arrow button or press F11 to page forward through the Prospect Level frames. Click the Left Arrow button or press F10 to page backwards between the frames. Click the Exit Prospect tab or press RETURN to exit the Prospect Level frames and return to the Prospect page. If you click the Profile List button (ESC 3) when the Prospect page is displayed, the system will check whether any Profile frames have been created. If no Profile frames exist, the system will automatically present the frames for completion or prompt the user as described above. If a new Prospect record is created, by loading an existing Client record into Advanced Prospect Management from Core Back-Office either by clicking the Load button or pressing ESC L, any Client Profile frame details for the client will be copied and a new Prospect Profile will be created for the new prospect. The Fact Find field on the new Prospect record will be set to the date held in the Fact Find field on the Client record. If the Client record does not have a Profile no Profile frames will be created for the Prospect. Any existing Client Extension pages are converted to BCD frames, forming part of the Prospect Profile. The action taken when existing Client Profile details are loaded into existing Prospect Profile details depends on the setting of option 87 ‘Replace Prospect Profile on load from BROOMS’ on Page 7 of Advanced Prospect Control. Either the existing Prospect Profile data is left unaltered or it can be completely replaced by the Client Profile. If the option is set to: “Yes” – The existing Prospect Profile details will be replaced with the Client Profile. “No” – The existing Prospect Profile details will NOT be replaced. “Usually Yes” or “Normally Not” – The following dialog box will appear: If “Yes” is selected the existing Prospect Profile details will be replaced with the Client Profile, if “No” is selected they will NOT be replaced. Any TX modules (Tripos or Open Word) in the Client Profile will not be transferred. The Client Profile is never updated during the load processing from Core Back-Office to Advanced Prospect Management. Viewing Prospect Profiles Ensure the Prospect page is displayed and click the Profile tab, Right Arrow button or press F11 to display the first Profile frame. Click the Right Arrow button or press F11 to display the next Profile frame. Click the Left Arrow button or press F10 to display the previous Profile frame. Click the Exit Prospect tab or press RETURN to return to the Prospect page. Alternatively click the Profile List button or press ESC 3 to display the Profile Sequence and Types page. The action buttons displayed operate in a similar way to their equivalents on the Prospect Risk Details Sequence and Types page. Copy will only copy a new module to the current Prospect Profile. If no Profile frames exist, the system will automatically present the frames for completion or prompt the user as described above. (Advanced Prospect Management Guide) Open GI Limited Updating and Maintaining Prospect Profiles To update an existing Profile frame within a Prospect Profile ensure the correct Profile frame is displayed and click the Update button (F2). Amend the details as required and click the OK button or press RETURN to save the changes. The Save Risk Details Amendments dialog box shown below may be displayed if option 33 ‘Disable Prospect Detail Save Confirm’ on Page 3 of Advanced Prospect Control is set to “Yes”. Click the OK button or press RETURN to save the details or click “No” to return to the Profile frame and click the Cancel button or press F3 to abandon the changes. History frames are not retained within Advanced Prospect Management. Adding Additional Profile Details To add additional Profile frames to the Prospect Profile ensure the Prospect page is displayed and click the Profile List button (ESC 3). The Profile Sequence and Types page is displayed and shows summary information for all the Prospect Level frames. Click the Add button if you wish to add a new Profile frame to the end of the sequence or click the Insert button to insert a frame into the current sequence. Enter the name of the frame you wish to add / insert in the Module Name field or click the drop down arrow or press F1 if you wish to add / insert the default Profile frames. If you elected to insert a Profile frame complete the Insert after Module No field as required. Click the OK button or press RETURN to continue. Deleting Profile Details To delete Profile frames from the Prospect Profile ensure the Prospect page is displayed and click the Profile List button (ESC 3). The Profile Sequence and Types page is displayed and shows summary information for all the Prospect Level frames. Click the Delete button and enter the number of the frame you delete in the Delete Module Number field then click the OK button (RETURN). (Advanced Prospect Management Guide) Open GI Limited Using Fact Find as Risk Information for a New Quotation This section explains how to use the available Prospect Profile frames as a source of Risk information for when creating Risk details for a new quotation by giving users the option to pre-fill new Quote Risk Level frames from the corresponding Prospect Profile frames. BCD frames will be disregarded when creating new quote risk details. Your pre-fill preferences can be set using option 83 ‘New Risk Level 3 Frame Pre-Fill from Level 1 on create’ on Page 7 of Advanced Prospect Control. The following options are available: No Normally Not Usually Yes Yes If the Pre-fill option is set to “No”, has been left blank or there is no frame of the same type in the Prospect Profile frame for the new Quote Risk frame being displayed, any Prospect Profile information will be disregarded and you will need to enter the data into the new Quote Risk frame manually. If the Pre-fill option is set to “Yes” and there is a single frame of the same type within the Prospect Profile the system will use the details from the corresponding Prospect Profile frame to populate the new Quote Risk frame fields automatically. Check the details and make the necessary alterations to the pre-filled fields and enter any additional data before the Quote Risk frame is saved. If the Pre-fill option is set to “Usually Yes” or “Normally Not” and there is a single frame of the same type within the Prospect Profile the system will display the following message for the new Quote Risk frame about to be displayed: Prefill Frame <frame name> from Client Profile? If you chose to proceed with the pre-fill option the system will use the corresponding Prospect Profile frame to populate the frame fields. Check the details and make the necessary alterations to the prefilled fields and enter any additional data before the Quote Risk frame is saved. If the Pre-fill option is set to “Yes”, “Usually Yes” or “Normally Not” and you chose to proceed with the pre-fill option when prompted. If there are multiple frames of the same type within the Prospect Profile the system will display the Select Profile Frame screen which will list the corresponding Profile frames, click the Profile frame you wish to pre-fill the new Quote Risk frame fields with, check the details, make the necessary alterations to the pre-filled fields and enter any additional data before the Quote Risk frame is saved. This process will be repeated for the second and subsequent frames. If you leave the list without making a selection, you will need to enter the data into the new Quote Risk frame manually. To differentiate between the details on the Select Profile Frame screen, allocate a key field for the frame using the ‘Summary Key Field’ feature within Frame Module Maintenance and set option 67 ‘Level 3 Frame Browse Display Style’ to “Description & Key Field” or “Key Field”. Refer to the Creating Summary Key Fields page. Regulation Module If you have Regulation Module software installed, the Sales and Advice frames BGA and BGB can be included within the initial ‘Find Find’ or added later to pre-fill the Quote Risk Sales and Advice frames at the trigger points defined on the Method of Sale screen in Regulation Module Control. (Advanced Prospect Management Guide) Open GI Limited Locate Bookmark Creating Summary Key Fields To create a Summary Key field for Prospect Profile and Quote Risk frames: 1. Locate the BROOMS Maintenance menu and select the ‘Frame Maintenance/Conversion’ option. 2. Select the ‘Frame Module Maintenance’ option from the next menu. 3. Select the ‘Amend Module Settings’ option from the Frame Module Maintenance sub-menu. 4. The select the ‘Summary Key Field’ option. 5. Enter the name of the frame e.g. SI in the Name of Frame field and press RETURN. 6. Enter the field name e.g. DESC1 in the Summary Key Field field and press RETURN. If you do not know the field name press F1 to display the Keyword Selection screen. Use the UP or DOWN ARROW key to move around the screen, when the selected Key field is highlighted press RETURN. 7. To return to the BROOMS Maintenance menu press the ESC key 6 times. 8. The Summary Key Field will then be displayed when viewing the Select Profile Frame screen, the Profile Sequence and Types page and the Prospect Risk Details Sequence and Types page if option 67 ‘Level 3 Frame Browse Display Style’ on Page 6 of Advanced Prospect Control is set to “Description & Key Field” or “Key Field”. (Advanced Prospect Management Guide) Open GI Limited Prospect Profile Keywords Prospect Profile Keywords have a unique prefix to distinguish ‘Fact Find’ information from Quote Risk information. Prospect Profile Keywords for Tripos, Open Word and Open-R documents are prefixed with the letter “F” e.g. F.SI.DESC1. These keywords can be used when creating Tripos and Open Word documents and in Database Enquires and reports. Module Client Level (DL1) The keyword you need to search for Prospect level Modules using Database Enquiry is DL1.Module. There is no prefix on either the keyword or the values. DL1.Module Module Type used in Database Enquiry to select prospect levels. Enter “Equal To” (EQ) ie. FF1. (Advanced Prospect Management Guide) Open GI Limited Locate Bookmark


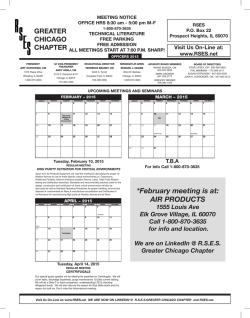

© Copyright 2026