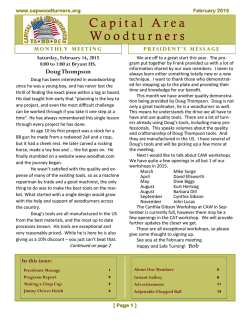
Latest Newsletter
Volume 17, Issue 1
January 2015
Next Meeting:
President’s Column - Bill Fowle
Wednsday, January 28th, 2015 - 6:30 PM
Sapperton Pensioners’ Hall
Happy New Year! I hope Santa spoiled you with lots of new turning supplies
and tools. What a great start to the new year. A fantastic demo from Derek Weidman and the fantastic opening to our Guild’s amazing show “Not Just Round” at the
Port Moody Arts Centre.
318 Keary St., New Westminster
January Food Suppliers:
It looked like Derek had a lot of fun turning a salmon at his demo. He said
he always wanted to make one. He sure made off-center turning look easy. So many
tips and tricks I think I might give it a try. I understand the class had a lot of good
information as well.
Mark Michaluk, Cam Montgomery, David
Middleton, Dan Moleschi, Brian Moore & Lorne
Nelson
January’s Greeter’s:
Ed Pretty, Annie Prefontaine, Norm Polson,
Ross Pilgrim, Beverley Pears & Gregg Parsons
•
Tech Talk — Bruce Campbell will host a forum
for your technical questions.
•
Focus on Form and Finish — Larry Steveson will
moderate a critique of your pieces.
•
New members forum — How to get the most
out of being a member of the GVWG.
Table of contents:
President's Column - Bill Fowle
1
Tech Talk - Bruce Campbell
2
Making a Wedding Goblet - Allan Cusworth
4
Turning 101 - Cathy Friesen
5
Focus on Fundamentals - Neva Hilliard
6
Instant Gallery
7
Presidents Challenge
14
Turning 101
16
Future Presentations
17
GVWG Officers, Appointees & Volunteers
18
The ‘Not Just Round’ opening went very well. About 120 people were there
and everyone was amazed at what could be achieved on the lathe. The diversity of the
pieces on display is wonderful showing many different styles and techniques. Congratulations to all the turners who entered a piece, you have made us proud. If you
haven’t already, make sure to see the show at the Port Moody Arts Centre before
Feb 15th.
A big thanks to Ron Hadar for all the work on the newsletter. This is Ron’s
last issue and we are still looking for an editor. We have split the job in two so the
job can be shared. Robert Carlson has volunteered to be the publisher (doing the
layout etc) but we need someone to do the editing (assembling and proof reading the
articles, etc). The newsletter is one of the most important features of our Guild and
we really need someone to step up and take on the task. Please let me know if you
are able to fill the position.
With the February meeting being our annual general meeting we are once
again looking for guild members to fill a few positions on the Board. This year we
need a Vice President, a Secretary and three Members At Large. These positions can
be filled by any member in good standing, and it doesn't matter what skill level of
turning you are at. We need people that can help plan the future path of the Guild.
The Executive does much of our work by email and we meet five times a year. There
is a summary of job descriptions on the website under ‘Governance’. Let me or one
of the Board members know if you can fill one of these roles. Please pitch in to help
keep our Guild growing and successful.
Get ready for Stephen Hatcher from Oyster Bay, Washington, Feb 28th and
Mar 1st. Stephen has an unique way of combining glass and stone into his wood turnings. His demo is ideal for all club members - beginners and more advanced turners. He has information for all of us. If you want to make beautiful woodturnings, the
hands-on class will certainly get you closer to that goal.
Happy Turning.
Bill
January’s Challenge: “Spirals”
Volume 17, Issue 1
January 2015
Page 2
Tech Talk - Bruce Campbell
Our January meeting had a good crowd of familiar faces and new folks.
The first question was about turning a travel mug for coffee. There are lots of people out there that sell the metal sleeve
and cap for around $10.00 a set but you can up-cycle a plastic one. Just carefully break off the plastic outer layer and then turn a
wooden outer sleeve to replace it. There are several videos on the internet that show how to do it. My only additional suggestion is
to be sure you use a good water-resistant finish on the wood - something like wipe on poly. I would suggest 10 or 12 coats.
The next discussion was around putting a large plate or cone on your live center. If you have a Oneway or Powermatic
lathe you have quite a robust live center with dual bearing, a replaceable point and a 3/4" standard thread on the "live" side. If your
Live center comes from Oneway you get two cones; one tapered point about 2" wide and 2 1/4" long and another cone about 3 1/2"
in diameter and 4" long. The Powermatic version comes with just the small cone. All are threaded to fit on the live center and the
large one can be threaded on both as a cone or by switching in around as a cup. These work great but if you need something larger you can make your own. One method is to drill a pilot hole in a block of wood and then force the threaded area into it with the
live center pin installed. Then by slowly rotating the wooden blank you can "cut" threads into the block and then turn it to whatever
shape you need.
If you need something more durable, various vendors sell attachments to do this. These include faceplates that you can
screw a piece of wood to or 3/4" adaptors that you can use with your chucks.
Something that worked for me was to glue a standard 3/4" nut into a drilled recess in a wooden blank and then shape the
wood as needed. It worked great and I still have it in the shop.
If you do not have a live center system for your lathe I recommend you consider buying one. A number of manufacturers
sell them (Sorby, Oneway, Powermatic, etc.) and they offer a lot of added function.
Next we talked about converting Morris tapers for your lathe. For example, you may have an older lathe with a #1 tailstock and you want to use a #2 taper live centre. Or, conversely, you have a smaller taper that you want to use in a larger one. To
do this there are taper adapters. Putting a smaller taper into a larger one is pretty straight forward. You can purchase a sleeve with
the smaller taper on the inside and the larger one on the outside (for example #2 to #3). Done.
Going from bigger to smaller is a little more challenging. Again, you can purchase an adapter but this time it is quite long
with a large barrel that the larger taper is milled in to and the smaller taper sticking out the back. They work fine but take a lot of
room (4 - 6 inches) and if you have a smaller lathe like a mini it can be impractical as it uses up too much of the bed. There is also a
risk of introducing wobble into the setup if any of the pieces don't line up just right.
Morris taper adapters have their place but they will never be quite as good as having the right taper for your lathe.
Next we talked about the settings on the Oneway Varigrind jig. This is by far the most popular fingernail jig in the market
and it works well. There are three adjustments and each of them has a primary impact of the grind but also influences the other two.
For an in-depth discussion of the three settings and how they impact one another have a look at the Tech Talk for April 2013.
As a follow-up to that discussion we talked about the Quickgrind Jig. This is a modification of the Varigrind to make it easier
and to adjust for different sized gouges. Full disclosure here, folk, I invented this device and am in a strong conflict talking about it
here. But, one of you brought it up so if you want more information visit www.artisansworkbench.com/Product%20info/QuickGrind/
QuickGrind.htm
As we discussed grinding I mentioned seeing a neat trick for when your scrapers get too short to swing around the Wolverine platform. The trick I saw was to use a piece of scrap wood to raise the shaft up far enough for the handle to clear the platform. Neat trick. But one of you went one step farther and suggested using a ring magnet from an old speaker to do the same
thing. The advantage is the ring magnet will not move around. Of course, it also attracts all the grindings so perhaps it is a mixed
blessing. Give it a try and see.
Next we talked about CA glues an if their are any noticeable quality differences. From what I know there are LOTS of Ca
glues used in a wide variety of industrial applications ranging from the thin fast-setting stuff we use to high-strength versions that take
hours to harden. But, for our purposes there are just a few. Seattle City is a popular brand around here. They offer the standard
Volume 17, Issue 1
January 2015
Page 3
range of thin, thick, and gap filling (very thick) but they also have a black version that pops nicely rather than trying to hide the glue
line.
Seattle City is about 40% more expensive than other "house brands" I have used and, quite frankly, I can't tell them apart for
function so I use the cheaper brands.
One thing to consider in CA glue is shelf-life. Most glues I have used start to thicken up after about 6 months and after a
year they are pretty much done. I have discovered that I can "thin" older glue that is starting to get too thick by adding thin CA glue
like a solvent. It works fairly well but when you need to do that it is a good indicator that the batch is just about had it. You can
extend the shelf life by keeping unopened bottles in the fridge or freezer but once they are opened it is best to use them up. Also,
moisture (water) is a weak activator for CA glue so try to keep moisture from getting inside the bottles.
We turned to talking about using CA glue for pens blanks. The advantage is that the setup is quick - just a few seconds. But
the disadvantage is that CA glue breaks down with heat and sanding and polishing of pen blanks can generate enough heat to be a
problem. CA glue is also somewhat brittle an a sharp knock (like dropping a pen) can cause a CA bond to fail.
For pen blank setups I use polyurethane glue (Gorilla Glue). This is the glue that foams up as it hardens. The glue is activated by water do after sanding the barrels and drilling the blanks I dip the blank in water and squeeze a bit of glue into the
hole. Then I use a cotton swab to spread it around the inside and slide in the tube. The manufacturer says leave it for a minimum of
2 hours but I leave it overnight. Some glue gets inside the tube but that gets nicely cleaned out during the end-trimming step.
If you have been having problems with CA glue on your pen projects try polyurethane glue. It takes longer but makes a
really solid glue-up.
Finally, a new member was interested in sourcing metal filings. Several people recommended any local key cutting service. They throw out pounds of the stuff a week, both aluminum and brass. I have tried both CA glue and Expoy to set the filings
into would. CA works fairly well and is quick but it can tend to turn white when too much is used at once. Best to do it in layers. Ca
glue works well too but bubbles can be an issue and it can leave nasty streams on the wood during sanding. Fortunately the same
trick fixes both. Use a blowtorch to gently heat the glue while it is still wet. This helps drive out the bubbles. Then once it is set use
the torch again to harden the glue even more. This will prevent it melting and smearing as you sand.
Thanks to all that took part in Tech Talk at the January meeting. It was an excellent session. Please join us at the February
meeting and bring your tricks, tips, and questions.
Volume 17, Issue 1
January 2015
Page 4
Making a Wedding Goblet - Allan Cusworth
A number of wedding goblets were made in advance since one
goblet could not be completed in the short time allowed for tonight’s
demonstration. This article describes the process as if one goblet was started
and finished.
As any good project does, this one started with a plan. The shape
used shows a goblet roughly 2½ to 3 times higher than its diameter. The
widest diameter of the goblet cup is located about 1/3 of the distance from
the top to the base. This natural design roughly follows the “Golden Mean”
principle. It looks appealing to the eye. However, the design choice is entirely
up to the woodturner.
The goblet in this project is about 6½” high, by 2¾” in diameter. These design elements were used to make a storyboard with a ½ profile pattern of the goblet’s shape drawn at the edge of a piece of cardboard.
The first blank was mounted in the lathe between centres with
the top end towards the headstock of the lathe. It was rough turned to a
cylinder with a tenon made to mount it in a four jaw chuck. The cylinder
was reversed into the chuck, and the tailstock was brought up for support and the cylinder was trued up. With the lathe stopped, the pattern
was then transferred from the storyboard to the cylinder.
The outside diameter of the cup area of the cylinder was
formed. The curve of the bottom of the cup was started to create a
sight line to follow when hollowing out the cup later. The outside
diameter at the top of the stem was left as large as possible to reduce
vibration when hollowing. The inside of the goblet cup was then
hollowed out, sanded, and finished with Salad Bowl Beeswax for a food
safe finish.
A paper towel wrapped cone was placed over the live centre in the tailstock and it was brought up to the lip of the
goblet cup for support while shaping the rest of the goblet. Form the final shape of the outside of the goblet cup. The first ½” ¾” of the stem was shaped to its final diameter. The base and goblet stem were then formed leaving a cylinder at the stem area
just proud of the outside diameter of the captive rings.
A 3/16” Diamond Parting Tool was used to cut 3/8” wide grooves in the large diameter stem area creating two disks.
The grooves are cut deep enough to be able to make the rings and leave ‘stem/mandrel’ diameter to use for sanding the inside of
the rings. The outside surface of the each captive ring was refined by rounding and sanding the top of the rings. Each ring was then
released by cutting in from each side of the disk with a Captive Ring Tool. After the rings were released, a “sanding mandrel” was
turned so strips of PSA abrasive of the different grits could be stuck to it to sand the inside of the rings.
After the rings were sanded, the base and stem were finish turned and
sanded. The goblet was finished with two coats of Salad Bowl Beeswax.
The goblet was removing from the lathe and then reversed onto a
friction chuck and the bottom of the base was finish turned with a slight concave
shape and some decorative rings. Some Salad Bowl Beeswax was then applied.
The goblet is now finished except for buffing and/or engraving and will
become a conversation piece for years to come.
Volume 17, Issue 1
January 2015
Page 5
Turning 101 - Cathy Friesen
On December 6th a sold out class of new turners were the lucky participants in a Christmas
Ornament Turning Workshop lead by Jim Johnson.
Our first project was a Christmas light bulb which began as a 3.5” block turned between
centers. Jim demonstrated a quick way to find the center, the proper use of a spindle roughing gouge and
how to make beads and coves with a small spindle gouge. Lastly, he explained finishing options for our
bulbs.
Our second project was a snowman made from 2 separate pieces of wood. This meant that we
had to join the pieces with a tenon which fit the hole we drilled in the other piece. It was a challenge to
turn 3 balls that were properly proportioned for the figure. Jim showed us a trick to turn the head and
hat in proportion to the body by aligning the pieces on the lathe before turning the head.
Thank you to Jim, Dan and Gerry for your knowledgeable, patient attentiveness as we practiced
safe and proper turning techniques, challenged ourselves and enjoyed the woodturning experience!
Thank you too to KMS Tools for supplying the venue and equipment for our class.
Join us in 2015 for the following Turning 101 workshops.
January 10th, 2015—Wall Clock
February 14th, 2015— Potpourri Dish
March 14th, 2015— Simple Bowl
April 11th, 2015—Natural Edge Bowl
All classes are held at KMS Tools in Coquitlam from 9:00 am – 4:00 pm at a cost of only $25 for each full day’s session.
Volume 17, Issue 1
January 2015
Page 6
Focus on Fundamentals - Neva Hilliard
Bob Askew demonstrated the specific methods he uses to mount a blank and
turn a bowl. He began his talk by reminding us of the safe use of the lathe – be sure your
blank is firmly attached, keep your tail stock up as long as you can, always turn your blank
before starting to make sure it will not catch on the tool rest and always turn your lathe
on at a slow speed and increase the speed to your level of comfort. Bob demonstrated
the use of a face plate, stating that, in his opinion, this is the most secure way to attach the
blank to the head stock.
In shaping the bottom of the bowl Bob discussed how best to determine the
shape and then went on to demonstrate making a tenon. He finished the bottom of the
bowl using both the push and pull cut, doing it slowly to show everyone how to approach
the piece. He then took the face plate off, mounted the piece into the chuck and showed
the group how he approached turning the inside. First he drilled a hole in the center to
the depth he wanted for the bottom and showed us how he positions the gouge to enter
the wood. For his final cuts he demonstrated the use of the Sorbey scraper. He used the
Nova Jaws to finish the bottom of the bowl. He emphasized the importance of making
sure the bottom of the tenon is flat or concave and suggested you always ‘dress up’ the
bottom with a couple of rings to receive your signature.
The session was well attended and we had good discussion about the various methods in turning a bowl. I would like to
thank Bob for his excellent demonstration and the effort he put into preparing for this session.
Volume 17, Issue 1
January 2015
Page 7
Instant Gallery
Bob Askew - Pepper Mill - 2.25 x 8 -
Peter McLaren - Cup - 3 x 3 -
Eastern Maple - In Process
Sycamore - Claphams & Polish
Annie Prefontaine - Pepper Mill -
Bob Askew - Nutcrackers - 2.5 x 4.5 -
Cherry - French Polish
Walnut Maple - Poly Tung Oil
Volume 17, Issue 1
January 2015
Page 8
Ed Job - Amboyna Burl - 14 x 2.5
Jim Johnson - Hollow Form - 5 x 6 - Yellow Cedar Burl - WOP
Keith Ruttan - Bowl - 9 x 5 - Maple - WOP
Keith Ruttan - Bowl - 7 x 3 - Maple - WOP
Volume 17, Issue 1
January 2015
Doug Macdonald - Bowl - 4 x 3 - Spalted Maple - Wax
Dennis Houle - Acorn Box - 4 x 7 - Cherry - WOP
Dennis Houle - Acorn Box - 4.5 x 9 - Spalted Cherry - WOP
Dennis Houle - Acorn Box - 3.75 x 7 - Cherry - WOP
Page 9
Volume 17, Issue 1
January 2015
Page 10
Kieth Hudson - Bird House Ornaments 2 x 4 - various woods - Lacquer
Kieth Hudson - Bird House Ornaments - 2 x 4 - various woods - Lacquer
Keith Bennett - Pen
Bob Askew - Egg Cups & Stand - 4 x 7 - Maple Teak - Poly Tung Oil
Volume 17, Issue 1
January 2015
Page 11
Peter McLaren - Thin Bowl - 7.25 - 2 - Maple - Claphams
Robert Carlson - Platter - 12 x 2 Maple - Tung Oil - Unfinished
Doug Macdonald - Bowl - 8 x 2
Cathy Friesen - Bowl - Maple - WOP & Watco Cherry Stain
Peter McLaren - Bottomless Bowl w Stand - 6.75 x 3 - Birch Clapham's & Polish
Volume 17, Issue 1
January 2015
Page 12
Jim Johnson - Three x Three - Walnut Cherry Maple - Walnut Oil
Jim Johnson - Pierced Form - 2.5 x 3.5 Walnut - Walnut Oil
Meerman - Miniature Kitchen Set - 1-12 scale - Birch
Volume 17, Issue 1
January 2015
Page 13
Larry Stevenson - Sphere - 4.75 Dia - Acacia - Fumed - Acrylic Gel Paint & Pearl
Larry Stevenson - Sphere - 4.25 Dia - Acacia - Fumed - Sandblasted Walnut Oil - Gold Leaf
Larry Stevenson - Sphere - 4.25 Dia - Acacia - Fumed - Sandblasted Walnut Oil - Pava Shell & Acrylic
Volume 17, Issue 1
January 2015
Presidents Challenge
Meerman - Smiley - 1 - Curly Maple - Wax
Dennis Houle - Assorted Pens - Shellawax
Dennis Houle - Pen Press to Fit Head & Tailstock
Page 14
Volume 17, Issue 1
January 2015
Marco Berera - Christmas Tree - 2 x 5 - Lebanon Cedar - Marker
Keith Hudson - Bird House - 2 x 4 - Lacquer
Page 15
Volume 17, Issue 1
January 2015
Turning 101
Dan Breck - Candlesticks - 2 x 4 & 7 x 2 - Maple - Lacquer
Annie Prefontaine - Candlestick - Maple & French Polish
Bill Howorth - Candle Holders - Wax WOP
Page 16
Volume 17, Issue 1
January 2015
Page 17
GVWG Meeting Presenters for 2nd Half of This Year
January 28, 2015 – Larry Stevenson – Turning Spheres
February 25, 2015 – Ed Pretty, Claudia Hayward – Safety Review Demo (what you would expect to become an accredited
demonstrator)
March 25, 2015 – Marco Berera – Piercing 1800’s Style
April 22, 2015 – Ed Pretty – Methods of Mounting and Finishing Your Work without Modern Chucks or Vacuum Chucks
May 27, 2015 – Neva Hilliard – Making a Baby Rattle
June 24, 2015 – Kerry Deane Cloutier/ Dennis Cloutier – TBA
Volume 17, Issue 1
January 2015
Page 18
GVWG Officers, Appointees & Volunteers
President
Bill Fowle
Librarian
604.466.2150
Vice President
Bruce Campbell
604.463.0760
Food Chief
604.944.3028
Secretary
Bob Askew
Gerry Vickers
Marco Berera
604.274.7594
FOF Coordinator
604.535.6774
Neva Hilliard
604.462.9476
Treasurer
Ken Kimberley
604.536.2683
Turning 101
Gerry Vickers
604.463.0760
Members At Large
Tom Byrom
604.929.1766
Barry Wilkinson
604.466.2150
Claudia Hayward
604.462.7597
Des Wilson
604.936.2749
Olaf Lepper
604.307.6005
John Spitters
778.783.0098
Newsletter
Ron Hadar
778.881.2422
[email protected]
Digital Photography
Bill Fowle
604.466.2150
Webmaster
Educational Coordinator
Steve Hansen
Steve Kent
604.937.0145
Larry Stevenson
604.940.9780
Bruce Campbell
604.944.3028
604.585.0638
[email protected]
© Copyright 2026
