
Authentication with OpenID
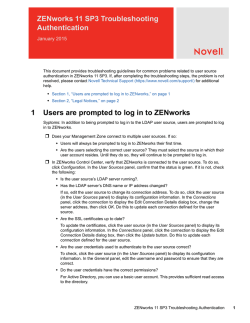
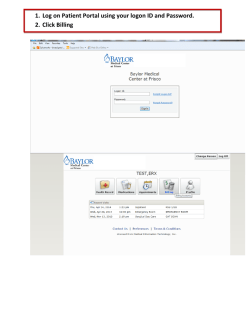
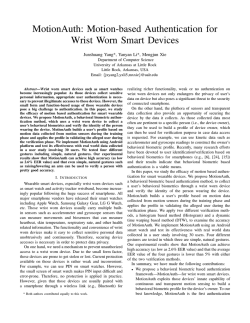
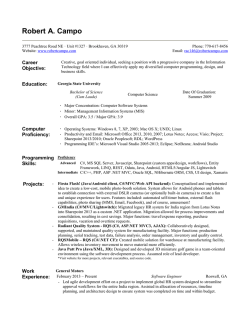
AUTH Authentication with OpenID Goals of this lab: Understand how authentication works An understanding of the difference between authentication and authorization Design your own authentication method Learn about identity management, especially in federated settings Get a hands-on experience with an identity management system Prerequisites: Programming experience, basic UNIX knowledge Note that you will use the Eclipse IDE in this lab. Familiarity with Eclipse, Java and HTML will help, but is not required. IDA/ADIT AUTH: AUTHENTICATION WITH OPENID Table of Contents Authentication ................................................................................................................................... 3 Identity management ........................................................................................................................ 3 Part 1: Lab description ......................................................................................................................... 4 Part 2: Pre-lab...................................................................................................................................... 4 Exercise 1: Authentication and Authorization ............................................................................... 4 Part 3: Initial setup ............................................................................................................................... 5 Exercise 2: Setting up Eclipse ...................................................................................................... 5 Exercise 3: Description of the RP and OP .................................................................................... 5 Part 4: Fix OpenID Connect authentication ......................................................................................... 6 Exercise 4: Get familiar with the lab environment ........................................................................ 6 Exercise 5: Fix the code in the two classes .................................................................................. 6 Part 5: Design and implementation of your own authentication method ............................................. 6 Exercise 6: Design of an authentication method .......................................................................... 6 Exercise 7: Implement your own authentication method .............................................................. 7 Part 6: APPENDIX ............................................................................................................................... 7 IDA/ADIT AUTH: AUTHENTICATION WITH OPENID Introduction Authentication Authentication is the process of proving that you are who you claim to be. For example, when accessing your webmail you need to provide your username and password at the website. By proving knowledge of the username and password, you confirm that you are indeed the owner of the webmail account. Beside passwords there are also other authentication methods such as the following: One-time passwords: The user gets a list of passwords that can only be used once. If an attacker captures a password during authentication it will be of no use since a new password will be used the next time. Challenge-response: Instead of entering a password the user will be presented with a number (the challenge) generated by the authentication server. The user calculates the correct answer to that specific challenge and sends it back to the service. The challenge-response algorithm is constructed in such a way that each user shares a unique secret with the server. This secret is used when calculating the response (often done by using a small, tamper-resistant hardware device containing the secret). Thus, only the correct user can calculate the response. Other examples of authentication include: Knowledge of categories: The user chooses among a set of categories beforehand (e.g. cats, airplanes and flowers) and is presented with a number of images. The user clicks on images belonging to the chosen categories in order to authenticate. Time and location: The user can only authenticate at specific times and/or when being located at a specific place. Identity management With the variety of popular web sites where users can create a personal account, such as blogs or e-mail accounts, users have an increasing amount of digital identities to remember. A digital identity is used when accessing a web site or system. A common example is a username/password pair. In the field of identity management – how to securely store and manage digital identities – the idea of federated identity management is one solution to the problem of users having difficulties remembering all their identities. In federated identity management the user has an account at an identity provider which is part of an identity federation. When the user wants to log in to a site that is part of an identity federation, the user gets redirected to the identity provider to which the user authenticates. This means that the user only needs to remember one identity in order to use any of his/her identities. IDA/ADIT AUTH: AUTHENTICATION WITH OPENID OPENID CONNECT In this lab you will use OpenID Connect, a federated identity management solution. Information about OpenID Connect is found here: http://www.openid.net/connect In OpenID Connect there are two types of web sites: Relying party (RP) – a site which outsources its authentication to an OpenID provider OpenID provider (OP) – a site that allows authentication as a service to Relying Parties, an example would be Google with its “sign in with Google” service. In some cases an OpenID Provider is called an Identity Provider (IDP). Part 1: Lab description In this lab you will receive an example implementation of an RP and OP. Your task is to: Fix the code used by the RP and OP, by following the OpenID Connect defined flow for authentication. Implement an authentication method to be used instead of passwords on the OP The lab uses a Jetty embedded server, Servlets and oauth2-oidc-sdk, an open source library for OpenID Connect. Documentation for Jetty Embedded: http://wiki.eclipse.org/Jetty/Tutorial/Embedding_Jetty. Documentation for oauth2-oidc-sdk can be found here: http://connect2id.com/products/nimbus-oauthopenid-connect-sdk You will work in Eclipse, a programming environment, and you will be given an Eclipse project containing example implementations of an RP and an OP. These simple, password based implementations contains places where some method calls are missing or are redundant. You will fix these problems in Part 4 of the lab. Part 2: Pre-lab First you should have a thorough understanding of what authentication and authorization are and how they differ; you will also need to have somewhat of an understanding of how authentication can be done You must complete the following task before proceeding with the rest of the lab. When you have handed in your solution to your lab assistant and passed the exercise you can continue to the implementation part of the lab. Exercise 1: Authentication and Authorization 1-1 Write about ½ page describing what authentication and authorization is and their uses. 1-2 Shortly describe the ideas and uses of Oauth, OpenID and OpenID Connect and the way they differ. Report: Hand in the answers to the questions above. IDA/ADIT AUTH: AUTHENTICATION WITH OPENID Part 3: Initial setup Before starting you need to import the OpenIDA3 project that you will work on into your Eclipse Workspace. Exercise 2: Setting up Eclipse 2-1 Open Eclipse by typing eclipse & in the same terminal. 2-2 Create a new workspace. When Eclipse has started, click the Workbench icon. Now you should import the lab project into Eclipse. 2-3 Click on File Import General Existing projects into workspace. Click Next. Select import from archive File. Click Browse to select the root directory. Then navigate to: /home/TDDD17/www-pub/labs/openida3.tar.gz. Click Finish. Note the following: if you see the message "Subversion Native library not available, click OK and continue. Note: The course home directory is mounted on demand the first time it is accessed during a session. If the directory is not visible in the graphical interface, first navigate to the directory by typing cd /home/TDDD17 in a terminal window. Now you have a project called OpenIDA in your workspace. You might have to wait a few seconds for the files to be imported. Note: If you see errors when importing your OpenIDA project, right click on OpenIDA in the package explorer. Select Build path Configure build path. Click the Libraries tab. If your JRE is unbound, do the following: Select the unbound JRE, click Edit and select Alternate JRE. Choose JDK 1.7.0 (or similar with 1.7 or 7 as part of the name). Click Finish. 2-4 Open the project OpenIDA. In the src folder you have a package named dbPackage. Open it. Then open the files OPdbConnection.java and RPdbConnection.java. Change the three first variables (String: url, user and password) according to the comments. 2-5 You should now compile and run the project. To do this, you can open the project, go into the serverPackage, right-clicking the ServerBooter.java file and choose Run as > Java application. Don’t worry about the red lines containing “INFO”, they should be there. 2-6 Open a browser and go to http://localhost:8054 You should now see a website where a user can log in by clicking the “Log In With OpenID Connect” button. Report: No report is required. Exercise 3: Description of the RP and OP This is how the system is supposed to work. Before you have completed Part 4, the program will not work this way. 3-1 What you see in your browser is an example implementation of an OpenID RP. The start page of the RP contains no functionality except the ability to be redirected to an OP for authentication. 3-2 By clicking the button you will be redirected to the example implementation of an OP. If you see a login form, the example OP is working. 3-3 In order to log in with a user you have two choices. Either login with the pre-prepared user (Username: qwe Password: asd), or create a new account. 3-4 At the OP you can do three things; upload a profile picture, log out, or acknowledge the authentication request from a RP (sending you to the RP’s page). IDA/ADIT AUTH: AUTHENTICATION WITH OPENID 3-5 If you authenticate the request from the relying party, you are sent to the relying party’s chat. Report: No report is required. Part 4: Fix OpenID Connect authentication In this part of the lab you will fix the code in the Relying Party (RP) and the OpenID Provider (OP). As the program is now, the program will start, and you should be able to see the start page for the RP, and both pages for the OP. However, if you try to authenticate on the RP’s page, the server will crash and you will get error messages in the web browser and the eclipse console. After this part of the lab has been completed, you should be able to via the RP’s start page authenticate through the OP, sending you back to the RP, allowing you to use the chatroom in the RP. Exercise 4: Get familiar with the lab environment Take a look at the files in the OpenIDA Eclipse project. In the src folder in the project you will find the source code for OpenIDA in which you have to make changes in the lab. There are two classes you need to care about, the RPLogin.java and the OPAuthRequestHandler.java. Later on you will probably also look at least at the two classes for database communication (XXdbConnection.java). In the WEB-INF folder you will find among other things HTML pages for the user interface of the RP and OP. 4-1 Familiarize yourself with RPLogin.java and OPAuthRequestHandler.java. These are the two classes you will have to make small changes to. Report: No report is required. Exercise 5: Fix the code in the two classes 5-1 Start in the RPLogin.java class. You will see that there is a method call missing to create an authenticationRequest object. You are supposed to call the correct method according to the OpenID Connect Authentication flow. 5-2 Fix the code in the same manner in the OPAuthRequestHandler.java. 5-3 If the server is still running, shut it down and then restart it. Note: If the webpage doesn’t change in behavior after changing the code. You can test two things. 1. Rebuild the project by pressing: Project Clean… 2. Clean the web browsers cache. Report: Hand in your well written and commented code (by e-mail). Part 5: Design and implementation of your own authentication method When you understand how the system works, design your authentication method, set up the database tables that you need and implement your solution. Note: When designing your authentication method, keep in mind that it should be possible to implement within reasonable time within the lab environment. Exercise 6: Design of an authentication method 6-1 If you are unfamiliar with authentication, search online to find information on different authentication methods and ideas on how to design your own method. 6-2 Design your own authentication method that doesn’t use passwords. Your method should offer comparable or better security then a username/password solution. The method can be for example one-time passwords, challenge-response or something IDA/ADIT AUTH: AUTHENTICATION WITH OPENID else that you come up with yourself, for example a method that is based on multiple factors such as time, location or images. Take the chance to be creative when designing your authentication method! 6-3 Perform a risk analysis of your design, using one of the methods taught in the course. 6-4 Write a report (a few pages) about your design choices and how your method works. Motivate why your method offers comparable (or better) security than using passwords. Discuss potential weaknesses of your method uncovered in the risk analysis, and how these could be avoided or mitigated. 6-5 Create a use-case diagram and a sequence diagram of your authentication method. Report: Your written report on the design of your method, including the risk analysis, and the use-case and a sequence diagrams. Exercise 7: Implement your own authentication method 7-1 How can your authentication method be implemented? Write 1-2 pages about how you are going to implement your method and what you need to add and change in the given lab files. Address at least the following issues: (a) What do you need to change in the database to allow the implementation? (b) What should the user interface look like? (c) What do you need to add/change in the HTML (and CSS) pages? (d) Do you need to add servlets or other classes to the project? (e) Do you need to change something in the OpenIDA source files? 7-2 Extend your OP by implementing your authentication method instead of using passwords. Mappings for new servlets must be added in the ServerBooter.java file, in the generateRESTAPI() method. You can see the existing mappings and do the same for other servlets that you add (A simple example can be find in the OPLoginHandler). 7-3 (Optionally) Now that you have a more thorough understanding of the OpenIDA environment, you may have noticed that there exist some security flaws in the main implementation. Try to write down these two, describing what they are and how they would be fixed. Report: Hand in your report for exercise 7-1, and your well written and commented code (by email). You should be able to run your OP - with your own authentication method - in a web browser and use it to log in to your RP. Each group will demonstrate their solution to the lab assistant. Contact your lab assistant to book a time for the demonstration. Part 6: APPENDIX This appendix shows what the RP and OP web pages look like, and how they should behave. IDA/ADIT AUTH: AUTHENTICATION WITH OPENID Fig 1: The main page of the Relying Party. It has no functionality except the login button, which sends the user to the OpenID Provider. Fig 2: The start page for the OpenID Provider. It allows the user to sign in with an already existing user account, or for a user to create an account. IDA/ADIT AUTH: AUTHENTICATION WITH OPENID Fig 3: The page the OpenID Provider has for logged in users. It provides the user with the following functionality: Change profile picture (which is only shown on this page). Logout, which sends the user back to the start page. Submit authentication. This is the part you will fix in Part 4 of the lab. If the user has a waiting authentication request from a Relying Party, the Relying Party’s ClientID is shown, and the user has the ability to submit the authentication request. After the authentication request has been submitted, the user is redirected to the Relying Party. Fig 4: This page is shown to logged in users at the Relying Party. The page has a simple chat board, where the users can write messages. Note that since the server is here only run locally, the only user you will see in the chat is yourself. IDA/ADIT AUTH: AUTHENTICATION WITH OPENID
© Copyright 2026