
HonigumPro
Honigum Pro
Mono
Inhalt | Contents
Gebrauchsinformation – DEUTSCH
4
Instructions for use – ENGLISH
14
Mode d’emploi – FRANÇAIS
24
Istruzioni per l’uso – ITALIANO
35
Instrucciones de uso – ESPAÑOL
46
Instruções de utilização – PORTUGUÊS
57
Gebruiksaanwijzing – NEDERLANDS
68
Brugsanvisning – DANSK
78
Bruksanvisning – SVENSKA
88
Instrukcja użycia – POLSKI
98
Инструкция по применению – РУССКИЙ 109
3
Gebrauchsinformation
Deutsch
Produktbeschreibung
Honigum Pro/Mono ist ein Monophasen-Abformmaterial auf der Basis von additionsvernetzenden Silikonen.
Das Material ist in der Automix-Sicherheitskartusche und in der gebrauchsfertig befüllten MixStar-Kartusche erhältlich, die für die Verwendung
im DMG MixStar-eMotion und weiteren handelsüblichen Mischgeräten geeignet ist.
Indikationen
•
•
•
•
•
4
Kronen- und Brückenabformungen
Inlay- und Onlayabformungen
Funktionsabformungen
Druckstellenermittlung
Überabformungen aller Art, z. B. für Implantate und Teleskope
Grundlegende Sicherheitshinweise
• Nur für den zahnärztlichen Gebrauch!
• Für Kinder unzugänglich aufbewahren!
Hinweise zur Anwendung
• Die angegebenen Verarbeitungszeiten (siehe »Technische Daten« auf Seite 11) gelten für eine Raumtemperatur von 23 °C und
eine normale relative Luftfeuchte von 50 %.
Höhere Temperaturen verkürzen, niedrigere
verlängern diese Zeiten.
• Rückstände von Retraktionslösungen gründlich mit Wasser abspülen, andernfalls können diese unter Umständen zu einer Verlängerung der Abbindezeit führen.
• Den Kontakt der Abformung mit organischen Lösungsmitteln oder lösungsmittelhaltigen Flüssigkeiten vermeiden, andernfalls
kann es zu einer Quellung des Materials und
damit zu Ungenauigkeiten im Ausguss kommen.
• Kontakt des Abformmaterials mit Latexhandschuhen vermeiden. DMG empfiehlt
die Verwendung von Handschuhen auf PVCoder PE-Basis.
• Honigum Pro/Mono nicht mit kondensationsvernetzenden Silikon- oder PolyetherAbformmaterialien kombinieren.
Handhabung der MixStar-Kartusche
im DMG MixStar-eMotion
Gebrauchsinformation des »MixStar-eMotion«
beachten!
riegelungsschieber nicht von der Kartusche
abziehen.
1
2
2. Den Verschluss von der Kartusche abziehen
und verwerfen. Neue Mischkanüle aufsetzen.
1. Zum Öffnen der Kartusche den Verriegelungsschieber nach oben schieben. Ver5
3. Mischkanüle durch Schließen des Verriegelungsschiebers arretieren.
Handhabung der MixStar-Kartusche
in Mischgeräten anderer Hersteller
Gebrauchsinformation des verwendeten
Mischgeräts beachten!
Zunächst die Kartusche ohne Mischkanüle
in das Mischgerät einsetzen, andernfalls ist
ein einwandfreies Anmischen des Materials
nicht gewährleistet!
In diesem Fall wie unter »Wechseln der Mischkanüle« auf Seite 6 beschrieben verfahren.
4. Kartusche in den MixStar-eMotion einsetzen. Ein kurzes akustisches Signal bestätigt
das korrekte Einsetzen der Kartusche.
Hinweise: Neue Kartuschen vor der ersten Anwendung durch Verwerfen der ersten ca. 3 cm Stranglänge einsatzbereit machen.
Die benutzte Mischkanüle nach der Applikation
als Verschluss auf der Kartusche belassen.
6
Wechseln der Mischkanüle
Gebrauchsinformation des verwendeten
Mischgeräts beachten!
Hinweis: Vor jedem Mischvorgang eine neue
Mischkanüle aufsetzen.
1. Den Verriegelungsschieber nach oben schieben.
2. Die alte Mischkanüle abziehen und die Kartuschenöffnungen von eventuellen Pfropfen
befreien.
3. Die Mischkanüle fest auf die entsprechenden
Öffnungen der Kartusche setzen.
4. Die Mischkanüle mit dem Verriegelungsschieber arretieren.
Kartusche einsetzen
1. Den Hebel [A] an der Rückseite des Ausbringgeräts nach oben drücken und den
Schieber [B] vollständig zurückziehen.
2. Kunststoffriegel [C] nach oben klappen, die
Kartusche einsetzen und mit dem Kunststoffriegel [C] arretieren.
Handhabung der Automix-Kartusche
Hinweis: Darauf achten, dass die Aussparungen
an der Kartusche und dem Ausbringgerät übereinstimmen.
F
E
C
D
B
A
G
Mischkanüle aufsetzen
1. Kartuschenkappe [D] oder benutzte Mischkanüle nach Drehung um 90° gegen den Uhrzeigersinn abziehen und verwerfen.
2. Neue Mischkanüle [E] aufsetzen.
Hinweis: Darauf achten, dass die Aussparungen
an der Mischkanüle und der Kartusche übereinstimmen.
3. Die Mischkanüle durch Drehen um 90° im
Uhrzeigersinn arretieren.
7
Material applizieren
Beim erstmaligen Gebrauch einer Kartusche
eine etwa erbsengroße Menge des Materials ausbringen und verwerfen.
Das Material durch Betätigen des Hebels [G]
am Ausbringgerät in der Mischkanüle mischen
und direkt applizieren.
Hinweis: Die benutzte Mischkanüle nach der
Applikation als Verschluss auf der Kartusche belassen!
Kartusche entnehmen
1. Den Hebel [A] an der Rückseite des
Ausbringgeräts nach oben drücken und den
Schieber [B] vollständig zurückziehen.
2. Kunststoffriegel [C] nach oben klappen und
die Kartusche entnehmen.
Empfohlene Anwendung
• Honigum Pro/Mono kann in allen gebräuchlichen nicht perforierten Abformlöffeln verwendet werden.
8
• Bestmögliche Resultate werden mit individuellen Abformlöffeln erzielt.
• Um die Adhäsion des Materials zu Metalloder Kunststofflöffeln zu verbessern, sollte
ein Löffeladhäsiv für A-Silikone (z. B. Tray
Adhesive, DMG) angewendet werden.
Monophasenabformung
Die individuellen Zeiten sind der Rubrik »Technische Daten« auf Seite 11 zu entnehmen.
Den vorbereiteten Abformlöffel mit Honigum Pro/Mono beschicken. Dabei den Abformlöffel leicht schräg unter die Mischkanüle halten.
Hinweis: Um Lufteinschlüsse zu vermeiden, sollte die Spitze der Mischkanüle bei der Applikation immer in die Masse eingetaucht bleiben.
Einen Teil des Materials in eine handelsübliche Elastomerspritze füllen oder die 50-mlKartusche direkt verwenden und die Präparation umspritzen.
Hinweis: Das Füllen des Löffels und das Umspritzen sollten gleichzeitig beendet sein, weil durch
die erhöhte Mundtemperatur das Umspritzmaterial schneller erhärtet als das im Löffel befindliche Material.
Hinweis: Um Lufteinschlüsse zu vermeiden, sollte die Spitze der Mischkanüle bei der Applikation immer in die Masse eingetaucht bleiben.
Innerhalb der Verarbeitungszeit den befüllten Löffel mit geringem Kraftaufwand langsam im Mund positionieren und die Präparation abformen.
Nach Beendigung der Abbindezeit die Abformung aus dem Mund entnehmen, siehe »Entnahme« auf Seite 10.
Hinweis: Das Füllen des Löffels und das Umspritzen sollten gleichzeitig beendet sein, weil durch
die erhöhte Mundtemperatur das Umspritzmaterial schneller erhärtet als das im Löffel befindliche Material.
Doppelmischabformung
Die individuellen Zeiten der verwendeten
Materialien sind der Rubrik »Technische Daten«
zu entnehmen. Dazugehörige Gebrauchsinformation beachten!
Den Abformlöffel mit Honigum Pro/Mono
beschicken. Dabei den Abformlöffel leicht
schräg unter die Mischkanüle halten.
Die Präparation mit Honigum Pro/Light umspritzen.
Innerhalb der Verarbeitungszeit den befüllten Löffel mit geringem Kraftaufwand langsam im Mund positionieren und die Präparation abformen.
Nach Beendigung der Abbindezeit die Abformung aus dem Mund entnehmen, siehe »Entnahme« auf Seite 10.
9
Die Abformung im Bereich der präparierten
Zähne parallel zur Zahnlängsachse entnehmen.
Anschließend wie unter »Reinigung und Desinfektion der Endabformung« auf Seite 10.
beschrieben verfahren.
Weitere Informationen sind auch der Stellungnahme der DGZMK zu entnehmen. Stellungnahme der DGZMK 3/93 V 1.0; www.
dgzmk.de
ADA recommends to follow Council on Dental Materials, Instruments and Equipment.
Disinfection of impressions. JADA 1991;122(3):110;
www.ada.org
Reinigung und Desinfektion der
Endabformung
Ausgießen und Galvanisieren
Entnahme
Die Endabformung nur mit Tauchlösungen
desinfizieren.
DMG empfiehlt die Verwendung einer 2 %igen
Glutaraldehydlösung.
Darauf achten, dass das verwendete Desinfektionsmittel zur Verwendung mit additionsvernetzenden Abformsilikonen indiziert ist.
Herstellerhinweise für das Desinfektionsmittel genauestens beachten!
Die Endabformung trocknen und bis zum Ausgießen lagern, siehe »Lagerung der Abformung« auf Seite 10.
10
Die Abformung frühestens 30 min nach der
Entnahme aus dem Mund ausgießen.
Für den Ausguss empfiehlt DMG die Verwendung von Modellhartgips (ISO 6873; Type 3, z. B.
Moldano, Bayer) bzw. Superhartgips für Formen
(ISO 6873; Type 4, z. B. Fujirock II, GC). Die Abformung lässt sich kupfer- und silbergalvanisieren.
Lagerung der Abformung
Abformung bei Raumtemperatur (15 – 25 °C/
59 – 77 °F) trocken lagern!
Vor direkter Sonneneinstrahlung schützen!
Honigum Pro/Mono
Die Abformung ist formstabil und kann auch nach
Monaten ohne Präzisionsverlust ausgegossen
werden.
Verarbeitungszeit [min]
≤ 1:30 ≤ 1:30
Technische Daten
Intraorale Verarbeitungszeit2
[min]
≤ 0:30 ≤ 0:30
Mundverweildauer [min]
≥ 2:00 ≥ 2:00
Dimensionsänderung nach
24 h [%]
≤ 0,40 ≤ 0,40
Druckverformungsrest [%]
≤ 0,35 ≤ 0,35
Fast
1
Honigum Pro/Mono
Verarbeitungszeit1 [min]
≤ 2:45 ≤ 2:45
Intraorale Verarbeitungszeit2
[min]
≤ 1:00 ≤ 1:00
Mundverweildauer [min]
≥ 3:15 ≥ 3:15
Dimensionsänderung nach
24 h [%]
≤ 0,40 ≤ 0,40
Druckverformungsrest [%]
≤ 0,35 ≤ 0,35
Verformung unter Druck [%]
≈ 2,8
Verformung unter Druck [%] ≈ 2,8
≈ 2,8
Fast
≈ 2,8
1
Die angegebenen Zeiten gelten für eine Raumtemperatur von
23 °C und eine normale relative Luftfeuchte von 50 %. Höhere
Temperaturen verkürzen, niedrigere verlängern diese Zeiten.
Die Verarbeitungszeit beschreibt den Zeitraum vom Mischbeginn an bis zu dem Zeitpunkt, an dem die Positionierung des
Löffels im Mund des Patienten spätestens erfolgen muss.
2
Die angegebenen Zeiten gelten ab Mischbeginn für eine Temperatur von 35 °C.
11
Desinfektion des Automix-Dispensers
Lagerung und Haltbarkeit
Der Automix-Dispenser ist nach der Desinfektion
wiederverwendbar, sollte aber bei sichtbaren
Verschleißspuren ausgetauscht werden.
Die Desinfektion kann mit einer handelsüblichen
Tauchdesinfektion erfolgen. DMG empfiehlt die
ausschließliche Verwendung von RKI (Robert
Koch Institut) gelisteten Desinfektionsmitteln.
Der Automix-Dispenser ist außerdem autoklavierbar.
Bei Raumtemperatur (15 – 25 °C/59 – 77 °F)
trocken lagern.
Nicht im Kühl- oder Gefrierschrank lagern!
Vor direkter Sonneneinstrahlung schützen!
Die benutzte Mischkanüle nach der Applikation als Verschluss auf der Kartusche belassen!
Nach Ablauf des Haltbarkeitsdatums nicht
mehr verwenden!
Zusammensetzung
Handelsformen
Vinylpolysiloxane, Siliciumdioxid, Pigmente, Additive, Platinkatalysator
Nicht in den USA erhältlich
1 Kartusche à 380 ml Paste, 10 MixStar-Tips
Klassifikation
Honigum Pro/Mono
ISO 4823:2000, Type 2: Medium-bodied consistency
REF 929568
Fast
12
REF 929978
5 Kartuschen à 380 ml Paste, 50 MixStar-Tips
8 Kartuschen à 50 ml Paste
Honigum Pro/Mono
Honigum Pro/Mono
REF 929569
Fast
REF 929911
REF 929979
Nur in den USA erhältlich
2 Kartuschen à 50 ml Paste, 4 Automix-Tips,
4 Intraoral-Tips
Honigum Pro/Mono
1 Kartusche à 380 ml Paste, 10 MixStar-Tips
Honigum Pro/Mono
REF 989568
REF 929830
Fast
REF 929976
8 Kartuschen à 50 ml Paste, 16 Automix-Tips,
16 Intraoral-Tips
4 Kartuschen à 50 ml Paste, 8 Automix-Tips,
8 Intraoral-Tips
Honigum Pro/Mono
REF 989830
Honigum Pro/Mono
REF 929834
Fast
REF 929977
13
Instructions for use
English
Product description
Honigum Pro/Mono is a monophase impression
material based on addition curing silicones.
The material is available in the Automix safety
cartridge and in the ready-to-use pre-filled MixStar
cartridge, which is suitable for use in the DMG
MixStar-eMotion and other commercially available mixing machines.
Indications
•
•
•
•
•
14
Crown and bridge impressions
Inlay and onlay impressions
Functional impressions
Pressure point identification
All types of pickup impressions, e.g. for
implants and telescopes
Basic safety instructions
• For dental use only!
• Keep away from children!
Advice on application
• The working times (refer to “Technical data”
section on page 20) apply at a room temperature of 23 °C and a normal relative air
humidity of 50%. Higher temperatures shorten, lower temperatures increase these times.
• Rinse off residues of retraction solutions
thoroughly with water because they can
increase the setting time in some instances.
• Never allow the impression to come into
contact with organic solvents or liquids containing solvents as this may result in a swelling of the material and may therefore lead to
inaccuracies in the cast.
• Never allow the impression material to come
into contact with latex gloves. DMG recommends the use of PVC or PE based gloves.
• Do not mix Honigum Pro/Mono with condensation curing silicone or polyether
impression materials.
Using the MixStar cartridge in the
DMG MixStar-eMotion
Follow the instructions for use for the
“MixStar-eMotion”!
1. Slide the locking mechanism upwards in
order to open the cartridge. Do not remove
the locking mechanism from the cartridge.
1
2
2. Remove the cap from the cartridge and
discard. Attach a new mixing tip.
3. Secure the mixing tip by sliding the locking
mechanism into the locked position.
15
Using the MixStar cartridge in
mixing units from other
manufacturers
4. Insert the cartridge into the MixStareMotion. A brief acoustic signal confirms the
correct insertion of the cartridge.
Note: Prepare fresh cartridges for use by extruding and discarding the first 3 cm of impression
material.
Leave the used mixing tip on the cartridge after
use. It serves as a cap.
Follow the instructions for use for the chosen
mixing unit!
First insert the cartridge into the mixing unit
without the mixing tip. Otherwise appropriate mixing of the material cannot be guaranteed!
In this case proceed as described in the section
“Changing the mixing tip” section on page
16.
Changing the mixing tip
Follow the instructions of the mixing unit you
are using!
Note: Attach a new mixing tip before each mixing process.
1. Slide the locking mechanism upwards.
2. Remove the old mixing tip and any hardened
material blocking the cartridge openings.
16
3. Place the mixing tip securely on the respective cartridge opening.
4. Lock the mixing tip in place with the locking
mechanism.
Using the Automix cartridge
F
E
C
D
B
A
2. Lift up the plastic lever [C], insert the
cartridge and lock it by pushing down the
plastic lever [C].
Note: Make sure that the notches on the cartridge
line up with those on the dispensing gun.
Attach mixing tip
1. Remove the cartridge cap [D] or used mixing tip by turning it 90° counterclockwise,
and discard it.
2. Attach a new mixing tip [E].
Note: Make sure that the notches on the mixing
tip line up with those on the cartridge.
3. Turn the mixing tip clockwise 90° to lock it.
G
Insert cartridge
1. Push up the lever [A] at the back of the
dispensing gun and pull back the slide [B]
completely.
Apply material
When using a cartridge for the first time,
express a pea-sized amount of material and
discard it.
The material is mixed in the mixing tip by
pulling the trigger [G] of the dispenser and it
is then applied directly.
17
Note: Leave the used mixing tip on the cartridge
after use. It serves as a cap.
Fill the prepared tray with Honigum Pro/Mono.
When doing so, hold the impression tray at
a slight angle beneath the mixing tip.
Remove cartridge
1. Push up the lever [A] at the back of the
dispensing gun and pull back the slide [B]
completely.
2. Lift up the plastic lever [C] and remove the
cartridge.
Note: To avoid air bubbles, the end of the mixing
tip should stay immersed in the impression material
throughout the process.
Recommended use
• Honigum Pro/Mono can be used in all common nonperforated impression trays.
• Best results are obtained with individual
impression trays.
• In order to improve the adhesion of the
material to metal or plastic trays, a tray adhesive for A-silicon (e.g. Tray Adhesive, DMG)
should be applied.
Monophase impression taking
For the individual times refer to the “Technical
data” section on page 20.
18
Fill a small amount of material into a commercially available elastomer syringe or use
the 50 mL cartridge directly and syringe the
preparation.
Note: The filling of the tray and syringing should
be completed at the same time as the higher temperature in the mouth leads to a quicker setting
of the syringed material compared to the tray
material.
Position the filled tray in the mouth within
the working time, slowly and using very little
force, and allow the impression to form.
Remove the impression from the mouth
once the setting time has ended, refer to
“Removal” section on page 19.
Double-mix impressions
For the individual times applicable to the
materials used refer to the “Technical data”.
Follow the associated instructions for use!
Fill the tray with Honigum Pro/Mono. When
doing so, hold the impression tray at a slight
angle beneath the mixing tip.
Note: To avoid air bubbles, the end of the mixing tip should stay immersed in the impression
material throughout the process.
Syringe the preparation with Honigum Pro/
Light.
Note: The filling of the tray and syringing should
be completed at the same time as the higher temperature in the mouth leads to a quicker setting
of the syringed material compared to the tray
material.
Position the filled tray in the mouth within
the working time, slowly and using very little
force, and allow the impression to form.
Remove the impression from the mouth
once the setting time has ended, refer to
“Removal” section on page 19.
Removal
Remove the impression parallel to the longitudinal axis of the prepared teeth.
After removal, proceed as described in the
“Cleaning and disinfecting the final impression”
section on page 19.
Cleaning and disinfecting the final
impression
Only disinfect the final impression with dipping solutions.
DMG recommends the use of a 2% glutaraldehyde solution.
Please ensure that the disinfectant used is
indicated for use with addition curing silicone
impression material.
19
Follow the instructions of the disinfectant
solution’s manufacturer precisely!
Leave the final impression to dry and store
until casting, refer to “Storage of the impression” section on page 20.
For more information, refer to the comments
of the DGZMK. Comments of the DGZMK
3/93 V 1.0; www.dgzmk.de
ADA recommends following Council on Dental Materials, Instruments and Equipment.
Disinfection of impressions. JADA 1991;122(3):110;
www.ada.org
Storage of the impression
Store the impression in a dry place at room
temperature (15 – 25 °C/59 – 77 °F).
Protect against exposure to direct sunlight!
The impression is stable and can be cast even
after months without loss of accuracy.
Technical data
Honigum Pro/Mono
Working time1 [min]
Casting and galvanization
The impression should be cast 30 minutes at
the earliest after removal from the mouth.
DMG recommends using special purpose hard
plaster (ISO 6873, Type 3; e.g. Moldano, Bayer)
for the cast and an ultra hard dental plaster for
the forms (ISO 6873, Type 4; e.g. Fujirock II, GC).
The impression can be copper or silver-plated.
20
Intraoral working time
[min]
≤ 2:45 ≤ 2:45
2
≤ 1:00 ≤ 1:00
Time in the mouth [min]
≥ 3:15 ≥ 3:15
Dimensional change after
24h
≤ 0.40 ≤ 0.40
Compression set [%]
≤ 0.35 ≤ 0.35
Strain in compression [%]
≈ 2.8
≈ 2.8
Disinfection of the Automix-Dispenser
Honigum Pro/Mono
Fast
Fast
The Automix-Dispenser is reusable after disinfection, although it should be replaced if visible
signs of wear appear.
Disinfection can be carried out using a commercially available dipping disinfectant. DMG recommends using only disinfecting solutions listed by the RKI (Robert Koch Institute). The
Automix-Dispenser can also be autoclaved.
Working time1 [min]
≤ 1:30 ≤ 1:30
Intraoral working time2
[min]
≤ 0:30 ≤ 0:30
Time in the mouth [min]
≥ 2:00 ≥ 2:00
Dimensional change after
24h
≤ 0.40 ≤ 0.40
Compression set [%]
≤ 0.35 ≤ 0.35
Composition
Strain in compression [%]
≈ 2.8
Vinyl polysiloxanes, silicium dioxide, pigments,
additives, platinum catalyst
≈ 2.8
1
The times apply at a room temperature of 23 °C and a normal relative air humidity of 50%. Higher temperatures shorten,
lower temperatures increase these times.
The working time describes the period from the start of mixing
until the time by which the tray must be positioned in the
patient’s mouth.
2
The times apply from start of mixing time for a temperature
of 35 °C.
Classification
ISO 4823:2000, type 2: Medium-bodied consistency
Storage and shelf-life
Store in a dry place at room temperature
(15 – 25 °C/59 – 77 °F).
21
Do not store in the refrigerator or freezer!
Protect against exposure to direct sunlight!
Leave the used mixing tip on the cartridge
after use. It serves as a cap
Do not use after the expiration date!
5 cartridges with 380 ml paste, 50 MixStar -Tips
Honigum Pro/Mono
REF 929569
Fast
REF 929979
Available in the following forms
2 cartridges with 50 ml paste,
4 Automix-Tips, 4 Intraoral-Tips
Not available in the USA
1 cartridge with 380 ml paste, 10 MixStar-Tips
Honigum Pro/Mono
REF 929830
Honigum Pro/Mono
REF 929568
Fast
REF 929978
Fast
REF 929976
8 cartridges with 50 ml paste,
16 Automix-Tips, 16 Intraoral-Tips
Honigum Pro/Mono
REF 929834
Fast
22
REF 929977
8 cartridges with 50 ml paste
Honigum Pro/Mono
REF 929911
Only available in the USA
1 cartridge with 380 ml paste, 10 MixStar-Tips
Honigum Pro/Mono
REF 989568
4 cartridges with 50 ml paste,
8 Automix-Tips, 8 Intraoral-Tips
Honigum Pro/Mono
REF 989830
Caution: US Federal Law restricts this device to
sale by, or on the order of a dentist, or other practitioner licensed by law of the state in which he
or she practices to use or order the use of this
device.
23
Mode d’emploi
Français
• Prise d’empreintes pour tous types d’ajustage, par exemple implants et couronnes
télescopes
Description du produit
Honigum Pro/Mono est un matériau d’empreinte
monophasé à base de silicones réticulant par addition.
Le matériau est commercialisé dans la cartouche
de sécurité Automix et dans la cartouche MixStar,
chargée et prête à l’emploi, pour la mise en oeuvre
dans le MixStar-eMotion de DMG ou dans d’autres
dispositifs mélangeurs habituellement en vente
dans le commerce.
Indications
• Prise d’empreintes de couronnes et de
bridges
• Prise d’empreintes d’inlays et d’onlays
• Prise d’empreintes fonctionnelles
• Détection de pression
24
Instructions fondamentales de
sécurité
• Pour une utilisation dentaire uniquement !
• Tenir éloigné de la portée des enfants !
Instructions d’utilisation
• Les temps d’application mentionnés (voir
« Données techniques » à la page 32) se
réfèrent à une température ambiante de
23 °C et une humidité relative normale de
50 %. Des températures plus élevées
réduisent les temps indiqués, des températures plus basses les prolongent.
• Rincez soigneusement à l’eau les résidus de
solutions de rétraction, ils pourraient dans
certains cas prolonger le temps de prise.
• Évitez tout contact de l’empreinte avec des
solvants organiques ou des liquides contenant des solvants. Ils pourraient provoquer
une dilatation du matériau qui entraînerait
des imprécisions lors de la prise d’empreinte.
• Évitez tout contact du matériau d’empreinte
avec des gants en latex. DMG recommande
d’utiliser des gants en PVC ou en PE.
• N’utilisez pas Honigum Pro/Mono en combinaison avec des matériaux d’empreinte
réticulant par condensation et contenant du
silicone ou du polyéther.
Maniement de la cartouche MixStar
dans le MixStar-eMotion de DMG
Veillez à respecter scrupuleusement le mode
d’emploi du « MixStar-eMotion » !
1. Pour ouvrir la cartouche, faites glisser vers le
haut le levier de verrouillage. N’enlevez pas
le levier de verrouillage de la cartouche.
25
1
2
2. Retirez le capuchon de la cartouche et jetezle. Placez la nouvelle canule de mélange et
4. Insérez la cartouche dans le dispositif
MixStar-eMotion. Un bref signal sonore est
émis pour confirmer l’insertion correcte de
la cartouche.
Remarque : Avant de prendre la première
empreinte, préparez les nouvelles cartouches en
éliminant environ les trois premiers centimètres
de la longueur.
3. fixez-la en fermant le levier de verrouillage.
26
Après l’application, la canule de mélange utilisée
restera sur la cartouche qu’elle gardera fermée.
Utilisation de la cartouche MixStar
dans les mélangeurs d’autres
fabricants
Veillez à respecter scrupuleusement le mode
d’emploi du mélangeur utilisé !
Placez tout d’abord la cartouche dans le dispositif sans la canule de mélange, sans quoi
un mélange correct du matériau ne pourra
être garanti !
Procédez ensuite conformément aux indications « Changement de la canule de mélange »
mentionnées à la page 27.
2. Retirez l’ancienne canule de mélange et
débarrassez les orifices de la cartouche des
bouchons éventuels.
3. Placez solidement la canule de mélange sur
les orifices correspondants de la cartouche.
4. Fixez ensuite la canule au moyen du levier de
verrouillage.
Manipulation de la cartouche
Automix
F
E
C
D
Changement de la canule de mélange
B
A
Veillez à respecter scrupuleusement le mode
d’emploi du mélangeur utilisé !
Remarque : Avant de procéder à un nouveau
mélange, faites attention à toujours utiliser une
nouvelle canule de mélange.
G
1. Faites glisser vers le haut le levier de verrouillage.
27
Placez la cartouche
1. Poussez vers le haut le levier [A] à l’arrière du
pistolet et tirez le poussoir [B] complètement en arrière.
2. Relevez le verrou en plastique [C], placez la
cartouche et bloquez-la avec le verrou en
plastique [C].
Appliquez le matériau
Lors de la première utilisation d’une cartouche,
faites sortir et éliminez une quantité de produit équivalente à la taille d’un petit pois.
Le mélange du matériau se fera dans la canule
en activant le levier [G] du pistolet ; le matériau pourra donc être appliqué directement.
Remarque : Veillez à ce que les encoches sur la
cartouche et sur le pistolet coïncident.
Remarque : Après l’application, la canule de
mélange utilisée restera sur la cartouche qu’elle
gardera fermée.
Insérez la canule de mélange
1. Retirez le capuchon de la cartouche [D] ou la
canule de mélange usagée en tournant de 90°
dans le sens contraire des aiguilles d’une
montre et jetez le capuchon ou la canule
usagée.
2. Placez la nouvelle canule de mélange [E].
Remarque : Veillez à ce que les encoches sur la
canule de mélange et sur la cartouche coïncident.
3. Fixez la canule en la tournant de 90° dans le
sens des aiguilles d’une montre.
28
Retirez la cartouche
1. Poussez vers le haut le levier [A] à l’arrière du
pistolet et tirez le poussoir [B] complètement en arrière.
2. Relevez le verrou en plastique [C] et retirez
la cartouche.
Utilisation recommandée
de la canule de mélange reste toujours trempée
dans la pâte.
• Honigum Pro/Mono peut s’utiliser dans
tous les porte-empreintes habituels, non
perforés.
• Les meilleurs résultats seront obtenus en
utilisant des porte-empreintes individuels.
• Pour améliorer l’adhérence du matériau avec
des porte-empreintes en métal ou en
plastique, il est recommandé d’utiliser un
adhésif pour porte-empreintes à base de
silicone A (par ex. Tray Adhesive, DMG).
Remplissez une partie du matériau dans une
seringue à élastomère, habituellement en
vente dans le commerce, ou utilisez directement la cartouche de 50 ml pour injecter la
préparation.
Empreinte monophasée
Les temps d’application individuels sont indiqués dans la rubrique « Données techniques »
à la page 32.
Chargez le porte-empreinte préparé de Honigum Pro/Mono. Tenez-le ensuite légèrement
incliné sous la canule de mélange.
Remarque : Afin d’éviter la formation de bulles
d’air lors de l’application, veillez à ce que la pointe
Remarque : Il faudra veiller à terminer simultanément le remplissage du porte-empreinte et
l’injection, le matériau d’injection durcissant plus
rapidement que le matériau du porte-empreinte
en raison des températures élevées de la cavité
buccale.
Pendant la durée d’application, positionnez
très délicatement le porte-empreinte chargé dans la cavité buccale et prenez une empreinte
de la préparation.
Après expiration du temps de prise, retirez
l’empreinte de la cavité buccale, voir « Retrait »
à la page 30.
29
Technique en double mélange
Les temps d’application des différents matériaux utilisés sont indiqués dans la rubrique
« Données techniques ». Veillez à respecter
les modes d’emploi correspondants !
Chargez le porte-empreinte de Honigum Pro/
Mono. Tenez-le ensuite légèrement incliné
sous la canule de mélange.
Remarque : Afin d’éviter la formation de bulles
d’air lors de l’application, veillez à ce que la pointe
de la canule de mélange reste toujours trempée
dans la pâte.
Injectez Honigum Pro/Light à la préparation.
Remarque : Il faudra veiller à terminer simultanément le remplissage du porte-empreinte et
l’injection, le matériau d’injection durcissant plus
rapidement que le matériau du porte-empreinte
en raison des températures élevées de la cavité
buccale.
Pendant la durée d’application, positionnez
très délicatement le porte-empreinte char30
gé dans la cavité buccale et prenez une empreinte
de la préparation.
Après expiration du temps de prise, retirez
l’empreinte de la cavité buccale, voir « Retrait »
à la page 30.
Retrait
L’empreinte sera retirée au niveau des dents
préparées, parallèlement à leur axe longitudinal.
Ensuite, procédez conformément aux indications « Nettoyage et désinfection de l’empreinte finale » mentionnées à la page 30.
Nettoyage et désinfection de
l’empreinte finale
Pour désinfecter l’empreinte finale, utilisez
uniquement des solutions de trempage.
DMG recommande d’employer une solution
de glutaraldéhyde à 2 %.
Veillez à ce que le produit de désinfection utilisé soit compatible avec des silicones réticulant par addition.
Respectez minutieusement les instructions
du fabricant du produit de désinfection !
Laissez sécher l’empreinte finale et stockezla jusqu’au coulage, voir « Stockage des
empreintes » à la page 31.
Pour de plus amples informations, veuillez
consulter les commentaires de la DGZMK
(Deutsche Gesellschaft für Zahn-, Mund- und
Kieferheilkunde - Société allemande d’odontostomatologie). Commentaires de la DGZMK
3/93 V 1.0; www.dgzmk.de
ADA recommande de suivre le Conseil relatif aux matériaux, instruments et équipement
dentaires. Désinfection d’empreintes. JADA
1991;122(3):110; www.ada.org
Coulage et galvanisation
La prise d’empreinte ne pourra être coulée
qu’au plus tôt 30 minutes après avoir retiré
l’empreinte de la cavité buccale.
Pour le coulage, DMG recommande d’utiliser du
plâtre dur (ISO 6873; classe 3, par ex. Moldano,
Bayer) ou du plâtre dentaire synthétique extradur pour moules (ISO 6873; classe 4, par ex. Fujirock II, GC). L’empreinte pourra être recouverte
par électrolyse d’une couche d’argent ou de cuivre.
Stockage des empreintes
Gardez les empreintes au sec et à température ambiante (15 – 25 °C /59 – 77 °F) !
Protégez l’empreinte des rayons directs du
soleil !
Les empreintes gardent leur forme et peuvent
être coulées des mois après avoir été confectionnées sans avoir perdu leur précision.
31
Données techniques
Honigum Pro/Mono
Fast
Honigum Pro/Mono
1
Temps d’application1 [min]
≤ 2:45 ≤ 2:45
Fast
Temps d’application [min]
≤ 1:30 ≤ 1:30
≤ 0:30 ≤ 0:30
Temps d’application intraorale2 [min]
≤ 1:00 ≤ 1:00
Temps d’application intraorale2 [min]
Durée de durcissement
dans la cavité buccale [min]
≥ 3:15 ≥ 3:15
Durée de durcissement
dans la cavité buccale [min]
≥ 2:00 ≥ 2:00
Modifications dimensionnelles après 24 h [%]
≤ 0,40 ≤ 0,40
Modifications dimenssionnelles après 24 h [%]
≤ 0,40 ≤ 0,40
Déformation résiduelle
après pression [%]
≤ 0,35 ≤ 0,35
Déformation résiduelle
après pression [%]
≤ 0,35 ≤ 0,35
Déformation sous l’effet de
la pression [%]
≈ 2,8
Déformation sous l’effet de
la pression [%]
≈ 2,8
≈ 2,8
1
32
≈ 2,8
Les durées indiquées se basent sur une température ambiante
de 23 °C et une humidité relative normale de 50 %. Des températures plus élevées réduisent ces durées, des températures
plus basses les prolongent.
Le temps d’application correspond à la durée entre le début
du mélange et le moment auquel le porte-empreinte peut être
positionné au plus tard dans la cavité buccale du patient.
2
Les durées indiquées sont calculées à compter du début du
mélange pour une température de 35 °C.
Désinfection de l’Automix-Dispenser
L’Automix-Dispenser est réutilisable après
désinfection, mais il doit être remplacé si des
traces d’usure sont visibles.
La désinfection peut être effectuée au moyen
d’un produit de trempage habituellement vendu dans le commerce. DMG recommande d’utiliser exclusivement les produits reconnus par le
RKI (Institut Robert Koch). L’Automix-Dispenser
est en outre autoclavable.
Stockage et durabilité
Garder au sec et à température ambiante
(15 – 25 °C/59 – 77 °F) !
Ne pas conserver au réfrigérateur !
Protéger l’empreinte des rayons directs du
soleil !
Après l’application, la canule de mélange utilisée restera sur la cartouche qu’elle gardera
fermée.
Ne plus utiliser après la date de péremption !
Formes de commercialisation
Non disponible aux États-Unis
Composition
Polysiloxane de vinyle, dioxyde de silicium, pigments, additifs, catalyseur platine
1 cartouche de 380 ml de pâte,
10 MixStar-Tips
Honigum Pro/Mono
REF 929568
Classification
ISO 4823:2000, type 2: consistance moyenne
Fast
REF 929978
33
5 cartouches de 380 ml de pâte,
50 MixStar-Tips
Fast
Honigum Pro/Mono
8 cartouches de 50 ml de pâte
REF 929569
Fast
REF 929977
Honigum Pro/Mono
REF 929911
REF 929979
Disponible uniquement aux États-Unis
2 cartouches de 50 ml de pâte,
4 Automix-Tips, 4 Intraoral-Tips
1 cartouche de 380 ml de pâte,
10 MixStar-Tips
Honigum Pro/Mono
REF 929830
Fast
REF 989568
REF 929976
8 cartouches de 50 ml de pâte,
16 Automix-Tips, 16 Intraoral-Tips
Honigum Pro/Mono
4 cartouches de 50 ml de pâte,
8 Automix-Tips, 8 Intraoral-Tips
Honigum Pro/Mono
REF 989830
REF 929834
34
Honigum Pro/Mono
Istruzioni per l’uso
Italiano
Descrizione del prodotto
Honigum Pro/Mono è un materiale per impronte
monofase a base di siliconi reticolati per addizione.
Il materiale è disponibile nella cartuccia di sicurezza
automiscelante (Automix) e nella cartuccia MixStar
già riempita e pronta per l’uso, adatta all’utilizzo
nel miscelatore DMG MixStar-eMotion e in altri
miscelatori disponibili in commercio.
Indicazioni
•
•
•
•
•
Impronte di corone e ponti
Impronte di inlay e onlay
Impronte funzionali
Determinazione del punto di pressione
Impronte di tutti i tipi con tecnica pick-up, ad
esempio per impianti e protesi telescopiche
Indicazioni di base per la sicurezza
• Solo per uso odontoiatrico.
• Conservare fuori dalla portata dei bambini.
Indicazioni per l’uso
• I tempi di lavorazione indicati (fare riferimento a “Specifiche tecniche” a pagina 42) si
riferiscono a una temperatura ambiente di
23 °C e un tasso di umidità relativa normale
del 50%. In caso di temperature più elevate
o più basse, i tempi si abbreviano o si prolungano rispettivamente.
• Pulire a fondo con acqua i residui delle soluzioni per retrazione gengivale, in quanto
potrebbero prolungare i tempi di presa.
• Evitare il contatto dell’impronta con solventi organici o liquidi contenenti solventi in
quanto ciò potrebbe provocare un rigonfiamento del materiale e, di conseguenza, causare imprecisioni nella colata.
35
• Evitare il contatto del materiale per impronte con guanti in lattice. Si raccomanda l’uso
di guanti in PVC o PE.
• Non utilizzare Honigum Pro/Mono in combinazione con materiali per impronte in silicone reticolato per condensazione o in polietere.
Uso della cartuccia MixStar nel
miscelatore DMG MixStar-eMotion
Attenersi alle istruzioni per l’uso di “MixStareMotion”.
36
1. Per aprire la cartuccia, spingere il dispositivo
di chiusura verso l’alto. Non rimuovere il
dispositivo di chiusura dalla cartuccia.
1
2
2. Togliere il tappo dalla cartuccia ed eliminarlo. Applicare una nuova cannula di miscelazione.
3. Bloccare la cannula di miscelazione chiudendo il dispositivo di chiusura.
Uso della cartuccia MixStar in
miscelatori di altri produttori
Attenersi alle istruzioni per l’uso del miscelatore
utilizzato.
Inserire innanzitutto la cartuccia nel miscelatore senza la cannula di miscelazione; diversamente, non è possibile garantire una perfetta miscelazione del materiale.
Quindi procedere come descritto nel paragrafo “Sostituzione della cannula di miscelazione” a pagina 37.
4. Inserire la cartuccia nel miscelatore MixStareMotion. Un breve segnale acustico conferma il corretto inserimento della cartuccia.
Avvertenze: prima di utilizzare le cartucce nuove per la prima volta, estrudere circa 3 cm di materiale ed eliminarlo.
Sostituzione della cannula di
miscelazione
Attenersi alle istruzioni per l’uso del miscelatore utilizzato.
Avvertenza: inserire una cannula di miscelazione
nuova prima di ogni procedura di miscelazione.
1. Spingere il dispositivo di chiusura verso l’alto.
Dopo l’uso lasciare inserita la cannula già usata
come tappo di chiusura della cartuccia.
37
2. Rimuovere la cannula di miscelazione utilizzata e liberare la cartuccia da eventuali residui che ne ostruiscono l’apertura.
3. Fissare la cannula di miscelazione sull’apertura corrispondente della cartuccia.
4. Bloccare la cannula di miscelazione con il
dispositivo di chiusura.
Inserimento della cartuccia
1. Sollevare la leva [A] sul retro dell’applicatore e arretrare completamente lo scorrevole
[B].
2. Sollevare il fermo in plastica [C], inserire la
cartuccia e bloccarla con il fermo in plastica
[C].
Uso della cartuccia automiscelante
(Automix)
Avvertenza: accertarsi che le tacche sulla cartuccia e sull’applicatore corrispondano perfettamente.
F
E
C
D
B
A
G
38
Applicazione della cannula di miscelazione
1. Rimuovere ed eliminare il tappo della cartuccia [D] o la cannula di miscelazione usata,
eseguendo una rotazione di 90° in senso
antiorario.
2. Applicare una nuova cannula di miscelazione [E].
Avvertenza: accertarsi che le tacche sulla cartuccia e sulla cannula di miscelazione corrispondano perfettamente.
3. Bloccare la cannula di miscelazione eseguendo una rotazione di 90° in senso antiorario.
Applicazione del materiale
Al primo utilizzo della cartuccia, estrudere
una quantità di materiale delle dimensioni di
un pisello ed eliminarla.
Miscelare il materiale estruso premendo la
leva [G] dell’applicatore nella cannula di miscelazione e applicarlo direttamente.
Avvertenza: dopo l’uso, lasciare inserita la cannula già usata come tappo di chiusura della cartuccia.
Estrazione della cartuccia
1. Sollevare la leva [A] sul retro dell’applicatore e arretrare completamente lo scorrevole
[B].
2. Sollevare il fermo in plastica [C] ed estrarre
la cartuccia.
Impiego raccomandato
• Honigum Pro/Mono può essere utilizzato
con tutti i portaimpronte non perforati disponibili in commercio.
• I risultati migliori si ottengono con i portaimpronte individuali.
• Per una migliore aderenza del materiale ai
portaimpronte in plastica o metallo, utilizzare un adesivo per portaimpronte per siliconi
A (ad es. Tray Adhesive, DMG).
Impronta monofase
Per conoscere i singoli tempi, fare riferimento alla sezione “Specifiche tecniche” a pagina 42.
Riempire il portaimpronte preparato con
Honigum Pro/Mono. Per effettuare questa
operazione, tenere il portaimpronte leggermente inclinato sotto la cannula di miscelazione.
Avvertenza: onde evitare la formazione di bolle d’aria, la punta della cannula di miscelazione
39
deve essere sempre immersa nella pasta durante l’applicazione.
Inserire una parte del materiale in una siringa per elastomeri in commercio oppure utilizzare direttamente la cartuccia da 50 ml e
applicare il materiale con la siringa sulla preparazione.
Avvertenza: le due operazioni di riempimento
del portaimpronte e applicazione con la siringa
devono concludersi contemporaneamente, in
quanto la temperatura più elevata del cavo orale favorisce la polimerizzazione precoce del materiale applicato con la siringa rispetto a quello applicato nel portaimpronte.
Inserire lentamente il portaimpronte pieno
nel cavo orale entro i tempi di lavorazione
esercitando una leggera pressione e rilevare
l’impronta della preparazione.
Trascorso il tempo di presa richiesto, estrarre l’impronta dal cavo orale; fare riferimento
a “Estrazione” a pagina 41.
40
Impronta con tecnica della doppia miscelazione
Per conoscere i singoli tempi dei materiali utilizzati, fare riferimento alla sezione “Specifiche tecniche”. Attenersi alle relative istruzioni per l’uso.
Riempire il portaimpronte con Honigum Pro/
Mono. Per effettuare questa operazione, tenere il portaimpronte leggermente inclinato sotto la cannula di miscelazione.
Avvertenza: onde evitare la formazione di bolle d’aria, la punta della cannula di miscelazione
deve essere sempre immersa nella pasta durante l’applicazione.
Applicare Honigum Pro/Light sulla preparazione con la siringa.
Avvertenza: le due operazioni di riempimento
del portaimpronte e applicazione con la siringa
devono concludersi contemporaneamente, in
quanto la temperatura più elevata del cavo orale favorisce la polimerizzazione precoce del mate-
riale applicato con la siringa rispetto a quello applicato nel portaimpronte.
Pulizia e disinfezione dell’impronta
finale
Inserire lentamente il portaimpronte pieno
nel cavo orale entro i tempi di lavorazione
esercitando una leggera pressione e rilevare
l’impronta della preparazione.
Trascorso il tempo di presa richiesto, estrarre l’impronta dal cavo orale; fare riferimento
a “Estrazione” a pagina 41.
Disinfettare l’impronta finale immergendola
in apposite soluzioni.
Si raccomanda l’utilizzo di una soluzione di
glutaraldeide al 2%.
Accertarsi che il disinfettante usato sia adatto
per essere utilizzato con siliconi per impronte reticolati per addizione.
Attenersi scrupolosamente alle indicazioni
fornite dal produttore del disinfettante.
Asciugare l’impronta finale e conservarla fino
alla colata; fare riferimento a “Conservazione dell’impronta” a pagina 42.
Per ulteriori informazioni, è possibile anche
consultare il parere della DGZMK. Parere della DGZMK 3/93 V 1.0; www.dgzmk.de
ADA raccomanda di attenersi alle direttive
del Consiglio su materiali, strumenti e attrezzature
odontoiatriche. Disinfezione delle impronte.
JADA 1991;122(3):110; www.ada.org
Estrazione
Rimuovere l’impronta estraendola parallelamente all’asse longitudinale dei denti preparati.
Quindi procedere come descritto nel paragrafo “Pulizia e disinfezione dell’impronta finale” a pagina 41.
41
Colata e galvanizzazione
Il tempo minimo per la colata dell’impronta
dopo averla estratta dal cavo orale è di 30 minuti.
Specifiche tecniche
Honigum Pro/Mono
Per la colata si raccomanda l’utilizzo di gessi duri
(ISO 6873; tipo 3, ad es. Moldano, Bayer) o superduri per forme (ISO 6873; tipo 4, ad es. Fujirock
II, GC). L’impronta può essere rivestita in rame
o argento.
Tempo di lavorazione1 [min] ≤ 2:45 ≤ 2:45
Conservazione dell’impronta
Conservare l’impronta in un luogo asciutto a
temperatura ambiente (15 – 25 °C/59 – 77 °F).
Tenere al riparo dalla luce solare diretta.
L’impronta è stabile e può essere colata anche a
distanza di mesi mantenendo inalterata la precisione.
Tempo di lavorazione
intraorale2 [min]
≤ 1:00 ≤ 1:00
Tempo di permanenza in
bocca [min]
≥ 3:15 ≥ 3:15
Variazione dimensionale
dopo 24 h [%]
≤ 0,40 ≤ 0,40
Deformazione permanente
[%]
≤ 0,35 ≤ 0,35
Deformazione per
compressione [%]
≈ 2,8
≈ 2,8
Fast
Fast
Honigum Pro/Mono
1
Tempo di lavorazione [min] ≤ 1:30 ≤ 1:30
42
Disinfezione del dispenser Automix
Honigum Pro/Mono
Fast
Fast
Tempo di lavorazione
intraorale2 [min]
≤ 0:30 ≤ 0:30
Tempo di permanenza in
bocca [min]
≥ 2:00 ≥ 2:00
Variazione dimensionale
dopo 24 h [%]
≤ 0,40 ≤ 0,40
Deformazione permanente
[%]
≤ 0,35 ≤ 0,35
Deformazione per
compressione [%]
≈ 2,8
≈ 2,8
Il dispenser Automix è riutilizzabile dopo la
disinfezione, tuttavia occorre sostituirlo in caso
di evidenti tracce di usura.
La disinfezione può essere eseguita con un normale disinfettante ad immersione disponibile in
commercio. Si raccomanda di utilizzare esclusivamente disinfettanti approvati dall’Istituto Robert
Koch (RKI). Il dispenser Automix è sterilizzabile
in autoclave.
Composizione
Polivinilsilossani, biossido di silicio, pigmenti, additivi, platino come catalizzatore
1
I tempi indicati si riferiscono a una temperatura ambiente di
23 °C e un tasso di umidità relativa normale del 50%. In caso di
temperature più elevate o più basse, i tempi si abbreviano o si
prolungano rispettivamente.
Il tempo di lavorazione indica lo spazio di tempo che va dall’inizio della miscelazione fino al momento in cui il portaimpronte
viene posizionato nel cavo orale del paziente.
2
I tempi indicati sono da intendersi dall’inizio della miscelazione
a una temperatura di 35 °C.
Classificazione
ISO 4823:2000, tipo 2: consistenza medium body
43
Conservazione e scadenza
Conservare in un luogo asciutto a temperatura ambiente (15 – 25 °C/59 – 77 °F).
Non conservare in frigorifero o congelatore.
Tenere al riparo dalla luce solare diretta.
Dopo l’uso lasciare inserita la cannula già usata come tappo di chiusura della cartuccia.
Non utilizzare dopo la data di scadenza.
5 cartucce da 380 ml di pasta,
50 MixStar-Tips
Honigum Pro/Mono
REF 929569
Fast
2 cartucce da 50 ml di pasta, 4 Automix-Tips,
4 Intraoral-Tips
Confezionamento
Honigum Pro/Mono
Non disponibile negli Stati Uniti
1 cartuccia da 380 ml di pasta,
10 MixStar-Tips
REF 929568
44
REF 929830
Fast
Honigum Pro/Mono
Fast
REF 929979
REF 929978
REF 929976
8 cartucce da 50 ml di pasta,
16 Automix-Tips, 16 Intraoral-Tips
4 cartucce da 50 ml di pasta,
8 Automix-Tips, 8 Intraoral-Tips
Honigum Pro/Mono
Honigum Pro/Mono
REF 929834
Fast
REF 989830
REF 929977
8 cartucce da 50 ml di pasta
Honigum Pro/Mono
REF 929911
Disponibile solo negli Stati Uniti
1 cartuccia da 380 ml di pasta,
10 MixStar-Tips
Honigum Pro/Mono
REF 989568
45
Instrucciones de uso
Español
Descripción del producto
Honigum Pro/Mono es un material de impresión
monofásico a base de siliconas de polimerización
por adición.
El material está disponible en el cartucho de seguridad Automix y en el cartucho MixStar, que se
suministra ya rellenado y listo para su uso, y que
se puede emplear en el DMG MixStar-eMotion
y otros aparatos para mezclar del mercado.
Indicaciones
• Toma de impresiones de coronas y puentes
• Impresiones de injertos de interposición y de
aposición
• Impresiones funcionales
• Determinación de los puntos de presión
• Todo tipo de impresiones de arrastre, por
ejemplo para implantes y anclajes telescópicos
46
Indicaciones de seguridad
fundamentales
• De uso exclusivo en odontología.
• Mantener fuera del alcance de los niños.
Notas sobre el uso
• Los tiempos de procesamiento indicados
(véase el apartado “Datos técnicos” en la
página 53) son válidos para una temperatura ambiente de 23 °C y una humedad relativa del aire del 50 %. Estos tiempos se acortan a temperaturas más elevadas, mientras
que aumentan a temperaturas más bajas.
• Eliminar por completo con agua los restos de
soluciones de retracción; de lo contrario,
dichos restos pueden, en determinadas circunstancias, incrementar el tiempo de fraguado.
• Evitar que la impresión entre en contacto con
disolventes orgánicos o líquidos que contengan disolventes, ya que el material podría
hincharse y provocar deformaciones en el
vaciado.
• Evitar que el material de impresión entre en
contacto con guantes de látex. DMG recomienda utilizar guantes de PVC o de PE.
• No mezclar Honigum Pro/Mono con materiales de impresión a base de siliconas de
polimerización por condensación o poliéter.
Utilización del cartucho MixStar en
el DMG MixStar-eMotion
Siga las instrucciones de uso del MixStareMotion.
1. Para abrir el cartucho, deslice hacia arriba el
mecanismo de bloqueo. No retire el mecanismo de bloqueo del cartucho.
1
2
2. Retire y deseche la tapa del cartucho. Coloque una nueva cánula de mezcla.
47
3. Asegure la cánula de mezcla cerrando el
mecanismo de bloqueo.
4. Inserte el cartucho en el MixStar-eMotion.
Una breve señal acústica confirma la correcta inserción del cartucho.
Consejos: para tener nuevos cartuchos listos
para usar, extraiga unos 3 cm de material y deséchelo.
Después de la aplicación, deje en el cartucho la
cánula de mezcla utilizada a modo de tapa.
48
Utilización del cartucho MixStar en
aparatos para mezclar de otros
fabricantes
Siga las instrucciones de uso del aparato para
mezclar que utilice.
En primer lugar, inserte el cartucho sin cánula de mezcla en el aparato para mezclar. De
lo contrario, no se garantiza que el material
se mezcle correctamente.
En este caso, proceda como se describe en el
apartado “Cambiar la cánula de mezcla” en
la página 48.
Cambiar la cánula de mezcla
Siga las instrucciones del aparato para mezclar que esté utilizando.
Consejo: coloque una nueva cánula antes de
empezar a mezclar.
1. Deslice hacia arriba el mecanismo de bloqueo.
2. Retire la cánula de mezcla usada y elimine los
posibles tapones de material de las aberturas del cartucho.
3. Fije la cánula de mezcla a la abertura correspondiente del cartucho.
4. Asegure la cánula de mezcla con el mecanismo de bloqueo.
Utilización del cartucho Automix
F
E
C
D
B
A
de la varilla de mando [B] totalmente hacia
atrás.
2. Levante el pestillo de plástico [C], coloque el
cartucho y bloquéelo con el pestillo de plástico [C].
Consejo: asegúrese de que la muesca del cartucho coincida con la muesca del dispensador.
Colocar la cánula de mezcla
1. Retire el capuchón del cartucho [D] o la
cánula de mezcla usada girándolos 90° en
sentido contrario a las agujas del reloj y deséchelos.
2. Coloque la nueva cánula de mezcla [E].
Consejo: asegúrese de que la muesca del cartucho
coincida con la muesca de la cánula de mezcla.
G
3. Gire la cánula de mezcla 90° en el sentido de
las agujas del reloj para bloquearla en posición.
Colocar el cartucho
1. Presione hacia arriba la palanca [A] situada
en la parte posterior del dispensador y tire
49
Aplicar el material
La primera vez que use un cartucho, extraiga una cantidad de material del tamaño de
un guisante y deséchela.
Mezcle el material en la cánula de mezcla
accionando la palanca [G] del dispensador y
aplíquelo directamente.
Consejo: después de la aplicación, deje en el cartucho la cánula de mezcla utilizada a modo de
tapa.
Quitar el cartucho
1. Presione hacia arriba la palanca [A] situada
en la parte posterior del dispensador y tire
de la varilla de mando [B] totalmente hacia
atrás.
2. Levante el pestillo de plástico [C] y extraiga
el cartucho.
Aplicación recomendada
• Honigum Pro/Mono se puede utilizar en
todas las cubetas de impresión convencionales no perforadas.
• Los mejores resultados se consiguen con
cubetas de impresión individuales.
• Para mejorar la adhesión del material a las
cubetas de metal o de plástico debe utilizarse un adhesivo especial para siliconas de adición (por ejemplo, el adhesivo para cubetas
Tray Adhesive de DMG).
Toma de impresiones monofásicas
Los tiempos individuales pueden consultarse en el apartado “Datos técnicos” en la página 53.
Llene la cubeta de impresión preparada con
Honigum Pro/Mono. Para ello, sujete la cubeta ligeramente inclinada con respecto a la cánula de mezcla.
Consejo: Para evitar la formación de burbujas
de aire, el extremo de la cánula de mezcla debe
50
mantenerse sumergido en todo momento en la
masa de material.
Llene una jeringa de elastómero convencional con parte del material o utilice directamente el cartucho de 50 ml para inyectar el
preparado.
tarse en el apartado “Datos técnicos”. Siga
las instrucciones de uso correspondientes.
Llene la cubeta de impresión con Honigum
Pro/Mono. Para ello, sujete la cubeta ligeramente inclinada con respecto a la cánula de
mezcla.
Consejo: el llenado de la cubeta y la inyección
deben completarse a la vez, ya que la temperatura de la boca, al ser más alta, provoca que el
material inyectado se endurezca más rápido que
el de la cubeta.
Consejo: Para evitar la formación de burbujas
de aire, el extremo de la cánula de mezcla debe
mantenerse sumergido en todo momento en la
masa de material.
Dentro del tiempo de procesamiento, coloque despacio la cubeta llena en la boca sin
ejercer mucha fuerza y deje que el preparado tome forma.
Una vez transcurrido el tiempo de fraguado,
saque la impresión de la boca; consulte el apartado “Retirada” en la página 52.
Nota: el llenado de la cubeta y la inyección deben
completarse a la vez, ya que la temperatura de la
boca, al ser más alta, provoca que el material inyectado se endurezca más rápido que el de la cubeta.
Técnica de impresión de dos pasos
Los tiempos que se requieren para cada uno
de los materiales empleados pueden consul-
Recubra el preparado con Honigum Pro/Light.
Dentro del tiempo de procesamiento, coloque despacio la cubeta llena en la boca sin
ejercer mucha fuerza y deje que el preparado tome forma.
51
Una vez transcurrido el tiempo de fraguado,
saque la impresión de la boca; consulte el apartado “Retirada” en la página 52.
Retirada
Saque la impresión en paralelo al eje longitudinal de los dientes.
A continuación, proceda como se describe
en el apartado “Limpieza y desinfección de
la impresión final” en la página 52.
Limpieza y desinfección de la
impresión final
Desinfecte la impresión final únicamente con
soluciones de inmersión.
DMG recomienda utilizar una solución de
glutaraldehído al 2%.
Asegúrese de que el desinfectante utilizado
está indicado para su uso con siliconas de polimerización por adición.
52
Siga atentamente las indicaciones del fabricante del desinfectante.
Seque la impresión final y guárdela hasta que
vaya a realizar el vaciado; consulte el apartado “Almacenamiento de la impresión” en la
página 53.
Puede obtener más información en los informes de la DGZMK (asociación alemana de
salud bucodental). Informes de la DGZMK
3/93 V 1.0; www.dgzmk.de
ADA recomienda seguir las indicaciones del
Council on Dental Materials, Instruments and
Equipment. Disinfection of impressions. JADA
1991;122(3):110; www.ada.org
Vaciado y galvanoplastia
La impresión debe vaciarse, como pronto,
30 minutos después de retirarla de la boca.
Para el vaciado, DMG recomienda utilizar yeso
piedra (ISO 6873; tipo III, por ejemplo, Moldano, Bayer) o yeso extraduro para modelos (ISO 6873;
tipo IV, por ejemplo Fujirock II, GC). La impre-
sión se puede recubrir mediante galvanoplastia
con cobre o plata.
Almacenamiento de la impresión
Almacenar la impresión a temperatura ambiente (15 – 25 °C/59 – 77 °F) en un lugar seco.
Proteger de la luz solar directa.
La impresión es intrínsecamente estable y es posible vaciarla sin perder precisión incluso transcurridos varios meses.
Honigum Pro/Mono
Tiempo dentro de la boca
[min]
≥ 3:15 ≥ 3:15
Modificación de las
dimensiones tras 24 h [%]
≤ 0,40 ≤ 0,40
Endurecimiento por
compresión [%]
≤ 0,35 ≤ 0,35
Deformación bajo presión
[%]
≈ 2,8
≈ 2,8
Fast
Fast
Honigum Pro/Mono
Datos técnicos
Honigum Pro/Mono
Tiempo de procesamiento1
[min]
≤ 2:45 ≤ 2:45
Tiempo de procesamiento
intraoral2 [min]
≤ 1:00 ≤ 1:00
Tiempo de procesamiento1
[min]
≤ 1:30 ≤ 1:30
Tiempo de procesamiento
intraoral2 [min]
≤ 0:30 ≤ 0:30
Tiempo dentro de la boca
[min]
≥ 2:00 ≥ 2:00
53
Desinfección del Automix-Dispenser
Honigum Pro/Mono
Fast
Fast
Modificación de las
dimensiones tras 24 h [%]
≤ 0,40 ≤ 0,40
Endurecimiento por
compresión [%]
≤ 0,35 ≤ 0,35
Deformación bajo presión
[%]
≈ 2,8
1
≈ 2,8
Los tiempos indicados son válidos para una temperatura
ambiente de 23 °C y una humedad relativa del aire normal del
50 %. Estos tiempos se acortan a temperaturas más elevadas,
mientras que aumentan a temperaturas más bajas.
El tiempo de procesamiento hace referencia al espacio de tiempo que media entre el comienzo de la mezcla y el momento en
que debe realizarse, a más tardar, la colocación de la cubeta en
la boca del paciente.
2
Los tiempos indicados son válidos a partir del comienzo de la
mezcla para una temperatura de 35 ºC.
El Automix-Dispenser se puede volver a usar una
vez desinfectado, pero sustitúyalo si muestra
signos visibles de desgaste.
La desinfección se puede efectuar por inmersión
con un desinfectante de los de venta habitual en
el mercado. DMG recomienda usar exclusivamente los desinfectantes incluidos en la lista del
RKI (Instituto Robert Koch). El Automix-Dispenser admite, además, la esterilización en autoclave.
Composición
Polisiloxano de vinilo, dióxido de silicio, pigmentos, aditivos, catalizador de platino
Clasificación
ISO 4823:2000, tipo II: consistencia media
54
Almacenamiento y conservación
Almacenar a temperatura ambiente (15 – 25 °C/
59 – 77 °F) en un lugar seco.
No guardar en frigorífico ni congelador.
Proteger de la luz solar directa.
Después de la aplicación, deje en el cartucho
la cánula de mezcla utilizada a modo de tapa.
No usar después de la fecha de caducidad.
Presentaciones comerciales
5 cartuchos con 380 ml de pasta,
50 MixStar-Tips
Honigum Pro/Mono
REF 929569
Fast
REF 929979
2 cartuchos con 50 ml de pasta,
4 Automix-Tips, 4 Intraoral-Tips
Honigum Pro/Mono
No disponible en EE. UU.
REF 929830
1 cartucho con 380 ml de pasta,
10 MixStar-Tips
Fast
REF 929976
Honigum Pro/Mono
REF 929568
Fast
REF 929978
55
8 cartuchos con 50 ml de pasta,
16 Automix-Tips, 16 Intraoral-Tips
4 cartuchos con 50 ml de pasta,
8 Automix-Tips, 8 Intraoral-Tips
Honigum Pro/Mono
Honigum Pro/Mono
REF 929834
Fast
REF 929977
8 cartuchos con 50 ml de pasta
Honigum Pro/Mono
REF 929911
Disponible sólo en EE. UU.
1 cartucho con 380 ml de pasta,
10 MixStar-Tips
Honigum Pro/Mono
REF 989568
56
REF 989830
Instruções de utilização
Português
Descrição do produto
Honigum Pro/Mono é um material de impressão monofásico à base de silicones de polimerização por adição.
O material está disponível no cartucho de segurança Automix e no cartucho MixStar cheio e
pronto a utilizar, adequado para a utilização no
DMG MixStar-eMotion e em outros misturadores comuns.
Indicações
•
•
•
•
•
Impressão para coroas e pontes
Impressão para inlays e onlays
Impressões funcionais
Determinação de pontos de pressão
Impressões de moldeira aberta de todos os
tipos, por exemplo implantes e coroas telescópicas
Avisos de segurança básicos
• Apenas para o uso odontológico!
• Conservar fora do alcance das crianças!
Instruções para a aplicação
• Os tempos de processamento indicados
(consulte “Dados técnicos” na página 63)
aplicam-se a uma temperatura ambiente de
23 ºC e a uma humidade relativa do ar normal de 50%. Temperaturas superiores reduzem estes tempos e temperaturas inferiores
aumentam-no.
• Enxaguar muito bem com água os resíduos
de soluções de retracção, caso contrário
estes poderão provocar um prolongamento
do tempo de polimerização.
• Evitar o contacto da impressão com solventes orgânicos ou líquidos contendo solventes, caso contrário poderá ocorrer a dilatação
do material e consequentes irregularidades
no molde.
57
• Evitar o contacto do material de impressão
com luvas de látex. A DMG recomenda a utilização de luvas à base de PVC ou PE.
• Não combinar o Honigum Pro/Mono com
silicone de polimerização por condensação
ou materiais de impressão à base de poliéter.
1. Para abrir o cartucho, deslizar a corrediça de
bloqueio para cima. Não retirar a corrediça
de bloqueio do cartucho.
1
Utilização do cartucho MixStar no
sistema MixStar-eMotion da DMG
2
Observar as instruções de utilização do
“MixStar-eMotion”!
2. Retirar a tampa do cartucho e descartá-la.
Aplicar uma cânula de mistura nova.
58
3. Travar a cânula de mistura, fechando a corrediça de bloqueio.
Utilização do cartucho MixStar em
misturadores de outros fabricantes
Observar as instruções de utilização do misturador utilizado!
Primeiramente, colocar o cartucho sem cânula de mistura no misturador, caso contrário
não estará garantida a mistura perfeita do
material!
Neste caso, proceder como descrito em “Troca
da cânula de mistura” na página 59.
4. Inserir o cartucho no MixStar-eMotion. Um
sinal sonoro breve confirma a colocação correcta do cartucho.
Troca da cânula de mistura
Notas: Preparar os cartuchos novos antes da primeira utilização, rejeitando aproximadamente
os primeiros 3 cm do material de impressão.
Nota: Aplicar uma cânula de mistura nova antes
de cada mistura.
Manter a cânula de mistura usada após a aplicação no cartucho para servir de tampa.
Observar as instruções de utilização do misturador utilizado!
1. Deslizar a corrediça de bloqueio para cima.
2. Retirar a cânula de mistura antiga e remover
eventuais tampas das aberturas do cartucho.
3. Aplicar firmemente a cânula de mistura nas
respectivas aberturas do cartucho.
59
4. Travar a cânula de mistura com a corrediça
de bloqueio.
Utilização do cartucho Automix
F
E
C
D
B
A
Nota: Certificar-se de que as ranhuras no cartucho coincidem com as do dispensador.
Aplicar a cânula de mistura
1. Retirar e descartar a tampa do cartucho [D]
ou a cânula de mistura usada após rotação de
90° no sentido contrário ao dos ponteiros do
relógio.
2. Aplicar uma cânula de mistura nova [E].
Nota: Certificar-se de que as ranhuras na cânula de mistura coincidem com as do cartucho.
G
Inserir o cartucho
1. Pressionar a alavanca [A] na parte posterior
do dispensador para cima e puxar a corrediça [B] completamente para trás.
2. Puxar o trinco de plástico [C] para cima, inserir o cartucho e travar com o trinco de plástico [C].
60
3. Travar a cânula de mistura, rodando-a 90° no
sentido dos ponteiros do relógio.
Aplicação do material
Na primeira utilização de um cartucho, espremer uma quantidade de material do tamanho de uma ervilha e descartar.
Misturar o material, pressionando a alavanca [G] no dispensador na cânula de mistura
e aplicar directamente.
Nota: Manter a cânula de mistura usada após a
aplicação no cartucho para servir de tampa!
Encher a moldeira preparada com Honigum
Pro/Mono. Segurar a moldeira ligeiramente
inclinada sob a cânula de mistura.
Remoção do cartucho
1. Pressionar a alavanca [A] na parte posterior
do dispensador para cima e puxar a corrediça [B] completamente para trás.
2. Puxar o trinco de plástico [C] para cima e retirar o cartucho.
Nota: Durante a aplicação, a ponta da cânula de
mistura deverá ser sempre imersa na massa para
evitar a formação de bolhas de ar.
Aplicação recomendada
• Honigum Pro/Mono pode ser utilizado em
todas as moldeiras não perfuradas comuns.
• Os melhores resultados são obtidos com
moldeiras individuais.
• Para melhorar a aderência do material em
moldeiras metálicas ou plásticas, deverá ser
aplicado um adesivo para moldeiras para silicones (por exemplo Tray Adhesive, DMG).
Impressão monofásica
Os tempos individuais encontram-se na secção “Dados técnicos” na página 63.
Encher uma parte do material numa seringa
de elastómero comum ou utilizar directamente o cartucho de 50 ml e moldar a preparação.
Nota: O enchimento da moldeira e a moldagem
deverão estar concluídos em simultâneo porque,
devido à elevada temperatura da boca, o material de moldagem endurece mais rapidamente
do que o material contido na moldeira.
Dentro do tempo de processamento, posicionar a moldeira cheia lentamente com reduzido esforço na boca e permitir a impressão
da preparação.
Retirar a impressão da boca decorrido o tempo de polimerização, consultar “Remoção”
na página 62
61
Impressão de mistura dupla
Os tempos individuais dos <materiais utilizados encontram-se na secção “Dados técnicos”. Observar as respectivas instruções de
utilização!
Encher a moldeira com Honigum Pro/Mono.
Segurar a moldeira ligeiramente inclinada sob
a cânula de mistura.
Nota: Durante a aplicação, a ponta da cânula de
mistura deverá ser sempre imersa na massa para
evitar a formação de bolhas de ar.
Moldar a preparação com Honigum Pro/Light.
Nota: O enchimento da moldeira e a moldagem
deverão estar concluídos em simultâneo porque,
devido à elevada temperatura da boca, o material de moldagem endurece mais rapidamente
do que o material contido na moldeira.
Dentro do tempo de processamento, posicionar a moldeira cheia lentamente com reduzido esforço na boca e permitir a impressão
da preparação.
62
Retirar a impressão da boca decorrido o tempo de polimerização, consultar “Remoção”
na página 62
Remoção
Retirar a impressão na área dos dentes preparados em paralelo ao eixo longitudinal dos
dentes.
Em seguida proceder como descrito em
“Limpeza e desinfecção da impressão final”
na página 62.
Limpeza e desinfecção da impressão
final
Desinfectar a impressão final apenas em soluções de imersão.
A DMG recomenda a utilização de uma solução de glutaraldeído a 2%.
Certificar-se de que o desinfectante utilizado
é indicado para a utilização com silicones de
impressão de polimerização por adição.
Observar rigorosamente as instruções do
fabricante dos desinfectantes!
Secar a impressão final e guardar até à moldagem, consultar “Armazenamento e validade” na página 65.
Poderá encontrar mais informações na declaração da DGZMK (Sociedade Alemã de Estomatologia). Declaração da DGZMK 3/93 V
1.0; www.dgzmk.de
A ADA (Sociedade Americana de Estomatologia) recomenda seguir o Council on Dental Materials, Instruments and Equipment
(Conselho de Materiais, Instrumentos e Equipamento Dentários). Disinfection of impressions. JADA 1991;122(3):110; www.ada.org
Moldagem e galvanização
Realizar o molde da impressão no mínimo
30 minutos após a remoção da boca.
Para a moldagem, a DMG recomenda a utilização de gesso odontológico duro (ISO 6873; Tipo
3, por exemplo Moldano, Bayer) ou gesso extre-
mamente duro (ISO 6873; Tipo 4, por exemplo
Fujirock II, GC). É possível cobrear e pratear o
molde.
Armazenamento do molde
Guardar o molde a temperatura ambiente
(15 – 25 °C/59 – 77 °F)!
Proteger da luz solar directa!
O molde é estável e pode ser moldado sem perda de precisão, mesmo após alguns meses.
Dados técnicos
Honigum Pro/Mono
Tempo de processamento1
[min]
≤ 2:45 ≤ 2:45
Tempo de processamento
intra-oral2 [min]
≤ 1:00 ≤ 1:00
63
Honigum Pro/Mono
Honigum Pro/Mono
Tempo de permanência na
boca [min]
≥ 3:15 ≥ 3:15
Alteração dimensional após
24 h [%]
≤ 0,40 ≤ 0,40
Compressão remanescente
[%]
≤ 0,35 ≤ 0,35
Deformação sob pressão [%]
≈ 2,8
≈ 2,8
Fast
Fast
Honigum Pro/Mono
Tempo de processamento
[min]
1
≤ 1:30 ≤ 1:30
Tempo de processamento
intra-oral2 [min]
≤ 0:30 ≤ 0:30
Tempo de permanência na
boca [min]
≥ 2:00 ≥ 2:00
64
Fast
Fast
Alteração dimensional após
24 h [%]
≤ 0,40 ≤ 0,40
Compressão remanescente
[%]
≤ 0,35 ≤ 0,35
Deformação sob pressão [%]
≈ 2,8
≈ 2,8
1
Os tempos indicados aplicam-se a uma temperatura ambiente de 23 ºC e a uma humidade relativa do ar de 50%. Temperaturas superiores reduzem estes tempos e temperaturas inferiores aumentam-no.
O tempo de processamento descreve o período desde a mistura até ao momento máximo em que deve realizar-se o posicionamento da moldeira na boca do paciente.
2
Os tempos indicados aplicam-se a partir do início de mistura
para uma temperatura de 35 ºC.
Desinfecção do dispensador Automix
O dispensador Automix é reutilizável após a
desinfecção, porém deverá ser substituído em
caso de sinais visíveis de desgaste.
A desinfecção pode realizar-se com um desinfectante de imersão comum. A DMG recomenda a utilização exclusiva de desinfectantes constantes da lista do RKI (Robert Koch Institut). O
dispensador Automix pode também ser desinfectado em autoclave.
Manter a cânula de mistura usada após a aplicação no cartucho para servir de tampa!
Não utilizar depois de expirado o prazo de
validade!
Composição
Não disponível nos EUA
Vinil polisiloxano, dióxido de silício, pigmentos,
aditivos, catalisador de platina
Classificação
Formas de comercialização
1 cartucho com 380 ml de pasta,
10 MixStar-Tips
Honigum Pro/Mono
REF 929568
ISO 4823:2000, Tipo 2: Consistência média
Fast
REF 929978
Armazenamento e validade
Guardar em local seco a temperatura ambiente (15 – 25 °C/59 – 77 °F).
Não guardar no frigorífico ou congelador!
Proteger da luz solar directa!
65
5 cartuchos com 380 ml de pasta,
50 MixStar-Tips
8 cartuchos com 50 ml de pasta,
16 Automix-Tips, 16 Intraoral-Tips
Honigum Pro/Mono
Honigum Pro/Mono
REF 929569
Fast
REF 929979
REF 929834
Fast
8 cartuchos com 50 ml de pasta
2 cartuchos com 50 ml de pasta,
4 Automix-Tips, 4 Intraoral-Tips
Honigum Pro/Mono
Honigum Pro/Mono
REF 929911
REF 929830
Fast
REF 929977
REF 929976
Apenas disponível nos EUA
1 cartucho com 380 ml de pasta,
10 MixStar-Tips
Honigum Pro/Mono
REF 989568
66
4 cartuchos com 50 ml de pasta,
8 Automix-Tips, 8 Intraoral-Tips
Honigum Pro/Mono
REF 989830
67
Gebruiksaanwijzing
Nederlands
Productbeschrijving
Honigum Pro/Mono is een monofase-afdrukmateriaal op basis van additiesiliconen.
Het materiaal is verkrijgbaar in de Automix-veiligheidspatroon en in de gebruiksklaar gevulde
MixStar-patroon, die geschikt is voor het gebruik
in de DMG MixStar-eMotion en andere in de
handel verkrijgbare mengapparaten.
Indicaties
•
•
•
•
•
68
kroon- en brugafdrukken
inlay- en onlayafdrukken
functie-afdrukken
drukpuntbepaling
allerlei soorten afdrukken, bijv. voor implantaten en telescoopkronen
Elementaire veiligheidsinstructies
• uitsluitend voor tandheelkundig gebruik!
• buiten bereik van kinderen opslaan!
Gebruiksinstructies
• De aangegeven verwerkingstijden (zie “Technische gegevens” op pagina 74) gelden
voor een kamertemperatuur van 23 °C en
een normale relatieve luchtvochtigheid van
50 %. Hogere temperaturen verkorten en
lagere temperaturen verlengen deze tijden.
• Restanten van retractie-oplossingen grondig
wegspoelen met water, anders kunnen die in
sommige gevallen leiden tot een verlenging
van de uithardingstijd.
• Het contact van de afdruk met organische
oplosmiddelen of oplosmiddelhoudende
vloeistoffen vermijden, anders kan het
materiaal#gaan opzwellen en kunnen daardoor onnauwkeurigheden in de gietvorm
ontstaan.
• Contact van het afdrukmateriaal met latex
handschoenen vermijden. DMG adviseert
het gebruik van handschoenen op basis van
pvc of PE.
• Honigum Pro/Mono niet combineren met
condensatiesiliconen- of polyetherafdrukmaterialen.
Gebruik van de MixStar-patroon in
de DMG MixStar-eMotion
Houd u aan de gebruiksaanwijzing van de
“MixStar-eMotion”!
1. Voor het openen van de patroon de vergrendeling naar boven schuiven. Vergrendelingsschuif niet van patroon trekken.
1
2
2. De sluiting van de patroon trekken en weggooien. Plaats een nieuwe mengcanule.
69
3. Vergrendel de mengcanule door het sluiten
van de vergrendelingsschuif.
Gebruik van de MixStar-patroon in
mengapparaten van andere
fabrikanten
Houd u aan de gebruiksaanwijzing van het
gebruikte mengapparaat!
Eerst de patroon zonder mengcanule in het
mengapparaat plaatsen, anders is correct mengen van het materiaal niet gegarandeerd!
In dit geval net zo te werk gaan als beschreven onder “Verwisselen van de mengcanule”
op pagina 70.
4. Plaats de patroon in de MixStar-eMotion.
Een kort akoestisch signaal bevestigt de correcte plaatsing van de patroon.
Aanwijzingen: Nieuwe patroon voor het eerste gebruik door verwijderen van de eerste ca. 3 cm
materiaal klaarmaken voor gebruik.
Laat de gebruikte mengcanule na gebruik als sluiting op de patroon zitten.
70
Verwisselen van de mengcanule
Houd u aan de gebruiksaanwijzing van het
gebruikte mengapparaat!
Aanwijzing: Voor elk mengproces een nieuwe
mengcanule plaatsen.
1. De vergrendelingsschuif naar boven duwen.
2. De oude mengcanule eraf halen en eventuele propjes uit de patroonopeningen verwijderen.
3. De mengcanule stevig op de daarvoor
bestemde openingen van de patroon plaatsen.
4. Vergrendel de mengcanule met de vergrendelingsschuif.
Gebruik van de Automix-patroon
F
E
Aanwijzing: Let erop dat de uitsparingen aan
de patroon en de Automix-dispenser overeenkomen.
Plaatsen mengcanule
1. Draai de patroonkap [D] of gebruikte mengcanule 90° linksom en gooi hem weg.
2. Plaats een nieuwe mengcanule [E].
C
D
2. Klap de kunststof grendel [C] omhoog, plaats
de patroon en zet deze vast met de grendel
[C].
B
A
Aanwijzing: Let erop dat de uitsparingen aan
de mengcanule en de patroon overeenkomen.
3. Vergrendel de canule door deze 90° rechtsom te draaien.
G
Plaatsen van de patroon
1. De hendel [A] aan de achterkant van de
Automix-dispenser naar boven duwen en de
schuif [B] helemaal terugtrekken.
Materiaal aanbrengen
Knijp de eerste keer dat een patroon wordt
gebruikt een hoeveelheid materiaal uit van
ongeveer de grootte van een erwt en gooi dit
weg.
71
Het materiaal door bediening van de hendel
[G] aan de dispenser in de mengcanule mengen en direct aanbrengen.
Aanwijzing: Laat de gebruikte mengcanule na
gebruik als sluiting op de patroon zitten!
De patroon verwijderen
1. De hendel [A] aan de achterkant van de
Automix-dispenser naar boven duwen en de
schuif [B] helemaal terugtrekken.
2. Kunststof grendel [C] omhoog klappen en
de patroon uitnemen.
Aanbevolen gebruik
• Honigum Pro/Mono kan in alle gangbare
niet-geperforeerde afdruklepels gebruikt
worden.
• De beste resultaten worden behaald met
individuele afdruklepels.
• Om de adhesie van het materiaal aan metalen- of kunststof lepels te verbeteren, dient
72
een lepeladhesief voor A-siliconen (bijv. Tray
Adhesive DMG) gebruikt te worden.
Maken van monofase-afdruk
De individuele tijden zijn te vinden in de rubriek
“Technische gegevens” op pagina 74.
De voorbereide afdruklepel vullen met Honigum Pro/Mono. De afdruklepel daarbij een
beetje schuin onder de mengcanule houden.
Aanwijzing: Om luchtbellen te voorkomen, moet
de punt van de mengcanule bij het aanbrengen
altijd in het materiaal gedompeld blijven.
Een in de handel gebruikelijke elastomeerspuit vullen met een deel van het materiaal
of de 50 ml patroon direct gebruiken en om
de preparatie spuiten.
Aanwijzing: Het vullen van de lepel en het spuiten moeten gelijktijdig beëindigd worden, omdat
door de hogere temperatuur in de mond het spuitmateriaal sneller hard wordt dan het materiaal
in de lepel.
Binnen de verwerkingstijd de volle lepel met
weinig kracht langzaam in de mond plaatsen
en een afdruk maken van de preparatie.
Na beëindiging van de uithardingstijd de afdruk
uit de mond nemen, zie “Uitnemen” op pagina 73.
Dubbelmengafdruk
De individuele tijden zijn te vinden in de rubriek
“Technische gegevens”. Houd u aan de bijbehorende gebruiksaanwijzing!
De afdruklepel vullen met Honigum Pro/Mono.
De afdruklepel daarbij een beetje schuin onder
de mengcanule houden.
Aanwijzing:Om luchtbellen te voorkomen, moet
de punt van de mengcanule bij het aanbrengen
altijd in het materiaal gedompeld blijven.
materiaal sneller hard wordt dan het materiaal
in de lepel.
Binnen de verwerkingstijd de volle lepel met
weinig kracht langzaam in de mond plaatsen
en een afdruk maken van de preparatie.
Na beëindiging van de uithardingstijd de afdruk
uit de mond nemen, zie “Uitnemen” op pagina 73.
Uitnemen
De afdruk parallel aan de lengteas van de geprepareerde tanden uitnemen.
Vervolgens net zo te werk gaan als beschreven onder “Reiniging en desinfectie van de
eindafdruk” op pagina 73.
Honigum Pro/Light om de preparatie spuiten.
Reiniging en desinfectie van de
eindafdruk
Aanwijzing: Het vullen van de lepel en het spuiten moeten gelijktijdig beëindigd worden, omdat
door de hogere temperatuur in de mond het spuit-
De eindafdruk alleen met dompeloplossingen desinfecteren.
73
DMG adviseert het gebruik van een 2% glutaraldehyde-oplossing.
Let erop dat het gebruikte desinfectiemiddel
geïndiceerd is voor het gebruik met additiesiliconen afdrukmaterialen.
Volg nauwkeurig de aanwijzingen van de fabrikant voor het desinfectiemiddel!
De eindafdruk drogen en tot het gieten bewaren, zie “Bewaren van de afdruk” op pagina 74
Meer informatie is ook te vinden bij het standpunt van de DGZMK. Standpunt van de DGZMK
3/93 V 1.0; www.dgzmk.de
ADA adviseert het volgen van Council on Dental Materials, Instruments and Equipment.
Desinfectie van afdrukken. JADA 1991;122(3):110;
www.ada.org
Voor de gietvorm adviseert DMG het gebruik
van hardgips(ISO 6873; type 3, bijv. Moldano,
Bayer) resp. superhardgips voor vormen (ISO 6873;
type 4, bijv. Fujirock II, GC). De afdruk kan met
koper of zilver gegalvaniseerd worden.
Bewaren van de afdruk
Afdruk bij kamertemperatuur (15 – 25 °C/
59 – 77 °F) droog bewaren!
Niet blootstellen aan direct zonlicht!
De afdruk is vormvast en kan ook na maanden
zonder verlies van nauwkeurigheid gegoten worden.
Technische gegevens
Honigum Pro/Mono
Gieten en galvaniseren
De afdruk minimaal 30 min. na het uit de
mond nemen gieten.
74
Verwerkingstijd1 [min]
≤ 2:45 ≤ 2:45
Intraorale verwerkingstijd2
[min]
≤ 1:00 ≤ 1:00
Honigum Pro/Mono
Honigum Pro/Mono
Verblijftijd in de mond [min] ≥ 3:15 ≥ 3:15
Dimensieverandering na
24 u [%]
≤ 0,40 ≤ 0,40
Drukvervormingsrest [%]
≤ 0,35 ≤ 0,35
Vervorming onder druk [%]
≈ 2,8
≈ 2,8
Fast
Fast
Honigum Pro/Mono
1
Verwerkingstijd [min]
≤ 1:30 ≤ 1:30
Intraorale verwerkingstijd2
[min]
≤ 0:30 ≤ 0:30
Verblijftijd in de mond [min] ≥ 2:00 ≥ 2:00
Dimensieverandering na
24 u [%]
≤ 0,40 ≤ 0,40
Drukvervormingsrest [%]
≤ 0,35 ≤ 0,35
Vervorming onder druk [%]
Fast
Fast
≈ 2,8
≈ 2,8
1
De aangegeven tijden gelden bij een kamertemperatuur van
23 °C en een normale relatieve luchtvochtigheid van 50%.
Hogere temperaturen verkorten en lagere temperaturen verlengen deze tijden.
De verwerkingstijd beschrijft de tijd vanaf het begin van het
mengen tot het tijdstip waarop uiterlijk de lepel in de mond
van de patiënt geplaatst moet worden.
2
De aangegeven tijden gelden vanaf het begin van het mengen
voor een temperatuur van 35 °C.
Desinfectie van de Automixdispenser
De Automix-dispenser is na de desinfectie opnieuw
te gebruiken, maar bij duidelijke tekenen van
slijtage moet deze worden vervangen.
De dispenser kan worden gedesinfecteerd door
deze onder te dompelen in een gangbaar desinfectiemiddel. DMG adviseert uitsluitend die desinfectiemiddelen te gebruiken die staan vermeld
75
in de lijst van het Robert Koch Institut. De Automix-dispenser is autoclaveerbaar.
Handelsvormen
Niet verkrijgbaar in de VS
Samenstelling
1 patroon met 380 ml pasta, 10 MixStar-tips
Vinylpolysiloxaan, siliciumdioxide, pigmenten,
additieven en platinakatalysator.
Honigum Pro/Mono
REF 929568
Classificatie
ISO 4823:2000, type 2: Medium-bodied
consistency
Fast
REF 929978
5 patronen met 380 ml pasta, 50 MixStar-tips
Honigum Pro/Mono
Opslag en houdbaarheid
Bij omgevingstemperatuur (15 – 25 °C/59 – 77 °F)
droog bewaren.
Niet in de koelkast of diepvries bewaren!
Niet blootstellen aan direct zonlicht!
Laat de gebruikte mengcanule na gebruik als
sluiting op de patroon zitten!
Niet gebruiken nadat de houdbaarheidsdatum
is verstreken!
76
REF 929569
Fast
REF 929979
Aleen verkrijgbaar in de VS
2 patronen met 50 ml pasta,
4 Automix-tips, 4 Intraoral-tips
1 patroon met 380 ml pasta, 10 MixStar-tips
Honigum Pro/Mono
Honigum Pro/Mono
REF 929830
Fast
REF 989568
REF 929976
8 patronen met 50 ml pasta,
16 Automix-tips, 16 Intraoral-tips
Honigum Pro/Mono
4 patronen met 50 ml pasta, 8 Automix-tips
8 Intraoral-tips
Honigum Pro/Mono
REF 989830
REF 929834
Fast
REF 929977
8 patronen met 50 ml pasta
Honigum Pro/Mono
REF 929911
77
Brugsanvisning
Dansk
Produktbeskrivelse
Honigum Pro/Mono er et monofase-afstøbningsmateriale på basis af additionstværbundet silikone.
Materialet fås i Automix-sikkerhedspatronen og
i den brugsklare fyldte MixStar-patron, som er
egnet til anvendelse i DMG MixStar-eMotion og
andre almindelige blandingsapparater.
Indikationer
•
•
•
•
•
78
Afstøbning af kroner og broer
Inlay- og onlayafstøbning
Funktionsafstøbninger
Trykpunktregistrering
Overafstøbninger af enhver art, f.eks. til
implantater og teleskoper
Grundlæggende
sikkerhedsanvisninger
• Kun til brug for tandlæger!
• Opbevares utilgængeligt for børn.
Henvisninger vedrørende
anvendelsen
• De angivne forarbejdningstider (se ”Tekniske
data” på side 84) gælder for en rumtemperatur på 23 °C og en normal relativ luftfugtighed på 50 %. Højere temperaturer forkorter, lavere forlænger disse tider.
• Fjern rester fra retraktionsstoffer ved hjælp
af vand. Ellers kan disse stoffer i givet fald
medføre en forlængelse af størkningstiden.
• Undgå, at afstøbningen kommer i kontakt
med organiske opløsningsmidler eller væsker
med opløsningsmidler, da materialet ellers
kan bulne op og således medføre unøjagtigheder i udstøbningen.
• Undgå, at afstøbningsmaterialet kommer i
kontakt med latexhandsker. DMG anbefaler
brug af handsker på basis af PVC eller PE.
• Honigum Pro/Mono må ikke kombineres
med kondensationstværbundet silikoneeller polyetherafstøbningsmateriale.
Håndtering af MixStar-patronen i
DMG MixStar-eMotion
1
2
2. Træk lukkeanordningen af patronen, og smid
den ud. Sæt en ny blandekanyle på.
Se brugsanvisningen til ”MixStar-eMotion”!
1. Skub låseskyderen opad for at åbne patronen. Træk ikke låseskyderen af patronen.
3. Sæt blandekanylen fast ved at lukke låseskyderen.
79
Håndtering af MixStar-patronen i
blandeapparater fra andre
producenter
4. Sæt patronen i MixStar-eMotion. Et kort lydsignal bekræfter, at patronen er sat korrekt i.
NB: Nye patroner gøres før første ibrugtagning
anvendelige ved at smide de første 3 cm‘s strenglængde ud.
Lad den brugte blandekanyle blive siddende som
lukning på patronen efter påføring!
Se brugsanvisningen for det anvendte blandeapparat!
Sæt først patronen i blandeapparatet uden
blandekanyle, da det ellers ikke er sikkert, at
materialeblandingen kan forløbe problemfrit!
Fortsæt i dette tilfælde som beskrevet under
”Udskiftning af blandekanylen” på side 80.
Udskiftning af blandekanylen
Se brugsanvisningen for det anvendte blandeapparat!
NB: Påsæt en ny blandekanyle før hver blanding.
1. Skub låseskyderen opad.
2. Træk den brugte blandekanyle af, og fjern
eventuelle propper fra patronåbningerne.
3. Sæt blandekanylen fast på patronens pågældende åbninger.
80
4. Sæt blandekanylen fast ved hjælp af låseskyderen.
Håndtering af Automix-patronen
F
E
NB: Vær opmærksom på, at udsparingerne på
blandekanylen og på patronen skal stemme overens.
C
D
Sæt blandekanylen på
1. Træk patronkappen [D] eller den brugte
blandekanyle af, og kassér den efter at have
drejet den 90° i retning mod uret.
2. Sæt en ny blandekanyle [E] på.
B
A
G
Indsæt patronen
1. Tryk armen [A] på bagsiden af dispenseren
opad, og træk skyderen [B] helt tilbage.
2. Vip plastlåsen [C] opad, sæt patronen ind, og
sæt den fast med plastlåsen [C].
3. Drej blandekanylen 90° i retning med uret til
stop.
Påfør materiale
Ved førstegangsbrug af en patron trykkes en
cirka ærtstor mængde af materialet ud og kasseres!
Bland materialet ved at aktivere armen [G]
på dispenseren i blandekanylen, og påfør materialet direkte.
NB: Lad den brugte blandekanyle blive siddende som lukning på patronen efter påføring!
NB: Vær opmærksom på, at udsparingerne på
patronen og dispenseren skal stemme overens.
81
Tag patronen af
1. Tryk armen [A] på bagsiden af dispenseren
opad, og træk skyderen [B] helt tilbage.
2. Vip plastlåsen [C] opad, og tag patronen af.
Anbefalet anvendelse
• Honigum Pro/Mono kan anvendes i alle
almindelige afstøbningsskeer.
• Det bedste resultat opnås ved hjælp af individuelle afstøbningsskeer.
• For at forbedre materialets adhæsion til
metal- eller plastskeer bør der anvendes et
skeadhæsiv til A-silikone (f.eks. Tray Adhesive, DMG).
Monofase-afstøbning
De individuelle tider findes i rubrikken ”Tekniske data” på side 84.
Fyld Honigum Pro/Mono i den forberedte
afstøbningsske. Hold derved afstøbningsskeen let skråt under blandekanylen.
82
NB: For at forhindre luftlommer skal blandekanylens spids altid være nedsænket i massen under
påføringen.
Fyld en del af materialet på en almindelig elastomersprøjte, eller anvend 50 ml-patronen
direkte, og omsprøjt præparationen.
NB: Påfyldningen af skeen og omsprøjtningen
skal afsluttes på samme tid, da omsprøjtematerialet størkner hurtigere end materialet i skeen
på grund af den højere temperatur i munden.
Positionér inden for forarbejdningstiden langsomt og forsigtigt den fyldte ske i munden,
og afstøb præparationen.
Tag efter endt størkningstid afstøbningen ud
af munden, se ”Udtagelse” på side 83.
Dobbeltblandeafstøbning
De individuelle tider findes i rubrikken ”Tekniske data”. Følg den dertil hørende brugsanvisning!
Fyld Honigum Pro/Mono i afstøbningsskeen.
Hold derved afstøbningsskeen let skråt under
blandekanylen.
Fortsæt herefter som beskrevet under ”Rengøring og desinfektion af slutafstøbningen”
på side 83.
NB: For at forhindre luftlommer skal blandekanylens spids altid være nedsænket i massen under
påføringen.
Rengøring og desinfektion af
slutafstøbningen
Sprøjt Honigum Pro/Light omkring præparationen.
NB: Påfyldningen af skeen og omsprøjtningen
skal afsluttes på samme tid, da omsprøjtematerialet størkner hurtigere end materialet i skeen
på grund af den højere temperatur i munden.
Positionér inden for forarbejdningstiden langsomt og forsigtigt den fyldte ske i munden,
og afstøb præparationen.
Tag efter endt størkningstid afstøbningen ud
af munden, se ”Udtagelse” på side 83.
Udtagelse
Tag afstøbningen omkring de præparerede
tænder ud parallelt med tandlængdeaksen.
Desinficer kun slutafstøbningen med midler
til neddypning.
DMG anbefaler anvendelse af en 2 %-glutaraldehydblanding.
Vær opmærksom på, at det anvendte desinfektionsmiddel indiceres med additionstværbundet afstøbningssilikone i forbindelse med
anvendelsen.
Følg nøje producentanvisningerne til desinfektionsmidlet.
Tør slutafstøbningen, og opbevar den indtil
udstøbningen, se ”Opbevaring af afstøbningen” på side 84.
Se DGZMK‘s kommentar for yderligere oplysninger. Kommentar fra DGZMK 3/93 V 1.0,
www.dgzmk.de
83
ADA recommends to follow Council on Dental Materials, Instruments and Equipment.
Disinfection of impressions. JADA 1991;122(3):110;
www.ada.org
Udstøbning og galvanisering
Udstøb tidligst afstøbningen 30 min. efter
udtagelse af munden.
DMG anbefaler anvendelse af modelhårdgips
(ISO 6873, type 3, f.eks. Moldano, Bayer) hhv.
superhårdgips til former (ISO 6873, type 4, f.eks.
Fujirock II, GC) til udstøbningen. Afstøbningen
kan kobber- og sølvgalvaniseres.
Opbevaring af afstøbningen
Opbevar afstøbningen tørt og ved rumtemperatur (15 – 25 °C/59 – 77 °F)
Beskyttes mod direkte sol!
Afstøbningen er formstabil og kan også udstøbes efter flere måneder, uden at der forekommer præcisionstab.
84
Tekniske data
Honigum Pro/Mono
Forarbejdningstid1 [min.]
≤ 2:45 ≤ 2:45
Intraoral forarbejdningstid2
[min.]
≤ 1:00 ≤ 1:00
Liggetid i munden [min.]
≥ 3:15 ≥ 3:15
Dimensionsforandring efter
24 t [%]
≤ 0,40 ≤ 0,40
Blivende deformation fra
tryk [%]
≤ 0,35 ≤ 0,35
Deformation under tryk [%]
≈ 2,8
≈ 2,8
Fast
Fast
Honigum Pro/Mono
Forarbejdningstid1 [min.]
≤ 1:30 ≤ 1:30
Intraoral forarbejdningstid2
[min.]
≤ 0:30 ≤ 0:30
Liggetid i munden [min.]
≥ 2:00 ≥ 2:00
Dimensionsforandring efter
24 t [%]
≤ 0,40 ≤ 0,40
Desinfektionen kan ske med et almindeligt desinfektionsmiddel til neddypning. DMG anbefaler udelukkende anvendelse af desinfektionsmidler angivet hos RKI (Robert Koch Institut).
Automix-dispenseren kan desuden autoklaveres.
Blivende deformation fra
tryk [%]
≤ 0,35 ≤ 0,35
Sammensætning
Deformation under tryk [%]
≈ 2,8
Vinylpolysiloxan, siliciumdioxid, pigmenter, additiver, platinkatalysator
Honigum Pro/Mono
Fast
Fast
≈ 2,8
1
De angivne tider gælder for en rumtemperatur på 23 °C og en
normal relativ luftfugtighed på 50 %. Højere temperaturer forkorter, lavere forlænger disse tider.
Forarbejdningstiden er tidsrummet mellem blandingspåbegyndelsen og det tidspunkt, hvor positioneringen af skeen i
munden på patienten senest skal ske.
2
De angivne tider gælder fra blandingspåbegyndelsen for en
temperatur på 35 °C.
Klassifikation
ISO 4823:2000, type 2: Medium-bodied consistency
Opbevaring og holdbarhed
Desinfektion af Automix-dispenseren
Automix-dispenseren kan bruges igen efter
desinfektion, men skal udskiftes ved synlige spor
af slitage.
Opbevares tørt og ved rumtemperatur (15 – 25 °C/
59 – 77 °F).
Opbevares ikke i køle- eller fryseskab!
Beskyttes mod direkte sol!
85
Lad den brugte blandekanyle blive siddende
som lukning på patronen efter påføring!
Må ikke anvendes efter udløbsdatoen!
2 patroner à 50 ml pasta, 4 Automix-tips,
4 Intraoral-tips
Honigum Pro/Mono
REF 929830
Handelsformer
Fast
Fås ikke i USA
1 patron à 380 ml pasta, 10 MixStar-tips
Honigum Pro/Mono
REF 929568
Fast
REF 929976
8 patroner à 50 ml pasta, 16 Automix-tips,
16 Intraoral-tips
Honigum Pro/Mono
REF 929834
REF 929978
Fast
REF 929977
5 patroner à 380 ml pasta, 50 MixStar-tips
8 patroner à 50 ml pasta
Honigum Pro/Mono
REF 929569
Fast
86
REF 929979
Honigum Pro/Mono
REF 929911
Fås kun i USA
1 patron à 380 ml pasta, 10 MixStar-tips
Honigum Pro/Mono
REF 989568
4 patroner à 50 ml pasta, 8 Automix-tips,
8 Intraoral-tips
Honigum Pro/Mono
REF 989830
87
Bruksanvisning
Svenska
Produktbeskrivning
Honigum Pro/Mono är ett monofasavtryck baserat på additionsförnätande silikoner.
Materialet finns tillgängligt i Automix-säkerhetspatron och i fylld MixStar-patron som är färdig
att använda, som är avsedd för att användas i DMG
MixStar-eMotion och andra blandapparater som
är vanliga i handeln.
Indikationer
•
•
•
•
•
88
Avtryck för kronor och bryggor
Avtryck för inlay och onlay
Funktionella avtryck
Fastställande av tryckställe
Alla sorters överavtryck, t ex för implantat
och teleskop
Grundläggande säkerhetsanvisningar
• Får endast användas för dentalt bruk av tandläkare!
• Förvaras otillgängligt för barn!
Användningsinformation
• De angivna bearbetningssidorna (se ”Tekniska data” på sid 94) gäller vid en rumstemperatur på 23 °C och en normal relativ luftfuktighet på 50 %. Högre temperaturer
förkortar tiderna, lägre temperaturer förlänger dem.
• Spola noggrant bort rester av retreaktionslösningar, i annat fall kan det förekomma att
dessa leder till en förlängning av härdningstiden.
• Undvik att avtrycket kommer i kontakt med
organiska lösningsmedel eller vätskor som
innehåller lösningsmedel, i annat fall kan
materialet svälla och därmed orsaka ojämnheter i avgjutningen.
• Undvik att avtryckmaterialet kommer i kontakt med latexhandskar. DMG rekommenderar användning av PVC- eller PE-handskar.
• Kombinera inte Honigum Pro/Mono med
avtrycksmaterial i kondensationsförnätande
silikoner eller polyeter.
Hantering av MixStar-patronen i
DMG MixStar-eMotion.
1
2
2. Avlägsna låset från patronen och släng det.
Sätt på ny blandningskanyl.
Beakta användarinformationen i ”MixStareMotion”!
3. Stoppa blandningskanylen genom att tillsluta låsregeln.
1. Skjut upp låsregeln för att öppna patronen.
Dra inte av låsregeln från patronen.
89
Hantering av MixStar-patronen i
blandapparater från andra tillverkare
Beakta användarinformationen för den använda blandapparaten!
Sätt därefter in patronen utan blandningskanyl i blandapparaten, i annat fall garanteras
inte en korrekt blandning av materialen!
I detta fall, gå till väga på samma sätt som
under ”Byte av blandningskanyler” på sid 90.
4. Sätt in patronen i MixStar-eMotion. En kort
akustisk signal bekräftar att patronen har
satts i korrekt.
Information: Förbered patronen inför första
användningen genom att kasta de första ca 3 cm
av strängen.
Den använda blandningskanylen lämnas efter
applikationen kvar som lock för patronen.
90
Byte av blandningskanyler
Beakta användarinformationen för den använda blandapparaten!
Information: Sätt på en ny blandningskanyl inför
varje blandningsprocess.
1. Skjut låsregeln uppåt.
2. Dra av den gamla blandningskanylen och
befria patronöppningen från eventuella
hinder.
3. Fäst blandningskanylerna ordentligt på
motsvarande patronöppning.
4. Arretera blandningskanylerna med låsregeln.
Handhavande av Automix-patronen
F
E
C
D
Sätt fast blandningskanylen
1. Vrid patronskyddet [D] eller den använda
blandningskanylen 90° moturs och dra sedan
av och släng dem.
2. Sätt på ny blandningskanyl [E].
Information: Se till att patronens fördjupning
och blandningskanylen passar ihop.
B
A
G
Sätt i patronen
1. Tryck spaken [A] på baksidan av utmatningsapparaten uppåt och dra tillbaka regeln [B]
helt.
2. Vik upp plastspärren [C], sätt i patronen och
lås fast den med plastspåren [C].
3. Blandningskanylen arreteras genom vridning
medurs 90°.
Applicera material
När en patron används för första gången ska
du först trycka ut material av en ärtas storlek
och kassera detta.
Aktivera spaken [G] på utmatningsapparaten
för att blanda materialet i blandningskanylen
och sedan applicera det direkt.
Information: Den använda blandningskanylen
lämnas efter applikationen kvar som lock för patronen!
Information: Se till att patronens fördjupning
och utmatningsapparaten passar ihop.
91
Ta ur patronen
1. Tryck spaken [A] på baksidan av utmatningsapparaten uppåt och dra tillbaka regeln [B]
helt.
2. Vik upp plastspärren [C] och ta ur patronen.
Rekommenderad användning
• Honigum Pro/Mono kan användas i alla vanliga avtrycksskedar.
• Bästa möjliga resultat uppnås med individuella avtrycksskedar.
• För att förbättra materialets vidhäftning till
metall- eller plastformar ska en skedhäftning
för A-silikon (t ex gjutformsadhesiv, DMG)
användas.
Monofasavtryck
De enskilda tiderna återfinns under rubriken
”Tekniska data” på sid 94.
Mata den förberedda avtrycksskeden med
Honigum Pro/Mono. Håll avtrycksskeden lätt
lutad under blandningskanylen.
92
Information: För att undvika luftfickor, ska blandningskanylens spets alltid vara nedsänkt i massan vid appliceringen.
Fyll en del av materialet i en elastomerspruta som finns tillgänglig i handeln, eller använd
50-ml-patronen direkt, och gjut runt preparationen.
Information: Fyllningen med skeden och utspridningen ska avslutas samtidigt eftersom gjutmaterialet hårdnar snabbare på grund av den högre
temperaturen i munnen, än vad materialet på
skeden gör.
Den fyllda skeden ska lätt och långsamt placeras i munnen inom bearbetningstiden och
bilda avtryck av preparationen.
Avlägsna avtrycket ur munnen efter härdningstiden, se ”Avlägsnande” på sid 93.
Dubbelblandningsavtryck
De individuella tiderna för materialen som
används hämtas under rubriken ”Tekniska
data”. Beakta bruksanvisningen för materialet!
Mata avtrycksskeden med Honigum Pro/Mono.
Håll avtrycksskedem lätt lutad under blandningskanylen.
Information: För att undvika luftfickor, ska blandningskanylens spets alltid vara nedsänkt i massan vid appliceringen.
Gjut över preparationen med Honigum Pro/
Light.
Information: Fyllningen med skeden och utspridningen ska avslutas samtidigt eftersom gjutmaterialet hårdnar snabbare på grund av den högre
temperaturen i munnen, än vad materialet på
skeden gör.
Den fyllda skeden ska lätt och långsamt placeras i munnen inom bearbetningstiden och
bilda avtryck av preparationen.
Avlägsna avtrycket ur munnen efter härdningstiden ”Avlägsnande” på sid 93.
Avlägsnande
Avlägsna avtrycket från området vid de preparerade tänderna parallellt med tandens axel.
Gå sedan tillväga på det sätt som beskrivs
under ”Rengöring och desinfektion av det
slutliga avtrycket” på sid 93.
Rengöring och desinfektion av det
slutliga avtrycket
Det slutliga avtrycket får enbart desinficeras
med dopplösningar.
DMG rekommenderar användande av en 2 %-ig
glutaraldehydlösning.
Se till att det desinfektionsmedel som används
är avsett för användning med additionsförnätande silikoner för avtryck.
Beakta tillverkarinformation för desinfektionsmedel noggrant!
Torka det slutliga avtrycket och förvara det
torrt tills den ska användas, se ”Förvaring av
avtrycket” på sid 94.
93
Ytterligare information kan fås från DGZMK:s
(Tyska sällskapet för tand-, mun- och käkmedicin) ställningstagande. DGZMK:s ställningstagande 3/93 V 1.0; www.dgzmk.de
ADA rekommenderar att man följer råd om
tandmaterial, instrument och utrustning. Desinfektion av avtryck. JADA 1991;122(3):110;
www.ada.org
Fixering och galvanisering
Fixera avtrycket tidigast 30 minuter efter det
att den har tagits bort ur munnen.
DMG rekommenderar användning av modellhårdgips (ISO 6873; Typ 3, t ex Moldano, Bayer)
resp. superhårt gips för formar (ISO 6873; typ 4,
t ex Fujirock II, GC) för avgjutning. Avtrycket kan
koppar- och silvergalvaniseras.
Förvaring av avtrycket
Förvara avtrycket tortt vid rumstemperatur
(15 – 25 °C/59 – 77 °F)!
94
Skyddas från direkt solbestrålning!
Avtrycket är formstabilt och kan även användas
efter flera månader utan att precisionen går förlorad.
Tekniska data
Honigum Pro/Mono
Bearbetningstid1 [min]
≤ 2:45 ≤ 2:45
2
Intraoral bearbetningstid
[min]
≤ 1:00 ≤ 1:00
Tid i munnen [min]
≥ 3:15 ≥ 3:15
Dimensionsändring efter
24 h [%]
≤ 0,40 ≤ 0,40
Tryckformningsrest [%]
≤ 0,35 ≤ 0,35
Utformning under tryck [%]
≈ 2,8
≈ 2,8
Desinfektion av Automix-Dispensern
Honigum Pro/Mono
Fast
1
Fast
Bearbetningstid1 [min]
≤ 1:30 ≤ 1:30
Intraoral bearbetningstid2
[min]
≤ 0:30 ≤ 0:30
Tid i munnen [min]
≥ 2:00 ≥ 2:00
Dimensionsändring efter
24 h [%]
≤ 0,40 ≤ 0,40
Tryckformningsrest [%]
≤ 0,35 ≤ 0,35
Utformning under tryck [%]
≈ 2,8
≈ 2,8
De angivna tiderna gäller vid en rumstemperatur på 23 °C och
en normal relativ luftfuktighet på 50 %. Högre temperaturer
förkortar tiderna, lägre temperaturer förlänger dem.
Bearbetningstiden beskriver den tidsrymd från det att materialet börjar blandas tills då positioneringen i skeden i patientens
mun absolut senast måste ske.
2
De angivna tiderna gäller från och med att materialet börjar
blandas vid en temperatur på 35 °C.
Automix-Dispensern är återanvändbar efter
desinfektion. Byt ut dispensern om synligt spår
av slitage skulle uppträda.
Desinfektion kan utföras med ett i handeln tillgängligt desinfektionsmedel för nedsänkning.
DMG rekommenderar att uteslutande desinfektionsmedel som är upptagna på RKI:s (Robert
Koch-institutet) lista används. Automix-Dispenser kan dessutom autoklaveras.
Sammansättning
Vinylpolysiloxan, kiseldioxid, pigment, tillsatser,
platinakatalysator
Klassifikation
ISO 4823:2000, Typ 2: Medelfyllig konsistens
95
Lagring och hållbarhet
5 patroner à 380 ml pasta, 50 MixStar-Tips
Förvaras torrt vid rumstemperatur (15 – 25 °C/
59 – 77 °F).
Förvara ej i kylskåp eller frys!
Skyddas från direkt solbestrålning!
Den använda blandningskanylen lämnas efter
applikationen kvar som lock för patronen!
Använd inte materialet efter det att angivet
sista hållbarhetsdatum har gått ut!
Honigum Pro/Mono
REF 929569
Fast
REF 929979
2 patroner à 50 ml pasta, 4 Automix-Tips,
4 Intraoral-Tips
Honigum Pro/Mono
Leveransform
REF 929830
Finns ej tillgänglig i USA
Fast
REF 929976
1 patron à 380 ml pasta, 10 MixStar-Tips
8 patroner à 50 ml pasta, 16 Automix-Tips,
16 Intraoral-Tips
Honigum Pro/Mono
REF 929568
Fast
Honigum Pro/Mono
REF 929978
REF 929834
Fast
96
REF 929977
8 patroner à 50 ml pasta
Honigum Pro/Mono
REF 929911
Endast tillgänglig i USA
1 patron á 380 ml pasta, 10 MixStar-Tips
Honigum Pro/Mono
REF 989568
4 patroner à 50 ml pasta, 8 Automix-Tips
8 Intraoral-Tips
Honigum Pro/Mono
REF 989830
97
Instrukcja użycia
Polski
Opis produktu
Honigum Pro/Mono to materiał do sporządzania jednofazowych wycisków na bazie silikonów
sieciujących w systemie addycyjnym.
Materiał jest dostępny w zabezpieczonym naboju Automix oraz w gotowym do użycia, napełnionym naboju MixStar, który nadaje się do zastosowania w DMG MixStar-eMotion oraz w innych
dostępnych w handlu urządzeniach mieszających.
Wskazania
• Deformacje koron i mostów
• Wyciski do wkładów koronowych typu inlay
i onlay
• Wyciski funkcyjne
• Ustalanie miejsc ucisku
• Wyciski wszelkiego rodzaju, np, do implantów i teleskopów
98
Podstawowe wskazówki
bezpieczeństwa
• Produkt przeznaczony wyłącznie do zastosowania w stomatologii!
• Przechowywać w miejscu niedostępnym dla
dzieci!
Wskazówki dotyczące użycia
• Podane czasy obróbki (patrz „Dane techniczne” na stronie 105) obowiązują dla temperatury pokojowej 23 °C oraz normalnej
względnej wilgotności powietrza 50 %. Wyższa temperatura skraca, a niższa wydłuża
podane czasy obróbki.
• Pozostałości roztworów retrakcyjnych należy dokładnie spłukać wodą, w przeciwnym
razie może dojść do wydłużenia czasu wiązania.
• Unikać styczności wycisku z rozpuszczalnikami organicznymi lub płynami zawierającymi rozpuszczalniki, w przeciwnym razie
może dojść do spęcznienia materiału i tym
samym do niedokładności w odlewie.
• Unikać kontaktu materiału wyciskowego
z rękawicami lateksowymi. DMG zaleca stosowanie rękawic na bazie PCW lub PE.
• Honigum Pro/Mono nie należy łączyć
z materiałami wyciskowymi z polietylenu ani
silikonu sieciującego kondensacyjnie.
Posługiwanie się nabojem MixStar
w urządzeniu mieszającym DMG
MixStar-eMotion
Należy przestrzegać informacji dotyczących
użytkowania „MixStar-eMotion”!
1. Aby otworzyć nabój, należy przesunąć zasuwę blokującą w górę. Nie należy zdejmować
zasuwy blokującej z naboju.
1
2
2. Zdjąć i wyrzucić zamknięcie naboju. Nałożyć
nową kaniulę mieszającą.
99
3. Zablokować kaniulę mieszającą przez
zamknięcie zasuwy blokującej.
4. Włożyć nabój do MixStar-eMotion. Krótki
sygnał akustyczny potwierdza prawidłowe
umieszczenie naboju.
Posługiwanie się nabojem MixStar
w urządzeniach mieszających innych
produkcji
Przestrzegać informacji dotyczących użytkowania dołączonych do stosowanego urządzenia mieszającego!
Najpierw włożyć do urządzenia mieszającego nabój bez kaniuli mieszającej, w przeciwnym razie nie można zagwarantować bezbłędnego wymieszania materiału!
W takim przypadku postępować zgodne z opisem w punkcie „Wymiana kaniuli mieszającej” na stronie 100.
Wymiana kaniuli mieszającej
Wskazówki: Przygotować nowy nabój przed
pierwszym użyciem przez wyciśnięcie pasma
o długości ok. 3 cm.
Przestrzegać informacji dotyczących użytkowania dołączonych do stosowanego urządzenia mieszającego!
Po zakończeniu nakładania należy pozostawić
zużytą kaniulę na naboju jako zatyczkę.
Wskazówka: Przed każdym mieszaniem nakładać nową kaniulę mieszającą.
1. Zasuwę blokującą przesunąć w górę.
100
2. Zdjąć starą kaniulę mieszającą i usunąć
z otworu kaniuli wszelki zaschnięty materiał.
3. Nasadzić stabilnie kaniulę mieszającą na
odpowiednie otwory w naboju.
4. Kaniulę mieszającą zablokować za pomocą
zasuwy blokującej.
2. Rygiel z tworzywa sztucznego [C] odchylić
w górę. Wstawić nabój i zablokować go przy
pomocy rygla [C].
Posługiwanie się nabojem Automix
Nakładanie kaniuli mieszającej
1. Ściągnąć kapturek naboju [D] lub zużytą
kaniulę mieszającą obracając ją o 90° w kierunku przeciwnym do ruchu wskazówek
zegara, a następnie wyrzucić.
2. Nałożyć nową kaniulę mieszającą [E].
F
E
C
D
B
A
Wskazówka: Zwrócić uwagę, aby wyżłobienia
w kaniuli mieszającej i dozowniku odpowiadały
sobie.
Wskazówka: Zwrócić uwagę, aby wyżłobienia
w kaniuli mieszającej i naboju odpowiadały sobie.
G
3. Zablokować kaniulę mieszającą obracając ją
o 90° w kierunku zgodnym z ruchem wskazówek zegara.
Wstawianie naboju
1. Dźwignię [A] z tyłu dozownika podnieść do
góry i całkowicie odsunąć zasuwę [B].
101
Nakładanie materiału
Przy pierwszym użyciu naboju należy wycisnąć niewielką ilość materiału wielkości ziarenka grochu i wyrzucić.
Zmieszać materiał w kaniuli mieszającej naciskając dźwignię [G] w dozowniku i od razu
nanieść go na wybrane miejsce.
Wskazówka: Po zakończeniu nakładania należy
pozostawić zużytą kaniulę na naboju jako zatyczkę!
Wyjmowanie naboju
1. Dźwignię [A] z tyłu dozownika podnieść do
góry i całkowicie odsunąć zasuwę [B].
2. Odchylić w górę rygiel z tworzywa sztucznego [C] i wyjąć nabój.
Zalecane zastosowanie
• Honigum Pro/Mono można stosować we
wszystkich powszechnie używanych łyżkach
wyciskowych bez perforacji.
• Najlepsze rezultaty uzyskuje się przy stosowaniu indywidualnych łyżek wyciskowych.
102
• Aby poprawić przyczepność materiału do
metalowych i plastikowych łyżek do wyciskania, należy zastosować środek adhezyjny do
silikonów typu A (np. Tray Adhesive, DMG).
Wycisk jednofazowy
Indywidualne czasy są podane w rubryce „Dane
techniczne” na stronie 105.
Umieścić Honigum Pro/Mono w przygotowanej łyżce wyciskowej. Łyżkę wyciskową
przytrzymać nieco ukośnie pod kaniulą mieszającą.
Wskazówka: Aby uniknąć wtrąceń pęcherzyków powietrza, należy trzymać końcówkę kaniuli mieszającej podczas nakładania zawsze zanurzoną w masie.
Część materiału umieścić w dostępnej w handlu strzykawce elastomerowej lub zastosować bezpośrednio nabój o poj. 50 ml i spryskać preparowany obszar.
Wskazówka: Napełnianie łyżki i spryskiwanie
należy zakończyć jednocześnie, ponieważ pod-
wyższona temperatura w jamie ustnej powoduje szybsze utwardzanie spryskiwanego materiału w porównaniu z materiałem znajdującym się
na łyżce.
li mieszającej podczas nakładania zawsze zanurzoną w masie.
W czasie obróbki łyżkę wypełnioną materiałem należy odpowiednio ustawić w jamie ustnej przy użyciu nieznacznej siły i wykonać
wycisk preparowanego obszaru.
Po upływie czasu wiązania należy wyjąć wycisk
z jamy ustnej, patrz „Wyjmowanie” na stronie 103.
Wskazówka: Napełnianie łyżki i spryskiwanie należy zakończyć jednocześnie, ponieważ podwyższona temperatura w jamie ustnej powoduje szybsze
utwardzanie spryskiwanego materiału w porównaniu z materiałem znajdującym się na łyżce.
Wycisk z podwójnie mieszanego
materiału
Indywidualne czasy dla użytych materiałów
są podane w rubryce „Dane techniczne”. Przestrzegać odpowiednich informacji dotyczących użytkowania!
Umieścić Honigum Pro/Mono w łyżce wyciskowej. Łyżkę wyciskową przytrzymać nieco
ukośnie pod kaniulą mieszającą.
Wskazówka: Aby uniknąć wtrąceń pęcherzyków powietrza, należy trzymać końcówkę kaniu-
Spryskać preparowany obszar Honigum Pro/
Light.
W czasie obróbki łyżkę wypełnioną materiałem należy odpowiednio ustawić w jamie ustnej przy użyciu nieznacznej siły i wykonać
wycisk preparowanego obszaru.
Po upływie czasu wiązania należy wyjąć wycisk
z jamy ustnej, patrz „Wyjmowanie” na stronie 103.
Wyjmowanie
Wycisk w obszarze preparowanych zębów
należy wyjmować równolegle do osi wzdłużnej zębów.
103
Następnie wykonać czynności zgodnie z opisem w punkcie „Czyszczenie i dezynfekcja
wycisku końcowego” na stronie 104.
Czyszczenie i dezynfekcja wycisku
końcowego
Wycisk końcowy należy dezynfekować wyłącznie przy użyciu roztworów zanurzeniowych.
DMG zaleca stosowanie 2%-owego roztworu aldehydu glutarowego.
Zwrócić uwagę, aby stosowany środek dezynfekujący był przeznaczony do użytku z silikonami do wycisków sieciujących addycyjnie.
Należy przestrzegać wskazówek producenta
środka dezynfekującego!
Wysuszyć wycisk końcowy i przechować do
momentu wykonania odlewu, patrz „Przechowywanie wycisku” na stronie 104.
Pozostałe informacje zostały zawarte w stanowisku DGZMK. Stanowisko DGZMK 3/93
V 1.0; www.dgzmk.de
104
ADA zaleca przestrzeganie wytycznych w zakresie materiałów w stomatologicznych, instrumentów i wyposażenia. Dezynfekcja wycisków. JADA 1991;122(3):110; www.ada.org
Odlewanie i galwanizacja
Odlew wycisku można wykonać najwcześniej
po 30 minutach od wyjęcia go z jamy ustnej.
Do wykonania odlewu DMG zaleca stosowanie
twardego gipsu modelowego (ISO 6873; typ 3,
np. Moldano, Bayer) lub bardzo twardego gipsu
do form (ISO 6873; typ 4, np. Fujirock II, GC).
Wycisk można poddać galwanizacji miedzią i srebrem.
Przechowywanie wycisku
Wycisk należy przechowywać w temperaturze pokojowej (15 – 25 °C/59 – 77 °F)!
Chronić przed bezpośrednim promieniowaniem słonecznym!
Wycisk zachowuje kształt i można na jego podstawie wykonać odlew po kilku miesiącach bez
uszczerbku dla precyzji.
Honigum Pro/Mono
Fast
1
Czas obróbki [min]
Dane techniczne
Fast
≤ 1:30 ≤ 1:30
Czas obróbki wewnątrz jamy
≤ 0:30 ≤ 0:30
ustnej2 [min]
Honigum Pro/Mono
Czas pozostawienia w jamie
ustnej [min]
≥ 2:00 ≥ 2:00
Czas obróbki wewnątrz jamy
≤ 1:00 ≤ 1:00
ustnej2 [min]
Zmiana wymiaru po 24 h
[%]
≤ 0,40 ≤ 0,40
Czas pozostawienia w jamie
ustnej [min]
≥ 3:15 ≥ 3:15
Resztkowe odkształcenie
pod wpływem ściskania [%]
≤ 0,35 ≤ 0,35
Zmiana wymiaru po 24 h
[%]
≤ 0,40 ≤ 0,40
Odkształcenie pod
wpływem ściskania [%]
≈ 2,8
Resztkowe odkształcenie
pod wpływem ściskania [%]
≤ 0,35 ≤ 0,35
Odkształcenie pod
wpływem ściskania [%]
≈ 2,8
Czas obróbki1 [min]
≤ 2:45 ≤ 2:45
1
≈ 2,8
≈ 2,8
Podane czasy obowiązują dla temp. pokojowej wynoszącej
23 °C i normalnej wilgotności względnej w wysokości 50 %.
Wyższa temperatura skraca, a niższa wydłuża podane czasy
obróbki.
Czas obróbki oznacza okres od rozpoczęcia mieszania do
momentu, w którym najpóźniej musi nastąpić umieszczenie
łyżki w jamie ustnej pacjenta.
105
2
Podane czasy obowiązują od początku mieszania w temperaturze 35 °C.
Dezynfekcja dozownika Automix
Po dezynfekcji dozownik Automix nadaje się do
ponownego użycia. Jednakże, w przypadku
widocznych śladów zużycia, należy go wymienić
na nowy.
Do dezynfekcji można stosować dostępny w handlu system dezynfekcji metodą zanurzeniową.
DMG zaleca stosowanie wyłącznie środków dezynfekcyjnych zatwierdzonych przez RKI (Instytut
im. Roberta Kocha). Dozownik Automix nadaje
się również do dezynfekcji w autoklawie.
Skład
polisiloksany winylu, dwutlenek krzemu, barwniki, dodatki, katalizator platynowy
Klasyfikacja
ISO 4823:2000, typ 2: średnia lepkość
106
Przechowywanie i trwałość produktu
Przechowywać w temperaturze pokojowej
(15 – 25 °C/59 – 77 °F).
Nie przechowywać w lodówce ani zamrażarce!
Chronić przed bezpośrednim promieniowaniem słonecznym!
Po zakończeniu nakładania należy pozostawić zużytą kaniulę na naboju jako zatyczkę!
Nie stosować po upływie terminu przydatności do użycia!
Formy handlowe
Produkt niedostępny w USA
1 nabój zawierający 380 ml pasty,
10 końcówek MixStar
Honigum Pro/Mono
REF 929568
Fast
REF 929978
5 nabojów, każdy zawierający 380 ml pasty,
50 końcówek MixStar
2 naboje, każdy zawierający
50 ml pasty, 4 końcówki Automix,
4 końcówki wewnątrzustne
Honigum Pro/Mono
REF 929830
Fast
8 nabojów, każdy zawierający 50 ml pasty,
16 końcówek Automix,
16 końcówek wewnątrzustnych
Honigum Pro/Mono
REF 929834
Honigum Pro/Mono
REF 929569
Fast
REF 929976
REF 929979
Fast
REF 929977
8 nabojów zawierających 50 ml pasty
Honigum Pro/Mono
REF 929911
107
Produkt dostępny tylko w USA
1 nabój zawierający 380 ml pasty,
10 końcówek MixStar
Honigum Pro/Mono
REF 989568
4 naboje, każdy zawierający 50 ml pasty,
8 końcówek Automix
8 końcówek wewnątrzustnych
Honigum Pro/Mono
REF 989830
108
Инструкция по применению Русский
Описание продукта
Honigum Pro/Mono представляет собой однофазную слепочную массу на основе аддитивных силиконов.
Этот материал поставляется в картриджах
Automix и в готовых к употреблению наполненных картриджах MixStar, которые могут
использоваться в DMG MixStar-eMotion и других стандартных смесителях.
Показания к применению
• Слепки коронок и мостов
• Слепки для моделирования зубных вкладок типа Inlay и Onlay
• Функциональные слепки
• Определение точек сдавливания
• Любые слепки после примерки, например, имплантатов и телескопов
Основные меры предосторожности:
• Только для применения в стоматологии!
• Хранить в недоступном для детей месте!
Указания по применению:
• Приведённые данные касательно времени схватывания (смотри «Технические
данные» на странице 117) действительны для температуры в помещении 23 ˚С
и нормальной относительной влажности воздуха 50 %. Более высокая температура приводит к сокращению, а более
низкая – увеличению времени схватывания.
• Тщательно смойте остатки ретракционных
препаратов водой во избежание
увеличения времени схватывания.
• Избегайте контакта слепка с органическими растворителями или жидкостями,
содержащими растворители, это может
вызвать разбухание материала и последующие неточности в отливках.
109
• Не допускайте контакта слепочной массы
с латексными перчатками. DMG рекомендует работать в перчатках на основе ПВХ
или ПЭ.
• Не смешивайте Honigum Pro/Mono со слепочными массами на основе конденсационных силиконов или полиэфиров.
Использование картриджа MixStar
в DMG MixStar-eMotion
Соблюдайте требования соответствующей
инструкции по эксплуатации MixStar-eMotion!
110
1. Чтобы открыть картридж, поднимите
задвижку вверх. Не снимайте задвижку с
картриджа.
1
2
2. Снимите крышку-заглушку с картриджа и
выбросьте её. Установите новый смесительный наконечник.
3. Зафиксируйте смесительный наконечник,
закрыв задвижку.
4. Вставьте картридж в MixStar-eMotion.
Короткий звуковой сигнал подтверждает
правильность установки картриджа.
Указания: Опробуйте и приготовьте новые
картриджи к применению, выдавив и выбросив первую полоску материала длиной ок.3 см.
После использования сохраните использованный смесительный наконечник в качестве
колпачка картриджа.
Использование картриджа
MixStar в смесителях других
производителей
Соблюдайте инструкции производителя
смесителях!
Сначала вставьте картридж в смеситель
без смесительного наконечника, в противном случае не гарантируется безупречное
смешивание материалов.
Порядок действий в таком случае описан
в разделе «Замена смесительного наконечника» на странице 111.
Замена смесительного
наконечника
Соблюдайте требования инструкции по
эксплуатации смесителя!
Указание: Надевайте новый наконечник перед
каждым новым смешиванием.
1. Переместите задвижку вверх.
111
2. Удалите старый смесительный наконечник и прочистите отверстия картриджа от
проступившего материала.
3. Вставьте смесительный наконечник в
соответствующих отверстия картриджа.
4. Зафиксируйте смесительный наконечник,
закрыв задвижку.
Установка картриджа
1. Поднимите рычаг [A] с обратной стороны
диспенсера вверх и полностью отведите
задвижку [B].
2. Приподнимите пластиковый фиксатор [C],
установите картридж и закрепите его пластиковым фиксатором [C].
Использование картриджа Automix
Указание: Следите за тем, чтобы выемки на
картридже совпадали с соответствующими
выступами на диспенсере Automix.
F
E
C
D
B
A
G
Установка смесительного наконечника
1. Снимите колпачок картриджа [D] или
использованный смесительный наконечник, повернув против часовой стрелки на
90о, и выбросьте их.
2. Установите новый смесительный наконечник [E].
Указание: Следите, чтобы прорези на смесительном наконечнике совпадали с соответствующими выступами на картридже.
112
3. Зафиксируйте наконечник, провернув его
на 90˚ по часовой стрелке.
Рекомендуемый способ
применения:
Нанесите материал
При первом использовании картриджа
выдавите и выбросьте небольшое количество материала (размером с горошину).
Смешайте материал в смесительном наконечнике, нажав на рычаг [G] на диспенсере, и нанесите его непосредственно на обрабатываемую поверхность.
• Honigum Pro/Mono применяется в любых
неперфорированных слепочных ложках.
• Наилучшие результаты обеспечивает
использование индивидуальных слепочных ложек.
• Для улучшения адгезии предварительной
слепочной массы к слепочным ложкам из
металла или пластика используется адгезивное средство для А-силиконов (напр.,
Tray Adhesive, DMG).
Указание: После использования сохраните
использованный смесительный наконечник
в качестве колпачка картриджа!
Извлечение картриджа
1. Поднимите рычаг [A] с обратной стороны
диспенсера вверх и полностью отведите
задвижку [B].
2. Приподнимите пластиковый фиксатор [C]
и извлеките картридж.
Техника однофазных слепков
Время схватывания отдельных материалов указано в разделе «Технические данные» на странице 117.
Заполните слепочную ложку Honigum Pro/
Mono. Ложку при этом следует держать
под смесительным наконечником слегка
под наклоном.
113
Указание: Чтобы избежать воздушных включений, край смесительного наконечника в процессе нанесения материала должен постоянно оставаться погружённым в массу.
Наберите часть материала в обычный шприц
для эластомеров или используйте непосредственно картридж на 50 мл и покройте препарируемый ареал материалом из
шприца.
Указание: Заполнение слепочной ложки и
покрытие подготовленного ареала должны
быть завершены одновременно, так как вследствие повышенной температуры ротовой полости наносимая укрывающая масса отвердевает быстрее материала в слепочной ложке.
В пределах времени схватывания медленно позиционируйте наполненную ложку
с небольшим усилием в ротовой полости
и снимите слепок.
По истечении времени схватывания извлеките слепок из ротовой полости, смотри
114
раздел «Извлечение слепка» на странице 118.
Слепок для техники двойного смешивания
Время схватывания отдельных материалов указано в разделе «Технические данные». Соблюдайте требования инструкции по применению!
Наполните слепочную ложку Honigum Pro/
Mono. При этом слепочную ложку следует держать под смесительным наконечником слегка под наклоном.
Указание: Чтобы избежать воздушных включений, край наконечника в процессе нанесения материала должен постоянно оставаться
погружённым в массу.
Покройте препарированный ареал Honigum
Pro/Light.
Указание: Заполнение слепочной ложки и
покрытие препарированного ареала должны
быть завершены одновременно, так как вслед-
ствие повышенной температуры ротовой полости наносимая укрывающая масса отвердевает быстрее материала в слепочной ложке.
В пределах времени схватывания медленно позиционируйте наполненную ложку
с небольшим усилием в ротовой полости
и снимите слепок.
По истечении времени схватывания извлеките слепок из ротовой полости, смотри
раздел «Извлечение слепка» на странице 118.
Извлечение слепка
С препарированных зубов слепок удаляется параллельно продольной оси зуба.
Последующие действия выполняются согласно описанию в разделе «Очистка и дезинфекция окончательного слепка» на странице 115.
Очистка и дезинфекция окончательного слепка
Используйте для дезинфекции окончательного слепка только погружные растворы.
DMG рекомендует применение 2-процентного раствора глютаральдегида.
Проверьте, пригодны ли применяемые дезинфицирующие средства для использования
с материалами на основе аддитивных силиконов.
Точно соблюдайте указания производителя дезинфицирующего средства!
115
Просушите окончательный слепок и сохраняйте до выполнения отливки, смотри «Способ хранения слепка» на странице 116
Дальнейшая информация содержится также в заключении Германского общества
зубной, ротовой и челюстной терапии
(DGZMK). Заключение DGZMK 3/93 V 1.0;
www.dgzmk.de
Американская ассоциация стоматологов
(ADA) рекомендует следовать указаниям
Совета по стоматологическим материалам,
инструментам и оборудования (Council on
Dental Materials, Instruments and Equipment).
Disinfection of impressions. JADA 1991;122(3):110;
www.ada.org
Отливка и нанесение гальванических покрытий
Отливка по слепку выполняется не ранее
30 минут после извлечения слепка из ротовой полости.
DMG рекомендует применять для изготовления отливки твёрдый моделировочный гипс
(ISO 6873; Type 3, например: Moldano, Bayer)
или супертвёрдый гипс для форм (ISO 6873;
Type 4, например: Fujirock II, GC). Слепок можно обрабатывать гальваническими покрытиями из меди или серебра.
Способ хранения слепка
Слепок следует хранить в сухом помещении при температуре 15 – 25 °C/59 – 77 °F!
Защищать от прямых солнечных лучей!
Слепок сохраняет заданную форму, поэтому
выполнение отливок по нему без потери точности можно проводить даже по истечении
нескольких месяцев.
116
Технические данные
Honigum Pro/Mono
Fast
Honigum Pro/Mono
Fast
Время схватывания1 [мин]
≤ 2:45 ≤ 2:45
Время схватывания в
ротовой полости2 [мин]
Время схватывания в
ротовой полости2 [мин]
≤ 1:00 ≤ 1:00
Время нахождения в
ротовой полости [мин]
≥ 2:00 ≥ 2:00
Время нахождения в
ротовой полости [мин]
≥ 3:15 ≥ 3:15
Изменение размеров по
истечении 24 ч [%]
≤ 0,40 ≤ 0,40
Изменение размеров по
истечении 24 ч [%]
≤ 0,40 ≤ 0,40
Остаточная деформация
сжатия [%]
≤ 0,35 ≤ 0,35
Остаточная деформация
сжатия [%]
≤ 0,35 ≤ 0,35
Деформация под
давлением [%]
≈ 2,8
Деформация под
давлением [%]
≈ 2,8
≈ 2,8
Fast
Fast
Honigum Pro/Mono
1
Время схватывания [мин]
≤ 1:30 ≤ 1:30
1
≤ 0:30 ≤ 0:30
≈ 2,8
Данные касательно времени схватывания действительны
при температуре окружающей среды 23 ˚C и относительной влажности воздуха 50 %. Более высокая температура
приводит к сокращению, а более низкая - увеличению времени схватывания.
Время схватывания обозначает период времени с начала
перемешивания до момента, не позднее которого должно быть выполнено позиционирование ложки в ротовой
полости пациента.
117
2
Данные касательно времени схватывания действительны
с момента начала перемешивания для температуры 35 ˚C.
Классификация:
ISO 4823:2000, Type 2: Medium-bodied consistency
Дезинфекция диспенсера Automix
После дезинфекции диспенсер Automix можно
использовать повторно, но если на нем
присутствуют видимые следы износа, его следует
заменить.
Дезинфекцию можно проводить обычными
средствами для дезинфекции путем погружения. DMG рекомендует использовать только
средства дезинфекции, входящие в список
Института Роберта Коха. Дезинфекция диспенсера Automix может также проводиться
путем стерилизации в автоклаве.
Состав
винилполисилоксаны, двуокись кремния, пигменты, присадки, платиновый катализатор
118
Способ и сроки хранения
Слепок следует хранить в сухом помещении при температуре 15 – 25 °C/59 – 77 °F!
Не хранить в холодильных или морозильных камерах!
Защищать от прямых солнечных лучей!
После использования сохраните использованный смесительный наконечник в качестве колпачка картриджа!
Не используйте по истечении срока годности!
Формы выпуска:
2 картриджа вместимостью по 50 мл пасты,
4 типсов Automix, 4 интраоральных типса
Не поставляется в США
Honigum Pro/Mono
1 картридж вместимостью 380 мл пасты,
10 типсов MixStar
Fast
Honigum Pro/Mono
REF 929568
Fast
REF 929978
5 картриджей вместимостью по
380 мл пасты, 50 типсов MixStar
Honigum Pro/Mono
REF 929569
Fast
REF 929830
REF 929979
REF 929976
8 картриджей вместимостью по
50 мл пасты, 16 типсов Automix,
16 интраоральных типсов
Honigum Pro/Mono
REF 929834
Fast
REF 929977
8 картриджей вместимостью по
50 мл пасты
Honigum Pro/Mono
REF 929911
119
Поставляется только в США
1 картридж вместимостью 380 мл пасты,
10 типсов MixStar
Honigum Pro/Mono
REF 989568
4 картриджа вместимостью по 50 мл
пасты, 8 типсов Automix
5 интраоральных типсов
Honigum Pro/Mono
REF 989830
120
121
122
DMG Chemisch-Pharmazeutische Fabrik GmbH
Elbgaustraße 248
22547 Hamburg
Germany
Fon: + 49. (0) 40. 84 006-0
Fax: + 49. (0) 40. 84 006-222
www.dmg-dental.com
091641/#2_2013-04
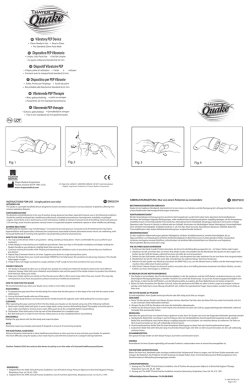

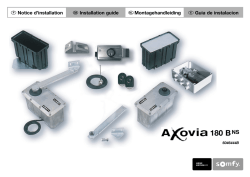
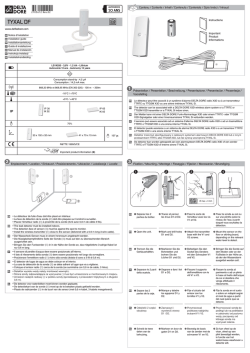

© Copyright 2026