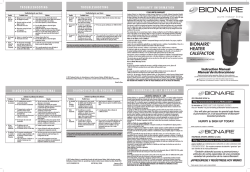
BRH6453 - Calefactor tipo estufa eléctrica infrarroja
CALEFACTOR
TIPO ESTUFA ELÉCTRICA
INFRARROJA
ELECTRIC INFRARED
HEATER
MODELO/ MODEL:
BRH6453
MANUAL DE INSTRUCCIONES
INSTRUCTION MANUAL
Español/Spanish01
English05
10. Un calefactor cuenta con partes calientes
que podrían producir chispas en su interior.
NO lo use en áreas donde se utiliza o guarda
gasolina, pintura u otros líquidos inflamables.
11. NO utilice este artefacto para otro propósito
que no sea para el que ha sido diseñado. Si
el artefacto no se utiliza como se recomienda
podría causar el riesgo de fuego, descarga
eléctrica y/o daños personales. El uso de
accesorios no recomendados por el
fabricante podría causar incendios, descargas
eléctricas o lesiones corporales.
12. NO lo utilice al aire libre.
13. Para prevenir el riesgo de incendio, NUNCA
tape la entrada o salida de aire. NO lo utilice
sobre superficies blandas, como una cama,
donde se puedan obstruir las aberturas.
14. Para desconectarlo, mantenga presionado el
botón de MODO/ APAGADO por dos
segundos hasta que se apague el calefactor,
luego retire el enchufe del tomacorriente.
15. Evite el uso de un cable de extensión ya
que puede sobrecalentar el artefacto y
producir un incendio. Sin embargo, si
necesita utilizar un cable de extensión, la
capacidad nominal del mismo debe ser
como mínimo de AWG No. 14 y
especificado para 1875W como mínimo.
16. NO intente reparar o ajustar ninguna función
eléctrica o mecánica de esta unidad. El
hacerlo invalidará la garantía. La unidad no
contiene partes que puedan ser reparadas por
el usuario. Toda reparación debe ser realizada
únicamente por un personal calificado.
17. Descontinúe su uso si el cable o el enchufe
se recalientan. Se recomienda que
reemplace el contacto si éste o el enchufe
se recalientan.
18. Si el calefactor no funciona, refiérase a las
instrucciones específicas para operación
automática, seguridad y apagado.
19. ADVERTENCIA: Para evitar que se produzca
un sobrecalentamiento, NO cubra el
calefactor (
).
20. Este aparato no debe ser utilizado por
personas (incluidos niños) con capacidades
físicas, sensoriales o mentales reducidas, o
que carezcan de la experiencia o los
conocimientos necesarios para ello, a no ser
que hayan sido supervisados o hayan
recibido instrucciones relativas al uso del
aparato por una persona responsable de su
seguridad. Vigile a los niños y no permita
que jueguen con el aparato.
21. Se requiere estricta supervisión cuando las
personas discapacitadas o los niños utilicen
cualquier electrodoméstico o estén cerca de él.
ESPAÑOL
LEA Y GUARDE ESTAS
IMPORTANTES MEDIDAS
PREVENTIVAS
INSTRUCCIONES IMPORTANTES
Para reducir el riesgo de incendio, descarga
eléctrica y/o daños personales, siempre se
deben seguir precauciones básicas de seguridad, incluyendo las siguientes:
1. Lea completamente las instrucciones antes
de utilizar el aparato.
2. Para evitar incendios o descargas eléctricas,
enchufe el calefactor directamente al
tomacorriente apropiado.
3. El calefactor se calienta al usarlo. Para
evitar quemaduras, NO toque las superficies
calientes. Utilice las asas para mover la
unidad. Mantenga los materiales
combustibles, como muebles, almohadones,
sábanas, papeles, ropa y cortinas a una
distancia de por lo menos 1 m de la parte
delantera del calefactor y manténgalos
alejados de los costados y de la parte de
atrás. El calentador no debe de estar
localizado directamente debajo de un
tomacorriente.
4. NO instale el cable debajo de alfombras. NO
cubra el cable con alfombrillas, tapetes o
similares. Coloque el cable fuera de las
zonas de alto tráfico y donde no exista el
riesgo de tropezarse con él.
5. Este calefactor no está diseñado para ser
utilizado en baños, lavaderos y áreas
interiores similares. NUNCA coloque el
calefactor donde pueda caerse dentro de
una bañera u otro recipiente con agua.
6. Siempre desenchufe el calefactor cuando no
lo esté utilizando. Este artefacto no ha sido
diseñado para funcionar mediante un
temporizador externo, sistema de control
remoto o cualquier otro dispositivo que
encienda el calentador automáticamente, ya
que existe riesgo de incendio si el
calentador es posicionado incorrectamente.
7. Asegúrese de desenchufar la unidad
halando por el enchufe y no por el cable.
8. NO inserte o permita que ningún objeto
extraño entre por las rejillas de ventilación o
de salida ya que pueden ocasionar una
descarga eléctrica o incendio, o dañar el
calefactor.
9. NO opere ningún artefacto con un cable o
enchufe dañados, después de que el
artefacto haya fallado o si se cae al suelo o
se daña de cualquier otra manera. Regrese
el artefacto al Centro de Servicio Autorizado
más cercano para examinarlo, repararlo o
para ajustarlo mecánica o eléctricamente.
LEA Y GUARDE ESTAS
IMPORTANTES INSTRUCCIONES
DE SEGURIDAD
1
INSTRUCCIONES PARA OPERAR
NOTA: ESTA UNIDAD ES PARA USO EN EL
SUELO SOLAMENTE.
1. Saque cuidadosamen ra guardarlo en el verano.
2. Asegúrese de que el dispositivo esté
APAGADO antes de enchufar el calentador
en el tomacorriente.
3. Evite sobrecargar el circuito eléctrico
evitando utilizar otro aparato de alta
potencia en el mismo tomacorriente.
4. Enchufe el calentador en un tomacorriente.
Una vez enchufado, se encenderá la luz
de encendido. Para la versión de 220 V,
asegúrese que el interruptor en la parte
trasera de la unidad este presionado en la
posición de encendido ( | ).
5. Presione el botón de Encendido ( )
en el panel de control o el control remoto
para encenderlo. El calefactor se iniciará en
el ajuste de alta calefacción (2). Pressione
el botón de encendido de nuevo para
seleccionar el ajuste de calefacción bajo (1).
Figura 1
A
B
C
D
E
G
F
H
A. Rejilla delantera
B. Lente infrarroja del control
remoto
C. Luz de encendido
D. Luces del indicador de la
temperatura
E. Botón de Encendido
F. Botóns Subir/Bajar
G. Ruedas (4)
H. Control remoto
CONFIGURACIÓN ENERGY SAVING
Presione el botón de Encendido ( ) para
activar la configuración Energy Saving ( ). El
calentador ahora alternará entre temperaturas
altas (2) y bajas (1) para proporcionar calor. Se
encenderá una luz verde en la pantalla.
CONTROL REMOTO
El calentador incluye un control remoto,
desempaque el control remoto de la caja. Esta
unidad requiere dos (2) baterías AAA, 1.5 V (no
incluidas). Tenga en cuenta que este control
remoto no funcionará a través de paredes. Quite
la pila antes de desechar el control remoto.
Reemplazo De Pilas
a) Retire la cubierta de la pila del control
remoto.
b) Retire las pilas antiguas del control remoto.
c) Inserte dos nuevas pilas y presiónelas
firmemente hacia adentro de la cavidad.
d) Vuelva a colocar la cubierta de las pilas.
Notas:
1. Reemplace todas las pilas al mismo tiempo.
2. Con cuidado de no doblar ni dañar el resorte
de contacto, limpie los contactos de la
batería y los contactos de los dispositivos
antes de instalar las baterías.
3. Quite las pilas del equipo cuando no lo vaya
a usar por un período de tiempo prolongado.
4. Reemplace las pilas que estén agotadas.
5. No mezcle pilas nuevas y viejas. No mezcle
pilas alcalinas, comunes (carbón-zinc) o
recargables.
AUTOAPAGADO
Para apagar el calentador, vuelva a presionar el
botón de Encendido ( ) hasta que se apaguen
todas las luces de temperatura. La luz de
encendido parpadeara por un minuto mientras
la unidad se este apagando.
Nota: Para la versión 120V, La luz de encendido
permanecerá iluminada mientras la unidad
este conectada. Para la versión 220V, la luz de
encendido permanecerá iluminada mientras el
interruptor en la parte trasera este encendido
( | ). Usted puede apagar la luz de encendido
poniendo el interruptor en la parte trasera
de regreso a la posición de apagado (o) o
desconectando el cable.
CONTROL DE TERMOSTATO
Su calentador está equipado con un termostato
digital que le permite configurar su calentador
a un nivel de confort preciso (18 °C- 30 °C).
Puede activar el modo Termostato digital
presionando los botones Subir ( ) o Bajar ( ).
Presione los botones Subir/Bajar en el panel
de control o el control remoto para seleccionar
el nivel de temperatura que desee. Cuanto
más alta sea la temperatura seleccionada,
mayor será el número de luces del indicador
de la temperatura que se encenderán. Cuando
presiona el botón Subir continuamente, todas
las luces de temperatura se iluminarán para
2
LIMPIEZA / MANTENIMIENTO
Siempre desenchufe el calentador y deje que se
enfríe antes de limpiarlo.
1. Limpie la unidad con un paño suave,
humedecido en una solución de jabón suave.
2. NUNCA utilice solventes abrasivos o
inflamables para limpiar la unidad.
3. Luego de limpiarla, asegúrese de secar
completamente la unidad con un trapo o
toalla.
Consejo: Con el transcurso del tiempo se
acumulará polvo en las rejillas delanteras que
puede eliminarse con un paño húmedo.
indicar que se seleccionó la temperatura
máxima (30 °C). Cuando se alcance la
temperatura preestablecida, el calentador se
enfriará soplando aire frío durante 60 segundos,
la luz de encendido parpadeará durante el
período de enfriamiento y, luego, el calentador
se apagará. Cuando la temperatura ambiente
es inferior a la temperatura preestablecida,
el calentador volverá a encenderse
automáticamente para mantener el nivel de
temperatura preestablecido.
Nota: Es normal que el calentador se encienda
y apague ya que, de este modo, conserva la
temperatura preestablecida. Para evitar que la
unidad se encienda y apague, debe cambiar
la configuración del termostato. El termostato
digital tiene memoria; recordará la última
configuración de temperatura antes de que
se apagara el calentador. Sin embargo, si el
calentador se desconecta, el termostato digital
ya no recordará la configuración de temperatura
anterior. Deberá restablecer el termostato digital
si el calentador se desconecta.
AUTOAPAGADO DE SEGURIDAD
Esta estufa está equipada con un sistema
patentado de seguridad de tecnología avanzada
que requiere que el usuario reactive la estufa
si es que existe una situación potencial de
recalentamiento. Cuando se alcance una
temperatura de posible sobrecalentamiento, el
sistema apagará automáticamente el calentador
para indicar dicha situación. Solo reanudará
el funcionamiento una vez que el usuario haya
restablecido la unidad.
INSTRUCCIONES VOLVER A ENCENDER
Si la unidad se apaga:
1. Desenchufe la unidad y espere 30 minutos.
2. Enchufela y vuélvala a operar normalmente.
SOLUCIÓN DE PROBLEMAS DEL CALENTADOR
PROBLEMA
• El calentador
no enciende.
POSIBLE CAUSA
☛ El restablecimiento
manual de
☛ No está conectado
correctamente.
☛ El tomacorriente no
sostiene el enchufe de
manera segura.
☛ El termostato está en un
valor demasiado bajo.
☛ Hay obstrucciones que
hacen que el calentador
no funcione.
☛ El interruptor de circuito
está desactivado.
SOLUCIÓN
✔ Siga las instrucciones de restablecimiento
que aparecen en este manual.
✔ Compruebe que el enchufe esté insertado
✔
✔
✔
✔
• No hay
suficiente
calefacción.
☛ El termostato está en un ✔
• El
calentador
se enciende
y apaga con
frecuencia.
☛ El termostato
valor bajo.
automáticamente
enciende y apaga el
calentador a fin de
mantener el nivel de
confort seleccionado.
correctamente. Asegúrese de que el tomacorriente
y el interruptor de circuito funcionen.
Contrate a un eléctrico con licencia para
reemplazar el tomacorriente.
Presione el botón de Subir para seleccionar
la configuración de temperatura más alta.
Coloque el calentador a 91 cm de distancia
de los demás objetos.
Compruebe que no haya otros aparatos de
alto vataje funcionando en el mismo circuito
y, si es necesario, restablezca el interruptor.
Presione el botón de Subir para seleccionar
la configuración de temperatura más alta.
✔ Para que esto suceda con menos frecuencia,
presione el botón Subir hasta alcanzar la
configuración máxima.
3
SOLUCIÓN DE PROBLEMAS DEL CALENTADOR
PROBLEMA
• El control
remoto no
funciona.
POSIBLE CAUSA
SOLUCIÓN
☛ Tiene poca batería.
☛ Está demasiado lejos.
☛ El visor del panel de control
✔ Cambie la batería (2 baterías AAA).
✔ El control remoto funciona hasta 6 m.
✔ Asegúrese de apuntar el control remoto
☛ Cuando el calentador
✔ Suba la temperatura.
está sucio.
• El
calentador
sopla aire
frío.
se encuentra en modo
Termostato y alcanza la
temperatura establecida, se
enfriará automáticamente
durante 60 segundos (sopla
aire frío) para asegurar la
precisión del termostato. La
luz de encendido parpadeará
durante el período de
enfriamiento.
☛ Es posible que se haya
presionado el botón de
Encendido para apagar el
calentador.
al panel de control del calentador y de
que no haya ningún obstáculo.
✔ Asegúrese de que el visor esté limpio.
✔ Presione el botón de Encendido para
encender el calentador.
• La
velocidad
del
ventilador
no cambia.
☛ La configuracion de Energy
✔ Presione el botón Subir hasta alcanzar
• Ruido
inesperado.
☛ Es posible que se escuchen
✔ Si el ruido persiste, visite nuestro sitio
web www.bionaire.com.
• Olor
inesperado.
☛ Es posible que el calentador
✔ Esto es normal y es el resultado del
Saving controla la emisión
de calor del calentador, no
la velocidad del ventilador.
El ventilador funciona a la
misma velocidad en todas las
opciones.
chasquidos o crujidos cuando
el calentador se calienta. Esto
es parte del funcionamiento
normal y seguro. Una vez que
el calentador se caliente, los
crujidos cesarán.
produzca olores o vapores
la primera vez que lo utilice
o después de haber estado
almacenado una temporada.
4
la configuración de temperatura más
alta para una máxima emisión de calor.
polvo u otros residuos que se acumulan
en el dispositivo de calefacción.
Asegúrese de que el calentador se
encuentre en un área ventilada y que
siga funcionando hasta que el olor o
vapor desaparezcan.
use not recommended by the manufacturer
may cause fire, electric shock, or injury to
persons. The use of attachments not
recommended or sold by the manufacturer
may cause hazards.
12. DO NOT use outdoors.
13. To prevent a possible fire, DO NOT block air
intakes or exhaust in any manner. DO NOT
use on soft surfaces, like a bed, where
openings may become blocked.
14. To disconnect heater, turn controls to the OFF
position, then remove the plug from outlet.
15. Avoid the use of an extension cord because
the extension cord may overheat and cause
a risk of fire. However, if you have to use an
extension cord, The electrical rating of the
extension cord must be equal to or greater
than the electrical rating of the heater.
16. DO NOT attempt to repair or adjust any
electrical or mechanical functions on this
unit. Doing so will void your warranty. The
inside of the unit contains no user
serviceable parts. All servicing should be
performed by qualified personnel only.
17. Discontinue use if plug or outlet is hot. It is
recommended that the outlet be replaced if
plug or outlet is hot to touch.
18. If the heater will not operate, see specific
instructions on Auto Safety Shut-off.
19. WARNING: In order to avoid overheating, do
not cover the heater (
).
20. This appliance is not intended for use by
persons (including children) with reduced
physical, sensory or mental capabilities, or
lack of experience and knowledge, unless
they have been given supervision or
instruction concerning use of the appliance
by a person responsible for their safety.
Children should be supervised to ensure that
they do not play with the appliance.
21. Close supervision is necessary when any
appliance is used by or near children, or
incapacitated individuals.
ENGLISH
PLEASE READ AND SAVE THESE
IMPORTANT SAFEGUARDS
IMPORTANT INSTRUCTIONS
When using electrical appliances, basic safety
precautions should always be followed to reduce
the risk of fire, electric shock, and injury to persons, including the following:
1. Read all instructions before using the
appliance.
2. To avoid fire or shock hazard, plug the
appliance into the appropriate outlet.
3. The heater is hot when in use. To avoid
burns, DO NOT let bare skin touch hot
surfaces. If provided, use handles when
moving this heater. Keep combustible
materials, such as furniture, pillows,
bedding, papers, clothes, and curtains at
least 1 m from the front of the heater and
keep them away from the sides and rear.
The heater must not be located immediately
below a socket outlet.
4. DO NOT run cord under carpeting. DO NOT
cover cord with throw rugs, runners, or the
like. Arrange cord away from traffic area and
where it will not be tripped over.
5. This heater is not intended for use in
bathrooms, laundry areas and similar indoor
locations. NEVER place heater where it may
fall into a bathtub or other water containers.
6. Always unplug the heater when not in use.
This appliance is not intended to be
operated by means of an external timer,
separate remote-control system or any other
device that switches the heater on
automatically, since a fire risk exists if the
heater is covered or positioned incorrectly.
7. When unplugging, be sure to pull by the plug
and not the cord.
8. DO NOT insert or allow foreign objects to
enter any ventilation or exhaust opening as
this may cause an electric shock or fire, or
damage the heater.
9. DO NOT operate heater with a damaged
cord or plug, or after the heater malfunctions,
has been dropped or damaged in any
manner. Take appliance to Authorized
Service Center for examination, electrical or
mechanical adjustment, or repair.
10. A heater has hot and arcing or sparking
parts inside. DO NOT use it in areas where
gasoline, paint, or flammable liquids are
used or stored.
11. Use appliance only for intended household
use as described in this manual. Any other
PLEASE SAVE THESE
INSTRUCTIONS
5
OPERATING INSTRUCTIONS
Note: This unit is for FLOOR USE ONLY.
1. Carefully remove your heater from the
box. Please save the carton for off-season
storage.
2. Make sure the unit is OFF before plugging
the heater into the outlet.
3. Avoid overloading your circuit by not using
other high wattage appliances in the same
outlet.
4. Plug the heater into an electrical outlet. Once
plugged in, the Power Light will illuminate. For
the 220 V version, make sure the switch on
the back of the unit is pressed on ( | ).
5. Press the Power Button ( ) on the control
panel or remote control to start operation.
The heater will start at the high heat setting
(2). Press the power button again to select
the low heat setting (1).
Figure 1
A
B
C
D
E
G
F
H
A. Front Grill
B. Remote Control
IR Lens
C. Power Light
D.Temperature
Indicator Lights
E. Power Button
F.Up/Down
Buttons
G. Casters (4)
H. Remote Control
ENERGY SAVING SETTING
Press the Power Button ( ) to activate the
Energy Saving ( ) setting. The heater will now
cycle between high (2) and low (1) temperatures
to provide heat. A green light will illuminate on
the screen.
REMOTE CONTROL
Your heater comes with a remote control,
unpack the remote control from box. This unit
requires 2 AAA batteries, 1.5 V (not included).
Please note this remote control will not work
through walls. Remove battery before discarding
the remote.
Battery Replacement
a) Remove battery cover from remote control.
b) Remove old batteries from the remote
control.
c) Insert two new batteries, pressing them
firmly into their slot.
d) Replace the battery cover.
Note:
1. Replace all batteries of a set at the same
time.
2. Being careful not to bend or damage the
contact spring, clean the battery contacts
and devices’ contacts prior to installing the
batteries.
3. Remove the batteries from the equipment
when it is not being used for an extended
period of time.
4. Remove the used batteries promptly.
5. Do not mix old and new batteries. Do not
mix alkaline, standard (carbon-zinc), or
rechargeable batteries.
SHUT-OFF
To shut off the heater, press the Power Button
( ) again until all temperature lights are off.
The Power Light will blink for one minute while
the unit is shutting down.
Note: For the 120V version, the Power Light will
remain illuminated while unit is plugged in. For
the 220V version, the Power Light will remain
illuminated while the switch on the back is on
( | ). You may turn the Power Light off by putting
the switch on the back to off (o) or unplugging
the cord.
THERMOSTAT CONTROL
Your heater is equipped with a digital thermostat
that allows you to set your heater to a precise
comfort level (18 °C- 30 °C) by pressing either
Up ( ) or Down ( ) button to activate the
digital thermostat mode. Press the Up/Down
buttons on the control panel or remote control
to select your desired temperature level. The
higher temperature is selected, the more
temperature indicator lights will illuminate.
When you continuously press the Up button,
all temperature lights will illuminate to indicate
the maximum temperature (30 °C) is selected.
When the preset temperature is reached, the
heater will cool down by blowing cool air for
60 seconds, the power light will flash during
the cool down period, and then the heater will
6
shut off. When the room temperature drops
below the preset temperature, the heater will
automatically turn on again to maintain the
preset temperature level.
Note: It is normal for the heater to cycle ON
and OFF as it maintains the preset temperature.
To prevent the unit from cycling, you need
to change the thermostat setting. The digital
thermostat has memory; it will remember the
last temperature setting before the heater is
turned off. However, if the heater is unplugged,
the digital thermostat will no longer remember
the previous temperature setting. You will need
to reset the digital thermostat if the heater is
unplugged.
3.After cleaning, be sure to completely dry the
unit with a cloth or towel.
Tip: Over time, dust may accumulate on the
front grills. This can be removed by wiping the
unit with a damp cloth.
CLEANING/MAINTENANCE
Always unplug the heater before cleaning and
allow the heater to cool down.
1.Clean the unit with a soft cloth moistened
with a mild soap solution.
2.NEVER use abrasive or flammable solvents to
clean the unit.
RESET INSTRUCTIONS
If your heater shuts down:
1.Unplug the unit and wait 30 minutes.
2.Plug in and operate normally.
AUTO SAFETY SHUT-OFF
This heater is equipped with a patented,
technologically-advanced safety system that
requires the user to reset the heater if there is
a potential overheat situation. When a potential
overheat temperature is reached, the system
will automatically shut the heater off to indicate
overheat situation. It can only resume operation
when the user resets the unit.
TROUBLESHOOTING FOR YOUR HEATER
TROUBLE
• Heater
Does Not
Turn On.
PROBABLE CAUSE
SOLUTION
✔ Follow reset instructions listed in this
☛ Manual user reset is
activated.
☛ Not plugged in properly.
☛ Electrical outlet does not hold
plug in securely.
☛ Thermostat set too low.
☛ Obstruction causing the
heater not to operate.
☛ Circuit breaker trips.
manual.
✔ Ensure plug is properly inserted. Make
✔
✔
✔
✔
sure electrical outlet and circuit breaker
are working.
Have outlet replaced by a licensed
electrician.
Press the Up Button to select the highest
temperature setting.
Unplug the heater and remove all
obstructions. Position your heater 91 cm
away from all objects.
Make sure no other high wattage
appliances are operating on the same
circuit and reset breaker if needed.
• Not
Enough
Heat.
☛ Thermostat set too low.
✔ Press the Up Button to the highest
• Heater
Cycles ON
and OFF
Frequently.
☛ The thermostat automatically
✔ To make this occur less frequently press
• Remote
Does not
work.
☛ Battery low.
☛ Distance too far.
☛ Control Panel Display dirty.
✔ Change battery (2 AAA batteries).
✔ Remote works up to 6 m.
✔ Be sure to point remote at control panel
temperature setting.
turns the heater on and off
to maintain selected comfort
level.
the Up Button to the highest setting.
on heater and there are no obstructions.
✔ Make sure display panel is clean.
7
TROUBLESHOOTING FOR YOUR HEATER
TROUBLE
• Heater is
Blowing
Cold Air.
PROBABLE CAUSE
SOLUTION
✔ Raise the temperature higher.
☛ When the heater is in
Thermostat Mode and
reaches the set temperature
it will automatically perform
a 60 second cool down
(blowing cold air) to ensure
thermostat accuracy. The
Power Light will flash during
the cool down period.
☛ Power Button may have been
pressed to turn off the heater.
✔ Press the Power Button to turn on
the heater.
• Fan Speed
Doesn’t
Change.
☛ Energy Saving control the
✔ Press the Up Button to the highest
temperature setting for maximum
heat output.
• Unexpected
Noise.
☛ You may hear a popping or
✔ If the noise persists, visit our
website at www.bionaire.com.
• Unexpected
Smell.
☛ There may be an odor or
✔ This is normal and is the result of
dust or other debris accumulating
on the heating element. Make sure
the heater is in a well ventilated
area and continue running until the
odor or vapor goes away.
heat output of the heater and
not the fan speed. Fan runs
at the same speed on all
settings.
crackling sound as the heater
heats up. This is normal and
safe operation. Once the
heater heats up, the crackling
sound will go away.
vapor coming from the heater
the first time you use it or
after prolonged or seasonal
storage.
8
9
PARA MÉXICO SÓLAMENTE - FOR MEXICO ONLY
CALEFACTOR TIPO ESTUFA ELÉCTRICA
INFRARROJA BIONAIRE®
MODELO: BRH6453, BRH6453-LA013
LEA EL INSTRUCTIVO ANTES DE USAR EL APARATO
LA SIGUIENTE INFORMACION ES PARA MEXICO
IMPORTADOR: SUNBEAM MEXICANA, S.A. DE C.V.
AV. JUÁREZ No. 40-201,
EX–HACIENDA DE SANTA MÓNICA,
TLALNEPANTLA, ESTADO DE MÉXICO,
C.P. 54050, R.F.C. SME570928G90, TEL. 53660800
PAIS DE ORIGEN: CHINA
PAIS DE PROCEDENCIA: E.U.A., CHINA
CONTENIDO: 1 PIEZA
CARACTERISTICAS ELECTRICAS
60 Hz 120 V
1500 W
© 2014 Sunbeam Products, Inc. Todos los derechos reservados. Distribuido por Sunbeam Latin
America, LLC, 5200 Blue Lagoon Drive, Suite 860, Miami, FL 33126.
Garantía limitada de un año – por favor consulte los detalles en el inserto.
© 2014 Sunbeam Products, Inc. All rights reserved. Distributed by Sunbeam Latin America, LLC,
5200 Blue Lagoon Drive, Suite 860, Miami, FL 33126.
One year limited warranty – please see insert for details.
www.bionaire.com
P.N. 176162
CBA -102414
Impreso en China Printed in China
© Copyright 2026
