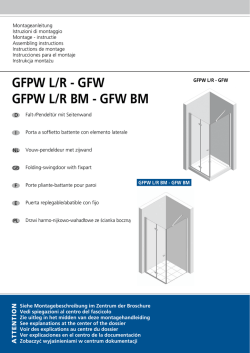
V6PT - V6S - V6SV V6PT BM
Montageanleitung
Istruzioni di montaggio
Montage - instructie
Assembling instructions
Instructions de montage
Instrucciones para el montaje
Instrukcja monta˝u
V6PT - V6S - V6SV
V6PT BM - V6S BM
D
Pendeltür für Nische
oder mit Seitenwand
I
Porta battente per nicchia
o con elemento laterale
NL
Pendeldeur voor nis
of met zijwand
GB
Swing door for niche
or with fixpart
V6PT L/R
V6PT L/R - V6S
Porte saloon pour niche
ou avec paroi latérale
E
Puerta saloon entre
paredes o con fijo
PL
Drzwi wahad owe do niszy lub
kompletay ze Êkianka bocznà
ATTENTION
F
Siehe Montagebeschreibung im Zentrum der Broschure
Vedi spiegazioni al centro del fascicolo
Zie uitleg in het midden van deze montagehandleiding
See explanations at the center of the dossier
Voir des explications au centre du dossier
Ver explicaciones en el centro de la documentación
Zobaczyç wyjaÊnieniami w centrum dokumentacji
V6PT L/R - V6SV
V6PT L/R BM - V6S BM
V6PT
1
18,5 mm
Glasmitte
Centro vetro
Glasmidden
Center of the glass
Milieu de verre
Centro vidrio
Osi szkła
3 mm
Glasmitte
Centro vetro
Glasmidden
Center of the glass
Milieu de verre
Centro vidrio
Osi szkła
3 mm
3 mm
3 mm
18,5 mm
IDEAL
9 mm
min. 714 - max. 755
min. 764 - max. 805
min. 864 - max. 905
min. 964 - max. 1005
min.1164 - max. 1205
IDEAL
9 mm
V6PT 750
V6PT 800
V6PT 900
V6PT 1000
V6PT 1200
Achtung: Von min. ... bis max. ... Maß einhalten.
Attenzione: Installare entro min. ... e max. ... mm.
Let op: van. ... tot. ... maat aanhouden.
Attention: Fix between min. ... and max. ... mm.
Attention: de min. ... à max. ... tenir les mesures.
Atención: Fijar entre min. ...y max. ... mm.
Uwaga!: Nale˝y zachowaç wymiar min. ... do maks. ...
2
3
Ø
6 mm
Ø6 mm
2
2
1
3
1
3,9x38
V6PT
4
5
2
2
3
3
1
1
6
7
40 mm
1
Ø 3mm
2
OK!
1
40 mm
15 mm
IMPORTANT!
3,5x9,5
Ø 3mm
3
V6PT
8
9
2
OK
Max
2 mm
OK
OK
2
10
=
1
=
3
1
2
11
Max
2 mm
V6PT
12
24 h
13
1
2
3
180°
4
V6PT
14
IDEAL
100 mm
100 mm
24 h
IDEAL
V6PT + V6SV
V6S 750 min. 716 - max. 746
V6S 800 min. 766 - max. 796
V6S 900 min. 866 - max. 896
V6S 1000 min. 966 - max. 996
15
3 mm
Glasmitte
Centro vetro
Glasmidden
Center of the glass
Milieu de verre
Centro vidrio
Osi szkła
3 mm
3 mm
3 mm
18,5 mm
Achtung: Von min. ... bis max. ... Maß einhalten.
Attenzione: Installare entro min. ... e max. ... mm.
Let op: van. ... tot. ... maat aanhouden.
Attention: Fix between min. ... and max. ... mm.
Attention: de min. ... à max. ... tenir les mesures.
Atención: Fijar entre min. ...y max. ... mm.
Uwaga!: Nale˝y zachowaç wymiar min. ... do maks. ...
Glasmitte
Centro vetro
Glasmidden
Center of the glass
Milieu de verre
Centro vidrio
Osi szkła
18,5 mm
IDEAL
9 mm
IDEAL
9 mm
Artikel für Wannenmontage | Articolo per montaggio piatto | Artikel voor montage op douchebak
Article for installation on shower tray | Article pour montage sur bac de douche |
Artículo para instalación sobre plato de ducha | Kabina nawannowa
V6PT + V6S
16
Standard...
Standard...
IDEAL
9 mm
V6S 700 min. 666 - max. 696
V6S 750 min. 716 - max. 746
V6S 800 min. 766 - max. 796
V6S 900 min. 866 - max. 896
V6S 1000 min. 966 - max. 996
V6PT 750 min. 724 - max. 765
V6PT 800 min. 774 - max. 815
V6PT 900 min. 874 - max. 915
V6PT 1000 min. 974 - max. 1015
V6PT 1200 min. 1174 - max. 1215
IDEAL
9 mm
Sondermaß
Fuori misura
Speciale maten
Tailor made sizes
Dimensions spéciales
Medida especial
Wymiar niestandardowy
Montage ohne Wanne | Montaggio senza piatto | Montage zonder douchebak | Installation without shower tray | Montage sans bac de douche |
Instalación sin plato de ducha | Montaż bez wanny
Standard...
Dimensions spéciales
Medida especial
Wymiar niestandardowy
V6PT
V6PT 750 min. 724 - max. 765 - IDEAL 736
V6PT 800 min. 774 - max. 815 - IDEAL 786
V6PT 900 min. 874 - max. 915 - IDEAL 886
V6PT 1000 min. 974 - max. 1015 - IDEAL 986
V6PT 1200 min. 1174 - max. 1215 - IDEAL1186
- 2 mm = IDEAL
V6S
Standard...
- 7 mm = IDEAL
V6S 700 min. 666 - max. 696 - IDEAL 678
V6S 750 min. 716 - max. 746 - IDEAL 728
V6S 800 min. 766 - max. 796 - IDEAL 778
V6S 900 min. 866 - max. 896 - IDEAL 878
V6S 1000 min. 966 - max. 996 - IDEAL 978
Sondermaß
Fuori misura
Speciale maten
Tailor madesizes
Achtung: Von min. ... bis max. ... Maß einhalten. Zeichnung bezieht sich auf Linksanschlag.
Attenzione: Installare entro min. ... e max. ... mm. Il disegno è riferito al montaggio porta a sinistra.
Let op: van. ... tot. ... maat aanhouden. De tekening heeft betrekking op een linkszijdige montage.
Attention: Fix between min. ... and max. ... mm. Drawing indicates left side hinge.
Attention: de min. ... à max. ... tenir les mesures. Le dessin concerne un montage initial à gauche.
Atención: Fijar entre min. ...y max. ... mm. El dibujo fue hecho para una situación con puerta a izquierda.
Uwaga!: Nale˝y zachowaç wymiar min. ... do maks. ... .Na dolnych pokrywach zawiasa znajdujà si´ wyci´cia na uszczelk´.
V6PT + V6S
Artikel für Bodenmontage Glasmitte | Articolo per montaggio su pavimento centro vetro | Artikel voor montage op vloer |
Articles for floor installation center of the glass panel | Article pour montage sur carrelage | Artículo para instalación sobre
pavimento, centro vidrio | Kabina do montażu w osi szkła
16
BM....
5,8 mm
3 mm
3 mm
18,5 mm
Standard und Sondermaß
Standard e fuori misura
Standaard maten en speciale maten
Standard and tailor made sizes
Dimensions standard et spéciales
Estándar y medida especial
Wymiar standardowy i specjalny
3 mm
BM....
3 mm
Montage Außenkante Profil | Montaggio senza centro vetro | Montage buitenkant profiel | Installation outer edge profile| Montage profil extérieur |
Instalación perfil en el exterior | Montaż po zewnętrznej stronie profila
Standard...
V6PT 750 min. 724 - max. 765 - IDEAL 736
V6PT 800 min. 774 - max. 815 - IDEAL 786
V6PT 900 min. 874 - max. 915 - IDEAL 886
V6PT 1000 min. 974 - max. 1015 - IDEAL 986
V6PT 1200 min. 1174 - max. 1215 - IDEAL1186
Standard und Sondermaß
Standard e fuori misura
Standaard maten en speciale maten
Standard and tailor made sizes
Dimensions standard et spéciales
Estándar y medida especial
Wymiar standardowy i specjalny
BM.... + 18,5 mm
Standard...
V6S 700 min. 666 - max. 696 - IDEAL 678
V6S 750 min. 716 - max. 746 - IDEAL 728
V6S 800 min. 766 - max. 796 - IDEAL 778
V6S 900 min. 866 - max. 896 - IDEAL 878
V6S 1000 min. 966 - max. 996 - IDEAL 978
BM.... 5,8 mm
Achtung: Von min. ... bis max. ... Maß einhalten. Zeichnung bezieht sich auf Linksanschlag.
Attenzione: Installare entro min. ... e max. ... mm. Il disegno è riferito al montaggio porta a sinistra.
Let op: van. ... tot. ... maat aanhouden. De tekening heeft betrekking op een linkszijdige montage.
Attention: Fix between min. ... and max. ... mm. Drawing indicates left side hinge.
Attention: de min. ... à max. ... tenir les mesures. Le dessin concerne un montage initial à gauche.
Atención: Fijar entre min. ...y max. ... mm. El dibujo fue hecho para una situación con puerta a izquierda.
Uwaga!: Nale˝y zachowaç wymiar min. ... do maks. ... .Na dolnych pokrywach zawiasa znajdujà si´ wyci´cia na uszczelk´.
V6PT + V6S
17
2
2
1
18
Ø6 mm
Ø
6 mm
2
1
3
3,9x38
3
3,9x38
V6PT + V6S
19
20
3,5x13
3
2
1
15
21
3,5x9,5
2
4
5
3 mm
IDEAL
1
3
15
V6PT + V6S
22
2
1
m
m
00
5
23
2
3
1
D
I
NL
Wichtig!
Bitte überprüfen Sie Ihre Duschkabine vor der Montage auf
Transportschäden. Für Schäden an bereits montierten Produkten
kann keine Haftung übernommen werden. Zur Reinigung
benutzen Sie ein PH-neutrales Reinigungsmittel oder den von uns
empfohlenen Spezialreiniger. Nicht zu verwenden sind Verdünner,
sowie alkalische, lösungs¬mittel-, säure- und chlorhaltige oder
scheuernde Mittel.
Importante!
Prima del montaggio controllare se il prodotto ha subito danni
di trasporto. Per danni su prodotti già montati non possiamo
assumerci alcuna responsabilità.
Per la pulizia utilizzare un detergente con un PH neutrale oppure
il detergente neutrale da noi consigliato.
Non utilizzare diluenti e/o sostanze alcaline, sostanze
contenenti solventi, acidi, cloro o abrasivi.
Belangrijk!
Vóór montage dient U het artikel op eventuele
transport¬beschadigingen of fabrieksfouten te kontroleren.
Voor schade aan reeds gemonteerde onderdelen kunnen wij
niet aansprakelijk gesteld worden. Voor de reiniging dient u
een PH neutraal reinigingsmiddel of de aanbevolen Sealskin
douchereiniger te gebruiken. Geen verdunner, alkalische, zuur,
chloor of schurende middelen gebruiken.
Werkzeuge für die Montage:
Wasserwaage, Bleistift, Körner, Hammer, Bohrmaschine,
Steinbohrer 6mm, Kreuz¬schraubenzieher, Schraubenzieher,
Stahlbohrer 3mm, Silikon.
Utensili per il montaggio:
livella, matita, bulino, martello, trapano, punta da muro 6 mm,
per acciaio 3 mm, cacciavite a croce, cacciavite piatto, silicone.
Benodigd gereedschap:
Kruisschroevendraaier, schroevendraaier, waterpas, potlood,
boormachine, steenboor 6mm, staalboor 3mm, silicon.
2 Achtung: Kontrollieren Sie die Beschaffenheit der Wand, Licht-,
Gas- und Wasserleitungen. Die mit der Kabine mitgelieferten
Dübel und Schrauben sind nur für sämtliche Beton- und
Mauerwerkbaustoffe geeignet. Für Wände anderer Bauart müssen
Sie dafür geeignetes Befestigungsmaterial verwenden. Verwenden
Sie nur Silikon oder Dichtungsmasse, welche für die Oberflächen
und Materialien geeignet sind, an denen die Duschkabine
montiert wird. Die Befestigung an der Wand, die Montage und die
Silikonierung der Duschkabine müssen sorgfältig und professionell
durchgeführt werden. Falls Fragen bezüglich der Montage
entstehen sollten, wenden Sie sich bitte an Ihren Wiederverkäufer
2 Attenzione: controlli le condizioni nelle quali si trovano sia la
2 Let op: Controleer de muur op licht, gas- en waterleidingen.
parete che le linee di gas, corrente ed acqua.
I tasselli e le viti fornite a corredo alla cabina doccia sono adatti
per materiale edile in cemento armato e di costruzione per pareti.
Per pareti di tipo costruttivo diverso deve utilizzare materiale di
fissaggio in funzione del materiale edilizio. Utilizzi solo silicone o
materiale isolante adatto alle superfici sulle quali verrà montata la
cabina doccia. Il fissaggio a parete, il montaggio e la siliconatura
della cabina doccia devono essere eseguiti in modo preciso
e professionale. Se dovesse avere domande in riferimento al
montaggio, si rivolga per favore al grossista.
De bij de douchecabine meegeleverde pluggen en schroeven
zijn uitsluitend voor beton en steen geschikt. Voor wanden
van een ander bouwmateriaal dient u daarvoor geschikt
bevestigmateriaal aan te schaffen. Gebruik uitsluitend siliconen
of een andere applicatiekit, welke geschikt is voor het oppervlak
en het materiaal wat aan de douchecabine gemonteerd wordt.
De bevestiging aan de wand, de montage en het siliconeren
van de douchecabine moet zorgvuldig en professioneel worden
uitgevoerd. Indien u vragen heeft tijdens de montage wordt
vriendelijk verwezen naar uw wederverkoper.
4, 5
4, 5
4, 5
6 Die Regulierung der Tür erfolgt mittels der
6 La regolazione della porta avviene agendo sulle viti di
6
7 Bohren Sie die Profile mit dem mitgeliefertem Bohrer 40 mm
7 Forare i profili con la punta in dotazione rispettando
7 Boor met het meegeleverde boortje op 40 mm van ieder
8 Durch das leichte Zu- oder Aufschrauben der
8 Avvitando o svitando leggermente le viti di regolazione si
8
13 Die Schwallschutzleiste auf der Duschtasse fixieren. Hierzu
13 Riempire il canalino inferiore del profilo antiallagamento di
13 De lekdorpel op de douchebak bevestigen. Hiervoor de
12,14 Am Ende der Montage ist die Duschabtrennung
12,14 La cabina doccia, una volta concluso il montaggio, deve
12,14 Nadat de douchecabine is gemonteerd, dient deze
18 Achtung: kontrollieren Sie die Beschaffenheit der Mauern und
18 Attenzione,controllare la costruzione del muro,assicurarsi
Die Montagehilfen einführen, und die Tür am
Ausgleichsprofil mittels der beiden Regulierungsschrauben
anschrauben.
Inserire lo spessore di montaggio ed avvitare la porta
sul profilo a muro tramite le due viti di regolazione
Regulierungsschrauben. Achtung: Die Distanz zwischen
Oberkante Duschtasse und Unterkante ESG-Glas muss 15
mm betragen.
regolazione avendo cura di mantenere una distanza vetropiatto di 15 mm
vom jeweiligem Profilende an. Mit den Schrauben 3,5x9,5
fixieren und anschließend die Montagehilfen wegnehmen.
la distanza di 40 mm da inizio profilo,fissare con le viti
3,5x9,5, poi togliere lo spessore di montaggio
Regulierungsschrauben erhalten Sie eine perfekte Anpassung
der Tür der Duschtasse gegenüber.
silicone,quindi appoggiarlo sul piatto come da disegno
essere siliconata come da disegno. Attenzione: le superfici
interessate (vetro, profili, piatto doccia, pavimento, ecc.)
devono prima essere pulite. Prima di utilizzare la doccia
devono passare almeno 24 ore!
vergewissern Sie sich, dass keine Strom-, Wasser-, Gas- und
Telefonleitungen beschädigt werden können.
19,20 Führen Sie das Seitenteil laut Zeichnung ein.
Mittels der mitgelieferten Schrauben das Türprofil am Fixteil
anschrauben.
21 Bohren Sie die Profile mit dem mitgeliefertem Bohrer an und
fixieren Sie diese mittels der Schrauben 3,5x9,5. Anschließend
schrauben Sie die Tür mittels der beiden Schrauben an und
führen Sie die Montagehilfen ein.
19,20 Inserire il lato fisso come da disegno
Tramite le viti in dotazione avvitare il profilo della porta sul
fisso.
21 Forare con la punta in dotazione,fissare con le viti 3,5x3,9
quindi avvitare la porta tramite le due viti di regolazione ed
inserire lo spessore di montaggio.
22 Montieren Sie laut Zeichnung das Verbindungsstück des
22 Montare il fermo del braccio di sostegno come da disegno.
21, 23, 24 Schrauben Sie die Tür mittels der beiden
21, 23, 24 Avvitare la porta sul profilo a muro tramite le due
Stabilisierungsarms.
Door het licht draaien van de stelschroeven krijgt u een
perfecte afstelling van de deuren ten opzichte van de
douchebak.
onderzijde met siliconen vullen en volgens tekening op de
douchebak plaatsen.
te worden afgekit volgens de tekening. Let op dat de
oppervlaktes welke gekit worden (glas, profiel, douchebak/
vloer etc.) ontvet worden. Voordat de douche in gebruik
genomen kan worden, dient de kit tenminste 24 uur te
worden uitgehard.
18 Let op: controleer vooraf of er in de muur waar u moet
che non vi siano linee elettriche,acqua,gas o linee
telefoniche.
Het afstellen van de deuren gebeurd door middel van de
stelschroeven. Let op: de afstand tussen onderkant van het
glas en bovenkant van de douchebak moet 15 mm zijn.
profieleinde. Met de schroeven 3,5 x 9,5 fixeren en daarna
de montagehulpjes verwijderen.
ottiene il perfetto allineamento della porta rispetto al piatto
den unteren Kanal mit Silikon füllen und auf der Duschtasse
laut Zeichnung positionieren.
lt. Zeichnung zu silikonieren. Achtung vorher die zu
silikonierenden Flächen (Glas, Profile, Duschtasse, Boden,
etc.) reinigen. Vor Benutzen der Dusche Silikon mindestens
24 Stunden lang aushärten lassen.
De montagehulpjes aanbrengen en de deuren aan het
wandbevestigingsprofiel schroeven door middel van de
stelschroeven.
boren, geen stroom-, water-, gas- en telefoonleidingen
lopen.
19,20 Monteer volgens tekening de zijwand
Met behulp van de meegeleverde schroeven het deurprofiel
aan de zijwand bevestigen.
21 Boor met het meegeleverde boortje het profiel en fixeer
deze doormiddel van de schroeven 3,5 x 9,5 . Plaats daarna
de deur door middel van de stelschroeven, plaats het
aanslagprofiel en het montagehulpje.
22 Plaats volgens tekening de glasbevestiging van de
stabilisatiesteun.
Regulierungsschrauben am Ausgleichsprofil fest und
führen Sie die Montagehilfe ein. Falls die Duschtasse außer
Lot gesetzt wurde, verwenden Sie bitte den am besten
geeigneten Keil aus der mitgelieferten Serie und fügen Sie
diesen zwischen ESG-Glas und Oberkante Duschtasse ein
(siehe Zeichnung).
25, 26, 27 Montieren Sie den Stabilisierungsarm laut
Zeichnung.
28 Die Regulierung der Tür erfolgt mittels der
Regulierungsschrauben. Achtung: Die Distanz zwischen
Oberkante Duschtasse und Unterkante ESG-Glas muss 15
mm betragen. Sobald die Regulierung beendet wurde, die
Schrauben der Verbindungsstücke des Stabilisierungsarms
festziehen.
29 Bohren Sie die Profile mit dem mitgeliefertem Bohrer 40 mm
vom jeweiligem Profilende an. Mit den Schrauben 3,5x9,5
fixieren und anschließend die Montagehilfen wegnehmen.
30 Durch das leichte Zu- oder Aufschrauben der
Regulierungsschrauben erhalten Sie eine perfekte Anpassung
der Tür der Duschtasse gegenüber.
35 Die Schwallschutzleiste auf der Duschtasse fixieren. Hierzu
den unteren Kanal mit Silikon füllen und auf der Duschtasse
laut Zeichnung positionieren.
34,36 Am Ende der Montage ist die Duschabtrennung
lt. Zeichnung zu silikonieren. Achtung vorher die zu
silikonierenden Flächen (Glas, Profile, Duschtasse, Boden,
etc.) reinigen. Vor Benutzen der Dusche Silikon mindestens
24 Stunden lang aushärten lassen.
viti di regolazione ed inserire lo spessore di montaggio.
Nell’eventualità di piatto fuori bolla per stabilizzare e
bloccare la cabina nella giusta posizione usare la misura
di spessore più appropriata da inserire tra il vetro e piatto
doccia come da disegno.
21, 23, 24 Indien de douchebak niet waterpas staat, gebruik
dan de meest geschikte wig uit de meegeleverde serie en
plaats deze tussen glas en douchebak.( zie tekening)
25, 26, 27 Monteer de stabilisatiesteun zoals op tekening
25, 26, 27 Montare il braccio di sostegno come da disegno.
28 La regolazione della porta avviene agendo sulle viti di
regolazione avendo cura di mantenere una distanza
vetro-piatto di 15 mm. A regolazione ultimata stabilizzare il
braccio di sostegno serrando le viti delle testine.
aangegeven.
28 Het stellen van de deur gebeurt met behulp van de
stelschroeven. Let op: De afstand tussen de bovenkant van
de douchebak en de onderkant van het glas dient 15 mm.
te bedragen. Zodra de deur in de juiste positie is gebracht,
de schroef in het verbindingsdeel van de stabilisatiesteun
vastdraaien.
29 Forare i profili con la punta in dotazione rispettando la
29 Boor met het meegeleverde boortje op 40 mm van ieder
30 Avvitando o svitando leggermente le viti di regolazione si
30 Door het licht draaien van de stelschroeven krijgt u
35 Riempire il canalino inferiore del profilo antiallagamento di
35 De lekdorpel op de douchebak bevestigen. Hiervoor de
34,36 La cabina doccia, una volta concluso il montaggio, deve
34,36 Nadat de douchecabine is gemonteerd, dient deze
distanza di 40 mm da inizio profilo,fissare con le viti 3,5x3,9
poi togliere lo spessore di montaggio.
ottiene il perfetto allineamento della porta rispetto al piatto.
silicone,quindi appoggiarlo sul piatto come da disegno.
essere siliconata come da disegno. Attenzione: le superfici
interessate (vetro, profili, piatto doccia, pavimento, ecc.)
devono prima essere pulite. Prima di utilizzare la doccia
devono passare almeno 24 ore!
profieleinde. Met de schroeven 3,5 x 9,5 fixeren en daarna
het montagehulpje verwijderen.
een perfecte afstelling van de deur ten opzichte van de
douchebak.
onderzijde met siliconen vullen en volgens tekening op de
douchebak plaatsen.
te worden afgekit volgens de tekening. Let op dat de
oppervlaktes welke gekit worden (glas, profiel, douchebak/
vloer etc.) ontvet worden. Voordat de douche in gebruik
genomen kan worden, dient de kit tenminste 24 uur te
worden uitgehard.
GB
F
E
Important!
Before assembling the shower, please control if the product has
been damaged by the transport. We don’t assume responsibility
for damaged products which are already assembled. For
cleaning use a pH-neutral cleaning agent or the special cleaner
recommended by us. Not to use are solvents, as well as alkaline,
solvent -, acid- and chloric or scrubbing agents.
Attention!
Avant de commencer les opérations de montage, assurez-vouz
que votre cabine n'a subi aucun dommage durant le transport.
Les réclamations pour cause de dommage ne peuvent être
acceptées lorsque la cabine est déjà placée. Pour nettoyer veuillez
utiliser s’il vous plaît un produit de nettoyage avec pH neutre ou le
produit spéciale recommandé par nous. N’utilisez pas des solvants,
ainsi qu’alcalins, acides ou produits avec du clore ou agressif.
Importante!
Antes del montaje controlar si el producto tiene daños de trasporte.
Para daños a productos ya montados no asumamos alguna
responsabilidad. Limpiar cada semana con agua y jabón, no utilizar
diluentes, detergentes rasgueantes, bencina, ... Para la limpieza utilizar
un detergente con un PH neutral o el detergente neutral recomendado
de duka. No utilizar diluentes y/o substancias alcalinas, substancias que
contienen solventes, ácidos, cloro o materias abrasivas.
Required assembly tools:
Water level, pencil, hammer, drill, drill 6 mm, cross-shaped
screwdriver, screwdriver, steeldrill 3mm, silicon.
Outils requis:
tournevis criciforme, niveau à bulle, crayon, perceuse, mèche de
6 mm pour la pierre, mèche da 3 mm pour l'acier et silicon.
Herramientas por el montaje:
Nivel, lápiz, puntero, martillo, tallador, punta de 6 mm, 3 mm por
acero, destornillador a cruz, destornillador plano y silicón.
2 Attention: please ensure to check the wall condition and
2
4, 5
4, 5
4, 5
6 The regulation of the door takes place by means of the
6 L’ajustement de la porte se fait moyennant les vis
6 La regulación de la puerta se hace mediante los tornillos
7 Drill the profiles with the in the installation kit included
7 Forer à l’aide de la mèche livrée un trou en haut et en bas
7 Taladrar los perfiles con el taladrador comprendido en el set de
8 By means of unscrewing or screwing on the regulation
8 Pour un réglage parfait de la porte sur le tub de douche,
8 Mediante un suave a- o destornillar de los tornillos de
13 Fix the anti-inundation profile on the shower tray as shown
13 Fixer la bande antifuite sur le tub de douche. Pour ce faire
13 Fijar el perfil anti-inundación sobre el plato de ducha. Para
12,14 Once the shower enclosure is assembled, it must be
12,14 La cabine de douche, une fois que l'assemblage est
12,14 La cabina de ducha, una vez ha concluido su instalación,
18 Attention: before drilling please check the walls for water-,
18 Attention : vérifier la solidité du mur et le passage éventuel
the position of electrical wiring, gas and water piping.
Plugs and screws, provided with the shower enclosure,
are only suitable for masonry walls. For different wall
constructionand material types, please use the appropriate
fixing means. Use only sealants suitable for the surfaces and
materials on which the shower enclosure will be installed.
Erection, installation, fixing on the wall and sealing of the
shower enclosure must be properly done according to
good practice. In case of doubt on erection and installation
procedures, please contact the reseller.
Insert the assembly help and screw the door on the
compensation profile by means of the two regulation
screws
ubicación de líneas de gas, energía y agua. Los tacos y los tornillos
enviados juntos a la mampara son adecuados para material edil en
cemento y para material de construcción de paredes. Para paredes
realizadas con material constructivo diferente tiene que utilizar
material de fijación en función del material de construcción.
Utilizar solo silicón o material de insolación adapto a las superficies
sobre las que se fija la mampara. La fijación a pared, el montaje
y la siliconatura de la mampara tienen que ser hechas en manera
precisa y profesional. Si tiene preguntas al respecto del montaje,
las rogamos de contactar el distributor.
Introduire les auxiliaires de montage, visser la porte au
profilé avec les deux vis de réglage
regulation screws. Attention: the distance between top side
of the shower tray and bottom of the door has to be 15 mm.
Inserir los auxilios de montaje, fijar la puerta al perfil de
compensación mediante los dos tornillos de regulación.
d’ajustement. Attention : La distance entre le bord supérieur
du tub de douche et le dessous du verre ESG doit être 15
mm.
driller 40 mm from both ends. Fix with the two 3,5x9,5
screws and take afterwards the assembly help away.
de regulación. Atención: la distancia entre nivel inferior
del vidrio y nivel superior del plato de ducha tiene que ser
siempre de 15 mm.
du profilé à 40 mm de la fin du profilé. Fixer avec les vis
3,5x9,5 et ensuite enlever les auxiliaires de montage.
screws, You get a perfect adjustment of the door respect to
the shower tray.
montaje a unos 40 mm del borde superior y inferior del perfil, fijar
con los tornillos 3,5x9,5 y apartar después los auxilios de montaje.
serrer légèrement les vis de réglage
in the drawing. Therefore fill the channel on the bottom
with silicon.
isolated with silicone according to the drawings. Attention:
Please assure that the surfaces used to isolate (glass,
profiles, shower tray, floor, etc.) is clean. Please wait for 24
hours till the silicone is dry before using it.
2 Atención: controlar por favor las condiciones de las paredes y la
Attention: il est important de vérifier l'absence de canalisations
d'eau, de gaz ou de câbles électriques dans le mur. Les chevilles
et vis fournies avec la cabine ne sont appropriées pour tous les
matériaux de maçonnerie et bétons. Pour des murs réalisés avec
d’autre matériaux veuillez utiliser pour cela du matériel de fixation
approprié. N'utilisez que du silicone ou un produit d'étanchéité qui
est approprié aux surfaces et matériaux, auxquels la cabine douche
sera installée. La fixation au mur, l'assemblage et le siliconnage de
la cabine de douche doivent être mis en oeuvre soigneusement et
professionnellement. Si des questions devaient naître concernant
l'assemblage, veuillez vous adresser à votre détaillant.
regulación obtiene un perfecto alineamiento de la puerta
respecto al plato de ducha.
remplir la rainure du dessous avec du silicone et le fixer sur
le tub suivant les instructions du dessin.
terminé, doit être siliconée selon le dessin. Attention: les
surfaces intéressées (verre, profils, receveur de douche,
sol, etc.) doivent d'abord être nettoyées. Avant d'utiliser le
cabine de douche attendre au moins 24 heures!
gas-, electricity- and phone lines .
esto llenar el canal inferior con silicón y ponerlo sobre el
plato de ducha siguiendo el dibujo.
debe ser sellada con silicona como se indica en el diseño.
Atención: las superficies en contacto con la silicona (cristal,
perfiles, plato de ducha, pavimento, etc.) se deben limpiar
con anterioridad. Antes de utilizar la cabina de ducha, deben
pasar al menos 24 horas.
18 Atención: Controla la situación de las paredes, conducciones
de conduites d’électricité, de gaz, d’eau et de téléphone.
de luz, gas, agua y teléfono antes de taladrar.
19,20 Insert the fix-panel as shown in the drawing.
By means of the included screws, screw the door profile on
the side panel.
19,20 Introduire la partie latérale suivant le dessin.
Visser le profilé de porte à la partie fixe moyennant les vis
livrées.
19,20 Inserir el fijo siguiendo el dibujo.
Atornillar el perfil de la puerta mediante los tornillos
incluidos al fijo.
21 Drill the profiles with the in the installation kit included
21 Forer les profilés avec la mèche livrée et fixer-les avec les vis
21 Taladrar los perfiles con el taladrador comprendido en el set
22 Fix the terminals of the support as shown in the drawing.
22 Monter l’élément de connection du support de renfort
22 Fija los trozos de conexión del soporte siguiendo el dibujo.
21, 23, 24 Screw the door on the compensation profile by
21, 23, 24 Fixer la porte moyennant les deux vis de règlement
21, 23, 24 Fijar la puerta al perfil de compensación mediante
driller. Fix with the two 3,5x9,5 screws. Afterwards screw
the door on by means of the two regulation screws and
insert the assembly help.
means of the two regulation screws and insert the assembly
aids. If the shower tray is not perfectly levelled, use please
that plastic wedge form the supplied series, witch adapts
most to Your situation and insert it between glass and
shower tray (see drawing).
25, 26, 27 Fix the support as shown in the drawing.
28 The regulation of the door has to be done by means of the
regulation screws. Attention: the distance between top side
of the shower tray and bottom of the door has always to
be of 15 mm. As soon as You finished the regulation, screw
the support by means of the screws in the terminals on.
3,5x9,5. Ensuite visser la porte moyennant les deux vis et
introduire les auxiliaires de montage.
suivant le dessin.
au profilé et introduire les auxiliaires de montage. Si le
tub n’est pas placé à niveau, utiliser la clavette la plus
convenable parmi la série de clavettes livrées pour ainsi
stabiliser et blocquer la porte (voire dessin).
25, 26, 27 Monter le support de renfort suivant le dessin.
28 L’ajustement de la porte se fait moyennant les vis
d’ajustement. Attention : La distance entre le bord supérieur
du tub de douche et le dessous du verre ESG doit être
15 mm. Après ajustement serrer les vis de l’élément de
connection du support de renfort.
29 Forer à l’aide de la mèche livrée un trou en haut et en bas
29 Drill the profiles with the in the installation kit included
driller 40 mm from both ends. Fix with the two 3,5x9,5
screws and take afterwards the assembly aids away.
30 By means of a soft unscrewing or screwing on of the
regulation screws, You get a perfect adaptability of the
door reported to the shower tray.
35 Fix the anti-inundation profile on the shower tray as shown
in the drawing. Therefore fill the channel on the bottom
with silicon.
34,36 Once the shower enclosure is assembled, it must be
isolated with silicone according to the drawings. Attention:
Please assure that the surfaces used to isolate (glass,
profiles, shower tray, floor, etc.) is clean. Please wait for 24
hours till the silicone is dry before using it.
du profilé à 40 mm de la fin du profilé. Fixer avec les vis
3,5x9,5 et ensuite enlever les auxiliaires de montage.
30 Pour un réglage précis de la porte envers du tub de douche,
serrer légèrement les vis de réglage.
de montaje y fija con los tornillos 3,5x9,5. Después atornilla
la puerta mediante los dos tornillos y apartar después los
auxilios de montaje.
los dos tornillos de regulación, inserir los auxilios de
montaje. Si el plato de ducha no es perfectamente nivelado,
utilizar por favor la cuña mas conveniente entre las cuñas
provistas para inserirla entre nivel inferior del vidrio y nivel
superior del plato de ducha (vea dibujo).
25, 26, 27 Monta el soporte siguiendo el dibujo.
28 La regulación de la puerta se hace mediante los tornillos de
regulación. Atención: la distancia entre nivel superior plato
de ducha y nivel inferior vidrio tiene que ser de 15 mm.
A regulación ultimada estabilizar el soporte serrando los
tornillos de los terminales.
29 Taladrar los perfiles con el taladrador comprendido en el set de
montaje a unos 40 mm del borde superior y inferior del perfil, fijar
con los tornillos 3,5x9,5 y apartar después los auxilios de montaje.
30 Mediante un suave a- o destornillar de los tornillos de
regulación obtiene un perfecto alineamiento de la puerta
respecto al plato de ducha.
35 Fixer la bande antifuite sur le tub de douche. Pour ce faire
remplir la rainure du dessous avec du silicone et le fixer sur
le tub suivant le dessin.
34,36 La cabine de douche, une fois que l'assemblage est
terminé, doit être siliconée selon le dessin. Attention: les
surfaces intéressées (verre, profils, receveur de douche,
sol, etc.) doivent d'abord être nettoyées. Avant d'utiliser le
cabine de douche attendre au moins 24 heures!
35 Fijar el perfil anti-inundación sobre el plato de ducha. Para
esto llenar el canal inferior con silicón y ponerlo sobre el
plato de ducha siguiendo el dibujo
34,36 La cabina de ducha, una vez ha concluido su instalación,
debe ser sellada con silicona como se indica en el diseño.
Atención: las superficies en contacto con la silicona (cristal,
perfiles, plato de ducha, pavimento, etc.) se deben limpiar
con anterioridad. Antes de utilizar la cabina de ducha, deben
pasar al menos 24 horas.
PL
Wa˝ne!
Przed rozpocz´ciem monta˝u kabin´ nale˝ysprawdziç pod
kàtem ewentualnych uszkodzeƒtransportowych. Nie ponosi si´
odpowiedzialnoÊciza szkody wykryte na w aÊnie montowanych
produktach. Do mycia i piel´nacji prosz´ u˝ywaç Êrodków
czyszczàych o odczynie PH oboj´tnym lub polecany przez nas
specjalny preparat. Nie nale˝y stosowaç rozpuszczalników, jak
równie˝ preparatów alkalicznych, kwaÊnych, zawierajàcych chlor lub
posiadajàych w aÊciwoÊci Êcierne.
Narz´dzia niezb´dne do monta˝u:
poziomica, o ówek, punktak, m otek, wiertarka, wiert o dokamienia
6 mm, Êrubokr´t krzy˝akowy, Êrubokr´t, wiert o do stali 3 mm.
2 Uwaga!Prosz´ sprawdziç jakoÊç i stan Êciany oraz przebieg
instalacji elektrycznej, gazowej i wodnej. Dostarczone w
komplecie z kabinà ko ki rozporowe iwkr´ty nadajà si´ wy àcznie
do Êian murowanych. Do Êian wykonanych w systemie lekkiej
zabudowy lub innychnale˝y zastosowaç odmienne systemy
mocowaƒ. Prosz´ zwróciç uwag´ na to, aby zastosowany zosta
rodzajsilikonu w aÊciwy dla powierzchni na jakiej zamontowano
kabin´. Monta˝ kabiny i jej uszczelnienie musi zostaçwykonane
zgodnie z instrukcjà! W wypadku wàtpliwoÊci prosimy zwróciç
si´ o pomoc do dystrybutora lub naszego przedstawicielstwa.
4, 5
Wprowadziç pomocnicze elementy monta˝owe oraz
przykr´ciç drzwi do profila wyrównujàcego za pomocà Êrub
regulacyjnych.
6 Regulacja drzwi odbywa si´ za pomocà Êrub regulacyjnych.
Uwaga! Nale˝y zachowaç dystans 15 mm pomi´dzy górnà
kraw´dzià brodzika a dolnà kraw´dzià elementu szklanego.
7 Na koñcach profili nale˝y wywierciç otwory za pomocà
zawartego w komplecie dostawy wiert a 40 mm, a nast´pnie
dokonaç trwa ego monta˝u Êrubami 3,5 x 9,5.Na koniec nale˝y
usunàç pomocnicze elementy monta˝owe.
8 Dzi´ki prostemu do- i odkr´caniu Êrub regulacyjnych uzyskuje
si´ perfekcyjne dopasowanie drzwi w stosunku do brodzika.
13 Profil chroniàcy przed rozpryskujàcà si´ wodà nale˝y
zamontowaç na brodziku. Spodni kana profila nale˝y wczeÊniej
wype niç silikonem. Umiejscowienie na brodziku odbywa si´
zgodnie z rysunkiem.
12,14 Po zakończeniu montażu należy kabinę uszczelnić silikonem
zgodnie z instrukcją. Uwaga ! Przedtem wszystkie silikonowane
powierzchnie (szkło, profile, brodzik, płytki) należy oczyścić.
Przed pierwszym natryskiem pozostawić silikon na 24 godziny
do wyschnięcia.
18 Uwaga! Nale˝y sprawdziç jakoÊç muru, a tak˝e upewniç si´,
czy nie ma zagro˝enia uszkodzenia przewodów elektrycznych,
wodociàgowych, gazowych lub telefonicznych. do
wyciàgni´cia z rysunkiem.
19,20 Za pomocà zawartych w komplecie dostawy Êrub profil
drzwiowy nale˝y przykr´ciç do elementu sta ego.
21 Na koñcach profili nale˝y wywierciç otwory za pomocà
zawartego w komplecie dostawy wiert a, a nast´pnie trwale
je zamontowaç Êrubami 3,5 x 9,5.Na koniec nale˝y przykr´ciç
drzwi u˝ywajàc obu Êrub oraz przytwierdziç pomocnicze
elementy monta˝owe.
22 Element po àczeniowy ramienia stabilizujàcego nale˝y
zamontowaç zgodnie z rysunkiem.
21, 23, 24 Drzwi nale˝y dokr´ciç za pomocà obu Êrub regulacyjnych
do profila wyrównujàcego oraz umieÊciç pomocnicze elementy
monta˝owe. JeÊli brodzik nie jest ustawiony w pionie, wówczas
nale˝y wykorzystaç najlepiej pasujàcy spoÊród zawartych w
komplecie dostawy klinów. Nale˝y go umieÊciç pomi´dzy
elementem szklanym a górnà kraw´dzià brodzika (patrz rys.).
25, 26, 27 Rami´ stabilizujàce nale˝y zamontowaç zgodnie z
rysunkiem.
28 Regulacja drzwi odbywa si´ za pomocà Êrub regulacyjnych.
Uwaga! Nale˝y zachowaç dystans à5 mm pomi´dzy górnà
kraw´dzià brodzika a dolnà kraw´dzià elementu szklanego.
Po zakoñczonej regulacji nale˝y dokr´ciç Êruby elementów po
àczeniowych ramienia stabilizujàcego.
29 Na koñcach profili nale˝y wywierciç otwory za pomocà
zawartego w komplecie dostawy wiert a 40 mm, a nast´pnie
dokonaç trwa ego monta˝u Êrubami 3,5 x 9,5.
30 Na koniec nale˝y usunàç pomocnicze elementy monta˝owe.
Dzi´ki prostemu do- i odkr´caniu Êrub regulacyjnych uzyskuje
si´ perfekcyjne dopasowanie drzwi w stosunku do brodzika.
35 Profil chroniàcy przed rozpryskujàcà si´ wodà nale˝y zamontowaç na
brodziku. Spodni kana profila nale˝y wczeÊniej wype niç silikonem.
Umiejscowienie na brodziku odbywa si´ zgodnie z rysunkiem.
34,36 Po zakończeniu montażu należy kabinę uszczelnić silikonem
zgodnie z instrukcją. Uwaga ! Przedtem wszystkie silikonowane
powierzchnie (szkło, profile, brodzik, płytki) należy oczyścić.
Przed pierwszym natryskiem pozostawić silikon na 24 godziny
do wyschnięcia.
Zum herausnehmen • Foglio da staccare • Om uit te nemen • Take out the folder • À enlever • Oja a extraer • Do wyciàgni´cia
V6PT + V6S
24
3
1
2
25
26
2
1
1
3
2
3
4
=
Ø 6mm
3,9x38
3,5x16
=
5
Ø 6 mm
4
V6PT + V6S
27
3
1
4
2
3,5x16
1
28
15 mm
OK!
2
V6PT + V6S
29
40 mm
1
Ø 3mm
1
3,5x9,5
40 mm
2
3
Ø 3mm
30
2
OK
OK
OK
2
=
1
=
V6PT + V6S
31
32
1
2
4
3
Max
2 mm
Max
2 mm
2
1
1
5
2
33
3
34
V6PT + V6S
35
1
2
3
180°
4
36
24 h
3
1
IDEAL
100 mm
100 mm
2
IDEAL
4
V6PT + V6S
37
24 h
V6PT
EL0547
SRAKFB3938
KLE001
SRAKV414
PLE401
PRHE339-01
EL0661
SRAM410KF
SRAM410KF
KLE018 PLE477
SRAKFS3595
PLMD39
KLEE403
PLE405
PLE327
PRHE340-01
EL0666
EL0665
PLE328
EL0613
PLE433
EL0663
GUME371
KLE001
SRAKFB3938
EL0677
GUMG025
PRHE431
GUMG025
EL0676
PLE434
EL0663
SRAKFS3595
EL0613
PLMD39
PLE326 PLE477
KLE018
SRAM410KF
SRAM410KF
PLMD39
SRAKFS3595
PRHE431
PLE401
SRAKV414
EL0547
PLE405
KLE001
SRAKFB3938
EL0661
PLE328
KLEE403
SRAKFS3595
PLMD39
KLEE403
KLE018
SRAM410KF
SRAM410KF
SRAKFB3938
PLE401
SRAKV414
PLE405
KLE001
PRHE340-01
PRHE339-01
GUME371
PLE326
PLE328
PLMD39
SRAKFS3595
EL0664
PLE434
SRAKFB3938
GUMF074-08
KLE001
PLE433
EL0664
PLE328
PLE332
PLMD39
KLEE403
PLE405
EL0550
PRBE356
PLE327
PLE332
GUMF074-09
SRAKFS3595
KLE018
SRAM410KF
SRAM410KF
SRAKV414
KLE001
PLE401
SRAKFB3938
• Bei Ersatzteillieferungen sind folgende Angaben erforderlich: • Per ordini di pezzi di ricambio sono necessari i seguenti dati: • Bij onderdeelbestellingen zijn de volgende gegevens gewenst:
• Spare parts need the following specification:
• Pour toute commande de pièces détachées,il est nècessaire de fournir
• Para pedir los repuestos, necesitamos de los siguientes datos: • W przypadku dostaw cz´Êci zamiennych wymagane sà nast´pujàce dane:
Breite / larghezza / breedte / width / largeur / anchura / szerokoÊç______________________________ Farbe / colore / kleur / colour / couleur / color / kolor___________________________________________
Höhe / altezza / hoogte / hight / hauteur / altura / WysokoÊç____________________________________ Glas / vetro / glaspaneel / Glas-type / verre / vidrio / element szklany____________________________
V6S
KLE001
SRAKV3516
KLEN102
SRAKFB3938
KLEN100
SRAM410KZ
PLE349
KLEE407
BGRN104
PRBE408
SRAM410KZ
PLE349
KLEMD030
EL0660
KLEE407
KLEN100
SRAKV3516
KLEN099
GUMN103
KLEN101
PLMD288
PLE478
EL0553
EL0552
SRAKFS3595
PLMD39
KLE001
SRAKFB3938
PRH24794-01
PLE479
SRAKV3513
KLE001
SRAKFB3938
SRAKV3513
SRAKFS3595
PLMD39
KLE001
SRAKFB3938
SRAKV3513
• Bei Ersatzteillieferungen sind folgende Angaben erforderlich: • Per ordini di pezzi di ricambio sono necessari i seguenti dati: • Bij onderdeelbestellingen zijn de volgende gegevens gewenst:
• Spare parts need the following specification:
• Pour toute commande de pièces détachées,il est nècessaire de fournir
• Para pedir los repuestos, necesitamos de los siguientes datos: • W przypadku dostaw cz´Êci zamiennych wymagane sà nast´pujàce dane:
Breite / larghezza / breedte / width / largeur / anchura / szerokoÊç______________________________ Farbe / colore / kleur / colour / couleur / color / kolor___________________________________________
Höhe / altezza / hoogte / hight / hauteur / altura / WysokoÊç____________________________________ Glas / vetro / glaspaneel / Glas-type / verre / vidrio / element szklany____________________________
V6SV
KLE001
SRAKV3516
KLEN102
SRAKFB3938
KLEN100
SRAM410KZ
PLE349
KLEE407
BGRN104
PRBE408
SRAM410KZ
PLE349
KLEMD030
EL0660
KLEE407
KLEN100
SRAKV3516
KLEN099
GUMN103
KLEN101
PLMD288
PLE478
EL0553
EL0552
SRAKFS3595
PLMD39
KLE001
SRAKFB3938
PRH24794-01
PLE479
SRAKV3513
KLE001
SRAKFB3938
SRAKV3513
SRAKFS3595
PLMD39
KLE001
SRAKFB3938
SRAKV3513
• Bei Ersatzteillieferungen sind folgende Angaben erforderlich: • Per ordini di pezzi di ricambio sono necessari i seguenti dati: • Bij onderdeelbestellingen zijn de volgende gegevens gewenst:
• Spare parts need the following specification:
• Pour toute commande de pièces détachées,il est nècessaire de fournir
• Para pedir los repuestos, necesitamos de los siguientes datos: • W przypadku dostaw cz´Êci zamiennych wymagane sà nast´pujàce dane:
Breite / larghezza / breedte / width / largeur / anchura / szerokoÊç______________________________ Farbe / colore / kleur / colour / couleur / color / kolor___________________________________________
Höhe / altezza / hoogte / hight / hauteur / altura / WysokoÊç____________________________________ Glas / vetro / glaspaneel / Glas-type / verre / vidrio / element szklany____________________________
Der Produzent behält sich jederzeit das Recht, ohne Vorbescheid Abänderungen vorzunehmen.
I
Il produttore si riserva il diritto di apportare modifiche al prodotto senza preavviso.
NL De producent houdt zich het recht voor, ten alle tijde zonder tegenbericht, veranderingen door te voeren.
GB The producer reserves the right to modify the product at any time without prior notice.
F
Le producteur se réserve le droit de modifier le produit sans aucun préavis.
E
El productor se reserva el derecho de aportar modificaciones al producto sin previo aviso.
PL
Producent zastrzega sobie prawo do wprowadzania zmian bez uprzedniego powiadamiania.
VERMON V6PT/V6S/V6SV - 16.07.2015
D
© Copyright 2026
