
Sophos Cloud Help
Sophos Cloud
Help
Document date: January 2015
Contents
1 About Sophos Cloud Help........................................................................................................4
2 Activate Your License................................................................................................................5
3 The Sophos Cloud User Interface............................................................................................6
4 Dashboard................................................................................................................................7
4.1 Action Center..............................................................................................................7
4.2 Email Alerts..............................................................................................................13
4.3 Account Summary....................................................................................................13
4.4 Sophos Labs Global Activity.....................................................................................13
4.5 Resolved Malware Detections..................................................................................14
4.6 Web Statistics...........................................................................................................14
5 Users & Devices.....................................................................................................................15
5.1 Users........................................................................................................................15
5.2 Groups......................................................................................................................18
5.3 Devices.....................................................................................................................19
5.4 Policies.....................................................................................................................22
5.5 Active Directory........................................................................................................35
5.6 Enable iOS Support..................................................................................................36
5.7 Beta Assignment.......................................................................................................37
6 Servers...................................................................................................................................39
6.1 Servers.....................................................................................................................39
6.2 Policies.....................................................................................................................41
7 Reports...................................................................................................................................51
7.1 Summary..................................................................................................................51
7.2 Users........................................................................................................................51
7.3 Servers.....................................................................................................................52
7.4 Computers................................................................................................................52
7.5 Mobiles.....................................................................................................................53
7.6 Peripherals................................................................................................................54
7.7 Events.......................................................................................................................55
7.8 Web Reports.............................................................................................................62
8 Global Settings.......................................................................................................................65
8.1 Web Control Customizations....................................................................................65
2
8.2 Scanning Exclusions.................................................................................................65
8.3 Tamper Protection.....................................................................................................66
9 Downloads..............................................................................................................................68
9.1 Installers...................................................................................................................68
10 Account................................................................................................................................69
10.1 Administration.........................................................................................................69
10.2 Contact Details.......................................................................................................70
10.3 Partner Details........................................................................................................70
10.4 Payment Methods...................................................................................................70
10.5 Statements..............................................................................................................71
10.6 Join The Beta Program...........................................................................................71
11 Supported Web Browsers.....................................................................................................73
12 Contact Sophos Support......................................................................................................74
13 Legal notices........................................................................................................................75
3
Sophos Cloud
1 About Sophos Cloud Help
Sophos Cloud is a web-hosted solution which offers seamless protection and policy enforcement
for users across all devices as well as for networks.
This Help file provides additional information and explains procedures step by step.
You can help us to improve the Help by posting suggestions or comments using the Support link
in the top right of the user interface.
Tip: For news about the latest improvements in Sophos Cloud, see What’s New.You can access
What's New at any time by using the link in the top right of the user interface.
Accessing the Help
The Help can be opened by clicking the Help link in the main menu or any blue question mark
you see in the user interface. The Help always opens in a separate window. As the Help is
context-sensitive, clicking a question mark in a certain section opens the topic related to that
section. So you do not have to browse the Help for the correct topic.
Using the Help
The Help consists of a navigation pane on the left side and the topic pane on the right side.
Navigation pane: The navigation pane contains two tabs—the Content tab and the Search tab.
■
The Content tab gives an overview of all topics covered by the Help.
■
The Search tab lets you search the whole Help for the word or words you specify. Results are
presented in the topic pane in the way search engines present web results, in the order of
relevance. Clicking the link of a result opens the respective topic in the topic pane. The search
term is highlighted.
Topic pane: Here the currently selected topic is displayed.
You can also download a PDF version of the Online Help by clicking the PDF button.
The With Frames button displays the output using HTML frames to render two separate sections:
a section that presents the table of contents on the left and a section that presents the content of
a topic on the right. The "with frames" layout is displayed if JavaScript is disabled in the browser.
Tips & Tricks
Hidden text: Often you can find additional information by clicking on drop-down arrows.
Closing the navigation pane: You can close the navigation pane by clicking the arrow located
on the bar between the navigation and the topic pane.
4
Help
2 Activate Your License
When you buy a new or upgraded license, you need to activate it. You do this in your Sophos
Cloud console (unless a Sophos Partner handles license activation for you).
Note: If you are starting a trial of Sophos Cloud, you don't need to activate a license yet. You do
this only when you upgrade to a paid license.
To activate a license:
1. Ensure you have the License Activation Key shown in the License Schedule that Sophos sent
you.
2. Go to the Account link and select Administration.
The Account link is on the right of the user interface.
3. On the Administration page, the "Review licenses and usage" section is open by default. Go
to the Apply Activation Code field, enter your Key and click Apply.
5
Sophos Cloud
3 The Sophos Cloud User Interface
The user interface of Sophos Cloud is divided into a header, a main menu, and the main frame.
The latter displays the content of the currently active menu. At the bottom of the page, you find
links to Sophos legal information as well as Sophos policies on privacy and cookie use.
Header
Apart from the product name and logo, the header shows details of the user logged on. It also
has these links:
■
Logout closes the session and deletes all cookies.
■
What's New opens a web page that tells you about new features in Sophos Cloud.
■
Support opens a dialog which allows you to send an email to Sophos Support (page 74).
Main Menu
The main menu lets you access the main functions of Sophos Cloud.
6
■
Dashboard displays an overview of your current security status and actions that need to be
taken.
■
Users & Devices lets you manage users and user groups, security policies, and deployment
of Sophos Cloud agent software to devices.
■
Servers lets you manage servers and server security policies. This section is only available
for beta customers.
■
Reports lets you see reports for the different security features of Sophos Cloud.
■
Lists contains lists that can be used to specify security settings for particular files, websites
or applications.
■
Downloads lets you download Sophos software.
■
Account opens a page where you can manage licenses, passwords, and administrator
accounts.
■
Help opens the online Help. Since the Help is context-sensitive, the topic relevant to the page
you are currently on is displayed.
Help
4 Dashboard
The Dashboard is the regular start page of Sophos Cloud and provides access to the most
important information at a quick glance. It consists of the three areas:
■
Action Center.
■
Account summary carousel displaying user summary, computer summary, and mobile summary.
■
Event summary carousel displaying statistics on Sophos Labs global activity, resolved malware
detections on your managed computers, and web activity of your users.
The areas are described on the following pages.
The left and the right pane of the Dashboard refresh automatically every five minutes, independently
from each other.
4.1 Action Center
The Action Center on the Dashboard immediately reflects the currently required actions.
Note: Only alerts that require your action are displayed in the Action Center. Alerts that are
resolved automatically by Sophos Cloud are not displayed. For example, if a malware has been
detected and then cleaned up successfully by Sophos Cloud, no alerts will be displayed in the
Action Center. If you want to view all events that occured on devices monitored by Sophos Cloud,
go to the Reports > Events page.
Action indicator
The image at the top indicates with three different colors if there are urgent issues that need
handling:
■
High Immediate action is required, there is at least one critical alert.
■
Medium There is at least one alert of medium importance.
■
Informational There is at least one informational alert.
Alerts
In the lower part of the Action Center there is the alert table. It lists all alerts according to their
type and occurrence. Alerts are grouped together by their type. Clicking on a group title displays
all associated alerts.
There are different types of alerts, please refer to the following pages.
Note: The alert event time is not updated if the same event occurs repeatedly.
7
Sophos Cloud
Actions on alerts
There is a checkbox next to each alert and alert group. Selecting one or more checkboxes, you
can apply certain actions on alerts. The action buttons are displayed at the bottom of the table.
Tip: If you select the checkbox of an alert group, you can apply an action to all underlying alerts
at once.
The following actions may be available, depending on the alert type:
■
Ignore alert You can ignore any alert. It will not be displayed again, although future alerts of
the same type will be displayed.
■
Reinstall computer software Clicking this action button takes you to the Users & Devices >
Users page where you can enforce re-deployment of the agent software.
■
Review policy Clicking this action button takes you to the Policies page where you can review
your policies and adapt them to your needs.
■
Contact Support This action becomes available for example when malware cleanup fails.
Clicking the button opens a dialog window which allows you to send an email to Sophos
Support (page 74).
■
Cleanup PUA(s) This action enables you to clean up a Potentially Unwanted Application
(PUA) that has been detected.
Note: This action might not be available if the computer detected the PUA in a network share.
This is because the Sophos Cloud agent does not have sufficient rights to clean up files there.
For more information on dealing with PUAs, see Alerts for Malware Protection (page 9).
■
Authorize PUA(s) This action enables you authorize a Potentially Unwanted Application (PUA)
to run on all computers. You might do this if you consider the application useful.
4.1.1 Alerts for Deployment, Updating and Compliance
There are the following types of deployment, updating and compliance alerts:
High
■
Failed to protect computer or server
A computer has started installation of the agent software but has not become protected for
one hour.The installer that has been run on the affected computer may provide more information
about the reason of the failure.
Medium
■
Computer or server out of date
A computer that has not been updated in the last 24 hours has been communicating with
Sophos Cloud in the last 6 hours, and did not update in the following 2 hours. Normally, a
computer will attempt to update about 5 minutes after it has been started, and then regularly
every 60 minutes. If re-applying fails repeatedly, it may be due to a more serious problem. In
those cases, re-installation may solve the problem.
8
Help
■
Reboot required after software update
The reboot of a computer is needed to complete an update of the agent software, but the
computer has not been rebooted for 2 weeks. Sometimes, after installing/updating the agent
software, a reboot is needed to fully enable the capabilities of the new/updated version of the
software. Although an update does not need to be performed immediately, it is advisable to
perform it as soon as possible.
■
Policy non-compliance
A device may not comply with a policy for various reasons, for example because the settings
have been changed on the device itself. In that case, after two hours of non-compliance, the
system will raise an alert and will try to re-apply the corresponding policy. When the device is
back in compliance, the Action Center alarm will be automatically cleared. If re-applying fails
repeatedly, it may be due to a more serious problem. In those cases, re-installation may solve
the problem.
■
New peripheral detected
A removable media or peripheral device has been detected on a device monitored by Sophos
Cloud. For information about managing peripherals, see Configure Removable Media and
Peripherals Control (page 28).
4.1.2 Alerts for Malware Protection
There are the following types of alerts that refer to malware protection.
Tip: For information about a threat and advice on how to deal with it, click its name in the alert.
Alternatively, go to the Threat Analysis page on the Sophos website. Under Browse threat
analysis, click the link for the type of threat, and then do a search for the threat or look in the list
of latest items.
High
Real-time protection disabled
Real-time protection has been disabled for a computer for more than 2.5 hours. Real-time protection
should be turned on at all times. Sophos Support may advise you to turn it off for a short period
of time in order to carry out an investigation.
Malware not cleaned up
Some detected malware could not be removed after a period of 24 hours, even if automatic
cleanup is available. Probably, the malware was detected via a scan that does not provide
automatic cleanup, e.g., an on-demand scan configured locally. You can deal with the malware
in one of these ways:
■
Clean it up centrally, by scheduling a scan in the policy (which will then have automatic cleanup
enabled).
■
Clean it up locally, via the Quarantine Manager.
9
Sophos Cloud
Manual cleanup required
Some detected malware could not be removed automatically because automatic cleanup is not
available. Click on the alert and the link will take you to the Sophos website, where you can read
advice on how to remove the threat. If you need help, contact Sophos Support.
Running malware not cleaned up
A program that was running on a computer and exhibited malicious or suspicious behavior could
not be cleaned up. Click on the alert to learn more about the threat and how to deal with it. If you
need help, contact Sophos Support.
Malicious traffic detected
Malicious network traffic, possibly headed to a command-and-control server involved in a botnet
or other malware attack, has been detected. Click on the alert to learn more about the threat and
how to deal with it. If you need help, contact Sophos Support.
Recurring infection
A computer has become reinfected after Sophos Cloud attempted to remove the threat. It may
be because the threat has hidden components that haven't been detected. An in-depth analysis
of the threat may be required. Please contact Sophos Support for assistance.
Medium
Potentially unwanted application detected
Some software has been detected that might be adware or other potentially unwanted software.
By default, potentially unwanted applications are blocked. You can either authorize it, if you
consider it useful, or clean it up.
Authorize PUAs
You can authorize a PUA in one of two ways, depending on whether you want to authorize it on
all computers or only some:
■
Click the Authorize PUA(s) button in Action Center. This authorizes the PUA on all computers.
■
Add the PUA to the scanning exclusions in the malware protection policy. This authorizes the
PUA only on computers to which the policy applies.
Clean up PUAs
You can clean a PUA up in one of two ways:
■
Click the Cleanup PUA(s) button in Action Center.
■
Clean it up in the agent software's Quarantine Manager on the affected computer.
Note: Cleanup might not be available if the computer detected the PUA in a network share. This
is because the Sophos Cloud agent does not have sufficient rights to clean up files there.
10
Help
Potentially unwanted application not cleaned up
Potentially unwanted application could not be removed. Manual cleanup may be required. Click
on the alert to learn more about the application and how to deal with it. If you need help, contact
Sophos Support.
Computer scan required to complete cleanup
A threat cleanup requires a full computer scan. To scan a computer, go to the Users & Devices >
Devices page, click on the name of the computer that you want to scan, and then click the Scan
Now button.
Note: The scan may take some time. When complete, you can see a "Scan 'Scan my computer'
completed" event and any successful cleanup events on the Reports > Events page. You can
see alerts about unsuccessful cleanup in the Action Center.
If the computer is offline, it will be scanned when it is back online. If a computer scan is already
running, the new scan request will be ignored and the earlier scan will carry on.
Alternatively, you can run the scan locally using the Sophos Cloud agent software on the affected
computer. Use the Scan my computer option in Sophos Endpoint Security and Control on a
Windows computer, or the Scan This Mac option in Sophos Anti-Virus on a Mac.
Reboot required to complete cleanup
The threat has been partially removed, but the endpoint computer needs to be restarted to complete
the cleanup.
4.1.3 Alerts for Mobile Devices
For mobile devices there are the following types of alerts:
High
■
Your APNS certificate will expire soon
If your APNS certificate will expire within the next 7 days, this alert is of high importance. A
valid APNS certificate is needed for communication between Sophos Cloud and iOS mobile
devices. Renew it as soon as possible. See APNS Certificate Renewal (page 37) for information
on how to do that.
■
Your APNS certificate has expired
As your certificate has expired, communication between Sophos Cloud and iOS devices is no
longer working. Renew it as soon as possible. See APNS Certificate Renewal (page 37) for
information on how to do that.
Medium
■
Mobile device decommissioned by user
11
Sophos Cloud
A user has deleted the Sophos Mobile Control app or removed its configuration (this cannot
be prevented). The mobile device is now unmanaged. It will lose its connection to the company
network if this network connection was specified in a policy (see Configure Wi-Fi Settings
(page 33)).
■
Action for mobile device failed
The kind of action that failed for the mobile device is specified in the corresponding events.
■
Mobile Exchange settings could not be applied (missing account information)
Exchange settings can only be applied if both the Exchange email and the Exchange login
are available. Unless you configured a policy containing specific user information, this account
information is taken from the user details. You find them under Manage > Users. See also
Users (page 15).
■
Unable to deploy to iOS devices. Please configure the APNS certificates first.
A valid APNS certificate is needed for communication between Sophos Cloud and iOS mobile
devices. See APNS Certificate Creation (page 36) for more information on how to get one.
■
Your APNS certificate will expire soon
If your APNS certificate will expire in 7-14 days, this alert is of medium importance.
Low
■
Action for mobile device succeeded
The kind of action that succeeded for the mobile device is specified in the corresponding
events.
■
Action for mobile device has been canceled
The kind of action that was canceled for the mobile device is specified in the corresponding
events.
■
Mobile device not compliant
A device is not compliant if any of the requirements specified in the policy valid for this device
is not met. For more information, see Configure Compliance Rules (page 34).
■
Mobile device enrolled
A mobile device is enrolled.
Informational
12
■
Your APNS certificate will expire soon If your APNS certificate will expire in 14-30 days,
this is just an informational alert.
■
Your APNS certificate was renewed This is to confirm that the certificate was renewed.
Help
4.2 Email Alerts
Sophos Cloud automatically sends email alerts to administrators when events occur (for example,
"Potentially Unwanted Application detected").
Sophos Cloud does as follows:
■
Sends alerts for Medium or High severity events that require action. For details of events in
these categories, see Action Center (page 7).
■
Sends alerts to all the administrators in your administrators list on the Account >
Administration page.
■
Does not send alerts if an alert for the same type of event has been sent within the previous
24 hours.
Note: You cannot change the email alert settings.
4.3 Account Summary
The account summary carousel provides an "at a glance" view of the status of your servers, users,
computers, and mobile devices.
■
Server Summary: Shows how many servers are active, inactive for over two weeks, inactive
for over two months, or not protected.
■
User Summary: Shows how many users are active, inactive for over two weeks, inactive for
over two months, or not protected.
■
Computer Summary: Shows how many computers are active, inactive for over two weeks,
inactive for over two months, or not protected.
■
Mobile Summary: Shows how many mobiles are managed, compliant, non-compliant, or not
managed.
Clicking on the Go To Report link in this view opens the respective report that provides more
detailed information.
If you haven't yet added any users, protected any computers, or enrolled any mobile devices, the
graphs will appear gray. Instead of the Go To Report link you will see a Manage Users, Protect
Computers, or Enroll Mobile Devices link respectively. Follow the links to set up your Sophos
Cloud.
4.4 Sophos Labs Global Activity
This graph on the Dashboard page is meant to give you an estimation of protection status compared
to the world-wide threat level identified by Sophos Labs.
At the top of the graph there is a four-step threat level indicator which ranges from green over
orange to red. The colors result from an estimation by Sophos Labs of the current prevalence of
malware, spam, and web threats, and intelligence regarding new vulnerabilities. The four threat
levels are rated as low, medium, high, or critical. More information on that topic is available at
sophos.com.
13
Sophos Cloud
The graph itself consists of a light-blue curve in the background. It depicts the overall detections
of new malware world-wide. In the foreground, there are different kinds of markers. Hovering on
a marker reveals information on the item in a small overlay window.
■
Threat Update A blue virus icon indicates malware markers. The information given comprises
the name of the malware, its type, the time when it was first seen, and its prevalence.
■
News Update A blue paper sheet icon indicates news from Sophos Naked Security, which is
the news weblog site of Sophos.
You can adjust the time scale of the graph by selecting D (Day), W (Week), or M (Month) in the
lower right of the pane.
4.5 Resolved Malware Detections
This graph provides reporting information on malware detections on your managed computers
that have been resolved.You see information on which user was affected and how many malware
instances were detected.
You can adjust the time scale of the graph by selecting D (Day), W (Week), or M (Month) in the
lower right of the pane.
4.6 Web Statistics
The Web Statistics portion of the Dashboard provides a quick overview of the status of web
control, and provides a link to the related activity report. In the Web Statistics pane you see an
overview of the following:
■
Web Threats: This shows the number of threats reported and provides a link to the Top
Malware Downloaders report.
■
Policy Violations: Displays the number of policy violations and links to the Top Policy
Violators report.
■
Policy Warnings
■
Warnings Issued: Displays the number of warnings issued to users and links to the Top
Warned report.
■
Proceeded: Displays the number of users who have proceeded past a warning and links
to the Top Warned report.
You can adjust the time period displayed by selecting D (Day), W (Week), or M (Month) in the
lower right of the pane.
14
Help
5 Users & Devices
The Users & Devices pages let you do tasks related to protecting your devices.
5.1 Users
On this page, you can add or manage users, and get the users' computers or mobiles protected.
You can enable the users to protect their own devices by emailing them a setup link.
The sections below tell you about the users list and also how to:
■
Add users (page 15).
■
Protect existing users (page 16).
■
Modify users (page 16).
■
Delete users (page 17).
About the users list
The current users are listed with details including:
■
Email address.
■
Deployment status. This shows whether the user has been sent a setup link and whether they
have protected their devices yet.
■
Exchange login.This is needed if you want mobile devices to synchronize Exchange information
automatically. You configure this by specifying a policy for mobile devices.
To see full details for a user, click on the user's name. For more information, see User Profile
(page 17).
To display different types of user, click the dropdown arrow on the filter above the list.
To send or resend setup links to users, use the buttons in the Action column.
Add users
You can add users in different ways:
■
Add users at the Users page manually.
■
Import users from Active Directory. See how at the Users & Devices > Active Directory page.
■
Download an installer and run it yourself (instead of letting users use the setup link). This adds
the user automatically. See the Downloads > Installers page.
This section tells you how to add and protect users at the Users page.
Add and protect a user
1. Click the Add button.
15
Sophos Cloud
2. In the Add New User dialog, enter the following settings:
User name. Enter the name of the new user. Do not include a domain name.
Email address. Enter the email address of the new user.
Exchange Login (optional).The Exchange login might be necessary if you want mobile devices
to synchronize Exchange information automatically. You configure this by specifying a policy
for mobile devices.
Add to groups (optional). Select one of the available user groups.
Tip: You can start typing a name in the search box to filter the displayed groups.
Email setup link. Select this if you want to send the user an email with links that enable them
to protect their own devices. If your license covers mobiles, specify whether the user will protect
Computers or Mobiles.
Note: The user needs administrative privileges and internet access in order to protect their
computer.
3. Click Save or Save & Add Another.
The new user is added to the user list.
When the user downloads and installs the software, their device is automatically associated with
the user.
Protect existing users
To email users you have already added to the list or imported:
1. Look at the list of users. There is an Email setup link button beside each (if you entered their
email address). Click it to send the setup link.
Note: If an email has already been sent, a Resend setup link button is displayed so that you
can send the email again.
2. In the Email setup link dialog, you are prompted to select the types of devices to protect (if
your license includes mobile).
Note: If you select both computers and mobile devices, users will receive a separate email
for each.
Note: If you see an Enable iOS button, you need to create an Apple Push Certificate so that
Sophos Cloud can manage iOS devices. Click the button to start.
Alternatively, you can email all the users at once using the Email setup link to <number of
users> button.
Modify users
To modify a user's account, click the user's name to open and edit their User Profile. For more
information, see User Profile (page 17).
16
Help
Delete users
To delete a user or users, select the checkbox next to each user you want to delete. Click the
Delete button.
Logins assigned to a deleted user can afterwards be assigned to another user.You can edit logins
by using the Modify logins link on a user's details page.
Note: Deleting a user does not delete devices associated with that user or remove the Cloud
software from these devices.
Note: Under some circumstances, the user may be recreated automatically in future:
■
If the user logs in to an associated device that is still managed by Sophos Cloud, they will be
added as a user again.
■
If the user was added from Active Directory and is still in Active Directory, they will be added
as a user again the next time that Sophos Cloud synchronizes with Active Directory.
5.1.1 User Profile
On this page, you can see and manage a user's full profile, including:
■
Account details. You can modify or delete accounts here.
■
Events (such as blocked websites or non-compliance with policies) detected on the user's
devices.
■
Devices associated with the user.
■
Policies applied to the user.
Note: If a user has been imported from Active Directory, you cannot change the account details.
However, you can add the user to a new Sophos Cloud group or add another login.
Account details
In the left-hand pane, you can modify or delete the user's account.
Modify the account
1. Edit the following settings:
Email address. You cannot change this if the user was imported from Active Directory.
Exchange Login. The Exchange login might be necessary if you want mobile devices to
synchronize Exchange information automatically. You configure this by specifying a policy for
mobile devices.
Member of x groups.To change the group or groups the user belongs to, click Modify groups
and select or deselect the groups you want .
Associated with x logins. To change the login assigned to the user, click Modify logins.
You can assign multiple logins to a user. Logins are only available when you removed the
login from another user or deleted the user.
2. Click Save.
Delete the account
17
Sophos Cloud
To delete the account, click Delete in the upper right of the page. Logins assigned to this user
can afterward be assigned to another user.
Events
This displays events (such as blocked websites or policy non-complicance) detected on the user's
devices.
Devices
This lists devices associated with the user. The list shows the device type and operating system,
as well as the following details:
■
Last Active. The time of the last synchronization.
■
Status. Whether there are security alerts on the device.
■
Action. The action that will be taken. The actions available depend on the device type. For
more information, see Device Profile (page 20).
Policies
This lists the policies that are applied to the user.
The icons beside a policy indicate the security settings (such as malware protection or mobile
control) included in the policy.
Note: A gray icon indicates that this part of the policy does not apply to the user. This happens
if a higher-priority policy with settings for the same feature is applied to the user.
You can view and edit policy details by clicking the policy in the list.
5.2 Groups
On this page, you can manage groups of users.
You can use groups to assign a policy to multiple users at once. Groups can be added, modified
and deleted. Deleting a group will not delete its users.
The current groups are listed and the number of users in each group is shown.
To see full details for a group, click on the group's name. This opens the Group Profile. For more
information, see Group Profile (page 19).
Add a group
1. Click the Add button.
2. In the Add New Group dialog, enter the following settings:
Group name. Enter the name of the new group.
Members. Select users from the list of available users.
Tip: In the Members box you can start typing a name to filter down the displayed entries.
18
Help
3. Click Add Group.
Modify or delete a group
To modify or delete a group, click the group's name to open and edit the Group Profile. For more
information, see Group Profile (page 19).
5.2.1 Group Profile
On this page, you can see and manage a group’s profile.
The page displays the group name and the group’s members. You can:
■
Add members.
■
Delete the group.
Add members
To add members to the group:
1. Click Add.
2. In the pop-up, select users from the list of available users. Click Add.
3. At the bottom of the Group Profile, click Save.
Delete the group
To delete the group:
At the bottom of the Group Profile, click Delete.
Deleting a group will not delete its users.
5.3 Devices
On this page, you can manage your protected devices. They will appear automatically after the
Sophos Cloud agent software has been installed.
The devices are listed with details of the device type (for example, PC, laptop, iPad) and the users
associated with the device.
You can:
■
View full details of a device.
■
Update a device.
■
Scan a device.
■
Delete a device.
19
Sophos Cloud
View full details
For details of a device, click on its entry in the list to open the device profile. The details shown
depend on the type of device.
For more information, see Device Profile (page 20).
Update a device
To update a device, click on its entry in the list to open the device profile. You can update the
device there.
For more information, see Device Profile (page 20).
Scan a device
To scan a device, click on its entry in the list to open the device profile. You can scan the device
there.
For more information, see Device Profile (page 20).
Delete a device
To delete a device, click on its entry in the list to open the device profile.You can delete the device
there.
For more information, see Device Profile (page 20).
5.3.1 Device Profile
On this page, you can see and manage a device's profile.
The information displayed on this page and the actions you can take depend on the device type.
For more details, look at the relevant section below:
Computers
On the Device Profile page for a computer, the following details are displayed:
■
Name
■
Last active: The time of the last synchronization.
■
Operating system
■
Last user
■
Last updated: The last time the Cloud agent software was updated.
The following actions are available:
20
■
Update Now: Updates the Sophos Cloud software on the computer.
■
Scan Now: Scans the computer immediately.
Help
Note: The scan may take some time. When complete, you can see a "Scan 'Scan my computer'
completed" event and any successful cleanup events on the Reports > Events page. You
can see alerts about unsuccessful cleanup in the Action Center.
If the computer is offline, it will be scanned when it is back online. If a computer scan is already
running, the new scan request will be ignored and the earlier scan will carry on.
■
Delete: Deletes the computer from the Sophos Cloud console. This does not uninstall the
Sophos Cloud agent software, but the computer will not synchronize anymore.
Note: If you deleted the computer accidentally, re-install the Sophos Cloud agent software
to get it back.
Mobile devices
On the Device Profile page, the following information is shown for all mobile devices:
■
Name. A name for the mobile device, as shown in the Sophos Cloud console.
■
Last Active. The time of the last check-in or synchronization that was performed.
■
Management Status.The management status of the device. For more information, see Mobiles
(page 53).
■
Compliance. The compliance status. The device should be compliant. It is not compliant if any
requirement specified in the policy valid for this device is not met. For more information, see
Configure Compliance Rules (page 34).
■
Device Model. Information about what kind of device it is.
■
Operating System. Operating system the device is running.
■
User. The user the mobile device belongs to. There is only one user for a mobile device.
■
Enrollment Date. The time of the first synchronization after installation and configuration of
the Sophos Mobile Control app .
For Android devices, the following additional information may be shown:
■
Samsung SAFE Support: Indicates if the device supports Samsung SAFEv2+ features.
Samsung SAFEv2+ includes additional security features, which are available on selected
Samsung devices.
■
Samsung SAFE Availability: Shows if the Samsung SAFEv2+ features can be managed by
Sophos Cloud on this device.
■
Samsung SAFE Version: The version number of Samsung SAFE on Samsung SAFEv2+
devices.
■
Unlock Password: A temporary password generated when the device is unlocked. (See the
Unlock action later in this topic.)
The following actions are available:
■
Wipe: Reset the mobile device to its factory settings. This involves the deletion of all user data,
which is desirable if the device has been lost or stolen. The Sophos Cloud software is deleted
as well, therefore the device will no longer be managed afterwards. However, it will remain in
the list with the management status wiped, so that you get feedback that the wipe was
successful. You can safely delete the device afterwards.
21
Sophos Cloud
■
Unlock: Unlocking a device removes the existing password protection on a device so that the
user can set a new password. Unlocking works differently on iOS and Android:
■
On iOS devices, the unlocking action immediately unlocks the device and the user will be
prompted to set a new password. Therefore it is necessary to notify the user in advance
(for example, via a phone call), as the device will remain unprotected until a new password
is set.
■
On Android devices, the unlock requires entering a password on the device. The password
is automatically generated after confirming the unlock action, shown at the device details
page and sent to the user via email. The user is requested to unlock the device using that
password and set a new one immediately.
■
Force Check-in: A check-in synchronizes the mobile device with Sophos Cloud. The device
and the Sophos Cloud app have to be active. For more information on check-in and sync, see
Configure Compliance Rules (page 34)
■
Lock: Enable the lock screen. The user will need the password that was set for the device in
order to be able to use the device again. If no password was set, the lock screen will be
enabled, but no password will be necessary.
■
Save: Save changes of the mobile device properties (the name).
■
Delete: Removes the device from Sophos Cloud management. This also deletes the Sophos
Cloud configuration and all associated corporate data from the device (a “corporate wipe”),
but leaves personal data untouched. The Sophos Mobile Control app is not deleted. In order
to get the mobile device back under Sophos Cloud management, the app has to be configured
again as described in the deployment email sent to the user (for details of how to send the
email, see Users (page 15))
5.4 Policies
Policies define the security measures that will be used for your users' devices.
On the Policies page, you can view, add, edit and test policies.
The sections below tell you how policies work and also how to:
■
View and manage a policy (page 25).
■
Add a policy (page 26).
■
Edit a policy (page 26).
How policies work
This section tells you how Sophos Cloud policies work.
What is the Base Policy?
The Base Policy is the default policy and is always available. This policy has been set up for you
and is already configured with the Sophos best practice settings. It applies to all the users initially.
You can edit the settings in the Base Policy. However, you cannot disable or delete it, even if you
create other policies.
22
Help
Tip: If you made any changes in the Base Policy and want to revert it to its original state, click
the Reset button.
Do I need any other policies?
If you wish, you can use only the Base Policy. You do not have to create any others. You can
even use the Base Policy without changing any settings -- unless you want to enable optional
features like Web Control. However, you can use “additional” policies if you want to.
What are additional policies?
Additional policies are policies that you create. You can use them to apply different settings to
different users or groups of users, or to make it easier to change the settings applied at different
times.
Your additional policies can override some or all of the settings in the Base Policy.
Additional Policies can be disabled, and, optionally, be set to expire after a certain point in time.
You can clone any policy so that you can quickly create a variation based on it.
The order in which you put the policies on the page matters, as this decides the priority given to
a policy. See “How do you use additional policies?" below.
What is in each policy?
A policy can include settings for all the security features that you have licensed, or for just some
features, or for a single feature.
Tip: Features are represented by icons shown in the same line as the policy name. Hover over
them for information.
For some features, such as malware protection, a policy contains all the settings for that feature.
You cannot split up the malware protection settings across several different polices in such a way
that a user gets one setting from one policy and another setting from a different policy.
For other features, such as mobile control, there are sub-features, such as Restrictions, Exchange
email settings or Wi-Fi settings, that are treated separately. So a user can get their Exchange
email settings from one policy and their Wi-Fi settings from another.
Note: You can have more than one policy that configures malware protection, but only one of
those policies applies to a particular user. And that one policy determines all the settings for that
user.
How do you use additional policies?
You can use an additional policy to apply different settings for all the security features, or just for
selected features.
The order in which you arrange the policies (the order shown on the Policies page) determines
which settings are applied for each security feature.
To determine the policy to apply for a given user, Sophos Cloud looks through the policies from
the top down. The first policy that is assigned to that user and that includes settings for a particular
feature (such as malware protection), will be applied for this feature.
However, the settings for another feature might be taken from another policy. Sophos Cloud will
search again for the highest policy that is assigned to that user and includes the feature in question.
The Base Policy is always at the bottom, and therefore applied last.
23
Sophos Cloud
You should place the most specific policies at the top and more general policies further down.
Otherwise, a general policy might apply to a device for which you wanted a individual policy.
To sort policies, grab a policy and drag it to the position where you want to insert it. Arrows and
a green bar indicate when you have reached a position where you can drop the policy.
Tip: You can check the policy settings that apply to a specific user by entering that user into the
search field in the upper right corner of the policies window. Gray icons indicate that settings do
not apply.
Example: Using two policies
In a simple scenario, you might want to use different malware protection settings for one user or
group of users.
You can create a new policy, customize the settings for malware protection, and apply the policy
to selected users.
When Sophos Cloud applies policies to those selected users, it will:
■
Check the new, additional policy first.
■
Find the malware protection settings in the additional policy and apply them to the selected
users.
■
Check the basic policy.
■
Find the settings for the other features, such as Peripheral Control, and apply them to the
selected users. The malware protection settings in the basic policy are ignored because the
settings in the additional policy have already been used.
Other users, who are not covered by this additional policy, will get all their settings, for malware
protection and for the other security features, from the Base policy.
Example: Using three policies
Assume that you have three policies, Base Policy, Policy A and Policy B, and that:
■
Policy A and Policy B are both assigned to a user.
■
Policy A is the higher one in the policies list.
■
Policy A specifies malware protection and Exchange email settings, but does not specify
others.
■
Policy B specifies malware protection and peripheral control settings, but no others.
In this case, the settings for malware protection and Exchange email are taken from Policy A,
settings for peripheral control, Wi-Fi settings and any other settings for mobile devices are taken
from Policy B if specified there. This is shown in the table.
24
Policy
Malware Protection Peripheral Control
Exchange Email
Settings
Wi-Fi Settings
Policy A
Yes
Yes
No
No
Help
Policy
Malware Protection Peripheral Control
Exchange Email
Settings
Wi-Fi Settings
Policy B
Yes
Yes
No
No
Base Policy
Yes
Yes
Yes
No
Policy that is
applied:
Policy A
Policy B
Policy A
No settings
View and manage a policy
To view and manage a policy, select the policy in the list.
In the left pane, icons are displayed against its entry in the list. In the right pane, there is a summary
of the policy and action buttons.
Key to the policy icons
The following table provides an overview of icons and their meaning:
Icon
Meaning
The policy is active.
The policy is disabled.
The policy is a scheduled policy and active.
The policy is a scheduled policy and disabled.
This is the Base Policy. The lock indicates that the
Base Policy can neither be deleted nor disabled.
Number of servers the policy is applied to.
Search box
Insert the name of a user into the search box and the list of policies will show which policies apply
to the user you searched for. Used Indicates that a policy applies.
25
Sophos Cloud
Policy Summary
Click a policy in the Policies list to see its summary. The summary provides information on the
policy capabilities, i.e., which protection is activated, and on the expiration date if applicable.
Actions
There are action buttons in the right pane, under the Policy Summary. The actions available
depend on the policy you select.
■
Enable or Disable Enabling a disabled policy makes it active so that it is applied in your
network.
Note: You can disable any active policy except for the Base Policy.
■
Edit Click this button to edit the settings of a policy. You can change every aspect of the
configuration.
■
Clone This is useful if you need a similar policy and do not want to start configuring from
scratch.
■
Delete You can delete any policy except for the Base Policy. When you try to delete an active
policy, you need to confirm a warning message first.
■
Reset This is only available with the Base Policy. You can reset the Base Policy to its initial
configuration if you want to revert changes made on that policy.
Action buttons that cannot be applied on a certain policy are grayed out.
Add a policy
To add a new policy, do the following:
1. Click the Add button above the Policies list.
2. Enter a name for the new policy into the text field. Click Next.
3. Select the features you want to configure in your policy, for example Protection from malware,
risky files and sites. Depending on your selection, corresponding panels will be displayed
below. Click Next.
4. Select users the policy should apply to. Click Next.
5. Now, configure the features in each panel, clicking Next after each step to open the following
panel. For information on specific features, see the other pages in this section.
Note: You can also open panels in any order by clicking on them directly but we recommend
that you at least look at the panels you skip.
6. Enable or disable the policy. This option is useful if you want to preconfigure the policy now
and activate it later. You can also set an expiry date if the policy needs to be deactivated
automatically in future.
7. When you have finished setting options, click Save.
Edit a policy
To edit a policy:
26
Help
1. In the policies list, click on a policy to see a summary. In the Policy Summary in the right
pane, click Edit. Alternatively, double-click the policy name in the list.
You see panels that show the current settings for the policy (if settings have been entered).
2. Select the panel for the feature that you want to edit.
Tip: You can open panels in any order to edit them.
3. When you finish editing a panel, either click Next to see the following panel or simply click
directly on another panel.
4. When you have finished your edits, click Save.
5.4.1 Configure Malware Protection
Malware protection keeps you safe from malware, risky file types and websites, and malicious
network traffic.
The malware scanning setup panel is available if you have selected the Protection from malware,
risky files and sites option in the policy.
1. Enable or disable real-time scanning. When enabled, scans files as users attempt to access
them, and denies access unless the file is clean.
Note: The default malware protection settings are controlled by Sophos to provide the optimum
protection without complex administration. You can be reassured that these settings include
protection against existing known malware, as well as dynamic lookups to protect against
newly identified malware even without a software update, and also proactive detection to
intelligently identify new malware that has not been seen before (often called day zero threats).
Automatic cleanup will be attempted on all malware detected.
2. Enable or disable scheduled scan.You can define a time and one or more days when scheduled
scanning should be performed. If you select the option Scan inside archive files, archives
are scanned as well during scheduled scans. Note that this may increase the system load and
make scanning significantly slower.
Note: The scheduled scan time is the time on the endpoint computers (not a UTC time).
27
Sophos Cloud
3. Optionally, configure Scanning Exclusions. You may want to exclude files, websites and
potentially unwanted applications from scanning.
Tip: If you want exclusions to apply to all your users and servers, you can use the Global
Settings > Scanning Exclusions page instead.
To set up exclusions:
■
In the Exclusion for drop-down list, select a type of item to exclude (file or folder, website,
or potentially unwanted application).
■
In the Value text field, enter the desired entry. The following rules apply:
■
■
■
File or folder.You can exclude a drive, folder or file by full path. For file title or extension
the wildcard * may be used, though *.* is not valid. Examples:
■
Folder: C:\programdata\adobe\photoshop\ (add a slash for a folder)
■
Entire drive: D:
■
File: C:\program files\progam\*.vmg
Website. Websites can be specified as IP address, IP address range (in CIDR notation),
or domain. Examples:
■
IP address: 192.168.0.1
■
IP address range: 192.168.0.0/24 The appendix /24 symbolizes the number of bits
in the prefix common to all IP addresses of this range. Thus /24 equals the netmask
11111111.11111111.11111111.00000000. In our example, the range includes all IP
addresses starting with 192.168.0.
■
Domain: google.com
Potentially Unwanted Application. Here, you can exclude applications that are normally
detected as spyware. Specify the exclusion using the same name under which it was
detected by the system. Find more information about PUAs in the Sophos Threat Center.
■
For File or folder exclusions, in the Activate for drop-down list, specify if the exclusion
should be valid for real-time scanning, for scheduled scanning, or for both.
■
Click Create. The exclusion is displayed on the scanning exclusions list.
Tip: To edit an exclusion later, select it in the exclusions list and click Update.
5.4.2 Configure Removable Media and Peripherals Control
The removable media access setup panel becomes available if you have selected the Control
access to removable media and other peripherals option in the policy.
28
Help
In the panel, you can define how removable media and other peripherals are handled. You can
also exempt peripherals from access control.
1. Configure Monitor but do not block.
When enabled, the access policy mode for all peripherals is Allow, regardless of the settings
in the Peripheral Type table. In the background, all peripherals used on the connected
computers are detected and registered.You can display and manage these detected peripherals
after disabling the checkbox.
When disabled, you can apply access policies to peripheral types and individual detected
peripherals.
2. Review the Peripheral Type table.
This table can only be edited if Monitor but do not block is disabled. It displays all detected
peripheral types, their current access policy, and the number of peripherals detected for each
peripheral type.
For each peripheral type, you can change the access policy:
■
Read-only Peripherals can be accessed only for reading.
■
Allow Peripherals are not restricted in any way.
■
Deny Peripherals are not allowed at all.
3. Configure Exemptions.
Exemptions are only available if Monitor but do not block is disabled. Clicking the Exemptions
button opens a section where you can exempt individual peripherals from the general control
settings of their respective peripheral type. The standard use case is to restrict a peripheral
type, and then to loosen restrictions for individual peripherals.
The section contains two tables: Peripherals on the top and Exemptions below. The
Peripherals table shows detected devices. There are two possibilities for a peripheral to get
detected: Either it has been detected while the Monitor but do not block checkbox was
enabled, or it belongs to a peripheral type with an access restriction (Read-only or Deny). In
other words, as long as the Monitor but do not block checkbox is disabled, and a peripheral
type is allowed, none of the peripherals of this type will be reported.
To exempt a peripheral, move it from the upper table to the lower table by clicking the icon
with the arrow pointing down between both tables. To assign a specific policy to one of the
exempt peripherals, select the desired policy from the Policy drop-down list of the respective
peripheral. In the Enforce by drop-down, select if you want to apply the policy to all peripherals
of that model or to the ones having the same peripheral ID (see respective columns).
Note: The policy that will actually be applied to a peripheral is the 'less strict' of the two. For
example, if Floppy Drive type policy is Read-only and an exempt peripheral has a policy Deny,
the peripheral will still be treated as read-only. In cases such as this one, where the exempt
peripheral has a policy that is 'stricter' than the policy for the peripheral type and is therefore
ignored, a red exclamation mark icon is placed by the exempt peripheral's policy.
5.4.3 Configure Web Control
The web control setup panel becomes available if you selected Manage web control settings
in the policy.
29
Sophos Cloud
Note: If web control is enabled in an additional policy, items you do not override will be processed
by the next matching policy. If no matching policy, including the Base Policy, has web control
enabled, only logging and reporting will be provided.
1. Select Enable web control.
You can now enable additional web control settings. Each option you select displays further
configuration options.
2. Select Additional security options to configure access to individual filetypes, advertisements
and uncategorized sites.
■
Recommended: This option blocks risky file types, but allows advertisements and
uncategorized files.
■
None: This option allows risky file types, advertisements and uncategorized files.
■
Let me specify: This allows you to set advertisements and uncategorized file types to
Allow or Block. For Risky file types you can also choose:
■
Warn: Selecting this option warns the user that a file may be risky before they can
download it.
■
Let me specify: Selecting this option allows you to set a number of individual file types
to Allow, Warn, or Block.
3. Configure Acceptable web usage settings.
Selecting Acceptable web usage allows you to control what sites users are allowed to visit.
Choose from the following options:
■
Keep it clean: Prevents users from accessing adult and other potentially inappropriate
web sites.
■
Gentle guidance: Blocks inappropriate browsing and warns users before visiting website
categories that may impact their productivity.
■
Conserve bandwidth: Blocks inappropriate browsing and warns users before visiting
productivity-impacting websites. Blocks site categories likely to consume high bandwidth.
■
Business only: Only allows site categories that are generally business-related.
■
Let me specify: Selecting this allows you to configure individual site categories. For each
group of categories (such as Productivity-related categories you can set the behavior
to Block, Warn, Allow or Let me specify. Choosing Let me specify allows you to configure
individual categories within these groups.
Note: For more control over how policy affects web sites you can use the Global Settings >
s > Web Control Customizations page.
4. Select Protecting against data loss to configure data loss settings.
Selecting this option allows you to choose Block data-sharing, Allow data-sharing, or Let
me specify. Setting these options controls access to web-based email and file downloads.
5. Select Control sites tagged in the Website List to enable specific actions for sites tagged
on the Global Settings > Web Control Customizations page.
Select a tag, and then set the Action to Allow, Block, or Warn.
30
Help
6. Select Log web control events to configure logging.
If you choose not to enable logging, only attempts to visit infected sites will be logged.
5.4.4 Configure Mobile Device Preferences
The mobile device preferences setup panel becomes available if you have selected the Control
policy for mobile devices option in the policy.
1. Choose the sub-features you want to specify settings for in the policy you are working on.
These sub-features might be, for example, restrictions, Exchange email settings or Wi-Fi
settings.
2. Specify settings for each sub-feature as described on the following pages.
5.4.4.1 Configure Password Policy
A mobile device can be locked by the user or also remotely by you as Sophos Cloud administrator.
In order to be able to lock a device effectively, a password has to be set by the user. To ensure
that users do not set weak passwords, the following settings allow you to specify the prerequisites
a password must fulfill:
1. Password complexity:
The following choices are available:
■
PIN Passwords may only contain numbers; using repeated numbers or sequences (1234,
4444, 9876,...) is not allowed.
■
Alphabetic Passwords must contain characters between a-z or A-Z as well as numbers.
■
Complex Passwords must contain characters as well as numbers and at least one special
character (%, &, $,...).
■
None There are no restrictions, passwords may contain characters, numbers and/or special
characters.
2. Minimum Password length: The minimum number of digits or characters a password must
have.
3. Click Advanced for more options for password settings.
4. Maximum number of login attempts: The user can try to enter the password as many times
as specified here.
Warning: If the user has no more attempts to enter the password left, the device will wipe
itself. All data will be lost. The reason is that it is assumed that the device has been stolen. If
the password was just forgotten, you can unlock the device on the Device Profile page for a
mobile device. For more information, see Device Profile (page 20).
5. Maximum password age (days): After the period of time specified here the user will be asked
to change the password. The new password must not match the one that has been used
before.
31
Sophos Cloud
6. Maximum auto lock (minutes): Auto lock means that after a period of time the device will
lock itself, if there has been no user interaction. The user can unlock it by entering the password.
The actual value for the auto lock can be changed by the user, but it cannot exceed the period
of time specified here. To give an example: You can set the value to 15 minutes, but the user
can choose to set it to 5 minutes instead.
5.4.4.2 Configure Feature Restrictions
Feature restrictions allow disabling or hiding access to certain features on all mobile devices. Not
all restrictions can be enforced on all mobile platforms due to functionality differences between
iOS and Android:
■
Wherever restrictions are not available on all mobile platforms, an icon indicates the platform
availability. By hovering over the Android icon, one can get more information which Android
devices are supported.
■
Wherever restrictions are available on all platforms, no icons are shown.
The following features can be restricted for mobile devices:
1. App Store: If activated, the App Store can no longer be used on the device.
2. Camera: If activated, the camera can no longer be used on the device.
3. Taking screenshots: Usually mobile devices offer the user the possibility to take pictures of
the currently displayed screen contents. The user just needs to know some hot keys. If this
option is activated, the user will no longer be able to take screenshots on the device.
4. Native browser: If activated, the user will no longer be able to use the native browser (for
example Safari) for surfing the Internet.
5. Sending diagnostic data to device vendor: If activated, the device will no longer send
diagnostic data about app crashes to Apple or Samsung.
6. Backup to iCloud: If activated, cloud backup to iCloud will no longer be possible on the device.
7. Touch ID usage: Some devices offer fingerprint recognition. With this option its use can be
prevented.
8. Sharing docs from managed to unmanaged accounts or apps: Without this option enabled,
sensitive company data might be disclosed.
9. Sharing docs from unmanaged to managed accounts or apps: Without this option enabled,
malware or unwanted content might find its way into the company network.
10. Control center on lock screen: Without this option enabled, various settings such as Wi-Fi
or Bluetooth might be displayed on the lock screen. It is not necessary to know the password
and unlock the device in order to carry out changes of these settings.
11. Notifications on lock screen (e.g. SMS, email, calls,...): Without this option enabled,
messages or missed calls might be shown on the lock screen. It is not necessary to know the
password and unlock the device in order to read this information.
5.4.4.3 Configure Exchange Email Settings
The Exchange email settings listed in the right box under Selected Exchange email settings
(active) will be automatically set on the devices the policy applies to. No more manual configuration
is necessary on the devices. The user just needs to enter the Exchange password.
32
Help
Due to OS limitations, Exchange email settings can only be set on iOS devices and Samsung
SAFEv2+ Android devices.
1. To enter a new Exchange email setting, click Add. The section Settings opens.
2. Specify the following:
■
Server: Server address (e.g. mail.mycompany.com)
■
Use SSL: Check, if a secure connection (https://) is to be used. It must be configured on
the Exchange server in order to work.
■
Domain: Enter your domain name, if this is necessary for authentication at the Exchange
server.
■
Days to sync: Synchronization period that is used for the Exchange email settings.
■
Account information: You can set this to use the Email address and Exchange Login
as displayed for the user on their profile page (go to the Users & Devices > Users page
and click on the user). However, maybe some users want to check other or more email
accounts than specified there. Therefore there is a second option: To enter specific account
information valid for a specific user.
■
Exchange email Enter the specific email address here.
■
Exchange login Enter the specific Exchange user here.
3. Click Create.
The setting will be shown under Predefined Exchange Mail settings (not active) and will also
be available later for use in other policies.
4. Click the arrow to the right.
The setting will be shown under Selected Exchange Mail settings (active) and will be active
for the respective users as soon as the policy is applied.
5. If you need to make changes, enter them in the respective fields and click Update afterwards.
You can delete settings as well as add new ones. Just be aware that, if you change or delete
a setting that has been used in other policies, these policies will be affected.
5.4.4.4 Configure Wi-Fi Settings
The Wi-Fi settings listed in the right box under Selected Wi-Fi settings (active) will be automatically
set on the devices the policy applies to. No more manual configuration on the devices is necessary,
and the devices can connect automatically to the respective networks.
Wi-Fi settings that can only be applied to iOS devices are indicated with the iOS icon.
1. To enter a new Wi-Fi setting, click Add. The section Settings opens.
33
Sophos Cloud
2. Specify the following:
■
Network Name (SSID): SSID (e.g. MyCompanyWiFi)
■
Security Type: Select the security type used by the network.
■
Password: If the setting for the security type is different from None, enter the password
necessary to connect with the network.
■
Connect automatically: Select this, if you want the mobile devices to connect without
asking the user.
■
Hidden network: Check this option if the network cannot be found by devices when they
perform a scan for networks. This setting is necessary so that the device can connect, even
though the network is hidden.
■
Proxy: If a proxy is needed, either select Automatic and enter the URL of the proxy in the
input field that will be displayed, or select Manual to enter proxy server, proxy port and, if
needed, proxy authentication (checkbox, proxy user and password). If no proxy is needed,
just select None.
3. Click Create.
The setting will be shown under Predefined Wi-Fi settings (not active) and will also be available
later for use in other policies.
4. Click the arrow to the right.
The setting will be shown under Selected Wi-Fi settings (active) and will be active for the
respective users as soon as the policy is applied.
5. If you need to make changes, enter them in the respective fields and click Update afterwards.
You can delete settings as well as add new ones. Just be aware that, if you change or delete
a setting that has been used in other policies, these policies will be affected.
5.4.4.5 Configure Compliance Rules
Users might connect mobile devices to the company network that do not meet certain criteria
essential for security reasons. As administrator, you want to be notified, and maybe you also want
to exclude the devices from email receipt or even from network access. Enable the respective
checkbox on the left, if you want to get notified, and enable the respective checkboxes in the
columns on the right, if you also want to remove email or Wi-Fi settings.
1. Choose your settings for devices that are jailbroken or rooted. Jailbroken or rooted devices
are devices modified to allow extended access to OS functionality not intended by the originator.
This may expose a high security risk.
2. Choose your settings for devices that did not check in recently. A check-in synchronizes the
iOS built-in mobile device management (MDM) and the Sophos Mobile Control app on Android
with Sophos Cloud. This will be done each time the device restarts and every 24 hours (if the
device is not turned off).
3. Choose your setting for devices with an iOS version that is too low. This will be relevant for
example if there are known security issues in older iOS versions.
4. Choose your setting for devices with an iOS version that is too high. This might be relevant if
you use custom apps that have not been tested or are not running on a newer iOS version.
5. Choose your setting for devices with an Android version that is too low.
34
Help
6. Choose your setting for devices with an Android version that is too high.
7. Choose your setting for iOS devices with the Sophos Mobile Control iOS app that did not
synchronize recently. A sync synchronizes the Sophos Mobile Control app with Sophos Cloud.
It will be done each time the app is started and every 24 hours (if the app is active). Data
exchanged include model, OS version and jailbreak detection status.
8. Choose your setting for Android devices that allow the sideloading of apps. "Sideloading" is
a setting on Android devices that, when activated, allows installing apps from sources other
than the Google Play Store (.apk-files, other store apps). Installing apps from sources other
than the Google Play Store exposes higher security risks.
5.5 Active Directory
On this page, you can view the status of Active Directory synchronization, the number of users
and groups imported from Active Directory, and the time of the last synchronization with Active
Directory.
The page also provides a download link for the Sophos Cloud Active Directory synchronization
utility.
The synchronization status shows whether the last synchronization was successful or whether
any warnings or errors occurred during the synchronization.
You can view Active Directory synchronization alerts on the Dashboard. You can view Active
Directory synchronization events on the Reports > Events page.
About Active Directory synchronization
Active Directory synchronization allows administrators to implement a service that maps users
and groups from the Active Directory to the Cloud console.
To synchronize with Active Directory, you need to download and install the Sophos Cloud Active
Directory Sync utility. The utility works as follows.
■
It synchronizes only active users. It doesn't synchronize other Active Directory objects, such
as disabled users, organizational units (OUs), computers, or printers.
■
It supports automated, one-way synchronization from the Active Directory to the Cloud console.
It does not support two-way synchronization between the Cloud console and Active Directory.
You cannot edit groups imported from Active Directory. For users imported from Active Directory:
■
You cannot modify their name, email, or Exchange login, or add or remove associated
groups or logins managed by Active Directory.
■
You can add or remove groups or logins that are not managed by Active Directory.
■
It can run automatically on a regular basis, as set up by the Cloud administrator.
■
It doesn't duplicate existing users if the user Cloud email or login corresponds to the user
Active Directory email or login (for example, users created automatically after protecting a
computer). If a match is found, then the existing user is updated with any new or changed
information. For example, an email address from Active Directory may be added to an existing
user in the Cloud console. Any information added or updated from the Active Directory cannot
be edited in the Cloud console.
35
Sophos Cloud
■
It supports only the Active Directory service.
■
It can synchronize with one Active Directory server.
■
It doesn't help you to deploy the Cloud agent software to your users' devices—use other
methods of deploying with Active Directory.
Set up synchronization with Active Directory
Before you can set up synchronization, you need .NET Framework 4 on the computer where you
will run the Active Directory Sync utility.
To set up synchronization with Active Directory:
1. Click the download link on the Active Directory page to download the Sophos Cloud Active
Directory Sync utility, and then run the setup wizard. Specify the information requested in the
wizard.
2. To open the Sophos Active Directory Synchronization dialog box, on the last page of the
setup wizard, select the Launch Sophos Cloud Active Directory Sync checkbox and click
Finish.
Alternatively, go to the Windows Start menu > All Programs > Sophos > Cloud > AD sync.
3. In the Sophos Active Directory Synchronization dialog box, enter the credentials of the
Active Directory user account that you want to use for the synchronization.
4. Choose the frequency of synchronization.
If you want to synchronize manually from the dialog box and don't want the synchronization
to run automatically on a regular basis, select Never.
5. To synchronize immediately, click Sync Now. The Active Directory users and groups are
imported from the Active Directory to the Cloud console.
To stop the synchronization in progress, click Abort.
5.6 Enable iOS Support
If you want to protect mobile iOS devices, a valid Apple Push (APNS) Certificate is necessary for
communication between Sophos Cloud and the iOS devices.
If your APNS certificate is about to expire, renew it as soon as possible so that communication
between Sophos Cloud and your iOS devices will be possible at all times.
For Android devices, no APNS certificate is required. If you are only operating Android devices,
you do not have to configure the APNS certificate here.
5.6.1 APNS Certificate Creation
Before you can enroll Sophos Cloud on iOS mobile devices, you need a valid Apple Push (APNS)
Certificate. You can get it online in the Apple Push Certificate Portal, the following steps show
you how:
1. Click the heading Download Certificate Signing Request and click the button Download,
save the .csr file on your computer.
36
Help
2. Click the heading Create/Renew APNS Certificate. If your company does not yet have an
Apple ID that will be also available in the future, create a new one and store the credentials
in a safe place where your colleagues can access it once it is needed again to renew the
certificate. Certificates expire after one year.
3. Click the link Apple Push Certificate Portal, sign in with the Apple ID and upload the certificate
signing request (.csr) you prepared in the first step. Download the APNS certificate (.pem file)
and save it on your computer.
4. Click the heading Upload APNS Certificate. Enter the Apple ID you used. This will help you
to remember which Apple ID you need to log in with once your certificate is about to expire.
5. Browse for the APNS certificate file that you saved on your computer (.pem) and click the
button Upload.
5.6.2 APNS Certificate Renewal
If your APNS certificate is about to expire, renew it as soon as possible in the Apple Push Certificate
Portal. You have got to log in with the Apple ID that you used to create the certificate.
1. Click the heading APNS Certificate Status. Here you find various information about the
certificate, for example the Apple ID you used to create the certificate. If you do not have
access to this account anymore, you cannot renew your certificate. This means that you need
to create and upload a new APNS certificate instead and re-enroll all of your devices. For more
information, please refer to the note below.
2. Click the heading Create/Renew APNS Certificate, follow the link provided to the Apple Push
Certificate Portal and log in. If you have got more than one certificate in your overview, then
identify the one that you need to renew with help of the information from the previous step.
3. In the Apple Push Certificate Portal, click Renew and download the certificate file (.pem).
4. Click the heading Upload APNS Certificate. The Apple ID is already filled in. (You just need
to change it if you failed to access your old account and used a new Apple ID.) Browse for the
APNS certificate file that you saved on your computer (.pem) and click the button Upload.
Note: If you cannot renew your certificate for any reason, you will have to create and upload a
new APNS certificate. However, this means that you have got to re-enroll all of your devices.
There are two ways to do so:
■
■
Under Users & Devices > Devices delete the devices from Sophos Cloud. Then send a new
deployment mail to your users so that they will re-enroll their devices. As the app still remains
installed, it is not necessary to do the first step described in the deployment mail.
Alternatively, the users can also delete the Sophos Cloud profile from their devices manually
and repeat the configuration as described in the deployment mail. They can even take their
old deployment mail, if they still have it. As a result, the device will change its state from
Decommissioned by user back to Managed.
5.7 Beta Assignment
The Beta Assignment page is only displayed if beta software is available for you to try.
You only use Beta Assignment if you are trying beta software on endpoint computers.You
do not use beta assignment for servers.
On this page, you can select the computers you want to install beta software on.
37
Sophos Cloud
You can only use this page if you have signed up for a Sophos Cloud beta progam. You do this
at the Account > Beta Programs page.
A list of your protected computers is displayed in the Available list.
Note: If you want to install the beta software on computers that are not in the list (because they
are not yet protected with Sophos Cloud), go to the Downloads > Installers page, download the
beta installer and run it on the computers.
You select computers as follows:
1. Find the computers you want in the Available list.
Tip: If you have many computers, you can filter the list to make it easier to find the ones you
want. To do this, enter partial computer names in the field below the list.
2. Select computers and use the arrow to move them to the Selected list. Click Apply.
The Sophos Cloud beta agent software will be installed on the selected computers after a few
minutes (or longer, depending on your connections).
You still need to enable the beta features. Go to the Users & Devices > Policies page, set up a
policy that includes the new features and apply it to users who use the computers you just selected.
38
Help
6 Servers
The Servers pages let you do tasks related to protecting your servers.
These pages are only available if you have installed the Sophos Cloud agent software on computers
running a server operating system.
6.1 Servers
On this page you can view and manage your protected servers.
Note: This page displays only servers on which you have installed the Sophos Cloud agent
software. To install the software, download and run the installer available on the Downloads >
Installers page.
The sections below tell you about the servers list and also how to:
■
View full details of a server.
■
Delete a server.
About the servers list
The current servers are listed with details including:
■
IP Address.
■
Operating System.
■
Last Active time. This is the last time that the server contacted Sophos.
■
Last Updated time. This is the last time that the Cloud agent software was updated.
To search for a server, enter the name in the search field above the list.
To display different types of server, click the dropdown arrow on the Show filter above the list.
View full details of a server
For details of a server, click on its entry in the list to open the server profile.
For more information, see Server profile (page 40).
Delete a server
To delete a server, click on its entry in the list to open the server profile. You can delete the server
there.
For more information, see Server profile (page 40).
39
Sophos Cloud
6.1.1 Server profile
On this page, you can see server details and manage the server.
The page includes:
■
Server details.
■
Actions available on the server.
■
An Events tab.
■
An Exclusions tab.
Server details
In the left-hand pane, you can see the server details. You can also make changes as follows:
■
Policy. The policy applied to the server (by default, Base policy) is displayed here. Click on
the policy name to view and edit the policy.
Note: Editing the policy affects all servers to which this policy is applied.
Actions
The Actions buttons are in the upper right of the page.
■
Update Now: Updates the Sophos Cloud software on the server.
■
Scan Now: Scans the server immediately.
Note: The scan may take some time. When complete, you can see a "Scan 'Scan my computer'
completed" event and any successful cleanup events on the Reports > Events page. You
can see alerts about unsuccessful cleanup in the Action Center.
If the server is offline, it will be scanned when it is back online. If a computer scan is already
running, the new scan request will be ignored and the earlier scan will carry on.
■
Lock Down: Prevents unauthorized software from running on the server.
This option makes a list of the software already installed on the server, checks that it is safe,
and allows only that software to run in future.
Note: If you need to make changes on the server later, either unlock it or use the Server
Lockdown preferences in the server policy.
■
Unlock: Unlocks the server. This button is available if you have previously locked down the
server.
■
Delete: Deletes the server from the Sophos Cloud console. This does not uninstall the Sophos
Cloud agent software, but the server will no longer synchronize with the console.
Note: If you deleted the server accidentally, re-install the Sophos Cloud agent software to
get it back.
40
Help
Events
This displays events (such as threats or policy non-complicance) detected on the server.
Exclusions
This displays a list of files or applications excluded from scanning for threats.
By default, Sophos Cloud automatically uses vendor-recommended exclusions for certain
widely-used applications. You can also set up your own exclusions in your policy. See Configure
Malware Protection (page 44).
Note: Some automatic exclusions shown in the list might not work on servers running Windows
Server 2003.
6.2 Policies
Policies define the security measures, such as malware protection, for your servers.
On the Policies page of Sophos Cloud, you can view all existing policies, add new policies, edit
policies, and test policies.
The sections below tell you how policies work and also how to:
■
View and manage a policy (page 25).
■
Add a policy (page 26).
■
Edit a policy (page 26).
How policies work
This section tells you how Sophos Cloud policies work.
What is the base policy?
The Base Policy is the default policy and is always available. This policy has been set up for you
and is already configured with the Sophos best practice settings. It applies to all servers initially.
You can edit the settings in the Base Policy. However, you cannot disable or delete it, even if you
create other policies.
If you wish, you can use only the Base Policy. You do not have to create any others. You can
even use the Base Policy without changing any settings -- unless you want to enable optional
features or customize which files are excluded from scanning.
Tip: If you made any changes in the Base Policy and want to revert it to its original state, click
the Reset button
What are additional policies?
Additional policies are policies that you create. You can use them to apply different settings to
different servers.
Your additional policies override the settings in the Base Policy.
Additional Policies can be disabled, and, optionally, be set to expire after a certain point in time.
41
Sophos Cloud
Any policy can be cloned to quickly create a variation based on the original.
What is in each policy?
A server policy includes settings for one or more of the features that you have licensed, such as
malware protection. It also lets you specify which servers the policy applies to, whether the policy
is enabled, and whether it expires.
Each policy contains all the settings for a feature. For example, you cannot split up the malware
protection settings across several different polices in such a way that a user gets one setting from
one policy and another setting from a different policy.
How do you use additional policies?
The order in which you arrange the policies (the order shown on the Policies page) determines
their priority.
To determine the policy to apply for a given server, the system looks through the policies from
the top down. The first policy in which the server is included, and that is currently enabled, will
be applied.
To sort policies, grab a policy and drag it to the position where you want to insert it. Arrows and
a green bar indicate when you have reached a position where you can drop the policy.
Tip: You can check the policy settings applied to a specific server by entering that server into
the search field in the upper right corner of the policies window. Gray icons indicate that settings
do not apply.
View and manage a policy
To view and manage a policy, select the policy in the list.
In the left pane, icons are displayed against its entry in the list. In the right pane, there is a summary
of the policy and action buttons.
Key to the policy icons
The following table provides an overview of icons and their meaning:
Icon
Meaning
The policy is active.
The policy is disabled.
The policy is a scheduled policy and active.
The policy is a scheduled policy and disabled.
This is the Base Policy. The lock indicates that the
Base Policy can neither be deleted nor disabled.
42
Help
Icon
Meaning
Number of servers the policy is applied to.
Search box
Insert the name of a server into the search box and the list of policies will show which policies
apply to the server you searched for. Used Indicates that a policy applies.
Policy Summary
Click a policy in the Policies list to see its summary. The summary provides information on the
policy capabilities, i.e., which protection is activated, and on the expiration date if applicable.
Actions
There are action buttons in the right pane, under the Policy Summary. The actions available
depend on the policy you select.
■
Enable or Disable Enabling a disabled policy makes it active so that it is applied in your
network.
Note: You can disable any active policy except for the Base Policy.
■
Edit Click this button to edit the settings of a policy. You can change every aspect of the
configuration.
■
Clone This is useful if you need a similar policy and do not want to start configuring from
scratch.
■
Delete You can delete any policy except for the Base Policy. When you try to delete an active
policy, you need to confirm a warning message first.
■
Reset This is only available with the Base Policy. You can reset the Base Policy to its initial
configuration if you want to revert changes made on that policy.
Action buttons that cannot be applied on a certain policy are grayed out.
Add a policy
To add a new policy, do the following:
1.
2.
3.
4.
Click the Add button above the Policies list.
Enter a name for the new policy into the text field. Click Next.
Select servers the policy should apply to. Click Next.
Now, configure the features in each panel, clicking Next after each step to open the following
panel.
Note: For information on specific features, see see Configure Malware Protection (page 44)
and Configure Server Lockdown (page 49).
43
Sophos Cloud
5. Enable or disable the policy. This option is useful if you want to preconfigure the policy now
and activate it later. You can also set an expiry date if the policy needs to be deactivated
automatically in future.
6. When you have finished setting options, click Save.
Edit a policy
To edit a policy:
1. In the policies list, click on a policy to see a summary. In the Policy Summary in the right
pane, click Edit. Alternatively, double-click the policy name in the list.
You see panels that show the current settings for the policy (if settings have been entered).
2. Select the panel for the feature that you want to edit.
Tip: You can open panels in any order to edit them.
3. When you finish editing a panel, either click Next to see the following panel or simply click
directly on another panel.
4. When you have finished your edits, click Save.
6.2.1 Configure Malware Protection
Malware protection keeps you safe from malware, risky file types and websites, and malicious
network traffic.
The default malware protection settings provide the best protection you can have without complex
configuration. For details, see Default settings (page 44).
If you want to change the settings, you can configure:
■
Real-time scanning. (page 44)
■
Scheduled scanning. (page 45)
■
Exclusions from scanning. (page 45)
Default settings
The default settings offer:
■
Detection of known malware.
■
In-the-cloud checks to enable detection of the latest malware known to Sophos.
■
Proactive detection of malware that has not been seen before.
■
Automatic cleanup of malware.
■
Automatic exclusion of activity by known applications from scanning. See Knowledgebase
Article 121461.
Real-time scanning
Real-time scanning scans files as users attempt to access them, and denies access unless the
file is clean. You can configure scanning for different parts of the system.
44
Help
You can select these options for scanning local files and network shares:
■
Local and remote files. If you select “Only local”, files in network shares will not be scanned.
■
On read. This scans files when you open them.
■
On write. This scans files when you save them.
You can select these options for scanning internet resources:
■
Scan downloads in progress.
■
Block malicious websites. This denies access to websites that are known to host malware.
You can select these additional options:
■
Automatically exclude activity by known applications. This prevents Sophos Cloud from
scanning files used by certain widely-used applications. For a list of these applications, see
Knowledgebase Article 121461. You can manually exclude activity by other applications by
using the Additional scanning exclusions (page 45) options.
■
Detect malicious behavior (HIPS). This protects against threats that are not yet known. It
does this by detecting and blocking behavior that is known to be malicious or is suspicious.
■
Use Live Protection. This checks suspicious files against the latest malware in the SophosLabs
database.
■
Automatically submit malware samples to SophosLabs. This sends a sample of detected
malware to Sophos for analysis.
Scheduled scanning
Scheduled scanning performs a scan at a time or times that you specify.
This form of scanning is enabled by default for servers.
You can select these options:
Enable scheduled scan. This lets you define a time and one or more days when scanning should
be performed. Note: The scheduled scan time is the time on the endpoint computers (not a UTC
time).
Scan inside archive files. If you select this option, archives are scanned during scheduled scans.
Note that this may increase the system load and make scanning significantly slower.
Additional scanning exclusions
Some applications have their activity automatically excluded from real-time scanning. See
Knowledgebase Article 121461.
You can also exclude other items or activity by other applications from scanning.
For example, you might do this because a database application accesses many files, and so
triggers many scans and impacts a server's performance.
Tip: To set up exclusions for an application, you can use the option to exclude processes running
from that application. This is more secure than excluding files or folders.
1. In the Exclusion for drop-down list, select a type of item to exclude (file or folder, process,
website, or potentially unwanted application).
45
Sophos Cloud
2. In the Value text field, specify the item or items you want to exclude. The following rules apply:
■
■
File or folder. You can exclude a drive, folder or file by full path. You can use wildcards
and variables. Examples:
■
Folder: C:\programdata\adobe\photoshop\ (add a slash for a folder)
■
Entire drive: D:
■
File: C:\program files\program\*.vmg
Process. You can exclude any process running from an application. This also excludes
files that the process uses (but only when they are accessed by that process). If possible,
enter the full path from the application, not just the process name shown in Task Manager.
Example:
■
%PROGRAMFILES%\Microsoft Office\Office 14\Outlook.exe
Note: To see all processes or other items that you need to exclude for an application, see
the application vendor's documentation.
Note: You can use wildcards and variables.
■
■
Website. Websites can be specified as IP address, IP address range (in CIDR notation),
or domain. Examples:
■
IP address: 192.168.0.1
■
IP address range: 192.168.0.0/24 The appendix /24 symbolizes the number of bits in
the prefix common to all IP addresses of this range. Thus /24 equals the netmask
11111111.11111111.11111111.00000000. In our example, the range includes all IP
addresses starting with 192.168.0.
■
Domain: google.com
Potentially Unwanted Application. Here, you can exclude applications that are normally
detected as spyware. Specify the exclusion using the same name under which it was
detected by the system. Find more information about PUAs in the Sophos Threat Center.
3. For File or folder exclusions only, in the Activate for drop-down list, specify if the exclusion
should be valid for real-time scanning, for scheduled scanning, or for both.
4. Click Create. The exclusion is displayed on the scanning exclusions list.
Tip: To edit an exclusion later, select it in the exclusions list and click Update.
Note: For full details of variables you can use, see Exclusions wildcards and variables (page
46).
6.2.1.1 Exclusions wildcards and variables
When you specify the files, folders or processes you want to exclude from scanning, you can use
wildcards or variables.
Note: Some wildcards or variables cannot be used for exclusions from real-time scanning on
Windows Server 2003. If you upgrade to Windows Server 2008, you can use all of them.
46
Help
Wildcards
You can use the wildcards shown in this table.
Note: Only * and ? can be used on Windows Server 2003.
Token
Matches
Comments
* (Star)
Zero or more of any character except \ or /
** (Star Star)
Zero or more of any character, but always bracketed This means that foo**bar
by \ or / characters. If it matches zero characters, it matches:
also only matches a single \ or / character.
foo/bar
foo/xyz/bar
foo/uvw/xyz/bar
but NOT foobar or fooxyzbar.
\ (Backslash)
Either \ or /
/ (Forward slash)
Either / or \
? (Question mark)
One single character, unless at the end of a string
where it can match zero characters.
. (Period)
A period OR the empty string at the end of a
filename, if the pattern ends in a period and the
filename does not have an extension.
Note that:
*.* matches all files
*. matches all files without
an extension
"foo." matches "foo" and"
"foo."
Examples
Here are some examples of the use of wildcards.
Expression
Interpreted as
Description
foo
**foo
Exclude any file named foo (in any location)
foo\bar
**foo\bar
Exclude any file named bar in a folder named foo (in any
location).
47
Sophos Cloud
Expression
Interpreted as
Description
*.txt
**\*.txt
Exclude all files named *.txt (in any location).
C:
C:
Exclude drive C: from scanning (including the drive's master
boot record).
C:\
C:\
Exclude all files on drive C: from scanning (but scan the drive's
master boot record).
C:\foo\
C:\foo\
All files and folders underneath C:\foo, including C:\foo itself.
C:\foo\*.txt
C:\foo\*.txt
All files or folders contained in C:\foo named *.txt
Variables for exclusions
You can use variables when you set up scanning exclusions.
The table below shows the variables and examples of the locations they correspond to on each
operating system.
Variable
Windows Server 2008 + later
Windows Server 2003
%allusersprofile%
C:\ProgramData
C:\Documents and Settings\All
Users
%appdata%
C:\Users\*\AppData\Roaming
C:\Documents and
Settings\*\Application Data
Note: Does not work for real-time
scanning.
%commonprogramfiles%
C:\Program Files\Common Files
C:\Program Files\Common Files
%commonprogramfiles(x86)%
C:\Program Files (x86)\Common
Files
C:\Program Files (x86)\ Common
Files
%localappdata%
C:\Users\*\AppData\Local
C:\Documents and Settings\*\Local
Settings\Application Data
Note: Does not work for real-time
scanning.
%programdata%
48
C:\ProgramData
C:\Documents and Settings\All
Users\Application Data
Help
Variable
Windows Server 2008 + later
Windows Server 2003
%programfiles%
C:\Program Files
C:\Program Files
%programfiles(x86)%
C:\Program Files (x86)
C:\Program Files (x86)
%systemdrive%
C:
C:
%systemroot%
C:\Windows
C:\Windows
%temp% or %tmp%
C:\Users\*\AppData\Local\Temp
C:\Documents and Settings\*\Local
Settings\Temp
Note: Does not work for real-time
scanning.
%userprofile%
C:\Users\*
C:\Documents and Settings\*
%windir%
C:\Windows
C:\Windows
6.2.2 Configure Server Lockdown
Server Lockdown prevents unauthorized software from running on servers.
To do this, Sophos makes a list of the software already installed, checks it is safe, and allows
only that software to run in future.
You lock down a server at its details page.
You can use the Server Lockdown preferences in a policy to customise the lockdown. For example,
you might want to add and run new software without unlocking the server.
The preferences let you:
■
Allow software to run and modify other files.
■
Block software.
Allow software to run and modify other files
This option lets you allow new software to run. It also lets you allow existing software (for example,
installers or updaters) to run and modify other applications.
You can specify files that are allowed, or a folder in which all the files are allowed.
Tip: You can specify a folder where you always download installers that you want to run on the
server.
1. Click Specify.
2. Select the type of item to allow (file or folder).
3. Enter the path of the file or folder.
49
Sophos Cloud
Note: You can use the wildcard *
4. Click Create.
Block software
This lets you block software that is currently allowed to run.
You can specify files that are blocked, or a folder in which all the files are blocked.
Tip: You can set up a blocked folder for applications, such as installers, that you want to make
available to other users on the network, but don’t want to run on your server.
1. Click Specify.
2. Select the type of item to block (file or folder).
3. Enter the path of the file or folder.
Note: You can use the wildcard *
4. Click Create.
50
Help
7 Reports
The report pages provide detailed reports about different Sophos Cloud topics.
7.1 Summary
This page gives statistics on users, computers, devices and servers managed by Sophos Cloud.
You can click the different categories to be directed instantly to the reporting page of the respective
topic.
7.2 Users
This page provides information on users of Sophos Cloud:
■
Users Number of users
■
Active Users who logged in at least once during the last two weeks.
■
Inactive 2+ weeks Users who did not log in for over two weeks.
■
Inactive 2+ months Users who did not log in for over two months.
■
Not Protected Unprotected users
Clicking on any of those categories opens a table below with more detailed information:
■
Name User name
■
Email Email address of the user
■
Online When the user has last logged in
■
Devices Deployment status of the user's devices
■
Logins Login name of the user
■
Groups Group membership of the user
Search, Export, and Print
At the top right of this page, a toolbar gives access to the following actions:
■
Search Enter a term to search for. By hitting Enter or clicking Refresh the table is drilled down
to results related to your search term.
■
Print You can print the current view. Clicking the Print button opens a printer-friendly view of
the current page and the printer dialog window of your operating system.
■
CSV You can export the current view as comma separated file. Clicking the CSV button opens
a dialog window to save the CSV file.
■
PDF You can export the current view as portable document file. Clicking the PDF button opens
a dialog window to save the PDF file.
51
Sophos Cloud
7.3 Servers
This page provides information on servers managed by Sophos Cloud:
■
Servers Number of registered computers
■
Active Servers that updated during the last two weeks
■
Inactive 2+ weeks Servers that did not update for over two weeks
■
Inactive 2+ months Servers that did not update for over two months
■
Not Protected Servers that have not yet had the Sophos cloud agent software installed.
Clicking on any of those categories opens a table below with more detailed information:
■
Name Name of the server
■
Online When the server last made contact
■
Real-time scan On: Real-time scan is enabled, Off: Real-time scan is disabled.
■
Last update When the server last updated
■
Last scheduled scan When the server last performed a scheduled scan
■
Alerts Numbers and types of outstanding alerts
Search, Export, and Print
At the top right of this page, a toolbar gives access to the following actions:
■
Search Enter a term to search for. By hitting Enter or clicking Refresh the table is drilled down
to results related to your search term.
■
Print You can print the current view. Clicking the Print button opens a printer-friendly view of
the current page and the printer dialog window of your operating system.
■
CSV You can export the current view as comma separated file. Clicking the CSV button opens
a dialog window to save the CSV file.
■
PDF You can export the current view as portable document file. Clicking the PDF button opens
a dialog window to save the PDF file.
7.4 Computers
This page provides information on computers managed by Sophos Cloud:
52
■
Computers Number of registered computers
■
Active Computers that updated during the last two weeks
■
Inactive 2+ weeks Computers that did not update for over two weeks
■
Inactive 2+ months Computers that did not update for over two months
■
Not Protected Computers that did not yet successfully install the Sophos cloud agent software.
Help
Clicking on any of those categories opens a table below with more detailed information:
■
Name Name of the computer
■
Online When the computer last made contact
■
Last user Last user that logged in to the computer
■
Real-time scan On: Real-time scan is enabled, Off: Real-time scan is disabled.
■
Last update When the computer last updated
■
Last scheduled scan When the computer last performed a scheduled scan
■
Alerts Numbers and types of outstanding alerts
Search, Export, and Print
At the top right of this page, a toolbar gives access to the following actions:
■
Search Enter a term to search for. By hitting Enter or clicking Refresh the table is drilled down
to results related to your search term.
■
Print You can print the current view. Clicking the Print button opens a printer-friendly view of
the current page and the printer dialog window of your operating system.
■
CSV You can export the current view as comma separated file. Clicking the CSV button opens
a dialog window to save the CSV file.
■
PDF You can export the current view as portable document file. Clicking the PDF button opens
a dialog window to save the PDF file.
7.5 Mobiles
This page provides information on mobile devices managed by Sophos Cloud:
■
Mobiles All registered mobile devices
■
Managed Mobile Devices under control of Sophos Cloud.
■
Unmanaged Mobile Devices not under control of Sophos Cloud.This covers Decommissioned
by user, Wiping and Wiped (see also below).
Devices that have not yet been enrolled will not appear in the list, they are unknown to Sophos
Cloud. The same is true for devices that have been deleted by you as administrator.
Clicking on any of those categories opens a table below with more detailed information:
■
Name Name of the device
■
OS Operating system
■
Last Active The time of the last check-in or synchronization that was performed.
■
User User name.
■
Compliance Compliance status
■
Management Status One of the following:
■
Managed: The device is under control, everything is fine.
53
Sophos Cloud
■
Decommissioned by user: The user removed the Sophos Cloud software from the device.
It is no longer under control.
■
Wiping: You initiated a wipe and the device is resetting itself to factory presets. All data will
be deleted.
■
Wiped: The device was reset to factory presets. It has lost connection to Sophos Cloud,
but remains in the list so that you can verify that it was wiped successfully. If the device
will be enrolled again, a new entry will be created for the device. You can safely delete the
old entry that lists the device as wiped.
■
Wipe failed: This is displayed in case the wipe failed for some reason. Please try again.
Search, Export, and Print
At the top right of this page, a toolbar gives access to the following actions:
■
Search Enter a term to search for. By hitting Enter or clicking Refresh the table is drilled down
to results related to your search term.
■
Print You can print the current view. Clicking the Print button opens a printer-friendly view of
the current page and the printer dialog window of your operating system.
■
CSV You can export the current view as comma separated file. Clicking the CSV button opens
a dialog window to save the CSV file.
■
PDF You can export the current view as portable document file. Clicking the PDF button opens
a dialog window to save the PDF file.
7.6 Peripherals
This page provides information on peripherals monitored by Sophos Cloud:
■
Peripherals Number of monitored peripherals
■
Allowed Allowed monitored peripherals
■
Read-only Monitored peripherals with read-only access by policy
■
Blocked Monitored peripherals that are blocked by policy
Clicking on any of those categories opens a table below with more detailed information:
54
■
Type Peripheral type
■
Model Peripheral model
■
ID Peripheral ID
■
Last computer The last computer where the peripheral was attached
■
Events Events triggered by the peripheral
■
Last user Last user who caused an event related to the peripheral
■
Last action Last action that was applied on the peripheral
■
When Time and date when the peripheral was last used
Help
Search, Export, and Print
At the top right of this page, a toolbar gives access to the following actions:
■
Search Enter a term to search for. By hitting Enter or clicking Refresh the table is drilled down
to results related to your search term.
■
Print You can print the current view. Clicking the Print button opens a printer-friendly view of
the current page and the printer dialog window of your operating system.
■
CSV You can export the current view as comma separated file. Clicking the CSV button opens
a dialog window to save the CSV file.
■
PDF You can export the current view as portable document file. Clicking the PDF button opens
a dialog window to save the PDF file.
7.7 Events
This page provides information about all events on devices monitored by Sophos Cloud.
Tip: If you want to see which of the events require your immediate action, go to the Dashboard
page and look in the Action Center (page 7).
Note: Generally, all events are shown straight away on the Events page. Events that require
your immediate action are categorized as alerts and are also shown on the Dashboard in the
Action Center. Some events are instantly categorized as alerts, others will be "promoted" to alerts
after a certain delay. As soon as an event becomes an alert, it will be displayed in the Action
Center. For more information about event types, see Event types (page 56).
Search: If you want to view events for a certain user, device, or threat name (for example,
"Troj/Agent-AJWL"), enter the name of the user, device, or threat in the search box.
Note: In this version of Sophos Cloud, you cannot search events for a file name, for example,
an executable file mentioned in the event.
Time range: Use the Time range slider to select the time period for which you want to view
events. You can view events that occurred in the past 90 days or less.
Event type and count: This table displays the count for each type of event over the specified
time range. It also allows you to display only certain categories or types of event. You do this by
selecting or clearing the checkboxes next to the event type categories, or by expanding the
categories and selecting or clearing the checkboxes next to the event types. By default, all events
are displayed.
Graph: The graph shows you at a glance the number of events that occurred per day.
Event table
The event table provides detailed information on events.
■
When: Time and date when the event occurred
■
Sev: Severity of the event
■
Event: Type of event
■
User: Source that caused the event, for example, the name of a user or system
55
Sophos Cloud
■
Device: Device that caused the event
Refresh, Reset, Print, and Export
At the top right of this page, a toolbar gives you access to the following actions:
■
Refresh: Refresh the page to display any new events that have been recorded since the page
was opened or last refreshed.
■
Reset: Restore the default settings. (By default, all events that occurred in the past 90 days
are displayed.)
■
Print: Send the current view of the report to the printer.
■
CSV: Export the current view as comma separated value (CSV) file.
■
PDF: Export the current view as portable document format (PDF) file.
7.7.1 Event types
Depending on the features included in your license, you may see all or some of the following
event types.
If a new event requires an action, an alert will be displayed on the Dashboard in the Action Center.
Go to the Action Center and select the checkbox next to the alert to see what actions are available.
For more information, see Action Center (page 7).
After you have taken an action or ignored the alert, it will no longer be displayed in the Action
Center, but the event will remain on the Events list.
Malware
Event type
Severity
Action
required?
Description
Malware detected
Medium
No
Malware has been detected on a device monitored
by Sophos Cloud. Sophos Cloud will attempt to
remove the threat. If successful, no alerts will be
displayed in the Action Center, and a "Malware
cleaned up" event will appear on the Events list.
Malware not cleaned up
High
Yes
The following events may be displayed for this event
type:
Manual cleanup required.
Computer scan required to complete cleanup.
Reboot required to complete cleanup.
Malware not cleaned up.
56
Help
Event type
Severity
Action
required?
Malware cleaned up
Low
No
Recurring infection
High
Yes
Threat removed
Low
No
Description
A computer has become reinfected after Sophos
Cloud attempted to remove the threat. It may be
because the threat has hidden components that
haven't been detected.
Runtime detections
Event type
Severity
Action
required?
Description
Running malware
detected
Medium
No
A program that was running on a computer and
exhibited malicious or suspicious behavior has been
detected. Sophos Cloud will attempt to remove the
threat. If successful, no alerts will be displayed in the
Action Center, and a "Running malware cleaned up"
event will appear on the Events list.
Running malware not
cleaned up
High
Yes
A program that was running on a computer and
exhibited malicious or suspicious behavior could not
be cleaned up. The following events may be
displayed for this event type:
Running malware requires manual cleanup.
Computer scan required to complete running
malware cleanup.
Reboot required to complete running malware
cleanup.
Running malware not cleaned up.
Running malware cleaned Low
up
No
Malicious activity
detected
Yes
High
Malicious network traffic, possibly headed to a
command-and-control server involved in a botnet or
other malware attack, has been detected.
57
Sophos Cloud
Potentially unwanted application (PUA)
Event type
Severity
Action
required?
Description
Potentially unwanted
Medium
application (PUA) blocked
Yes
Potentially unwanted application has been detected
and blocked.
Potentially unwanted
application (PUA) not
cleaned up
Yes
The following events may be displayed for this event
type:
Medium
Manual PUA cleanup required.
Computer scan required to complete PUA
cleanup.
Reboot required to complete PUA cleanup.
PUA not cleaned up.
Potentially unwanted
Low
application (PUA) cleaned
up
No
Policy Violations
58
Event type
Severity
Action
required?
Description
Policy non-compliance
Medium
Yes
An alert will be displayed in the Action Center if a
computer remains non-compliant for more than two
hours.
Policy in compliance
Low
No
Real-time protection
disabled
High
Yes
Real-time protection
re-enabled
Low
No
An alert will be displayed in the Action Center if
real-time protection has been disabled for a computer
for more than 2.5 hours.
Help
Web control
Event type
Severity
Action
required?
Description
Web policy events
Low
No
Web threat events
Low
No
See Web Reports (page 62) for detailed information
on how users are accessing sites, who is violating
policy, and which users have downloaded malware.
Severity
Action
required?
Updating
Event type
Computer or server out of Medium
date
Yes
Update succeeded
Low
No
Update failed
Low
No
Reboot recommended
Low
No
Reboot required
Medium
Yes
Event type
Severity
Action
required?
New computer or server
registered
Low
No
Computer or server
re-protected
Low
No
New computer or server
protected
Low
No
Description
Protection
Description
59
Sophos Cloud
Event type
Severity
Action
required?
Description
Failed to protect
computer or server
High
Yes
A computer has started installation of the agent
software but has not become protected for one hour.
Error reported
Low
No
Scan completion
Low
No
New logins added
Low
No
New users added
automatically
Low
No
Event type
Severity
Action
required?
Peripheral detected
Medium
Yes
Peripheral allowed
Low
No
Peripheral restricted to
read-only
Low
No
Peripheral blocked
Low
No
Severity
Action
required?
Peripherals
Description
Mobiles
Event type
New mobile device
enrolled
Mobile device outdated
60
Description
For information about alerts for mobile devices, see
Alerts for Mobile Devices (page 11).
Help
Event type
Severity
Action
required?
Description
Mobile device
decommissioned by user
Action for mobile device
failed
Action for mobile device
succeeded
Your APNS certificate has High
expired
Mobile Exchange settings
could not be applied
(missing account
information)
Action for mobile device
has been canceled
Your APNS certificate
was renewed
Low
ADSync
Event type
Severity
Action
required?
Description
Active Directory
synchronization error
High
Yes
An alert will appear in the Action Center if an Active
Directory synchronization error is not resolved
automatically for more than one hour.
Active Directory
synchronization
succeeded
Low
No
Active Directory
Medium
synchronization warning
No
61
Sophos Cloud
7.8 Web Reports
There are a number of reports that provide information on the web control feature of Sophos
Cloud. These provide information on how users are accessing sites, who is violating policy, and
which users have downloaded malware.
For each of these reports you can set the time range of the report and either print the information
or export to PDF or as a CSV file.
7.8.1 Blocked Categories
The Top Blocked Categories report provides information about which blocked categories your
users are attempting to visit most often. The pie chart shows the breakdown of the top categories,
and lists the percentage of attempted visits for each blocked category.
Blocked Categories table
The table on the Top Blocked Categories report provides more information on blocked categories.
For each of the categories in the table, it lists both the number of visits and how many unique
visitors attempted to visit sites in the category.
Manage Report Data
You can limit report data to a specific date range by entering a From: and To: date. Once you
have a date range specified you can:
■
Refresh: Update the data displayed in the report for the specified date range.
■
Print: Send a copy of the report to the printer.
■
CSV: Export a file of comma separated values (useful for importing to a spreadsheet or
processing in other ways).
■
PDF: Generate and download a PDF file of the report.
7.8.2 Warned Sites
The Top Warned report provides information about which categories that have been set to "Warn"
your users attempt to visit most often. The pie chart shows the breakdown of the top sites, and
lists the percentage of each that users have browsed to.
Top Warned table
The table on the Top Warned report provides more information on the warned sites. For each of
the sites, the table lists the number of warned users, how many users proceeded, and lists the
top five users that proceeded on to the site.
62
Help
Manage Report Data
You can limit report data to a specific date range by entering a From: and To: date. Once you
have a date range specified you can:
■
Refresh: Update the data displayed in the report for the specified date range.
■
Print: Send a copy of the report to the printer.
■
CSV: Export a file of comma separated values (useful for importing to a spreadsheet or
processing in other ways).
■
PDF: Generate and download a PDF file of the report.
7.8.3 Blocked Sites
The Top Blocked report provides information about which blocked sites your users are attempting
to visit most often. The pie chart shows the breakdown of the top sites, and lists the percentage
of visits for each of the top blocked sites .
Top Blocked table
The table on the Top Blocked report provides more information on blocked sites. For each of
the sites listed in the table, it lists both the number of visits and the top five users that have
attempted to visit each.
Manage Report Data
You can limit report data to a specific date range by entering a From: and To: date. Once you
have a date range specified you can:
■
Refresh: Update the data displayed in the report for the specified date range.
■
Print: Send a copy of the report to the printer.
■
CSV: Export a file of comma separated values (useful for importing to a spreadsheet or
processing in other ways).
■
PDF: Generate and download a PDF file of the report.
7.8.4 Policy Violators
The Top Policy Violators report provides information about users that are violating your web
control policy most often. This includes browsing to blocked sites and attempting to download
blocked file types. The pie chart shows the breakdown of the top users, and lists the percentage
of policy violations.
Policy Violators table
The table on the Top Policy Violators report provides more information the users violating policy
and their top violations. For each of the users in the table, it lists the number of visits that triggered
63
Sophos Cloud
a policy violation, and the top five violations for that user. The Top 5 Violations (Visits) section
shows the blocked category or file type, and how many times the user was blocked.
Manage Report Data
You can limit report data to a specific date range by entering a From: and To: date. Once you
have a date range specified you can:
■
Refresh: Update the data displayed in the report for the specified date range.
■
Print: Send a copy of the report to the printer.
■
CSV: Export a file of comma separated values (useful for importing to a spreadsheet or
processing in other ways).
■
PDF: Generate and download a PDF file of the report.
7.8.5 Malware Downloaders
The Top Malware Downloaders report provides information about users that are attempting to
download known malware most often. The pie chart shows the breakdown of the top users, and
lists the percentage of visits by each user.
Note: A visit includes both malware detection for files the user attempted to download, and visits
to high risk sites that are known to have hosted malware in the past.
Top Malware Downloaders table
The table on the Top Malware Downloaders report provides more information about the top
users attempting to download malware or visit High Risk sites. For each of the users in the table,
it lists the computer where the attempt happened, the number of visits, and the top five visits for
that user.
Manage Report Data
You can limit report data to a specific date range by entering a From: and To: date. Once you
have a date range specified you can:
64
■
Refresh: Update the data displayed in the report for the specified date range.
■
Print: Send a copy of the report to the printer.
■
CSV: Export a file of comma separated values (useful for importing to a spreadsheet or
processing in other ways).
■
PDF: Generate and download a PDF file of the report.
Help
8 Global Settings
The Global Settings pages are used to specify security settings for computers, files, websites or
applications. These settings apply to all your users and devices.
The pages displayed depend on the features included in your license.
Note: If you want to apply settings only to certain users, use the Policies pages instead.
8.1 Web Control Customizations
On this page, you can extend the website filtering provided by the web control feature in Sophos
Cloud. This page is not available if you do not have a web control license.
Use the website list on this page to manage URLs not categorized by Sophos, or to override the
default category. To customize control for specific websites, add them to this list. Tag them to
create groups of sites, like custom categories, that you can control in individual policies, or override
the Sophos category for a site to change it for all your users. The URLs listed in the website list
can be edited, or they can be deleted from the list.
To add a site to the website list:
1. Click Add.
The Add Site page is displayed.
2. Enter sites.
Entries in the website list can be single URLs, full domains, CIDR ranges, or even top level
domains.
3. Select Enable Tags to associate a tag with the sites you have entered.
Tags can be used when creating web control policies on the Users & Devices > Policies
page.
4. Select Override category to associate a specific category with the sites you have entered.
5. Enter text in the Comments text box.
It can be helpful to include information about tags you have created and categories you have
overridden for troubleshooting policy issues in the future.
6. Click Save.
Your entry will be added to the website list.
Once you have added sites to the website list, you can limit the view of what you see by clicking
Show Filters. Entering text in either Site, Tagged as, or Category limits the view of the website
list to only matching entries. To delete entries, select the checkbox to the right and click Delete.
8.2 Scanning Exclusions
On this page, you can exclude files, websites and applications from scanning for threats.
65
Sophos Cloud
For example, you might exclude activity by some commonly-used applications to reduce the
impact of scanning on performance.
Note: These exclusions will apply to all your users and devices. If you want them to apply only
to certain users, use the scanning exclusions in the policies instead.
1. In the Exclusion for drop-down list, select a type of item to exclude (file or folder, website, or
potentially unwanted application).
2. In the Value text field, enter the desired entry. The following rules apply:
■
■
File or folder. You can exclude a drive, folder or file by full path. For file title or extension
the wildcard * may be used, though *.* is not valid. Examples:
■
Folder: C:\programdata\adobe\photoshop\ (add a slash for a folder).
■
Entire drive: D:
■
File: C:\program files\program\*.vmg
Website. Websites can be specified as IP address, IP address range (in CIDR notation),
or domain. Examples:
■
IP address: 192.168.0.1
■
IP address range: 192.168.0.0/24
■
■
■
The appendix /24 symbolizes the number of bits in the prefix common to all IP addresses
of this range. Thus /24 equals the netmask 11111111.11111111.11111111.00000000.
In our example, the range includes all IP addresses starting with 192.168.0.
Domain: google.com
Potentially Unwanted Application. Here, you can exclude applications that are normally
detected as spyware. Specify the exclusion using the same name under which it was
detected by the system. Find more information about PUAs in the Sophos Threat Center.
3. For File or folder exclusions, in the Activate for drop-down list, specify if the exclusion should
be valid for real-time scanning, for scheduled scanning, or for both.
4. Click Create. The exclusion is displayed on the scanning exclusions list.
To edit an exclusion later, select it in the exclusions list and click Update.
8.3 Tamper Protection
On this page, you can configure tamper protection for all your servers and users' computers.
By default, users are kept from tampering with their protection settings via a tamper protection
password. You can enable, disable or configure this feature as follows:
■
Enable Tamper Protection. By default, tamper protection is enabled. You can disable this
feature by clearing this checkbox.
When tamper protection is enabled, a local administrator on a computer who does not know
the password will not be able to change settings for on-access scanning, suspicious behavior
detection settings of the Host Intrusion Prevention System (HIPS), Sophos Live Protection
(real-time lookup and updating service), or web protection (blocking access to malicious
66
Help
websites). They will also not be able to disable tamper protection or uninstall the Cloud agent
software.
If you want to enable a local administrator to perform these tasks, you must provide them with
the tamper protection password so that they can authenticate themselves with tamper protection
first. If they need to uninstall the software, they will need to disable tamper protection first.
■
Current password. By default, for security reasons, the characters of the tamper protection
password are displayed as asterisks.
■
Show. Displays the tamper protection password in legible form. Click Hide to mask it again.
■
Generate. Generates a new tamper protection password. Clicking the button opens a dialog
where you have to confirm with Generate. The new password is generated automatically and
is distributed to online computers immediately. Offline computers receive the password the
next time they connect to the internet.
67
Sophos Cloud
9 Downloads
The Downloads pages let you download Sophos software.
9.1 Installers
This page provides links where you can download the agent software installers for use on your
computer or on other computers.
Note: You cannot protect mobile devices by this method. Instead go to the Users page and send
users a setup link that enables them to enroll their mobile.
Before you start, check what operating systems you can protect with Sophos Cloud.
After downloading, you can:
■
Run the installer to protect the local computer.
■
Transfer the installer to other computers via memory stick or network share and run it on them.
■
Use automated software deployment tools such as System Center Configuration Manager
(SCCM) to run the installer on large numbers of computers.
Each user who logs in is added to the Cloud users list automatically. They are listed with full login
name, including the domain if available (for example, DOMAINNAME\jdoe).
Note: If there is no domain, and a user logs in to multiple computers, multiple user entries are
displayed for this user, e.g., MACHINE1\user1 and MACHINE2\user1. You can merge these
entries by deleting one of the entries and then assigning the login to the other (and renaming the
user, if required).
For more information, see Sophos Knowledgebase Article 119265.
68
Help
10 Account
The Account pages let you do tasks related to your Sophos Cloud account.
10.1 Administration
On this page, you can review your license details and usage, activate new or upgraded licenses,
change username or password, and manage administration accounts.
Review licenses and current usage
This section shows a table where information on your current license(s) is displayed. Each licensed
feature has a table row of its own with additional information.
■
License. The name of the license you purchased.
■
Usage. The number of users using this license.
Note: This number includes only users who have at least one device associated with them.
It may also include any devices that have Sophos software installed but do not yet have a user
associated with them.
■
Limit. The maximum number of users that can use this license. The limit depends on the
subscription.
■
Expiry. The date when the license expires.
■
License Type. There are different kinds of licenses available.
■
License No.. The license number.
This section also lets you do the following:
Apply Activation Code
This enables you to activate a new or upgraded license. Enter the Activation Key shown on the
License Schedule that Sophos has emailed you and click Apply.
Review End User License Agreement
Click this button to display the Sophos Cloud End User License Agreement in a separate window
for review. Optionally, you can print it by clicking the Print button.
Change your user login email address
In this section, you can change the email address you use for logging into Sophos Cloud.
Use only addresses you have access to, as for security reasons a confirmation link will be sent
to the new email address. As soon as you have confirmed that new address, you can use it to
log into Sophos Cloud. The old email address is no longer valid.
69
Sophos Cloud
Change your user login password
After entering your current and new password and clicking Update, a notification email will be
sent to your configured email address. The new password is immediately effective, so you can
log into Sophos Cloud with the new password. The old password is no longer valid.
Add or modify administrator accounts
By default, there is only one administrator account configured. You can create additional
administrator accounts here, modify them or delete them. They are completely independent from
user accounts, i.e. they can only be created here and will not show up under Manage > Users
and Groups. Note that administrators currently logged in cannot be deleted.
Change Sophos Support settings
In this section you select the types of support you want to receive.
Enable Remote Assistance enables Sophos support to access your Sophos Cloud instance
directly for 72 hours to help you. This option is disabled by default.
Note: You can also enable this option when you request support by clicking the Support and
Feedback icon at the top of the Sophos Cloud window.
Enable Partner Assistance enables your designated partner to access your Sophos Cloud portal
and to configure the Sophos Cloud service on your behalf. This option is disabled by default.
Note: If you do not enable partner assistance, your partner will only see high-level reporting
information such as services purchased and current usage figures.
10.2 Contact Details
On this page, you can review and edit the contact details associated with your account.
You can enter details for:
■
Your company.
■
The person at your company who is the primary contact for Sophos Cloud issues.
10.3 Partner Details
On this page, you can view details of the Sophos partner who is assigned to you.
If you do not have a partner assigned to you yet, this page tells you what to do.
10.4 Payment Methods
On this page you can manage the methods you use to pay for a Sophos Cloud subscription.
The page displays details of the credit card or cards you have registered and can use to pay for
your subscription. The card currently being used to pay is marked with the word "Active".
70
Help
Note: If you have not yet bought a subscription, the page displays a Buy Now button. You will
add credit card details during the purchasing process.
You can add or delete cards and change the card you pay with.
Add a credit card
Click Add new credit card and enter your details.
Note: If you want to start using this card to pay, click Pay with this card beside the card details.
The card is then marked as "Active".
Delete a credit card
To delete a credit card, click Delete next to the card details.
Change the card you pay with
To change the card you pay with, find the card you want and click Pay with this card next to the
card details.
10.5 Statements
On this page, you can view statements for your Sophos Cloud account.
To view statements:
1. Enter the start and end dates of the period for which you want to view statements. Click Submit.
A list of statements is displayed.
2. To view full details of a statement in PDF form, click View next to a statement. To download
a copy, click Download.
10.6 Join The Beta Program
The Join the Beta Program page is only displayed when beta software is available for you
to try.
You can sign up to take part in the Sophos Cloud Version 3 beta program. This allows you to
install a beta version on selected servers and try out the new features.
Just follow these instructions.
Sign up
On the Account > Beta Programs page, tick the checkbox to accept the Sophos Beta End User
License Agreement.
To use the beta features, you now need to install beta agent software on servers and apply a new
policy.
71
Sophos Cloud
Install the beta software
You install the beta software as follows.
Note: If you already have the Cloud agent on the server, these steps upgrade it to the beta
version.
1. Go to the Downloads > Installers page.
2. Click on the Windows installer to download it.
Note: There is no special "beta" installer. The regular Windows installer has been updated
to give you new features, as long as you have signed up.
3. Run the installer to install the Cloud agent.
You can run the installer on this computer, transfer it to other computers and run it there, or
use your own tools to install it on multiple computers.
Your server or servers will now be put in a special section in the Cloud console and will have a
server-specific policy applied.
Tip: When the beta program ends, servers will be upgraded to the full release version.
Check out the new features
1. Log on to the Cloud console. You should see a new Servers link in the main menu.
2. Click Servers. Your servers are now listed and managed in this new section.
3. Click on a server to see its details page. This shows you:
■
Events reported on the server (updates, threats detected etc.)
■
Exclusions. These are files excluded from scanning.
■
The policy applied to the server.
4. In the Policies pane, click Base policy to look at the policy details.
5. In the Base policy, you can see the default settings for protection from malware. By default,
files needed for your server to run properly have already been excluded from scanning for
you.
6. If you want to customize the files excluded from scanning, open Scanning Exclusions. You
can add or remove files or applications.
Note: The changes will apply to all servers covered by the policy.
You can also set up more policies for your servers.
Set up a policy
1. Go to the Servers > Policies page.
2. Click Add. Follow the steps to enter the policy settings.
In the settings, ensure you apply the policy to the servers where you installed the beta software.
72
Help
11 Supported Web Browsers
The following browsers are currently supported:
■
Microsoft Internet Explorer 10 and 11.
■
Google Chrome.
■
Mozilla Firefox.
■
Apple Safari (Mac only).
We recommend that you install or upgrade to a supported version in the above list and that you
always run an up-to-date version. We aim to support the latest version and previous version of
Google Chrome, Mozilla Firefox, and Apple Safari. If an unsupported browser is detected you will
be redirected to https://cloud.sophos.com/unsupported.
73
Sophos Cloud
12 Contact Sophos Support
Get help
To get help from Sophos Support, click the Support link on the top right of the user interface (page
6), select I need help!, fill in the form, and click Send. Please be as precise as possible for
Support to be able to help you effectively. Support will contact you within 24 hours.
Optionally, you can also select the Enable Remote Assistance checkbox. This enables Support
to directly access your Sophos Cloud instance to be better able to help you.
Note: If you selected Remote Assistance, this function is only going to be enabled when you
click Send. Remote Assistance will automatically be disabled after 72 hours. You can, however,
disable it any time on the Account > Administration > Change Sophos Support settings page.
For more information, see Change Sophos Support settings (page 70).
Submit feedback
To submit feedback or a suggestion to Sophos Support, click the Support link on the top right of
the user interface (page 6), select I have a suggestion or feedback, fill in the form, and click
Send.
You can also find technical support for Sophos Cloud by:
74
■
Visiting the SophosTalk community at community.sophos.com/ and searching for other users
who are experiencing the same problem.
■
Visiting the Sophos support knowledgebase at www.sophos.com/en-us/support.aspx.
Help
13 Legal notices
Copyright © 2013–2015 Sophos Limited. All rights reserved. No part of this publication may be
reproduced, stored in a retrieval system, or transmitted, in any form or by any means, electronic,
mechanical, photocopying, recording or otherwise unless you are either a valid licensee where
the documentation can be reproduced in accordance with the license terms or you otherwise have
the prior permission in writing of the copyright owner.
Sophos, Sophos Anti-Virus and SafeGuard are registered trademarks of Sophos Limited, Sophos
Group and Utimaco Safeware AG, as applicable. All other product and company names mentioned
are trademarks or registered trademarks of their respective owners.
75


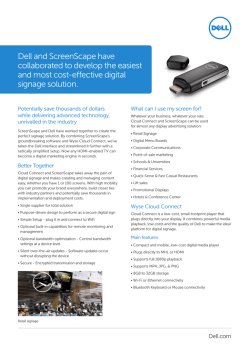
© Copyright 2026