
User Guide - Veesus Ltd
Arena4D
User Guide
Software Version 1.18.0
29/01/2015
Arena4D – User Guide
Table of Contents
1 Introduction.........................................................................................................................6
1.1 About...........................................................................................................................6
1.2 Installation...................................................................................................................6
1.2.1 Windows.............................................................................................................. 6
1.2.2 Mac OSX & Linux................................................................................................ 6
1.3 License........................................................................................................................6
2 Getting Started................................................................................................................... 7
2.1 Screen Layout.............................................................................................................7
2.1.1 Project Tree......................................................................................................... 7
2.1.2 View Window....................................................................................................... 8
2.2 Local Viewer............................................................................................................... 9
2.3 System Settings.......................................................................................................... 9
2.3.1 Angle Precision..................................................................................................10
2.3.2 AutoSave........................................................................................................... 10
2.3.3 Background Colour............................................................................................10
2.3.4 Data Processing Folder.....................................................................................10
2.3.5 Elevation Model................................................................................................. 10
2.3.6 Font Foreground Colour.................................................................................... 10
2.3.7 Font Background Colour................................................................................... 10
2.3.8 Font Size........................................................................................................... 10
2.3.9 Language...........................................................................................................10
2.3.10 Measurement Precision...................................................................................10
2.3.11 Point Render Quality....................................................................................... 10
2.3.12 Paper Size....................................................................................................... 11
2.3.13 Plumb Line Precision....................................................................................... 11
2.3.14 Snapshot Folder.............................................................................................. 11
2.3.15 Startup View Position.......................................................................................11
2.3.16 Warn On Errors................................................................................................11
2.3.17 Watermark Image............................................................................................ 11
2.3.18 Watermark Scale............................................................................................. 11
2.3.19 Width Precision................................................................................................11
2.4 Project Manager........................................................................................................11
2.4.1 Repository..........................................................................................................11
2.5 Coordinates...............................................................................................................12
2.6 Overlays....................................................................................................................12
2.6.1 Anti-Aliasing.......................................................................................................12
2.6.2 Compass........................................................................................................... 12
2.6.3 Crosshairs......................................................................................................... 12
2.6.4 Cursor Location................................................................................................. 12
2.6.5 Eye Location......................................................................................................12
2.6.6 Globe................................................................................................................. 12
2.6.7 Globe Transparency.......................................................................................... 13
2.6.8 Messages.......................................................................................................... 13
2.6.9 Open Street Map............................................................................................... 13
2.6.10 Place Names................................................................................................... 13
2.6.11 Scale Bar......................................................................................................... 13
2 of 47
Arena4D – User Guide
2.6.12 Sky...................................................................................................................13
2.6.13 Sunlight............................................................................................................13
2.6.14 Viewpoints....................................................................................................... 13
2.6.15 Watermark....................................................................................................... 13
2.6.16 Wireframe........................................................................................................ 13
2.6.17 World Map....................................................................................................... 13
2.7 Keyboard Shortcuts.................................................................................................. 13
2.8 Mouse Settings......................................................................................................... 14
3 Navigation........................................................................................................................ 15
3.1 Navigation & Controls............................................................................................... 15
3.1.1 Align View.......................................................................................................... 16
3.1.2 Nudge View....................................................................................................... 16
3.1.3 Rotate View....................................................................................................... 16
3.1.4 Top Down...........................................................................................................16
3.2 Orthogonal View....................................................................................................... 16
4 Data Objects.................................................................................................................... 17
4.1 Adding/Removing Data............................................................................................. 17
4.1.1 File Open........................................................................................................... 17
4.1.2 Data Menu......................................................................................................... 17
4.2 Object Properties...................................................................................................... 17
4.3 Moving Objects......................................................................................................... 18
4.4 Exporting Data.......................................................................................................... 18
4.5 Supported Data Types.............................................................................................. 19
4.5.1 3D Model........................................................................................................... 19
4.5.2 Actor...................................................................................................................19
4.5.3 Alarm................................................................................................................. 19
4.5.4 Angle..................................................................................................................19
4.5.5 Annotation..........................................................................................................19
4.5.6 Antenna............................................................................................................. 19
4.5.7 Audio Dictation...................................................................................................19
4.5.8 Clip Box............................................................................................................. 20
4.5.9 Environmental Audio......................................................................................... 20
4.5.10 Field of View (FOV)......................................................................................... 20
4.5.11 Flood................................................................................................................ 20
4.5.12 CAD................................................................................................................. 21
4.5.13 Folder.............................................................................................................. 21
4.5.14 GPS................................................................................................................. 21
4.5.15 Image...............................................................................................................21
4.5.16 Hyperlink..........................................................................................................21
4.5.17 Measurement...................................................................................................21
4.5.18 Panorama........................................................................................................ 21
4.5.19 Path................................................................................................................. 22
4.5.20 Pin....................................................................................................................22
4.5.21 Plumb Line.......................................................................................................22
4.5.22 Point Cloud...................................................................................................... 22
4.5.23 Polyline............................................................................................................ 23
4.5.24 Shape File....................................................................................................... 23
4.5.25 Terrain File.......................................................................................................23
3 of 47]
Arena4D – User Guide
4.5.26 Threat Dome....................................................................................................23
4.5.27 Trajectory.........................................................................................................23
4.5.28 TruView............................................................................................................23
4.5.29 Width............................................................................................................... 24
4.5.30 Viewpoint......................................................................................................... 24
4.5.31 WMS................................................................................................................ 24
5 Time..................................................................................................................................25
5.1 Object Time...............................................................................................................25
5.2 Time Controller......................................................................................................... 25
6 Viewpoints........................................................................................................................ 26
6.1 Creating Output (Movies, PowerPoint, PDF)............................................................26
6.2 Movie Settings.......................................................................................................... 26
6.3 Viewpoint Positioning................................................................................................27
7 Shortcuts.......................................................................................................................... 28
7.1 Shortcut.....................................................................................................................28
8 Maps & Terrain................................................................................................................. 29
8.1 Installing....................................................................................................................29
8.2 Terrain Exaggeration & Offset...................................................................................29
9 Advanced Tools................................................................................................................ 30
9.1 CSV Import............................................................................................................... 30
9.2 Live Feed.................................................................................................................. 30
9.3 View From Point........................................................................................................30
10 Point Clouds...................................................................................................................31
10.1 Point Cloud Importer...............................................................................................31
10.2 Point Cloud Tools....................................................................................................32
10.2.1 Coarse Registration.........................................................................................32
10.2.2 Automated Registration................................................................................... 33
10.2.3 Point Survey.................................................................................................... 34
10.2.4 Alignment.........................................................................................................34
10.3 Point Cloud Editing................................................................................................. 34
10.3.1 Selection..........................................................................................................34
10.3.2 Colour Matching.............................................................................................. 35
10.3.3 Painting............................................................................................................36
10.3.4 Exposure......................................................................................................... 36
10.3.5 Patching...........................................................................................................36
10.3.6 Masking........................................................................................................... 36
10.4 Point Cloud Exploitation......................................................................................... 37
10.5 Point Cloud Rotation...............................................................................................37
10.6 Point Cloud Height Adjustment...............................................................................38
10.7 Point Cloud Exporting............................................................................................. 38
10.8 Aligning Pre-Registered Point Cloud Data............................................................. 38
11 Presentation Mode......................................................................................................... 39
12 Controls Quick Reference..............................................................................................40
12.1 Orbit Views..............................................................................................................40
12.2 First Person Views..................................................................................................40
12.3 Shortcut Keys......................................................................................................... 40
13 Hints and Tips................................................................................................................ 42
13.1 Combine Point Filling & Point Magnification...........................................................42
4 of 47
Arena4D – User Guide
13.2 Use Point Lighting Mode 2..................................................................................... 42
13.3 Setup Arena Data Processing Folder..................................................................... 42
13.4 Use Point Filtering.................................................................................................. 43
13.5 Filling Gaps............................................................................................................. 43
13.6 Measurements........................................................................................................ 43
13.7 Point Cloud Identification........................................................................................43
14 Revisions........................................................................................................................44
5 of 47]
Arena4D – User Guide
1 Introduction
1.1
About
Welcome to the User Guide for the Veesus Ltd Arena4D Geographic Information System
(GIS) 3D visualisation tool.
Arena4D is a true 3D GIS tool, that incorporates a point rendering engine at its core, that
allows the rapid loading and visualisation of huge point cloud data sets. It is multi-platform
and has been designed to be as simple and intuitive. The core premise behind Arena4D
was to take Light Intensity Direction And Ranging (LIDAR) data, make it easy to use and
accessible to non-expert users (and on commodity grade PC's), and add context to the 3D
LIDAR data, by provided the ability to load many other data types to the same 3D view
(Panoramic images, documents, photos, audio, etc). Adding the forth dimension of time
allows all of this combined data to be presented in a manner that can be purely analytical
or to allow the user to "tell a story". The software has the ability to export all visualisation
data into other formats, such as Powerpoint, PDF, Image Files of High Definition (HD)
video, for presentation or reports.
Conceptually, any projects that are saved in Arena4D are termed “Arenas”.
1.2
Installation
Whether you are installing on Windows, Mac OSX or Linux the process is straight forward.
Arena4D ships with all dependencies and is a self contained application. No DLL's are
installed in system folders and no registry entries are created.
Configuration files that are generated by Arena4D to tailor your installation and save your
user preferences are stored within your default User area (e.g. C:\Users\Joe
Bloggs\Arena4D).
1.2.1
Windows
Simply run the provided installation executable and follow the on screen prompts. The
installer will create an uninstaller file and place an entry in the Windows Control Panel
should you wish to delete Arena4D.
1.2.2
Mac OSX & Linux
No installation is required. Simply double click the supplied application icon to launch the
software.
1.3
License
Arena4D requires a valid license to allow access to all features. Without a license,
Arena4D will run in a limited mode that will allow you to view data but not create, edit or
save.
6 of 47
Arena4D – User Guide
2 Getting Started
2.1
Screen Layout
The Arena4D application uses a docking framework allowing you to arrange windows as
you please. The default layout features four main windows. The Project Window (on the
Left), View Window (in the middle), Tool Window (on the right) and the Maps Window
(on the bottom).
All windows can be resized, stacked or reordered by simply dragging them
around. The window toolbars allow you to minimize, restore, maximize or
externalize windows.
Minimized windows appear to the left of the application.
2.1.1
Project Tree
The Project Tree shows any data that is loaded in
an Explorer tree like structure, any description
that has been saved with the current Project and
the properties of any selected object within the
tree.
Double clicking any item in the Project Tree will
“zoom” the view to that item.
At the bottom of the Project Tree is the Gazetteer
function. This allows you to zoom into an address
7 of 47]
Arena4D – User Guide
or location. This tool is only active when there is an Internet connection.
2.1.2
View Window
The View Window features the globe visualisation window with an image of the earth and
the local viewer. This is the 3D viewing area where your data will be visualised.
Above the 3D viewing area is the application Tool Bar that features all the menu options
available in Arena4D.
The Tool Bar has eight distinct sections.
File: used to open/save Projects and other viewable data files.
System: commonly used features such as Clear, Undo, Redo Copy, Print, Screen Grab,
Generate PDF, and Presentation mode.
Import: tools to assist the import of raw data, such as point clouds.
Export: tools to export data from Arena4D.
Exploitation: features that enhance the operation of Arena4D, such as time.
Point Cloud: specific point cloud editing and visualisation tools.
Navigation: control and view related options.
Terrain: tools to raise, flatten and reset the terrain.
At the bottom of the screen is a progress bar which is active whenever any long running
disk based operation is running, such as loading or saving of large files.
Arena4D is multi threaded and will always let you continue to work when any long running
8 of 47
Arena4D – User Guide
process is active.
The progress bar can be used as an indicator as to whether Arena4D is busy doing work in
the background or not.
2.2
Local Viewer
The local viewer is provided to assist working with data that is not georeferenced. Arena4D
was originally a GIS solution which worked best with data georeferenced on the globe. The
local viewer allows you to edit point cloud data without worrying about georeferencing it on
to the globe.
The following four options are available in the local viewer:
1) Show Axis – Hide/Show the rotation axis
2) Show Grid – Hide/Show the plane grid
3) Up Axis – Select the default up axis to align the plane grid to
4) Fix Axis – Allows rotation only around this axis, aligned to forward view (Z Axis)
To view georeferenced data in the local viewer, simply double click it in the Project Tree or
right click it in the Project Tree and select Focus Local Viewer.
2.3
System Settings
Arena4D has a number of user configurable attributes. These can be found under the
System Settings from the System drop down menu.
Selecting the System Settings will bring up a system panel int the Tool Window where can
select and edit the System Settings.
9 of 47]
Arena4D – User Guide
2.3.1
Angle Precision
Number of decimal places to show for an Angle.
2.3.2
AutoSave
Sets the timeout for automatically saving the
currently open Arena.
2.3.3
Background Colour
The application background colour of the 3D
viewing window. The default is black to
represent space.
2.3.4
Data Processing Folder
Arena4D requires a temporary storage area to process data. This defaults to your user
home folder. If you would like to change this to a larger or faster drive area then set the
folder here.
2.3.5
Elevation Model
Sets how Arena4D should report “Altitude” at any given point. The options are Mean Sea
Level (default), Above Ground Level or above Earth Gravitational Model 1996.
2.3.6
Font Foreground Colour
Sets the font colour for any overlays on the globe, such as annotations.
2.3.7
Font Background Colour
Sets the background colour of fonts for any overlays on the globe, such as annotations.
2.3.8
Font Size
Sets the size of fonts for any overlays on the globe, such as annotations.
2.3.9
Language
Sets the language of Arena4D.
2.3.10
Measurement Precision
Number of decimal places to show for a Measurement.
2.3.11
Point Render Quality
This controls how many points Arena4D will attempt to hold in RAM and draw at any one
time. The higher the number the better the quality of the point cloud but the lower the
performance.
10 of 47
Arena4D – User Guide
2.3.12
Paper Size
The scale bar overlay features a 1cm = …. m caption that shows how many meters are
represented by one centimeter. This is dependent on the paper size which the view is
printed on. Therefore the paper size option allows you to specify the dimensions of your
printed page so that the scale bar accurately reflects scaling.
2.3.13
Plumb Line Precision
Number of decimal places to show for a Plumb Line.
2.3.14
Snapshot Folder
Sets the folder where screen shots and pdfs will be stored.
2.3.15
Startup View Position
Sets the viewing position at which the software will start each time. Default is a zoomed
out view of the earth.
2.3.16
Warn On Errors
A debug option that allows Arena4D to notify the user if there have been any problems
causing a software failure. Errors are recorded whether this option is on or off in the
error.log file in the system user folder.
2.3.17
Watermark Image
Sets the image that is to be used by the watermark overlay.
2.3.18
Watermark Scale
Sets the size of the image to be used by the watermark overlay.
2.3.19
Width Precision
Number of decimal places to show for a Width.
2.4
2.4.1
Project Manager
Repository
Arena4D stores Projects in a special area called a Repository. This is simply a folder that
is accessible by your current computer, therefore it may be on your local hard drive or a
network area.
When you save a Project, the data that you have added is copied into your repository.
Therefore, the original data can be moved or deleted and it will not effect your Project.
The Project Manager is available in the Project Window.
The Project Manager allows you to:
•
Search your Repository via a filter box.
•
Change repository.
11 of 47]
Arena4D – User Guide
•
Open a Project.
•
Export Projects.
•
Import Projects.
•
Delete Projects.
2.5
Coordinates
Arena4D is capable of displaying coordinate
information in hundreds of different coordinate
system formats. The default is the well known
decimal degrees of Latitude and Longitude.
However, if you prefer to work in a different
coordinate system, this can be configured when
you create a new Project.
The Coordinate setting screen provides a list of
available coordinate systems and their
associated EPSG codes. These can be filtered
using the filter box at the top.
2.6
Overlays
The Overlays menu provides numerous different visual options for the 3D viewing area.
The on/off state of each of the visual options is remembered by Arena4D each time you
close it; therefore restarting in the state which you left it.
2.6.1
Anti-Aliasing
Smoothes jagged edges of screen graphics.
2.6.2
Compass
An animated on screen compass showing current heading and tilt.
2.6.3
Crosshairs
Places a set of crosshairs in the centre of the screen.
2.6.4
Cursor Location
Displays the current location in the 3D world of the cursor. Also displays the distance from
the current eye view to the cursor location. This provides a simple distance measuring tool.
2.6.5
Eye Location
Similar to Cursor Location but instead displays the current eye view position.
2.6.6
Globe
Enables and disables the globe.
12 of 47
Arena4D – User Guide
2.6.7
Globe Transparency
Makes the globe partially see through.
2.6.8
Messages
Shows the onscreen Head Up Display (HUD). This
shows the current view mode as well as network
activity, disk activity and whether edit mode is active.
2.6.9
Open Street Map
Street level mapping. (Internet connection required.)
2.6.10
Place Names
Town and City names. (Internet connection required.)
2.6.11
Scale Bar
Simple scale bar that dynamically changes on zoom.
2.6.12
Sky
Provides realistic looking sky and horizon.
2.6.13
Sunlight
Provides real time lighting.
2.6.14
Viewpoints
Shows the position and orientation of viewpoint objects.
2.6.15
Watermark
Overlays a semi transparent image on the bottom left of the screen. This is useful for
incorporating branding into generating screenshots and videos.
2.6.16
Wireframe
Draws the globe as a simple wireframe. Only visible when Globe overlay is OFF.
2.6.17
World Map
A small map indicating where the eye view position is over the globe.
2.7
Keyboard Shortcuts
Arena4D has a number of keyboard shortcuts for experienced users. These are all
configurable using the Keyboard Shortcut Manager on the System menu.
Shortcut keys can feature any combination of the available
keys in the Settings list plus Shift, Ctrl and Alt keys.
Conflicting shortcuts will be caught and brought to your
13 of 47]
Arena4D – User Guide
attention.
Note: Shortcuts are only active when the main viewing window is selected. This is shown
by a white highlighted border around the main viewing window.
2.8
Mouse Settings
Arena4D allows you to tailor the mouse controls to your own personal preference. These
are all configurable using the Mouse Settings function on the System menu.
Typical usage is, for example, to invert the Y-Axis of the mouse when in first person mode.
14 of 47
Arena4D – User Guide
3 Navigation
3.1
Navigation & Controls
Arena4D provides two different navigation modes in the main globe view: Orbit and First
Person. These are available under the Navigation tool bar.
Orbit controls:
•
Dragging the mouse with the left mouse button will rotate the globe.
•
Dragging the mouse with the middle button (wheel) will cause the view to pan and
tilt.
•
Dragging the mouse with the right mouse button will translate the view horizontally
and vertically.
•
Scrolling the wheel will cause the view to zoom in and out at the cursor.
•
Optionally you can hold down the Shift key whilst left dragging to simulate dragging
with the middle button.
First Person places you in a typical game like control and view mode:
•
“W,S,A,D” keys are used to walk forwards, backwards and strafe left and right.
•
Dragging with the left mouse button will allow you to freely look around.
•
Scrolling the wheel will cause you to go up and down in altitude.
•
Holding the Shift key whilst walking will cause you to speed up.
Reorientate is used when you have got lost in your data. It will raise you up slightly, place
your view at the ground and return you to Orbit view mode.
Reset returns you to a standard globe view.
Reset FoV returns the field of view to the default setting.
Rotate places you in Orbit mode and automatically orbits around the object in the centre
of the screen.
The local viewer of Arena4D works like many CAD applications. The left mouse button
allows you to rotate the view and the right mouse button drags your view. If you are
“editing” a data object such as a point cloud (see next section on Data Objects) then these
controls will effect the position and orientation of the object instead.
•
Default shortcut key “X” will centre view on your cursor.
•
Default shortcut key “U” will snap the cursor to the closest point in a point
cloud within a close radius to the cursor.
15 of 47]
Arena4D – User Guide
3.1.1
Align View
The align view controls allow you to orientate the view to be tangental to a surface. There
are 3 different Align View controls: 2 Point, 3 Point and Tangent.
In 2 Point or 3 Point modes simply click on 2 or 3 points of the screen to align your view to
look directly at the object you clicked on.
Tangent mode works in a similar manner to 3 Point, however the order of the points you
click is important. The first 2 points describe the “path” or vehicle direction you want to
calculate from. The final point selects the object you want to be looking at. The view will
then be positioned so that your eye point is 90 degrees to the path described, whilst
looking at the object you selected with the final point.
Align Views all have shortcut keys associated with them.
3.1.2
Nudge View
Nudge view shows an overlay with four direction arrows. These direction arrows allow you
to shift the view slightly in each direction. The amount the view shifts is controlled by the
panel on the right of the display. The default value is 1m.
3.1.3
Rotate View
Rotate view allows you to flip your view by 90 degrees left, right or up and down. You can
also flip by 180 degrees to view an object from the other side.
Rotate View has shortcut keys associated with each direction.
3.1.4
Top Down
Rotates your current view to look straight down at whatever is in focus within your current
viewport.
Top Down has a shortcut keys associated (Shift + T).
3.2
Orthogonal View
Orthogonal view on the navigation tool bar removes all perspective from the main viewing
window and is useful for doing line drawings. However it can be disorientating when
moving around. If in doubt check that this is disabled when moving.
16 of 47
Arena4D – User Guide
4 Data Objects
Data Objects are items that can be placed in the 3D world of your Arena. Some, such as
point clouds and images require additional files to load; others such as annotations require
no additional files as they are purely graphical markups.
4.1
Adding/Removing Data
Data can be added to your Project in three ways (with the exception of Viewpoints,
Measurements, Plumb Lines and Polylines which all have keyboard shortcuts associated
with them).
1. Right clicking on the Globe and choosing the Data
Object you wish to add.
2. Using the File Open toolbar/menu options.
3. Dragging and dropping a file on to the globe.
If the data to be added has Geo-reference information associated with it (e.g. EXIF tags on
pictures), the data will be placed exactly where the Geo-reference information describes
the location. If there is no Geo-reference data available, the data will be placed where the
user “dropped” it on the globe.
Data is removed from your Arena by simply right clicking on the object in the Project Tree,
right clicking, and selecting Remove.
4.1.1
File Open
The file open button on the tool bar (orange icon) is used to
open data objects which require raw files such as point
clouds and images.
4.1.2
Data Menu
The data menu is used to add data objects which require no raw files, such as annotations
and measurements.
4.2
Object Properties
Each Data Object added to an Arena has a number of
properties which can be edited by the user. All of these
properties are accessible via the Project Tree . Select an
object within the tree, right click and select properties.
When an objects properties is selected, the lower half of the
Project Tree window shows a table with all the properties
listed.
The properties are typically broken up into sections. Nearly
every data object has the same first four sections, with only
17 of 47]
Arena4D – User Guide
the Advanced sections changing depending on the capabilities of a Data Object.
General – this shows the name of the object and the Lock Position checkbox that stops
you from accidentally moving the Data Object on the screen.
Position – This is the current location of the Data Object.
Time (Start/End) – When enabled, this is the time at which the Data Object will
automatically enable/disable itself. See the section on Time Control for more information.
Min/Max Altitude – Sets the height at which the object becomes visible.
4.3
Moving Objects
Objects can be moved about the globe in three ways. The first is simply by typing the new
position into the Properties window. The second is by manually dragging the Data Object
on the globe. (This method only works if the Lock Position property is disabled.)
When a Data Object is selected in the Project Tree pressing and holding ALT will allow
you to drag the object around the globe.
Whenever you press and hold the ALT key the Messages HUD will light up the red Edit
icon to warn you that you are in the Editing mode.
Finally you can geolocate an object by right clicking it within the Project Tree window and
then clicking on the globe where you would like the data to appear.
4.4
Exporting Data
The system task bar provides four export options for the currently displayed view in the
main View Window.
All four options are WYSIWYG (What You See Is What You Get) tools that provide an
exact export of whatever is displayed on the screen.
Note: The output folder is selected via the Snapshot Folder icon in the System Settings.
Print – Prints the View Window to an available printer.
Clipboard – Puts an image of the View Window into the computers clipboard.
Screenshot – Saves a JPEG image of the View Window.
PDF – Creates a PDF with an image of the View Window.
The export task bar provides more advanced features for viewpoints and point clouds
which are discussed later in the user guide.
18 of 47
Arena4D – User Guide
4.5
Supported Data Types
Arena4D supports numerous different data types. 2D, 3D, audio and visual data types are
all supported to provide a superb contextual view of the combined data types.
4.5.1
3D Model
3D textured models in most common formats.
Scale – change scale size of model.
Heading – the heading of the model.
Up Axis – set which axis should be used to orientate the model.
4.5.2
Actor
Draws a generic 3D person on the globe.
Double clicking the Actor places you at their eye view position.
Pressing Escape exits from the Actor view.
Height – height of Actor from base of feet to top of head.
Eye Offset – offset of eyes from top of head.
Image File – image to display alongside Actor.
Annotation – text to display alongside Actor.
Colour – colour of Actor model.
Field Of View – set the FoV of the Actor in degrees.
4.5.3
Alarm
Displays a flashing alarm icon. Used mainly in conjunction with Arena4D time capabilities
and maintenance records.
4.5.4
Angle
Angles allow you to draw two lines from clicking 3 points and will measure the angle
between the two lines.
4.5.5
Annotation
Simple text annotation drawn in a speech bubble style.
4.5.6
Antenna
Supports the import of STK antenna models in text format. The models are then drawn in
3D and the radiation pattern of the Antenna clearly visualised.
4.5.7
Audio Dictation
Audio Dictation allows you to record from your PC's microphone. The recorded sound file
is represented as an icon on the globe.
19 of 47]
Arena4D – User Guide
Double clicking the icon on the globe will play back the sound file.
To record a sound file, simply click on the record button under the Properties window.
4.5.8
Clip Box
Allows you to “clip” the visible data down to a smaller size. For example if the roof of a
house needs to be removed a Clip Box can be drawn around just the lower parts of the
house.
Click and drag the corners of the Clip Box to reshape it.
Click and drag and hold SHIFT to adjust the height of the clip box sections. If you do this
on a corner you will just raise/lower that level. If you do it on the border you will raise/lower
the entire Clip Box.
4.5.9
Environmental Audio
Environmental Audio allows you to draw an area on the globe and specify a sound clip with
that area. Whenever the user's viewpoint enters that area the audio clip will start to play
back. This is useful for adding extra atmospherics to a scene.
To draw the area, simply click on the Set Positions check box under the Properties
window, then click on the globe where you would like to draw the outline of the area. Once
you have finished choosing the outline positions of the Area, click the Set Positions
checkbox once again.
The Environmental Audio data type supports standard WAV files. Select your WAV audio
file by clicking on the Audio File property.
When adding an Environmental Audio outline, press the escape key to stop adding
new positions.
4.5.10
Field of View (FOV)
The FOV data type shows the field of view of an item, such as a camera, in 3D. If there is
a network MJPEG feed of the camera available, it will also display that camera feed.
Click on the FoV to toggle drawing of the available camera feed. Double Clicking the FoV
will place you in First Person View mode in the Field of View object location.
Stream URI – network address of MJPEG stream.
Field Of View – set the FoV of the item in degrees.
Change View – places you in First Person View mode in the viewpoint of the FOV object.
When you change the view in the Presentation Screen, the viewpoint of the FOV object.
will be updated. Click the Change View button once again to exit and save.
Range – the maximum distance visible by the FOV object.
4.5.11
Flood
Renders a flood plain that interacts with the terrain to simulate the impact of high waters in
an area.
Radius – sets the size of the flood area.
20 of 47
Arena4D – User Guide
4.5.12
CAD
The CAD data type supports DXF CAD files in either 2D or 3D format.
Heading rotates the CAD image.
Scale resizes the CAD image.
4.5.13
Folder
Folders have no real properties but represent folders in the Project Tree to allow grouping
of data into sub folders and separate categories.
4.5.14
GPS
Displays GPX (GPS eXchange format) files as a path on the globe.
Clamp To Offset – typically the GPS data includes elevation information. However, in built
up areas this can be very inaccurate. Enabling this function will ignore elevation data and
instead keep the track at a constant offset above the ground.
Track Offset – the height in meters to offset the track from the ground.
Colour – colour of the track.
4.5.15
Image
Images are represented by an icon on the globe. When your mouse cursor is placed over
the icon a thumbnail of the image is displayed.
Double clicking the icon will open the image up full size in a separate window.
All typical image formats are supported.
4.5.16
Hyperlink
Hyperlink lists are used for data types not natively supported by Arena4D, or those that
don't translate well to 3D. For example Word documents and PDF files. These files are
shown as a list of hyperlinks which can be clicked in the 3D view.
When clicked, the files are loaded by the operating system into the tool best suited for
visualising the selected file type.
Files – select files to add to list.
4.5.17
Measurement
Measurements allow you to measure between any two points in the Presentation Screen.
The cursor will change to a crosshairs when measurement is active. Simply click on the
two points you wish to measure between.
4.5.18
Panorama
Panoramas support the same image formats as Image data types. However, the
panoramas are shown as wire spheres rather than icons.
Double Clicking the wire sphere will place you in First Person view inside the sphere and
21 of 47]
Arena4D – User Guide
show you the associated Panorama imagery.
To exit the Panorama view you can double click the screen imagery, or press the 'Escape'
button on your keyboard.
Projection Type – allows you to specify Spherical or Cylindrical panorama types.
Perspective Ratio – allows you to fine tune width x height ratio of the image to correct for
distortions.
Heading – the heading of the panorama.
Radius – the size of the panorama within the 3D world.
Vertical Offset – depending on the instrument used to capture the Panorama, the ideal
viewing position may not be the centre of the Panorama. This allows you to offset the
viewing position vertically to cater for different capture tools.
4.5.19
Path
Paths are like multipoint measurements. Instead of measuring between two points you can
measure the length of several connected points.
Paths also give you the ability to “walk” the path by playing back a trajectory along the path
you have created.
When adding a Path, press the escape key to stop adding new positions.
Show Annotation – enable/disable visualisation of annotations.
Line Width – size of path line to draw.
Colour – colour of path line.
Offset – height above clicked point to draw path line.
Play – animate viewpoint along the trajectory of path.
Play Speed – speed of playback in meters per second.
4.5.20
Pin
A single point measurement.
4.5.21
Plumb Line
Vertical distance measurement data type.
4.5.22
Point Cloud
Arena4D has a high performance Point Cloud engine that allows it to render almost
limitless amounts of data. However, for this to be possible, any Point Cloud data must be
pre-processed as Arena4D's own VPC file format. This is done using the Point Cloud
Generator; please see the Point Cloud section of the User Guide for more information.
Point Count – simply shows number of points in file.
Point Size – size of point used to render this cloud.
Heading – set the heading of the point cloud.
22 of 47
Arena4D – User Guide
Show ArcBall – draws sphere at centre of rotation.
Reset Orientations – undoes any registration or movement of Point Cloud and returns it
to its original location and orientation.
Colour – renders with RGB or Intensity data.
Colourize Intensity – applies a contrasting colour ramp to intensity data.
Properties – adjust the RGB, Contrast and Brightness values of the selected Colour
band.
Colour By Class – if LAS classification is available, the point data will be coloured
according to its LAS classification value.
4.5.23
Polyline
Draw a simple multi point poly line within the 3D data.
4.5.24
Shape File
Standard ESRI Shape File. Drawn as line drawing overlay on the globe.
4.5.25
Terrain File
Terrain Files update the elevation model of Arena4D with higher fidelity data. Arena4D
supports GeoTiff terrain data.
4.5.26
Threat Dome
Renders a sphere representing a threatened area; for example from an explosive device.
Radius – size of threat dome.
Colour – colour of sphere.
4.5.27
Trajectory
Trajectory visualises the extra data captures from mobile LiDAR capture vehicles. The
navigation data and imagery collected during a capture is overlaid on the globe in 3D.
Play Trajectory – visualises the animated path of the vehicle, updating the displayed
imagery as appropriate.
Follow Trajectory – when in Vehicle View mode it ensures the view camera keeps
pointing in relation to the direction of travel, rather than in a constant heading.
Vehicle View – places your viewpoint to that of the vehicle and see the captured imagery
overlaid on to the point cloud data.
Hide Panorama – turn off imagery.
Frame Number – the current frame number.
4.5.28
TruView
Leica TruView data sets are supported in Arena4D. Simply select the SWPositions XML
file and Arena4D will do the rest.
23 of 47]
Arena4D – User Guide
Double clicking the TruView boxes will place you in the view of the panoramic images
created by TruView data sets.
Press Escape or Double Click the TruView imagery to exit the panoramic view mode.
4.5.29
Width
Width objects allow you to measure accurately between two points, ensuring the
measurement is parallel to a described line. The width object requires you to click three
times on the screen. The first two mouse presses select the line to which you will measure
at a tangent (e.g. the curb line). The third press will select the other side of the gap you
width to measure (e.g. curb on other side of road).
4.5.30
Viewpoint
Viewpoints are very powerful data types and form the basis for presentations and video
generation. A viewpoint is a snapshot of your current location and viewing angle in the 4D
world (space and time).
Dwell Time – when used in video generation, how long this view should last before
moving to the next viewpoint.
Duration – the time taken to move to this viewpoint.
View Mode – by default Viewpoints are saved as First Person View modes, here you can
change this to Orbit or Rotate View modes.
Field Of View – set the FoV of the Viewpoint in degrees.
Enable – activate the fourth dimension. When transferring to this view the Arena4D clock
will be set to the time specified in Time.
Time – the time to set the Arena4D clock to.
Spline – the amount of spline curve to apply to a view transition when animating a series
of viewpoints together. The larger the number the greater the curve (0 – 1.0).
4.5.31
WMS
Creates a link to an OGC compliant Web Mapping Server (WMS).
Server URL – Server to connect to.
24 of 47
Arena4D – User Guide
5 Time
5.1
Object Time
Every Data Type has a Start time and End time
that can be enabled.
When enabled, the object listens to the Arena4D
system clock and turns itself on or off as
appropriate.
Viewpoints can specify the system clock time and
can therefore have the power to turn objects on
and off.
This powerful feature allows complex videos and
Arena walk throughs to be created that show how
the scene changes over time.
5.2
Time Controller
The Time Controller can be found on the
Exploitation Tool Bar.
The time controller has four tab panels associated with it.
System – specifies the current time. Default is to use the current system time.
Slider – slider that allows you to quickly
and easily move in between two specified
times.
Start – start time to use on slider.
End – end time to use on slider.
Note: The system time also controls the
position of the Sun on the sunlight overlay.
25 of 47]
Arena4D – User Guide
6 Viewpoints
6.1
Creating Output (Movies, PowerPoint, PDF)
Highlighting multiple Viewpoints in the Project Tree
window allows you to make live animations,
presentations or videos. These output options can be
chosen on the export tool bar, or by right clicking them
in the project tree and selecting this appropriate output
format..
The options provided are:
Play Viewpoints – step through each viewpoint in
order.
Generate Movie – create an MP4 recording of the
viewpoint transitions.
Generate PowerPoint – each viewpoint is outputted
as a new slide with its name and time as the title.
Generate PDF – create a multipage PDF with each page featuring a screenshot of the
viewpoint.
6.2
Movie Settings
When generating a
movie file you can select
a number of options to
produce the best output
for your requirements.
Format – Video format
output.
Resolution – number of
horizontal and vertical pixels to use per frame. The higher the pixel count the better the
quality of video, but the more time taken to process. The default setting is standard High
Definition television quality.
Frame Rate – the number of images per second of animation. The higher the number the
smoother the video. The default setting is the standard UK television rate of 25 frames per
second.
Duration – forces the video length to a set duration, therefore increasing or decreasing
viewpoint durations as required to match the requested overall duration.
Speed – sets a constant fly through path speed. This will ignore all other duration settings.
26 of 47
Arena4D – User Guide
Motion Blur – blends a series of frames to give the impression of motion blur.
Stereo – generates a side by side 3D stereoscopic video file.
6.3
Viewpoint Positioning
Viewpoints have two key attributes, their position and their focal position. This defines
where the view will be, and what it is looking
at.
Turning on the Viewpoints Overlay allows
you to visualise on the screen the
orientation of a viewpoint.
The green sphere represents the location of
the viewpoint, and the red sphere the focal
position.
Viewpoints can be moved like any other
data object using the ALT key and dragging
on the screen. To move a focal point use Shift + ALT.
Additionally viewpoints and focal
positions can be moved by mousing
over the appropriate sphere and
dragging it to a new location.
Selecting more than one viewpoint will
show the path which the camera will
take when animating the selected
viewpoints.
27 of 47]
Arena4D – User Guide
7 Shortcuts
7.1
Shortcut
Shortcuts allow you to have multiple properties for a single object. Just like having a
shortcut to an application on your desktop, a shortcut does not alter the raw data files but
allows you to assign different properties such as icon, name, etc.
If you update the raw file pointed to by a Data Object, or any of it's shortcuts, then all
shortcuts will reflect this change.
An obvious use of shortcuts for changing the position of data over time. For example an
Actor may be on a street corner in the morning, however in the afternoon you may want
them to appear on another road. By
creating a shortcut that can be easily
accomplished with the main object being
on the street corner, but the shortcut
becoming active in the afternoon and the
position being changed.
To create a shortcut to an object simply
right click select it in the Arena Tree and
choose “Create Shortcut”.
When a shortcut is created it is clearly identified with
a yellow arrow and it the relationship to its parent.
When a parent object is deleted all shortcuts
referring to it are also removed from the Arena.
28 of 47
Arena4D – User Guide
8 Maps & Terrain
8.1
Installing
Terrain and Map data added via Data Types (Terrain & WMS) is saved on a per Arena
basis. Sometimes it is useful to install terrain and map data that is permanently added as
part of the core tool.
To do this, use the Maps Window.
To add new data simply click the Install... button and follow the prompts. The tool supports
GeoTiff map and terrain data as standard.
Selecting Create a full pyramid is slower, but creates a data structure that is more
memory efficient and quicker to load.
Maps and terrain can be turned on and off via the check boxes associated with each data
type.
8.2
Terrain Exaggeration & Offset
If you do not have high fidelity terrain available and the default installed
terrain is not correct for your area of operation, you can manually adjust
the terrain via the Exaggeration and Offset buttons on the Terrain Tool
Bar.
Exaggeration determines the scaling of the hills. A value of 0 will create a flat earth, the
default is 1. A value of 2 will create hills twice as high and valleys twice as deep.
Offset raises and lowers the terrain as a whole.
Reset returns to default values.
Any terrain modifications made under these settings will be saved per Arena allowing
different terrain models to be used with different Arenas.
29 of 47]
Arena4D – User Guide
9 Advanced Tools
9.1
CSV Import
The CSV Import tool imports large volumes of data as
either an Annotation or a Polyline.
To use the CSV tool click the Select File button to
specify the CSV file to read in.
Then use the appropriate drop down boxes to select
which columns in the CSV data represent which
required data fields.
GPS Correction is used to provide a global offset to all
the data being read, to correct for data that is artificially
too high or too low.
To specify the data projection format, select it from the
coordinate list provided at the top of the tool.
Finally, there is an Attribute Dictionary. Arena4D uses
the Attribute Dictionary to determine what default size
and colour settings it should apply to CSV data based
on the Name Column of the data.
This is useful when importing lots of different road
marking data. For example, anything with name “curb”
could be set to a width of 5 and colour of Grey
automatically.
When all the settings are correct, simply press the
import button to read the data in.
Single entries will be read in as an Annotation,
whereas multiple concurrent entries with the same
name will be read in as a Polyline
9.2
Live Feed
The live feed creates an accessible Web Server which remote devices can connect to. The
server retrieves the location information from the remote device and displays their name
and location on the globe.
9.3
View From Point
When view from point is active, clicking on any object in the 3D world will place your
viewpoint at that position looking back at where you came from.
30 of 47
Arena4D – User Guide
10 Point Clouds
10.1
Point Cloud Importer
Arena4D has to pre-process point cloud data into its own native VPC format to allow it to
render the data quickly and smoothly. A Point Cloud Generator is built into the Arena4D
software for doing this processing and conversion.
The Point Cloud Generator supports LAS 1.0 ~1.2 (and LAZ) , ASCII (xyz, pts) text input
files and the new e57 format data files.
Generating a VPC file with the built in tool is very straight forward. The generator
intelligently analyses the input files to create the best performing output file. You only need
to supply basic level information about the point cloud to start processing.
The processor is designed in a wizard style to make the process as easy as possible.
1. Firstly, click Select File(s) to select your input file. Then click “Next >>” at the
bottom of the screen.
2.1 You will then be asked if your data is GeoReferenced. If you know the global
coordinate system you can select it from the extensive list provided. As you select
possible options you will be shown where on the globe your data will appear. Then
click “Next >>” at the bottom of the
screen.
2.2 If you decline to GeoReference
your data it will be placed in a
default location. Then click “Next
>>” at the bottom of the screen.
3. Finally you can select the
advanced options before
processing. Then click “Next >>” at
the bottom of the screen.
Measurement Unit. Select between
metric, imperial and US survey.
Colour/Intensity Range. The default
setting of Automatic allows the software to
intelligently analyses the raw data for the
colour range of the data. It will scale the
result to the closest common
representation (8 bit, 16 bit, etc). Setting
this to Absolute will just use the minimum
and maximum values found and perform
no conversion to common value ranges.
Sometimes however data sets do get
corrupted with invalid data. If your data set
31 of 47]
Arena4D – User Guide
is corrupted, but you know what the colour range should be, then specify it here.
Adjust for EGM96 Geoid. Depending on how the point cloud data was generated, it may
or may not have had its GPS height data corrected for the EGM96 Geoid. If your data
appears too high or too low, use this to fix the height data.
ASCII Order. No ASCII text file is produced in the same format between different software
packages. This option allows you to specify what order the colour information is supplied in
the file.
Scale. If the data is in something other than the default measurement units (meters/feet)
then scale accordingly here.
Filter. It is common for point clouds to feature overlapping data, especially when made up
from several static scans of the same area. Filtering allows you to remove repeated, or
overly dense data from the point cloud. This will help make a smaller file with better
performance, however it does take longer to process.
The filter operates in millimeters and allows you to specify how many millimeters you
would like between adjacent points. Depending on the scan type, 2mm to 5mm is a good
starting point. The default is 0mm which will apply no filtering.
Ignore Invalid E57 Points. Don't include invalid E57 data in the final file.
Combine Clouds. Combine all the selected filed into one single point cloud.
Retain File Name(s). Create output file(s) with the same name as the input file(s).
Place Local Data On Globe. Automaticall georeference non-georeferenced data on to the
globe.
A progress bar at the top of the Point Cloud Generator will keep you informed as to the
progress of the process. Typically, the system can process around 20 million points per
minute.
The output file is automatically loaded and zoomed into on the globe. When the Arena is
saved, it will be copied into your repository.
NOTE: If the data is not georeferenced and you have not selected Place Local Data On
Globe then the data will only be visible in the Local
View window.
10.2
Point Cloud Tools
Arena4D contains several tools for working with point
cloud data. These tools are designed to be simple to
use and allow you to quickly perfect your point cloud
data visualisation.
When the Point Editing tool is selected a palette of
capabilities is displayed on the right hand side of the
screen.
10.2.1
Coarse Registration
Arena4D contains an incredibly fast registration tool
that makes aligning point clouds a painless exercise.
32 of 47
Arena4D – User Guide
Although you can manually align point clouds using Arena4D's built in manipulation
controls, there really isn't a substitute for a proper registration tool.
The registration tool works on either one or three matched points between two different
point clouds.
If you select just a single matching point between the clouds, they will be aligned by
movement only and no rotation.
If you select three matching points, they will be aligned by movement and rotation of the
second cloud.
Reference Point Cloud – the point cloud you don't want to move, but to use as a
reference.
Register Point Cloud – the point cloud you want to move and reorientate to match the
Reference point cloud.
Point 1 – select this button and then click on the first point in the reference or register
point cloud that you wish to align. Leaves a red dot.
Point 2 – same as Point 1 but for second point. Leaves a green dot.
Point 3 – same as Point 1 but for third point. Leaves a blue dot.
The alignment process typically works like this:
1. Select a reference and a register point cloud.
2. Click the Point 1 button and then click on the
required point in the reference point cloud.
3. Click Point 1 button again and click on the
matching point in the register point cloud.
4. Repeat for points 2 and 3.
5. Once done press Register to register the two
clouds together. If you are unhappy with the
result click the Undo button on the task bar.
10.2.2
Automated Registration
Arena4D also includes an automated fine registration
tool that uses intelligent analysis of the point cloud
data to align overlapping point clouds as accurately
as possible.
Note: for the algorithm to work at its best, it is
important to have roughly aligned the point clouds
either using manual methods or the Coarse
Registration tool.
Note: The algorithm works by comparing your
chosen point cloud with all other enabled point
clouds. If you want to exclude a point cloud from the
“reference frame” ensure it is disabled in the Project
Tree.
33 of 47]
Arena4D – User Guide
With the cloud to register overlapping the reference point clouds press the “Refine” button.
This will ask you to choose which cloud you want to register. Click on a point that
represents a good overlap position where data is most closely aligned. The algorithm will
then run and print a report.
Search Radius – the distance to look beyond the point selected for matching data.
Subsample – the quantity of data to analyse.
Max Iterations – maximum number of iterations to refine the result.
Target Error – maximum allowable average error in misalignment.
10.2.3
Point Survey
if you know exactly where a point in a point cloud should reside in the real world (e.g. an
aerial base) then select this tool and click on that point. Fill in the required location
information and the entire point cloud will be moved to the location specified.
10.2.4
Alignment
The alignment tool is used to correct misaligned point clouds. Depending on the capture
technique the scan may not enter into Arena4D in a correct vertical, or horizontal, fashion.
For example a building may be
leaning over at 45 degrees.
Simply select the point cloud
you wish to correct in the drop
down menu and then click the
“Select Plane” button. This will allow you to choose 3 points which represent a vertical, or
horizontal, plane. For example the wall of a building. Once the 3 points are selected the
software will automatically rotate the point cloud so that the wall is truly vertical, and in
doing so the rest of the point cloud.
10.3
Point Cloud Editing
Arena4D allows you to perform real time editing on your point cloud data, and with the new
file format introduced in version 1.11.0 you can roll back your edits to the original file at any
time during the editing process.
10.3.1
Selection
The tools provided allow a number of different ways to select points within the point cloud.
When a tool is selected the options available for it are presented underneath.
Beneath the tool selection panel there are 6 function buttons.
Select – Arms the current select tool.
Unselect – Arms the current unselect tool.
Select All – Selects all points in the currently enabled point clouds.
Invert – Invert the current selection.
34 of 47
Arena4D – User Guide
Clear – Unselect all points.
Hide – Hide the currently selected points.
Some tools automatically de-select
themselves after a single usage, where as
the brush tool stays active until the user
deactivates it.
Once a selection has been made the
selected points can be processed using the
Process button.
The processing options provided are listed
in the drop down list above the Process
button.
Copy – Generates a new point cloud from
the selected points.
Copy & Delete – Generates a new point
cloud from the selected points and removes
them from the original point clouds.
Delete – Removes the selected points from
their original point clouds.
Depending on how large the point cloud is,
and how many points are selected, these
processes can be long running. The
progress bar at the bottom of the screen
provides feedback to the job progression.
Any jobs that alter the state of the point
cloud file will be added to the current
software undo history and can be undone/re-done like any other property edit.
Once the software is exited these changes are irreversible on older point cloud files.
Note. If you have a newer point cloud file (software version 1.11.0 or newer) then you can
always return to the original file by right clicking the point cloud in the Project Tree tree and
selecting “Restore Point Cloud”. Again this change is added to the undo history.
10.3.2
Colour Matching
All the point editing tools are able to filter which points to edit by the use of colour and/or
intensity matching.
The colour matching capability ensures only points matching the selected attributes are
selected or edited. Enable each algorithm by ticking the appropriate “Enable” check box.
The colour or intensity can be selected by either double clicking the colour box, adjusting
the intensity spinner or clicking the appropriate “Pick..” toggle button. Selecting the “Pick..”
option will allow you to click on a point within the 3D view and select that colour/intensity.
Each matching tool has a tolerance slider that adjust the strictness of the matching.
35 of 47]
Arena4D – User Guide
10.3.3
Painting
Painting allows you to change the colour of
the points within your point cloud using all
the available Tool Types (Brush, Rectangle,
Fence, etc..). The colour palette can be
adjusted exactly the same as the Colour
Matching options.
The Colour Matching options can also be
applied to the paint tools. Therefore allowing
you to narrow down the choice of points
which will be painted.
The paint tool features two sliders, the
Coverage slider which allows you to adjust
how densely the paint is applied and the
Opacity slider which adjust the amount of the chosen colour applied to the points.
10.3.4
Exposure
The exposure tool works in exactly the same way as the Painting tool. The only difference
is that instead of painting the points with a different colour the points current colours are
adjusted depending on the settings of the Brightness and Contrast controls.
10.3.5
Patching
Patching allows you to create new synthetic points to fill in gaps within your data.
For example pavements or road segments that have not been captured owing to passing
cars or people.
Patching works with all the Select Tools
except the brush tool.
The patching tool has two options, Point
Spacing and Jitter.
Point Spacing determines the minimum gap between any two points.
Jitter applies a noise effect to the generated points to make them look more realistic and
less uniform in their layout.
10.3.6
Masking
The Masking capabilty allows you to
determine which point clouds will be
effected by any of the edit tools.
Unselecting a point cloud in the list will
mean that it will be “invisible” to the
select/paint tools.
This is useful for example when wanting to match colours between a Patch and the master
point cloud it is gap filling for. By unselecting the master point cloud you can paint freely on
36 of 47
Arena4D – User Guide
the Patch without fear of painting onto the original master cloud.
10.4
Point Cloud Exploitation
As well as the built in Point Cloud properties that can be adjusted, Arena4D also provides
some extra powerful Point Cloud
exploitation tools which can be found
on the Point Cloud Tool Bar.
Point Colouring – this is a tri-state button, which means it can be in one of three states.
The default state means that point clouds will be drawn using what ever colour properties
have been set for them; that is either RGB or Intensity. You can mix and match how point
clouds are drawn. The first press of the Point Colouring button will switch ALL point clouds
to be rendered in RGB mode. Press the button again and they ALL be drawn in intensity.
Press it a third time and point clouds will return to their “mixed” mode.
Point Lighting – this is also a tri-state button. The default state means that no special
lighting effects are applied to the point cloud. The first press of the button will enable
lighting and provide dynamic shading and highlighting to the point cloud. The second press
will do the same but remove all colour from the point cloud. This can really help to highlight
hard to see features.
Point Magnification – when the cursor is placed over a point it highlights the point for the
user. This is useful when trying to click on points in a point cloud as it is generally all too
easy to miss a point and click on the background somewhere.
Point Filling – this is another tri-state button. The tool intelligently resizes the points to try
and minimise gaps in the point cloud data. The first mode simply increases the point size
as you get closer to the point cloud. The second mode intelligently resamples the point
cloud to blend neighbour points into a smoother seamless looking surface.
10.5
Point Cloud Rotation
Point clouds can be moved just like any other data object by selecting the object in the
Project Tree window and then dragging the cursor on the globe whilst holding down the
ALT key of the keyboard.
Pressing ALT + SHIFT whilst dragging activates rotation around the data center point.
The center point can be visualised by turning on the Arc Ball property of the point cloud.
The rotation happens in one axis only, at right angles to the viewing position. Effectively
this allows you to tilt the point cloud as if it were on a see-saw and you were looking along
the length of the see-saw. To raise/lower different edges, simply change your viewing
position to look directly at the edge you wish to raise/lower.
37 of 47]
Arena4D – User Guide
10.6
Point Cloud Height Adjustment
When a point cloud is first brought into Arena4D it may, or may not sit
perfectly on the terrain depending on many reasons (captured data,
terrain fidelity, processing options, etc).
Arena4D provides an onscreen visual guide to hep you locate and
position your point cloud on the terrain. Use the onscreen Up and
Down arrows to position the data, and when happy confirm with the
green “tick” button.
This tool can be accessed at any time by right clicking on the point
cloud in the Arena Manager window and selecting “Adjust Point Cloud
Height”.
10.7
Point Cloud Exporting
Point Clouds may be exported from Arena4D into LAS, PTS or ASCII text files. There are a
number of options when exporting point clouds as to how they should be exported.
GeoReferenced – The points are exported exactly as they appear in Arena4D, with the
coordinate system chosen by the user.
Non-GeoReferenced – The points are placed back in the original position they were
exported in. Therefore if the centre of the original point cloud was (100,25,22) then it will
be again in the exported version.
10.8
Aligning Pre-Registered Point Cloud Data
If you bring in a series of scan data as individual scans which have been registered in a 3rd
party product, it is now easy to
align them all together if one or
more scan have been moved to a
new location on the globe.
Select the scans you wish to align
in the project tree and right click
and select Align Registered
Point Clouds.
You will then be presented with
the option to select which cloud to
treat as the Reference Point
Cloud. This is the cloud which all
the others that you have selected will be aligned to. Once chosen, press OK and the data
will instantly snap to their registered locations.
38 of 47
Arena4D – User Guide
11 Presentation Mode
As well as being able to generate videos, live fly-throughs and publications from
Viewpoints you can also use them within a live presentation using the Presentation Mode
of Arena4D.
To access Presentation Mode simply click the Presentation Mode button on the System
Tool Bar.
Once Presentation Mode is active all windows will minimise, leaving the main viewing
window to fill the screen.
At the bottom of the screen there will be two buttons, Previous and Next. Using these two
buttons you can sequentially step through the current Viewpoints. The current Viewpoint
number and name is shown in the middle between the two buttons.
39 of 47]
Arena4D – User Guide
12 Controls Quick Reference
12.1
Orbit Views
Left mouse drag
–
rotate globe.
Left mouse drag + SHIFT
–
pan/tilt.
Right mouse drag
–
translate.
Middle mouse drag
–
pan/tilt.
Mouse wheel
–
zoom.
Shift + C
–
centre view here.
W
–
walk forwards.
S
–
walk backwards.
A
–
strafe left.
D
–
strafe right.
SHIFT
–
run.
Left mouse drag
–
look around.
R
–
reorientate.
F
–
reset field of view.
G
–
reset view.
X
–
snap to cursor.
U
–
snap to closest point.
T
–
target view.
Shift + R
–
rotate.
V
–
create Viewpoint.
M
–
create Measurement.
P
–
create Plumb Line.
L
–
create Polyline.
H
–
create Pin.
E
–
select – Point Edit.
I
–
identify Point Cloud.
12.2
First Person Views
12.3
Shortcut Keys
40 of 47
Arena4D – User Guide
Shift + E
–
unselect – Point Edit.
CTRL + ALT + Space
–
toggle Presentation Mode.
Space
–
toggle View type.
CTRL + P
–
print.
CTRL + A
–
PDF.
CTRL + S
–
screenshot.
CTRL + C
–
copy to clipboard.
1,2,3,4,5
–
change point size.
Shift + 1
–
align view to tangent.
Shift + 2
–
align view to 2 points.
Shift + 3
–
align view to 3 points.
Arrow Keys
–
rotate view 90 degrees.
Shift + T
–
top down view.
Shift + Z
–
fix depth during measurements.
Shift + X
–
fix X axis during measurements.
Shift + Y
–
fix Y axis during measurements.
41 of 47]
Arena4D – User Guide
13 Hints and Tips
Arena4D is a very versatile and powerful tool. To get the best experience of the software
here are some useful suggestions when working with Arena4D.
13.1
Combine Point Filling & Point Magnification
Use a combination of Point Filling and Point Magnification when measuring to ensure you
are clicking on the correct point. Point Clouds can be difficult to work with owing to the
natural “gaps” in the data. These two modes can reduce the frustration when working with
such data and combining them makes you almost forget you are using a Point Cloud at all.
13.2
Use Point Lighting Mode 2
Point Clouds are typically coloured using photographs taken at a time different from when
the laser scan beam captured the original point. This can be anything from seconds in time
to days/weeks/months. This can lead to the data “fooling” the human eye by presenting
confusing colour that doesn't relate to the actual object that has been scanned.
By using Point Lighting Mode 2 all the colour is removed from the scene. However the
intelligent lighting engine brings out the fine detail such as changes in surfaces, like ripples
and cracks. These items normally go unseen in standard visualisation packages.
13.3
Setup Arena Data Processing Folder
Arena4D requires a folder in which it processes data. Mostly this is used by the Point
Cloud import wizard. Point Cloud processing is an intensive process which works well on
fast hard drives.
The Point Cloud processing routine will read data from a source location, process it in the
Arena Data Processing Folder and then save it to a chosen destination location. For best
performance throughput it is advisable not to have the Arena Data Processing Folder on
the same drive as the source/destination folder. Otherwise the computer will have to read
and write at the same time from the same drive which is slower than reading from one and
writing to another.
Finally data processing can take a large amount of drive space, so consider choosing a
drive with a good amount of free space.
42 of 47
Arena4D – User Guide
13.4
Use Point Filtering
Scan data often overlaps producing redundant data. Scans can be dramatically reduced in
size by using point filtering. This can slow down the processing import stage, but creates a
much smaller faster end product. Depending on scan acquisition type a range of between
2mm and 5mm is a good spacing to start experimenting with.
Using the Point Smoothing & Point Lighting function of Arena4D can easily overcome
reduced point densities brought about by filtering, and in most cases actually improve the
quality of the rendered data over raw unfiltered data.
13.5
Filling Gaps
If your point data has some noticeable gaps, try increasing the Point Render Threshold to
a larger number in the System Settings. The higher the number, the more points that are
loaded but the slower the rendering will become.
The other option is to adjust the Point Ratio values. When Point Filling is turned on it will
apply a formula to the points to work out their size on the screen. This formula uses the
distance, the point size and the point smoothing factor to calculate the correct size. By
adjusting the point size and point smoothing figure in the Point Cloud properties you can
adjust this gap filling effect.
13.6
Measurements
When taking measurements, especially in orthographic view mode, it can be preferable to
ignore any changes in axis of the data. For example you may wish to just measure the
pure horizontal size of a window frame, ignoring any bends or curves.
To do this, firstly align your view with the window using the view alignment tools. Then start
a measurement. When the measurement tool is active press Shift + Z. This places the
software in a mode where it will ignore the depth in the scene and just measure X and Y
values within your 2D viewing window. If you want to measure purely horizontally press
Shift + Y to lock the Y axis at the current cursor position.
13.7
Point Cloud Identification
Pressing and holding the I key whilst hovering over the mouse over a point will show which
point cloud the point belongs to.
43 of 47]
Arena4D – User Guide
14 Revisions
Version 1.18.0
•
•
•
•
Window docking framework
Local data viewer
Multi-Lingual support
Space Navigator 3D Mouse suport
Version 1.17.0
•
•
•
•
•
•
•
•
•
•
•
•
•
•
Support for 3D DXF files
Point Cloud Identification key
Pin object type
Greater range of movie export options, including individual image frames
Streamlined point cloud import/export tool
Streamlined screenshot tool
Adjustable on screen precision for measurements
Automatic focus on cursor
Better support for local coordinate system point clouds
One touch collapsable project tree panel
Internal use of “Snap To Point” function for point cloud tools
Translate view mouse controls
Ability to “lock” X,Y or Z components of view when measuring
Ability to align pre-registered point cloud data
Version 1.16.0
•
•
•
•
•
•
•
Paint Tool
Exposure Tool
Patching Tool
Fence Select
Origin Point Cloud Exporting
RAW Video Output
Changed Edit key to ALT
Version 1.15.0
•
•
•
•
•
•
•
Width Tool
Horizontal Alignment Tool
Simplified Viewpoint Adjustment
Improved HMI
Renamed Camera to FOV
Renamed List to Hyperlink
Renamed Target View to View From Point
Version 1.14.0
44 of 47
Arena4D – User Guide
•
•
•
•
•
•
•
•
•
•
•
Align view controls
Rotate view by 90 degrees controls
Angle data type
Polyline data type
Calculate angle between measurements
Toggle zoom at cursor
Snap to cursor view point
Snap to closest object
New 3D model engine
Adjustable Font Size
360 degree view manipulation in Orbit View mode
Version 1.13.0
•
•
•
•
•
•
•
User configurable mouse controls
Improved measurement tool
New 3D cursor position overlay
Improved animation capability
Improved point cloud engine
Improved plane selection tool
Numerous UI enhancements
Version 1.12.0
•
•
•
•
•
H264 video output
Unselect points in edit mode
Vertical alignment tool for point clouds
Height adjustment tool for point cloud import
Keyboard shortcut manager
Version 1.11.0
Presentation Mode
Point Cloud Copying & Deletion
•
•
Version 1.10.0
•
•
•
Shortcuts
Intensity Colour Ramp
Align to multiple point clouds
Version 1.9.0
•
•
•
•
•
•
New animation engine with spline curves for smoother trajectories
Automated registration of any point cloud data
Vertical alignment tool for point clouds
Point Cache system for network streaming of point cloud data
Start-up viewpoints for each Arena
Redo as well as Undo edits
Version 1.8.0
•
Faster point processing
45 of 47]
Arena4D – User Guide
•
•
•
Point cloud filtering
Fixed speed or duration movies
Support for more coordinate systems
Version 1.7.0
•
•
•
Faster point rendering
Stability improvements
New Point Smoothing technology
Version 1.6.1
•
•
•
•
•
•
•
Advanced dynamic point lighting engine
e57 file support
Unified look and feel
Point cloud import wizard
Transparent globe option
Plumb line tool
Floating licenses
Version 1.5
•
•
•
•
•
•
•
•
•
•
•
•
Register point clouds to a single point
Survey point clouds to an exact position with the new survey tool
Chronological undo history
Point cloud linking for moving multiple clouds at once
Streamlined point cloud processing
Wire frame globe option
Customise startup view position
Autosave
Point cloud filters
Optional desktop GUI interface
Pre-defined movie formats (Up to 4K resolution) with stereo 3D and motion blur filter
options
Fixed centre animations for creating "fly by" videos
Version 1.4
•
•
•
•
•
•
Repository Manager, easier management of your Arenas and their data.
Watermark layer
Paper Scaling, adds accurate scale information to your output from Arena4D based
on the destination paper size
Per Arena Terrain Settings
Dongle licensing
Object property revisioning, allows you to undo edits step by step
Version 1.3
•
•
•
•
•
•
Point Cloud Registration
Environmental Audio
PDF Generation
3D model support (PLY, 3DS, OBJ)
Full Screen Anti-Aliasing
Transparent DXF Support
46 of 47
Arena4D – User Guide
•
•
•
•
•
•
•
•
•
CSV Import
Follow Trajectory on Arena Mapper data
Atmospherics (Clouds & Sunlight)
Paths
Multiple Elevation Models (MSL, AGL, EGM96)
Greater range of Shapefile projections supported
Lock position of objects to stop accidental movement
New Properties Window/Arena Manager
Selectable Measurement Colours
47 of 47]


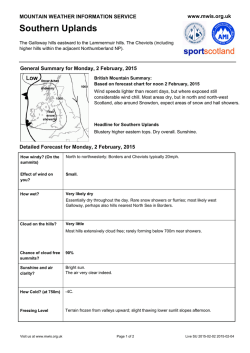


© Copyright 2026