
Download - CostsMaster
CostsMaster
CostsMaster User Guide Version 4
CostsMaster
Draftsman Edition
© 1999 - 2013 CostsMaster Ltd.
CostsMaster User Guide Version 4
© 1999 - 2013 CostsMaster Ltd.
All rights reserved. No parts of this work may be reproduced in any form or by any means - graphic, electronic, or
mechanical, including photocopying, recording, taping, or information storage and retrieval systems - without the
written permission of the publisher.
Products that are referred to in this document may be either trademarks and/or registered trademarks of the
respective owners. The publisher and the author make no claim to these trademarks.
While every precaution has been taken in the preparation of this document, the publisher and the author assume no
responsibility for errors or omissions, or for damages resulting from the use of information contained in this
document or from the use of programs and source code that may accompany it. In no event shall the publisher and
the author be liable for any loss of profit or any other commercial damage caused or alleged to have been caused
directly or indirectly by this document.
Printed: December 2014
4
CostsMaster User Guide Version 4
Table of Contents
7
Chapter I Overview
CostsMaster
- An Overview
...................................................................................................................................
7
10
Chapter II Installation
CostsMaster Installation
...................................................................................................................................
10
13
Chapter III General Tasks
General Tasks
...................................................................................................................................
13
Working With Windows
...................................................................................................................................
16
Working With Grids
...................................................................................................................................
18
Working With Files
...................................................................................................................................
35
43
Chapter IV Setting up the bill
Setting Up The Bill
...................................................................................................................................
43
Rates, Fee Earners & Counsel
...................................................................................................................................
57
Enhancement
...................................................................................................................................
65
70
Chapter V Recording work
General Information
...................................................................................................................................
70
Attendances & Disbursements
...................................................................................................................................
75
Recording Work in Different Locations
...................................................................................................................................
83
95
Chapter VI Types of Bill
Columned Bills
...................................................................................................................................
95
Costs Budgets
...................................................................................................................................
104
Breakdowns & Statements of Costs
...................................................................................................................................
111
CLAIM1 and CLAIM1A Forms
...................................................................................................................................
114
High Cost Case Plans
...................................................................................................................................
119
Reports
...................................................................................................................................
125
Chapter VII Creating Bills & Other
Documents
127
Exporting The Bill
...................................................................................................................................
127
Export Phrases & Export Templates
...................................................................................................................................
136
Chapter VIII Getting work in to (and out of)
CostsMaster
144
Importing Work
...................................................................................................................................
144
Importing Work from a CostsMaster File
...................................................................................................................................
145
Importing Work from a Time Recording System
...................................................................................................................................
146
Data Import Wizard
...................................................................................................................................
147
Import File Format Mapping
...................................................................................................................................
149
© 1999 - 2013 CostsMaster Ltd.
CostsMaster User Guide Version 4
5
Transfer Mappings
...................................................................................................................................
151
Pending Work Window
...................................................................................................................................
152
Outputting Work
...................................................................................................................................
154
XML Totals
...................................................................................................................................
155
Chapter IX Customising CostsMaster
157
Local Settings
...................................................................................................................................
157
Other Settings
...................................................................................................................................
167
Chapter X Tools and Utilities
173
Tools & Utilities
...................................................................................................................................
173
Chapter XI Software Protection
183
Software Protection
...................................................................................................................................
183
Chapter XII Getting Help
187
Getting Help
...................................................................................................................................
187
Chapter XIII CostsMaster Reference
190
Export Phrase Formatting
...................................................................................................................................
190
Keyboard Shortcuts
...................................................................................................................................
194
XML & CSV Import and Output Work Specifications
...................................................................................................................................
199
XML Totals File Content
...................................................................................................................................
217
Command Line Parameters
...................................................................................................................................
221
Feature Comparison
...................................................................................................................................
223
Index
230
Chapter
1
Overview
Chapter 1 - Overview
CostsMaster - An Overview
What Is CostsMaster?
CostsMaster is a software tool for Costs Lawyers & Law Costs Draftsmen designed to
assist them in the preparation of high quality costs budgets, statements of costs, bills of
costs and case plans for assessment by the Court or the Legal Aid Agency.
The program is designed to be as quick to use as recording work with pencil and paper
and dictation with the benefit of increased accuracy and control over the appearance of
the finished bill.
The team behind CostsMaster have extensive experience of Costs Drafting - it is truly a
tool written by draftsmen for draftsmen.
CostsMaster Versions
The program can function in different modes depending on the licence you hold:
Restricted Trial Mode
When you run the software without a dongle, or with a dongle that has expired or has no
more free users, the program will run in restricted trial mode. This is designed for new
users to evaluate the program to see if it meets their needs. The program will not expire
and is fully functional but you are limited to recording 15 hours work.
Extended Trial Mode
For most people the restricted trial mode is more than sufficient for them to evaluate
whether the program meets their needs. However we recognise that there may be
occasions when recording 15 hours work per file is insufficient to let you fully evaluate
the program. If this is the case we will always consider giving you a trial which does not
restrict the amount of work recorded but which will function for a limited period. For this
we will need to send you a dongle which contains the time restriction.
If you wish to apply for an extended trial please contact us at [email protected]
giving your full business name and address together with the reasons why the standard
trial mode is insufficient for you to evaluate the program. Please note that we are unable
to send out extend trial dongles to applicants who only give a free email address.
Standard Mode
This is the standard version of CostsMaster.
System Requirements
CostsMaster requires the following:
Operating System
Windows
Windows
Windows
Windows
Windows
XP
Server 2003 (via Terminal Services)
Vista
Server 2008 (via Terminal Services)
7
© 1999 - 2013 CostsMaster Ltd.
7
8
CostsMaster User Guide Version 4
Windows 8
Windows Server 2012 (via Terminal Services)
64 bit versions are supported via the 32 bit compatibility layer.
Office Software for Bill Generation
CostsMaster generates its exported bills on disc in Rich Text Format (RTF), a document
format designed for interchange of documents between different word processors. Whilst
this should mean that any word processor will suffice, in practice each interprets the
Rich Text Format differently.
The following Word Processors are fully supported:
Word 97
Word 2000
Word 2002 (XP)
Word 2003
Word 2007
Word 2010
Word 2013
The following Word Processors are partially supported:
Open Office.
Display
1024 x 768 Screen Resolution. Multiple displays are supported.
CPU
Core 2 Duo 1.86GHz or faster recommended.
Memory
1 - 2GB Ram (4GB recommended)
Hard Drive Space
30 MB free space on your hard drive
Other Hardware
1 free USB port for hardware dongle.
© 1999 - 2013 CostsMaster Ltd.
Chapter
2
Installation
10
CostsMaster User Guide Version 4
CostsMaster Installation
Obtaining The Program
The CostsMaster program is available as a download from our web site
www.costsmaster.co.uk. Obtaining the program in this manner always ensures that you
have the latest version available. Updates are made available from time to time which are
free to all registered users. Occasionally the program may be made available on flash
drive. Whilst convenient these quickly fall out of date so if you have obtained the program
by this method you might want to check our web site to see if a more recent version has
been released.
Downloading the program
When you click on the program on our web site you may be asked where you want to
save the file. If you are upgrading it is important not to select the CostsMaster icon on
the desktop as this will overwrite the program file and stop it working. We would
recommend creating a folder on your hard drive, perhaps within "My Documents", into
which you save all the files you download from the internet. An obvious name would be
"Downloads" but you can call it whatever you wish as long as you can locate it after the
download has finished.
Installing The Program
If you downloaded the file double click it to start the installation. If you have obtained the
program from us on a flash drive you can use the graphical interface to select the
program to install. If Windows does not automatically show the graphical interface,
navigate to the flash drive and double click the "Run Me" program.
The setup program will now run. You will be asked where you want to install
CostsMaster. The default is C:\Program Files\CostsMaster Draftsman Edition
(C:\Program Files(x86)\CostsMaster Draftsman Edition on 64 bit operating systems) but
you can choose any location on your hard drive.
The installation program will copy the program files to your hard drive. Other files will be
copied to other locations. For full details of the locations of all CostsMaster files please
see the section headed File Locations
The installation program will optionally create short cuts in the Start menu, in the Quick
Launch bar (XP only) and on your desktop.
Updating The Program
You can upgrade the program to a more recent version at any time by
downloading the latest version of the setup program from our web site.
running the "Check for Updates" tool from the Help menu. This item will only be
enabled if you have sufficient permission to perform the update.
When you upgrade only the program files will be replaced - all your settings and
documents will be retained.
If you are upgrading from CostsMaster 2 you will need to be aware that when you install
the program it will initially function in restricted trial mode. You will need to contact us to
obtain a hardware dongle. Full details of how to do this can be found by following the
© 1999 - 2013 CostsMaster Ltd.
Chapter 2 - Installation
11
links on the trial window that will appear when you start the program.
Installing The Dongle
If you have purchased CostsMaster you will have been sent a dongle. This is a small key
that plugs into a spare USB port on your computer. It contains information about your
licence and without it the program will only operate in restricted trial mode, so take care
of it. After installing the software, insert the dongle into a spare USB port on your PC.
Windows will install the driver for the dongle and should report that your new hardware is
working correctly.
After this start CostsMaster. If the dongle has been successfully installed you should no
longer see the white trial window when it starts. Please note that if you have requested
an extended trial dongle you will see a grey trial window showing how much of the trial
period remains.
Network Installation
Terminal Services
CostsMaster can be installed on a Terminal Services network. If installing the software in
this manner you must request a Network dongle as individual dongles will not work under
Terminal Services.
Network Dongle
Whether CostsMaster is installed under Terminal Services or on individual workstations,
it is possible to request a single network dongle that will allow true concurrent usage. For
these you will need to set up one PC on your network as a dongle server. The software
to do this can be downloaded from our web site. Please see the Network Dongle User
Guide for full details of how to install the dongle server software and configure the
firewalls on your network.
© 1999 - 2013 CostsMaster Ltd.
Chapter
3
General Tasks
Chapter 3 - General Tasks
General Tasks
Running CostsMaster For The First Time
After installing the program you can start CostsMaster from one of the shortcuts that the
installer will have placed on your system. The installer has options to place shortcuts on
the Program Menu, on the desktop and on the quick launch bar (XP only).
Restricted Trial Mode
If you are running the program without a dongle the Trial window will appear. This has
options to
a) Request a dongle if you already have a licence for CostsMaster Version 2
b) Run the restricted trial.
c) Purchase the software
If you are seeing this screen when you have a dongle installed, please see the section
on problems with the dongle.
Extended Trial Mode
If you have requested an extended trial dongle, a window will appear showing you how
much of the trial period remains. If the trial period has expired a box will be available
where you can enter the update code that will be sent to you if you subsequently
purchase CostsMaster.
Spare Dongle
If you start the program with a spare dongle in the machine the program will warn you
and give you the opportunity to enter any update code you have obtained which will
activate the spare dongle for a limited period.
Welcome Screen
In all other cases, and after closing the above windows, the Welcome screen appears.
This has buttons that allow you to
a) Open a recent file
b) Browse for a file on your hard drive
c) Import work from a time recording system
d) Start a new document based on a partially completed template
e) Start a new completely blank file
f) View the user guide
g) Check to see if there are any updates available
h) Close CostsMaster (if you started it accidentally).
The welcome screen can also be viewed at any time by selecting the New File button on
the main toolbar (or by going to File > New).
Selecting any of the above options (other than the last) closes the Welcome screen and
shows the main CostsMaster toolbar.
This has buttons which give you access to the most commonly used functions in the
program. The program is divided into logical sections relating to the divisions in a
traditional bill of costs. Holding the mouse over a button will produce a hint as to the
button's purpose but for full details please see the sections on Setting up The Bill and
© 1999 - 2013 CostsMaster Ltd.
13
14
CostsMaster User Guide Version 4
Recording Work.
At the bottom of the main tool bar is a status panel divided into four sections which show
Recent events that have happened (such as exporting a document or saving the file)
The current part
The current profile
Whether the program is currently showing all features or only features relevant to legal
aid, inter partes, Court of Protection or Central Funds.
These will be explained more fully in the following pages.
Tip of The Day
For new users the tip of the day window can be a good way to learn about the exciting
new features in CostsMaster. This window is shown on startup (although you can opt for
this not to happen by selecting the appropriate tick box on the tip of the day window), or
from the Help menu on the main toolbar.
Inputting Information
The work you enter into CostsMaster is held in a form that closely resembles the
structure of a traditional bill of costs.
Each bill has sections for Fee Earners, Categories, Parties, Narrative, Parts etc. Each
part has a section for Procedural Steps, Parties, Documents, Travelling & Waiting, Costs
of Assessment etc.
Each of the sections is represented by a window which can be accessed in one of three
ways:
From the menu on the main toolbar.
All functions within the program can be accessed this way.
From one of the buttons on the main toolbar.
Again all functions in the program can be accessed in this way but by default only the
most frequently used buttons are visible. You can choose which buttons you would like
on the toolbar in the Toolbar Settings window.
By using a keyboard shortcut
A keyboard shortcut is the quickest way to get to a particular function. CostsMaster
provides a comprehensive range of shortcuts for the most frequently used functions.
Please see the section on Keyboard Shortcuts for a full list of the shortcuts available.
There is also a PDF file of available shortcuts installed with the program and accessible
from the program folder in the start menu. This is designed to be printed on thin card and
folded over where it can be placed on your desktop for easy reference.
Full details of the available windows and their usage can be found throughout this guide,
particularly in the sections on Working With Windows, Setting Up The Bill, and
Recording Work.
© 1999 - 2013 CostsMaster Ltd.
Chapter 3 - General Tasks
15
Specifying Colours
CostsMaster allows you to specify colours for different items such as column
backgrounds. Where this is available the colours are chosen by clicking the button next
to the colour swatch. This opens the Colour Picker window.
The Colour Picker Window lets you select one of 16 million available colours. Colours are
made up of a combination of red, green and blue elements, each of which can have a
value of 0 to 255. The original colour you started with is displayed in a swatch on the
bottom left of the screen with the new colour you are selecting to its right.
If you know the red, green and blue values of the colour you want you could type these
directly into the relevant boxes in this window. More likely you will want to experiment
with different colours. For each of the basic elements there is a slider that you can move
to "mix" the quantities of red, green and blue. You can also drag the mouse around on
the colour spectrum.
The colour spectrum represents a mix of two of the three basic colour elements. The
third element is represented by the bar down the left-hand side. By default the spectrum
shows the mix of red through to green (with the blue element being controlled by the side
bar) but you can change this by selecting an alternative value from the drop-down box
above it. Dragging the mouse around this spectrum will let you select the exact shade of
colour you require.
© 1999 - 2013 CostsMaster Ltd.
16
CostsMaster User Guide Version 4
Working With Windows
Working With Windows
The main CostsMaster toolbar gives access to the other windows via the menu at the top
or via the buttons (which can be customised using the Toolbar Settings window)
Most windows that allow you to record work have a grid where data can be entered.
Please see the section on Working With Grids for further information.
There are two different types of window in CostsMaster, those that can be left open while
you work on another part of the program and those that must be closed before you can
proceed further.
Windows that can be left open
Most windows with grids can be left open while you work elsewhere. These windows will
update their information if data in another part of the program changes.
For example if you have the documents window open showing documents recorded in
the current part and you move to the parts window and change the current part, the
documents window will change to show the items recorded in the newly selected part.
Any information you input into these windows is applied immediately. e.g. if you add an
attendance and enter 30 minutes for the time the running totals in the control centre will
update to reflect the new total.
To close the window simply click on the close button at the bottom of the screen.
There is also a help button which will bring up the page from this guide which is most
relevant to the window.
Windows that must be closed before you continue
Some windows must be closed before you can make changes elsewhere. Such windows
include those relating to options as well as edit windows for each grid.
For the most part changes on these windows are not applied until you click the OK
button and you are given the option of abandoning any changes made by clicking the
cancel button. However there are some cases where changes to data are applied
immediately (usually because the change needs to be made in order to update other
information on that page). For example, using the auto-complete Shift + Enter function to
complete rates and enhancement requires the values to be stored. Clicking the cancel
button after performing such an operation will not undo these changes.
These windows also have a help button which will bring up the page from this guide
which is most relevant to the window.
When one of these windows is open only the following shortcuts will be available:
Shortcuts concerned with time recording
Saving (including Save As)
Help
Any shortcuts relevant to the window itself
© 1999 - 2013 CostsMaster Ltd.
Chapter 3 - General Tasks
Closing Windows
In addition to clicking the OK / Cancel / Close buttons you can close any window using
the keyboard shortcut
Alt + Enter
This is the same as clicking the Close or OK buttons. For windows which must be
closed before you can continue, the shortcut
Shift + Alt + Enter
is identical to clicking the Cancel button.
© 1999 - 2013 CostsMaster Ltd.
17
18
CostsMaster User Guide Version 4
Working With Grids
Introduction to grids
Grids are used extensively throughout CostsMaster as they provide a flexible means of
recording work. Each item is shown on a separate row. Items have various fields that
differ depending on the type of item. Each field is represented by a different column.
Most items have more fields than can be comfortably shown in a grid. By default, lesser
used columns are hidden leaving only those that are required frequently by most users. It
is possible to access hidden fields either by enabling the column for that field or by
viewing all fields in the edit window for the grid. In addition a complete list of available
fields for a grid can be seen by clicking the top left column of a grid or using the shortcut
Ctrl + Shift + K
Clicking a field in this list will take you to the column for that grid or, if it is hidden, to the
edit window.
To get back to this help page from any grid please use the following shortcut:
Ctrl + Shift + ?
All grids have a set of buttons along the top that let you manage the items in the grid.
Full details can be found in the following sections:
Adding & deleting items
New Item
Ctrl + Shift + N
Insert Item
Ctrl + Shift + I
Delete Items
Ctrl + Shift + D
Items can be added either to the end of the grid by clicking the New button or above the
currently selected item by clicking the Insert button. Inserting items is not possible when
more than one item has been selected. When the grid is in Multi select mode adding an
item automatically opens the edit window for that item
The currently selected items can be deleted by clicking the delete button.
Moving items within the grid
Move Up
Ctrl + Shift +
Move Down
Ctrl + Shift +
The currently selected items can be moved up or down one position by clicking the move
up / move down buttons.
Alternatively items can be dragged to a new position in the grid with the mouse or even
to a completely different grid provided the type of data displayed in both grids is
© 1999 - 2013 CostsMaster Ltd.
Chapter 3 - General Tasks
19
compatible. All attendance grids are compatible with each other as are all disbursement
grids.
To move an item or items by dragging it is necessary for the grid to be in multi-select
mode and then to hold down the ALT key in order to signify that you intend to move an
item rather than select it.
Each of these methods behaves slightly differently if you have multiple non-consecutive
items selected, i.e. you have used the Ctrl key to select more than one item and at least
two of the items have a row between them that is not selected. In this case, if you use
the up / down arrow buttons each item will be moved up or down by one position.
However if you drag them on to an existing item they will all appear consecutively after
that item.
Copying and Moving Items to different locations
Right Click Method
In CostsMaster there are two different ways of copying and moving items to a different
part or location within the program. As well as Cutting, Copying and Pasting, you can
right click on an item or a group of selected items and select the destination from the
pop up menu that appears.
Using this method, you can copy or move items to a different part or to a different
location within the same part. Should you want to move items to a different location
within a different part using this method it would have to be accomplished in two stages.
If moving items to a procedural step or party, a box will appear listing all the current
procedural steps and parties from which you can select the desired location. In addition,
for procedural steps, there is an entry labelled "<Create New Procedural Step>" which,
will move your items to a new step that will be created for the purpose.
When moving items to a part, the currently selected part is greyed out, but when copying
it is not, meaning you can use this method to make a copy of an item in the same
location.
This method is not available when the Show Work From All Parts option is selected in
the Control Centre.
Drag & Drop Method
Alternatively items can be dragged to a new position in the grid with the mouse or even
to a completely different grid provided the type of data displayed in both grids is
compatible. All attendance grids are compatible with each other as are all disbursement
grids.
To move an item or items by dragging it is necessary to hold down the ALT key in order
to signify that you intend to move an item rather than select it.
To copy an item or items by dragging it is necessary to hold down the CTRL key as well
as the ALT key.
© 1999 - 2013 CostsMaster Ltd.
20
CostsMaster User Guide Version 4
Cutting, copying & pasting items
Cut
Ctrl + X
Copy
Ctrl + C
Paste
Ctrl + V
The currently selected items can be cut or copied to the CostsMaster clipboard by
clicking the cut or copy buttons. These buttons behave differently depending on whether
the grid is in multi select mode. When not in multi select mode the Cut and Copy
buttons apply to selected text, but in multi select mode they apply to the entire item.
To paste text or an item or items that have been cut or copied to the CostsMaster
clipboard click the Paste button. The paste button is enabled whether or not the grid is in
multi select mode but only when there is compatible data in the CostsMaster clipboard.
Pasted items will appear in the grid immediately before the currently selected item.
Cutting and copying items in this way will only allow you to paste them within
CostsMaster - they will not be available to external applications.
Please note that Cut/Copy/Paste are not available in the Part Attendances and Part
Disbursements grid, nor when Show Work For All Parts is turned on.
Pasting items to grids can only be done when the items on the clipboard are the same
type as the grid.e.g. it is possible to copy an attendance from Documents to Party Long
Telephone Calls but not to Miscellaneous Disbursements. One exception to this is when
you attempt to paste attendances or disbursements into a procedural step. Here a new
step will be created and the attendances or disbursements pasted within it. When
pasting an item to an incompatible location you are warned that this is not possible.
Editing
Ctrl + Shift + E
Editing directly in the grid
Editing items directly in the grid is only available when the grid is not in multi select
mode.
Most columns in a grid can be edited directly by typing in the grid or by selecting an
item from a drop-down box. The data you type into the grid is generally validated and
saved when you exit a cell. Different columns have different methods of editing data
depending on the type of that data. The different ways of editing are:
Ordinary Edit
This allows you to type text directly in the grid. It is typically used for textual
descriptions. If there are presets associated with the type of column you are editing they
will be suggested automatically as you type. It is also possible to cycle through the
presets using the Ctrl + Alt +
or
shortcuts or to view the available presets using
the Alt +
shortcut .
Drop Down Edit
Also known as a Combo Edit, this allows you to choose from a list of pre-defined values
© 1999 - 2013 CostsMaster Ltd.
Chapter 3 - General Tasks
21
that appear when you click the arrow to the right of the box. For some columns you have
to select one of the options but for others the options are suggestions and you can also
type something different directly in the box. When you type in the box and items from
the list that match what you type are suggested to you. The drop down list can be shown
using the Alt +
shortcut and you can cycle through the list of possible values without
dropping the list by using the Ctrl + Alt +
or
shortcuts. When selecting an item
from the drop down list for some columns, the data is validated immediately rather than
when you exit the cell..
Spin Edit.
This is a box that you can type in that also has up and down buttons that increment or
decrement the value in the box. It is typically used for columns showing whole numbers.
You can cycle through the incremental values by using the Ctrl + Alt +
or
shortcuts.
Button
Some columns represent data that cannot be directly edited in a grid. These columns
will have a full button in the cell that when clicked will open a window where detailed
information can be entered. For some columns this new window will contain a separate
detailed grid.
Edit Button
This is a box with a button to the right of it. This is similar to the Button but it also has a
box that displays a value. This is used for some columns where the text displayed is a
summary of that contained on the detailed window. For a few columns the text can be
altered directly and where this is possible the value entered will be the most commonly
used out of the full possibilities available in the separate window.
Properties
Properties can be changed by clicking the relevant button on the Properties toolbar, by
clicking in the properties column and selecting the item from the drop down list, or by
using the appropriate keyboard shortcut. If you are in the Properties column you can
make the list of shortcuts appear using the Alt + shortcut. If you use the button or
shortcut and have more than one item selected each property will be toggled, that is to
say if it was previously on it will be changed to off. So if you select three items, the first
of which is excluded and the other two are not, after clicking the exclude button the last
two will be marked as excluded whereas the first will not.
To move between cells you can use the tab key. The enter key accepts the current
suggested text of a dropped down item and moves to the next cell. To add a hard
carriage return to text use Ctrl + Enter.
Editing via the Edit window
You can also view and edit all fields for an item in the Edit window. This is useful as you
can view (and change) the settings of columns which are hidden because you use them
infrequently.
If you select multiple items and click the edit button you can change the data for all
items in one go. To do this, put the grid into Multi-Select mode, select the items and
click the edit button. The window will show blank controls for any data that has different
values. However you can change any item and all selected items will then have that
value. Any field that is not altered will not be changed. It is easy to, say, change several
items to a different fee earner in this manner.
© 1999 - 2013 CostsMaster Ltd.
22
CostsMaster User Guide Version 4
Merging Items
Ctrl + Shift + J
Using this feature, the currently selected items can be merged together into a single
item.
When items are merged each field within the item is considered separately and
CostsMaster attempts to create a meaningful merge of the data. Some fields, such as
descriptions and other text fields, will have the text of the items added one after the
other. Other fields such as time will have their values added together and some, such as
start and end dates will take the earliest or latest as appropriate. There are a few fields
which can not be merged meaningfully and for these the value of the first item will remain
after the merge.
Merging items can only be done when the grid is in multi-select mode and when more
than 1 item has been selected. When merging parts you will be presented with the
Merge Parts wizard.
Merging Parts
When you attempt to merge two or more parts you will be presented with the Merge
Parts Wizard. This window will take you through a series of questions in order to
establish how the work in the selected parts should be merged.
Please note that as well as physically combining parts, it is also possible to combine
them dynamically when exporting a bill.
Claim Work At Different Rates
This page lets you decide whether you wish the work in the merged parts to be claimed
at different rates after the merge.
The options on this page might seem a little frightening at first but once you think about
the implications of merging parts you will understand the options better.
Because CostsMaster lets you define different rates for a category for each part you may
try to merge two or more parts where work is recorded against the same fee earner but
claimed at different rates. Were you to simply merge all the work into a single part it
would be recorded against the same fee earner and you could no longer distinguish
between it in order to claim it at different rates.
CostsMaster takes care of this situation for you by giving you three options:
1. Maintain a distinction by creating separate fee earners
If this option is selected for each part being merged, a separate fee earner will be created
for each fee earner used in a part being merged. As you can imagine, in a complex bill
this can leave you with a large amount of fee earners, some of which are unnecessary if
you only want to claim the work at differing rates.
However, this option is useful if, for any reason, you wish to be able to identify each
piece of work by the part it was originally in, e.g. if you are claiming work covered by
multiple statute bills in a single part because the indemnity principle has not been
breached, you may want the comfort on assessment of being able to identify which work
was covered by which statute bill.
After merge the additional fee earners will all be assigned to the same category that the
© 1999 - 2013 CostsMaster Ltd.
Chapter 3 - General Tasks
23
original fee earner was assigned to. You must create any additional categories that you
need and assign them appropriately.
2. Maintain a distinction only where assigned rates change
This is the preferred option if you simply want to claim the work in the parts being
merged at the rates they are currently being claimed. With this option selected,
CostsMaster automatically creates fee earners only where the rates being claimed are
different.
For example, you have work recorded against fee earner ABC in each of three parts
which you now wish to merge, ABC is assigned to the partner category and you have
defined rates for Part 1 of £180, Part 2 £180 and Part 3 £200. When the parts are
merged the work in parts 1 and 2 will be merged and assigned to ABC but the work in
part 3 when merged will be assigned to “Copy of ABC”.
In order for CostsMaster to be able to do this you must have already assigned a category
to each fee earner and have set up the rates appropriately for each category.
CostsMaster will only create additional fee earners if you have defined differing hourly
rates for the categories. In deciding whether to create new fee earners CostsMaster only
considers the hourly rate.
Additionally CostsMaster can create the appropriate categories to match these fee
earners. Please see further down the page for details.
3. Do not maintain a distinction and merge all work.
This part should be chosen only if you are certain that after the merge you will not want
to distinguish between the work that was formerly in different parts for any reason. With
this option no additional fee earners will be created and all work in the merged part will
be assigned to the original fee earner.
Create Categories
This next page appears only if you have chosen the option to maintain a distinction
between work only where assigned rates change on the previous page AND if the rates
for one or more selected parts are different.
Here you can opt to let CostsMaster create additional categories automatically to match
the new fee earners. Alternatively you can choose to do this manually afterwards.
Sort Items
The next page gives you the option to sort the merged work. By default the work being
merged is appended to the previous parts but you can opt for it to be sorted in date
order.
Spliting Items (Parts)
At present the Split Items function applies only to parts. It lets you split a part into two
with all work prior to a given date remaining in the original part and all work from that date
being moved into a new part.
Not all work can be split in this way. Standard telephone calls, letters out emails out and
letters in will remain in the first part as they do not have any date information as will
© 1999 - 2013 CostsMaster Ltd.
24
CostsMaster User Guide Version 4
items with completely blank dates. The program will attempt to divine the intended date
from any partially recorded dates but this will only be successful if there is enough
information recorded. Partially recorded dates near to the split date may be interpreted
incorrectly and will need to be dealt with manually.
When you split a part you will be presented with a window into which you can type the
date at which you want to split the part. Click OK and the program will automatically split
the part for you. The part names will be amended to add a description of the date at
which the parts were split. This is for identification purposes only and you can rename
them afterwards.
Viewing data
Expand Rows
Contract Rows
Ctrl + Shift + <
Ctrl + Shift + >
Show Bands
Ctrl + Shift + B
Expanding & Contracting
Often, the amount of data in a grid cell is larger than the space available. It is possible to
expand the rows of a grid to show all the text in a cell by clicking the expand button.
However, fewer rows will be visible. If you want to see more rows the process can be
reversed by clicking the button again.
If all the data in a grid cell is larger than the cell can handle it is possible to view it by
hovering the mouse over the cell.
Displaying Bands
The Show Bands button displays alternate rows in the grid in different colours. This can
make the grid easier to read.
See Also
Customising the grid
Selecting multiple items
Selecting items
Multi-Select Mode
Ctrl + Shift + M
Select All
Ctrl + Shift + Q
By default grids are placed in direct edit mode allowing you to type directly in the grid. In
this mode it is not possible to select more than one item at a time. To do this you must
place the grid into multi-select mode by clicking the multi-select button. In this mode it is
not possible to directly edit text but data for one or more items can be edited via the edit
window.
In multi select mode it is possible to select one or more rows. Multiple consecutive rows
can be selected by clicking on the first row, then whilst holding the Shift key, clicking on
the last row (or by clicking on the first row and using Shift + Up/Down arrow to select the
© 1999 - 2013 CostsMaster Ltd.
Chapter 3 - General Tasks
25
range of items). Multiple non-consecutive rows can be selected by selecting the first row
then, whilst holding the Ctrl key, selecting each of the other rows in turn.
It is also possible to select all items in a grid by clicking the Select All button or using
the assigned shortcut. When using this function the grid will be placed in multi-select
mode if it is not already in that state.
Notes
Ctrl + Shift + O
Notes can be defined for each row in a grid. Clicking the Notes button will open a new
window with a grid in which the notes are listed.
When a row has notes defined the properties cell for that row will display a small orange
triangle in the top right-hand corner. Hovering the mouse over the properties cell will
display the notes for that row in a hint window. Any private notes will be displayed in
parenthesis.
Please see the section on Notes for more information.
Extended Characters
Ctrl + Shift + H
If you need to type a character that does not appear on your keyboard you can view the
available characters by clicking the above button.
This will open the Extended Characters window which displays a grid of all available
characters for the currently selected font. There are three ways to insert a character at
the current cursor point in the grid:
Click the character you want to include, then press the "select" button.
Double click the character you want to include.
Navigate to the character you want with the arrow keys and press the Enter key
When you click on a character it is displayed in the lower right corner of the window
together with its extended key code. If you use an extended character frequently you can
insert it without opening the extended characters window by holding down the ALT key
and entering the 4 digit extended code (with leading zeroes).
Properties
Most items displayed in grids have what we call properties. These are items that are
either on or off. For example attendances can be excluded or marked as estimated.
These items are displayed as icons in the properties column of the grid.
Properties can be set in one of five ways:
You can click the relevant button in the toolbar.
You can use the shortcut for the relevant item.
You can click the edit button and change the property in the edit window.
You can click in the properties column with the left button and select (or de-select) the
item from the list
If you are in the properties cell the Alt +
shortcut will drop down the list of
© 1999 - 2013 CostsMaster Ltd.
26
CostsMaster User Guide Version 4
available properties (which can then be selected using the up and down arrows and the
enter key).
If multiple items are selected the first three methods will toggle the property of all
selected items.
In the grid, properties can be displayed one after another or aligned in columns
depending on the option to show property icons in columns in the local settings window.
Whichever option is set, you must take care to ensure that the width of the properties
column is sufficient for your needs because if the grid is not expanded and there is
insufficient space for all properties, those outside the column will not be seen. By default
the width of each properties column is sufficient to display each property.
Properties common to many types of data
Draw Attention
Ctrl + Shift + W
This allows you to flag items that require your attention in some way.
When you mark an item as requiring attention any items that include the marked item
will appear with a greyed out icon to indicate that an item at a lower level requires
attention. This avoids the likelihood of outstanding items in remote locations being
overlooked.
Excluded
Ctrl + Shift + X
An excluded item is never exported and its value is not counted towards the running
totals. This allows you to record items that may or may not be claimable and decide
later whether to include them or not.
When an item is excluded it follows that any items within it are excluded also. Therefore
when you exclude an item any items within it will be shown with a greyed out icon to
indicate that they will be excluded but as a result of the setting of an item higher up the
chain.
Recoverability
Ctrl + Shift + 9 / 5 /1
This property will let you tag an inter partes item with three levels based on its chances
of recovery. Please see the section on Recoverability for further details.
Solicitor / Client
Ctrl + Shift + 0
This property will let you tag an item as unrecoverable from the Paying Party.
Legal Aid
Ctrl + Shift + L
For bills covering both legal aid and inter partes costs this indicates items claimable
solely from the Legal Aid Agency. This can be applied to Categories and Counsel, or to
individual Disbursements.
Attendance properties
© 1999 - 2013 CostsMaster Ltd.
Chapter 3 - General Tasks
Estimated
Ctrl + Shift + S
Attendances for which no time is recorded can be marked as such in the exported bill
Print Out Time
Ctrl + Shift + P
This is intended for items where there is no file note but there is an entry on the print out
from a time recording system.
Additional Info
Ctrl + Shift + F
The description for this item will appear in the table of additional information in a CLAIM1
form.
Disbursement properties
Estimated
Ctrl + Shift + S
Disbursements for which no invoice or fee note exists can be marked as such in the
exported bill
Expert Fees
Ctrl + Shift + T
For disbursements representing expert fees.
Expert Fees
For disbursements where the LAA has authorised the expert to exceed the hourly rate.
Invoice
Ctrl + Shift + V
For disbursements for which an invoice exists.
Paid
Ctrl + Shift + P
For disbursements which have been paid. This can be set automatically when the word
"paid" is typed in the description column.
Receipt
Ctrl + Shift + R
For disbursements for which a receipted invoice exists.
Court Fees
Ctrl + Shift + U
For Court Fees, which are given special treatment in Costs Budgets.
© 1999 - 2013 CostsMaster Ltd.
27
28
CostsMaster User Guide Version 4
Counsel Properties
Leading Counsel
Ctrl + Shift + Q
Leading Counsel are given special treatment in Events-Based Case Plans and Costs
Budgets. It is also possible to show Fees for Leading and Junior Counsel separately in
the Control Centre.
FGF
Ctrl + Shift + F
Mark the selected Counsel as being paid under the Family Graduated Fee Scheme.
Notes Properties
Private
Ctrl + Shift + P
Indicates that the note is private to the draftsman and should not be included in any
exported document.
Parts Properties
Claim VAT
Ctrl + Shift + V
Claims VAT on the costs in this part.
Anticipated
Ctrl + Shift + S
The costs in this part have not yet been incurred.
Procedural Steps Properties
Pre-Agreed
The costs for this Procedural Step have been agreed in advance with the LAA.
FGF
Claim Counsel's fees for this Procedural Step under the Family Graduated Fee or Family
Advocacy Scheme rather than as Events.
Parties To The Action Properties
Client
Ctrl + Shift + C
Specifies that this party to the action is also a client. When a party to the action is a
client it is possible to record extended information for them together with extra
information such as their legal aid certificate details.
© 1999 - 2013 CostsMaster Ltd.
Chapter 3 - General Tasks
29
Legal Aid Certificates Properties
Full Details
Ctrl + Shift + F
When this property is selected the certificate item will appear on the front sheet with full
details of the scope and limitation, whereas normally this information is not exported.
Success Fee Properties
Limited
Ctrl + Shift + L
The amount of this Success Fee will be limited to a certain percentage of the damages.
Setting this property enables you to define the percentage and amount of damages.
Checking spelling
Each grid now has a live spelling checker that will mark mis-spelt words in the grid with a
squiggly red line. By default only columns that are likely to have unique alphabetic text
are checked, but it is possible to enable spell checking for any column you wish in the
column settings window for a particular column.
To obtain suggestions for a mis-spelt word simply right click on the word in the grid. A
pop up menu will appear with a list of possible suggestions for the mis-spelt word.
Clicking one of the suggestions will replace the word with the suggestion.
Live spelling in grids can be turned on or off for all grids in the Local Settings window,
Spelling page.
Filtering data
The grid can be filtered to show only certain rows that match a condition that you define.
When the filter option is turned on using the button on the toolbar, an additional row
appears at the bottom of the grid, coloured yellow. Any text typed into the filter row
causes the grid to show only matching rows. So, if you type "statement" in the filter row
of the description column, only entries where the description contains the word
statement will be shown.
In addition to simply matching text, it is also possible to use comparisons such as >
(greater than) or < (less than) etc. These are useful in numerical columns to show, say,
items with time greater than 1 hour. Note that such comparisons are performed in terms
of minutes or Standard Items: i.e. ">15" in a Time/No column will select all items with
more than 15 minutes recorded, or more than 15 Standard Items.
Adding a new item when the filter is enabled will result in the Edit window for that grid
being displayed even if the grid is not in multi-select mode. If the newly created item
does not meet a filter condition and would therefore be hidden, the filter is disabled to
allow the new item to remain visible; otherwise the filter is re-enabled.
If you edit one or more rows using an Edit window, accepting the changes will result in
the filter being reapplied.
Moving around the filter row works the same as for any grid row, with a couple of
© 1999 - 2013 CostsMaster Ltd.
30
CostsMaster User Guide Version 4
additional shortcuts: Ctrl + PageDown will move from the regular grid to the filter row,
and Ctrl + PageUp will move from the filter row back to the regular grid.
Filtering on properties
You can set filter conditions to display only rows with or without particular properties.
Click in the properties column of the filter row and select a property from the list: the icon
will be displayed. If you hold down the Ctrl key when clicking, the icon will be displayed
with a large X through it: this will select rows without that property.
If you select several properties, only rows with (or without) all the selected properties will
be displayed.
Advanced filtering
The basic filtering described above allows you to filter on one condition per column.
Sometimes you may need more than this, for example if you wanted to show items
dated within a known period. The grid settings window now has an additional filters page
where it is possible to set up multiple filters. This page can be accessed quickly by
clicking the filter icon on the left most column. Here you can add as many filters per
column as you wish. By default all filters are cumulative (AND) but it is also possible to
specify a range of alternatives that can be met (OR) and to specify if the match should
be case sensitive.
Each filter (except a property filter) has three main components, which are mandatory,
and two extra options:
Column
is one of the columns available in the current grid, regardless of current
visibility (i.e. columns which are hidden but not disabled)
Op
is one of the seven possible operators:
[..]
=
<>
>
>=
<
<=
Match
matches if column contains match (note that this compares
the text: "5" will match "5:00" or "150")
matches if column is exactly the same as match
matches if column not the same as match
matches if column is strictly greater than match
matches if column is greater than or the same as match
matches if column is strictly less than match
matches if column is less than or the same as match
is the text to be matched against column
Case Sensitive determines whether "a" matches "A": if ticked then no.
Join
determines how this filter interacts with previous filters (only available for
second and subsequent filters):
AND
OR
will show the row if this filter matches and the previous filters did
also
will show the row if this filter matches as well as if the previous
filters did also
A property filter can be Joined with other filters as above: it only has the Column and
Match components: the latter will hold one or more properties, all of which need to
match. The Case Sensitive option does not apply.
© 1999 - 2013 CostsMaster Ltd.
Chapter 3 - General Tasks
31
Sorting data
Data in the grid can be sorted by any column by clicking on the column heading whilst
holding the Ctrl key. Clicking once sorts the column in ascending order, clicking twice
sorts it in descending order. A small blue triangle appears in the heading for any column
that is sorted, pointing upwards if the sort is ascending or downwards if it is descending.
If there are many identical entries in a column being sorted you can apply a second (and
subsequent) sort by clicking on another column heading whilst holding the Shift key.
When you do this the sort indicator contains a number indicating the sort precedence
order. You can repeat click a column whilst still holding the Shift key to change the sort
order for that column.
Please note that some grids, such as the rates grids, cannot be sorted as their order is
pre-determined by the order of parts.
If you ctrl + click on the top left most column header a small pop up menu will appear
giving you two options:
Undo Sort
This will make the grid revert to the state it was in immediately prior to the last sort
operation. Please note that this function will operate only once and it is not therefore
possible to undo two successive sort operations.
Sort by natural order
When items are entered into CostsMaster the date and time they are created is stored
with them. This makes it possible to sort items by the order they were entered. This can
be useful if you need to go back through a file which may be out of order to check the
work that has been recorded.
In CostsMaster 2 the natural order was stored only for attendances and is only unique
within a single grid. Now you can sort any item by its natural order. Furthermore,
because CostsMaster uses the creation date to determine the natural order, it is now
possible to view attendances and disbursements from multiple locations by natural order
in the part attendances and part disbursements windows.
The creation date is accurate to the nearest second. This means that if you create two
attendances in very quick succession (by using a keyboard shortcut) they will effectively
have the same natural order and their order when sorted by natural order will vary. This is
considered to be acceptable in normal usage.
Data imported from CostsMaster 2 files is restricted in the way it can be sorted by
natural order. Most attendances can be sorted this way within a grid but in the part
attendances window they will appear out of order. Procedural step attendances, Costs of
Assessment attendances and other imported items will appear in a random order when
sorted by natural order.
Customising the grid
It is possible to alter the size of each column by dragging the column heading at its right
edge. Furthermore the position of each column can be changed by clicking and dragging
the column heading whilst holding the ALT key. The position and size of each column is
stored and remembered for future use.
Further properties can be set in the Grid Settings window.
© 1999 - 2013 CostsMaster Ltd.
32
CostsMaster User Guide Version 4
In addition each column has a set of Column Settings that can be edited by users.
Grid Settings
Ctrl + Shift + G
The Grid settings window lets you define the appearance of the grid as a whole. It is
divided into three sections:
Appearance
The appearance of all grids is defined in the Local Settings Window but you can opt to
override the global settings for a particular grid.
Font
This sets the font for the grid as a whole.
Background Colour
This sets the background colour for the grid.
Band Colours
This is the colour that will display for alternate rows when the
Show Bands feature is turned on.
Selected Cell Colour
This sets the background colour for the cell (or rows in multiselect mode) that is currently selected.
Toolbars
These settings allow you to specify whether each toolbar is visible
or not.
Columns
Here you will find a list of all columns capable of being shown in
the current grid. Those that are visible have a tick in the box next
to them. By clicking the check box you can make columns visible
or invisible as you'd like. You can also access the Column
settings window for the currently selected column via the button at
the bottom right corner of the window.
Filters
Here you can set up more complicated filters as described in
Filtering data.
Column Settings
If you right-click on a column and select "Column Settings" you will be presented with
the column settings window. This window allows you to set various properties for each
column individually.
Width
The width of the column. You can set this numerically here
as an alternative to dragging the column heading.
Hidden
By ticking this box you can hide any columns that you never
use in order to make more space for other columns. The
data represented in these columns can still be viewed and
edited in the edit window for the item.
Spell Check
If this box is ticked the cell in this column will display misspelled words with squiggly red lines. See Checking
spelling for more information.
© 1999 - 2013 CostsMaster Ltd.
Chapter 3 - General Tasks
33
Text Alignment
This group of buttons allows you to set the alignment of text
to either Left, Right or Centre.
Cursor Position
This setting determines the position of the cursor when you
tab into the column. You can have the cursor appear at the
beginning,at the end or for all the text to be selected. The
latter is useful if you want to be able to replace the entire
text quickly.
Column Heading
The title of the column in the grid. By default this is the
same as the name of the column but you can change it
should you want to.
Use Column Style
When ticked the column will use the colour and font
specified in the following settings, rather than using the font
and background colour specified in the grid settings window.
This is useful if you want a column to stand out for some
reason.
Background Colour
The background colour for the column. See Specifying
Colours for more details.
Font
An example of the current column font is displayed. The
"change" button allows you to change all aspects of the font.
Toolbars
Most of the functions applicable to grids can be accessed from the buttons on the
toolbars at the top of the grid. Each grid has three separate toolbars:
Main toolbar
This contains buttons for adding, deleting, moving and editing the selected items in the
grid.
States toolbar
This contains buttons that control the appearance of the grid. These include Multi-select,
Show bands, & Expand and contract.
Properties toolbar
This contains buttons for setting properties for the items in the grid such as estimated for
attendances or expert fees for disbursements.
These toolbars can be dragged to different positions should you so wish, or you can also
hide any toolbars that you don't use, perhaps because you always use the keyboard
shortcuts. You can do this via the right-click pop-up menu that appears when you click
on the toolbar, or from the toolbars sub menu on the main grid pop-up menu. Power
users can even hide all toolbars to release space for more items on screen.
© 1999 - 2013 CostsMaster Ltd.
34
CostsMaster User Guide Version 4
Exporting grid data
Data in any grid can be exported for use in a spreadsheet or other program.
The grid contents can be exported in CSV or XML formats. There is an option in the local
settings window to specify whether a header row is added when exporting to a CSV file.
Only data in visible columns is exported. Any notes recorded for an item will also be
included if the properties column is visible.
Other features
These features are all found on the pop up menu that appears when you right-click on the
grid.
Show All Columns
This will make any hidden columns visible.
Reset Grid Settings
This will cause the grid to revert to the state it was in when it first appeared. Only the
default columns will be visible and the settings will all be reset to their defaults.
Refresh Grid
This setting will cause the grid to repaint itself. Occasionally you might encounter a
situation where the grid does not paint itself properly particularly when it is first shown.
Clicking Refresh Grid will often cure this but we would ask that you also let us know
about the problem so that we can fix it.
Open Parent Window
(found under Current Item). This will open the window of the item one level up from the
currently selected item.
Open Current Window
(found under Current Item in the Part Attendances and Part Disbursements window). This
will open the currently selected item in its original window.
Set Index For Items of the same date
When selected will set the index field for all items of the same date in ascending order.
The index field is used as a secondary sort field on export (typically for bills such as
CLAIM1s where items from many locations are put into a single table). This function
really comes into its own in the part attendances window where you can sort items by
date, then manually re-order the items of the same date into the order you want them to
appear before using this function to set the appropriate index values.
© 1999 - 2013 CostsMaster Ltd.
Chapter 3 - General Tasks
35
Working With Files
Introduction
The work you record in CostsMaster is saved to and loaded from files which are stored
on your hard disk. From version 3 CostsMaster files are saved with the .cm3 file
extension, although this may be hidden by Windows. Files in earlier versions of
CostsMaster had a .cdc extension.
A CostsMaster file represents both the computer disk file as well as the solicitor's paper
file that you cost.
Opening Files
New File
Ctrl + N
Open File
Ctrl + O
Reopen File
Starting a new file.
Clicking the New file button will take you to the welcome screen that you see when you
first start CostsMaster. From here you can start a new file based on a template or a
completely new blank file.
There are two main ways of opening CostsMaster files, from within the program or from a
Windows folder window.
Opening files from within CostsMaster.
If you already have CostsMaster running you can open files by clicking on the Open File
button on the toolbar, or by going to the File menu and selecting "Open". This will open
the standard file dialog which will allow you to browse the folders on your hard drive and
locate your files.
When first opened, the dialog displays your CostsMaster files folder which by default is a
"CostsMaster Files" subdirectory within your "My Documents" directory, but you can
navigate to any other location on your PC or network.
By default the dialog shows all files with a file extension that it can open (.cm3 or .cdc)
but you can change the type of file displayed by changing the value of the "Files of Type"
box at the bottom of the dialog.
A number of sample files are installed with the program. You can use these to explore
the features available in CostsMaster and see the different types of document that you
can produce.
Opening Files from a Windows Folder
If you do not have CostsMaster running you can open a file from within a Windows folder
such as your My Documents folder, by double clicking it. This will start CostsMaster and
open the file automatically for you. Only files saved by CostsMaster 3 and later can be
opened in this manner - clicking on a .cdc file will open the file in CostsMaster 2.
© 1999 - 2013 CostsMaster Ltd.
36
CostsMaster User Guide Version 4
Reopening Files
Files you have worked on recently are listed within the Reopen menu. Simply clicking on
one will reopen it without you having to browse your hard drive for it.
Opening Files from a Newer Version of CostsMaster
If you try to open a file that has been saved by a more recent version of CostsMaster you
will be presented with a warning box advising you that the file can be opened but that any
information specific to the newer version will be lost. This should not be a problem if you
are only going to work on the file yourself but, if you intend to send the file back to the
person who originally saved it, that information will not be retained and they may have to
enter it again.
Generally you are advised to always use the latest version which can be freely
downloaded from our web site at any time.
Opening Backup Files
When you save a file CostsMaster makes backups of the previous saves up to a number
that you can define in the Local Settings Window. To open one of these backup files go
to the File menu and click on Open. In the file dialog box change files of Type to
"CostsMaster Backup Files". In CostsMaster 3 backup files are stored in their own folder
which, by default, is a backups sub folder within the CostsMaster Files folder, so you will
need to navigate to there.
Your backup files should have the extensions .c01, .c02 etc up to the number of
backups you have specified. the .c01 file is the most recent.
Please note that using the above method to open backup files will show only files up to
.c09 in the dialog. To view older files you will need to change the "files of type" box to
"All files".
Saving Files
Save
Ctrl + S
Save As
Ctrl + F
If you have recorded work or made any changes to a file within CostsMaster you should
save your work to disk by clicking the Save button on the main toolbar, or by going to the
file menu and clicking "Save" or "Save as...".
If you click "Save" and the file has previously been saved or opened (i.e. there is a known
file name) the file will be saved without further intervention. However if the file has not
previously been saved or if you click "Save as..." then the standard CostsMaster file
dialog will appear allowing you to browse for a folder in which to save the file and give it a
name.
When first opened the dialog displays your CostsMaster files folder which by default is a
"CostsMaster Files" subdirectory within your "My Documents" directory, but you can
navigate to any other location on your PC or network.
If you attempt to close the program when there is unsaved work you will be prompted to
save the file.
© 1999 - 2013 CostsMaster Ltd.
Chapter 3 - General Tasks
37
CostsMaster also has a comprehensive system for making backups of bills and for
automatically saving your work at pre-defined intervals. These options can be accessed
from the Local Settings Window.
Program Templates
New From Template
Ctrl + T
Save As Template
Ctrl + W
Program templates is the name we give to partially completed CostsMaster files that are
used as the basis for the subsequent bills you produce.
When you start a new file you will probably find that there is some information you enter
time after time. To save yourself entering it every time you start a new file, enter the
information then click Save As Template.
When you next need to prepare a bill, instead of starting a new blank file go to New From
Template and select the template you previously saved. This will start a new file with all
the information previously entered saving you from entering it all over again.
A number of basic program templates are provided as a starting point. If you alter these
you should save them with a different name otherwise your changes may be overwritten
when updating the program.
If you work in house or do a lot of work for the same solicitors you might find it
worthwhile to record details of fee earners within the template.
Program Templates from CostsMaster Version 2
If you have created Program Templates from Version 2 these can also be opened but will
undergo the conversion process as for ordinary CostsMaster 2 files. We would
recommend that you re-save the files as templates in the current version to avoid having
to undergo the conversion process each time.
Importing CostsMaster 2 Files
Files from previous versions of CostsMaster (.cdc files) can be opened (but not saved) by
CostsMaster 3 and later. The internal format of data for CostsMaster has changed so
after opening the file will be converted to the new format. The original file will remain
unaltered.
After the conversion a window will appear displaying any errors, warnings or general
information. Warnings and information are common and usually refer to changes made
as a result of the different data structure that you may wish to inspect in order to verify
that the changes are acceptable. Warnings generally require you to take some action
such as verifying the changes made, whereas information simply records minor changes.
For example, there are now no global rates in CostsMaster so any CostsMaster 2 bill
that uses global rates will have them converted to part rates and the rate assignment of
the parts altered accordingly. This will be flagged up as Information.
Errors generally relate to items in the CostsMaster 2 file that have to be discarded,
usually because the feature is no longer necessary.
© 1999 - 2013 CostsMaster Ltd.
38
CostsMaster User Guide Version 4
Solicitor and Case Details
Information for the Solicitor and Case Details are drawn from the front sheet and CLAIM1
settings windows in CostsMaster 2. In CostsMaster 3 and later, client and legal aid
certificate information is stored against parties to the action. Therefore when importing
information from a CostsMaster 2 file the program uses some educated guess work in
order to retain all the information in the best place possible. Some times this results in
additional parties to the action being created in order to hold information drawn from
elsewhere. These added parties may well be duplicates of parties already imported and
you may need to do some work in order to have the information presented in its optimal
form. The following rules are used when importing this data:
a) If a CLAIM1 the Solicitor name and reference are taken from the CLAIM1
settings window, otherwise they are taken from the front sheet window. All
other solicitor information is taken from the front sheet window.
b) Court information is taken from the front sheet window and Case Type
information from the CLAIM1 Settings window.
c) If there are parties to the action defined in the front sheet window they are
copied to the case details window.
d) For CLAIM1s: If there is additional client information in the CLAIM1 settings
window the program attempts to identify which of the parties to the action
this relates to by matching the surname and initial. If found the information is
stored there. If not found a new party to the action is created to hold the
information. Legal aid certificate information is taken from the CLAIM1
settings window. If there are additional certificate numbers defined separate
parties to the action are created to hold this.
e) For bills legal aid certificate information is taken from the front sheet window.
Rates
There are no longer Global Rates in CostsMaster. CostsMaster will attempt to convert
global rates to part rates but in some circumstances this may not produce the desired
result and the rates may need adjusting manually.
Enhancement
Please be aware that if enhancement is turned off in the CostsMaster 2 file no
enhancement values will be imported into this version of CostsMaster. If you want to
retain enhancement values in such circumstances please enable enhancement in the
CostsMaster 2 file first.
Fee Earner and Routine Enhancement
If you defined Routine enhancement on the categories tab in the CostsMaster 2 file it will
automatically be converted to the new Category Enhancement. Further more the program
will analyse the enhancement of all fee earners assigned to this category and if their
enhancement is the same amount as the routine enhancement it will move it to category
enhancement. This is done to keep all panel member enhancement together in one
location.
Disbursements and Counsel Fees
From version 3.1 CostsMaster specifies Counsel fees by assigning a disbursement to a
Counsel which has been defined in the Counsel window. In CostsMaster 2 each
© 1999 - 2013 CostsMaster Ltd.
Chapter 3 - General Tasks
39
disbursement was specified directly as either being a Counsel fee or not and there was
no link between the fees recorded and specific Counsel.
When importing a CostsMaster 2 file the program attempts to identify the name of the
Counsel from the disbursement and if possible will attempt to link the disbursement to
the Counsel automatically. Firstly, if the CostsMaster 2 file is a CLAIM1 it will look for
Counsel names in the Page 5 Family Graduated Fee section and Counsel Account
information on page 7. Later versions of CostsMaster 2 (version 2.6.76 and later) allowed
the user to specify the name for Counsel in the page 7 field and if this is completed the
accuracy of the automatic detection process will be greatly enhanced. The amount
recorded in the account information in the CostsMaster 2 file is not used by CostsMaster
but is retained in the form of a note against the Counsel for cross reference purposes.
After this the program attempts to identify the name of Counsel in the disbursement
description and to match it with one of the Counsel entries. If no name can be discerned
a new Counsel entry called "Counsel" is created and the disbursement is assigned to it.
This process is never going to be 100% accurate and you will inevitably need to do some
tidying up of the Counsel window and reassignment of disbursements (hint - you can
assign Counsel to multiple disbursements at once using the part disbursements
window).
Success Fees & Summary Assessment Schedules.
Success fees are handled in a slightly different way in CostsMaster 3 but success fees
from a version 2 file should import into version 3 without problem.
The way that costs for summary assessment and costs that have been summarily
assessed are entered has been much simplified for version 3. In version 2, to prepare a
summary assessment schedule it was necessary to create an entry in the Summary
Assessment Schedules window and assign or clone fee earners, then use those fee
earners to identify the work. In version 3 all you need do is record the work in a separate
part, then export a Statement of Costs using only that part. When importing a version 2
file any work assigned to a summary assessment schedule will be moved to its own
part.
For costs that have already been summarily assessed, instead of being entered in the
Summary Assessment windows and assigned to a procedural step, such details are now
entered directly as part of a procedural step. In version 2 you could record profit,
disbursements and VAT but in version 3 you can record profit, disbursements and
Counsel's fees with separate VAT for each. This means it may not be possible to
correctly import the CM2 values without your manual intervention. When imported the
disbursements value may include an element of Counsel's fees and the VAT, which is
imported as profit VAT, may include VAT on disbursements and Counsel's fees.
Procedural Steps
Procedural step attendances are stored in a single grid in CostsMaster 3 rather than
having a separate grid for travelling & waiting as was the case previously. When imported
the travelling & waiting items are added after the other items so the order of items on
export should be unaffected.
The number of options for the procedural step type has increased in CostsMaster. They
now are:
No attendance
Hearing with Counsel
Hearing without Counsel
Conference with Counsel
Conference without Counsel
© 1999 - 2013 CostsMaster Ltd.
40
CostsMaster User Guide Version 4
Other Attendance
When importing a CostsMaster 2 file the program attempts to establish whether the step
relates to an attendance or a hearing. If the description to the step (or the first
attendance if the description is blank) has the word "conference" or if its legal aid code is
"ACO" it is assumed to be a conference, otherwise it will be marked as a hearing.
Clearly such a system will never be 100% correct but in practice it does a remarkably
good job of getting most steps correct reducing the number of items you have to adjust
manually.
Work against Parties
In CostsMaster 2 each fee earner had its own list of party attendances, long telephone
calls and miscellaneous attendances. Now there is just one of each type of list shared
among all fee earners. The attendances will be imported in the order they are found in the
disk file which is generally the order in which the fee earners were created. As such they
will probably appear in the grids out of date order and may require sorting manually.
In CostsMaster 2 it was possible to specify a party as being treated as advocacy. This
work-around allowed you to record work at preparation rates yet still have it count as
advocacy for the purpose of a CLAIM1A or a Family Fixed Fee bill. This was necessary
in CostsMaster 2 because work recorded within procedural steps could not be claimed at
the preparation rate. In CostsMaster 3 you can now record work at preparation (or indeed
any) rate with a procedural step and therefore the "treat as advocacy" property is no
longer required for parties. When importing a CostsMaster 2 file with such a party, any
work is moved to a new procedural step and marked as "Hearing without Counsel" but
claimed at preparation rate. This should result in the correct totals, although you may
want to move the work to different procedural steps if you are exporting a bill.
Costs of Assessment
There is now no specific location for recording Prescribed Rate Costs. Instead they are
recorded as lump sum attendances. When a file is imported that has prescribed rate
costs it is automatically converted to a lump sum attendance.
File Locations
By default CostsMaster is installed to C:\Program Files\CostsMaster Draftsman edition,
though you can of course change this during the setup.
The default save directory is set to <My Documents>\CostsMaster files
Settings are stored in <Application data>\CostsMaster\Draftsman. This is the same
location used by CostsMaster 2.5 and higher. A typical setting for the application data
directory is C:\documents and settings\<user name>\application data. The settings are
stored in xml files. Whilst these files can be edited in a text or xml editor we do not
recommend this as XML files are not as tolerant of badly formed data as ini files. Thus a
mistake in editing could cause the settings to be lost. At present CostsMaster shares
the abbreviations files (abbreviations.dat and clsabbrev.dat) with CostsMaster 2.
Dictionaries are stored in <Application data>\CostsMaster\Dictionaries. This is the same
location used by CostsMaster version 2.5 and later. CostsMaster will therefore
automatically pick up and use the dictionaries from earlier versions.
Export templates are recorded within the Windows Registry but settings are maintained
in an "Export Templates" subfolder of the Settings directory.
The default location for program templates is<My Documents>\CostsMaster files
\Program Templates
© 1999 - 2013 CostsMaster Ltd.
Chapter 3 - General Tasks
Some of these default locations can be changed from within CostsMaster by going to
Options > Local Settings > File Locations.
© 1999 - 2013 CostsMaster Ltd.
41
Chapter
4
Setting up the bill
Chapter 4 - Setting up the bill
43
Setting Up The Bill
VAT
Ctrl + Shift + V
VAT can be defined in a number of places within CostsMaster. It is usually accessed
from a button that will show the VAT window but some grids also offer a "Claim VAT"
property that allows you to turn the claim for VAT on and off.
The VAT window allows you to specify whether VAT can be claimed and at what rate.
There are three common scenarios:
1. Claim VAT on both profit costs and disbursements:
Tick the Claim VAT box and enter the appropriate rate in the VAT Rate box.
2. Do not claim VAT on profit costs or disbursements:
Untick the Claim VAT box.
3. Claim VAT on disbursements but not on profit costs:
Tick the Claim VAT box but enter 0 for the VAT Rate. The VAT on profit costs
will come out at zero and will be ignored whilst VAT on disbursements can still
be claimed.
Instructing Solicitor
Ctrl + I
This window can be located under the File menu on the main toolbar and contains
information relating exclusively to the instructing solicitor.
This window contains information about the firm of solicitors with conduct of the matter. It
contains contact details that are used on forms and on the front sheets of bills.
Bills
Ctrl + Alt + B
The bills window is where you define the bill that you are costing.
If you are used to selecting a bill type in version 2 you will notice its absence in this
version. This means that you do not need to decide on the ultimate format of your bill
before you even start costing the file. Instead you simply select the bill you would like
when exporting. It is even possible to export multiple bills of different types should you so
wish.
Show or Hide Features
This control mimics the similar button on the Control Centre. It lets you hide features
which are not relevant to the type of bill you are doing. In this way it is similar to the Bill
Type that you had to set in CostsMaster 2 but the effect here is simply in which parts of
the user interface are presented to you and you can always change to a different setting
© 1999 - 2013 CostsMaster Ltd.
44
CostsMaster User Guide Version 4
or back to showing all features without having to undergo any conversion process on your
data.
Default Phase
The Default Phase is used to specify the phase that is used for new attendances and
disbursements. You can select the phase from the drop down box but please note that
this control will have no impact if the attendance is within a part that has its own default
phase set or for a party that has a default phase set. In these circumstances the party
takes first precedence followed by the part.
This control mirrors that in the Control Centre.
VAT
VAT for the bill as a whole.
Enhancement
Here you would define enhancement that will apply to all costs within the bill. It is
analogous to global enhancement in CostsMaster 2 except that you are not limited to
claiming it at different rates solely on preparation and procedural steps. Please see the
section on Enhancement for further details.
Excluded
Setting the excluded property for a bill will prevent it from exporting. .
Draw Attention
This property can be used to highlight items that require your attention in some manner.
Case Details
Shows the Case Details window where work about the Court and the parties to the action
can be entered.
Case Details
Ctrl + Alt + D
The Case Details window contains details of the Court that the matter concluded in, the
case type, the assessment basis and the parties to the action. This information is used
on forms and on the headings of bills of costs. It is not necessary to complete all the
information here if it is not going to be used for the particular bill you intend to prepare.
This window contains information applicable to most bill types but information specific to
a particular bill type can be accessed by clicking on the appropriate button at the bottom
of the window.
Court & Title
© 1999 - 2013 CostsMaster Ltd.
Chapter 4 - Setting up the bill
45
The Court, Division and Sub-Division boxes have a number of preset Courts from which to
choose.
If you choose "Family Court", then the choices available when you set your CLAIM1A up
which relate to which Court the proceedings finish in will change: they will instead relate
to the Judge presiding over the proceedings at the conclusion. Similarly if you are
recording FAS details the "Court level" selection will change to refer to the Judge rather
than the Court itself. Choosing any other Court will cause these changes to revert.
Parties to the Action
Parties to the action are entered in a grid. These have a dual purpose: as well as
appearing in the heading of the action it is also possible to specify that they are a client,
in which case further information can be recorded including full details of their legal aid
certificate.
Description
The name of the party as it appears in the action. Using the Shift + Enter shortcut in this
column will cause CostsMaster to attempt to identify the client title, first name and last
name from the description.
Status
Their status in the action (e.g. Claimant, First Respondent etc.)
Type (Paying or Receiving Party)
Whether the party (or its solicitor in legally aided cases) is to pay costs, receive costs or
neither. When specifying that a party to the action is a client, this will be automatically
set to "receiving", provided it has not previously been set to "paying".
Title
The title of the client.
First Name
The First names of the client.
Last Name
The Last name of the client
Surname at Birth
The client's surname at birth if different
Date of Birth
The client's date of birth.
Client
This property indicates that the party to the action is also a client. It indicates to the
© 1999 - 2013 CostsMaster Ltd.
46
CostsMaster User Guide Version 4
program that details specific to a client such as title, first and last names and date of
birth can be used where appropriate. It also enables the button in the Funding column
giving access to the legal aid certificate window. If any of the client specific fields are
completed this property will be set automatically.
Notice of Commencement
Here you can enter information concerning fees and costs relevant to the form for Notice
of Commencement of Assessment Proceedings. The fees and costs can be recorded as
presets and applied by clicking an entry from the pop up menu that appears when you
click the "Presets" button.
Assessment Basis
This box lets you define the basis for the assessment - standard or indemnity. Below it
you can access the Assessment Instruments window.
Assessment Instruments
This window allows you to define orders and judgments that give authority for
assessment together with their date. When exporting the front sheet of a bill this
information will automatically be included in the description that appears on the front
sheet.
As well as entering the information manually you can create assessment instrument
entries when entering procedural steps. When you have created a procedural step for
your judgment, order or discharge of legal aid certificate and recorded the date there is a
quick function that will create the assessment instrument for you. It will also look at the
text of the procedural step and attempt to work out if the step relates to a judgment or
order, with the latter being assumed when it cannot tell. There are two ways to create an
assessment instrument from a procedural step:
In the procedural step grid, select the step, right click on the grid and select "Add as
Assessment Instrument".
In the Edit Procedural Step window click the "Add as Assessment Instrument" button.
CLS Funding Certificate
Right Shift + Right Ctrl + F
This window can be accessed from the Case Details window.
This window allows you to enter full legal aid certificate details for a client if you wish.
The certificate details are typically used on the heading of a case plan or the front sheet
of a bill of costs. As this information also typically appears as procedural steps in
exported bills, there is a button that when clicked will create procedural steps for all
items defined in this window.
For each certificate it is possible to enter the number and any apportionment, plus a
number of items relating to scope and limitation at different points in the life of the
certificate. This information is entered in a grid and the following fields are available:
Type
This is the type of action that occurred to the certificate at this stage. Possible options
are:
© 1999 - 2013 CostsMaster Ltd.
Chapter 4 - Setting up the bill
Full
Emergency
Amended
Discharged
Revoked
Prior Authority
Change Of Solicitor
Date
This is the date of the action
Scope
The scope of the certificate at this time. For Prior Authority this will be what the prior
authority was granted for e.g. "Psychiatrist".
Limitation
Any limitation on the certificate at this time. For Prior Authority this is the amount for
which authority has been obtained e.g. "£5,000.00". Include any currency symbols or
other formatting you want to appear.
It is not necessary to enter full details of the certificates here if you do not wish to do so.
For a case plan it is sufficient to make one entry.
The information on this window is used to create the legal aid certificate information on
the front sheet of bills. If you do not want any information here to be shown on the front
sheet you can exclude it.
Excluded
Any items that are excluded will not appear on the front sheet to an exported bill.
Draw Attention
This property can be used to highlight items that require your attention in some manner.
Full Details
When this property is selected the item will appear on the front sheet with full details of
the scope and limitation, whereas normally this information is not exported.
Create Procedural Steps
When preparing a bill for assessment by the Court it is common practice to include the
changes to the certificate as procedural steps. This button will save you having to enter
the information twice by automatically creating the procedural steps for you. Any items
which have been marked as excluded will not have a step created for them. The program
will attempt to create the procedural steps at the correct place but please note that it
does not check to see if it has already created procedural steps, so pressing this button
twice will result in duplicates being made (unless you temporarily mark as excluded the
items already created).
© 1999 - 2013 CostsMaster Ltd.
47
48
CostsMaster User Guide Version 4
Narrative
Ctrl + Alt + N
The narrative window is where you record narrative information for inclusion in the bill. In
CostsMaster 2 it was confined to the main narrative for your bill but in this version it
contains tabs containing the enhancement justification and reasons for instructing
Counsel in the Family Proceedings Court.
These tabs can be hidden if you don't need them for the current bill by right clicking in
the window and de-selecting the entries you want to hide. The settings for which tabs
are shown and which is the current tab are stored so that the next time you reopen the
file the same tabs are shown.
Narratives can also be defined separately for each part. For further details please see the
section on parts and for details of how and when these part narratives can be exported
please see the section on assigning parts in the export wizard.
Costs Budget
Ctrl + Alt + Y
The costs budget window allows you to specify information needed for the budget as well
as manage each phase. Please see the sections on preparing costs budgets and
managing costs budgets for further details.
Date
The date of the costs budget
Include Costs of Assessment
Whether costs of assessment are included in the budget. If ticked then any work
recorded in the costs of assessment window (other than the costs draftsman's fees at a
percentage) will be included in the budget. If unticked then the figures will not be included
and the words "costs of assessment" are added to the list of items not included on the
front of the exported document.
Other Exclusions
Here you can list any other items that have not been included in the costs budget. The
text here will be included on the front page of the exported document.
Phases
The grid on this window has a row for each possible phase, plus an additional row for
"Unassigned or Solicitor/Client costs". Additional rows can be added, should you need to
define a conditional phase. Additional phases defined here will then be available as an
option in the phases drop down control for applying to work, as well as the default phase
controls. It is not possible to delete the standard phases but they can be re-ordered (for
convenience - they will always export in the standard order) but conditional phases you
have created can be deleted.
The following fields are available for each phase:
© 1999 - 2013 CostsMaster Ltd.
Chapter 4 - Setting up the bill
49
Phase Name
The name of the phase. This is editable only for conditional phases you have created.
Assumptions
Any assumptions made when anticipating costs for this phase.
Budget
If a budget is set for a phase you can enter it here. This will then allow you to manage
the budget using this window.
Incurred
The total costs assigned to each phase in parts not marked as anticipated. This field is
read-only.
Anticipated
The total costs assigned to each phase in parts marked anticipated. This field is readonly.
Total
The total incurred and anticipated costs for each stage. This field is read-only.
New Costs.
This column shows the difference between costs recorded post budget and the costs
previously anticipated for that work. It is read-only. This column is useful only when
analysing costs entered post budget and should be ignored when preparing the budget
for the first time.
Prev. Inc.
This column, which is hidden by default, stores the previously incurred costs at the date
of the budget and is used in calculating the New Costs figure. It is read-only.
Prev. Ant.
This column, which is hidden by default, stores the previously anticipated costs at the
date of the budget and is used in calculating the New Costs figure. It is read-only.
Parties
Ctrl + Alt + P
Parties are the various persons the solicitor corresponded with during the course of the
case (and should not be confused with parties to the action).
The parties window gives access to the following fields:
Description
The name of the party as it will appear in the bill. The Description must be unique - if you
© 1999 - 2013 CostsMaster Ltd.
50
CostsMaster User Guide Version 4
add a description that already exists (or if you paste an item copied from the grid)
CostsMaster will automatically add a number to the end of the description or, if there is
already a number at the end it will increase the number by one.
Aliases
When importing work from a time recording system it is possible to automatically assign
work to parties based on the name recorded within the recorded descriptions. However
these often vary (e.g. What you have recorded as client might be referred to as "client",
"CLT", Claimant" or the client's actual name.) You can use this field to record these
additional descriptions, each separated by a comma or other punctuation, in order to
assist the automatic assignment process. This field has no use beyond the import work
process.
Additional Description
A field to record additional information that you might want to appear after the party name
in an exported bill
Heading for Misc Attendances
An optional heading that can be used before the miscellaneous attendances
Shortcut
It is possible to assign a keyboard shortcut to each party so that you can quickly open
the party details window to record routine work. This makes costing a file considerably
faster than having to access the party via the mouse. Available shortcuts are from F1 F12 with all combination of Shift, Ctrl & Alt keys. In addition the right Shift & Ctrl keys
are treated separately giving 132 possible shortcuts.
Even if you run out of shortcuts it is possible to reuse shortcuts from little used parties
by ensuring that the ones you want are further up the list of parties.
When you create a new party the next available shortcut is suggested to you but you
can assign any shortcut of your choosing. Shortcuts are assigned by holding down the
key combination you want while the cursor is in the shortcut box.
Legal Aid Code
The legal aid code assigned to work recorded against this party in CLAIM1 and CLAIM1A
forms. New attendances created for this party will automatically have this code assigned
to them though you can override this on an attendance by attendance basis should you
so wish. When the legal aid code is changed any attendances for this party that had the
former code will be automatically altered to have the new code, but attendances that had
a different code will remain as they are.
Phase & Activity
Setting the phase for a party is not necessary but can be done if you have set up the
"parties" as holders for work from each phase.
If you alter the phase after recording attendances or disbursements for this party, the
phase of those attendances and disbursements may be changed automatically, or you
may be asked whether you wish to alter these values, depending on the setting for this
in Local Settings > Phase/Task/Activity Options.
© 1999 - 2013 CostsMaster Ltd.
Chapter 4 - Setting up the bill
Export Position
In bills this determines where in the bill the party work will appear. Options are:
a) Before procedural steps
b) After procedural steps
c) In party section (the default)
d) After documents
e) After travelling & waiting
f) After work done
g) After miscellaneous disbursements
h) After success fees
i) After costs of assessment
It is therefore possible to use a "party" for some other purpose such as miscellaneous
notices.
N260 Section
This field allows you to specify which section in an N260 (statement of costs for
summary assessment) the work for this party should appear.
Excluded
Any work recorded against a party that is excluded will not appear in the exported bill.
Draw Attention
This property can be used to highlight items that require your attention in some manner.
Enhancement
The enhancement claimed on all work recorded against this party.
Success Fees
Ctrl + Alt + S
This window allows you define one or more success fees together with associated
disbursements. You simply need to specify the details of the success fee and it will
automatically be claimed in your bill, calculated on the total profit costs of the parts
which are assigned to the fee.
Obviously, success fees are claimed on inter partes costs only. Legally aided costs will
not be affected by any success fees claimed. The Bill Settings and Breakdown Settings
windows contain options that determine whether the success fee is claimed on
Summarily assessed costs and on costs of assessment.
Success fees are defined in this window but you must later specify which parts utilise
which fees. This is done in the Parts window. If you create a part after creating a
success fee the part will automatically be assigned to the last success fee defined.
Success fees for Counsel are defined in the Counsel window.
Description
© 1999 - 2013 CostsMaster Ltd.
51
52
CostsMaster User Guide Version 4
Text that will allow you to identify the success fee.
Success Fee Percentage
The percentage at which the success fee is calculated.
Location
You can specify exactly where in a bill the success fee will be claimed. Because parts
can be combined and reordered when exporting you are given three options concerning
the placement of the fee.
End of Last Relevant Part - the success fee will be claimed in the last
exported part that utilises the fee. It will be calculated on the profit costs of all
parts that utilise the fee. This is the default.
End of Each Relevant Part - the success fee will be claimed at the end of
each part that utilises the fee. It will be calculated only on the profit costs of that
part.
End of Bill - the success fee will be claimed in the last part of the exported bill
even if that part is not assigned to this or any other success fee. It will be
calculated on all profit costs that utilise this success fee throughout the bill.
Limit to Percentage of Damages
It is also possible to limit the success fee to a percentage of damages. When enabled
you can specify both the damages and the percentage to which the success fee is
limited and the fee claimed will not exceed this.
VAT
This field allows you to specify the VAT rate used for the success fee. By default it uses
the VAT rate of the part in which the success fee is exported, but it is possible to specify
a different rate if you want the success fee to appear in a particular part but not use the
VAT rate for that part.
Excluded
If a success fee is excluded it will not be claimed in an exported bill.
Draw Attention
This property can be used to highlight items that require your attention in some manner.
Parts
Ctrl + Alt + T
A CostsMaster bill consists of one or more parts. You therefore need at least one part
but you may have more.
For bills to be assessed by the Court the distinction between parts is clearly shown.
However, many forms make no provision for parts but CostsMaster still allows you to
record work in different parts and where possible shows work separately. Even if you do
not intend to split the work into parts in the finished bill you can still break the work into
different parts in CostsMaster and combine them automatically when exporting.
© 1999 - 2013 CostsMaster Ltd.
Chapter 4 - Setting up the bill
53
You may also split work into parts for your own benefit and combine them dynamically
when exporting the bill.
You will see that the main toolbar displays, in the bottom right panel, an indication of the
currently selected part (or the fact that no parts have yet been defined if that is the case).
When you look at work windows (which we will come to later) the details shown will be
those for the currently selected part.
A part has the following fields:
Description
The name of the part as it will appear in the bill. This information may only appear in a bill
if it has more than one part.
Additional Description
Further information that you may wish to include after the part heading in a bill. This text
will always appear with the part heading.
Start Date / End Date
You can optionally specify the dates that this part covers. These dates can be used to
automatically show the period a part covers in an exported document. In addition when
you record an attendance outside the range of dates the program warns you that you are
doing so, in case you are inadvertently entering an attendance in the wrong part.
VAT
The VAT that is claimed for this part.
Export Options
Accessed from the Edit Parts window, this window lets you specify how this part will be
exported (if at all) to various bill types.
The settings here reflect those set in the export wizard. Please see the section on
Assigning Parts and subsequent sections for further information.
Anticipated
Whether the part represents anticipated costs in a costs budget. Please see the section
on preparing costs budgets for further information.
Excluded
If a part is excluded any work recorded within it will not appear in an exported bill.
Draw Attention
This property can be used to highlight items that require your attention in some manner.
© 1999 - 2013 CostsMaster Ltd.
54
CostsMaster User Guide Version 4
Aspect
For work falling under the PFLRS and FAS schemes this setting determines which
aspect of work is recorded within this part. It is possible to record work from multiple
aspects within a single bill - each part can only contain a single aspect but it is possible
for more than one part to be assigned to a single aspect.
When exporting a CLAIM1A under the new scheme the program will automatically
collate work from the same aspect into separate CLAIM1A forms based on this setting.
This setting is also used to determine if FAS applies to this part.
Enhancement
Any enhancement claimed for this part.
Events Case Plans
This button gives access to a window where you can record the previous solicitors costs
for use in an events based case plan only.
IP Limitation / Legal Aid Limitation
It is possible to limit the profit costs of a part. Please see the section on Limiting Costs
for further information
Success Fee
To specify that the costs in this part are subject to a success fee you can choose the
success fee that applies (from those already defined in the Success Fees window)
Summary Assessment Date
The date of any summary assessment hearing covering the costs in this part.
Summary Assessment Judge
The name of the Master of Judge who is assigned to deal with the Summary
Assessment Hearing.
Summary Assessment Hearing Type
The type of any summary assessment hearing covering the costs in this part. You can
select from the pre-selected text or add an entry of your own.
Default Phase
The Default Phase is used to specify the phase that is used for new attendances and
disbursements within this part. You can select the phase from the drop down box but
please note that this control will have no impact if the attendance is for a party that has a
default phase set. In these circumstances the party takes precedence. This setting will,
however, take precedence over any default phase set for the bill.
Narrative & Enhancement Justification
Each part now has its own Narrative and Enhancement Justification fields. You can use
these to record information that relates only to a specific part, or to be used when
exporting the bill in a different format. Please see the section on assigning parts in the
export wizard for further details.
© 1999 - 2013 CostsMaster Ltd.
Chapter 4 - Setting up the bill
Changing Parts
When you look at a work window, such as the documents window, it will show all the
documents recorded within the current part. The current part is displayed at the bottom
of the main toolbar. Selecting a part in the parts window changes the current part to the
newly selected part. However you can also change parts quickly by using the shortcut
Ctrl +
whether the parts window is open or not.
Limiting the costs claimed
Sometimes you might want to claim a profit costs figure for a part that differs from the
total of the work recorded. One example is where the solicitor has delivered interim
statute bills to the client and you cannot claim more than the total claimed in those bills,
another is where a costs order provides for only a percentage of costs to be recovered
and a third might be where you want your case plan to show the exact same figure for
pre contract work as appears on the CLAIM1 which, due to the effects of rounding, rarely
happens.
In CostsMaster the total costs claimed in each part can be restricted to a minimum, a
maximum, a percentage or a fixed figure.
In the Parts window there are columns called "IP Limitation" and "Legal Aid Limitation".
For each part, this column will display the amount of any limitation in the part for inter
partes or legal aid costs respectively together with an indication of whether the limitation
is a minimum, percentage or fixed if appropriate (if a maximum limitation is selected just
the amount is shown).
When you click in the cell a small button appears on the right. If you click this you will
open the Edit Limitation Window.
Amount
This is the amount you want to claim for the part or the percentage alteration if
appropriate.
Description
This is the text that will appear in the bill when the costs are limited.
Type
This determines the type of limitation. Four options are available:
Maximum - If the costs exceed this figure the specified amount will be claimed,
otherwise the actual costs will be claimed
Minimum - If the costs are less than this figure the specified amount will be claimed,
otherwise the actual costs will be claimed.
Percentage - The costs claimed will be the specified percentage of the actual costs
incurred.
Fixed - The specified amount will be claimed irrespective of the amount of the actual
costs.
It is also possible to specify the type of limitation without going into the edit limitation
window. In the parts grid you simply have to enter the amount in the column together
with the letters "max", "min", "fix" or the "%" symbol and the program will make the
appropriate selection. Please note that setting the amount without any letters will alter
© 1999 - 2013 CostsMaster Ltd.
55
56
CostsMaster User Guide Version 4
the amount only.
Applies To
You can use this box to specify the type of bills the limitation will apply to. By default all
bills are limited.
Limiting Costs in Aggregated Parts.
When exporting a bill it is possible to aggregate two or more CostsMaster parts into a
single part in the exported document. If two aggregated parts are limited then the
combined part may have inconsistent limitation settings. CostsMaster will use the
following rules to determine which settings will apply:
The settings that are generally used are those of the lowest numbered part in
CostsMaster. If later parts that are to be aggregated have incompatible settings then the
limitation specified in the latter parts is ignored. Incompatible settings include different
types of limitation or limitations that apply to different inter partes / legal aid settings.
If the latter parts have compatible settings then, for maximum, minimum and fixed types,
the limiting values will be combined together. For percentage types the percentage value
of the first part only will be used.
Generally, having multiple part limitations in parts which are to be aggregated on export
will lead to results you probably didn't intend, and thus should be avoided where
possible.
There is one other point you should be aware of - aggregating parts with limitations where
the parts have different VAT rates will result in the VAT being calculated on the limited
costs at the first VAT rate defined. It will not be possible to split the limitation between
the differing VAT rates.
Limiting costs in a fixed fee CLAIM1A
Any costs limitation will be ignored in a CLAIM1A where a fixed fee is paid because the
fixed fee is not an item within the part that can be subject to the limitation.
Limiting costs in a Phase Bill
Any costs limitation will be shown in the main body of a Phase Bill but ignored in the
Phase Summary.
© 1999 - 2013 CostsMaster Ltd.
Chapter 4 - Setting up the bill
57
Rates, Fee Earners & Counsel
Fee Earners
Ctrl + Alt + F
In CostsMaster work is recorded against “fee earners”. You can consider CostsMaster
fee earners in their traditional sense (i.e. as a person in a firm of solicitors who carries
out work e.g. John Smith), but they can be far more than that. They can represent work
carried out at different periods of time or work done in connection with specific issues or
causes of action (e.g. injunction). In short, a CostsMaster fee earner represents any
distinction you would make when recording work in the traditional manner on your pad of
paper.
You do not need to define all your fee earners at the start - you can add them as you go
along. However it is best to try and decide upon the way you intend to break down the
work at the beginning if you can.
Please note that due to internal complications, you cannot cut a fee earner from the fee
earners grid, but you can copy and paste them.
The following fields are available for fee earners:
Description
This is for the user to differentiate between different fee earners on a file if necessary, it is
not a description used in the bill. The Description must be unique - if you add a
description that already exists (or if you paste an item copied from the grid) CostsMaster
will automatically add a number to the end of the description or, if there is already a
number at the end it will increase the number by one. Presets can be selected by using
the Alt + Down arrow shortcut.
Initials
The initials of the fee earner. If blank when entering the description the program will
attempt to guess the initials from the description entered.
Category
Each fee earner needs to be assigned to a category for their work to appear in an
exported bill. The category is the name by which the work will appear in the bill. There
are a number of preset categories (and you can add your own) or you can define a new
category or select an existing one that has been defined on the categories window.
When you change the category property you will be warned that any disbursements
embedded in attendances which are assigned to this fee earner will have their legal aid
property altered to match.
Schedule Category
This determines the category that is used for inter partes work in the schedule of inter
partes work at legal aid rates.
© 1999 - 2013 CostsMaster Ltd.
58
CostsMaster User Guide Version 4
Excluded
If a fee earner is excluded any work assigned to them will not appear in the exported bill.
Any attendances assigned to an excluded fee earner will show a greyed out excluded
property icon to indicate that they will not export.
Draw Attention
This property can be used to highlight items that require your attention in some manner.
Enhancement
The enhancement applied to all work assigned to this fee earner.
Large Numbers of Fee Earners
Whilst it might be tempting to record all of your fee earners within a template for ease of
use, and whilst there is no actual limitation on the number of fee earners you can define,
having a very large number can result in the fee earners window becoming unresponsive
(unless you remove the option to show fee earners with no work in colour) and can result
in export taking a very long time. This latter is exacerbated by the number of parties and
parts in your file. Each party in each part has a record of routines for each fee earner and
when there are very large numbers of fee earners it simply takes the program a very long
time to work through all of these in order to establish whether there is any work to
export.
Categories
Ctrl + Alt + C
If “fee earners” represent the way you divide up the work when you cost the file,
Categories represent the way the work will appear in the finished bill. Each fee earner is
assigned to a Category. This assignment can be changed at any time and more than
one fee earner can be assigned to a category.
It is possible to record your work against each individual fee earner and later decide
which category they belong to. And when you later discover that the fee earner you
assumed to be a clerk is in fact a senior assistant solicitor you can reassign them to the
correct category in a matter of seconds. Alternatively if you want to claim work which
could be argued is outside the scope of the costs Order, you can record this against a
separate “fee earner”. If you want the work included in the bill assign it to an appropriate
category; if you wish to exclude it simply define the category as “Unassigned”.
The following fields are available for categories:
Description / Description 2 / Description 3
The description is how the category will appear in the finished bill. In addition there are
two other descriptions that can be used to have alternative text used in different places in
the bill. For example you might want the Category name in the Rates Utilised section to
be "Assistant Solicitor (Grade B)", whereas in the parties section it could be just
"Assistant Solicitor" and in the documents section "(AS)".
The Description must be unique - if you add a description that already exists (or if you
© 1999 - 2013 CostsMaster Ltd.
Chapter 4 - Setting up the bill
59
paste an item copied from the grid) CostsMaster will automatically add a number to the
end of the description or, if there is already a number at the end it will increase the
number by one.
Display Rates
This determines when the rates for a particular category should be shown in a bill. The
options are:
When work is recorded - The category will only be described in the rates utilised
section if there is work for that category in the part.
Always - The category will be described in the rates utilised section even if there is no
work for it in a part.
Never - The category will never be shown in the rates utilised section.
Rate Type Displays
For each available rate type you can specify whether the rates will be shown in the rates
utilised section. Please note that if the "Display Rates" setting is set to Never then these
settings will have no effect - they only apply when the Display Rates setting causes a
category to appear in the bill. The options are:
Always - This rate type will always appear in the rates utilised section.
When not zero - This rate type will only appear if the rate is greater than zero
When different from preparation - This rate type will only appear if the rate differs from
the preparation rate
When work is recorded - This rate type will only appear when the part includes work for
this category at this rate type
Never - This rate type will never appear in the rates utilised section.
Excluded
When a category is excluded any work assigned to a fee earner that is itself assigned to
the category will not be included in the exported bill. Any attendances assigned to an
excluded category will show a greyed out excluded property icon to indicate that they
will not export.
Draw Attention
This property can be used to highlight items that require your attention in some manner.
Legal Aid
When a category is marked as legal aid, work assigned to any fee earners that are in
turn assigned to this category is considered as legal aid work and will be treated as such
when exported to documents. Any fee earners assigned to a Legal Aid category (and
any attendances assigned to those fee earners) will show a greyed-out version of this
icon to indicate that they are legal aid by virtue of this chain of assignments.
When you change the Legal Aid property of a category you will be warned that any
disbursements embedded in attendances which are assigned to this category will have
their Legal Aid property altered to match.
© 1999 - 2013 CostsMaster Ltd.
60
CostsMaster User Guide Version 4
Enhancement
The enhancement claimed on all work assigned to all fee earners that are assigned to
this category. This replaces routine enhancement in CostsMaster 2 and it is
recommended that it should be used for all panel member enhancement instead of Fee
Earner enhancement.
Rates
Rates
Ctrl + Alt + R
Part Rates
Alt + R
Rates represent the amounts claimed for different classes of work (called Rate Types).
Each category requires the hourly rates to be defined in this window.
Rates are multiplied by the values entered in the time/items column to generate an
amount. Most rates assume that the figures entered in the time/items column are hours
and minutes but certain rate types such as telephone calls, letters out, emails and
letters in assume the figures entered in the time/items column represent items and are
calculated accordingly.
The available Rate Types are:
Preparation
The hourly rate used for general attendances when no other Rate Type is specified.
Advocacy
The hourly rate used for hearings at Court when the fee earner concerned conducted the
hearing
Counsel
The hourly rate used for hearings at Court when Counsel conducted the hearing, or for
attending conferences in Counsel's chambers.
Travelling & Waiting
The hourly rate used for time spent travelling to Court and other appointments and for
waiting whilst there.
Telephone Calls
The individual item rate at which standard telephone calls are charged.
Letters Out
The individual item rate at which standard letters out are charged.
Emails Out
The individual item rate at which standard emails out are charged.
© 1999 - 2013 CostsMaster Ltd.
Chapter 4 - Setting up the bill
61
Routine Letters Out
The individual item rate at which standard routine letters out (in Court of Protection bills)
are charged.
Letters In
The individual item rate at which standard letters in are charged.
Related fields :
Use Rates from
Allows you to specify that a particular part should use the rates from a different part
without the need to specify them again. When a part is using rates from a different part
the actual rates used are shown but the text appears greyed out and cannot be edited.
There are two rates windows:
The first shows all available categories in a list on the left. Selecting one of these shows
the rates that category is using in each part in the bill. This is akin to the old Rates By
Category tab in CostsMaster 2.
The other window is called the Part Rates window and shows all the rates claimed for
each category within the current part. This is akin to the old Rates By Part tab in
CostsMaster 2.
As well as entering the rates manually there are three ways you can make this easier:
If you have defined rates presets in the Presets window (see later in this guide for
further information) you can apply them by selecting the appropriate row of the rates
grid then right clicking on the grid and selecting the rates from the presets sub-menu
that appears.
After typing in the preparation rate and with the cursor still in the preparation rate cell,
press Shift + Enter. The other advocacy, counsel and travelling rates will be
completed with the same figure and letters out, telephone calls and emails will appear
at one-tenth of the preparation rate. Letters In remain zero. This is typically used for
market rates.
Using Fee Earners, Categories & Rates
The overall relationship between these elements is:
Fee Earners > Categories > Rates
By now you should begin to see the flexibility of this system. For example it is possible
to record your work against each individual fee earner and later decide which category
they belong to. And when you later discover that the fee earner you assumed to be a
clerk is in fact a senior assistant solicitor you can reassign them to the correct category
in a matter of seconds. Alternatively if you want to claim work which could be argued is
outside the scope of the costs Order, you can record this against a separate “fee
earner”. If you want the work included in the bill assign it to an appropriate category; if
you wish to exclude it simply define the category as “Unassigned”.
Example
Here is an example of one possible scenario. You have one Partner (Elizabeth Finch),
© 1999 - 2013 CostsMaster Ltd.
62
CostsMaster User Guide Version 4
two Assistant Solicitors (Alison Brown and Chris Dench) and a Trainee (Geoffrey Harris)
working on a file. You should have no difficulty including the Partner and Trainee by
following the steps above but what about the Assistant Solicitors?
(a) you might want to record the work done by each of them separately
or
(b) you might want to show all work done by Assistant Solicitors together
In (a) identify each one by their initials or name and then select Assistant Solicitor for
both
In (b) insert “Assistant Solicitor” as the Fee Earner and the Category
If you have two sets of prescribed rates, perhaps because the solicitor obtained a
franchise part way through the matter, you will obviously need two legal aid rates (e.g.
LA A and LA B). However you will also need to duplicate each inter partes fee earner.
This way you can assign the same category for the work in the bill but maintain the
distinction for the legal aid rates in the schedule.
In this case you will record work against the A or B rates as appropriate thereby
maintaining the distinction. When the bill is exported all work by, say, Elizabeth Finch
(A) and Elizabeth Finch (B) will be aggregated and appear as “Partner”. In the Legal Aid
Schedule this work will be claimed at the 2 different legal aid rates.
Counsel
Ctrl + Alt + Q
Details of Counsel instructed on a matter can be also be recorded in CostsMaster. Once
recorded you can apply them to disbursements or attendances to specify that the work
recorded represents Counsel's Fees.
As well as designating the work as Counsel's fees, CostsMaster can also calculate and
complete information relating to Counsel, such as the table of Counsel's account
information on page 7 of the CLAIM1 or the List of Counsel instructed under the Family
Graduated Fee Scheme on page 5 of the CLAIM1.
The following fields are available for Counsel:
Description
The name of the Counsel instructed. The Description must be unique - if you add a
description that already exists (or if you paste an item copied from the grid) CostsMaster
will automatically add a number to the end of the description or, if there is already a
number at the end it will increase the number by one. Presets can be selected by using
the Alt + Down arrow shortcut.
Export Description
In some circumstances, such as when claiming both inter partes and legal aid work, it is
necessary to create two different Counsel entries for the same Counsel. In this instance
you can use the Description field to distinguish between the two entries internally whilst
using the Export Description to ensure that only Counsel's correct name appears in the
exported bill.
© 1999 - 2013 CostsMaster Ltd.
Chapter 4 - Setting up the bill
63
Account No.
Counsel's Legal Aid Account Number. Used on forms such as the CLAIM1.
Success Fee Percentage
If Counsel is instructed under a success fee you can specify the percentage success fee
here. Any work assigned to this Counsel will then attract a success fee even if it is in a
part to which a solicitor's success fee has not been assigned. Please note, therefore,
that if some of Counsel's fees are not subject to the success fee it will be necessary to
create a separate Counsel entry for this purpose.
Success Fee VAT Rate
If a success fee is claimed this determines the VAT rate that is used. The default is to
use the VAT rate of the part in which the fee is claimed but it is also possible to specify
a different rate which can be used where Counsel has charged VAT at a different VAT
rate to that of the part in which you want to claim the fee. You can select from three
common VAT rates in the drop down box or enter any VAT rate directly.
Success Fee Location
This setting determines where Counsel's success fees are claimed. There are three
options available:
With Solicitor's success fees - Counsel's fees within a part assigned to a
solicitor's success fee will be claimed immediately after the solicitor's success
fees are claimed. It will be calculated on the total fees assigned to this Counsel
in all parts that are assigned to the same solicitor's success fee. If there are
Counsel's success fees in a part that is not assigned to a solicitor's success
fee the fees will be claimed at the end of that part.
End of Each Relevant Part - the success fee will be claimed at the end of
each part that utilises the fee. It will be calculated only on the fees assigned to
this Counsel within that part.
End of Bill - the success fee will be claimed in the last part of the exported bill
even if that part is not assigned to this or any other success fee. It will be
calculated on all fees assigned to this Counsel throughout the bill.
Rates
The hourly rates used for calculating Counsel's fees when claimed as timed attendances.
Separate rates can be defined for all available rate types as explained in the section on
rates, although many of these would not normally be used for Counsel.
Leading Counsel
This property specifies whether this Counsel is a leading counsel. The totals of Counsel
so designated are usually distinguished from junior counsel in exported documents.
FGF
This property specifies whether Counsel was instructed under the Family Graduated Fee
Scheme. If this property is set this Counsel's description will automatically appear in the
appropriate box on page 5 of the CLAIM1 form. Setting this property automatically sets
the legal aid property.
© 1999 - 2013 CostsMaster Ltd.
64
CostsMaster User Guide Version 4
Legal Aid
This property specifies whether the work assigned to this Counsel is legal aid. Deselecting this property will also remove the FGF property if set. If you are preparing a bill
comprising both inter partes and legal aid work and you wish to claim some Counsel
fees inter partes and some legal aid it will be necessary to create two Counsel entries
and make one legal aid. In this circumstance you can utilise the Export Description to
ensure only Counsel's real name appears in the exported bill whilst using different
Descriptions to help you distinguish between the two within CostsMaster.
© 1999 - 2013 CostsMaster Ltd.
Chapter 4 - Setting up the bill
65
Enhancement
Introduction
Enhancement is the percentage increase that can be claimed on legally aided costs as
prescribed by the Legal Aid Agency. It has no counterpart in inter partes costs and will
be applied only to work that is specified as legal aid or, in the case of the Schedule of
inter partes costs at legal aid rates, to inter partes costs when re-calculated at legal aid
rates.
The enhancement feature has changed somewhat since CostsMaster 2 in order to better
implement the changes to the Rules since CostsMaster was first designed. Full details
of the changes can be found in the section Changes in Enhancement Since Version 2.
Types of Enhancement
There are no less than seven locations where enhancement can be claimed in
CostsMaster. Different values can be specified for each location and the total
enhancement claimed for an item will be the cumulative total of all locations that apply to
the relevant attendance.
The locations where enhancement can be claimed are:
Bill
Enhancement claimed here will be applied to all work in the bill except for items that
have been excluded. This is analogous to global enhancement from previous versions of
CostsMaster.
Part
Enhancement claimed here will apply to all work within the selected part.
Fee Earner
Enhancement claimed here will apply to all work done by this fee earner.
Category
Enhancement claimed here will apply to all work assigned to this category on export.
Party
Enhancement claimed here will apply to all work recorded against this particular party.
Periodic
Enhancement claimed here will apply to any attendances whose date falls within the
period defined.
Specific
This enhancement is applied to specific attendances. It allows you to apply
enhancement for a situation not covered by the above six options. It is similar to
© 1999 - 2013 CostsMaster Ltd.
66
CostsMaster User Guide Version 4
individual enhancement in CostsMaster 2 but specific enhancement does not need to be
defined beforehand - it is enough to type the figure into the enhancement column. Whilst
any specific enhancement is added to the other types of enhancement claimed, you can
of course use it on its own by just typing the enhancement for each attendance in the
enhancement column.
Claiming Enhancement
Whereas in previous versions of the program enhancement could be specified only for
preparation items and procedural steps, in this version it is possible to specify the
amount of enhancement separately for each rate type. This gives the draftsman complete
control of which items attract enhancement and the amounts that are claimed for each.
When an enhancement column is visible in a grid and you click or tab into that column
an edit button will appear. There are two ways to enter the figures for enhancement:
The detailed method
If you click on the button you will be taken to the enhancement set up window where
detailed information can be input for each of the rate types or the enhancement exclusion
settings can be specified.
The quick method
You can enter the enhancement figure directly into the edit box. For attendances and
categories this will set all rate types to have the same value but for other enhancement
types it will set only the preparation and advocacy rate types to the value you have
entered. This corresponds to the way most people will use the program but should you
need to do something different you always have the detailed method to hand.
Excluding Enhancement
Wherever enhancement can be claimed it can also be excluded. There are four settings
available:
No
Yes
Never
Always
When deciding if enhancement should be excluded CostsMaster considers all the places
where enhancement is claimed.
If all the locations have the excluded property set to "No" then any enhancement defined
at each of those locations is claimed. However, if any one of the locations has the
excluded property set to "Yes" then no enhancement will be claimed.
But what if there are special circumstances? Perhaps you want to claim routine
enhancement for a panel member fee earner even where other forms of enhancement are
excluded; or perhaps there was a period for which all enhancement has been disallowed.
This is where you can use the other options, "never" and "always".
If any of the locations have the excluded property set to "yes" but one of the locations
has excluded set to "never", then no enhancement is claimed for that item except any
defined in the location where excluded is set to "never". In our first example above, if you
wanted to claim routine enhancement for all work carried out by a certain fee earner you
could set up that fee earner as having 15% routine enhancement on all items then set
the excluded property to "never".
© 1999 - 2013 CostsMaster Ltd.
Chapter 4 - Setting up the bill
67
However if any of the locations have the excluded property set to "always" then no
enhancement will be claimed whatsoever in any circumstances.
It is also possible to exclude enhancement for an attendance by typing "X" in the
enhancement box. This sets exclude to either "Yes" or "Always" depending on the
option defined in the Local Settings window.
Changes In Enhancement Since Version 2
There are various changes to the way that enhancement is claimed in CostsMaster
version 3 and later compared with how this feature worked in CostsMaster 2.
Enhancement Window
The Enhancement window does not exist, its functions being carried out elsewhere.
Enhancement Enabled Option (Enhancement Window)
Enhancement is always enabled automatically for legal aid bills. You can disable it for
the whole bill by setting Bill enhancement to "exclude always".
Claim Enhancement for a Part Option (Edit Part Window)
This has been replaced by part enhancement. This is automatically enabled for a part but
can be disabled by setting exclude enhancement to "exclude always".
Exclude a party from enhancement (Edit Party Window)
This is covered by party enhancement and for each party you can opt to exclude
enhancement by setting exclude enhancement to "exclude always".
Global enhancement (Enhancement Window)
This has been replaced by bill enhancement, however the principle remains the same. In
the Bill window any enhancement claimed will apply to all work in the bill, except for
items that have been excluded.
Individual enhancement (Attendances)
This has been replaced by specific enhancement. For every attendance in the bill you
can apply specific enhancement. This is particularly useful if you feel that certain
attendances or work done merits additional enhancement to that already claimed. Unlike
individual enhancement in CostsMaster 2, specific enhancement does not need to be
defined beforehand.
Routine enhancement (Rates & Fee Earners Window - Categories tab)
This has been replaced by category enhancement as defined on the Categories Window.
All enhancement locations allow you to specify enhancement for routine items and
travelling and waiting.
Enhancement justification
This can now be found on the narratives window.
© 1999 - 2013 CostsMaster Ltd.
68
CostsMaster User Guide Version 4
Don't exclude fee earner enhancement
This is now covered by the exclude options within fee earner and / or category
enhancement.
Enhancement Set-Up Window
Enhancement can be claimed in many different ways, but each will bring you to the
Enhancement Set-Up Window.
This window allows you to specify different levels of enhancement for each of the
available rate types.
As well as specifying when to claim enhancement, this window can also be used to
specify when not to claim it. To do this, there is a drop-down box labelled "Excluded".
This has four settings:
No
Yes
Never
Always
Where an item is excluded the values in the other boxes have no relevance.
© 1999 - 2013 CostsMaster Ltd.
Chapter
5
Recording work
70
CostsMaster User Guide Version 4
General Information
Entering Dates
The way in which CostsMaster handles dates allows you to enter them in a variety of
ways to suit the situation.
Whole dates
Most of the time you will know the exact date on which an item of work was carried out.
In this case you can enter the date in the format dd/mm/yy or dd/mm/yyyy but you can
also use long or short month names ("Sep", "September") and long days as well ("21st")
The valid elements that can separate a date element are not limited to forward slashes
and can be defined in the Local Settings Window where there is a page of options
relating to dates.
Omitting the Year
Within grids you may omit the year and CostsMaster will attempt to guess it based on
the year of any previous item and the year of the last date entered anywhere on the file.
In order to establish the date that is intended CostsMaster uses the following rules:
1.
If the year of the previous item when added to the dd/mm gives a date that
is in the future the year before is used instead
2.
If the year of the previous item when added to the dd/mm gives a date that
is newer than the previous date or older than the previous date by an
amount within the Date Window settings as defined in the Local Settings
Window then the year of the previous date is used otherwise the next year
is used to make the intended date.
Partial dates
If the full date is not known it is possible to enter part of a date and CostsMaster will still
attempt to identify the elements you have entered and format them appropriately on
export.
Date ranges
Sometimes, you may have a note of work that was done over a range of dates on a
series of particular dates. Entering this in CostsMaster is no problem. Just enter the
dates separated by whatever characters you want to appear on export (e.g. 1/12/2012 5/12/2012) and CostsMaster will do the rest. You can even enter a range of partial dates
(e.g. "Nov - Dec 2012") or a series of dates (e.g. "1-3 & 5/12/12"). As you can see from
the last example you can enter ranges that include repeating elements only once and
CostsMaster will work out the correct dates.
When you merge items that include dates that have ranges CostsMaster will be able to
understand the range and merge the dates accordingly provided the date range is
separated by the word "to" or a dash "-". If the range is indicated by some other method
it will not be recognised by the merge procedure and you may need to adjust the
resulting date manually in order to sow it in an optimum manner.
Functions that work on dates
© 1999 - 2013 CostsMaster Ltd.
Chapter 5 - Recording work
71
If you have specified a date range for an item CostsMaster understands that there are a
number of dates, whole or partial, that apply to that item. Functions that work on dates
have to decide which of the many dates is the effective date and do so as follows:
Functions that divide work by date (such as Splitting parts) use the earliest possible date
as the effective date.
Functions that check whether a date is within a range of dates (such as checking
whether the date of an attendance is within the range of dates defined for a part) will only
consider a date included if both its earliest and latest dates are within the specified
range.
Functions that order dates (such as sorting) will arrange the dates by each element in
turn so that if two items have the same first date, the items are then sorted by the
second date etc. with any item that doesn't have a corresponding date coming first.
Entering text in date fields
By default text is not permitted in date fields but this option can be changed in the Local
Settings Window. If you have allowed text to be entered it is even possible to describe a
date as "About December 2012" or even "various" if your fee earner is really bad at
making attendance notes!
If you are going to enter text in date fields you might want to look at the values defined
for date separators in the Local Settings window. It is highly inadvisable to use any of
these characters other than for the purpose of separating date elements as to do so will
cause CostsMaster to misunderstand your intentions. It is for this reason that the
comma is no longer included by default in the date separators and it may be that you
want to remove the full stop also from this list if you use this in a date other than as a
separator.
Display of dates
Within the program the date will be displayed in the format defined by the Windows short
date format. This is usually dd/mm/yyyy for more recent Windows versions and dd/mm/
yy for older versions . This setting can be changed by going to Control panel and
clicking Regional settings.
NOTE: if your computer is set to use a different Windows date format the program may
behave unpredictably with dates.
When Exporting the bill all dates are converted according to the format specified in the
relevant export phrase. This gives you complete control over the look of dates in your
exported document and it is quite simple to vary the date format depending on the type
of document you are exporting.
Entering Time
Time can be entered in a variety of ways. Hours and minutes can be separated by a
colon, full stop, comma or semi colon. Time entered with a valid separator will always be
interpreted in the same way:
These examples are for 1 hour and 12 minutes
Minutes
Hours and minutes
Units
© 1999 - 2013 CostsMaster Ltd.
:72
1:12
1:2
72
CostsMaster User Guide Version 4
These examples are for 48 minutes:
Minutes
Hours and minutes
Units
:48
0:48
:8
Time entered without a separator (i.e. whole numbers) will be interpreted as either hours
minutes or units as defined by the user. The default is minutes. This can be set on the
Local settings menu. The number of minutes in a unit can be also be defined. See the
section on customizing the program later in this guide for further details.
Using the standard designation above it is not possible to enter fractions of an hour that
require two digits as the program will interpret this a meaning minutes. e.g 1.2 will be
interpreted as 1:12 but 1.25 will be interpreted as 1:25 rather than 1:15. You can get
around this by using the "f" character as a separator so that 1f25 will be interpreted as
1:15. When entering time in this manner any fractional amount is rounded up to the
nearest minute at the time of entry.
Displaying time
The program will always display time in the format h:mm e.g. 1:24 or 0:48
Time entered as 0 will be displayed as such when exported. This is a safety feature as it
makes it easy to spot a figure that has been left blank accidentally. Should you wish to
leave a figure blank on export enter the time as a dash , i.e. "-".
When an attendance is assigned a rate type such as telephone calls, letters out, emails
out or letters in, the Time / Items column is used to record the number of items of that
particular type.
Rounding
CostsMaster does not round figures until they appear in an exported bill. When they are
rounded the rounded amount is carried forward for future calculations so that the figures
on paper all add up correctly.
CostsMaster offers two types of rounding. Common Rounding is the method used in the
past but it now also offers Bankers' Rounding. Both methods are similar save for cases
where the third digit is a 5 and there are no other digits greater than 0. In Common
rounding this will be rounded up but in bankers rounding it will be rounded up only if the
second digit is an odd number.
Bankers' rounding is said to give results that are statistically more even.
The Practical Effects Of Rounding
Because of the way that different forms of bill are laid out the total costs for the same file
will differ when exported as different bills. This is particularly relevant for forms such as
the CLAIM1 where each attendance is calculated and rounded and the rounded amount
is then recalculated with enhancement and rounded again. The more "rounded" the rates
are the less the rounding effect. The current care rates are especially prone to rounding
anomalies of this kind.
This is all brought into sharp focus when costs for a CLAIM1 are also used in a Case
Plan. In the latter the times are aggregated for each fee earner at a particular rate and
enhancement resulting in far fewer rounding calculations. The result is a significant
difference between the profit costs on the CLAIM1 and in Part 1 of the Case Plan. In one
© 1999 - 2013 CostsMaster Ltd.
Chapter 5 - Recording work
73
sample bill with profit costs of approximately £10,000 the Case Plan costs were 91p
less using Common Rounding but 45p more using Bankers' Rounding. (In the example, if
you wanted the costs in the case plan to match exactly it is possible to fix the costs of a
part at a set amount using the Part Limitation window.)
Rounding and Running Totals
In CostsMaster the running totals are calculated by first calculating each item
individually. This is done because it is considerably faster and because the type of bill
being exported is not known until export. Thus the effects of rounding mean that the
running totals are only approximate.
Abbreviations
Alt + Shift + A
CostsMaster lets you define your own abbreviations which can be used to speed up the
time you spend typing. This is an invaluable feature in CostsMaster that helps the costs
draftsman to become even more efficient and productive.
Abbreviations can be defined in the Edit Abbreviations Window.
They can be applied to the following data:
The description column of any grid (including the additional descriptions for categories
and parties)
The narratives (including enhancement description and additional narratives for a case
plan)
The miscellaneous attendances heading for a party
The payee field of a disbursement
The brief description for a procedural step
The status of a case party
The scratch pad
The text of a note
Let's assume you have defined the following abbreviations:
clt
dftg
stmt
client
drafting
statement
If you typed the following in the documents grid:
Dftg stmt for clt
When you left the cell it would be expanded to:
Drafting statement for client
Please note that if the first letter of the abbreviation is capitalised, so will the first letter of
the expanded text. In order for this to work all abbreviations and their expanded
descriptions should be entered in lower case characters, except where a word is always
capitalised.
Be careful never to define an abbreviation that is a word you might use. For example if
you defined app as an abbreviation for application you would not be able to refer to an
APP 8 – it would appear as Application 8!
© 1999 - 2013 CostsMaster Ltd.
74
CostsMaster User Guide Version 4
Plurals must be defined separately from the singular form. Possessives too must be
defined separately but may become automatic in subsequent versions.
Furthermore you cannot define any abbreviation that appears on the list of Legal Aid
codes in the Local Settings window. These are treated differently for compatibility with
the CLAIM1.
You can however alter the preset definition of these codes and can use them as
abbreviations, with one caveat:
you must type them entirely in upper case for them to be recognised. This is
because some of the codes could be confused with words (ACT would cause
“perusing provisions of Housing Act” to appear as “perusing provisions of
Housing Attending Court”!).
Notes
Ctrl + Shift + O
Each item in CostsMaster has the ability to record notes against it. These can be used
as reminders to yourself or as notes to someone checking the file. You can also export
them to a word processed document as an annotated note.
In grids an item with a note will have a coloured triangle in the top right corner of the
properties column. This triangle is coloured yellow for public notes, red for private notes
and orange for notes of both types.
Notes have just two fields:
Description
This is the text of the note
Private
Private notes are notes intended for your benefit only. Private notes are not included in
any exported document.
© 1999 - 2013 CostsMaster Ltd.
Chapter 5 - Recording work
75
Attendances & Disbursements
Attendances
In CostsMaster all attendances have identical fields irrespective of where they are
related. This makes the program more consistent to use and also facilitates the copying
and moving of data from one location to another.
Attendances have the following fields:
Date
The date of the attendance. Please see Entering Dates for more information.
Description
The description of the work that was done. Depending on the way the attendance is
formatted for export this may be optional in some cases.
Time / Item
The time spent in minutes (or the number of items for unitary rate types). See entering
time for more information.
Lump Sum
An optional lump sum that will appear with the attendance. If a lump sum is recorded
then any values entered in the time and enhancement columns will be ignored and will
appeared greyed out.
Fee Earner
The fee earner to which this attendance is assigned. An attendance must be assigned to
a fee earner for the work to appear in the exported bill. Unlike CostsMaster 2 it is not
necessary to assign the attendance to a fee earner immediately - there is an
"Unassigned" option for any work where you do not as yet know which fee earner to
assign it to.
If the fee earner you wish to select has not yet been created you can simply type the
name in the box and you will be asked if you want to create it.
Counsel
As well as recording solicitors' time you can also record Counsel fees as a timed
attendance. To do this simply leave the fee earner as "unassigned" and instead assign
the Counsel column to the name of a Counsel. If you select a Counsel when the fee
earner is not unassigned the program will ask you if you intended to do this and if you
ask yes, the fee earner will be marked as "unassigned" automatically.
Counsel's fees recorded in this manner will be calculated using the rate defined for this
Counsel in the Counsel window and will usually show the calculation in the exported bill.
They will still be treated as Counsel fees in the same way as if they had been created as
a disbursement.
© 1999 - 2013 CostsMaster Ltd.
76
CostsMaster User Guide Version 4
Rate Type
The rate type is the rate element (preparation, advocacy, travelling & waiting) that will be
used for this attendance. In CostsMaster 2 this was fixed by the location of the
attendance but in this version an attendance will merely default to the most common
usage for a location and the draftsman is free to alter it. This makes it possible, for
example, to claim attendances at Court at preparation rate or to include travelling &
waiting next to the attendance it relates to etc.
It is also possible to use telephone calls, letters out, emails and letters in rate types in
an attendance. If such a rate type is selected it will be assumed that the figure entered in
the time/items column represents items and will be calculated as such. Please note that
if you change a rate type from say, preparation to telephone calls, and you have already
recorded say 30 minutes for that attendance it will now be recalculated as if it referred to
30 items which will give a different result.
Phase
This field allows you to assign the attendance to a particular phase for the purposes of a
costs budget. Please see the section on preparing costs budgets for further information.
Legal Aid Code
This column allows you to specify the legal aid code that will be attributed to this item in
certain legal aid forms. As well as selecting from a range of codes, CostsMaster will
attempt to set the code automatically when changing the description for an item where
the code has not been set. It does this by virtue of a list of key word/code pairs which
are defined in the Abbreviations and Legal Aid Codes Window.
Disbursements
Each attendance can have one or more disbursements embedded within it. These
disbursements will export to a bill immediately after the attendance and are useful for
situations where you want to keep the disbursement next to the attendance to which it
relates.
Please note that embedding a disbursement within an attendance tightly binds that
disbursement to the attendance. If the attendance is subsequently deleted the
disbursement will be too.
Enhancement
The specific enhancement that is applied to this attendance in addition to all other
enhancement that it might attract.
If you hover the mouse over the enhancement column of an attendance a hint will be
displayed showing how the enhancement claim is made up.
Index
A numeric value that can be used to specify the order that exported items will appear in
when they have the same date.
Claim1 Column
Using this field it is possible to specify which column of the schedule of time spent in a
CLAIM1 this item will appear in. When the legal aid code is set for an item (either
because you set it directly or because CostsMaster guessed it as a result of text typed
© 1999 - 2013 CostsMaster Ltd.
Chapter 5 - Recording work
77
in the description field, CostsMaster will guess the column that will be used based on
the Code used. This will be correct for most items but this column gives you the
opportunity to alter this when you want.
Estimated
Whether the attendance time was estimated by the draftsman rather than coming from a
file note.
Print Out
Whether the attendance time came from a computer print out rather than a file note.
Additional Information
Whether the description should be used in the additional information table of the CLAIM1
form. By default CostsMaster will attempt to set this automatically whenever you set the
legal aid code for an attendance. It determines whether the property should be set by
virtue of a list of codes defined in the Abbreviations and Legal Aid Codes window.
Recoverability
This property will let you tag an inter partes item with three levels based on its chances
of recovery. Please see the section on Recoverability for further details.
Solicitor / Client
This property will let you tag an inter partes item as being solicitor/client. As such it will
not be included in bills or costs budgets but will be included in the client totals on the
costs budget window enabling you to manage any budget agreed with your client.
Excluded
An excluded attendance will not appear in the exported bill.
Draw Attention
This property can be used to highlight items that require your attention in some manner.
Summary Columns
Some grids (such as procedural steps) include an "Attendances" column which displays
a summary of the attendances included. When you click in the cell you cannot edit the
amount but a button appears that will take you to the attendances window where each
attendance can be altered.
The summary text shows the number of hours and minutes recorded for all the
attendances within the item. In addition if any lump sums are recorded the total of these
© 1999 - 2013 CostsMaster Ltd.
78
CostsMaster User Guide Version 4
is shown in parenthesis. Furthermore, the total of any embedded disbursements are
shown in square brackets.
Disbursements
Disbursements can be recorded at various places within CostsMaster. The fields
available are:
Description
A description of the disbursement. This can be a full description or it can utilise the
additional properties to create a compound description on export. Please see the section
on export templates for further details.
Amount
The amount of the disbursement. If you hit the Shift + Enter keys while the cursor is in
this field the program will assume that the figure you have entered is inclusive of VAT and
will split out the basic and VAT elements.
VAT
The VAT claimed on the disbursement. If you hit the Shift + Enter keys while the cursor
is in this field the program will calculate the VAT on the amount entered in the Amount
field.
For exported documents that distinguish between disbursements that attract VAT and
those that do not (Such as the CLAIM1), it is possible to record a disbursement that is
subject to VAT where you do not yet know the amount and have it appear in the correct
section by recording a VAT amount but no principal. In this case the program will know
not to include the VAT in the exported bill.
Assessed Amount / Assessed VAT
The amount and VAT of the disbursement as assessed. These fields are for use in the
CLAIM1 & CLAIM1A only and allow you to automatically calculate the figures for a claim
for costs assessed by the Court. Simply complete these fields with the amount at which
the disbursement was assessed, then tick the "calculate automatically" box in the
Assessed Costs page of the CLAIM1 & CLAIM1A Settings window.
If the disbursement has been assessed as drawn you can quickly populate the
Assessed fields by using the "Mark Assessed as Drawn" Tool, the equivalent entry on
the right-click pop up menu in the grid or clicking the button of the same name in the
Edit Disbursements window. If using the tool or if more than one disbursement is
selected you will be asked whether you want to set this for all disbursements (in which
case any existing figures will be overwritten) or only for those disbursements with a zero
assessed amount. In this way it is a simple matter to manually set the figures for any
disbursements that have been reduced on assessment, and then set all others to the
amounts claimed.
Percentage
It is possible to record a disbursement in full but claim only a percentage by setting this
field to the percentage you want claimed. In an exported bill the disbursement will export
with the full amount shown in the description together with details of the percentage
claimed. If a percentage is defined, the grid will only show the full amount of the
disbursement when the cursor is in the cell, other times it will show the amount that will
© 1999 - 2013 CostsMaster Ltd.
Chapter 5 - Recording work
79
be claimed as a result of the percentage reduction. As well as entering the percentage
directly it is possible to enter a forward slash followed by the number by which the
disbursement should be divided, and CostsMaster will then calculate the percentage.
Counsel
This drop down box contains a list of all the Counsel defined in the Counsel window.
Selecting the name of a Counsel designates this disbursement as representing
Counsel's fees. If the Counsel you want to select is not in the list you can simply type
the name and you will be asked if you want to create the Counsel. If you do not need to
distinguish between counsel you can simply create a counsel called, say, "Counsel" and
assign disbursements to it to designate them as Counsel fees.
Phase
This field allows you to assign the attendance to a particular phase for the purposes of a
costs budget. Please see the section on preparing costs budgets for further information.
Payee
Optional field for recording who the disbursement was paid to
Invoice Date
Optional field for recording the date of any invoice relating to the disbursement.
Invoice No
Optional field for recording the number of any invoice relating to the disbursement.
Date Paid
Optional Field for recording the date the disbursement was paid
Legal Aid Expert Fields
These fields allow you to record details for experts' fees as required for the CLAIM1 and
CLAIM1A forms. The expert group and expert type can be selected from drop down
boxes. Here the description is given in full but on export to a CLAIM1 only the relevant
code will be shown. The list of available expert types will vary depending on the expert
group selected.
Expert Time
This field is used in Costs Budgets to specify the time spent by an expert. It is used for
information purposes in the exported document and does not form the basis of any
calculation. You must always enter the amount claimed by the expert as a disbursement
in the usual way.
Estimated
Whether the disbursement amount was estimated by the draftsman rather than coming
from an invoice or fee note.
© 1999 - 2013 CostsMaster Ltd.
80
CostsMaster User Guide Version 4
Legal Aid
For Legal Aid & Inter Partes bills determines if the disbursement is claimed against the
Legal Aid Agency or inter partes. When creating a new disbursement the Legal Aid
property will be set if the current default fee earner (as defined in the Control Centre) is
assigned to a Legal Aid Category.
For Counsel fees the Legal Aid status of the disbursement is determined by the Legal
Aid property of the Counsel to which it is assigned, rather than this property directly. As
a result if the Counsel to which it is assigned is marked as legal aid the property icon will
show in grey as an indication of that status.
Invoice
Optional field for specifying whether an invoice is available for this disbursement
Paid
Optional field for specifying whether this disbursement has been paid. Will be set
automatically if the description contains the word "Paid".
Receipt
Optional field for specifying whether there is a receipt for this disbursement.
Expert Fees
Specifies whether the disbursement relates to Expert Fees. Will be set automatically if
the description contains the word "Report".
Court Fees
Specifies whether the disbursement relates to Court Fees (for use in Costs Budgets).
Recoverability
This property will let you tag an inter partes item with three levels based on its chances
of recovery. Please see the section on Recoverability for further details.
Solicitor / Client
This property will let you tag an inter partes item as being solicitor/client. As such it will
not be included in bills or costs budgets but will be included in the client totals on the
costs budget window enabling you to manage any budget agreed with your client.
© 1999 - 2013 CostsMaster Ltd.
Chapter 5 - Recording work
81
Excluded
Any disbursement that is excluded will not appear in the exported bill.
Draw Attention
This property can be used to highlight items that require your attention in some manner.
The optional disbursement fields can be used in place of information in the description
field. This will allow you to
a) create an export phrase that builds the description dynamically and
b) use the optional fields in a disbursement report to the client showing which
disbursements are missing receipts, which have no invoices, which haven't
yet been paid etc.
Pre Agreed
This property is used to indicate that the amounts claimed in this disbursement have
already been agreed by the LAA in an events case plan.
Summary Columns
Some grids (such as procedural steps) include a "Disbursements" column which
displays a summary of the disbursements included. When you click in the cell you
cannot edit the amount but a button appears that will take you to the disbursements
window where each disbursement can be altered.
The summary text shows the total amount of all the disbursements within the item with
any VAT shown in parenthesis.
Recoverability
For inter partes work, it is now possible to tag items with an indication of their
recoverability. This can be done by means of three coloured properties—green, yellow
and red—or by specifying the percentage of the amount which you think is recoverable.
All items are tagged green by default indicating they are 100% recoverable, but you can
chose to tag them yellow (50% recoverable) or red (0% recoverable). If you enter a value
which is more than 0% but less than 100%, the item will be tagged yellow (to indicate
that it is at least partly recoverable)
Although the value stored is a percentage, it is possible to enter this value as an actual
amount using the Shift + Enter shortcut. For example, if an attendance had time
recorded of 48 minutes and you feel that only 30 minutes will be allowed, enter 30 into
the Recoverability column and press Shift + Enter and the value will be converted to 62%
.
The recoverability percentage applies not only to timed attendances but also to lump
sums as well as disbursements, and the Shift + Enter shortcut applies equally to these.
Specifying recoverability for an item does not cause it to be included or excluded from an
exported document - the figures are intended to be used as an indication of your likely
recovery on assessment and should be useful when negotiating. They also apply to inter
partes costs only (legally aided items will show the Legal Aid icon in their place).
© 1999 - 2013 CostsMaster Ltd.
82
CostsMaster User Guide Version 4
The tags can also be applied by shortcut:
Ctrl + Shift + 1 = Red
Ctrl + Shift + 5 = Yellow
Ctrl + Shift + 9 = Green
Please note these shortcuts use the numbers on the main keyboard rather than the
number pad.
Control Centre
The Control Centre has an improved option allowing you to display percentage
recoverability: popping up the menu you will see that a new percentage option has been
added which works as follows:
green, yellow, red: all costs other than solicitor client are shown
green, yellow: No costs tagged red (with a recoverability value of 0) or solicitor client
costs are included
green: only costs tagged green (with a recoverability value of 100) are shown
percentage: all costs other than solicitor client are shown but are subject to the
recoverability percentage value giving you a better indication of the likely recovery on a
file if you have completed the recoverability column with exact percentages.
Auto-Insert Text
Shift + Enter
There are two features that will automatically insert text into the description column of
attendances and disbursements:
Document tags
CostsMaster allows you to quickly insert a "tag" number into a description. This is
typically used if you are flagging the physical documents with a paper tag and wish to
include a reference to that flag in the item description. CostsMaster automatically keeps
track of the next available tag and will insert it when you use the Shift + Enter shortcut in
the description column of an attendance or disbursement.
By default CostsMaster defaults to tagging documents in lower case Roman numerals
and inserting the tag within parentheses, but both of these settings can be altered in the
Local Settings window.
The tag is inserted at the current cursor position. Please note that if any text is selected
it will be replaced by this operation.
Mileage Claims
For disbursements only, CostsMaster can insert a claim for mileage simply by entering
the amount of miles travelled and using the Shift + Enter key in the description column.
A full description is inserted together with the amount and VAT.
If the cell has just the figures for the miles travelled CostsMaster can calculate the
appropriate amount just by using the shortcut. However if there is other text in the cell it
is necessary to select the figures for miles travelled before using the shortcut.
The mileage rate is defined in the Local Settings Window together with the text that is
inserted with it.
© 1999 - 2013 CostsMaster Ltd.
Chapter 5 - Recording work
83
Recording Work in Different Locations
Procedural Steps
Alt + S
Procedural Steps represent items such as Court attendances, conferences with
Counsel, pleadings etc which are traditionally shown in a bill of costs in chronological
order at the beginning. However, in High Costs Case Plans, procedural steps are used to
record all future work. Please see the section on Recording future work in a case plan for
further information.
The following information can be entered for each procedural step:
Date
The date of the procedural step. Attendances within a step also have their own date
although this column is hidden by default. CostsMaster automatically ensures that new
attendances are given the same date as the step to which they belong, but you can alter
the date to include work in a procedural step that is done on a different date.
When you change the date of a procedural step CostsMaster may or may not change
the date of any attendances within that step depending on the setting for this in Local
Settings > Dates. The options allow you to specify that CostsMaster should
Never change dates (you can still do so manually if you wish)
Ask whether you want to change the dates (including whether to change dates of
all attendances or only those that had the same date as the procedural step)
Automatically change dates if they were the same as the procedural step and
ask about any others
Automatically change dates if they were the same as the procedural step and
ignore any others
Automatically change all dates.
See Entering Dates for more information on recording dates in CostsMaster.
Type
Here you can select the type of attendance from the following options:
- No Attendance
- Hearing (Solicitor Advocate)
- Hearing (Counsel Advocate)
- Conference Without Counsel
- Conference With Counsel
- Advocates Meeting
- Other Attendance
For case plans that require a list of hearing dates, these are compiled automatically from
any procedural steps where the type is set to Hearing without Counsel or Hearing with
Counsel.
Where the local option to show procedural steps in colour is selected the procedural
steps display in different colours depending on the type of step. This makes it easier to
see what steps you have at a glance if you have the type column hidden. The colours
used are
© 1999 - 2013 CostsMaster Ltd.
84
CostsMaster User Guide Version 4
- No Attendance
- Hearing (Solicitor Advocate)
- Hearing (Counsel Advocate)
- Conference Without Counsel
- Conference With Counsel
- Advocates Meeting
- Other Attendance
Black
Green
Purple
Olive
Maroon
Blue
Turquoise
Description
The description of the step, such as "Attending upon hearing"
Phase
This allows you to specify the phase of a step. Any summarily assessed costs within
the step will use this setting when exported to a costs budget. In addition it will function
as a type of preset in that any attendances and disbursements created within the step
will automatically assume this phase.
Even if you set the phase for a step it doesn't preclude you from altering them for
individual attendances should it be necessary.
If you alter the phase after recording attendances or disbursements within the step, the
phase of those attendances and disbursements may be changed automatically, or you
may be asked whether you wish to alter these values, depending on the setting for this
in Local Settings > Phase/Task/Activity Options.
Brief Description
This optional field allows you to define a brief description to be used in places where the
full detail of long hearings is not usually required. If no brief description is used, the main
description is used instead
Excluded
If a procedural step is excluded none of its attendances or disbursements will be
exported in the finished bill.
Draw Attention
This property can be used to highlight items that require your attention in some manner.
Attendances
Time spent in relation to the procedural step is recorded in a standard attendance
window which is accessed either from the Procedural step grid attendances column or
from the edit procedural step window. Please see the section on Attendances for more
information. If the procedural step has costs that have been summarily assessed or
costs recorded under the Family Advocacy Scheme these attendances may be greyed
out indicating that they will not appear in exported documents.
© 1999 - 2013 CostsMaster Ltd.
Chapter 5 - Recording work
85
Disbursements
Disbursements expended in relation to the procedural step are recorded in a standard
disbursement window which is accessed either from the Procedural step grid
attendances column or from the edit procedural step window. Please see the section on
disbursements for more information. If the procedural step has costs that have been
summarily assessed these disbursements may be greyed out indicating that they will
not appear in exported documents.
Summarily Assessed Costs
This field is used to record details of costs which have already been summarily
assessed. Clicking the button will open the Summarily Assessed Costs window.
FAS
This field is used to record work that falls under the Family Advocacy Scheme. The text
may be greyed out if the FAS does not apply due to the Aspect that has been defined for
the current part. Clicking the button will open the Edit FAS window. If summarily
assessed costs have been recorded the FAS column will be disabled and anything
already defined will not export.
Events
This field is used to record events information for LAA Events Case Plans. Clicking the
button will open the Edit Events window.
In addition, if Counsel has opted to claim his fees under the FGF or FAS schemes, you
can select the Counsel FGF/FAS property for the step and record Counsel's total fees as
a disbursement.
The total value of the events in a step will be included in the control centre totals in
preference to any other costs recorded within the step.
Pre Agreed
This property is used to indicate that the events claimed in this step have already been
agreed by the LAA.
Summarily Assessed Costs
Right Ctrl + Right Shift + S
This window is invoked from the Procedural Steps Grid or the Edit Procedural Steps
window and is used to record work which has already been summarily assessed.
Work recorded in this window is not claimed but is shown in an exported bill and can be
included in the success fee calculation.
Costs Summarily Assessed at
Ticking this box enables the summarily assessed costs and causes attendances and
disbursements for this procedural step to be disabled. It will also enable the other boxes
to allow you to record the costs details.
Profit Costs
© 1999 - 2013 CostsMaster Ltd.
86
CostsMaster User Guide Version 4
Here you can enter amounts awarded for profit costs and VAT thereon.
Fee Earner
The fee earner that the costs will be assigned to for the purposes of the costs budget.
Disbursements
Here you can enter amounts awarded in respect of disbursements and any VAT thereon.
Counsel
Here you can specify a Counsel and after so doing can record any amounts awarded in
respect of Counsel fees and VAT thereon. If the Counsel you have specified has a
success fee defined the amount recorded here will be taken into account in calculating
his success fee.
Edit FAS Window
Right Ctrl + Right Shift + F
This window is invoked from the Procedural Steps Grid or the Edit Procedural Steps
window and is used to record work under the Family Advocacy Scheme.
Changing values in this window will cause the FAS claim to be calculated using the
currently defined presets. There are multiple presets available for FAS and you will first
need to specify the one relevant to your case in the Control Centre.
Enable FAS
Enabling FAS for a procedural step will cause the FAS settings to become active. They
will override any attendances recorded in the step in CLAIM1As and fixed fee bills.
Court Level
Depending upon the date of the containing Procedural Step, this will be the Court in
which the matter was heard or the level of the presiding Judge. If the Procedural Step is
dated before 22nd April 2014, it will be the Court; from that date onward it will be the
Judge.
If you are editing multiple Procedural Steps, some with dates before 22nd April 2014 and
some after, it will be the Court unless you chose "Family Court" in Case Details in which
case it will be the Judge.
Hearing Type
The options available will differ depending on the Aspect set for the part.
Hearing time for FAS purposes
This is the amount of time spent at the hearing in accordance with the FAS rules.
Units
This is calculated automatically when the hearing time for FAS purposes changes, but
you can override this should you need to.
© 1999 - 2013 CostsMaster Ltd.
Chapter 5 - Recording work
87
Fixed Fee Rate
This is calculated from the Court Level, Hearing Type and Aspect for the part. Preset
fixed fees are supplied with the program but can be altered in the Presets window should
the values change at some point in the future.
Claim
This is the value of the claim calculated from the units and fixed fee rate. Changing either
of these values will cause the claim to recalculate. You can also override the claimed
value should you need to do so.
Settlement Fee
For parts where the Aspect is set to Finance, this allows you to include a claim for a
settlement fee.
Bolt-Ons
In addition to the main fee you can quickly claim any applicable bolt-ons by ticking the
relevant boxes. For bundles you can specify the bundle size and for travel you can
specify the distance and reasons.
Edit Events Window
This window is invoked from the Procedural Steps Grid or the Edit Procedural Steps
window and is used to record work to be claimed in an Events Case Plan.
It is possible to record separate information for the solicitor, junior counsel and leading
counsel, although the latter will not be used unless you export a two counsel case plan.
For each you can specify the initials of the fee earner concerned. If specified the initials
are used to mark the column in the case plan. If they are omitted an 'X' is used instead.
For each you can also choose the type of event from the following:
None
Event
Over-run
Under-run
No Attendance (for solicitors only)
The "No Attendance" entry is used to specify that the solicitor did not attend the hearing
but needs to claim the preparation fee for that hearing.
If the case plan has been set to one of the Solicitor Advocate types then you will have
the following options for the solicitor:
None
Event (advocacy)
Event (with counsel)
Over-run (advocacy)
Over-run (with counsel)
Under-run (advocacy)
Under-run (with counsel)
No Attendance
If you select one of the types specific to Solicitor Advocate case plans, and then alter
© 1999 - 2013 CostsMaster Ltd.
88
CostsMaster User Guide Version 4
the case plan type to one where these types do not apply, you do not need to manually
alter each one as they will automatically export to the equivalent non-solicitor advocate
type.
Party Work
Alt + P
The Party Work window shows a summary of all work recorded against the parties. This
work can be attendances, disbursements or standard items that are claimed in bills by
number rather than time.
The information displayed in this window is only a summary of that recorded elsewhere
and cannot be edited directly. For each of the fields, clicking on the button in the grid or
double clicking the cell will cause a window to be opened in which the individual data can
be edited. For the attendance and disbursement fields this will open an attendance or
disbursement window but for the standard fields the party details window will be opened.
The following fields are available:
Personal Attendances
Right Shift + Right Ctrl + A
Time spent in personal attendance with a party.
Telephone Calls
Right Shift + Right Ctrl + T
Time spent in telephone calls with a party.
Letters Out
Right Shift + Right Ctrl + L
Time spent on letters out to a party.
Emails
Right Shift + Right Ctrl + E
Time spent on emails to a party.
Letters In
Right Shift + Right Ctrl + I
Time spent on letters in from a party.
Preparation
Right Shift + Right Ctrl + P
Time spent on preparation in connection with a party.
Misc Attendances
Right Shift + Right Ctrl + M
Time spent in other attendances with a party.
© 1999 - 2013 CostsMaster Ltd.
Chapter 5 - Recording work
Disbursements
Right Shift + Right Ctrl + D
Disbursements expended in relation to the party.
The following items are "standard items" and are actually stored within their
own lists, accessible from the party details window:
Telephone Calls
The number of standard telephone calls made and received with a party.
Letters Out
The number of standard letters written to a party.
Emails Out
The number of standard emails written to a party.
Routine Letters Out
The number of standard routine letters written to a party in a Court of Protection bill.
Letters In
The number of standard letters received from a party.
Party Details
The party details window is used to record standard communications for a party. These
are simple one unit items for which it is not necessary to record a date or description.
The window also gives access to the other locations for the party where long telephone
calls and long letters etc. can be recorded.
This window is displayed if you utilise a party shortcut or click the button in a standard
item column in the party work window.
Standard Communications
The party details window allows you to quickly record standard items for a party. These
items can be recorded in various ways:
by using the shortcut keys (see below)
by right clicking in the cell
by using the up/down arrows of the spin edit control.
For the first two methods holding the shift key whilst performing the action causes the
number of items to be reduced.
Fee Earner
This is a read only field which indicates which fee earner the routine items are recorded
for.
TC
LO
EO
Shortcut = T
Shortcut = L
Shortcut = E
© 1999 - 2013 CostsMaster Ltd.
Telephone Calls
Letters Out
Emails Out
89
90
CostsMaster User Guide Version 4
rLO
LI
Shortcut = R
Shortcut = I
Routine Letters Out (Court of Protection bills)
Letters In
Phase
In order to record a routine item at a particular phase it is necessary to specify the phase
using the box on this window before recording the routine item. You can do this be
selecting from the drop down box or by using the shortcut Ctrl + < or > to cycle through
the available phases.
You can then use any of the above methods to add or delete an item. When you add an
item in this way. CostsMaster automatically stores the information as an attendance set
to the appropriate rate type and phase within the appropriate party work list. By doing
this it is possible to quickly record routine items yet have them separated by fee earner
and phase for use in costs budgets and other documents. These attendances can be
modified manually but there are some restrictions, for example it is not possible to
record lump sums or embedded disbursements.
If the phase is specified when you delete a routine item then CostsMaster will remove
one routine item from any underlying attendance with the same phase. If there is no such
phase you will not be able to delete the routine. If no phase is specified when deleting
then one routine item will be removed from the first attendance.
Please see the section relating to the party work window for more information on the way
routines are stored in CostsMaster 4.
Personal Attendances
Right Shift + Right Ctrl + A
Time spent in personal attendance with a party.
Telephone Calls
Right Shift + Right Ctrl + T
Time spent in telephone calls with a party.
Letters Out
Right Shift + Right Ctrl + L
Time spent on letters out to a party.
Emails
Right Shift + Right Ctrl + E
Time spent on emails to a party.
Letters In
Right Shift + Right Ctrl + I
Time spent on letters in from a party.
Routine Letters Out
Right Shift + Right Ctrl + O
Time spent on routine letters out to a party in a Court of Protection bill.
© 1999 - 2013 CostsMaster Ltd.
Chapter 5 - Recording work
91
Preparation
Right Shift + Right Ctrl + P
Time spent on preparation in connection with a party.
Misc Attendances
Right Shift + Right Ctrl + M
Time spent in other attendances with a party.
Disbursements
Right Shift + Right Ctrl + D
Disbursements expended in relation to the party.
Documents
Alt + D
This window is used to record preparation work that appears in the Documents section in
a traditional bill. Documents are considered as attendances in CostsMaster and full
details can be found in the section on attendances.
Travelling & Waiting
Alt + W
This window is used to record travelling & waiting attendances that are not recorded
elsewhere. Related disbursements can be embedded within the travelling & waiting items
as is the case for all attendances. Please see the attendances section for further details.
Miscellaneous Disbursements
Alt + J
This window is used to record disbursements that have not been recorded elsewhere.
Please see the section on disbursements for further details.
Costs of Assessment
Alt + C
The Costs of Assessment Window allows you to claim costs relating to preparation and
assessment of the bill of costs.
Costs Draftsman's Fee As A Percentage
Enabling this feature will allow you to claim a fee for preparing the bill of costs based on
a percentage of the profit costs claimed. You can specify the percentage and whether
the fee is claimed inter partes, legal aid or both.
It is also possible to specify the range of parts that the fee is calculated on using the
"Calculate Fee on costs from" drop down box. This box allows you to select "This part
© 1999 - 2013 CostsMaster Ltd.
92
CostsMaster User Guide Version 4
only" or to choose from any of the parts that precede the current part. Please note that
altering the number of order of parts will impact on this setting as follows:
Adding a part within the range will include the new part in the range, but adding a part
before the range will adjust the range automatically.
Deleting a part before the range will adjust the range automatically.
Moving a part will adjust the range automatically, but if the part in which the Costs
Draftsman's fee is defined is moved before the range it will be set to "this part only".
There are three ways the costs draftsman's fee can be claimed
As a disbursement
As a lump sum profit cost
As a pseudo-hourly rate profit cost.
This last option calculates the fee at a percentage and then works out how many hours
this represents at the rate specified (rounded down to the nearest minute). The time and
rate is then claimed as if it were an ordinary attendance.
As you may be aware it is possible on export to specify the order in which the parts
export and even to merge parts together. The range of parts you have specified for the
costs draftsman's fees may no longer be relevant on export, therefore CostsMaster uses
the following rule to determine the amount on which the costs draftsman's fee will be
calculated:
The figure on which the costs draftsman's fee is calculated is the
total costs of all exported parts that include work drawn from a
CostsMaster part included in the range of parts for the costs
draftsman's fee.
This ensures that the costs of all specified CostsMaster parts are included in the fee but
it doesn't (and cannot) prevent the costs of other parts which are merged with these parts
on export also being included. It is the Draftsman's responsibility to ensure this does not
happen.
In the Bill Settings and Breakdown Settings windows there is an option to claim a
success fee on Costs of Assessment. Please note that if such an option is selected the
success fee will not be calculated on the Costs Draftsman's fee even if it is claimed as a
lump sum profit cost or as a pseudo hourly rate profit cost, because the Costs
Draftsman's fee is always calculated last. If you wish to claim a success fee on the
costs of bill preparation you should not use the costs draftsman's fees as a percentage
feature but should instead create a fee earner for the the person preparing the bill and
record their time in the costs of assessment attendances window.
Make provision for attending assessment
This box will add a line to a traditional bill of costs claiming costs of attending
assessment. The figures for this are left blank as the intention is that they will be
inserted on assessment.
Claim Schedule Costs At Prescribed Rates.
In Legal Aid & Inter Partes bills CostsMaster will claim any inter partes costs defined on
this window in the Legal Aid schedule at inter partes rates. If this box is ticked the
costs will be re calculated at prescribed rates for the schedule as for other costs.
Claim Case Plan Costs as a separate stage
© 1999 - 2013 CostsMaster Ltd.
Chapter 5 - Recording work
93
For High Costs Case Plans you can opt to show all the costs of assessment in a
separate part in the exported case plan. Please note that if you are also claiming a costs
draftsman's fee at a percentage it will be calculated on the total figure shown in those
parts and will not include any costs of preparation which will now be shown in a separate
part. If claiming a costs draftsman's fee in these circumstances it is recommended that
you do not select the option to show the costs of assessment in a separate part.
Attendances
Clicking this button opens an attendance window where you can claim for such items as
checking and signing the bill of costs
Disbursements
Clicking this button opens a disbursement window where you can claim any related
disbursements.
Please note that there is no specific section for claiming prescribed rate costs as was
the case in CostsMaster 2. This is because it is now possible to claim an attendance at
a lump sum rate so prescribed rate costs can be claimed in this manner.
Part Attendances
Alt + L
In this window you can view all attendances within a part. In addition to all the usual
attendances columns there is an extra (read only) column labelled "location" that
indicates where the attendance has come from.
You can alter most fields of an attendance in this grid but cut/copy paste are not
currently available.
Part Disbursements
Alt + K
In this window you can view all disbursements within a part. In addition to all the usual
disbursement columns there is an extra (read only) column labelled "location" that
indicates where the disbursement has come from.
You can alter most fields of a disbursement in this grid but cut/copy paste are not
currently available.
Pending Work
Although the pending work window is usually used when importing work from an external
system, attendances and disbursements can also be recorded directly here should you
wish. You may want to do this if you are recording work where you are uncertain whether
it will be claimed or you are uncertain as to its location. Any work recorded in the
pending work window will not be exported until it is moved to a different location in
CostsMaster.
© 1999 - 2013 CostsMaster Ltd.
Chapter
6
Types of Bill
Chapter 6 - Types of Bill
95
Columned Bills
Introduction
Recording work for columned bills is very straight forward as the structure of windows in
CostsMaster follows the format of the traditional exported bill. Work recorded, say, in the
procedural steps window will appear in the procedural steps section in the bill etc. Each
of the available windows are detailed earlier in this guide.
When it comes to export you can use the Bill Settings window to customise the format
of the bill.
Bill Settings
Ctrl + Alt + J
This window is accessed from the Case Details window or by clicking the Case Details
button on the main toolbar and selecting the Bill Settings item from the drop down list
that appears.
It allows you to record information specific to exported bills for assessment by the Court.
Whilst this window deals with the appearance of the exported bill, its settings are saved
with the file and can therefore vary on a file by file basis. This means that if you have to
send a file to a colleague, it will export as you intended rather than based on the local
settings of your colleague's machine.
The downside is that there are a lot of options on this window that you might find yourself
re-setting whenever you start a new file. There are two solutions to this:
When you start a new file and set the options in this window the way you want, you
should consider saving the file as a program template so that you can start your next
file from this point without having to enter the options again.
The program will also remember the last selections made in this window and when
starting a new blank file will restore these options for you, saving you the need to
make the same changes repeatedly.
General
This section contains a variety of options, some of which were previously located in the
Export Options window.
Mark Blank Disbursements with an "X"
When selected any blank disbursements in a bill will be marked with an X to draw
attention to their absence. in addition any totals that should include the disbursement
are similarly marked.
Below this is a further option that is enabled only when this is ticked. It allows you to
produce a separate summary with the totals to date which you can use should you wish
to pencil in the current figures.
Move blank dates on export
When sorting dates on export CostsMaster will try and keep items with blank dates next
© 1999 - 2013 CostsMaster Ltd.
96
CostsMaster User Guide Version 4
to the item that precedes them within the program. Occasionally this is not possible and
in this case this option determines if they appear before all other items or after all other
items.
Pad pound signs in exported bills
When this option is ticked the item amounts in the exported bill will have their pound
signs spaced so that they align with the pound sign on the longest item.
Show Lodgment Fee
When this option is selected, any lodgment fee defined on the Case Details window will
be included after the bill summary in an columned bill.
Include A Work Done Section
This setting allows you to specify whether the bill is exported with the work against the
parties, documents and miscellaneous travelling & waiting wrapped within a "Work Done"
section with its own total at the end or whether each section is claimed separately.
Backsheet Certificates
This box allows you to select one of the groups of certificates that you want to appear on
the back of the bill. Certificates and groups can be added and edited in the Certificates
window which you can get to by clicking the "Edit Certificates" button.
Phase Bills
Show Chronology
When this option is ticked the Procedural Steps narratives are shown together at the top
of the Bill. If a brief description has been entered, this will be used later in the Bill instead
of repeating the full description: this is especially helpful if a lengthy Order has been
included.
Show Budget Amount in Phase Summary
When this option is ticked the Phase Summary at the end of the Bill will include an extra
column comparing the Budget amount with the Pre-Budget and Post-Budget amounts.
Lines & Headers
Column Lines
This setting allows you to specify whether column lines are shown (for use when printing
on plain paper) or turned off (when printing on your own paper with pre-printed lines).
There are three options, None (which creates a document devoid of lines for printing onto
pre-lines paper), Basic (which gives single lines but works with all word processors) and
Advanced (which gives very fine double lines but works with Word only). It is also
possible to select the line colour that is used.
Separate settings are provided for bills and Legal Aid schedules. By default the Legal Aid
schedule uses a different colour to the bill to assist in distinguishing between the two
documents.
Header & Footer Composition
There are five elements that can be included in either the header or footer of the
© 1999 - 2013 CostsMaster Ltd.
Chapter 6 - Types of Bill
97
document if you so wish. They are
Page number
Date of export
Company Name
Reference
Filename
The company name and reference are recorded in the Local Settings window. The
filename is the name you have saved your CostsMaster file as without the full path.
Rates & Narrative
Narrative Position
This setting determines whether the narrative appears in the bill or on the front sheet.
Rates Position
This setting determines whether the Rates for the parts are shown at the start of each
part, at the start of the bill or on the front sheet. Please note that the latter option is only
available when the narrative is also set to show on the front sheet.
Category Description for Rates Utilised
This setting allows you to specify which of the three possible descriptions that can be
defined for each category should be used in the Rates Utilised section at the beginning
of each part.
Hide rate type where obvious
This option will cause the travelling & waiting rate type to be suppressed whenever the
word "travel" or "waiting" appear in the description for an item.
Don't refer to rates if same as part one.
If you have multiple parts and some are set to use rates from part one, with this option
selected the "Rates as per part one" text will not be exported. Furthermore, if the rates
are set to show at the beginning of the bill or on the front sheet and all rates use rates
from part one, with this option set you will not get a set of part descriptions at the
beginning of the bill and the Rates Utilised section will appear on its own. This gives the
same effect as using "Global Rates" in CostsMaster 2.
Success Fees
Include Success Fees in Costs Draftsman's Fee calculation
When ticked the amount of any success fee will be included in the total profit on which a
costs draftsman's fee is calculated.
Claim Success Fees on Summarily Assessed Costs
When ticked any summarily assessed costs will be included in the amount on which a
success fee is calculated.
Claim Success Fees on Costs of Assessment
© 1999 - 2013 CostsMaster Ltd.
98
CostsMaster User Guide Version 4
When ticked any time recorded in the costs of assessment window is included in the
amount on which a success fee is calculated. When enabled there is a further option
that determines whether the success fee on this item is shown in the success fees
section or in the costs of assessment section.
Enhancement
Mark Enhancement
This option allows you to specify whether to mark items that are excluded or not
excluded.
Please note that excluded markers will be applied only to work that is subject to
enhancement where exclude is set to "Yes" or "Always". The markers will not appear
where enhancement is not claimed on work of a particular rate type because to do so
could produce a result where the enhancement claim is ambiguous. Such enhancement
will specify which rate types it is applied to.
Primary / Secondary Marker
The primary marker is the one that is used most often to mark enhancement. The
secondary marker is only used for complex enhancement claims where a single marker
is insufficient to unambiguously identify the excluded items.
Family Fixed Fee Bills
© 1999 - 2013 CostsMaster Ltd.
Chapter 6 - Types of Bill
These options apply only when exporting using a family fixed fee bill template and are
ignored for all other bill types.
Claim Advocacy Only
When selected core costs will not be exported to the bill.
Show separate subtotals for core costs
When selected separate subtotals are shown for core costs and the enhancement
claimed on them.
Claim enhancement on core costs
When selected enhancement will be claimed on core costs.
Show CLAIM1A Care 2007 Fixed Fee after Bill Summary
When selected any Care 2007 Fixed Fee defined in the CLAIM1A Settings window will
be shown after the bill summary. It will not be included in any totals.
Show FAS in Columns
When selected any costs claimed under the Family Advocacy Scheme will be included
in the columns and carried forward to the part and bill totals. When the option is not
selected the costs are shown in the body of the bill only by way of information.
Include FAS in Costs Draftsman's Fee Calculation
When FAS is not shown in columns, selecting this option will include the FAS totals in
the Costs Draftsman's fee calculation. When FAS is shown in columns the FAS costs
are automatically included in the Costs Draftsman's Fee calculation and this setting has
no effect.
Legal Aid Schedules
Show Legal Aid Rates in Legal Aid Schedule
When ticked the legal aid rates are repeated at the beginning of the Schedule of inter
partes costs at legal aid rates.
Show Enhancement Justification in Legal Aid Schedule
When ticked the enhancement justification is repeated after the rates in the schedule of
inter partes costs at legal aid rates.
Front & Back Sheets
Assessment Details Alignment
This option determines whether the text for assessment details is aligned left, right,
centre or justified
Put Assessment Details in tramlines
This option determines whether the assessment details text appears within horizontal
© 1999 - 2013 CostsMaster Ltd.
99
100
CostsMaster User Guide Version 4
lines on the page.
Sections
The remaining items represent each of the available sections in a columned bill. There
are five main sections in a bill (procedural steps, party work, documents, travelling &
waiting and costs of assessment), plus additional sections for party work where the party
is set to export to a location other than the party section. These additional sections will
only be shown in the bill settings window when a party has been set to export to that
section.
Each section has its own settings that can be set independently of the other section.
This gives you huge flexibility in the look of your exported bill.
Please note that some controls may show options that are greyed out due to that option
being rendered irrelevant by the setting of another option on this page.
Show Attendances In Schedule
This setting determines when the various attendances in a section are shown in the bill
and when they are included in a schedule appended to the bill. You can choose to have
them in one or the other or to be included when the number of items exceeds an amount
which you can define in the accompanying box.
Short Attendance Descriptions
When items are claimed with amounts the description automatically wraps before the
amount column. This option will make descriptions wrap at this point even if no figures
are claimed next to them.
Add blank line between categories
When items are grouped together by category, such as in a summary or in the party
work section, this option will cause the work for each category to be separated by a
blank line.
Category Description for Attendances
This setting allows you to specify which of the three possible descriptions that can be
defined for each category should be used when necessary when exporting an
attendance.
Item Spacing
This determines whether a items are listed with a blank line between them.
LA/IP Work
This setting applies only to bills where inter partes and legal aid work is claimed within
the same section. For these it determines how such work is shown. If numbered, the
inter partes and legal aid work will have a separate number.
Repeat Summaries - the inter partes summaries are shown and totalled,
followed by the legal aid summaries.
Double columns - the summaries include both inter partes and legal aid work
and a single total is shown, but the figures in the columns show the separate
inter partes and legal aid values. If numbered, the item has a single number.
© 1999 - 2013 CostsMaster Ltd.
Chapter 6 - Types of Bill
101
Double Totals - the summaries include both inter partes and legal aid work but
two totals are shown, one for inter partes and one for legal aid. If numbered,
each total has a separate number.
Claim Attendances
This setting allows you to specify whether each item in a section is calculated and its
amount shown next to it, or whether its time is carried forward and aggregated and the
amount calculated as part of a summary. The setting of this control will cause many
other controls to enable or disable them selves or some of their options accordingly.
Claim in Columns
This setting determines whether the section is claimed in the bill columns when it is
totalled at the end or whether the individual items or summaries should be claimed in the
columns directly and no total shown. The setting of the Claim Attendances control
determines whether the items or summaries options are available. The option for Work
Done is automatically selected when the "Include a work done section" box is ticked. If
this control is set to one of these and the Claim Attendances control is changed, this
control will be updated automatically. Please note that for the party, documents and
travelling & waiting sections, this control will be disabled if the option to include a Work
Done section is ticked.
If you are intending to produce a Schedule of Inter Partes Costs at Prescribed legal aid
rates to accompany a bill we would strongly advise you to ensure that no sections are
set to claim Summaries in columns. The summaries in the legal aid schedule are
recreated based on the legal aid categories and do not have any correlation with the
summaries in the bill. If summaries are claimed in columns they will be numbered in the
bill but not in the legal aid schedule.
Numbering
As well as specifying where the figures are claimed, you can specify where items are
numbered. If Claim in Columns is set to items or summaries this control will be limited to
the same option, as all items claimed in columns must be numbered. However, if Claim
in Columns is set to Total you can also opt to number individual items or summary items
should you wish to do so. The option for Work Done is enabled when "Include a work
done section" box is ticked.
Summary Spacing
Similar to Item Spacing (above) this determines whether the lines in the summary have a
blank line between them.
Add blank line before summary
When ticked an extra blank line is inserted between the section items and the summary.
© 1999 - 2013 CostsMaster Ltd.
102
CostsMaster User Guide Version 4
Category Description for Summary
This setting allows you to specify which of the three possible descriptions that can be
defined for each category should be used when necessary when exporting an summary
item.
Show the rate class where it is not the default
Determines whether the rate class for an item is shown where it differs from the default
rate class for the type of attendance. For most sections the default rate class is
preparation but for procedural steps it could be either advocacy or Counsel (depending on
the type of the procedural step) and for items recorded within the travelling & waiting
section it is, unsurprisingly, travelling & waiting.
Show Counsel Fees before attendances
For procedural steps only, this determines whether any Counsel fees should be shown
before the attendances. Any other disbursements recorded will be shown in the usual
way after the attendances.
Category Position
For procedural steps only, these controls determine how the category is shown for both
inter partes and legal aid work. The following options are available:
Before description - the category is shown on a line of its own with a further
blank line before the procedural step description.
At start of description - the category is added to the beginning of the procedural
step description.
At end of description - the category is appended to the procedural step
description.
At start of first item - the category is added to the beginning of the first
attendance description.
At end of first item - the category is appended to the first attendance
description.
In addition there is a further option to specify whether the category name should appear
in parenthesis.
Show the number of items
For party work only, this allows you to specify when the number of items within a section
is shown before that section.
Preview
The preview button will generate a short preview bill of the currently selected section in
order to see the effect of changes. The preview will use work recorded in the file so it is
necessary to actually have work in the section in order to see the effect. In addition
some additional work may also be shown.
© 1999 - 2013 CostsMaster Ltd.
Chapter 6 - Types of Bill
103
Bill Certificates
The Certificates window allows you to create and edit certificates and group them
together for inclusion on the back sheet of a bill.
Certificate Groups
These are collections of certificates grouped together for inclusion in a bill. You can
choose a certificate group to be exported with your bill in the bill settings window. The
buttons above the list allow you to add, insert, edit, move and delete the certificate
groups. When you select a certificate group the certificates it contains are shown in the
Certificates in Group box.
Certificates in Group
This box lists all the certificates in the currently selected group. These certificates can
be reordered or removed from the group.
Available Certificates
This box lists each of the available certificates that have been defined. Certificates can
be added to the currently selected group by selecting the certificate and clicking the
"<<" button to the left of the list. The buttons at the top of the list allow you to create new
certificates, re-order certificates and delete them. Once a certificate has been created
the name it is given cannot be changed. The text of a certificate can be altered in the
Certificate content window.
Certificate Content
This box shows the text of the certificate itself. Clicking on either the Available
Certificates or the Certificates in Group box will cause this box to update to show the
text of the certificate you have selected. The certificate text can be altered here.
When you select a certificate from the Certificates in Group box three additional check
boxes become available.
Precede with "Or" - when ticked the exported certificate will be preceded with the word
"or". This is obviously used where you have included two alternative certificates in a
group.
Check Box - when ticked the certificate will appear in the exported bill with a check box
next to it.
Post Assessment - when ticked the certificate will appear in a post assessment
certificates section in the exported bill. This is traditionally used only in legal aid bills.
Please note that when you select a certificate from the Certificates in Group list and you
make changes to that certificate, the text that is altered is the text of the original
certificate. It is best to think of the Certificates in Group list as a list of references to the
original certificates with the text being obtained at the time the bill is exported. This does
mean that should you need to amend the text of any certificate, and groups that use that
certificate will automatically utilise the changes when they are next exported.
© 1999 - 2013 CostsMaster Ltd.
104
CostsMaster User Guide Version 4
Costs Budgets
Introduction
CostsMaster allows you to both prepare a Costs Budget and to manage that budget
once it is set by the Court or agreed with the other side. The following sections explain
these procedures in detail.
Preparing Costs Budgets
General information relating to Costs Budgets is entered in the Costs Budget Window.
Beyond that it is only necessary to specify the phase that applies to each item of work
and to specify which work is incurred and which anticipated.
Phases and Costs Budgets
The Precedent H Costs Budget has the work grouped by phases. These represent
periods in the action such as "pre-action costs" or types of work such as "witness
statements". As well as the standard phases it is sometimes necessary to create
contingent phases for work which may or may not be required depending on the course
the case takes.
Before an attendance and disbursement can be included in a budget it must be tagged
with a phase. Whilst this might seem like an arduous task CostsMaster provides ways
to automatically mark work without you having to do so:
Apply Phases Tool
If you have an existing file that you want to mark retrospectively you can use this
function on the tools menu to mark all attendances and disbursements or just those
whose phase has not been set. It uses keywords which you can define in the Presets
Window to match against the description and thus identify a suitable phase.
Apply Phases when Importing work
When importing work from a case management system you can have CostsMaster
automatically apply phases using presets in the same manner as the Apply Phases Tool
above. The import wizard has a page where the necessary box can be selected and the
phases are then applied as the work is imported.
Apply phases whilst recording work
If you are entering work into CostsMaster there are several default phases that, if defined,
will automatically set the phase for any item. Default phases can be defined for the bill
(in the Control Centre, designed for when all work you are entering at present falls within
a phase (e.g. "pre-action costs"), for a part (e.g. where you have decided to record all
work for a particular phase within a separate part) and for a party (e.g. a witness could be
set to "Witness Statements"). These are applied in reverse order so that any party
default takes precedence over any part default and that takes precedence over any bill
default.
In the event that no default phase is defined the content of the description is used to
match against presets in the same manner as the Apply Phases tool. Because of this
the default phase can only be applied when the description has been changed.
© 1999 - 2013 CostsMaster Ltd.
Chapter 6 - Types of Bill
105
Assigning Phases to Routine items
As well as assigning phases to attendances and disbursements you can also apply
phases to routine telephone calls, letters and emails etc. Please see the Party Details
window for more information.
If you have existing work there are two options depending on whether you need an
accurate result or an approximation. If it is the latter then there is a tool that will split
routine work between phases pro-rata with the timed work. To do this you must first
ensure that all your timed work has phases assigned. On the other hand, if you need an
accurate result then it will be probably be necessary to revisit the original work in order to
assess how the work should be divided between phases.
Anticipated Work and Parts
Costs Budgets also require you to distinguish work that has been incurred with work that
you anticipate doing during the life of the case. In CostsMaster you do this by recording
anticipated work in a separate part and marking that part with the Anticipated property.
Work in an exported costs budget is automatically grouped by phase and so there is no
need to separate work into many separate parts unless you need to do so in order to
produce another type of document. Whilst it is not necessary to do so, you are still at
liberty to split your work into separate parts should you so wish.
Procedural Steps
Procedural Steps have their own phase field but this is a full phase field, used for any
summarily assessed costs within the step, and not a default phase. However once the
phase is set for a procedural step any attendances or disbursements will automatically
pick up that phase. Should you not want an attendance or disbursement to have the
same phase you can simply override this for the attendance or disbursement concerned.
Managing Costs Budgets
Once a budget has been set by the Court or agreed with the other side it is possible to
use CostsMaster to manage the costs on the file and ensure you are on target to meet
the budget or to know when it is necessary to seek a revised budget.
The costs budget window gives a detailed analysis of each phase in the columns of the
grid together with an analysis of the entire matter in the summary at the top of the page.
Setting the budget
The costs budget window allows you to set a budget for each phase if that is what has
been set. If the Court has set a single overall budget you can simply enter the overall
budget against any phase. In this case you will not be able to analyse the budget phase
by phase but only for the matter as a whole.
When you set the budget for a phase CostsMaster stores the current incurred and
anticipated costs for use in analysing how the subsequently incurred costs stack up
against the figures you anticipated for that work. The first time this is done silently but
should you alter the budget you will be asked if you want to overwrite the previously
stored figures with the current incurred and anticipated values. You will probably always
want to answer "yes" to this unless you are correcting an error in the previously set
budget or changing the budget just to see the effect of different values etc.
Should you need to alter the stored values you can do so via the edit window (or by
making the Prev.Inc. and Prev.Ant. columns visible).
© 1999 - 2013 CostsMaster Ltd.
106
CostsMaster User Guide Version 4
Updating work post-budget
After the budget has been set you can from time to time update the CostsMaster file by
importing new work from a time recording system or by entering new work directly into
CostsMaster. As well as entering new work you will need to reassess the anticipated
work yet to be done. On the one hand this will decrease because work that was
previously anticipated has now been incurred, and it is important that you accurately
alter this if you want to make use of the comparison between work done and what you
anticipated for that work. On the other hand the anticipated costs may increase as you
realise that there is other work to do that you had not planned for. In this latter case you
may decide that you need to apply for a revised budget.
Analysing the costs
Once the budget has been set you will get an indication of how the costs are comparing
to the budget in a number of ways:
hovering with the mouse over figures shows the percentage value of that figure
some cells can use a colour background to indicate the percentage value of
the figure in that cell based on pre-defined ranges. The background colour can
either change gradually giving a gradient of colours as it approaches the end
of the range or it can change abruptly from one colour to another when the
value passes the end of the range. This setting is specified in the local
settings window.
The different comparisons you can do and the way they are shown are as follows:
Checking that your incurred costs do not exceed the budget
The Incurred column lists the total costs actually done. Once the budget has been set
hovering the mouse over the incurred value will show the percentage of incurred costs
against the budget.
In addition this percentage is reflected in the background colour as follows:
0 - 75
76 - 100
101 - 125
126 -
Solid Colours
Green
Yellow
Red
Red
Gradient Option
Green
Green - Yellow
Yellow - Red
Red
Monitoring the Anticipated Costs
The Anticipated column lists the total costs that you have anticipated for the action.
Once the budget has been set hovering the mouse over the anticipated value will show
the percentage of anticipated costs against the budget. There is no colour background
indication for anticipated costs.
Checking that the total projected costs do not exceed the budget
The Total column lists the total costs both done and anticipated. Once the budget has
been set hovering the mouse over the total value will show the percentage of total costs
against the budget.
In addition this percentage is reflected in the background colour. These differ from the
incurred costs because it will be usual for the total costs to be at 100% of the budget or
© 1999 - 2013 CostsMaster Ltd.
Chapter 6 - Types of Bill
107
slightly greater. The range of colours is therefore based around green being 100% with an
excess moving to red and a deficit to blue:
0 - 100
101 - 125
126 - 150
151 -
Solid Colours
Green
Yellow
Red
Red
Gradient Option
Green
Green - Yellow
Yellow - Red
Red
Checking how the actual costs compare to the costs you anticipated for that
work.
The New Costs column lists the difference between costs done post budget and the
anticipated value of that work. It therefore provides an indicator of the accuracy of your
budget and how well the fee earners are doing in keeping to the budget. In order for this
comparison to be possible the budget must be set, the values of the incurred and
anticipated costs at the date of the budget stored (this is done automatically by
CostsMaster), new work has been recorded or imported and the anticipated costs have
been altered to remove the element that applied to the work that has now been done.
When this has been done the New Costs Column will show the difference (a negative
figure if the new work is less than previously anticipated). Hovering the mouse over the
New Costs value will show the value as a percentage.
In addition this percentage is reflected in the background colour which uses a similar
range of colours to the total costs with "normality" centered on 100%:
0 - 100
101 - 125
126 - 150
151 -
Solid Colours
Green
Yellow
Red
Red
Gradient Option
Green
Green - Yellow
Yellow - Red
Red
Client budget
Aside from budgets set by the Court, it is also possible to record any budget agreed with
your client and then monitor the costs against that budget. The total costs for the client
will also include costs that have not been assigned to a phase or are marked as solicitor/
client costs.
You can hover over the Incurred and Total values to get an indication of the percentage
as for the Court budget above. There is no New Costs comparison available for the client
budget.
Costs Budget Comparisons
The costs budget window allows you to add extra budgets which can be compared
against yours. At the bottom of the window you will see a tab labelled "Costs Budget
Phases": to the far right of the window are two buttons labelled "+" and "-" which allow
you to add a new budget or remove that selected (you cannot remove the main budget).
If you click the "+" button you will be asked for a name for the new budget. You can
either create a blank budget and enter the figures by hand or extract the figures from a
suitable Excel spreadsheet: if you tick the latter you can open the file in question or
type/paste in the path.
You can edit each comparison budget just like the primary: you can add or delete
© 1999 - 2013 CostsMaster Ltd.
108
CostsMaster User Guide Version 4
Contingent Phases, but you cannot remove standard phases.
You can export a comparison by selecting "Costs Budget Comparison" in the "Costs
Budget" list on the Export Wizard.
Costs Budget Settings
Ctrl + Alt + V
The Costs Budget Settings window allows you to specify options that affect the look and
content of the exported budget.
General
Shading
This setting determines the colours used in the exported document. The options are
Colour - the document is exported with different colours for solicitor, counsel,
experts and disbursements. In addition different shades are used to distinguish
totals from other values making the form easier to read.
Grey - the document does not distinguish between solicitor, counsel, expert
and disbursements but does use different shading to distinguish totals and
headers from other figures.
None - the document is exported with no colour or shading.
Group Counsel Fees by
This setting allows you to adjust how Counsel Fees are shown. The options are
Name / Rate - each Counsel is shown by name along with their hourly rate.
Leader or Junior / Rate - Counsel are grouped together according to whether
they are marked as Leading Counsel or not, and within that by their hourly rate.
Leader or Junior - Counsel are grouped together according to whether they
are marked as Leading Counsel or not, regardless of hourly rate.
All - Counsel are all grouped together on a single line labelled "All Counsel".
Show Counsel Subtotal
If selected an additional row will be inserted after the list of Counsel showing a sub-total
for all Counsel.
Group Expert Fees by
This setting allows you to adjust how Expert Fees are shown. The options are
Payee / Rate - each Expert is shown by name along with their hourly rate.
Rate - Experts are grouped together by their hourly rate.
All - Experts are all grouped together on a single line labelled "All Experts".
Show Expert Subtotal
If selected an additional row will be inserted after the list of Experts showing a sub-total
for all Experts.
Show Rate Column in Addendum
© 1999 - 2013 CostsMaster Ltd.
Chapter 6 - Types of Bill
109
If selected an additional column will be inserted in the Addendum showing the hourly rate
where applicable.
Show Assumptions in Addendum
This setting allows you to control whether the Assumptions recorded in the Costs
Budget window will be added to the Addendum. The options are:
Never
Always
When any one has more characters than the threshold
When all combined have more characters than the threshold
The Assumptions In Addendum Threshold is entered into the box underneath these
options.
Header & Footer
There are five elements that can be included in either the header or footer of the
document if you so wish. They are
Page number
Date of export
Company Name
Reference
Filename
The company name and reference are recorded in the Local Settings window. The
filename is the name you have saved your CostsMaster file as without the full path.
Spreadsheet
There are four settings which allow you to control how your spreadsheet looks. They are
Hide Zero Values - cells appear blank if they evaluate to 0
Colour Editable Cells - cells that you can alter are turned yellow
Freeze Breakdown Columns - the row headings on the Breakdown tab
remain in place when you scroll sideways
Repeat Breakdown Columns - the row headings on the Breakdown tab are
replicated for each Phase
The latter two settings are mutually exclusive: you can select neither or just one, not
both.
There are also boxes which allow you to control the Font Size and how many Phases
Per Page appear on the Breakdown tab
Print Scaling
These boxes allow you to set the zoom factors for the Summary, Breakdown and
Addendum tabs, which apply when those tabs are printed.
Phases
For each phase (including any contingent phases you have created) you can specify
options relating to the supporting documentation. You can make changes to one phase
and have them apply to all phases by holding down the shift key when making the
selection. To make them apply only to subsequent phases hold down the ctrl key.
Include in Supporting Documentation
© 1999 - 2013 CostsMaster Ltd.
110
CostsMaster User Guide Version 4
When selected the costs assigned to this phase will be included. Ticking this box
enables the other controls on this page.
Incurred Costs / Anticipated Costs
Tick the incurred costs box to include details of incurred costs in the supporting
documentation and likewise for the anticipated costs.
Group By
The work in the supporting documentation can be grouped within each phase by
locations and (optionally) by parties, where locations are the sections within
CostsMaster within which the work is recorded, similar to the Breakdown of Costs.
There is a further option to include attendances in full.
© 1999 - 2013 CostsMaster Ltd.
Chapter 6 - Types of Bill
111
Breakdowns & Statements of Costs
Introduction
As well as preparing a full bill you can also export your work as a breakdown or as a
statement of costs for summary assessment. Options are available that govern the level
of detail in the breakdown or statement making it easy to create a breakdown that shows
the appropriate amount of detail.
Breakdowns
A breakdown of costs is a summary of the work recorded that falls short of a full bill.
The breakdown shows the total of work under various sub headings which relate to the
location in which the work was recorded in CostsMaster, such as "Documents". In
addition, for procedural steps, work will be shown broken down by the type of procedural
step so there will be entries for "Hearings without Counsel" and "Conferences with
Counsel" etc.
With the options available in the breakdown settings window it is possible to customise
the level of detail that appears in the breakdown. With no options selected the
information shown is limited to single line entries for each of the sections that have work
recorded. However with all options selected the breakdown would then have as much
information as a bill with the attendances removed leaving just the summaries. By
changing the combination of options you can customise the breakdown to show just as
much information as you want.
In addition you can export multiple parts to a breakdown and combine them or keep
them separate as you do with a bill. This makes it easy to produce breakdowns for costs
at differing VAT rates, although in this case you could still combine the parts together
and CostsMaster will attempt to show the work at different VAT rates separately
(provided the option to show categories is selected).
Breakdown Settings
The breakdown settings window allows you to specify the level of detail that is included
in a breakdown or statement of costs.
The following pages are available:
General
This page allows you to specify how the work in a breakdown or statement of costs (but
not an N260) is broken down. Options allow you to show work separately for each
category, to have the work for each party shown separately and to list disbursements
individually.
In addition you can chose to hide figures that contain a blank disbursement and have the
figure marked with an "X" instead.
Success Fees
This page allows you to specify how success fees are claimed in breakdowns and
© 1999 - 2013 CostsMaster Ltd.
112
CostsMaster User Guide Version 4
statements of costs (but not N260 forms in which there is no facility for doing so). The
options allow you to include summarily assessed costs and costs of assessment in the
success fee calculation and to include the success fee in the costs draftsman's fee
calculation.
Header & Footer
There are five elements that can be included in either the header or footer of the
document if you so wish. They are
Page number
Date of export
Company Name
Reference
Filename
The company name and reference are recorded in the Local Settings window. The
filename is the name you have saved your CostsMaster file as without the full path.
N260
This page contains settings relevant only to the N260.
It allows you to claim Counsel Fees individually or by grouping them as suggested in the
N260 form by hearings/non-hearings. If the latter option is selected then the description
for non-hearings used in the exported form is drawn from the disbursement description of
each Counsel's fee. You should therefore limit the description in this case to something
like "advice" or "conference" in order to get a meaningful description on export.
N260
The N260 form is the prescribed form for use on Summary Assessment hearings.
The form has various restrictions by virtue of its design which either require additional
fields to be set within CostsMaster or minor alterations to the exported format. Success
fees cannot be included as there is no facility on the form for showing them. The options
for these in the Breakdown Settings window, together with those for breaking down work,
are not therefore applicable to the N260.
Work in the N260 is broken down between the client, opponent, site inspections and
others. Work in these sections should be recorded against a party. There is a new field
"N260 Section" available for parties where you can specify in which section that party's
work should appear.
To claim work at a hearing it should be claimed within a procedural step which is set to
Hearing (Solicitor Advocate) or Hearing (Counsel Advocate).
Any work in the file claimed with a rate type of Travelling & Waiting will be claimed under
Travel & Waiting at hearing as there is no other location for it to be claimed. If you wish
travel work to be claimed elsewhere you should record it with a preparation rate type.
Just as with other documents, it is possible to export more than one part and to either
show the parts separately or to combine them together. If you export two parts that each
have their own summary assessment settings the program will attempt to combine the
hearing type and dates in a readable manner.
© 1999 - 2013 CostsMaster Ltd.
Chapter 6 - Types of Bill
113
Statements of Costs
A statement of costs is very similar to a breakdown but is intended to be used on a
summary assessment hearing. It does not follow the N260 format but is more flexible
and may be preferable if the Court allows its use, or as a backup document giving more
detail. As such all the options in the Breakdown Settings Window apply to statements of
costs in the same way as they do to breakdowns.
In addition it is necessary to specify the type of hearing that the statement of costs is
intended for (interim, final etc.) and the date of the hearing. This is done in the Parts
Window.
If you have previously used CostsMaster 2, you will be pleased to know that we have
greatly simplified the steps in order to prepare a statement of costs. All that you need to
do is make sure that the work for the statement is recorded in its own part. You then
export just that part to the statement of costs.
If the statement of costs is for an interim hearing, once it has been assessed there are
various options available to you depending on the outcome of the hearing:
If the costs were awarded in your favour or against you then the costs in this part will
not form part of the final bill. In this case you can either delete the part or mark it as
excluded.
If the costs of the application are awarded to the winner of the full case, you can then
either merge the parts for the statement with those for the main bill, or leave them
separate and combine them on export.
Just as with other documents, it is possible to export more than one part and to either
show the parts separately or to combine them together. If you export two parts that each
have their own summary assessment settings the program will attempt to combine the
hearing type and dates in a readable manner.
© 1999 - 2013 CostsMaster Ltd.
114
CostsMaster User Guide Version 4
CLAIM1 and CLAIM1A Forms
Introduction
Recording work for a CLAIM1 or CLAIM1A is done in exactly the same way as for
traditional columned bills. There are however a few additional details you will need to be
aware of and these are covered in this section.
CLAIM1 Set Up
Unlike previous versions, CostsMaster no longer has a CLAIM1/CLAIM1A bill type.
Instead you choose on export to create a CLAIM1 or CLAIM1A from the various
documents available.
Information specific to the CLAIM1 and CLAIM1A is completed in the CLAIM1/CLAIM1A
Settings window.
CLAIM1/CLAIM1A Settings
Ctrl + Alt + K
This window is accessed from the Case Details Window or by clicking the Case Details
button on the main toolbar and selecting the CLAIM1/CLAIM1A Settings item from the
drop down list that appears.
It allows you to record information specific to the CLAIM1 and CLAIM1A forms.
The window is divided into sections accessed by clicking the items in the list on the left.
There are sections for various pages on the forms plus separate pages for the various
aspects on the CLAIM1A.
Many of the boxes are analogous to boxes on the completed form and as such their
purpose is obvious. We will therefore only detail here those controls whose purpose may
not be readily apparent.
General
Claim for costs
This option determines whether the form is for costs assessed by the Court or for costs
to be assessed by the Legal Aid Agency. There are four options:
assessed by the Court - only costs entered on the Assessed Costs page will be
included
to be assessed by the LAA - only work recorded within the file will be included
assessed by the Court (with FAS to be assessed by the LAA) - The claim will
comprise the costs entered on the Assessed Costs page plus any FAS recorded in
procedural steps
High Cost Case with FAS - claims costs and FAS but no fixed fee.
Form Type
© 1999 - 2013 CostsMaster Ltd.
Chapter 6 - Types of Bill
115
This option determines whether the case falls under one of the Family Fixed fee
schemes (CLAIM1A). Setting this option has several consequences:
When exporting a CLAIM1 or CLAIM1A you will only be able to export using a
template that matches the setting defined here.
The running totals in the control centre will display the core costs, advocacy
and fixed fee separately where the case is not exceptional.
Mark Blank Disbursements with an "X"
When selected any blank disbursements will be marked with an X to draw attention to
their absence. in addition any totals that should include the disbursement are similarly
marked.
Move blank dates on export
When sorting dates on export CostsMaster will try and keep items with blank dates next
to the item that precedes them within the program. Occasionally this is not possible and
in this case this option determines if they appear before all other items or after all other
items.
Row Height for Schedule of Time Spent
This option allows you to specify the height of the row for the schedule of time spent.
This defaults to 0.7cm but can be made larger to make the rows closer to the size of the
form. (If the figure is set to 0 each row will be as high as it needs to be to display all text
so the rows may be of unequal height.)
Counsel
Names of Counsel Instructed under the Family Graduated Fee Scheme
This information is created automatically from those Counsel listed in the Counsel
Window whose FGF property has been set.
Counsel's Account Information
This information is created automatically from the list of Counsel in the Counsel Window.
The account number for Counsel must be recorded there but the amount is calculated
automatically from any disbursements and attendances assigned to each Counsel. It
therefore updates itself automatically to reflect any changes made to Counsel's fees
within the bill.
Experts Meet MOJ Standards?
The Reasons box will only be available if you pick "No".
Joint Experts
A new row will be added to the grid when you tab out of the Apportioned % cell in the
last row.
Assessed Costs
If you are preparing a claim for costs assessed by the Court you simply need to select
the relevant option on the general page of this window and enter the relevant details from
© 1999 - 2013 CostsMaster Ltd.
116
CostsMaster User Guide Version 4
the assessment certificate on this page. If the assessed costs fall under the PFLRS
scheme you will also need to specify the Aspect. If you are also claiming FAS costs to
be assessed by the LAA you must make sure that the Aspect matches that of the part
containing the FAS costs.
For assessed Counsel fees it is necessary to record these separately for each Counsel
in the grid on the assessed costs page in order that Counsel's account information is
correctly recorded for each on the exported form.
It is also possible to include assessed disbursements, expert fees and Counsel fees
within the exported form and to calculate them automatically. In order to do this you
must complete the Assessed Amount and Assessed VAT fields for each disbursement:
please see the section on entering disbursements for more details on how to do this.
Please note that when marking disbursements to be calculated automatically the figure
that appears in the box alongside is an estimate and does not include any Costs
Draftsman's fee which will be included in the amount when the form is exported.
CLAIM1A pages
Please see the CLAIM1A page for more details.
Recording Work In a CLAIM1
There are three additional things to think about when recording work for a CLAIM1: The
legal aid Codes for each item, whether you want an entry for the item in the additional
information section of the form and the column in which an attendance time should
appear in the Schedule of Work in the CLAIM1 form.
Legal Aid Codes
All attendance grids have a field called code. Clicking in this field shows a drop down box
from which you can select one of the legal aid codes. This code will be shown against
the item in the Schedule of Work in the CLAIM1. In addition the Parties window allows
you to assign a code to work recorded against that party.
Additional Information
The additional information property specifies whether the description for this item appears
in the page 5 additional information section of the CLAIM1.
In which columns will work appear in the schedule of time spent?
All attendance grids have a field called CLAIM1 Column which determines the column
that will be used to show that attendance in the Schedule of time spent. CostsMaster
uses the rate class and the legal aid code of an attendance to determine the default
value but you can alter this to specify the column directly should you so wish.
CLAIM1A
If you wish to produce a CLAIM1A it is necessary to change the setting on page 1 of the
CLAIM1/CLAIM1A Settings window and complete the information on the relevant pages
of that window in relation to the fixed fee.
There are six separate pages relating to the CLAIM1A, one for each of the aspects
covered by the Phase 2 Family Fees plus one for the original 2007 Care fixed fee
scheme.
© 1999 - 2013 CostsMaster Ltd.
Chapter 6 - Types of Bill
117
Defining a Fixed Fee
Each page contains details of the factors that determine the fixed fee. When all factors
have been completed the fixed fee is shown in the box of that name. CostsMaster comes
with sample fixed fees which are correct at the time of publication but should these
change you can alter them yourself in the Presets window. You can also alter the fixed
fee yourself to a different value but please bear in mind that if you make any changes to
the controls that determine the fixed fee, it will be recalculated automatically.
Note that if you have chosen "Family Court" in Case Details then the available choices
will be adjusted: instead of choosing the Court in which proceedings conclude, you
choose the level of the presiding Judge at said conclusion.
There are also two controls that allow you specify the percentage of the fixed fee that will
be claimed (default is 100%) plus the VAT rate that will be used to calculate VAT on the
fixed fee (this defaults to the bill VAT rate). For the Finance page you can also specify
the Fixed fee for the threshold calculation which can differ from the fixed fee itself if a
settlement fee is claimed.
Boxes are also available, where appropriate, for "Other providers acted", "Payment on
account claimed" and "Change of Solicitor Half fee". Ticking this last box will cause half
the fixed fee to be claimed and must be selected by the draftsman when the
circumstances require it. The"other providers acted" box is used for the version 4
CLAIM1A onwards in place of the "Costs of All Providers" box on the general page which
is now only used for CLAIM1s.
Setting Aspects
Defining a fixed fee in one of these pages is not sufficient in itself to cause the fixed fee
to be applied. It is necessary to set the Aspect for each part.
If the legal aid certificate covers work under separate aspects it is possible to produce
CLAIM1As for each of the aspects by recording work for each aspect in a separate part
(or parts). Each part has an Aspect field where you can set the aspect that applies to
that Part. CostsMaster will then collate all work for the same aspect into a single
CLAIM1A form.
When you export the form CostsMaster will calculate whether the threshold has been
exceeded. If it has the CLAIM1A will be prepared as an exceptional claim (including all
costs for Care 2007 certificates and FAS costs for other aspects). If not the fixed fee will
be claimed together with a claim for any FAS or other advocacy costs.
Specifying Fixed Fee Presets
All pages except "Care (2007)" contain options for specifying which fixed fee presets to
use. Changing this value will prompt an offer to recalculate any FAS entries in parts
using the relevant aspect.
Family Advocacy Scheme
With CostsMaster it is a simple matter to claim costs under the Family Advocacy
Scheme.
Costs under FAS are recorded under a procedural step. Each step has a FAS field which
gives access to the Edit FAS window where you can specify the details required.
You can only define FAS settings for a procedural step whose type is "Hearing (solicitor
© 1999 - 2013 CostsMaster Ltd.
118
CostsMaster User Guide Version 4
advocate)" or "Advocates meeting". If you open the Edit FAS window in a procedural step
that is of a different type the program will warn you and offer to alter the type to "Hearing
(solicitor advocate)".
If you open the Edit FAS window in a part where you have not yet set the Aspect the
program will prompt you to do so, If you do not it will not be possible for the program to
calculate the fixed fee and you will need to enter this manually.
Changing values in the Edit FAS window will cause the FAS claim to be calculated using
the currently defined presets. There are multiple presets available for FAS and you will
first need to specify the one relevant to your case in the Control Centre.
© 1999 - 2013 CostsMaster Ltd.
Chapter 6 - Types of Bill
119
High Cost Case Plans
Introduction
This section sets out information specific to High Cost Case Plans. Most work is
recorded in the same way as in ordinary bills but there are some differences, particularly
in relation to future work.
CostsMaster produces Case plans in a variety of formats. including two following the
format specified by the LAA plus an extended family format favoured by some draftsmen
for showing the work in complex cases more clearly.
CostsMaster will allow you to record three different types of work in a case plan:
1. Work done before the case became a high cost case. Usually this work is also
included in a CLAIM1.
2. Work done after the case became a high cost case. This covers both work done after
the matter became a high costs case but before preparation of a case plan and work
which has previously been included in a case plan as future work but has now been
carried out and the actual work shown.
3. Future work. This is typically divided into different stages.
Each of the above types of work, and each stage of future work, will appear in its own
table in the case plan. You are not obliged to include every type of work and can include
only those types relevant to the case at hand.
CostsMaster ships with two sample case plan bills - an ordinary one for use in the trial
version and a detailed one for those with a full licence. You are encouraged to open
these and see how the files have been set up.
Please note that due to the different way the work is calculated in a CLAIM1 it is quite
likely that the costs in the case plan will differ by a few pence as a result of rounding. If
you want the profit costs for your pre contract work to equal the profit costs on the
CLAIM1 to the penny you will have to limit the costs for that part to the amount of the
exported CLAIM1. Please see the section on limiting costs for more details.
Case Plan Set Up
Information specific to the Case Plan is entered in the Case Plan Settings Window.
Each part within CostsMaster will correspond to a part in the Case Plan (hereafter called
a case plan part). Whilst each part needs to be assigned to a case plan part you are not
limited to a one to one assignment and it is possible to have more than one part
assigned to a case plan part. In this case the work from all parts so assigned will be
aggregated.
It is not even necessary for the parts to be in the same order as they will be in the case
plan, although in practice they will usually be, and future work will be exported in the
order it is found.
Bill Setup
You will need to ensure the following information is completed for use on the Case Plan
form:
© 1999 - 2013 CostsMaster Ltd.
120
CostsMaster User Guide Version 4
1. The Solicitor's firm name in the Instructing Solicitor window.
2. In the case details window, complete the case type, then create a party for each
client you represent and set the client property for each of them. Then click the edit
button for each of the clients and, in the edit window, click the Legal Aid Certificate
button and enter the certificate number.
Narratives
The main narrative will be used for the summary of case. The list of hearing dates will be
compiled automatically from the information in procedural steps. You may also need to
complete some of the other case plan specific narratives in the narrative window (right
click and select if they are not visible).
The case plan specific narratives relate to the boxes of the same name at the beginning
and end of the case plan. Please note that the current LAA Family format does not
utilise the Rates Utilised narrative but this is still used in the extended template.
Part Setup
Create separate parts for post case plan work done and for each future work stage. You
can assign these to the case plan parts now in the Part Export Options Window or wait
until export and assign them then.
Case Plan Settings
Ctrl + Alt + L
This window is accessed from the Case Details window or by clicking the Case Details
button on the main toolbar and selecting the Case Plan Settings item from the drop down
list that appears.
It allows you to record information for the multiple narratives that can appear on a case
plan.
The box on the left hand side lists the different sections that are available. As there are
many items that will not be applicable to the type of case plan you are currently working
on you can optionally filter this list to show only those applicable to different types of
case plan using the drop down box at the top of the window.
Most of the sections are self-explanatory but please note the following:
General Options
Case Plan Date
This box allows you to record the date of the case plan. If you want the date to be
automatically set to the date you export then tick the box below.
Mark Blank Disbursements with an "X"
When selected any blank disbursements will be marked with an X to draw attention to
their absence. in addition any totals that should include the disbursement are similarly
marked.
© 1999 - 2013 CostsMaster Ltd.
Chapter 6 - Types of Bill
121
Move blank dates on export
When sorting dates on export CostsMaster will try and keep items with blank dates next
to the item that precedes them within the program. Occasionally this is not possible and
in this case this option determines if they appear before all other items or after all other
items.
Events
This section allows you to specify the rates to use for events case plans. In addition you
can specify pre-contract costs.
Events rates are supplied with CostsMaster and are stored in the presets window, where
they can be altered if necessary. To specify which rates you want to use you must
specify the type of case plan, the Court, contract date and length of hearing. The
appropriate rates will then be shown in the boxes below.
If you select one of the Solicitor Advocate case plans, additional boxes will be available
as for these the rates for attending hearings with Counsel differs from that when
appearing as advocate.
Case Management Information
This section allows you to record details of the people who have worked on the case for
inclusion in the section of the same name in the case plan. Whilst you can simply
include the names of Counsel and experts here there are options to automatically
include this information on export if you have chosen to record it elsewhere in
CostsMaster.
If the option to include Counsel is ticked the program will automatically insert the names
of any Counsel defined in the Counsel window who have work assigned to them. If the
option to include experts is ticked the names of any experts defined in the section of that
name on the case plan window are automatically included
When either of these options is ticked the names will be included at the first instance of
a blank line in the case management information section. If there is no blank line the
names will be added to the end of the case management information.
The other options on this page simply relate to boxes on the case plan form and do not
require further explanation here.
Recording work in a standard case plan
Work done pre-Case Plan is recorded in the normal manner, but future work is treated
differently.
Here is an excerpt from an exported case plan showing part of the section for future
work:
© 1999 - 2013 CostsMaster Ltd.
122
CostsMaster User Guide Version 4
You will see that future work is split into "events" that have a date and description and
one or more items of work. There is no "Events" window in CostsMaster but the
Procedural Steps window can double for this with ease, therefore it is recommended that
you record all future work as procedural steps. Any work recorded in a part that is
assigned to future work that is not in a procedural step will still be included in the case
plan but it will be grouped together and summarised after the events.
You will need to create a procedural step for each event. The date and brief description
("Pre Hearing Review") of the step are used for the date and description of the event. If
anything has been included in the procedural step "main" description it will be displayed
in the work column as further detail of the work undertaken. In the example above that is
the paragraph commencing "Preparation for pre hearing review...". Please note that if no
brief description is given then the "main" description is used instead for the event.
Within the step each item of work is created as an attendance or disbursement. So the
first item in the example above would be an attendance with the description
"Preparation", assigned to the fee earner "Panel Member" and with a time of 2 hours.
Routine work is entered in the same way with the rate type changed to telephone calls,
letters out, emails out or letters in and the number of items entered in the time/items
column.
Disbursements appear at the end of an event but embedded disbursements appear
immediately after the attendance in which they are embedded.
If no description is used for an attendance the default description of the rate type is used,
thus for routine items you can omit the description altogether and let the program name
them "Telephone calls" etc.
The LAA's pro-forma non-family case plan shows Counsel fees in future work as time
calculated at an hourly rate. You can achieve the same result by recording Counsel fees
as an attendance which is assigned to a Counsel for which the appropriate rates have
been set.
© 1999 - 2013 CostsMaster Ltd.
Chapter 6 - Types of Bill
123
Recording work in an Events Based Case Plan
CostsMaster now supports the creation of Events based case plans. In these the costs
are calculated based on the number of "events" that occur or are predicted to occur.
Solicitor's costs
A solicitor "event" is defined by creating a procedural step and selecting the Solicitor
Event property.
When a procedural step has this property applied and is exported to an Events based
Case Plan, the procedural step will be listed in the plan as an event with its description.
The Solicitor column in the plan will be ticked (in the "Anticipated" column if the the part
is marked as future work, and the "Actual" column otherwise). In addition any
attendances recorded for the step will be ignored.
The properties have no effect when a procedural step is exported to any other type of
document. In this way it is possible to record work for a traditional case plan and also
mark it as an events based case plan. By exporting both types of document you can
easily compare the differences between the two.
Counsel Fees
A Counsel "event" is defined by creating a procedural step and selecting the Counsel
Event property in addition to or instead of the Solicitor event. As for the solicitor, the
appropriate columns in exported plan will be marked depending on whether the part is
future work and any Counsel fees recorded for the step will be ignored.
If Counsel has opted to claim fees under the FGF scheme then you should instead apply
the Counsel FGF property. This will cause the Counsel fees recorded within the step to
be included in the Counsel FGF table and claimed in the case plan.
Disbursements and Expert Fees
Disbursements and Expert Fees are recorded as for standard case plans.
Previous Solicitors
The costs of previous solicitors can also be recorded. Depending upon which kind of
Events Based Case Plan you want to prepare, there are two ways of doing this. It is
however recommended to enter such costs in a separate part as usual.
If you are preparing a Case Plan involving multiple Counsel for the SCU, these costs are
not shown separately: they should be entered in the usual fashion and will be exported
along with costs of current solicitors.
If you are preparing a Case Plan for the VHCC, involving a single Counsel or a Solicitor
Advocate, these costs are shown in a separate section, known as "Form L". They must
be entered in a separate part and are not entered as ordinary work: instead the totals are
entered in a special window which is accessed from the Edit Parts Window. When you
close this window you will be asked if you want to mark this part as covering previous
solicitors work. When a part is so marked the total costs entered will appear in the
previous solicitors table in the events case plan and all other work except Procedural
Steps will be ignored. This setting can also be set in the export wizard.
© 1999 - 2013 CostsMaster Ltd.
124
CostsMaster User Guide Version 4
You will also need to enter details for the hearings to appear on Form L. You need to
enter the date, and the "Event Type": this will be the Description unless a Brief
Description is present. Enter the Event details in the usual fashion which will be shown in
the "Solicitor/Counsel/Both" column.
Enhancement in Case Plans
Enhancement in case plans is claimed in exactly the same way as for other bills.
One further feature, available in the extended format case plan, is the automatic
identification of routine work. Case plans claiming work done traditionally distinguish
between work done with no enhancement or panel member enhancement and that done
with other types of enhancement. CostsMaster will automatically add the word "routine"
to all work attracting no enhancement or where the only enhancement claimed is Fee
Earner or Category Enhancement.
Costs of Preparing The Case Plan
CostsMaster makes a distinction between costs of assessment claimed in a part
showing work done prior to the case becoming a high cost case, and costs of
assessment claimed in other parts. The former will usually have been claimed in a
CLAIM1 and for this reason these assessment costs are always included within the case
plan part itself.
For future work, however, you have the choice of having these costs appear in the case
plan part or showing them together in a special part at the end of the case plan. The
option to do this can be found in the Costs of Assessment window. Please note that this
setting will affect all costs of assessment but will not affect any costs of assessment
claimed in other parts, for which the option must be separately set.
Costs Draftsman's fee at a percentage
It is technically possible within CostsMaster to claim a Costs Draftsman's fee at a
percentage within a case plan (although we understand that it would be unusual to do
so). However the format of the case plan presents several traps for the unwary and if you
do choose to use the feature in a case plan you should exercise extreme caution,
especially if you are merging parts or exporting them in a different order.
Because the costs incurred pre-contract have usually been claimed on a CLAIM1 there
is a "Chinese wall" between pre-contract and post-contract costs as regards the costs
draftsman's fee. If a costs draftsman's fee is defined in a part assigned on export to a
post-contract part and the range of parts to which it is applied includes a part that is
assigned on export to a pre-contract part, the costs of the pre-contract part will not be
included in the calculation. The converse applies also.
Also, if you select the option to include the costs of assessment in a separate part, the
costs draftsman's fee will be calculated on the total figure shown in those parts and will
not include any costs of preparation which will now be shown in a separate part. If
claiming a costs draftsman's fee in these circumstances it is recommended that you do
not select the option to show the costs of assessment in a separate part.
© 1999 - 2013 CostsMaster Ltd.
Chapter 6 - Types of Bill
125
Reports
Introduction
CostsMaster allows you to produce reports of the work you have recorded. At present
only Disbursement reports can be exported but other reports will be added in future
versions.
Report Settings
Ctrl + Alt + G
This window is accessed from the Case Details window or by clicking the Case Details
button on the main toolbar and selecting the Report Settings item from the drop down list
that appears.
It allows you to specify which type of disbursements and which fields will be included in
a disbursement report.
You can choose to include Counsel Fees, Expert Fees and Other disbursements. For
those that you have selected you can choose which of the available disbursement fields
you want to appear in the report.
Please note that a report is different from a bill or other exported document in that it is a
report of the work recorded which may include excluded items. It is therefore possible to
opt to show whether the item is excluded.
© 1999 - 2013 CostsMaster Ltd.
Chapter
7
Creating Bills & Other
Documents
Chapter 7 - Creating Bills & Other Documents
127
Exporting The Bill
Introduction
Ctrl + E
When you have finished recording work, you need to export the bill for sending to your
client and ultimately to the Court or Legal Aid Agency.
CostsMaster can export your bill as a document for editing in a Word Processor or it can
generate a PDF file which you can send electronically without fear of it being altered.
You can even have the best of both worlds by editing the document in the bundled Word
Processor before generating a PDF file.
When you click the Export button you will be taken through the steps needed to create
the bill by the Export Wizard.
The Export Wizard
The export wizard takes you step by step through the process of specifying the form and
content of the exported bill.
Each page has one or more options to select. The "next" button takes you to the next
page and, should you need to review a decision made earlier in the process,
the"previous" button will allow you to retrace your steps. If you want to abort the process
you can click the "cancel" button.
The changes made in the export wizard are saved when the wizard closes and reused
the next time the wizard is run. In addition you can save the changes before the end
using the "Apply" button. This can be useful if you want to make changes in order to
preview a document without having to actually create an exported document.
If you have already been through the wizard and made your choices, but subsequently
need to perform a further export, you can click the "Export Now" button which will skip
the following pages of the wizard and use the choices made previously.
We describe here the pages that are common to all bills but certain pages will appear
only if you have selected a certain bill type and these will be explained later in the
section on exporting particular bills
Select the documents to export.
For each type of document you can select one or more export templates that will
determine the format of the document. It is therefore possible to export more than one
type of document simultaneously.
When exporting a bill there are sub-entries for Front & back sheets and Schedules.
These can be exported on their own without the bill (by simply not selecting a bill to
export), with the bill as separate documents or included within the same document as
the bill (by ticking the "include with bill" tick box).
Please note:
when included with a bill these documents will use the font and other settings of the
bill and will ignore any settings defined for the template.
© 1999 - 2013 CostsMaster Ltd.
128
CostsMaster User Guide Version 4
when included with a bill only the first of each type of document will be exported.
if you export a bill without selecting a documents schedule, and the bill settings
require the production of a documents schedule, the default documents schedule will
automatically be exported (rather than export an incomplete document).
Specify the type of file to export.
You can choose from Word Processor documents or Spreadsheets, which can be edited
afterwards, or PDF files which are read-only.
You can also specify whether each type of file should be opened for viewing by
CostsMaster.
Specify where the file should be saved
This window gives you the option of:
(i) Saving the file automatically - this saves the file in the same location as the saved
CostsMaster file with the same name plus a suffix to denote the type of exported
document.
This is the default and will be automatically selected unless the user chooses to alter the
setting. Any alterations made will be stored and reused the next time the Wizard is
opened.
(ii) entering a name if the file already exists
This allows the user to choose a different name for a file instead of overwriting the
previous copy of the document.
(iii) always choosing where to save the file
This allows the user to always select where the file should be saved, rather than in the
default directory.
Part Assignment
There will then follow any pages specific to the types of document you are exporting
where you can assign parts, followed by:
Other Options
Include a draft watermark
This page allows you to incorporate a watermark on the document, particularly useful if
you wish it to be clear to the client that it is only a draft version. Not all word processors
support this.
Include notes
Any (non-private) notes that you have recorded in CostsMaster can optionally be
exported to the bill. These will appear as annotated comments and can be useful if there
are many items you need to bring to the attention of your client. Please note that not all
Word processors support this feature and that the format of the document you are
exporting may restrict the ability of CostsMaster to export certain notes. Where this
applies full details are given in the section on exporting particular documents.
Sort Items By Date
© 1999 - 2013 CostsMaster Ltd.
Chapter 7 - Creating Bills & Other Documents
129
When this option is selected CostsMaster will automatically sort any items that appear
by date order. Not all exported items appear in this way (e.g. in a case plan pre-contract
work is collected together and ordered by its type) and any such items will not be
affected by this setting. Where items do not have a date CostsMaster assumes that you
want them kept in the approximate order that they appear and attempts to do this where
possible.
Show Letters In Where The Rates Are Zero
Usually, any letters in recorded are only shown in the exported bill if the applicable rate
for letters in is not zero. Sometimes you might want to show the letters in even though
they are not claimed (e.g in order to indicate a large number that required your
response). If this option is selected all letters in recorded will be shown in the exported
bill.
Export Totals to XML File
This option will cause the creation of an XML file alongside your bill containing the totals
from the bill. This can be used to load into your practise management system for billing
on analytical purposes. Please see the section on XML Totals for more
information.Options specific to the type of bill(s) being exported
A further page may appear with options specific to the type of bill you are exporting.
Details of these options can be found in the sections on exporting specific documents.
Assigning Parts
For each bill type you choose to export CostsMaster lets you decide which parts you
want to export, the order in which they are exported and whether any parts are combined
together in the finished bill.
For each bill type you are exporting you will be shown a grid listing each of the parts you
have defined in CostsMaster. For each part you will be able to change a range of options.
Some of these options are specific to certain bill types and are explained fully in the
sections on exporting those bills. The two settings common to all bills are:
Export To
This allows you to choose from three options:
Not Exported - this part will not be included in the exported bill
Next Available Part - CostsMaster will export this part and will assign it the
next available part number. Parts with this setting will export in the order they
appear in the Parts Window.
Specific Part - this part will be exported with a specific part number that you
can define.
Export Part No.
This setting is enabled only when the above setting is set to "Specific Part". It allows you
to specify the part number it will have on export and can be used to combine parts
together (see below). Parts with this setting will export in ascending order of the part no.
You can therefore use this feature to alter the order that the parts export. It is even
possible to skip a part number for any reason (say if a previous solicitor's costs are being
prepared by a different draftsman).
© 1999 - 2013 CostsMaster Ltd.
130
CostsMaster User Guide Version 4
Combining Parts
if you want two or more parts to be combined into a single part on export simply set
each of them to "Specific Part" and set the part number to the same value.
Mixing Settings
It is perfectly permissible to use a combination of parts set to "Next Available" and
"Specific". In this case any parts set to "Next Available" will be interposed in any gaps in
the numbering of specific parts.
Please note that the settings on this page reflect any settings you have already made in
the Part Export Options window. Changes here will be applied to the part for future use.
Part Narrative
This setting determines how any part narratives or enhancement justification is used in
the bill. The available options are:
None - any part narrative recorded or enhancement justification is not exported
Instead of Narrative - the main narrative and enhancement justification are not
exported and the part narrative and enhancement justification appear in their
place. If more than one part is exported the narratives and enhancement
justification for both parts will be combined.
Appended to Narrative - any part narrative will appear after the main narrative
and likewise for any part enhancement justification. Please note that if some
parts being exported are set to append to narrative and some to instead of
narrative they will all be treated as being append to narrative.
In the Part - The main Narrative and Enhancement Justification will appear as
normal and any part narrative and enhancement justification will appear within
the part. Depending on the type of bill and the settings chosen this option may
not result in the part narrative being exported. For bills the part narrative will
appear after the part heading and additional description but for CLAIM1s the part
narrative will appear only if you have opted to show the part heading in the page
4 schedule, in which case it will appear after the part heading.
With the Rates - For bills only, this option will result in the part narrative
appearing wherever the rates appear in the bill. The bill settings window lets you
choose whether the rates appear at the beginning of the part, after the narrative
in the bill or on the front sheet. This option will result in the part narrative
appearing before the rates, wherever they might appear, and the part
enhancement justification appearing after the rates.
If a part is not exported its part narrative cannot be exported.
The part narrative setting is stored separately for each type of bill so it is possible to, for
example, have a basic narrative that is used for a case plan and part narratives that are
used for a CLAIM1, or to record a general overview in the main narrative and work specific
to the parts in the part narrative. If you set the part narratives to append to narrative, the
main narrative will automatically cover only the parts you export.
Default Category
You can use this column to specify a default category for each exported part. Where a
default category is defined the category name is not shown against each item of work
but is instead described at the beginning of the part.
© 1999 - 2013 CostsMaster Ltd.
Chapter 7 - Creating Bills & Other Documents
131
Previewing The Bill
Ctrl + P
If you do not want to export a final bill but only wish to see how the work you have
recorded so far looks like, it is possible to create a near instantaneous preview of the bill
within CostsMaster.
This preview skips the export wizard and uses the default values. However, if you have
previously been through the wizard it will utilise the choices you made then and apply
them to the previewed bill.
When you click the Preview button on the main toolbar or on the menu a sub menu will
open with options for each type of bill that can be previewed. If you use the above
shortcut it will show the last type of bill previewed.
If you have more than one template for any document type selected in the export wizard
the preview will preview all the selected templates, one after another.
Creating Bills
The following information relates only to the export of columned bills.
Assigning Parts - (Include In) Legal Aid Sch(edule)
This determines whether the costs in the part get included in any Schedule of inter
partes costs at legal aid rates that is exported.
In the export wizard this column will only be visible if a Legal Aid Schedule is selected.
Export Templates
CostsMaster comes with over 30 different bill templates. If some of these are not
appropriate for the type of work you do you can suppress their display in the Export
Templates window.
Bills can optionally be created as a single document with a front and back sheet at either
end and with documents schedules included, so if you need to email your bill you now
need to send just one document.
Most settings for the bill are made in the Bill Settings window.
It may also be useful to set out a brief summary of the differences between the various
templates:
Three, Four and Six column templates
Three column templates are probably the format favoured by most costs draftsmen. They
claim VAT, disbursements and profit costs in separate columns.
Four column templates claim VAT Claimed, Costs Claimed, VAT Allowed and Costs
Allowed (see also the CPR variant below).
Six column bills are used when claiming both inter partes and legal aid costs (see also
IP-LA below).
© 1999 - 2013 CostsMaster Ltd.
132
CostsMaster User Guide Version 4
IP-LA
Templates come in inter partes (IP), legally aided (LA) or IP-LA variants.
Three and Four Column bills come in variants for inter partes and legal aid work.
Exporting a file that has both inter partes and legal aid work using, say, a 3 column IP
bill will include only the inter partes work, ignoring all the legal aid work.
IP-LA bills are used for bills that contain both legal aid and inter partes costs. All six
column bills are IP-LA but there are also IP-LA versions of the three and four column bills
where the inter partes and legal aid costs are automatically split between parts.
CPR
For four column bills, the CPR variant follows the exact order of columns suggested by
the Civil Procedure rules, namely Costs Claimed, VAT Claimed, Costs Allowed and VAT
Allowed.
Phase Bill
When preparing a Costs Budget, work is divided into Phases. The Phase Bill splits each
exported Part into Phases to correspond with the Budget. A Phase Bill variant is
available for all templates which include an IP aspect.
Family Fixed Fee
These bills are used for legal aid cases under the various family fixed fee schemes. In
these bills advocacy work is shown in italic and enhancement can optionally be shown
separately from core costs and displayed in bold.
Landscape
The six column templates have a lot of information and to fit it all in not only is the default
font size smaller than other bills, but the description column is narrower too. For this
reason we provide alternative six column bills in landscape format which don't suffer from
this width restriction.
Traditional templates
The standard templates use word processor tables for their layout. This makes for an
easily controlled bill but this format can be awkward to edit in your word processor if you
are unfamiliar with tables (although we would urge you to learn this because it is not
difficult). As an alternative some templates are provided in "traditional" format which uses
free flowing text with alignment governed by tab stops. This is the style of document
produced by previous versions of CostsMaster. Whilst this is straightforward to edit,
Word is the only word processor capable of handling this type of document as it relies on
being able to tab beyond the right margin, something no other word processor seems
able to do.
Creating a Costs Budget
The following information relates only to exporting a costs budget.
Costs budgets are exported in the same way as other documents. However, because
work in a costs budget is grouped by phase there is no option to assign the parts you
wish to export and should you need to exclude a part from the budget you will need to
set its excluded property within the program.
© 1999 - 2013 CostsMaster Ltd.
Chapter 7 - Creating Bills & Other Documents
133
Precedent H Costs Budget
This can be exported as a word processor document, ideal for printing, or as an Excel
Spreadsheet that can be used at the hearing where the budget is set.
Supporting Documentation
The Precedent H budget only includes summaries of the work included in the budget. If
you wish to back up the budget with more detail, you can produce supporting
documentation covering your own choice of phases and detail and grouped by location.
Please see the section on Costs Budget Settings for more information.
Costs Budget Report
This is a report of how the costs recorded in CostsMaster compare with the costs set in
the budget and is intended to be sent to the client or fee earner for information.
Creating a Breakdown or Statement of Costs
The following information relates only to exporting a breakdown or statement of costs.
When exporting a breakdown or statement of costs you can choose which parts are
exported and, if desired, merge parts together just as you can for other bills. Indeed for a
statement of costs for an interim hearing it is necessary to record the costs for the
statement in a separate part (or parts) from other costs and choose to export just these
parts when creating the statement.
Creating a CLAIM1 or CLAIM1A
The following information relates only to the export of a CLAIM1 or CLAIM1A form.
The exported form in CostsMaster 3 and later differs from that in CostsMaster 2. In this
version the form is exported to a word processor document and the Form Viewer is no
longer required to view or edit it.
Because of this the layout of some parts of the form has changed. Items such as the
page 4 schedule and narrative will now flow continuously across pages rather than be
shown as separate pages at the end.
The forms copy the original LAA forms closely which means that it is still necessary to
show some items in an additional addendum page at the end. Where this is done the
layout of the items has been much improved and in the case of routine items it mimics
the layout of the page 7 routine table but gives far more detail. Because Information is
placed right up to the edge of the page it is important that when printing you set your
printer to print on A4 sized paper. Some printers default to using the US standard “Letter”
paper which is slightly shorter and wider than A4. This will result in the very bottom of the
form being cut off. In addition if you add a draft watermark (which is placed in the header
of the document so that it can appear behind the text) most word processors will leave
space for the header even though there is no text there. This will result in the bottom of
the pages being pushed over to the next page.
Add a line between parts
If this option is selected and you have chosen to export two or more CostsMaster parts
to separate CLAIM1 parts, the parts will be separated in the page 4 schedule, page 5
additional information and page 7 disbursements by a line with the Part number and
description.
© 1999 - 2013 CostsMaster Ltd.
134
CostsMaster User Guide Version 4
Selecting the appropriate template
The export wizard will present you with a list of the CLAIM1 or CLAIM1A forms available
to use on your system. It makes this choice based on the CLAIM1/CLAIM1A setting on
page 1 of the CLAIM1/CLAIM1A Settings window.
Creating a Case Plan
The following information relates only to the export of a case plan.
Assigning Parts - Case Plan Part.
When exporting a case plan an extra column appears on the part assignment page
allowing you to specify the Case Plan Part from the following options:
Pre Case Plan Work Done - this covers work done before the case became a case
plan.
Post Case Plan Work Done - this section can be used if you want to show work
already done after the case became a case plan in its own section rather than as
future work.
Post Case Plan Future Work - this is your estimate of work to be done for the duration
of the case.
Each of these has a different format on export (although the differences between the two
work done types is limited to the heading).
Some things you should be aware of:
1. This setting determines the format of the part on export, not the order in which the
parts will appear. It is your responsibility to ensure that the parts export in the correct
order (either by having the parts in CostsMaster in the correct order and setting them
to "Next Available Part" or by specifying the part numbers directly).
2. Because any parts with the same Export Part No. will be combined in the bill, any
parts that are to be combined must be assigned to the same case plan part.
CostsMaster takes care of this automatically so:
if you change this setting for such a part, any other parts set to the same export
part will have the setting changed also.
if you change the export part no. to a number already used, this setting will be
updated to match that of the other parts.
Assigning Parts - List Hearings
This option determines whether the dates of any hearings in this part are included in the
list of hearings that appears at the beginning of the exported case plan. By default any
pre-case plan parts are set to have their hearing dates included but you can alter this for
any part should you wish to do so.
Include notes
This option, on the Other Options page, has special implications for case plans. It is not
possible to export notes for many items as the layout of the case plan gives nowhere for,
say party notes to be displayed. The following notes can be exported for a case plan:
Bill Notes - These are shown attached to the heading of the case plan.
Part notes - These are shown attached to the heading of each part.
© 1999 - 2013 CostsMaster Ltd.
Chapter 7 - Creating Bills & Other Documents
In the work done sections:
Attendance Notes - As attendances are grouped together by fee earner and type any
notes attached to them will be similarly grouped. The note will have the location, date
and description added to the beginning otherwise it would not be apparent which item
the note was referring to.
In the future work sections:
Attendances - as attendances are shown individually in the future work sections the
notes are shown against the item they relate to.
Disbursements - these are also shown individually in the future work section so the
notes are shown in the same way as for attendances.
Procedural Steps - These are shown attached to the event heading.
Additional Options
There is an additional option to specify whether the list of hearing dates appears with
each date on a separate line or with all dates in a single line separated by a semi-colon.
Creating a Notice of Commencement
CostsMaster can optionally produce Notices of Commencement of Assessment
proceedings. The Court fees and other information is recorded on the case details
window and on export you simply need to select an appropriate Notice of
Commencement template from the drop down box in the export wizard.
Creating A Report
CostsMaster allows you to export a report of all disbursements recorded within the file.
Unlike other documents, a report will include any disbursements marked as excluded
and it is not possible to limit the report to a range of parts.
The Report Settings Window allows you to specify whether to show Counsel's Fees,
Expert Fees or Other disbursements, and which fields to include for each of the above
types.
© 1999 - 2013 CostsMaster Ltd.
135
136
CostsMaster User Guide Version 4
Export Phrases & Export Templates
Export Phrases
Alt + Shift + E
Export phrases are used to describe the content and format of different lines in the
exported document. They can include plain text that you can alter plus references to
elements of the items you record in CostsMaster, such as attendances, disbursements,
parts etc. On export these references are used to export the data you have entered. In
addition, the phrases contain information about how dates and amounts are to be
formatted and the typographic formatting of the text.
All these elements can be altered to give you complete control of the appearance of your
exported documents.
The Export Phrases window divides the available phrases into sections which are
displayed in the box on the left. Selecting one of these updates the right hand side to
show further details. The sections that are displayed here can vary depending on how the
window was opened. If Opened from the Options > Export Phrases menu item on the
main window then all available sections will be visible as well as export options. If
however the window is opened by clicking the "Export Phrases" button in the Export
Templates window, only the phrases relevant to the currently selected template will be
shown.
Export options were included in this window in versions up to 3.4. From version 3.5 they
have been relocated to the Bill Settings, CLAIM1 Settings and Case Plan Settings
windows. The options for tools to be run on export are now found in the local settings
window.
When you select a phrase section the left hand part of the window reveals a further list in
the middle of the screen plus other controls on the right. The middle list shows all the
available phrases in the currently selected section. Selecting one of the phrases results
in the controls on the right updating to show the contents and formatting of that phrase,
giving you the ability to alter the phrase if desired.
Export phrases give you a lot of control for editing but that control can make them a little
complicated. There are therefore two ways of editing export phrases: simple mode and
advanced mode. You can switch between the two modes using the tabs at the middle
top of the window.
Override the Global Phrase with the phrase in this template
This tick box will only be visible if you have launched this window from the Export
Templates window. As well as the global export phrases, each template has its own set
of phrases. When this box is unticked it means the global export phrase will be used,
but if ticked the template's own phrase will be used instead.
Preview
The preview button will generate a short preview bill of the currently selected section in
order to see the effect of changes. The preview will use work recorded in the file so it is
necessary to actually have work in the section in order to see the effect. In addition
some additional work may also be shown.
© 1999 - 2013 CostsMaster Ltd.
Chapter 7 - Creating Bills & Other Documents
137
In simple mode you are able to edit the text of an export phrase and make formatting
changes that affect the phrase as a whole. More detailed editing is available in advanced
mode.
Primary Text
This is plain text that is exported to a document exactly as it is entered. For example,
the Heading phrase in the Bills - Rates section has by default the text "Rates Utilised",
but you can alter this should you want your rates section to be headed differently. Not all
phrases have primary text. The item phrase in the Bill - Documents section for example
has no plain text because its content is created from each entry you have made in the
Documents window.
Secondary Text / Description
A very few phrases have two pieces of text, usually where plain text is split around an
element that is drawn from the file. The Default Category Description phrase in the Bill General section has primary text of "All work carried out by" and secondary text of
"except where stated otherwise". On export this would be placed either side of the
Default Category so it might read "All work carried out by Partner except where stated
otherwise".
This box behaves slightly differently for properties. Property phrases are used to show a
visual property from within CostsMaster (such as "estimated") in a textual form for
export. Not all properties in CostsMaster have meaning in an exported document, and
only those that are used in exported documents are shown here. For properties the
Secondary Text box allows you to record the description that is appended to the
narrative where a property is used in the bill. So if you look at the estimated property you
will see that the Description is "Estimated time is marked (e)" to explain the presence of
the "(e)" estimated markers in your bill.
Character Style / Set Style
It is possible to set the character style for the phrase as a whole by ticking the Bold,
Underline and italic boxes. Where a phrase has one or more of these attributes the
boxes will be ticked and the "Character Style" text will display with the appropriate style
settings by way of illustration.
Setting these values in Simple Mode will apply them to the entire phrase. In advanced
mode it is possible to apply them selectively to elements of the phrase. If the phrase has
differing formatting the boxes to set the character style will not be visible but instead you
will see a button labelled "Set Style". When you click this you will be warned that the
separate styles will be lost and a universal style applied instead.
Formatting
At the bottom of the simple tab are various formatting controls that control the exact form
that Dates, times, currencies and other elements can take. These may or may not be
visible depending on the phrase. Only if the phrase contains an element capable of being
formatted in that way will the relevant page appear.
The available options for the formatting controls allow you to select an item by way of
example (so the Day control in the Date formatting will have options for "8", "08", "8th"
and "none". An example of the full formatting is displayed above the formatting controls.
The example that is used can be altered using a box at the bottom of the formatting
controls.
The various formats and options are described in the reference section.
© 1999 - 2013 CostsMaster Ltd.
138
CostsMaster User Guide Version 4
In Advanced mode you are given access to each element of the export phrase. As well
as setting formatting for each item individually you can alter the order of items and
specify the text that appears before or after an item.
The elements of the export phrase are shown in a box near the top of the advanced tab. If
you select the Item phrase within the Bill - Documents section you will see a range of
text representing an entry for a documents item in a bill. You cannot edit the text directly
but if you click on different parts of the text you will see the element that you have
clicked on highlighted in yellow.
Show Examples / Fields
At the top left of the export phrase is a control that toggles the phrase between showing
example text and the name of the internal field element. For example if you leave this set
to examples the first element is a date displayed as today's date. If you change the
control to show fields this element is now shown as "<DATE>". When showing fields it is
a little easier to spot which elements are present but showing examples makes it easier
to understand the purpose of each element.
Move Position
To the top right of the export phrase are two buttons that will move the currently selected
element to the left or right. This makes it possible to reorder the elements of the phrase
so that they appear in the order you want.
"Superfluous" Elements
Looking at the documents item example you will probably be thinking that it contains
more than you would want to see in a bill. The reason for this is because it shows items
that may or may not appear in the bill depending on whether certain conditions are met.
For example the documents item has a time element ("2:06") followed by an items
element ("25") and a Lump Sum element ("£1234.56"). For any given documents item
only one of these will appear, usually the time, but if you recorded a lump sum figure
then the lump sum element would be used and if you recorded an attendance at a
unitary rate type the items element would be used.
Furthermore there are several elements such as the Category Name ("Partner") that will
appear only if it is not the default and the Rate Class ("Advocacy Rate") that will appear
only if you have recorded an attendance at a rate type that differs from the default for that
section (preparation for the documents section).
Character Style
Just as in simple mode it is possible to set the Bold, underline and italic styles plus the
font size but in advanced mode you apply them to individual elements. Should you wish
to apply a style to all elements you can click the "Apply to All" button.
Conditional Text
There are two controls for Conditional prior and post text. These are used to add plain
text either side of an element but in such a way that the plain text will only appear if the
element appears. We mentioned above that there are situations where an element may
not appear, such as the rate type which will only appear if it is not the default for that
section. In the Documents item example the rate type "Advocacy" has conditional prior
text of "(" and conditional post text of " rate)". This means that if the rate type appears it
will be wrapped in parenthesis and have the word "rate" appended as it appears in the
example. If the Advocacy rate type does not appear then the parenthesis and word "rate"
© 1999 - 2013 CostsMaster Ltd.
Chapter 7 - Creating Bills & Other Documents
139
will not appear either.
Formatting
At the bottom of the tab you may see various controls that allow you to format the
selected element. Unlike Simple Mode, only one set of formatting controls is visible at a
time and only if the currently selected element supports such formatting. So if you click
on the time element ("2:06") you will see controls that allow you to specify the format of
the time element. You can also change the example used (and if you have already done
so you will understand why my examples above may not accord with your copy!).
The various formats and options are described in the reference section.
Restore Default
You may find that in exploring the possibilities of the Export Phrases window that you
make one too many changes to a phrase. Fear not, the "Restore Defaults" will return it
to the state it was when CostsMaster was first loaded. Please not that all changes you
have made to this phrase since installation will be lost.
Export Templates
The Export Templates window can be accessed from the Options menu.
In previous versions of CostsMaster the term export template was used to refer to the
Word templates used for export. These contained the page layout, macros for formatting
and some pre-entered text. In this version such files no longer exist. Instead, all other
formatting is contained within the new export templates which can be edited entirely
within CostsMaster.
On the left of the window is a list of folders that organise the available templates into
logical groups. The groups available are
Column Bill Templates
Front & Back Sheets
Breakdowns & Statements
Other Templates
Legal Aid Forms
Notices of Commencement
Reports
Document Schedules
Legal Aid Case Plans
Clicking the Plus sign to the left of the folder will reveal the available templates in each
group. When you click on a template the right hand part of the page becomes enabled
with the settings for that particular template. This side of the window is divided into
different tabs covering different area, some of which may not be relevant for every
template. You can make changes to any enabled control and the changes will be applied
when you close the window by using the OK button. If you have altered a template and
do not like the effect, and you want to revert to the original settings you can do so by
clicking the "Reset to Default Values" button on the "General" tab.
General
Hide this template in the Export Wizard
If this box is ticked the selected template will not appear in the export wizard and it will
not be possible to export a document using it. You may want to do this if you never
produce a particular type of template and want fewer items to choose from in the Export
© 1999 - 2013 CostsMaster Ltd.
140
CostsMaster User Guide Version 4
Wizard.
Make a Copy of this Template
This button allows you to make a copy of a template. You can then alter the settings of
the copy whilst leaving the original template as is. When you click this button you will be
prompted for a name for the template. The name must be unique and a suggested name
is given, though you are free to use any unique name of your choosing.
Reset To Default Values
This button will remove any changes you have made to a template and return it to the
state it was in when CostsMaster was first installed.
Delete Template
This will delete the selected template from your system. You can restore a deleted
template (but with its default settings) on the Repair tab (see below).
Export Phrases
As well as the general export phrases, each template has its own set of export phrases.
These can be used when you want a different phrase for a particular type of export (e.g. a
different estimated time marker for a CLAIM1) or where you have a client who likes
different wording, you can make a copy of a template and change the phrases to suit.
Clicking this button will open the Export Phrases window.
Save Template As
This button allows you to save a template to a location on your hard disk or on the
network. You can then give this template to a colleague or place it in a shared location
for the use of others.
Import Template
This button allows you to import a template that another user has saved from their copy.
When importing you can choose to place the template in the default location with your
other export templates, or to put it in a another location such as a shared network drive.
Appearance
Default Font Name & Size
These controls allow you to alter the default font name and size. Please note this font
will apply to the text of items recorded within CostsMaster and may not apply to some
pre-set text and parts of forms which may have their text style hard coded.
Please bear in mind that not all fonts will display at the same width and height for a given
font size. For example, Arial is a larger font then Times New Roman. Many bill templates
default to using Times New Roman 12 point. If you change this to Arial we would
recommend also changing the font size to 11 point which will give a similar size text and
prevent large numbers from wrapping onto a second line.
Default Cell Padding
For templates that use a table structure to export, this setting determines the amount of
space in centimetres that is allowed between text and the edge of the cell. Please be
© 1999 - 2013 CostsMaster Ltd.
Chapter 7 - Creating Bills & Other Documents
141
aware that increasing this value may result in certain text no longer fitting in a cell and
wrapping to a second line as a result.
Form Protection / Form Shading
If the template represents a pre-printed form these controls will be enabled. If Form
protection is ticked the pre-set text on a form will not be editable and the user will only
be able to edit the text that would normally be added to a pre-printed form. With this box
un-ticked all text on the form can be edited. If Form shading is ticked, the areas of a
protected form that can be edited are shown in grey giving the user a visual indication of
which areas of a protected form can be altered.
Please note that not all word processors may implement these functions. Furthermore
these functions can also be enabled and disabled within your word processor.
Page Setup
Orientation
This determines whether the template is generated as portrait or landscape. Most forms
assume a certain orientation and altering this setting will cause the form to export
incorrectly.
Margins
These boxes allow you to specify the margins for the page and the header and footer. If
reducing the margins you will probably have to alter the column positions as there will
now be correspondingly less space on the page to fit everything in.
Columns & Lines
The controls on this tab apply only to columned bills.
Column Position Table
This table allows you to specify the position of the end of each column in a bill template.
Should you need to alter a template to match pre-printed paper you can do so here.
Column headings can also be specified here. Should you want a heading to span two
lines simply add "\par" (without the quotes - it is the standard RTF symbol for a
paragraph).
Header Row Height
This is the height in centimetres of the header row of the exported bill which shows the
names of the columns. This can be altered to match the position of the header on preprinted paper.
Pence Column Width
This and the remaining controls on this tab apply only when the option in the bill settings
window for advanced lines is selected. This setting specifies the width of the pence
column and therefore the location at which the Advanced lines option will draw the
dividing line between pounds and pence.
Double Line spacing
© 1999 - 2013 CostsMaster Ltd.
142
CostsMaster User Guide Version 4
This is the (very small) gap between the double lines of the advanced lines option.
Header Line Top / Middle / Bottom
These values determine the position at which the advanced lines option draws horizontal
lines for the header of the bill. The mid line value is used for templates which have a
header row which is divided into two rows over the columns, usually where the columns
are grouped into sections, such as legal aid & inter partes, or amount claimed and
amount allowed.
Repair
This tab contains a button that will validate all installed templates and restore any
CostsMaster-installed templates that you had previously deleted.
© 1999 - 2013 CostsMaster Ltd.
Chapter
8
Getting work in to (and out
of) CostsMaster
144
CostsMaster User Guide Version 4
Importing Work
Shift + Alt + I
Whilst CostsMaster has a fast and efficient method that allows you to enter data quickly,
if you have access to the data in a time recording system you may prefer to load that
work into CostsMaster to form the basis of the bill.
Alternatively, you may have work within a separate CostsMaster file that you want to
import into your current file and merge with the data there.
The following pages explain how you can do both these things.
© 1999 - 2013 CostsMaster Ltd.
Chapter 8 - Getting work in to (and out of) CostsMaster
145
Importing Work from a CostsMaster File
In order to import work from a CostsMaster file it is only necessary to specify the file and
choose which parts you wish to import in the Data Import Wizard. It isn't even necessary
for the files to have the same basic setup - if the imported files have different fee earners,
categories, Counsel or parties they will be created for you automatically during the
import process. However if the work in the file being imported uses fee earners, Counsel,
Categories or parties with the same name as the main file it will instead be reassigned to
use the existing items so as to avoid duplication.
It is only possible to import an entire part into CostsMaster, and these parts will be
added as additional parts in the main file. You can then choose whether to merge the
parts with existing parts or leave them separate as you wish.
it is only possible to import work from files saved by CostsMaster 3 or later. If you have
data in an earlier file that you wish to import you must first import it into the current
version and save it. You can then import this saved version.
© 1999 - 2013 CostsMaster Ltd.
146
CostsMaster User Guide Version 4
Importing Work from a Time Recording System
In order to import work from a time recording system you first need to get your time
recording system to generate a file containing the work in a format that the data import
wizard can handle. At present the file can be in either XML, CSV or Excel formats: the
first of these is slightly more flexible, but must match the specification which can be
found on our web site, whereas the latter two can be mapped as appropriate using the
helper provided.
Most decent time recording systems have the ability to allow the user to export data to
XML or CSV in a format that the user can control. If you cannot specify the fields that are
output you may need to ask the vendor of your time recording system to arrange this for
you, or just generate fields in the default format and use the Data Mapping functions in
CostsMaster to identify the required fields.
Once you have the file you can import it using the Data Import Wizard. It then appears in
the Pending Work window from where you can make changes and decide where it
should be moved to within the program.
Work imported in this manner will still need the intervention of a draftsman, not least in
the essential task of deciding which work is recoverable and where in the bill each type
of work should appear. The import work function makes it easy to import data and move
it to various locations within CostsMaster.
© 1999 - 2013 CostsMaster Ltd.
Chapter 8 - Getting work in to (and out of) CostsMaster
147
Data Import Wizard
Shift + Alt + I
Once you have a compatible file you are ready to run the Data Import Wizard. This
wizard guides you through the steps to import work from a file generated by a case
management or other system.
Select the type of file to import
You can choose to import data from an existing CostsMaster file or from a time recording
system.
Select a file to import
Click the "select file" button and navigate to the folder on your computer that contains
the file you wish to import. When you select it the file will be validated and if it passes
you will be taken to the next page.
If the file you select does not use the standard format, you will need to define a mapping
to convert it, using the Import File Format Mapping dialog which is accessed using the
"Manage Mappings" button. Once a mapping is defined it can be selected using the
drop-down. The "Make Default" button sets a particular mapping to be pre-selected: this
is also available on the dialog itself and in Local Settings.
Select Parts (CostsMaster files only)
When importing a CostsMaster file you can select which parts you wish to import.By
default all parts are selected but you can de-select any that you do not wish to import.
Assign Work to Parts (time recording system files only)
You can save yourself some time by creating any parts you know you will need and
setting start and end dates for them. If the option to assign work to parts is selected the
wizard will automatically set the Proposed Part to the appropriate part based on the date
of each item. If you forget to create parts before starting the wizard you can still access
the parts window from the button on the assignment page.
Assign Work to Locations (time recording system files only)
If the imported file contains information about the CostsMaster location that it is destined
for, the import wizard will automatically assign the item to that location. However, even if
your imported file does not contain any location information, you can also get
CostsMaster to guess the eventual location of work. It does this by looking for key words
in either the Activity or Description columns in the imported work. The key words are
defined in the presets window and can be altered and added to in order to improve the
success rate. This option is only enabled if you have selected the option to Assign work
to Parts on the previous page.
Assign work to Parties (time recording system files only)
If your imported file contains information about any parties on which an attendance was
carried out, this will be utilised by the import wizard and the attendance will be assigned
accordingly. In addition, you can opt to have the Import wizard automatically create any
© 1999 - 2013 CostsMaster Ltd.
148
CostsMaster User Guide Version 4
such parties if they do not already exist in the CostsMaster file.
However, if your imported file does not contain any party information,you can still have
CostsMaster attempt to assign work against parties to an actual party. It will do this by
looking for the name of each party you have created against the description of each item
being imported. If you have not yet set up any parties you can do so now from the button
on this window. As well as specifying the name of the party it is also possible to record
aliases. These are also checked when assigning work on import so that if the party is
referred to by different words ("Claimant", "Client" or "CLT" etc.) you can record these as
aliases, separated by commas or other punctuation, and they will be detected and the
correct party assigned. This option will only be enabled if you have also selected the
option to Assign work to parts earlier in the wizard.
Assign Phases to work
If the work being imported is not already tagged with phases CostsMaster can attempt to
do this automatically by matching the description of each item against the presets which
you can customise for this purpose.
You can also choose to assign phases to all work or only to work which doesn't have a
task or activity already set.
If you choose not to apply phases at this time you can do so later by running the Apply
Phases tool.
Import the work
Press finish and the work will be imported. Work from a time recording system will be
displayed in the Pending Work Window, whilst parts from a CostsMaster file will be
added after the existing parts in the main file.
© 1999 - 2013 CostsMaster Ltd.
Chapter 8 - Getting work in to (and out of) CostsMaster
149
Import File Format Mapping
In order to import work into CostsMaster it used to be necessary for that work to be in a
prescribed format in order that CostsMaster could know the meaning of each column in
the file. Now, even this is no longer necessary as you can tell CostsMaster which
columns to use and for which purpose as part of the import process.
This is done in the Import File Format Mapping window. Please remember that the
information you provide in this window can be saved for use in future meaning this is a
process that only has to be done once for a particular type of file. In fact, if you always
import work from a single system, you can specify the mapping as a default and will
never have to use this window again!
Mapping fields applies only to CSV and Excel files. XML files must be in the prescribed
format if they are to be imported.
Mapping an Import File to CostsMaster
The mapping is done via the grid at the bottom of the window. This contains one column
for every type of data that CostsMaster is expecting. The first row (or rows depending on
type - see below), in red, contains a drop down box containing a list of all the possible
fields. Your task is to select the field that best represents the data in your file. The
easiest way to do this is to click "Load Test File" and select your import file. Some data
from this file will be read into the grid and it is then a simple matter to match the red drop
down to the type of information in the rows below.
Mapping controls
Above the grid are several controls which may need to be altered depending on the type
of file being imported:
Each Row Contains - A file being imported may contain attendances, disbursements
or a combination of both. This control allows you to specify
Attendances - each row contains an Attendance item (minimum 12
columns)
Disbursements - each row contains a Disbursement item (minimum
11 columns)
Either - each row can contain either an Attendance or a
Disbursement item, according to whether "Type" is "A" or
"D" (minimum 12 columns). With this option you will have two rows in
red to select from, one for attendances and one for disbursements.
Composite - each row can contain either or both types, depending
upon whether there is data in "Time" or "Amount" (minimum 14
columns).
Selecting a new format after making any other changes will prompt CostsMaster to ask
you if you want to save the changes.
Data Starts At Row - If your file contains headings or a description at the beginning this
control allows you to skip them.
Worksheet - If you are importing an Excel file this control allows you to specify which
sheet in a multi-sheet Excel workbook should be used as a source. Work sheets are
shown as tabs above the grid and selecting a different tab will alter this control and vice
© 1999 - 2013 CostsMaster Ltd.
150
CostsMaster User Guide Version 4
versa.
Show Columns - the number of columns displayed will vary depending on the type of
data selected above. In addition you can opt to include extra columns in order to include
additional data from your file which you want to retain but which CostsMaster may not be
expecting.
Additional Columns as Notes - if you have increased the number of columns, you can
use this option to retain the additional data as notes attached to the imported items. If
this option is not selected these extra columns are discarded.
Time is in Hours - This option selects whether a whole number in "Time" is evaluated in
minutes or hours: this only applies when the format includes Attendance items.
Comment prefix - A row in a file may be a comment which is data that is not intended
to be imported. Such a file has an identifying character at the beginning, which is
commonly "C": the default is blank, but that can be altered here.
Saving the Mappings
This section of the window allows you to save your information for use in future. The dropdown box contains a list of all mappings you have previously saved and allows you to
quickly choose which mapping to work with for a particular import file. Once saved,
mappings can also be selected from the data import wizard without having to enter this
window.
The Save button will save any changes to the current mapping, whereas the Save As…
button will allow you to save the current settings under a new name (or replace an
existing mapping). We recommend you give the mapping a name that clearly identifies
its purpose so it can be recalled easily later. Should you want to remove an entry you
can do so with the "Delete" button.
If you tend to use one particular mapping most of the time you can use the "Make
Default" button to specify it as the default, meaning you will not even have to select it
when going through the data import wizard. If you select the default mapping, some text
to identify this fact is displayed underneath the drop-down. The facility to select the
default is duplicated in Local Settings and on the Data Import Wizard.
You can transfer saved mappings to or from a colleague: the Transfer to/from External
File… button will open the Transfer Mappings window.
© 1999 - 2013 CostsMaster Ltd.
Chapter 8 - Getting work in to (and out of) CostsMaster
151
Transfer Mappings
To exchange mappings with colleagues, it is necessary to transfer them between
CostsMaster's internal list and an external file.
My Mappings
The left-hand list is for the current set of mappings, and is filled by clicking the Load
button underneath. Multiple items can be selected using Ctrl -click and Shift-click as
elsewhere. The Delete Selected button will remove the selected items from the list,
which can be restored using the Load button until the window is closed or the Save
button used to confirm changes.
The COPY -->> button will copy selected items to the right-hand list.
File Mappings
The right-hand list is used for an external file. The Load button will allow you to load
items from an existing file: the name of the file will be displayed at the top of the window.
The Save and Save As… buttons allow you to save your chosen items to a new file or
update an existing file. Again the Delete Selected button will remove the selected items
from the list.
The COPY <<-- button will copy selected items to the left-hand list.
© 1999 - 2013 CostsMaster Ltd.
152
CostsMaster User Guide Version 4
Pending Work Window
Shift + Alt + W
The pending work window is used mostly when importing work from an external system.
However you can also use it to record attendances and disbursements that you want
recorded but do not yet want to include in the bill. When importing work you may want to
alter it in the Pending Work window before moving it to other locations within
CostsMaster.
Altering Imported work
When you import work from an external time recording system you will almost certainly
have to make changes to it, whether to expand on the description given or to set different
properties for the items. You can make such changes in the Pending Work window
which gives full access to all fields of the attendance or disbursement either directly in
the grid or via the edit window. Alternatively, you may want to send items to their
ultimate destinations (see below) and make changes there.
Splitting Imported Work
In some cases you may find you have a single item which needs to be sent to multiple
locations. You can split this item quickly via the Edit Pending Attendance window.
Simply click the "Split" button at the bottom of this window and enter a description and
time in the window that appears. You can also assign the sub item to a part, location
and party. There are drop down options for items already created but if you type in the
name of a different part or party it will ultimately be created for you.
The sub item will be listed in the box to the bottom left of the window and any time
entered for the sub item will automatically be deducted from the main item. If you select
part of the description text before clicking the Split button, this will be placed as the text
for the sub item and automatically removed from the description afterwards.
If you change your mind about a sub item you can edit it or even delete it. Any changes
to the time are reflected in the time for the main pending attendance, so if you delete an
item its time is returned to the main attendance. Please note that if you created the subitem by selecting part of the attendance description this selected text will have been
removed from the description but cannot be re-instated when the sub-item is deleted.
When you close the Edit Pending Attendance window new items will be created for all
the sub items. You can then assign locations to these as described below.
Resolving Negative Time
In CostsMaster it is not possible to record negative time for an attendance - this
generally would not make any sense in a bill of costs. However, when importing time, it
is quite common to encounter negative time entries where they have been created to
reduce or negate a previous entry. Such entries cannot be moved into CostsMaster and
must be dealt with in the Pending Work Window where the time element is shown in red.
Items can be adjusted manually but CostsMaster also provides a button to assist with
the process. The button is at the top of the window and is labelled "Resolve Negative
Time". By default it is disabled but becomes enabled when two items (but no more) are
selected and one of those items has negative time. Clicking this button will subtract the
© 1999 - 2013 CostsMaster Ltd.
Chapter 8 - Getting work in to (and out of) CostsMaster
153
negative time from the positive. In addition, There is an option in Local Settings labelled
"When resolving negative time automatically remove entries that are reduced to zero". If
selected then any entries that get reduced to zero by this process are automatically
deleted.
Moving items to different locations within CostsMaster
Any work recorded in this window will not appear in an exported bill until it is moved to
another location in CostsMaster. You can think of this window as a holding area for work.
All the work in this window has an extra three fields for Proposed Part, Proposed
Location and Proposed Party. You can specify some or all of these fields and then click
the "Move items to location" button, copy and paste items to their desired location or
even drag them from here to the desired location. As using the "Move items to location"
button is probably the probably the quickest method (and the other methods are covered
elsewhere in this guide) we will focus on that here.
The pending work window can show both attendances and disbursements. At the top left
of a window is a selection switch that changes between these two views. To the right of
this are two buttons to create new parts or parties, something you might like to do as
you work through the items in this window.
To move work to its correct location you need to specify at the least the Proposed
Location. This must be selected from the drop down box.
If the Proposed Part is not completed the item will be moved only if there is one part or if
there are no parts (in which case a part will automatically be created). The proposed part
can be selected from the drop down box or can be typed in. If the text typed in does not
match an existing part a new part will be created.
The Proposed Party need only be completed if the location relates to a party. THis can
be selected from the drop down list or can be text typed in. Again, if the text typed in is
not an existing party a new party will be created.
You can specify these locations in three ways:
1. Select the items you want to change, complete the boxes at the bottom of the screen,
then click "Apply to selected items". The selected items now show the proposed part,
location and party specified below.
2. With the grid not in multi-select mode choose the values for each item from the drop
down boxes.
3. Select the items you want to change, then click the edit button and change the values
in the Edit Pending Work window.
Of course there is a fourth and that is to get the program to assign the part and location
for you during the import process as mentioned in the section on the Data Import
Wizard.
Once you have specified sufficient locations you can click on the "Move items to
Location" button. The button to left of this toggles the function between moving all items
and moving only selected items. When the button is clicked any items that have
sufficient information in the proposed fields will be moved. Anything that has insufficient
information, e.g. because you have specified a party location but not a party) will remain
for you to attend to.
© 1999 - 2013 CostsMaster Ltd.
154
CostsMaster User Guide Version 4
Outputting Work
Shift + Alt + O
As well as importing work, it is also possible to output work to an external file for loading
into other systems. At present work output in this manner uses the same data format as
is used for importing data from a time recording system. This format is fairly basic and
does not contain all the information recorded within CostsMaster.
The output work function will involve the CostsMaster Data Output wizard. This wizard
gives you the option of selecting which parts you wish to output and to choose a name
for the file. The file will then be written in XML format only.
© 1999 - 2013 CostsMaster Ltd.
Chapter 8 - Getting work in to (and out of) CostsMaster
155
XML Totals
As well as outputting work from CostsMaster it is also possible to generate an XML file
alongside a bill that contains the totals from that bill. These can be loaded into your case
management system for billing or analytical purposes.
Totals can be generated for bills, breakdowns, CLAIM1s and case plans. All that is
needed is to tick the appropriate box in the Export Wizard and the totals file will be
generated in the same folder as the bill.
Full details of the fields that are output can be found in the reference section.
© 1999 - 2013 CostsMaster Ltd.
Chapter
9
Customising CostsMaster
Chapter 9 - Customising CostsMaster
157
Local Settings
Introduction
The Local Settings window contains options that affect the way you use CostsMaster.
There are a number of individual pages accessible by clicking an item in the list on the
left of the screen.
General
No of file names in recent list
This governs the number of items that appear in the list of recently opened files in the file
menu. The default is 10.
Show Full path for items in recent list
By default the list of recently opened files shows only the file name part and not the full
location. When this option is ticked the full location is shown. This makes the items
much longer but is necessary if you need to distinguish between similarly named items
in different locations.
Always Show Control Centre
When ticked the control centre is always shown when CostsMaster starts. If it is
unticked you can view the control centre by clicking the "Control Centre" menu item on
the File Menu.
Show Fee Earners With No Work in Colour
When ticked this option will show any fee earners that have no work recorded against
them in a different colour.
Show Procedural Steps In Colour
When ticked procedural steps will be shown in different colours according to the type of
procedural step. This makes it easy to see the type of step at a glance if the type
column is hidden.
Please see the section on Procedural Steps for details of the colours used.
Lock Open Files
When ticked any file open in CostsMaster will be locked at the file system level
preventing anyone else opening the file and making changes which would cause one or
other user to lose data.
Automatically re-size windows when grid widths change
When re-sizing columns or making columns visible or hidden, if this option is selected
the window will adjust in size to accommodate the widths of the grid. If this option is not
selected you will have to adjust the window size manually.
© 1999 - 2013 CostsMaster Ltd.
158
CostsMaster User Guide Version 4
Show property icons in columns
By default any property icons that are set are displayed in the properties column one
after the other. If this option is set, properties of the same type are aligned underneath
each other. This makes it easier to see which properties are set but the properties
column must be larger to accommodate them.
Use Extended Shortcuts
Because there are so many features in CostsMaster it is not possible to access them all
via shortcuts in the normal manner. For this reason, when this option is selected the left
and right shift keys are considered independently when identifying shortcuts. When it is
not selected the left and right shift and control keys are considered equivalent and any
shortcuts that utilise the right keys will be unavailable.
Assume whole numbers are
This setting determines how the program interprets whole numbers entered into a time/
items column. The options are for hours, minutes or units and if the latter is selected you
can define how many minutes make up a unit.
This only affects the way numbers are entered. Time is always displayed as hh:mm.
Personal
This page has information relating to the company or firm preparing the bill of costs. It is
typically used on the front sheets of bills.
The Draftsman is VAT Registered box determines whether VAT is claimed on the Costs
Draftsman's fee when calculated at a percentage. It applies only when claiming the
Costs Draftsman's fee as a disbursement. If claimed as a profit cost (either lump sum or
pseudo-hourly rate) then VAT is always claimed at the part VAT rate.
Safety
Automatically save files
If this box is checked CostsMaster will automatically save your file (if it has changed)
every so often. You can also define how frequently this takes place.
Show Message When Auto saving
Additionally CostsMaster can advise you when auto saves happen so that you can mark
the place in the file. In the event that your computer crashes before the next save you
will then know where to start re-costing the file from.
Give Audible Warning When Auto saving
As well as displaying the message when auto saving, the program can produce an
audible warning. This is particularly useful for people who look at the keyboard when
they type as it is very easy for such people to accidentally dismiss the auto save
notification and to thereafter accidentally overwrite data.
Commit Data prior to auto save
Usually data in the control in which you are typing is saved to memory only when you
leave that control. With this option selected the data in the control you are working in is
© 1999 - 2013 CostsMaster Ltd.
Chapter 9 - Customising CostsMaster
159
committed to memory just before the auto save takes place. This means that the data
saved is right up to the minute. However it results in the program refreshing its windows
which can cause the data to become selected and then accidentally deleted by the next
keystroke. (hitting the ESC key or Ctrl + Z BEFORE leaving the control restores the
accidentally deleted text!).
When saving keep this many old files
When a file is saved CostsMaster additionally keeps old copies. CostsMaster files have
a .cm3 extension and backups are given a .c01 etc. extension. This setting determines
how many backups to keep. This is a useful safety device if you find you make a
mistake when costing a file and need to go back to a point before the error occurred.
Backup copies are stored in the Backup files folder which is defined in the File
Locationspage
To facilitate this you may find it useful to mark your file with the time a save takes place
(whether it is a manual save or an auto save). If you do need to revert to an earlier save
you can then locate the point on the file that has the same time as the backup file you
have reverted to.
For details on opening backup files please see the section on Opening Files.
Verify Saved Files
When ticked CostsMaster will verify that the file it has saved exists on disk and that it is
the correct size.
Enable History (Undo/Redo)
When ticked the program records a History of all actions performed by the user together
with sufficient data to allow the action to be undone at a later date. In large files this
feature can cause the program to become sluggish. If this affects you you can disable
the history by unticking this box.
File Locations
This page lets you specify the default location for the different types of files you use in
CostsMaster. Changing any of these items changes the location for future use but does
not move any files stored in the old location to the new location. If you wish to do this
you should do so yourself using My Computer or similar.
CostsMaster Files (.cm3)
This is the default location for the files containing the information you have input into
CostsMaster. By default it is <My Documents>\CostsMaster Files\
Exported Documents (.rtf)
CostsMaster 3 and later exports documents differently to previous versions. Instead of
putting the data directly into Word the program saves the file in a format that should be
readable by many word processors and then optionally opens the file in the word
processor of your choice. This setting determines the location that these files are saved
to.
You can specify that the file will be saved to the same location as the CostsMaster file or
you can have it save into a specific folder.
© 1999 - 2013 CostsMaster Ltd.
160
CostsMaster User Guide Version 4
Backup Files (.c01 etc.)
Previous versions of CostsMaster saved backup files in the same location as the original
file but from version 3 they are saved into their own backups folder. The default is <My
Documents>\CostsMaster Files\Backups\
Program Templates
These are part completed bills that you can use to avoid completing the same tasks you
do every time you start a bill. The default is <My Documents>\CostsMaster Files
\Program Templates\
Export Templates
Unlike in CostsMaster 2 Export Templates are not the Word templates used when
exporting but a CostsMaster created blueprint for what the exported bill will look like. The
default is <My Documents>\CostsMaster Files\Export Templates\
Enhancement
X in an enhancement box sets exclude to
In any enhancement column you can exclude enhancement by typing an "X" as an
alternative to entering the Enhancement Set-up Window and setting the exclude value
manually. As you will see from that window there are four options in the exclude box,
and this setting determines which of the two negative options are applied when you type
"x", "Yes" or "Always".
Dates
Dates entered without years...
When entering a date without a year CostsMaster will attempt to guess the year. It does
this by checking the previous date entered and using the year from that if it will make a
date that is in advance of the previous date, otherwise it adds to the year. However not all
files are in strict date order and entering a date that is a few days before the previous one
would result in CostsMaster guessing that it was a year later than it was. Therefore the
program uses the date window specified here and will assume the current year if the
resulting date falls within the number of days specified.
Date Separators
This box allows you to specify the characters that can be used to separate the elements
of a date. By default CostsMaster lets you use the forward slash, full stop or colon but
you can define any characters you want to use here.
More importantly, you may want to remove characters such as the full stop or colon if
you are entering text in a date field and want to use these characters as part of a date. If
you do not do so, CostsMaster will probably misinterpret the information you have
entered.
Prevent text being entered in date columns
This option, when selected, will prohibit the entry of any characters other than numbers
and date separators in a date field. You may however want to turn this option off should
you want to enter text in dates such as "around Dec 2012" or even "various".
© 1999 - 2013 CostsMaster Ltd.
Chapter 9 - Customising CostsMaster
161
Warn when text is typed instead of a date
This option is only enabled if the above option is selected. When it is itself selected and
you type an alphabetic character, you will receive a warning to this effect. This is useful if
you tend to look at the keyboard when you type as it is quite easy to type the
description to an attendance whilst the cursor is in the date column. The option below
specifies the way the warning will occur.
When you need to be warned about an invalid entry...
If you type text in a date column or if you have specified start and end dates for a part
and you then type a date outside that range, the program will warn you of this fact. Here
you can choose how you want to be warned, either by message, by making a sound or
both.
When changing the date of a procedural step...
When the date of a procedural step is changed CostsMaster can change the date of its
attendances to match. You can chose to
Never change dates (you can still do so manually if you wish)
Have CostsMaster ask whether you want to change the dates (including whether
to change dates of all attendances or only those that had the same date as the
procedural step)
Automatically change dates if they were the same as the procedural step and
ask about any others
Automatically change dates if they were the same as the procedural step and
ignore any others
Automatically change all dates.
Currency
Current VAT Rate
This is the default value that is used for bill VAT when starting a new bill. Changing this
has no effect on existing files - you must change the VAT figure within the Edit Bill
Window or the Edit Part Window.
Rounding Method
Please see the section on rounding for further details.
Auto-Insert Text
Mileage Rate
This box lets you specify the mileage rate (in pence per mile) that is used to create a
disbursement claiming mileage allowance simply by typing the miles travelled in the
description column of a disbursement and using the Shift + Enter shortcut. Only
numbers are allowed (with no pound signs etc.)
Please note that whereas in CostsMaster 2 this value was displayed as a fraction of a
pound, in this version it is displayed as pence only.
Mileage Description
When using the mileage shortcut described above CostsMaster will use the text entered
here to construct a phrase that will be inserted into the disbursement description
© 1999 - 2013 CostsMaster Ltd.
162
CostsMaster User Guide Version 4
column. If you use the special characters ^1 and ^2 in the phrase they will be replaced
by the miles travelled and the mileage rate respectively. The default description is
Paid travel expenses (^1 miles at ^2 pence per mile)
If the Mileage rate is 36 pence per mile and 26 miles are claimed the resulting
description will be
Paid travel expenses (26 miles at 36 pence per mile)
Document Tag Type
There is a similar feature activated by the same Shift + Enter shortcut in the description
column of the attendances and disbursements grid. This lets you insert a tag into the
description that can refer to a flag placed on a physical document. This setting
determines the type of that flag. The options are
Lower case Roman numeral (i, ii, iii)
Upper case Roman numeral (I, II, III)
Numerical (1, 2, 3)
Lower case alphabetic (a, b, c....aa, ab etc.)
Upper case alphabetic (A, B, C....AA, AB etc.)
Mixed case alphabetic (A, B, C....a, b, c....Aa, Ab etc.)
Document Tag Description
When the above shortcut is used CostsMaster will use the text entered here to construct
a phrase that will be inserted into the description column. If you use the special
character ^1 in the phrase it will be replaced by the actual tag.
The default description is
(^1)
Which results in the tag appearing in parenthesis:
(iv)
Please see the section on Auto-Insert Text for more information.
Next Tag
The value of the next tag to be used can be set here - useful if you added an item by
mistake, or you want the numberingto carry on from a previous bill.
Sounds
Other sound related settings can be found in the Safety and Dates sections
Play audible warnings as
CostsMaster can give audible warnings when you might need to look up from your work,
such as when autosaving a file or when you type alphabetic text into a date column. This
setting determines whether those sounds are played via your soundcard and speakers or
via the small speaker that is fitted to your PC case and can be made to beep.
Each has its drawbacks. When using your soundcard you must obviously have your
speakers turned on but despite this this is the recommended option as the beep
© 1999 - 2013 CostsMaster Ltd.
Chapter 9 - Customising CostsMaster
163
functionality is being phased out from Windows and recent versions do not support it.
Give audible acknowledgment recording telephone calls etc. by keyboard
When ticked this causes the program to alert you when a telephone call, letter out, email
out or letter in is recorded using the keyboard shortcuts. Each shortcut generates a
sound of a different pitch which makes it easier to confirm that the item has been
recorded and you haven't hit an incorrect key by mistake.
Spelling
Live spelling check in grids and text boxes
When ticked the grids will underline any mis-spelt words as they are typed without need
to do a full spelling check.
Full Spelling check options
When performing a full spelling check (from the tools menu) you can use these boxes to
specify which parts of the file CostsMaster does not check. Available options are:
Case Details
Fee Earners and Counsel
Categories
Parties
Notes
Pending Work
Costs Budget
By default, the first two options are set to "no"; the rest are all set to "yes".
Spelling Options
Opens the Spelling Options Window
Spelling Options
These options are accessed from the "Spelling" page of the Local Settings Window.
Spelling
Show spelling errors as you type
Enables live spelling in grids and principal text entry boxes such as the narrative window,
by underlining mis-spelled words with a red line.
Automatically correct spelling errors as you type
Enables the auto correction of mis-spelled words found in your Auto-Correct list (see
below)
Automatically correct dual capitals
Automatically corrects the second character of a word to lower case where the first two
characters are in upper case.
Flag repeated words when checking spelling
© 1999 - 2013 CostsMaster Ltd.
164
CostsMaster User Guide Version 4
Causes words repeated twice to be flagged even if they are correctly spelt.
When Checking Spelling Ignore...
These options allow you to specify types of mis-spelled words that you don't want
flagged including:
words in upper case
words containing numbers
markup languages (HTML, XML etc.)
Internet addresses
Abbreviations
Lines beginning with any character specified by you.
Language
Language Settings
Allows you to specify the language used for Spelling checks. By default only the British
dictionary is installed with CostsMaster.
Additional Dictionaries
This lists any additional dictionaries on your computer that can be utilised, such as
Word custom dictionaries (dictionaries containing words you have added within Word or
other Microsoft programs). If you have other dictionaries you want to use you can locate
them by clicking the "Locate Dictionaries" button and browsing your hard drive for their
whereabouts.
Custom Dictionary
The custom dictionary is where words you have added during a spelling check are
stored. The default custom dictionary is called cmuser.adu but you can create additional
dictionaries should you want to. This dictionary is stored within your Windows profile and
is specific to you even on multi-user systems. Even so, should you wish to create a
specific dictionary for certain files where, say, you encounter a large amount of specific
technical jargon, you can do so here.
Adds
These are the words you have added to your custom dictionary. You can add further
words here or delete any words added in error.
Auto-Corrections
These are the word replacement pairs that will be automatically corrected if the option to
do so is selected (see earlier on this page). This is the place to list words you commonly
mis-spell (such as accomodate instead of accommodate.) Here you can create new
entries or delete any you no longer want included.
Exclusions
These are words that you do not want flagged as misspelled.
© 1999 - 2013 CostsMaster Ltd.
Chapter 9 - Customising CostsMaster
165
Fonts
This page lets you specify the font used for the narrative window and the font and
colours for grids.
The changes made here will apply to all grids although each grid has the option to
override these settings and use its own font and colour.
Export Tools
CostsMaster gives you the option of running a selection of tools automatically before
every export. Simply select the tools you want to run here.
Available options are the Spelling Check and the various Searches.
Export Viewers
CostsMaster allows you to specify which applications are used to view different types of
documents once you have exported them.
CostsMaster exports word processor documents in Rich Text Format (RTF), an open
format designed for the exchange of word processing data between systems. The RTF
specification was developed by Microsoft and accordingly it is best supported by
Microsoft Word. Other word processors, such as Open Office Writer, can read RTF
documents with only minor issues but others have limitations which make the complex
documents produced by CostsMaster impossible to view.
CostsMaster exports spreadsheet documents in Excel Format (XLS), a format used by
Microsoft Excel. It can also be opened and edited with Open Office.
Either of these can also be exported in PDF format, which are read-only, and can be
opened with any PDF viewer.
For each type of document (Word Processor, PDF and Spreadsheet) you have the option
to use whatever default application you already have defined or to choose a specific
application for files exported from CostsMaster.
Hints
When hovering the mouse over columns and data CostsMaster often shows a hint
explaining the purpose of the item or showing the complete text where there is
insufficient space in a column etc. These options cover how those hints are displayed.
Here you can turn off the display of hints altogether as well as specifying the time (in
milliseconds) you have to hold the mouse over an area before a hint appears and the
time it remains on screen. You can even change the background colour of the hint.
Import & Output
When resolving negative time automatically remove entries that are reduced to
zero
It is not possible to record negative time in CostsMaster but when importing work from a
time recording system such entries are often encountered where they are often used to
correct or negate a previous entry. When such entries are found the user can utilise
functions in the Pending Work window which automatically deduct negative time from an
associated entry. When this is done and the items are reduced to zero, if this option is
© 1999 - 2013 CostsMaster Ltd.
166
CostsMaster User Guide Version 4
selected then the items will be deleted automatically, otherwise they must be deleted
manually.
Include Header In CSV Grid Exports
When selected the exported CSV file for a grid will contain the column names as the first
line.
Import File Mapping
You can choose a default File Mapping to use when importing data from an external file,
or manage the available mappings.
Phase, Task & Activity
When changing the phase of a party or procedural step...
When the phase of a party or procedural step is changed CostsMaster can change the
values of its attendances and disbursements to match. You can chose to
Never change values (you can still do so manually if you wish)
Have CostsMaster ask whether you want to change the values (including
whether to change Values of all attendances & disbursements or only those that
had the same value as the party or procedural step)
Automatically change values if they were the same as the party or procedural
step and ask about any others
Automatically change values if they were the same as the party or procedural
step and ignore any others
Automatically change all values.
Show Costs Budget percentages as
This option allows you to specify whether the background colour of a cell in the Costs
Budgets window shows a colour. Three options are available:
No Colour
Solid colours - the background colour changes abruptly when the percentage
value exceeds the threshold
Gradients - the background colour changes gradually over the range of
percentage values. This gives a visual indication of how far over budget a
particular phase is.
© 1999 - 2013 CostsMaster Ltd.
Chapter 9 - Customising CostsMaster
167
Other Settings
Presets
The presets window in CostsMaster has changed slightly from previous versions. Each
page now presents information in a consistent manner with a list of non-editable items
that can be added-to, moved and deleted with the buttons above it and editable controls
to its right that show the data for the currently selected item.
Presets can currently be defined for:
Attendances
These replace the former presets for Procedural Step Attendances and can be used in
any attendance grid.
Disbursements
These presets are available in the description to every disbursement grid and in the edit
disbursements window.
Categories
These presets are for categories when selected from the Category field of the Fee
Earners Window. You can specify all three descriptions plus whether the category is
legal aid or inter partes.
Fee Earners
These presets can be selected from the description field in the Fee Earners window by
using the Alt + Down Arrow shortcut.
Counsel
These presets can be selected from the description field in the Fee Earners window by
using the Alt + Down Arrow shortcut.
Rates
These preset rates can be applied in either the Rates Window or the Part Rates Window.
Parties
These presets are available for the description in the party grid and in the edit party
window.
Party Status
These presets are available to describe the status of parties to the action.
Case Types
These presets can be used on CLAIM1s and Case Plans where the type of case is
required. The presets are available from the Case Type box in the Case Details window.
© 1999 - 2013 CostsMaster Ltd.
168
CostsMaster User Guide Version 4
Notice of Commencement
These preset fees can be used when creating Notices of Commencement of Detailed
Assessment.
Attendance / Disbursement Locations
These presets are used when guessing the ultimate destination of imported work. You
can create name/value combinations that will help you to improve the accuracy of this
function when importing work.
Phases
These presets are used when applying phases to work using the Apply Phases tool,
when importing work or when no default is defined. You can add additional words and the
phase each will trigger to help improve the accuracy of the matching process.
CLAIM1A Fees
These presets are used to select the correct fee when the relevant factors are changed
on the CLAIM1/CLAIM1A Settings window.
FAS Fees
These presets are used to calculate the correct fee when the relevant information is
entered into the Edit FAS window.
Events Fees
These presets are used to select the correct fee when the relevant factors are entered
into the Case Plan Settings window.
Abbreviations & CLS Codes
Alt + Shift + A
The abbreviations window is where you define abbreviations and legal aid codes.
Buttons on the bottom of the window allow you to add, edit or delete an item. It is also
possible to print out a list of items for reference purposes.
Abbreviations
Abbreviations are where you specify short phrases that you want CostsMaster to
automatically extend to a lengthier piece of text. For further information on the use of
abbreviations please see the section on using abbreviations.
Legal Aid Codes
Legal aid codes are like abbreviations, except you are limited to the preset codes.
However you can specify the lengthier text that should appear when you type the code
into a description
Auto Codes
When typing a description in an attendance CostsMaster will attempt to guess the
© 1999 - 2013 CostsMaster Ltd.
Chapter 9 - Customising CostsMaster
169
appropriate legal aid code for the attendance. It does this based on lists of key words
with associated codes. If CostsMaster finds one of the key words in the description it will
automatically apply the associated code to the attendance. Once the code has been set
the program will not attempt to change it should you alter the description.
There are separate lists of codes for Procedural Steps attendances, Party Attendances
and a general list for other uses.
It is permissible for more than one word to be assigned to the same code. Indeed, as
with abbreviations, this is necessary in order to deal with variations of a word. If your
description contains more than one keyword CostsMaster will use the first keyword
found.
If you simply want to record the code with no description, instead of selecting the code
from the drop down box you can simply type the code in the description and
CostsMaster will automatically select if for you and remove the code from the
description. You can combine this feature with other text so that if you type "DST and
considering accounts", the program will set the code to DST and the description will read
"and considering accounts". It is envisaged that you would then set this description to
appear in the additional info section of the CLAIM1 form.
In addition there is an option in the Control Centre called "expand legal aid codes in
descriptions" which, if selected, will replace the removed code with its expanded text.
Auto Info
When setting a legal aid code CostsMaster can also attempt to determine whether the
additional info property for the attendance should also be set. It does this based on a list
of codes in the Auto Info section and the setting of the Control Centre option "Set
Additional Info...". If this is set to "Automatically by code", then if the code you have set
is one of those listed here the additional info property will be set. Once set the program
will not then attempt to alter this should you change the code.
Main Toolbar
The toolbar on the main CostsMaster window is made up of several separate toolbars
each corresponding to an entry on the main menu.
Repositioning toolbars
By clicking and dragging the toolbar at its extreme left hand edge it is possible to reorder
its position within the toolbar area. When dragging within the toolbar area you can stack
the toolbars on multiple lines by dragging the toolbar up or down as you move it.
Toolbar Settings
Alt + Shift + T
The toolbar settings window allows you to specify which toolbars appear on the main
toolbar and which buttons are visible on each. There are also some general options that
apply to all toolbars.
Button Size
You can specify whether buttons are shown with small, medium of large icons.
© 1999 - 2013 CostsMaster Ltd.
170
CostsMaster User Guide Version 4
Auto Arrange Buttons
When you have more buttons visible than can be shown on screen you can access the
additional buttons via the pop out on the right of the toolbar. When this option is selected
any buttons selected in this way will appear on the main toolbar in place of any that are
little used.
Show Captions for Toolbars
When this option is ticked a title appears above each toolbar explaining its purpose.
Show Captions for buttons
When ticked this option causes the buttons on the main toolbar to display text that
explains its purpose. This can be useful whilst you are getting familiar with the program
but it does cause fewer buttons to appear in a given space and you may need to
increase the size of the Main window or drag some of the toolbars to a lower level in
order to see everything.
Toolbar Style
This drop down box allows you to alter the colour of the toolbars and menus. It is
necessary to click the Apply Style button to make any changes take effect.
Toolbars
The sections other than "General" each relate to a toolbar. There is a toolbar
corresponding to each main menu heading and each entry on a menu also has a button.
Many of these are hidden by default but on each page you can specify whether the
toolbar is visible and choose which buttons are visible on each.
Profiles
By default CostsMaster settings are saved in a single file on your hard drive. However
CostsMaster also gives you the opportunity to create additional option sets that can hold
alternative settings that can be used in different situations. These are called profiles.
Profiles can be created, copied, deleted and applied in the Profiles Manager window.
A new profile is applied from the drop down box at the top of the window. The new profile
will be applied when you close the Profiles manager. Applying a new profile will cause all
your current settings, window positions, grid settings etc. to be replaced with the values
from the new profile. As a result you may see some windows "jump" to their new
positions whilst others will be closed beforehand. The safety settings will be changed
also and it is recommended that you check these to make sure that backups are being
saved at a suitable frequency.
Below this are a range of controls for managing your profiles.
Any profiles you have defined will appear in the list on the left. For each profile you can
specify the name (which must be unique but CostsMaster will take care of this for you if
you wish) and an optional description.
The buttons above the list of profiles allow you to do the following:
© 1999 - 2013 CostsMaster Ltd.
Chapter 9 - Customising CostsMaster
171
Add
This will create a new profile and add it to the end of the list. You will have the option to
create a profile using the default settings that are used when the program first runs or to
base it on the settings on the currently active profile. This will retain the current window
positions, grid options and other settings from which you can make further changes.
Copy
A new profile will be created using the settings of the currently selected profile in the list
of profiles (as opposed to the currently active profile). This again gives you a basis from
which to make further changes.
Insert
This will create a new profile and insert it before the currently selected item in the list of
profiles. As with adding, you are given the option to base the new profile on the default
settings or on the currently active profile.
Move Up
Moves the selected item up one place in the list of profiles
Move Down
Moves the currently selected item down one place in the list of profiles
Delete
Deletes the currently selected profile from the list of profiles. The settings file on disk will
not be deleted and can be imported should you need it again. However if you create a
new profile with the same name as one that has been deleted the disk file will be
overwritten with the options of the new profile.
Import
An advanced option that allows you to import option files. This allows one person to
create a profile that can be shared amongst several users. The other users can import
the file and it will then be saved amongst the other profiles on their PC.
When you create a profile that you want to share with others you will find it in the
CostsMaster Application Data Directory. The location of this folder can vary from PC to
PC but if you go to the Help menu and click "About" the value for your Computer will be
displayed. Navigate to that directory and look for a file with the same name as the profile
you created. Copy this to the other user's PC and get them to import it in their Profiles
Manager.
© 1999 - 2013 CostsMaster Ltd.
Chapter
10
Tools and Utilities
Chapter 10 - Tools and Utilities
173
Tools & Utilities
History
Ctrl + H
The History window gives you an overview of the recent changes made to your
CostsMaster file as well as giving you the opportunity to revert to a specific point in that
history, undoing any changes made in the interim.
The history window contains a grid which shows each change that has taken place as a
separate row. The grid columns contain information on the type of change, the date and
time the change took place, the location of the item that was changed and (if
appropriate) the field that was changed together with the old and new values.
Selecting a row in the grid enables the Undo button at the bottom of the window. Clicking
this button will undo all the changes up to this point. Once an undo operation has been
carried out you can reverse all or part of the change by selecting the point you want to go
back to and clicking the Redo button.
Please note that the History window will only contain items that have changed since you
last opened your file. Items from previous sessions are not retained and cannot be
undone, but any backup files on disk are listed here and you can use the History window
as a convenient way to revert to a backup file.
In large files the history function can cause the program to become slow as many
functions require a copy of the entire file to be saved in case it is needed to be undone. If
you wish to turn the history off you can do so using a option in the Local Settings
window.
Find & Replace
Ctrl + F
CostsMaster includes comprehensive tools to search for and optionally replace any text
you have entered into the program.
Search For
Type the text you want to find or replace in the top most box. Below this are two options:
Ignore Case - When this option is ticked the search routine will not distinguish between
text in upper and lower case.
Whole Words Only - When this option is selected the matching text is found only if it
forms a whole word on its own e.g. searching for "sum" would not match "Summer" with
this option selected but would if it was not selected.
Find First / Find Next - Clicking this button will find the first/next occurrence of the word
in the file. The window containing the specified word will be opened and the text
highlighted.
Replace By
© 1999 - 2013 CostsMaster Ltd.
174
CostsMaster User Guide Version 4
When this option is selected any text found will be replaced by the specified text.
Prompt on Replace - when this option is selected you are asked for confirmation that
you want the replacement operation to be carried out.
Replace First/Next - Clicking this button will find the first/next instance and display it. If
"Prompt on replace" is selected you will be asked to confirm the replacement otherwise
the replacement will happen but you will have to click the Find Next button to continue
the replacement operation.
Replace All - Clicking this button will replace all instances of the word without having to
click the Find Next button each time. If you have selected "Prompt on replace" then you
will still be asked to confirm each replacement.
More Options
By default CostsMaster will search in all locations for the specified text but by clicking
the "More Options" button you can gain access to a set of controls that allow you to
specify not only which areas of the program you want to search in but also which parts.
Finding text in hidden columns
If text is found in a column that is hidden the column is made visible but only until the
window is next closed. If you want to reset the columns without closing the window you
can do so using the button for this purpose on the grid toolbar.
Searches
CostsMaster has a number of searches you can perform in order to report on items that
you might want to address before exporting a bill.
As an improvement on the basic display in CostsMaster 2, version 3 shows the results in
a grid that can be edited to correct the blank time without having to locate the original
entry. The refresh button at the bottom of the window will re-run the search.
Search for Blank Time
The blank time search looks through all attendances and shows any where the time and
the lump sum are zero.
Search For Blank Disbursements
The blank disbursements search looks through all disbursements (including
disbursements embedded within attendances) and shows any where the amount is zero.
Search for Estimated Time
The estimated time search looks through all attendances and shows any that have been
marked as estimated.
Search for Excluded Attendances
© 1999 - 2013 CostsMaster Ltd.
Chapter 10 - Tools and Utilities
175
The excluded attendances search will show you all attendances within the file that have
been marked as excluded, whether directly or as a result of another item higher up being
excluded.
Search for Excluded Disbursements
The excluded disbursements search will show you all disbursements within the file that
have been marked as excluded, whether directly or as a result of another item higher up
being excluded.
Search for Attendances with Unassigned Phases
This will search for any attendances that do not have a phase assigned to them.
Search for Disbursements with Unassigned Phases
This will search for any disbursements that do not have a phase assigned to them.
Verify Counsel's Fees
This search looks at all Counsel's fees within procedural steps and shows any where the
procedural step is not set to be a hearing or conference with Counsel.
Spelling Check
This tool will perform a spell check of your entire file. Any words which are not found in
the dictionary will be flagged up in a window where you will have the opportunity to alter
them, ignore them or add them to the dictionary.
Not every piece of text in a CostsMaster file is checked as many fields record work that
is not likely to be in a spelling dictionary, such as a legal aid reference number. The
main description field of each item is always checked as are fields that contain
substantial text. Fields that contain names are not checked.
In addition it is possible to specify whether CostsMaster should check the spelling in
different sections of the file. These options are set in the Local Settings window, spelling
page.
Apply CLS Codes
When you type a description for an attendance the program will attempt to work out the
most suitable legal aid code for the attendance based on key words in the description as
defined in the Abbreviations and Legal Aid Codes window.
If you import a CostsMaster 2 file where codes have not been set, or if you alter the key
words and wish to change the existing codes based on the new settings you can use
this tool to do just that.
When you invoke this tool you will be asked if you want to overwrite all codes or only
codes that have not been set. After this the program will examine each attendance and
set the Code value automatically.
© 1999 - 2013 CostsMaster Ltd.
176
CostsMaster User Guide Version 4
Apply Tasks & Activities
This tool will allow you to apply Phases to an existing file where the phases have not
been set or where you want to replace those phases.
When you invoke this tool you will be asked if you want to overwrite all phases or only
phases that have not been set. After this the program will examine each attendance and
disbursement and set the Phase value automatically.
Split Routines Pro Rata By Task
This tool will split all routine work that does not have a phase assigned and assign
phases pro rata with the timed work assigned to each phase.
This tool will only ever give an approximate result but it may be useful for historical work
where ultimate accuracy is not required.
For the best results please ensure that all timed work is assigned to a phase before
running this tool.
Mark Estimated Time As Excluded
This tool will examine your entire file and mark any item as excluded that has the
estimated property set.
Mark Disbursements as Assessed as Drawn
This tool will alter all disbursements within a file to set the assessed amount and
assessed VAT columns to the value of the Amount and VAT columns respectively. You
can choose to alter all disbursements (overwriting any existing values) or alter only those
disbursements with no figure set for the Assessed Amount value. This allows you to go
through a file, enter the assessed amount for any disbursements that have been
reduced, exclude any that have been disallowed, then store the full amount claimed in
the assessed columns for the remainder.
Time Recording
Ctrl + Alt + Shift + T
This can also be accessed from the Tools menu.
This feature can be used for recording the time spent costing a file. This can be useful if
the costs draftsman wishes to keep an accurate record of time spent preparing the bill or
case plan for invoicing purposes. It can be activated as follows:
The time recording window shows the current time being recorded and the total time
recorded so far on the file. The current time will be reset if you:
(a) save the file
(b) stop recording time, or
(c) do not use a mouse or keyboard on a CostsMaster window for the idle timeout period
To record time you must first enable time recording on the window. Here you can also
specify the idle timeout (from 0 to 9999 minutes - 2 minutes is the default) and the
© 1999 - 2013 CostsMaster Ltd.
Chapter 10 - Tools and Utilities
177
minimum amount of time that is stored (from 1 to 999 minutes - 1 minute is the default).
There are three buttons at the bottom of the window:
(i) The Play button starts recording
(ii) The Stop button stops recording
In addition these two buttons indicate the current state of time recording and
(iii) The Pause button indicates that recording has been stopped by virtue of the idle
timeout being reached. Clicking the pause button has no effect.
Time recording can also be started using the Ctrl + Alt + Shift + R shortcut and stopped
using the Ctrl + Alt + Shift + O shortcut.
There is no need to leave the time recording window open - it merely provides information
on the state of the time recording, which will continue even when it is closed.
Please note:
There is a short delay between the actual passing of the idle timeout and the time
recording window showing that time recording is paused, and a similar delay when
recording starts again.
When importing a CostsMaster 2 file any time recorded there will be added to the total
time. Please check any such time carefully as the time recording system in
CostsMaster 2 could give unpredictable results on occasion.
Dongle Manager
Alt + Shift + D
This can be found under the Tools menu. This window provides information about the
dongle connected to your computer. For more information on the CostsMaster dongle
please go to the following section:
The CostsMaster dongle
For information on the features the Dongle Manager provides please go to:
Dongle Management
Backup Settings
This tool will create a folder on your desktop called "CostsMaster Settings" and place in
it a copy of all your settings files. You can then copy this elsewhere as a safety backup,
or if you are moving CostsMaster to a new PC, you can copy this folder to the new PC
and double click the install.bat file within the folder to automatically copy all your
settings to the new PC.
© 1999 - 2013 CostsMaster Ltd.
178
CostsMaster User Guide Version 4
Check for Updates
Check For Updates
This feature can be found under "Help" on the main toolbar.
This is a new addition to CostsMaster and, if selected, will automatically run a check to
see whether or not there have been any updates to CostsMaster since the version that
you are using was installed. If there have been you will be informed of the latest version
and given the opportunity to install it.
Configure Updates
Here you can specify whether the program automatically searches for updates and, if so,
how often.
Scratch Pad
Ctrl + H
This is a basic notes window that can be viewed on the File menu. Its purpose is as a
repository for notes and reminders to oneself.
The notes you make are saved with the file. If you have recorded any notes in the
scratchpad for a file, the scratchpad window will be displayed automatically when you
open the file.
Control Centre
Ctrl + L
The Control Centre window can be shown by clicking the "Control Centre" entry on the
File menu. It will automatically be shown if the option to "Always show control centre" in
the local settings window is ticked.
Running Totals
The window displays a grid showing Profit Costs, Disbursements, Counsel's fees and the
total with VAT for each and a grand total inclusive of VAT.
At the top of the window are a set of buttons which
Show the base, enhancement, lump sum, success fees, summarily assessed
costs, FAS costs and Costs Draftsman's fee separately for profit costs
Show ordinary disbursements, expert fees and Costs Draftsman's fee
separately
Show junior and leading Counsel fees separately including any success fees
Show or hide the VAT columns
Show inter partes and legal aid totals separately.
Show inter partes costs in total, excluding those marked "difficult to recover"
and also excluding those marked "possibly recoverable" (please see the
section on recoverability for more details).
There is also a drop down box labelled "Show totals for" which optionally shows the
totals for:
© 1999 - 2013 CostsMaster Ltd.
Chapter 10 - Tools and Utilities
179
the current bill
the current part
Where the CLAIM1/CLAIM1A setting has been set to CLAIM1A in the CLAIM1/CLAIM1A
Settings window the Profit costs figure will be replaced with separate figures for core
costs, advocacy costs and the fixed fee. When the option to show profit in detail is
selected, separate figures will be given for core costs, lump sum Core costs, advocacy
base costs, advocacy enhancement, lump sum advocacy and the fixed fee.
The running totals give you an approximate indication of the current costs. The actual
costs claimed may vary as a result of rounding depending on the type of bill exported.
The running totals calculate each attendance separately and add the totals together.
Your exported bill may group attendances together which might result in a difference of a
few pence. The difference is less pronounced with rates that use whole even numbers.
Claiming enhancement often exaggerates the difference. However the difference should
always be a small percentage of the overall costs claimed - usually pence and reaching
pounds only in very large bills.
At the bottom of the window is a drop down panel with other options that you may wish
to change frequently when costing.
Default Fee Earner
The default fee earner is the fee earner at the top of the grid in the fee earners window.
This combo box allows you to quickly change the default fee earner from a drop down
box.
The default fee earner will be the top most selected fee earner when entering routine
items for a party. When creating a new attendance it will initially be assigned to the
default fee earner, so using this setting can save you time in reassigning fee earners
later.
Default Phase
The Default Phase is used to specify the phase that is used for new attendances and
disbursements. You can select the phase from the drop down box but please note that
this control will have no impact if the attendance is within a part that has its own default
phase set or for a party that has a default phase set. In these circumstances the party
takes first precedence followed by the part.
This control mirrors that in the Edit Bills window.
Show Work From All Parts
When this button is selected, the following windows will show all work within the bill
rather than just for the current part:
Procedural Steps
Party Work
Party Attendances
Party Long Telephone Calls
Party Miscellaneous Attendances
Party Disbursements
Documents
Travelling & Waiting
Miscellaneous Disbursements
© 1999 - 2013 CostsMaster Ltd.
180
CostsMaster User Guide Version 4
Costs of Assessment Attendances
Costs of Assessment Disbursements
Part Attendances
Part Disbursements
In the case of the last two windows, using this option will display all attendances and
disbursements respectively within the bill.
When work for all parts is shown the grids will show an additional column indicating the
part that a particular item resides in. Please note, however, that it is not possible to add,
delete, cut, copy, paste or reorder items when work for all parts is shown.
Please note that when this option is selected the current part will be constantly updated
to the part of the currently selected item in the active grid. For example if you have this
option turned on in a bill with two parts, when you open the documents window it will
show entries from both parts. If part 1 is the current part, when you select a document
that is in part 2 the Main toolbar will show that the current part has now changed to part
2.
Show or Hide Features
If you are preparing a legal aid only, inter partes only, Court of Protection or Central
Funds bill, you may not want to see features that do not apply to the bill you are working
on. This control allows you to choose which features are shown. Unlike previous versions
of CostsMaster that only hid columns, this now applies to all features and will hide
buttons on the main toolbar, controls in windows and export templates to name but
three.
Show Form Columns
This button allows you to specify whether columns that relate to legal aid forms, such as
the Code column, should be visible. By de-selecting this you can remove unnecessary
columns when working on a file that you know will be a bill, but enable them quickly
when working on a file that may be a CLAIM1.
Expand Legal Aid Abbreviations
When this button is selected any legal aid code you type into the description of a cell
will be expanded to its full equivalent as defined in the Legal Aid Codes tab of the
Abbreviations & Legal Aid Codes window.
Do Not Set Codes For Blank Descriptions
When this button is selected legal aid codes will not be set automatically for blank
descriptions. When it is not selected the program will attempt to apply a code and this
will usually result in the default *OT code being selected.
Set Additional Info Options
This button contains 3 sub options that determine whether and how the program
automatically sets the additional info property:
© 1999 - 2013 CostsMaster Ltd.
Chapter 10 - Tools and Utilities
Automatically by Codes: The program will examine the legal aid code and if it is in
the list of Auto Info codes defined in the Abbreviations & Legal Aid Codes window, the
additional info property will be set.
Automatically if the description is not blank: Provided there is some text in the
description the additional info property will be set. This is useful if you know you are
creating a CLAIM1 and you want any text you type to appear in the additional info
section.
Manually: The program will not attempt to set the additional info property and you
must set this manually.
Calculator
Although CostsMaster performs all of the calculations in the bill for you, there may be
times when you need to perform a calculation manually. If you can't lay your hands on
your real calculator CostsMaster gives you a virtual calculator that is always available
from the tools menu.
Generate List of Parties
This tool will generate a list of the parties you have recorded together with their
associated shortcut keys. It is useful if you have a lot of parties and want to print out a
list to aid with remembering the shortcuts.
The list can be generated in RTF or PDF format. The list is saved in the same directory
as your file (or the default location if you haven't yet saved your file). If you save it as an
RTF file it will be opened in TextMaster and if you save it as a PDF file it will open in the
Default PDF reader on your system.
© 1999 - 2013 CostsMaster Ltd.
181
Chapter
11
Software Protection
Chapter 11 - Software Protection
Software Protection
The CostsMaster dongle
The dongle is a small hardware key that plugs into a spare USB port on your PC.
Without the key the program will only run in restricted trial mode. The key replaces the
old system of activation codes and access keys.
When you upgrade to Version 3 you will be given one hardware dongle for each full
licence that you are currently paying for (unless you opt for the network dongle). From
version 3 there is no longer a need for non-concurrent licences as you can simply take
your hardware dongle with you when working from home.
You will need one free USB port for the dongle. The dongle must be connected at all
times whilst using the software and removing it may cause the program to revert to
restricted trial mode.
Spare Dongles
In addition we can provide you with a spare dongle which will be programmed but not
activated for use with CostsMaster. In the event that a hardware dongle is lost, stolen,
fails or is left at a different location, this spare dongle can be activated for a limited time
via a code which we can send by email or give to you over the telephone. The number of
times a spare dongle will be activated is within our discretion and we reserve the right to
refuse to do so if we the frequency of such requests indicates that it is not being
activated for one of the reasons stated above.
Replacement Dongles
In the event that a dongle is lost or stolen we will provide you with a replacement dongle
though there will be a fee to cover the cost. In the event that the dongle fails we will
provide a replacement free of charge. Replacement for any other reason is within our
discretion and at such price as we deem reasonable.
Network Dongles
Instead of obtaining separate dongles for each user it is possible to order one network
dongle that will allow you to use the program for up to a set number of users on a
network. If you opt for this method you will receive one network dongle activated for the
number of users that you are currently paying for. Obviously, it is not possible with a
network dongle for users to work from home (unless they connect to the office system
remotely). In this case you will need to obtain individual dongles for users that wish to
work from home, with the balance being on the network dongle.
Terminal Services
Please note that if CostsMaster runs on a system running Terminal Services you MUST
use a network dongle. An individual dongle will not be accepted on such a system. In
order for a user to work from home on such a system they must log into the Terminal
Server remotely via VPN or similar. However, if CostsMaster is executed on the
workstation, even if a server on the network is running Terminal Services, then an
individual dongle can be accepted.
For help with installation and trouble shooting of network dongles, please see the
separate Dongle Server User Guide which is available from our web site.
© 1999 - 2013 CostsMaster Ltd.
183
184
CostsMaster User Guide Version 4
Dongle Management
Alt + Shift + D
The Dongle Management window can be accessed from the Tools menu within
CostsMaster.
This window provides information about the dongle connected to your computer. It also
provides diagnostic information in the event of a problem with the dongle and it allows
you to input an upgrade code if you upgrade your version of CostsMaster.
The information displayed is as follows:
Dongle No:
The number of the dongle. Each dongle has a unique number that identifies it. This
number must be provided to us should you wish to upgrade.
Next Update
The number of the next upgrade that will take place. Every time the dongle is updated
this number increases. It must be provided to us if you upgrade.
Product Code
Each dongle has a product code that links it to particular software. For CostsMaster this
will be CM3.
Product Level
The edition of CostsMaster that this dongle entitles you to use. Its possible values are:
Blank - a dongle that has not been set up for use with CostsMaster
Spare - your spare dongle which can be activated for use if your main dongle is
lost, stolen or mislaid
Standard - a dongle set up for use with the full draftsman edition
Dongle Type
The type of dongle you have - Individual or Network.
Network users
For network dongles only this specifies the number of simultaneous network users that
are permitted by this dongle.
Executions remaining
If you have an extended trial this shows the number of times you can use the program
after it is next closed
Expiry Date
If you have an extended trial this shows the date on which the program will cease to
work.
© 1999 - 2013 CostsMaster Ltd.
Chapter 11 - Software Protection
185
Diagnostics button
In the event of an error this provides diagnostic information to help us solve your problem.
Update code
In order to upgrade from one version to another, or to temporarily activate a spare dongle
we need to send you an update code which you type into the box on this window and
click the apply button. Sometimes the update code is very long in which case we will
send it to you as a file. To open a file click on the folder icon and browse to the location
you saved it. When the code appears click the Apply button.
Problems with The Dongle
Occasionally you may encounter a problem with the dongle. We discuss the most
commonly encountered issues here with details of how to resolve them.
Issues with Network Dongles
If you have a network dongle then you should ask your IT department to consult the
Dongle Server user's guide which is installed with the Dongle Server software or which
can be downloaded from our web site.
CostsMaster suddenly drops into trial mode
This can happen if the checking of the dongle fails for any reason. The dongle is checked
at random intervals and if Windows "loses" an individual dongle or a network blip means
a network dongle cannot be checked, then the program will drop into trial mode.
Although you are limited to 15 hours work in trial mode this is a limitation on entering
work. No work is lost when entering trial mode and although you cannot enter any more
work you can safely save your file and restart CostsMaster. There is a Save button on
the trial window that will do this, or you can click "Run Trial" to access the main toolbar
and save your work in the normal way.
CostsMaster starts up in Trial Mode
If the program was previously running fine, it may just be a temporary issue with your
PC. We have found that Windows occasionally "loses" a dongle and refuses to
acknowledge its existence. In this case the light on the dongle will probably either be
extinguished or flashing. Usually, all that is necessary is to try the dongle in a different
USB port, or to restart CostsMaster or Windows.
If you have just inserted the dongle into the PC and it doesn't work it may be that you
started CostsMaster before Windows had properly installed the drivers for the dongle. In
this case restarting CostsMaster should be all that is required.
If you are still having problems then please contact support for assistance.
© 1999 - 2013 CostsMaster Ltd.
Chapter
12
Getting Help
Chapter 12 - Getting Help
187
Getting Help
The User Guide & Other Documents
User Guide & Help File
The user guide and help file both have the same content but are in different formats.
The user guide is in Adobe PDF format and is set out in chapters like a book. Although it
has an index at the end it is really suited to reading about a topic as a whole.
The user guide is installed with the program and can be accessed from the
Documentation section of the Help menu.
The help file is in Microsoft HTML Help format and is broken down into smaller blocks of
text that are specific to a particular subject. This makes it more useful for finding specific
information whilst using the program.
The help file can be accessed in a number of ways:
From the Help menu on the main toolbar
By clicking on the Help button that appears at the bottom of most windows
By using the Ctrl + Shift + ? shortcut in any grid
The first method will take you to the contents page of the help file but the other methods
will take you directly to the most relevant page for the window you currently have open.
Shortcut Sheets
These are a list of the most common shortcuts available in CostsMaster. They are
designed to be printed off on thick A4 paper or card and folded in half to give two sheets
which can be stood up on your desk as an aide-memoire.
Release Notes
This is a (somewhat technical) list of the new features and bugs fixed in the latest
version.
Quick Start Guides
In addition to the main user guide we also provide some quick start guides which are
designed to give you a quick practical example of how to produce a particular document.
Guides are available for
Bills
Case Plans & CLAIM1s
CLAIM1As
Family Fixed Fee Bills
© 1999 - 2013 CostsMaster Ltd.
188
CostsMaster User Guide Version 4
Technical Support
Technical support is available to registered users by email or telephone. The support
lines are manned Monday to Friday between the hours of 10.00am and 4.00pm. The
current contact details will be provided to you when you purchase your licence.
Our lines are staffed by experienced costs draftsmen who are also CostsMaster users
themselves and who are adept at explaining how to put your knowledge of costs drafting
to the best use in CostsMaster. Of course we can also help with any technical issues
you might have from time to time.
If Things Go Wrong
Occasionally you may experience an error in CostsMaster. Although we test the
program thoroughly before release, we are only human and you might stumble upon a
hitherto undiscovered bug. If the program code encounters an error you will be presented
with an error box with several options:
Send Bug Report
This will send a bug report to us so we can investigate and fix the problem. The bug
report will include details of your hardware and any other programs running at the time of
the crash, but all information received is treated in the strictest confidence.
You will also have the option to include a screen grab - please do as a picture really
does speak a thousand words in these cases. You are also invited to enter a description
of the problem. Please use this space to tell us as near as possible what you were doing
immediately prior to the problem appearing. The more information you can give us the
more likely we are to trace and fix the problem.
Continue
This will close the error report without sending the bug report.
Close and lose data
This will close the program immediately. As is suggested by the name, any unsaved
data will be lost. This is therefore a button of last resort and should be used only if the
program is stuck in a cycle of error messages from which you cannot escape any other
way.
© 1999 - 2013 CostsMaster Ltd.
Chapter
13
CostsMaster Reference
190
CostsMaster User Guide Version 4
Export Phrase Formatting
This section describes the different means of formatting export phrases from within the
Export Phrases Window.
Dates
Dates have the following formatting options, given an example date of 6 August 2011:
Day
6
06
6th
None
Month
8
08
Aug
August
None
Year
11
2011
None
Separator
/
Space
:
.
Example Date
The example date defaults to the current date but can be altered from the box at the
bottom of the window.
Time
Times have the following formatting options, given an example time of 126 minutes:
Hours
2
02
2h
2 hours
Mins
© 1999 - 2013 CostsMaster Ltd.
Chapter 13 - CostsMaster Reference
6
06
6m
6 minutes
Mins (Decimal)
0.1
0.10
0.100
0.1000
Separator
:
Space
.
None (not Decimal)
· (middle dot)
Decimal Hours
There are two caveats to bear in mind when changing this setting.
First, the selection simply determines how the Mins option is interpreted. CostsMaster
does not remember how Mins was set before Decimal Hours was changed and will not
revert if it is changed back.
Second, the "None" setting for the Separator is equivalent to a regular decimal point if
Decimal Hours is set, since it make no sense to have no separator in this context.
Currency
Currencies have the following formatting options:
Symbol
£
None
Pounds
If not zero
Always
Pence
Don't Show Zero
Show Zero
Separator
.
Space
Double space
:
-
© 1999 - 2013 CostsMaster Ltd.
191
192
CostsMaster User Guide Version 4
· (middle dot)
Padding
Increasing the value beyond zero will place the symbol this many digits away from the
figure at a minimum. This is used to align pound signs in a neat row.
Thousand Separator
Inserts a comma before every third set of pound figures.
Show If Zero
If ticked will show a zero amount rather than showing nothing.
Decimal
A decimal figure is one that can have a fractional element but which is not a currency.
Decimal figures have the following formatting options:
Units
If not zero
Always
Fraction
Don't Show Zero
Show Zero
Separator
.
Space
Double Space
:
· (middle dot)
Thousand Separator
Inserts a comma before every third set of pound figures.
Show If Zero
If ticked will show a zero amount rather than showing nothing.
Sequential
A sequential number is a whole number with no fraction that follows a sequential format.
Sequential numbers have the following formatting options, given an example amount of
25:
Style
1, 2, 3, 4
i, ii, iii, iv
© 1999 - 2013 CostsMaster Ltd.
Chapter 13 - CostsMaster Reference
I, II, III, IV
a, b, c, d
A, B, C, D
A, B..Z, a, b..z
a, b..z, A, B..Z
one, two, three
One, Two, Three
Minimum Digits
Setting a value greater than zero will add zeros to the beginning of the number if
necessary to make it up to the number of digits specified
Show Zero
If ticked will show a zero amount rather than showing nothing.
© 1999 - 2013 CostsMaster Ltd.
193
194
CostsMaster User Guide Version 4
Keyboard Shortcuts
Shortcuts for Windows
The following shortcuts will open their respective window or bring it to the front if it is
already open.
Bill Windows
Ctrl
Ctrl
Ctrl
Ctrl
Ctrl
Ctrl
Ctrl
Ctrl
Ctrl
Ctrl
Ctrl
Ctrl
Ctrl
Ctrl
Ctrl
Ctrl
+
+
+
+
+
+
+
+
+
+
+
+
+
+
+
+
Alt
Alt
Alt
Alt
Alt
Alt
Alt
Alt
Alt
Alt
Alt
Alt
Alt
Alt
Alt
Alt
+
+
+
+
+
+
+
+
+
+
+
+
+
+
+
+
B
C
D
F
H
J
K
L
N
P
Q
R
S
T
V
Y
Bills
Categories
Case Details
Fee Earners
Periodic Enhancement
Bill Settings
CLAIM1 Settings
Case Plan Settings
Narrative
Parties
Counsel
Rates
Success Fees
Parts
Costs Budget Settings
Costs Budgets
Part Windows
Alt
Alt
Alt
Alt
Alt
Alt
Alt
Alt
Alt
+
+
+
+
+
+
+
+
+
C
D
J
K
L
P
R
S
W
Costs of Assessment
Documents
Miscellaneous Disbursements
Part Disbursements
Part Attendances
Party Work
Part Rates
Procedural Steps
Travelling & Waiting
General Window Shortcuts (in Windows that have these columns and/or buttons)
R Ctrl
R Ctrl
R Ctrl
R Ctrl
R Ctrl
R Ctrl
R Ctrl
R Ctrl
R Ctrl
+
+
+
+
+
+
+
+
+
R Shift+ A
R Shift+ C
R Shift+ D
R Shift+ F
R Shift+ G
R Shift+ H
R Shift + I
R Shift + L
R Shift + M
R Ctrl
R Ctrl
R Ctrl
R Ctrl
R Ctrl
+
+
+
+
+
R Shift+ R
R Shift+ S
R Shift+ V
R Shift + X
R Shift+ Z
Attendances
Case Details
Disbursements
Legal Aid Certificate
Long Telephone Calls in the Party Details Window
Enhancement
Inter Partes Limitation
Legal Aid Limitation
Miscellaneous Attendances in the Party Details
window
Party Details (routine items)
Summary Assessment Details
VAT
Expand Abbreviations
FAS Details
© 1999 - 2013 CostsMaster Ltd.
Chapter 13 - CostsMaster Reference
Other Window shortcuts:
Ctrl + F
Ctrl + H
Shift + Alt + A
Shift + Alt + D
Shift + Alt + E
Shift + Alt + T
Alt + Enter
Alt + Shift + Enter
195
Find & Replace
History Window (Undo & Redo)
Abbreviations Window
Dongle Manager
Export Phrases Window
Toolbar Settings Window
Closes the active window and applies any pending
changes
Closes the active window without applying any
pending changes.
Shortcuts for Grids
Due to the number of shortcuts required, some key combinations are used more than
once.
Shortcuts that apply to all grids:
Ctrl
Ctrl
Ctrl
Ctrl
Ctrl
Ctrl
Ctrl
Ctrl
Ctrl
Ctrl
Ctrl
Ctrl
Ctrl
Ctrl
Ctrl
Ctrl
Ctrl
+
+
+
+
+
+
+
+
+
+
+
+
+
+
+
+
+
Shift
Shift
Shift
Shift
Shift
Shift
Shift
Shift
Shift
Shift
Shift
Shift
Shift
Shift
Shift
Shift
Shift
+
+
+
+
+
+
+
+
+
+
+
+
+
+
+
+
+
A
B
D
E
G
H
I
K
M
N
O
Q
W
X
<
Ctrl + Shift + >
Ctrl + Shift + ?
Ctrl + C
Ctrl + V
Ctrl + X
Ctrl + Enter
Alt +
Alt +
Alt + Shift +
© 1999 - 2013 CostsMaster Ltd.
or
Add and edit an item.
Show the grid rows in alternate colours
Delete the selected items
Edit the selected items
Grid Settings
Extended Characters
Insert an item
Show and select columns
Toggle multi-select mode
Add a new item
Show the notes window
Select All
Mark the item as requiring attention (Warning).
Exclude the currently selected items from the bill
Move the selected items up
Move the selected items down
Contract the rows of the grid so that they show one
line of text
Expand the rows of the grid so they show all text for
each item
Help for the grid
Copy text
Copy items (in multi select mode)
Paste text
Paste items (in multi select mode)
Cut text
Cut items (in multi select mode)
Adds a hard carriage return.
In the properties column, displays the properties pop
up menu
In columns with a drop-down box causes the list of
options to drop down
In columns with preset suggestions, causes a list of
suggestions to drop down
Causes any drop-down list to close up.
In columns with a drop-down box or with preset
196
CostsMaster User Guide Version 4
Alt + Home / End
Alt + Shift + Home / End
suggestions, cycles through the available
possibilities (overwriting the current contents of the
cell)
In a column with a drop-down list showing, selects
the first or last item.
In a column with a drop-down box or with preset
suggestions, selects the first or last item
(overwriting the current contents of the cell).
Shortcuts that apply to some but not all grids:
Right Shift + Right Control + A
Right Shift + Right Control + C
Right Shift + Right Control + D
Right Shift + Right Control + E
Right Shift + Right Control + H
Right Shift + Right Control + F
Right Shift + Right Control + I
Right Shift + Right Control + T
Right Shift + Right Control + L
Right Shift + Right Control + M
Right Shift + Right Control + O
Right Shift + Right Control + P
Right Shift + Right Control + R
Right Shift + Right Control + S
Attendance window for grids that offer an
attendances column
Case Details window for the bills grid
Disbursements window for grids that offer a
disbursements column
Long Emails for the Party Work and Party Details
grid
Enhancement window for grids that offer an
enhancement column
Legal Aid Certificate window for the Parties to the
Action grid
FAS in the Procedural Steps grid
Long Letters In for the Party Work and Party Details
grid
Long Telephone Calls window for the Party Work
and Party Details grid
Long Letters Out for the Party Work and Party
Details grid
Part Limitation in the Parts Window
Limit to Percentage of Damages in the Success
Fees Window
Misc attendances window for the Party Work and
Party Details grid
Long Routine Letters Out for the Party Work and
Party Details grid
Preparation for the Party Work and Party Details
grid
Party Details window (routine items) for the Party
Work grid
Summary Assessment Details window for the
Procedural Steps grid
Shortcuts that apply to Attendances grids:
Ctrl + Shift + F
Ctrl + Shift + P
Ctrl + Shift + S
Ctrl + Shift + X
Ctrl
Ctrl
Ctrl
Ctrl
+
+
+
+
Shift
Shift
Shift
Shift
+
+
+
+
9
5
1
0
Mark the item as appearing in the additional
information section on a CLAIM1
Mark the selected items as having time recorded on
a print out.
Mark the selected items as estimated
Expand abbreviations immediately (applies to Edit
Attendances window only)
Recoverability Green
Recoverability Yellow
Recoverability Red
Solicitor/Client
© 1999 - 2013 CostsMaster Ltd.
Chapter 13 - CostsMaster Reference
Shortcuts that apply to Disbursement grids:
Ctrl + Shift + L
Ctrl
Ctrl
Ctrl
Ctrl
Ctrl
Ctrl
Ctrl
Ctrl
Ctrl
+
+
+
+
+
+
+
+
+
Shift
Shift
Shift
Shift
Shift
Shift
Shift
Shift
Shift
+
+
+
+
+
+
+
+
+
P
R
S
T
V
9
5
1
0
Mark the selected items as being recoverable from
the LAA (6 column bills only)
Mark the selected items as having been paid
Mark the selected items as having a paper receipt
Mark the selected items as estimated
Mark the selected items as being Expert fees
Mark the selected items as having a paper invoice
Recoverability Green
Recoverability Yellow
Recoverability Red
Solicitor/Client
Speed Shortcuts in the Party Details Window
A
D
E
F
G
I
J
L
M
N
O
P
R
T
0-9
Ctrl + < or >
Attendances
Disbursements
Emails Out
Long Emails Out
Long Telephone Calls
Letters In
Long Letters In
Letters Out
Miscellaneous Attendances
Long Letters Out
Long Routine Letters Out
Preparation
Routine Letters Out
Telephone Calls
Change Current Fee Earner
Change Routine Phase
Shortcuts that apply to the Bills & Parts grids:
Ctrl + Shift + V
Mark the selected items as claiming VAT
Shortcuts that apply to the Categories grid:
Ctrl + Shift + L
Mark the selected items as being for Legal Aid
costs (6 column bills only)
Shortcuts that apply to the Counsel grid:
Ctrl + Shift + C
Ctrl + Shift + F
Ctrl + Shift + L
Mark the selected Counsel as being Leading
Counsel.
Mark the selected Counsel as being instructed
under the FGF Scheme
Mark the selected Counsel as being Legal Aid.
Shortcuts that apply to the Parties To The Action grid:
Ctrl + Shift + C
Mark the selected parties as being clients.
Shortcuts that apply to the Notes grid:
Ctrl + Shift + P
© 1999 - 2013 CostsMaster Ltd.
Mark the selected items as being private
197
198
CostsMaster User Guide Version 4
Auto-complete shortcut:
Shift + Enter
In a date column uses the date of the previous item
In the description column of a disbursement grid
that contains a whole number, interprets the
number as being mileage
In the description column of other grids adds a
document tag reference
In the VAT column of a disbursement grid
calculates the VAT based on the value in the
amount column.
In the amount column of a disbursement grid
interprets the value in the amount column as being
inclusive of VAT and separates it into the principal
and VAT elements.
Other Shortcuts
File Shortcuts
Ctrl
Ctrl
Ctrl
Ctrl
Ctrl
Ctrl
Ctrl
Ctrl
Ctrl
Ctrl
Ctrl
Ctrl
Ctrl
Ctrl
+
+
+
+
+
+
+
+
+
+
+
+
+
+
A
D
E
F
H
I
L
N
O
P
Q
S
T
W
Save File As
Scratch Pad
Create Bill
Find & Replace
History Window (Undo & Redo)
Instructing Solicitor
Control Centre
New File
Open File
Preview Bill
Exit CostsMaster
Save File
New From Template
Save As Template
Miscellaneous Shortcuts
Ctrl +
Change Parts
© 1999 - 2013 CostsMaster Ltd.
Chapter 13 - CostsMaster Reference
XML & CSV Import and Output Work
Specifications
The latest XML Schema and CSV Specifications can be downloaded from our web site
at
http://www.costsmaster.co.uk/importschema.htm
At the time of writing there are several versions of the XML Schema and CSV
Specification. Version 2.0 is the latest and adds an optional field for the inclusion of
phase information.
Version 1.0 files can be imported by CostsMaster v3.4 and later.
Version 1.1 files can be imported by CostsMaster v3.6 and later.
Version 2.0 files can be imported by CostsMaster v4.0 and later.
CostsMaster v4.1 will output work in v2.0 XML format.
XML Schema v1.0
<xsd:schema xmlns:xsd="http://www.w3.org/2001/XMLSchema"
targetNamespace="http://www.costsmaster.co.uk/ImportSchema"
xmlns:cm="http://www.costsmaster.co.uk/ImportSchema">
<xsd:annotation>
<xsd:documentation>
CMS Input for Costmaster CM3
CostsMaster Ltd. All rights reserved.
Version 1.0
</xsd:documentation>
</xsd:annotation>
<xsd:element name="WorkBlock" type="cm:WorkBlockData"/>
<xsd:complexType name="WorkBlockData">
<xsd:sequence>
<xsd:element name="WorkItem"
type="cm:WorkItemData"
minOccurs="0"
maxOccurs="unbounded"/>
</xsd:sequence>
</xsd:complexType>
<xsd:complexType name="WorkItemData">
<xsd:choice>
<xsd:element name="Attendance" type="cm:AttendanceData" />
<xsd:element name="Disbursement" type="cm:DisbursementData" />
</xsd:choice>
</xsd:complexType>
<xsd:complexType name="AttendanceData">
<xsd:sequence>
<xsd:element name="Date" type="xsd:string" minOccurs="1"/>
<xsd:element name="Activity" type="xsd:string" minOccurs="1"/>
<xsd:element name="Description" type="xsd:string" minOccurs="1"/>
<xsd:element name="Time" type="xsd:string" minOccurs="1"/>
© 1999 - 2013 CostsMaster Ltd.
199
200
CostsMaster User Guide Version 4
<xsd:element name="FeeEarner" type="xsd:string" minOccurs="1"/>
<xsd:element name="HourlyRate" type="xsd:string" minOccurs="0"/>
<xsd:element name="RateType" type="xsd:string" minOccurs="0"/>
<xsd:element name="Category" type="xsd:string" minOccurs="0"/>
<xsd:element name="Note" type="xsd:string" minOccurs="0"
maxOccurs="unbounded"/>
<xsd:element name="EmbeddedWorkItem" type="cm:WorkItemData"
minOccurs="0" maxOccurs="unbounded"/>
</xsd:sequence>
</xsd:complexType>
<xsd:complexType name="DisbursementData">
<xsd:sequence>
<xsd:element name="InvoiceDate" type="xsd:string" minOccurs="1"/>
<xsd:element name="Activity" type="xsd:string" minOccurs="1"/>
<xsd:element name="Description" type="xsd:string" minOccurs="1"/>
<xsd:element name="Amount" type="xsd:string" minOccurs="1"/>
<xsd:element name="VAT" type="xsd:string" minOccurs="1"/>
<xsd:element name="Note" type="xsd:string" minOccurs="0"
maxOccurs="unbounded"/>
</xsd:sequence>
</xsd:complexType>
</xsd:schema>
XML Schema v1.1
<xsd:schema xmlns:xsd="http://www.w3.org/2001/XMLSchema"
targetNamespace="http://www.costsmaster.co.uk/ImportSchema"
xmlns:cm="http://www.costsmaster.co.uk/ImportSchema">
<xsd:annotation>
<xsd:documentation>
CMS Input for Costmaster CM3
CostsMaster Ltd. All rights reserved.
Version 1.1
</xsd:documentation>
</xsd:annotation>
<xsd:element name="WorkBlock" type="cm:WorkBlockData"/>
<xsd:complexType name="WorkBlockData">
<xsd:sequence>
<xsd:element name="WorkItem"
type="cm:WorkItemData"
minOccurs="0"
maxOccurs="unbounded"/>
</xsd:sequence>
</xsd:complexType>
<xsd:complexType name="WorkItemData">
<xsd:choice>
<xsd:element name="Attendance" type="cm:AttendanceData" />
<xsd:element name="Disbursement" type="cm:DisbursementData" />
</xsd:choice>
</xsd:complexType>
© 1999 - 2013 CostsMaster Ltd.
Chapter 13 - CostsMaster Reference
<xsd:simpleType name="AttendanceLocation">
<xsd:restriction base="xsd:string">
<xsd:enumeration value=""/>
<xsd:enumeration value="PROC_STEP"/>
<xsd:enumeration value="PW_ATT"/>
<xsd:enumeration value="PW_LTC"/>
<xsd:enumeration value="PW_MISC"/>
<xsd:enumeration value="PW_TC"/>
<xsd:enumeration value="PW_LO"/>
<xsd:enumeration value="PW_EO"/>
<xsd:enumeration value="PW_RLO"/>
<xsd:enumeration value="PW_LI"/>
<xsd:enumeration value="DOC"/>
<xsd:enumeration value="TWA"/>
<xsd:enumeration value="COSTS"/>
</xsd:restriction>
</xsd:simpleType>
<xsd:simpleType name="DisbursementLocation">
<xsd:restriction base="xsd:string">
<xsd:enumeration value=""/>
<xsd:enumeration value="PROC_STEP"/>
<xsd:enumeration value="PW_DISB"/>
<xsd:enumeration value="MISC"/>
<xsd:enumeration value="COSTS"/>
</xsd:restriction>
</xsd:simpleType>
<xsd:complexType name="AttendanceData">
<xsd:sequence>
<xsd:element name="Date" type="xsd:string" minOccurs="1"/>
<xsd:element name="Activity" type="xsd:string" minOccurs="1"/>
<xsd:element name="Description" type="xsd:string" minOccurs="1"/>
<xsd:element name="Time" type="xsd:string" minOccurs="1"/>
<xsd:element name="FeeEarner" type="xsd:string" minOccurs="1"/>
<xsd:element name="HourlyRate" type="xsd:string" minOccurs="0"/>
<xsd:element name="RateType" type="xsd:string" minOccurs="0"/>
<xsd:element name="Category" type="xsd:string" minOccurs="0"/>
<xsd:element name="Location" type="cm:AttendanceLocation" minOccurs="0"/>
<xsd:element name="Party" type="xsd:string" minOccurs="0"/>
<xsd:element name="Note" type="xsd:string" minOccurs="0"
maxOccurs="unbounded"/>
<xsd:element name="EmbeddedWorkItem" type="cm:WorkItemData"
minOccurs="0" maxOccurs="unbounded"/>
</xsd:sequence>
</xsd:complexType>
<xsd:complexType name="DisbursementData">
<xsd:sequence>
<xsd:element name="InvoiceDate" type="xsd:string" minOccurs="1"/>
<xsd:element name="Activity" type="xsd:string" minOccurs="1"/>
<xsd:element name="Description" type="xsd:string" minOccurs="1"/>
<xsd:element name="Amount" type="xsd:string" minOccurs="1"/>
<xsd:element name="VAT" type="xsd:string" minOccurs="1"/>
© 1999 - 2013 CostsMaster Ltd.
201
202
CostsMaster User Guide Version 4
<xsd:element name="Location" type="cm:DisbursementLocation" minOccurs="0"/>
<xsd:element name="Party" type="xsd:string" minOccurs="0"/>
<xsd:element name="Note" type="xsd:string" minOccurs="0"
maxOccurs="unbounded"/>
</xsd:sequence>
</xsd:complexType>
</xsd:schema>
XML Schema v2.0
<xsd:schema xmlns:xsd="http://www.w3.org/2001/XMLSchema"
targetNamespace="http://www.costsmaster.co.uk/ImportSchema"
xmlns:cm="http://www.costsmaster.co.uk/ImportSchema">
<xsd:annotation>
<xsd:documentation>
CMS Input for Costmaster CM4
CostsMaster Ltd. All rights reserved.
Version 2.0
</xsd:documentation>
</xsd:annotation>
<xsd:element name="WorkBlock" type="cm:WorkBlockData"/>
<xsd:complexType name="WorkBlockData">
<xsd:sequence>
<xsd:element name="WorkItem"
type="cm:WorkItemData"
minOccurs="0"
maxOccurs="unbounded"/>
</xsd:sequence>
</xsd:complexType>
<xsd:complexType name="WorkItemData">
<xsd:choice>
<xsd:element name="Attendance" type="cm:AttendanceData" />
<xsd:element name="Disbursement" type="cm:DisbursementData" />
</xsd:choice>
</xsd:complexType>
<xsd:simpleType name="AttendanceLocation">
<xsd:restriction base="xsd:string">
<xsd:enumeration value=""/>
<xsd:enumeration value="PROC_STEP"/>
<xsd:enumeration value="PW_ATT"/>
<xsd:enumeration value="PW_LTC"/>
<xsd:enumeration value="PW_LLO"/>
<xsd:enumeration value="PW_LEO"/>
<xsd:enumeration value="PW_LRL"/>
<xsd:enumeration value="PW_LLI"/>
<xsd:enumeration value="PW_PREP"/>
<xsd:enumeration value="PW_MISC"/>
<xsd:enumeration value="PW_TC"/>
<xsd:enumeration value="PW_LO"/>
<xsd:enumeration value="PW_EO"/>
© 1999 - 2013 CostsMaster Ltd.
Chapter 13 - CostsMaster Reference
<xsd:enumeration value="PW_RLO"/>
<xsd:enumeration value="PW_LI"/>
<xsd:enumeration value="DOC"/>
<xsd:enumeration value="TWA"/>
<xsd:enumeration value="COSTS"/>
</xsd:restriction>
</xsd:simpleType>
<xsd:simpleType name="PhaseCode">
<xsd:restriction base="xsd:string">
<xsd:enumeration value="UNASS"/>
<xsd:enumeration value="PREACT"/>
<xsd:enumeration value="ISSPLEA"/>
<xsd:enumeration value="CMC"/>
<xsd:enumeration value="DISCL"/>
<xsd:enumeration value="WITNESS"/>
<xsd:enumeration value="EXPERT"/>
<xsd:enumeration value="PTR"/>
<xsd:enumeration value="TRIPREPC"/>
<xsd:enumeration value="TRIAL"/>
<xsd:enumeration value="ADRSET"/>
<xsd:enumeration value="COND"/>
</xsd:restriction>
</xsd:simpleType>
<xsd:complexType name="PhaseType">
<xsd:simpleContent>
<xsd:extension base="cm:PhaseCode">
<xsd:attribute name="ConditionalPhaseName" type="xsd:string" />
</xsd:extension>
</xsd:simpleContent>
</xsd:complexType>
<xsd:simpleType name="RateClassCode">
<xsd:restriction base="xsd:string">
<xsd:enumeration value="PREP"/>
<xsd:enumeration value="ADV"/>
<xsd:enumeration value="CSL"/>
<xsd:enumeration value="TW"/>
<xsd:enumeration value="TC"/>
<xsd:enumeration value="LO"/>
<xsd:enumeration value="LI"/>
<xsd:enumeration value="RLO"/>
<xsd:enumeration value="USER 1"/>
<xsd:enumeration value="USER 2"/>
<xsd:enumeration value="USER 3"/>
<xsd:enumeration value="USER 4"/>
<xsd:enumeration value="EO"/>
</xsd:restriction>
</xsd:simpleType>
<xsd:simpleType name="DisbursementLocation">
<xsd:restriction base="xsd:string">
<xsd:enumeration value=""/>
© 1999 - 2013 CostsMaster Ltd.
203
204
CostsMaster User Guide Version 4
<xsd:enumeration value="PROC_STEP"/>
<xsd:enumeration value="PW_DISB"/>
<xsd:enumeration value="MISC"/>
<xsd:enumeration value="COSTS"/>
</xsd:restriction>
</xsd:simpleType>
<xsd:complexType name="AttendanceData">
<xsd:sequence>
<xsd:element name="Date" type="xsd:string" minOccurs="1"/>
<xsd:element name="Activity" type="xsd:string" minOccurs="1"/>
<xsd:element name="Description" type="xsd:string" minOccurs="1"/>
<xsd:element name="Time" type="xsd:string" minOccurs="1"/>
<xsd:element name="FeeEarner" type="xsd:string" minOccurs="1"/>
<xsd:element name="HourlyRate" type="xsd:string" minOccurs="0"/>
<xsd:element name="RateType" type="cm:RateClassCode" minOccurs="0"/>
<xsd:element name="Category" type="xsd:string" minOccurs="0"/>
<xsd:element name="Location" type="cm:AttendanceLocation" minOccurs="0"/>
<xsd:element name="Party" type="xsd:string" minOccurs="0"/>
<xsd:element name="Phase" type="cm:PhaseType"/>
<xsd:element name="Note" type="xsd:string" minOccurs="0"
maxOccurs="unbounded"/>
<xsd:element name="EmbeddedWorkItem" type="cm:WorkItemData"
minOccurs="0" maxOccurs="unbounded"/>
</xsd:sequence>
</xsd:complexType>
<xsd:complexType name="DisbursementData">
<xsd:sequence>
<xsd:element name="InvoiceDate" type="xsd:string" minOccurs="1"/>
<xsd:element name="Activity" type="xsd:string" minOccurs="1"/>
<xsd:element name="Description" type="xsd:string" minOccurs="1"/>
<xsd:element name="Amount" type="xsd:string" minOccurs="1"/>
<xsd:element name="VAT" type="xsd:string" minOccurs="1"/>
<xsd:element name="Location" type="cm:DisbursementLocation" minOccurs="0"/>
<xsd:element name="Party" type="xsd:string" minOccurs="0"/>
<xsd:element name="Phase" type="cm:PhaseType"/>
<xsd:element name="Note" type="xsd:string" minOccurs="0"
maxOccurs="unbounded"/>
</xsd:sequence>
</xsd:complexType>
</xsd:schema>
XML Schema v2.1
<xsd:schema xmlns:xsd="http://www.w3.org/2001/XMLSchema"
targetNamespace="http://www.costsmaster.co.uk/ImportSchema"
xmlns:cm="http://www.costsmaster.co.uk/ImportSchema">
<xsd:annotation>
<xsd:documentation>
CMS Input for Costmaster CM4
CostsMaster Ltd. All rights reserved.
Version 2.1
© 1999 - 2013 CostsMaster Ltd.
Chapter 13 - CostsMaster Reference
</xsd:documentation>
</xsd:annotation>
<xsd:element name="WorkBlock" type="cm:WorkBlockData"/>
<xsd:complexType name="WorkBlockData">
<xsd:sequence>
<xsd:element name="WorkItem"
type="cm:WorkItemData"
minOccurs="0"
maxOccurs="unbounded"/>
</xsd:sequence>
</xsd:complexType>
<xsd:complexType name="WorkItemData">
<xsd:choice>
<xsd:element name="Attendance" type="cm:AttendanceData" />
<xsd:element name="Disbursement" type="cm:DisbursementData" />
</xsd:choice>
</xsd:complexType>
<xsd:simpleType name="AttendanceLocation">
<xsd:restriction base="xsd:string">
<xsd:enumeration value=""/>
<xsd:enumeration value="PROC_STEP"/>
<xsd:enumeration value="PW_ATT"/>
<xsd:enumeration value="PW_LTC"/>
<xsd:enumeration value="PW_LLO"/>
<xsd:enumeration value="PW_LEO"/>
<xsd:enumeration value="PW_LRL"/>
<xsd:enumeration value="PW_LLI"/>
<xsd:enumeration value="PW_PREP"/>
<xsd:enumeration value="PW_MISC"/>
<xsd:enumeration value="PW_TC"/>
<xsd:enumeration value="PW_LO"/>
<xsd:enumeration value="PW_EO"/>
<xsd:enumeration value="PW_RLO"/>
<xsd:enumeration value="PW_LI"/>
<xsd:enumeration value="DOC"/>
<xsd:enumeration value="TWA"/>
<xsd:enumeration value="COSTS"/>
</xsd:restriction>
</xsd:simpleType>
<xsd:simpleType name="JPhase">
<xsd:restriction base="xsd:string">
<xsd:enumeration value=""/>
<xsd:enumeration value="JA00"/>
<xsd:enumeration value="JB00"/>
<xsd:enumeration value="JC00"/>
<xsd:enumeration value="JD00"/>
<xsd:enumeration value="JE00"/>
<xsd:enumeration value="JF00"/>
<xsd:enumeration value="JG00"/>
<xsd:enumeration value="JH00"/>
<xsd:enumeration value="JI00"/>
<xsd:enumeration value="JJ00"/>
© 1999 - 2013 CostsMaster Ltd.
205
206
CostsMaster User Guide Version 4
<xsd:enumeration value="JK00"/>
<xsd:enumeration value="COND"/>
</xsd:restriction>
</xsd:simpleType>
<xsd:complexType name="PhaseType">
<xsd:simpleContent>
<xsd:extension base="cm:JPhase">
<xsd:attribute name="ConditionalPhaseName" type="xsd:string" />
</xsd:extension>
</xsd:simpleContent>
</xsd:complexType>
<xsd:simpleType name="TaskType">
<xsd:restriction base="xsd:string">
<xsd:enumeration value=""/>
<xsd:enumeration value="JA10"/>
<xsd:enumeration value="JA20"/>
<xsd:enumeration value="JA30"/>
<xsd:enumeration value="JA40"/>
<xsd:enumeration value="JB10"/>
<xsd:enumeration value="JB20"/>
<xsd:enumeration value="JB30"/>
<xsd:enumeration value="JB40"/>
<xsd:enumeration value="JC10"/>
<xsd:enumeration value="JC20"/>
<xsd:enumeration value="JD10"/>
<xsd:enumeration value="JD20"/>
<xsd:enumeration value="JD30"/>
<xsd:enumeration value="JD40"/>
<xsd:enumeration value="JE10"/>
<xsd:enumeration value="JE20"/>
<xsd:enumeration value="JF10"/>
<xsd:enumeration value="JF20"/>
<xsd:enumeration value="JG10"/>
<xsd:enumeration value="JG20"/>
<xsd:enumeration value="JG30"/>
<xsd:enumeration value="JH01"/>
<xsd:enumeration value="JH02"/>
<xsd:enumeration value="JH03"/>
<xsd:enumeration value="JH04"/>
<xsd:enumeration value="JH05"/>
<xsd:enumeration value="JH06"/>
<xsd:enumeration value="JH07"/>
<xsd:enumeration value="JH08"/>
<xsd:enumeration value="JH09"/>
<xsd:enumeration value="JI01"/>
<xsd:enumeration value="JI02"/>
<xsd:enumeration value="JJ10"/>
<xsd:enumeration value="JJ20"/>
<xsd:enumeration value="JJ30"/>
<xsd:enumeration value="JK10"/>
<xsd:enumeration value="JK20"/>
<xsd:enumeration value="JK30"/>
<xsd:enumeration value="JK40"/>
<xsd:enumeration value="L110"/>
<xsd:enumeration value="L120"/>
© 1999 - 2013 CostsMaster Ltd.
Chapter 13 - CostsMaster Reference
<xsd:enumeration value="L130"/>
<xsd:enumeration value="L140"/>
<xsd:enumeration value="L150"/>
<xsd:enumeration value="L160"/>
<xsd:enumeration value="L190"/>
<xsd:enumeration value="L210"/>
<xsd:enumeration value="L220"/>
<xsd:enumeration value="L230"/>
<xsd:enumeration value="L240"/>
<xsd:enumeration value="L250"/>
<xsd:enumeration value="L260"/>
<xsd:enumeration value="L310"/>
<xsd:enumeration value="L320"/>
<xsd:enumeration value="L330"/>
<xsd:enumeration value="L340"/>
<xsd:enumeration value="L350"/>
<xsd:enumeration value="L390"/>
<xsd:enumeration value="L410"/>
<xsd:enumeration value="L420"/>
<xsd:enumeration value="L430"/>
<xsd:enumeration value="L440"/>
<xsd:enumeration value="L450"/>
<xsd:enumeration value="L460"/>
<xsd:enumeration value="L470"/>
<xsd:enumeration value="L510"/>
<xsd:enumeration value="L520"/>
<xsd:enumeration value="L530"/>
</xsd:restriction>
</xsd:simpleType>
<xsd:simpleType name="ActivityType">
<xsd:restriction base="xsd:string">
<xsd:enumeration value=""/>
<xsd:enumeration value="A101"/>
<xsd:enumeration value="A102"/>
<xsd:enumeration value="A103"/>
<xsd:enumeration value="A104"/>
<xsd:enumeration value="A105"/>
<xsd:enumeration value="A106"/>
<xsd:enumeration value="A107"/>
<xsd:enumeration value="A108"/>
<xsd:enumeration value="A109"/>
<xsd:enumeration value="A110"/>
<xsd:enumeration value="A111"/>
<xsd:enumeration value="A112"/>
<xsd:enumeration value="A113"/>
<xsd:enumeration value="A114"/>
<xsd:enumeration value="A115"/>
<xsd:enumeration value="A116"/>
<xsd:enumeration value="A117"/>
<xsd:enumeration value="A118"/>
<xsd:enumeration value="A119"/>
<xsd:enumeration value="A120"/>
<xsd:enumeration value="A121"/>
<xsd:enumeration value="A122"/>
<xsd:enumeration value="A123"/>
<xsd:enumeration value="A124"/>
© 1999 - 2013 CostsMaster Ltd.
207
208
CostsMaster User Guide Version 4
<xsd:enumeration value="A125"/>
<xsd:enumeration value="A126"/>
<xsd:enumeration value="A127"/>
<xsd:enumeration value="A128"/>
</xsd:restriction>
</xsd:simpleType>
<xsd:simpleType name="ExpenseType">
<xsd:restriction base="xsd:string">
<xsd:enumeration value=""/>
<xsd:enumeration value="X101"/>
<xsd:enumeration value="X102"/>
<xsd:enumeration value="X103"/>
<xsd:enumeration value="X104"/>
<xsd:enumeration value="X105"/>
<xsd:enumeration value="X106"/>
<xsd:enumeration value="X107"/>
<xsd:enumeration value="X108"/>
<xsd:enumeration value="X109"/>
<xsd:enumeration value="X110"/>
<xsd:enumeration value="X111"/>
<xsd:enumeration value="X112"/>
<xsd:enumeration value="X113"/>
<xsd:enumeration value="X114"/>
<xsd:enumeration value="X115"/>
<xsd:enumeration value="X116"/>
<xsd:enumeration value="X117"/>
<xsd:enumeration value="X118"/>
<xsd:enumeration value="X119"/>
<xsd:enumeration value="X120"/>
<xsd:enumeration value="X121"/>
<xsd:enumeration value="X122"/>
<xsd:enumeration value="X123"/>
<xsd:enumeration value="X124"/>
<xsd:enumeration value="X125"/>
<xsd:enumeration value="X126"/>
<xsd:enumeration value="X127"/>
<xsd:enumeration value="X128"/>
<xsd:enumeration value="X129"/>
<xsd:enumeration value="X131"/>
<xsd:enumeration value="X133"/>
<xsd:enumeration value="X135"/>
<xsd:enumeration value="X137"/>
<xsd:enumeration value="X139"/>
<xsd:enumeration value="X141"/>
<xsd:enumeration value="X143"/>
</xsd:restriction>
</xsd:simpleType>
<xsd:simpleType name="RateClassCode">
<xsd:restriction base="xsd:string">
<xsd:enumeration value=""/>
<xsd:enumeration value="PREP"/>
<xsd:enumeration value="ADV"/>
<xsd:enumeration value="CSL"/>
<xsd:enumeration value="TW"/>
© 1999 - 2013 CostsMaster Ltd.
Chapter 13 - CostsMaster Reference
<xsd:enumeration value="TC"/>
<xsd:enumeration value="LO"/>
<xsd:enumeration value="LI"/>
<xsd:enumeration value="RLO"/>
<xsd:enumeration value="USER 1"/>
<xsd:enumeration value="USER 2"/>
<xsd:enumeration value="USER 3"/>
<xsd:enumeration value="USER 4"/>
<xsd:enumeration value="EO"/>
</xsd:restriction>
</xsd:simpleType>
<xsd:simpleType name="DisbursementLocation">
<xsd:restriction base="xsd:string">
<xsd:enumeration value=""/>
<xsd:enumeration value="PROC_STEP"/>
<xsd:enumeration value="PW_DISB"/>
<xsd:enumeration value="MISC"/>
<xsd:enumeration value="COSTS"/>
</xsd:restriction>
</xsd:simpleType>
<xsd:complexType name="AttendanceData">
<xsd:sequence>
<xsd:element name="Date" type="xsd:string" minOccurs="1"/>
<xsd:element name="CMSActivity" type="xsd:string" minOccurs="1"/>
<xsd:element name="Description" type="xsd:string" minOccurs="1"/>
<xsd:element name="Time" type="xsd:string" minOccurs="1"/>
<xsd:element name="FeeEarner" type="xsd:string" minOccurs="1"/>
<xsd:element name="HourlyRate" type="xsd:string" minOccurs="0"/>
<xsd:element name="RateType" type="cm:RateClassCode" minOccurs="0"/>
<xsd:element name="Category" type="xsd:string" minOccurs="0"/>
<xsd:element name="Location" type="cm:AttendanceLocation" minOccurs="0"/>
<xsd:element name="Party" type="xsd:string" minOccurs="0"/>
<xsd:element name="PhaseCode" type="cm:PhaseType" minOccurs="0"/>
<xsd:element name="TaskCode" type="cm:TaskType" minOccurs="0"/>
<xsd:element name="ActivityCode" type="cm:ActivityType" minOccurs="0"/>
<xsd:element name="Note" type="xsd:string" minOccurs="0"
maxOccurs="unbounded"/>
<xsd:element name="EmbeddedWorkItem" type="cm:WorkItemData"
minOccurs="0" maxOccurs="unbounded"/>
</xsd:sequence>
</xsd:complexType>
<xsd:complexType name="DisbursementData">
<xsd:sequence>
<xsd:element name="InvoiceDate" type="xsd:string" minOccurs="1"/>
<xsd:element name="CMSActivity" type="xsd:string" minOccurs="1"/>
<xsd:element name="Description" type="xsd:string" minOccurs="1"/>
<xsd:element name="Amount" type="xsd:string" minOccurs="1"/>
<xsd:element name="VAT" type="xsd:string" minOccurs="1"/>
<xsd:element name="Location" type="cm:DisbursementLocation" minOccurs="0"/>
<xsd:element name="Party" type="xsd:string" minOccurs="0"/>
<xsd:element name="PhaseCode" type="cm:PhaseType" minOccurs="0"/>
<xsd:element name="TaskCode" type="cm:TaskType" minOccurs="0"/>
<xsd:element name="ExpenseCode" type="cm:ExpenseType" minOccurs="0"/>
<xsd:element name="Note" type="xsd:string" minOccurs="0"
© 1999 - 2013 CostsMaster Ltd.
209
210
CostsMaster User Guide Version 4
maxOccurs="unbounded"/>
</xsd:sequence>
</xsd:complexType>
</xsd:schema>
CSV Specification v1.0
Each line in the CSV file represents either an attendance or a disbursement work item.
The first character in the first column on each line is either ‘A’ or ‘D’ to indicate which
type of work item the line contains. Attendance lines contain either 7 or 8 columns of
data, while Disbursement lines contain 6 or 7 columns. The contents of each column is
shown in the following table:
Column
Attendance Data
Disbursement Data
1
A
D
2
Date
Date
3
Activity
Activity
4
Description
Description
5
Time
Amount
6
Fee Earner
VAT
7
Hourly Rate
Note (optional)
8
Note (optional)
(No Data)
Below is an example CSV data file containing 8 attendances and 4 disbursements:
A,18/02/2011,117 Perusal,perusing and considering documentation,01:00,Jackie
Davidson,0
A,14/07/2011,106 Letter Out,Letter to Mrs A Johnson,00:12,Jackie Davidson,31.9,Note 1
A,10/07/2011,104 Drafting,drafting POA1,00:12,Jackie Davidson,66.4
A,13/07/2011,101 Attendance,Attendance Note: G. Attendance,00:36,Jackie
Davidson,65.8
A,14/07/2011,105 Letter In,Email,00:06,Fiona Carter,31.5,Note 2
A,17/07/2011,106 Letter Out,Letter to Mrs "A" Johnson,00:06,Fiona Carter,31.5
A,10/07/2011,106 Letter Out,email to counsel,00:06,Fiona Carter,21.27
A,20/07/2011,105 Letter In,email from counsel,00:06,Fiona Carter,21.27
D,06/01/2011,Parking Fees,Visiting Client,£60,£12
D,06/01/2011,Court expenses,Attending Hearing,£100,£20
D,06/01/2011,Accomodation,Expert Visit,£150,£30,Note 3
D,06/01/2011,Misc,Office expenses,£20,£4
Newline characters and commas are allowed in “double quoted” strings – the quotes are
stripped during the import process. However to explicitly import a double quote character
, the input string should contain two adjacent double quote characters.
© 1999 - 2013 CostsMaster Ltd.
Chapter 13 - CostsMaster Reference
211
CSV Specification v1.1
The first field in the file is the version number “V1.1”. This field can either be the only field
on the first line, or the first field on the first data line (it is also allowed at the start of
subsequent data lines, but has no effect). This field is not included in the following
description.
Any line starting with the character ‘C’ is a comment line and is ignored by the import
process.
Each data line in the CSV file represents either an attendance, a disbursement or an
embedded disbursement work item. The first character in the first column on each line is
either ‘A’ or ‘D’ or ‘E’ to indicate which type of work item the line contains. Lines
marked ‘E’ represent disbursements that will be embedded within the most recent
attendance item when imported into CostsMaster.
Attendance lines contain at least 9 columns of data, while Disbursement (and Embedded
Disbursement) lines contain at least 8 columns. The contents of each column is shown
in the following table:
Column
Attendance Data
Disbursement/Embedded Disbursement Data
1
A
D or E
2
Date
Date
3
Activity
Activity
4
Description
Description
5
Time
Amount
6
Fee Earner
VAT
7
Hourly Rate
Location**
8
Location*
Party
9
Party
Note (optional***)
10
Note (optional***)
*The location field in Attendance Data lines may be empty or consist of one of the
following strings:
PROC_STEP, PW_ATT, PW_LTC, PW_MISC, PW_TC, PW_LO, PW_EO,
PW_RLO, PW_LI, DOC, TWA, COSTS
**The location field in Disbursement Data lines may be empty or consist of one of the
following strings:
PROC_STEP, PW_DISB, MISC, COSTS
***There may be zero or more Note fields on any data line.
Importing data is a two step process. First the input file is reading into the Pending Work
window, then the items are assigned to the appropriate part of the bill. If the input file
contains Location and Party data then assigning the items will be more accurate and
faster. Party data is only relevant for the various Party Work locations (PW_).
Below is an example CSV data file containing 7 attendances, 1 embedded disbursement
and 4 disbursements:
V1.1
C, Sample CostsMaster Input File
© 1999 - 2013 CostsMaster Ltd.
212
CostsMaster User Guide Version 4
A,18/02/2011,117 Perusal,perusing and considering documentation,01:00,Jackie
Davidson,30,DOC,
A,14/03/2011,106 Letter Out,Letter to Mrs A Johnson,00:12,Davidson,31.9,PW_LO,’Mrs
A Johnson
A,10/07/2011,104 Drafting,drafting POA1,00:12,Jackie Davidson,66.4,DOC,, ,Note 1
A,13/07/2011,101 Attendance,Attendance Note: G. Attendance,00:36,Jackie
Davidson,65.8,PW_ATT,,
E,13/07/2011,102 Expenses during Attendance, Parking fees,5.00,1.00,,,
A,14/07/2011,105 Letter In,Email,00:06,Fiona Carter,31.5,PW_LI,Client,Note 2
A,17/07/2011,106 Letter Out,Letter,00:06,Fiona Carter,31.5,PW_LO, Mrs "A" Johnson
A,10/07/2011,106 EMail Out,email to counsel,00:06,Fiona
Carter,21.27,PW_EO,counsel,Note 3,Note 4
D,06/01/2011,102 Gen expenses,Visiting Client,£60,£12,MISC,Client
D,06/01/2011,Court expenses,Attending Hearing, £100,£20,PROC_STEP,,
D,06/01/2011,Accomodation,Expert Visit,£150,£30,,,Note 5
D,06/01/2011,Misc,Office expenses,£20,£4,,
Newline characters and commas are allowed in “double quoted” strings – the quotes are
stripped during the import process. However to explicitly import a double quote character
, the input string should contain two adjacent double quote characters.
CSV Specification v2.0
The first field in the file is the version number “V2.0”. This field can either be the
only field on the first line, or the first field on the first data line (it is also allowed
at the start of subsequent data lines, but has no effect). This field is not included in
the following description.
Any line starting with the character ‘C’ is a comment line and is ignored by the
import process.
Each data line in the CSV file represents either an attendance, a disbursement or
an embedded disbursement work item. The first character in the first column on
each line is either ‘A’ or ‘D’ or ‘E’ to indicate which type of work item the line
contains. Lines marked ‘E’ represent disbursements that will be embedded within
the most recent attendance item when imported into CostsMaster.
Attendance lines contain at least 11 columns of data, while Disbursement (and
Embedded Disbursement) lines contain at least 10 columns. The contents of each
column is shown in the following table:
Column
Attendance Data
Disbursement/Embedded Disbursement Data
1
A
D or E
2
Date
Date
3
Activity
Activity
4
Description
Description
5
Time
Amount
6
Fee Earner
VAT
7
Hourly Rate
Location2
© 1999 - 2013 CostsMaster Ltd.
Chapter 13 - CostsMaster Reference
8
Location1
Party
9
Party
Phase Code 3
10
Phase Code 3
Cond. Phase Name 4
11
Cond. Phase Name 4
Note (optional 5)
12
Note (optional 5)
213
Notes:
1. The location field in Attendance Data lines may be empty or consist of one
of the following strings: PROC_STEP, PW_ATT, PW_LTC, PW_MISC,
PW_TC, PW_LO, PW_EO, PW_RLO, PW_LI, DOC, TWA, COSTS
2. The location field in Disbursement Data lines may be empty or consist of
one of the following strings: PROC_STEP, PW_DISB, MISC, COSTS
3. The Phase Code field may be empty or consist of one of the following
strings: UNASS, PREACT, ISSPLEA, CMC, DISCL, WITNESS, EXPERT, PTR,
TRIPREPC, TRIAL, ADRSET, COND
4. The Conditional Phase Name field is only used for Conditional (user
defined) phases, i.e. when the phase code is COND. Otherwise this field is
ignored during Import.
5. There may be zero or more Note fields on any data line.
Importing data is a two step process. First the input file is read into the Pending
Work window, then the items are assigned to the appropriate part of the bill. If the
input file contains Location and Party data then assigning the items will be more
accurate and faster. Party data is only relevant for the various Party Work locations
(PW_).
Below is an example CSV data file containing 7 attendances, 1 embedded
disbursement and 4 disbursements:
V2.0
C, Sample CostsMaster Input File
A,18/02/2011,117 Perusal,perusing and considering documentation,01:00,Jackie
Davidson,30,DOC,,,
A,14/03/2011,106 Letter Out,Letter to Mrs A
Johnson,00:12,Davidson,31.9,PW_LO,’Mrs A Johnson,,
A,10/07/2011,104 Drafting,drafting POA1,00:12,Jackie Davidson,66.4,DOC,,WITNESS,
,Note 1
A,13/07/2011,101 Attendance,Attendance Note: G. Attendance,00:36,Jackie
Davidson,65.8,PW_ATT,,,,
© 1999 - 2013 CostsMaster Ltd.
214
CostsMaster User Guide Version 4
E,13/07/2011,102 Expenses during Attendance, Parking fees,5.00,1.00,,,UNASS,
A,14/07/2011,105 Letter In,Email,00:06,Fiona Carter,31.5,PW_LI,Client,COND,Phase
X,Note 2
A,17/07/2011,106 Letter Out,Letter,00:06,Fiona Carter,31.5,PW_LO, Mrs "A"
Johnson,,
A,10/07/2011,106 EMail Out,email to counsel,00:06,Fiona
Carter,21.27,PW_EO,counsel,,,Note 3,Note 4
D,06/01/2011,102 Gen expenses,Visiting Client,£60,£12,MISC,Client,CMC,
D,06/01/2011,Court expenses,Attending Hearing, £100,£20,PROC_STEP,,,
D,06/01/2011,Accomodation,Expert Visit,£150,£30,,,,Note 5
D,06/01/2011,Misc,Office expenses,£20,£4,,,COND,Phase "Y",Note 6
Newline characters and commas are allowed in “double quoted” strings – the
quotes are stripped during the import process. However to explicitly import a
double quote character , the input string should contain two adjacent double quote
characters.
CSV Specification v2.1
The first field in the file is the version number “V2.1”. This field can either be the
only field on the first line, or the first field on the first data line (it is also allowed
at the start of subsequent data lines, but has no effect). This field is not included in
the following description.
Any line starting with the character ‘C’ is a comment line and is ignored by the
import process.
Each data line in the CSV file represents either an attendance, a disbursement or
an embedded disbursement work item. The first character in the first column on
each line is either ‘A’ or ‘D’ or ‘E’ to indicate which type of work item the line
contains. Lines marked ‘E’ represent disbursements that will be embedded within
the most recent attendance item when imported into CostsMaster.
Attendance lines contain at least 12 columns of data, while Disbursement (and
Embedded Disbursement) lines contain at least 13 columns. The contents of each
column is shown in the following table:
Column
Attendance Data
Disbursement/Embedded Disbursement Data
1
A
D or E
2
Date
Date
3
CMS Activity
CMS Activity
4
Description
Description
5
Time
Amount
6
Fee Earner
VAT
© 1999 - 2013 CostsMaster Ltd.
Chapter 13 - CostsMaster Reference
7
Hourly Rate
Location6
8
Location1
Party
9
Party
Phase Code 2
10
Phase Code 2
Task Code 3
11
Task Code 3
Expense Code 7
12
Activity Code 4
Note (optional 5)
13
Note (optional 5)
215
Notes:
1. The location field in Attendance lines may be empty or consist of one of
the following strings: PROC_STEP, PW_ATT, PW_LTC, PW_MISC, PW_TC,
PW_LO, PW_EO, PW_RLO, PW_LI, DOC, TWA, COSTS
2. The Phase Code field in Attendance or Disbursement lines may be empty
or exactly match a standard Phase Code, JA00, JB00 etc. Any other value is
treated as a user defined phase name.
3. TheTask Code field in Attendance or Disbursement lines may be empty or
exactly match a standard Task Code, JA10, JH30 etc.
4. The Activity Code field in Attendance lines may be empty or exactly match
a standard Activity Code, A101, A120 etc.
5. There may be zero or more Note fields on any data line.
6. The location field in Disbursement lines may be empty or consist of one of
the following strings: PROC_STEP, PW_DISB, MISC, COSTS
7. The Expense Code field in Disbursement lines may be empty or exactly
match a standard Expense code, X103, X123 etc.
Importing data is a two step process. First the input file is read into the Pending
Work window, then the items are assigned to the appropriate part of the bill. If the
input file contains Location and Party data then assigning the items will be more
accurate and faster. Party data is only relevant for the various Party Work locations
(PW_).
Below is an example CSV data file containing 7 attendances, 1 embedded
disbursement and 4 disbursements:
V2.1
© 1999 - 2013 CostsMaster Ltd.
216
CostsMaster User Guide Version 4
C, Sample CostsMaster Input File
A,18/02/2011,Perusal,perusing documentation,01:00,Jackie
Davidson,30,DOC,,JD00,JD10,A121
A,14/03/2011,Letter,Letter to Mrs AJ,00:12,Davidson,31.9,PW_LO,’Mrs A
Johnson,,,A121,A Note
A,10/07/2011,Drafting,drafting POA1,00:12,Jackie
Davidson,66.4,DOC,,JB00,JB02,A111,Note 1
A,13/07/2011,Attendance,Attendance Note: G. Attendance,00:36,Jackie
Davidson,65.8,PW_ATT,,,,,
E,13/07/2011,Expenses during Attendance, Parking fees,5.00,1.00,,,UNASS,,
A,14/07/2011,Letter In,Email,00:06,Fiona Carter,31.5,PW_LI,Client,My Phase,,,Note
2
A,17/07/2011,Letter Out,Letter,00:06,Fiona Carter,31.5,PW_LO, Mrs "A"
Johnson,,JA10,
A,10/07/2011,EMail Out,email to counsel,00:06,Fiona
Carter,21.27,PW_EO,counsel,,,,Note 3,Note 4
D,06/01/2011,Gen expenses,Visiting Client,£60,£12,MISC,Client,CMC,,
D,06/01/2011,Court expenses,Attending Hearing, £100,£20,PROC_STEP,,,,
D,06/01/2011,Accomodation,Expert Visit,£150,£30,,Client,JB00,JB30,X112,Note 5
D,06/01/2011,Misc,Office expenses,£20,£4,,,Phase "Y",JC01,X101,Note 6
Newline characters and commas are allowed in “double quoted” strings – the
quotes are stripped during the import process. However to explicitly import a
double quote character , the input string should contain two adjacent double quote
characters.
© 1999 - 2013 CostsMaster Ltd.
Chapter 13 - CostsMaster Reference
XML Totals File Content
XML Totals File Content
This section describes the content of an XML Totals file. This is a very simple XML
format.
The top level element is named <ExportedTotals>. Within this are sub elements as
detailed in the tables below.
Bills, Breakdowns & Statements of Costs
Element Name
Description
Notes
Export Date
The date and time of the
export in W3C format
TotalCDFees
The total Costs Draftsman's
fee as calculated
automatically by
CostsMaster and claimed
in the exported document
ProfitForCDFees
The total profit on which the
Costs Draftsman's fee was
calculated
RecordedProfitNet
The total net profit costs
recorded before any
limitation
[1] [2]
ActualProfitNet
The total net profit costs
after any limitation
[1] [2]
TotalCounselNet
The total net Counsel Fees
[1] [2]
TotalLeadingCounselNet
The total net Leading
Counsel Fees
[1] [2]
TotalJuniorCounselNet
The total net Junior
Counsel Fees
[1] [2]
TotalExpertNet
The total net Expert Fees
[1] [2]
TotalOtherDisbsNet
The total net other
disbursements
[1] [2]
TotalProfitCoreCLSNet
The total net CLS core
costs
[1]
Only where the bill contains
a CLS element.
TotalProfitEnhCLSNet
The total net CLS
enhancement
[1]
Only where the bill contains
a CLS element.
TotalProfitAdvCLSNet
The total net CLS advocacy [1]
Only where the bill contains
a CLS element.
TotalFASCLS
The total FAS
© 1999 - 2013 CostsMaster Ltd.
[1]
217
218
CostsMaster User Guide Version 4
TotalFixedFeesCLS
The total fixed fees
[1]
CLAIM1 & CLAIM1A
Element Name
Description
Notes
ExportDate
The date and time of the
export in W3C format
TotalCDFees
The total Costs Draftsman's
fee as calculated
automatically by
CostsMaster and claimed
in the exported document
ProfitForCDFees
The total profit on which the
Costs Draftsman's fee was
calculated
RecordedProfitNet
The total net profit costs
recorded before any
limitation
ActualProfitNet
The total net profit costs
after any limitation
[1]
TotalCounselNet
The total net Counsel Fees
[1]
TotalExpertNet
The total net Expert Fees
[1]
TotalOtherDisbsNet
The total net other
disbursements
[1]
CostsOfAssessmentNet
The total net Costs of
Assessment
[1]
Standard Case Plans
Element Name
Description
Notes
ExportDate
The date and time of the
export in W3C format
TotalCDFees
The total Costs Draftsman's
fee as calculated
automatically by
CostsMaster and claimed
in the exported document
ProfitForCDFees
The total profit on which the
Costs Draftsman's fee was
calculated
RecordedProfitNet
The total net profit costs
recorded before any
limitation
[3]
ActualProfitNet
The total net profit costs
after any limitation
[3]
© 1999 - 2013 CostsMaster Ltd.
Chapter 13 - CostsMaster Reference
TotalCounselNet
The total net Counsel Fees
[3]
TotalExpertNet
The total net Expert Fees
[3]
TotalOtherDisbsNet
The total net other
disbursements
[3]
Events Based Case Plans
Element Name
Description
ExportDate
The date and time of the
export in W3C format
SolicitorEventsNet
The total events related
profit costs
PreviousSolicitorProfitNet
The total net Profit Costs
for previous solicitors
ActualProfitNet
The total net Profit Costs
CounselEventsNet
The total events related
Counsel Fees
CounselFGFNet
The total net Counsel Fees
recorded under FGF for the
current solicitor
Notes
PreviousSolicitorCounselNe The total net Counsel Fees
t
for previous solicitors
TotalCounselNet
The total net Counsel Fees
ExpertEventsNet
The total net expert fees for
the current solicitor
TotalExpertNet
The total net Expert Fees
OtherDisbsEventsNet
The total net other
disbursements for the
current solicitor
PreviousSolicitorDisbsNet
The total net
disbursements for previous
solicitors
TotalOtherDisbsNet
The total net other
disbursements
PreviousSolicitorNet
The total net Profit Costs,
Disbursements and
Counsel Fees for Previous
Solicitors
TotalNetCosts
The total costs including
costs of previous solicitors
Because the form has no
facility for entering expert
fees for previous solicitors
this figure may include
experts.
Please note:
any elements marked [1] have a VAT equivalent where the the letters "Net" in the
© 1999 - 2013 CostsMaster Ltd.
219
220
CostsMaster User Guide Version 4
element name are replaced with "Vat". e.g.
RecordedProfitNet
RecordedProfitVat
any elements marked [2] have IP and CLS equivalents (but only where the bill contains
both inter partes and CLS costs) where the letters IP or CLS are added after the main
body of the name before "Net" or Vat" e.g
RecordedProfitNet
RecordedProfitIPNet
RecordedProfitCLSNet
any elements marked [3] have equivalents for Pre and Post Case plan values where
the letters "Pre" and "Post" are appended to the element name e.g.
RecordedProfitNet
RecordedProfitNetPre
RecordedProfitNetPost
© 1999 - 2013 CostsMaster Ltd.
Chapter 13 - CostsMaster Reference
221
Command Line Parameters
Command Line Parameters
It is possible to alter the way CostsMaster operates via the use of command line
parameters. These are additional flags passed to the program in the command line that
is used to start the program.
Fading Splash Screen
/noalphablend
The splash screen that appears when first starting the program fades in and out when the
program is not running under Terminal Services. This can pose a strain on older
computers with inferior graphics capabilities and can be disabled by adding the /
noalphablend parameter
No Splash Screen
/nosplash
It is also possible to dispense with the splash screen altogether. This is not
recommended because the purpose of the splash screen is to inform the user that
initialisation work is going on behind the scenes before the main windows appear.
Suppressing the splash screen doesn't stop this work going on and it will therefore
appear to the user that nothing is happening.
Multiple Instances of CostsMaster
/m ulti
By default only one copy of CostsMaster can be opened at once. Having multiple floating
windows from different instances open at the same time quickly becomes confusing, and
there are issues with changing settings in one version where the change will be lost if
that version is not closed last. It is possible to override this and have two or more
instances running but we would strongly advise against this unless you are absolutely
sure you know what you are doing.
To open a second instance, you need to start the second instance with the /multi
parameter. You will still get a warning asking you if you want to continue. For your sanity
we would advise you to heed it.
Defining a command line parameter
The easiest way to add a parameter is to alter a shortcut (either an existing one or by
creating a new one if you want to use one of these features only occasionally). If you
right click on a shortcut to CostsMaster and select "properties", the Windows shortcut
properties box will appear. The target will probably contain something like:
"C:\Program Files\Costsmaster Draftsman Edition\CostsMaster.exe"
To add the /noalphablend parameter add it to the end like this:
"C:\Program Files\Costsmaster Draftsman Edition\CostsMaster.exe" /noalphablend
To add more than one parameter just separate them with a space:
© 1999 - 2013 CostsMaster Ltd.
222
CostsMaster User Guide Version 4
"C:\Program Files\Costsmaster Draftsman Edition\CostsMaster.exe" /noalphablend /multi
© 1999 - 2013 CostsMaster Ltd.
Chapter 13 - CostsMaster Reference
Feature Comparison
Feature Comparison
The following table shows which features are available in each version of CostsMaster.
= Feature is present
= Feature is present but in an outdated form at
CostsMaster 2
Documents Generated
3 Column LA Bills
3 Column Inter Partes Bills
4 Column LA Bills
4 Column Inter Partes Bills
3 & 4 column Inter Partes / LA bills
6 Column Prescribed Rates Bills (with schedule
of costs at prescribed rates)
6 Column Pre-Prescribed Rates Bills
6 column bills in landscape format
4 Column Criminal Bills
Costs Budget
CLAIM1
CLAIM1A
High Cost Case Plan
High Cost Events Based Case Plan
Fixed Fee Scheme Bills
FAS & Fixed Fee Scheme Phase 2 bills
Notice of Commencement
Summary Assessment Schedules
Breakdown of Costs
Front Sheets
Lined or Unlined Bills
Documents Schedules
Disbursement Report
Grids
Add items
Insert Items
Delete Items
Move items up/down
Drag and Drop items up/down
Drag and Drop items to a different grid
Restricted Copy / Move
Cut / Copy / Paste Items
Move / Copy / Paste Multiple Items
© 1999 - 2013 CostsMaster Ltd.
CostsMaster 4
223
224
CostsMaster User Guide Version 4
CostsMaster 2
CostsMaster 4
Edit Multiple Items simultaneously
Apply properties to multiple items simultaneously
via keyboard shortcuts
Edit all fields directly in the grid
Iconic Properties for fast visual identification
Expand / Contract Rows
Show rows in alternate colours
Record multiple notes for any item - notes can be
public (for use in the bill or letter to client) or
private to the draftsman
Alter column width and position
Customise font for all grids
Customise font for each grid
Customise appearance and colour of each grid
Customise toolbars for each grid
Specify which columns are visible
Customise column appearance
Autocomplete year within the grid
Autocomplete year across different grids
Select extended characters for insertion
Specify position of cursor when entering a cell
Narrative
Narrative Window
Edit all narratives, enhancement justification,
Counsel justification and Case Plan information
within a multi-tabbed narrative window
Parts
Multiple Parts
VAT (per part)
Care & Conduct (per part)
Limit Profit Costs
Part Start and End Dates
Part Enhancement
Specify which exported bills the part should be
included in
Fee Earners, Categories & Rates
Multiple Fee Earners
Multiple Categories
Multiple Global Rates
Multiple Part Rates
Rates & Category Presets
Rates & Category Advanced Features
Show Fee Earners In Colour
© 1999 - 2013 CostsMaster Ltd.
Chapter 13 - CostsMaster Reference
CostsMaster 2
CostsMaster 4
Parties
Specify location that the party appears in the bill
Enhancement
Global Enhancement
2
Separate Procedural Step Enhancement
Periodic Enhancement
Individual Enhancement
Party Enhancement
Fee Earner Enhancement
Category Enhancement
Routine Enhancement
Claim Enhancement at different values depending
on the rate type
Tiered Exclude Enhancement Options
Attendances
Assign work to any fee earner
Lump Sum amounts
Embedded Disbursements
Estimated
Excluded
Print Out
Draw Attention To
Assign the rate type to any attendance
irrespective of its location
All attendances have same fields
View all attendances from a part in a single
window
View all attendances from a bill in a single
window
Create fee earners by typing their name in the
attendances grid
Documents Tag
Emails Out
Date Ranges and Compound Dates
Disbursements
Disbursement Mileage shortcut
Disbursement Auto-VAT shortcuts
Legal aid/Inter partes
Counsel
Leading Counsel
Expert Fees
© 1999 - 2013 CostsMaster Ltd.
3
225
226
CostsMaster User Guide Version 4
CostsMaster 2
CostsMaster 4
Invoice
Paid
Receipt
Payee
Invoice Date
Invoice No
Date Paid
Draw Attention To
View all disbursements from a part in a single
window
View all disbursements from a bill in a single
window
Report on Disbursements utilising new fields
Assessed Amount/VAT
Recorded Work
Procedural Steps
Attendances, Telephone Calls. Letters In & Out
Emails
Documents
Travelling & Waiting
Miscellaneous Disbursements
Success Fees
Solicitor's Success Fees
Counsel's Success Fees
Costs of Assessment
Attendances
Disbursements
4
Prescribed Rate Costs
Costs Draftsman's fee at a percentage
Export
Bill Preview
PDF Export
Fully Featured Word Processor Included
Export bills as a single document
Easily alter and customise the certificates on the
back sheet of bills
Define assessment Instruments and have their
details appear automatically on front sheets
Specify and remember sort order for items
7
Specify CLAIM1 column for page 4 schedule
Export to word processor for bills
© 1999 - 2013 CostsMaster Ltd.
Chapter 13 - CostsMaster Reference
CostsMaster 2
CostsMaster 4
Export to word processor for forms
Form Viewer
Microsoft Word
Microsoft Works
5
Open Office Writer
5
WordPerfect
5
Wordpad
5
Totals Window / Control Centre
Running Totals
Show VAT
Show Base Costs and Enhancement separately
Show Junior and Leading Counsel separately
Show Disbursements and Expert fees separately
Show legal aid and inter partes costs separately
Totals for current file
Totals for current bill
Totals for current part
Spelling Check
Spelling check in file
Live spelling in Narratives
Live spelling in Grids
Sort By Date
Sort By Natural Order/Undo Last Sort
Sort By any Column Heading
Spelling Checker
Auto Complete Shortcuts
Splitting & Merging
Merge Parties & Procedural Steps
Merge Parts
Merge Attendances, Disbursements and other
items
Split Parts
Tools
Check For Blank Time
Check For Blank Disbursements
Verify Counsel's Fees
Generate List Of Parties
Find & Replace Text
Mark estimated time as excluded
Mark disbursements Assessed as Drawn
© 1999 - 2013 CostsMaster Ltd.
227
228
CostsMaster User Guide Version 4
CostsMaster 2
CostsMaster 4
Search results appear in grids that can be edited
directly
Settings
Preset Abbreviations
User Defined Abbreviations and Legal Aid Codes
Local Settings
Presets
Export Options
Personal Export Phrases
Bill Export Phrases
Customisable Main Toolbar
High Quality sound alerts
Program Templates
History / Undo & Redo
Undelete
Restore From Backup
Profiles
Help
Help Pages
User Guide
Quick Start Guide
CostsMaster Assistant
Email Support
Telephone Support
Other features
Easy Access Welcome Screen
Scratch Pad
Time Recording
6
Access Key Software Protection
Dongle Software Protection
Automatic Updates
Customise the colour of the panels on the work
windows
Import work from Case Management and other
systems
Export work to XML for use in other systems
Export totals for use in PMS
Hide features by work type
Operating Systems
© 1999 - 2013 CostsMaster Ltd.
Chapter 13 - CostsMaster Reference
CostsMaster 2
229
CostsMaster 4
Windows 95
Windows 98
Windows ME
Windows NT4
Windows 2000
Windows XP
Windows Server 2003
Windows Vista
Windows Server 2008
Windows 7
Windows 8
1=
2 = Global Enhancem ent has been replaced by Bill Enhancem ent
3 = The routine enhancem ent function has been superseded by Category enhancem ent.
4 = This feature is not required in CostsMaster 3 as you can record a lum p sum w ith a costs
attendance.
5 = At present other w ord processors all exhibit problem s w ith other types of bills. It is
hoped to eradicate m ost of the m ajor problem s.
6 = Tim e Recording existed in CostsMaster 2 in an experim ental form . The version in
CostsMaster 3 is fully featured and accurate.
7 = In CostsMaster 2 you could reorder item s exported to a CLAIM1 but this inform ation w as
not retained for subsequent exports.
© 1999 - 2013 CostsMaster Ltd.
230
CostsMaster User Guide Version 4
Counsel as
62
Documents
91
Documents Tag
82
Estimated Time Search
174
Excluded Search
174
Legal Aid Codes, Apply
175
Legal Aid Codes, Auto-Setting
168
Location Presets
167
Mark Estimated Time As Excluded
176
Miscellaneous, Party
49, 88
Part Attendances
93
Party
89
Pending Work
93, 152
Personal, Party
88
Presets
167
Procedural Steps
83
Properties
25
Recoverability
81
Searches
174
Short Descriptions
95
Show in Schedule
95
Task & Activity, Apply
176
Travelling & Waiting
91
Unassigned Activity Search
174
Unassigned Phase Search
174
Unassigned Task Search
174
Index
Abbreviations
73, 168
Expand Legal Aid Abbreviations
178
Activity
Apply Automatically
176
Attendances
75
Attendances - Unassigned
174
Disbursements - Unassigned
174
Options
166
Party
49
Presets
167
Unassigned, Search for
174
Additional Information
Attendances
75
Properties
25
Set Options
178
116, 168
Advocacy
60
Family Bills, Claim only
95
Family Fixed Fee Export Templates
Importing CostsMaster 2 files
37
Advocates' Meeting
FAS
117
131
83
Amounts
72, 137, 191
Apply Codes
175
Apply Tasks & Activities
176
Aspect
Part assignment
52
Back Sheet
Certificates
95, 103
Export Templates
131, 139
Assessed
As Drawn, Mark Disbursements
176
Costs, CLAIM1 & CLAIM1A
114
Disbursements
78
Statement of Costs
113
Assessment
Basis
44
Costs of 91
Instruments
46
Notice of Commencement
Post, Certificates
103
Assignment
Import Work
147
Part, Case Plan
134
Parts on Export
129
Attendance
75
At Court
83
Auto-Insert Text
82, 161
Blank Time Search
174
Category Descriptions
95
Costs Of Assessment
91
135
Backup
158
File Locations
159
Files
35
Restore From
173
Settings
177
Bill
43, 95
Case Details
44
Certificates
103
Current, Totals for
178
Default Phase
178
Enhancement
65
Export Phrases
136
Export Templates
131, 139
Exporting
127, 131
Interim Statute
55
Preview
131
Quick Start Guide
187
Settings
95
Blank
Dates, Move To Top
95
Disbursements Search
174
Disbursements, Mark on Export
95
© 1999 - 2013 CostsMaster Ltd.
Index
Blank
Time Search
174
Unassigned Phase Search
Costs, Show only
174
Bolt-On
86
Breakdown
111
Export Phrases
136
Export Templates
139
Exporting
133
Settings
111
Calculator
181
Case Details
44
Check spelling
163
Importing CostsMaster 2 files
Report
125
37
Case Management System
Importing work from
49, 144, 146, 152
Negative time
165
Outputting totals to
155
Outputting work to
154
Case Plan
119
Assigning Parts
134
Case Plan Part
134
Costs of preparing
91, 124
Enhancement
124
Events based
52, 83, 120, 123
Export Phrases
136
Export Templates
139
Exporting
134
Fixing costs to CLAIM1 amount
55
Future Work
83, 121
Narrative
48
Procedural Steps
83
Quick Start Guide
187
Recording Work
121
Rounding
72
Set Up
119
Settings
120
Case Type
Presets
44
167
Category
58
Breakdowns, Show work by
111
Check Spelling
163
Default
129
Enhancement
65
Exported bills, Settings
95
Fee Earner Assignment
57
Merging parts
22
Presets
167
Rates
60
Using
61
Central Funds
© 1999 - 2013 CostsMaster Ltd.
231
178
Certificate
Back Sheet
103
Legal Aid
25, 46
CLAIM1 & CLAIM1A
114
Additional Information
25, 75, 116, 178
Assessed disbursements
78
CLAIM1A
116
CLAIM1A Fixed Fee Presets
167
Column
75, 116
Counsel in the FPC
48
Counsel Instructed under FGF Scheme
62
Counsel's Account No.
62
Export Phrases
136
Export Templates
139
Exporting
133
Legal Aid Code
49, 116, 168
Part Narrative
129
Quick Start Gudie
187
Recording Work
116
Rounding
72
Set up
114
Settings
114
Show Form
178
Client
Property
25, 44
Colour
15
Column
32
Costs Budgets
108, 166
Fee Earners
157
Font
165
Grid
32
Hints
165
Lines, Exported Bills
95
Procedural Steps
157
Column
32
Bills, Export Template
131
CLAIM1
75, 116
Lines, Exported Bills
95
Show All
34
Combining
Merging Parts
22
Parts on Export
129
Command Line Parameters
221
Comparing Budgets
105
Conference
83
Mis-Assigned Counsel Search
Control Centre
178
Always Show
157
Copy
19, 20
Export Template
Profile
170
139
174
232
CostsMaster User Guide Version 4
Copy
19, 20
Settings, Backup
Court Fees
Property
177
Costs Budget
Analysis
105
Background Colours
166
Comparison
105
Excel Spreadsheet
132
Exporting
132
Introduction
104
Managing
105
Preparing
104
Report
132
Routine Work
89
Settings
108
Supporting Documentation
Window
48
Court of Protection
Costs, Show only
178
Routine Letters Out
60, 88, 89
CSV
Data Mapping
149
Importing Work
144, 146
Specification
199
Specification v1.0
210
Specification v1.1
211
Specification v2.0
212
Specification v2.1
214
Cut
20
108, 132
Costs of Assessment
95
Attendances
91
Bill Settings
95
Case Plan
124
Case Plan costs as separate stage
91
Claim Success Fees on
95
Costs Draftsman's Fee As A Percentage
Disbursements
91
Importing CostsMaster 2 files
37
Success Fee
91
CostsMaster File
Importing work from
78
145
Counsel
62
Case Plan
120, 121
Check Spelling
163
CLAIM1 & CLAIM1A settings
114
Conference
83
Costs Budgets
108
Events Case Plan
123
Events Rate
120
Fees as Disbursements
78
Fees as Timed Attendances
75
FPC Justification
48
Hearing
83
Importing CostsMaster 2 files
37
Mis-Assigned Counsel Search
174
N260
111
Presets
167
Property
25
Rate Type
60
Running Totals
178
Summarily Assessed Costs
85
Court
44
Attendances at
83
FAS
86
Fees, Notice of Commencement
135
91
Date
Attendance
75
Auto-complete shortcut
195
Blank, Move on export
95
Case Plan
120
Enhancement (periodic)
65
Entering
70
Export Formatting
137
Export Phrase Formatting Reference
Invoice, Disbursement
78
Legal Aid Certificate
46
of Birth, Client
44
Options
160
Paid, Disbursement
78
Part Start/End
52
Procedural Step
83
Set Index
34
Sort items, Export Wzard
127
Split part at
23
Statement of Costs Hearing
52
190
Default
Fee Earner
178
File Locations
40
Phase (Bill)
43, 178
Phase (Part)
52
Delete
Export Template
139
Items in grid
18
Profile
170
Disbursement
78
Attendances
75
Auto-Insert Text
82
Blank Search
174
Blank, Mark on export
95
Breakdown settings
111
Case Plan settings
120
CLAIM1 & CLAIM1A settings
114
© 1999 - 2013 CostsMaster Ltd.
Index
Disbursement
78
Costs Of Assessment
91
Document Tag
82
Embedded
75
Excluded Search
174
Importing CostsMaster 2 files
37
Location Presets
167
Mark Assessed As Drawn
176
Mileage
82
Miscellaneous
91
Part Disbursements
93
Party
89
Party Work
88
Pending Work
93, 152
Presets
167
Procedural Steps
83
Properties
25
Recoverability
81
Report
125, 135
Searches
174
Task & Expense, Apply
176
Document
Exported, File Location
Tag
82, 161
159
Documentation
187
Documents Schedule
Export Templates
131, 139
Export wizard
127
Documents Section
91
Bill Settings
95
Dongle
7, 11, 13, 183
Error
185
Information
177
Management Window
Manager
177
Network
183
Replacement
183
Spare
183
System Requirements
Trial Mode
185
Update
177
Drag & Drop
19
Draw Attention
Property
25
Editing
Export Phrases
Grid
20
138
Emails Out
Attendances
75
Party Details
89
Party Work
88
© 1999 - 2013 CostsMaster Ltd.
184
7
Rate Type
60
Sounds when entering
Splitting parts
23
162
Enhancement
65
Attendances
75
Bill
43, 65
Case Plan
124
Category
58, 65
Changes since version 2
67
Claiming
66
Excluding
66
Family Fixed Fee
131
Fee Earner
57, 65
Importing CostsMaster 2 files
37
Justification (main)
48
Justification (Part)
52
Marker
95
Options
160
Part
52, 65
Part, Assigning on export
129
Party
49, 65
Periodic
65
Rate Type
66
Set-up window
68
Specific
65
Types
65
Entering Data
14, 20, 25
Error Messages
188
Estimated Time
Mark As Excluded
176
Property
25
Search For
174
Events
87
Events Case Plan
83
Previous Solicitor
52
Rates
120
Recording work
123
Excel Spreadsheet
Costs Budget
132
Data Mapping
149
Importing Work From
146
Excluded
Attendances Search
174
Disbursements Search
174
Enhancement
66, 68
Estimated Time
176
Marker, Enhancement
95
Property
25
Expense
Apply Automatically
Disbursement
78
Presets
167
176
233
234
CostsMaster User Guide Version 4
Default
178
Enhancement
65
Importing CostsMaster 2 files
Merging parts
22
Party Details
89
Presets
167
Routine Work
89
Show In Colour
157
Using
61
Expert
Costs Budgets
108
Property
25, 78
Rate
78
Running Totals
178
Export
127
Assigning Parts
129
Bill
95, 131
Breakdown
111, 133
Case Plan
119, 134
CLAIM1
133
CLAIM1 & CLAIM1A
114
Combining parts
129
Costs Budget
132
Date from time recording system
Description, Counsel
62
File Locations
159
Grid Data
34
Notice of Commencement
135
Part number
129
Party Position
49
Phrases
136
Preview
131
Report
125, 135
Settings, Part
52
Statement of Costs
111, 133
Success Fee Location
51
Templates
131
Tools
165
Wizard
127
XML Totals
155
Export Phrases
136
Advanced
138
Formatting Reference
Simple Mode
137
FGF
62
CLAIM1 & CLAIM1A
114
Events Case Plan
83, 123
Files
35, 36, 37
CostsMaster Files
40
CSV
144, 146
Default Locations
40
Dictionaries
40
Export Templates
40, 131
Exporting
127
Importing CostsMaster 2 files
37
Importing Work
144, 145, 146
Installation
40
List of Parties
181
Location Options
159
Locking Options
157
Outputting Work
154
Program Templates
40
Recent File Name Options
157
Safety Options
158
Settings
40
Settings, Backup
177
XML
144, 146, 154
XML Totals
155
144, 146
190
Filter
Grid
Export Templates
131
Default Directory
40
Export Phrases
136
Window
139
Family Proceedings Court
Justification
48
FAS
86, 117
Aspect
52
CLAIM1, assessed by LSC
114
Include in Costs Draftsman's fee calculation
Procedural Steps
83
Show in Columns
95
Feature Comparison
223
Fee Earner
57
Attendances
75
Check Spelling
163
37
95
29
Find
173
Fixed Fees
CLAIM1A
116
Family Bill Options
95
Family Export Template
FAS
52, 83, 86, 117
FGF
83
Limiting Costs
55
PFLRS
52
Presets
116
Running Totals
178
131
Font
Colour
32
Export Phrases
137, 138
Exported Documents
139
Grid
32, 165
Narrative
165
© 1999 - 2013 CostsMaster Ltd.
Index
Footer
Bills
95
Breakdown
108, 111
Export Templates
139
Header
Bills
95
Breakdown
108, 111
Export Templates
139
Front & Back Sheets
Assessment Instruments
46
Certificates
95, 103
Draftsman information
158
Export Templates
131, 139
Export Wizard
127
Legal Aid Certificate details
25, 46
Options
95
Solicitor details
43
Global Enhancement
67
Grade
58
Grid
18, 32
Add
18
Bands
24
Column Settings
32
Contract
24
Copy
19, 20
Cut
20
Delete
18
Drag & Drop
19
Editing
20
Expand
24
Exporting Data
34
Extended Characters
25
Filter
29
Font
165
Insert
18
Merge
22
Move
19
Move Up & Down
18
New
18
Notes
25
Options
31
Paste
20
Properties
25
Refresh
34
Reset
34
Resize Windows when width changes
Selecting
24
Shortcuts
195
Show All Columns
34
Sorting
31
Spelling
29
Spelling, Enable
163
Split
23
Toolbars
33
© 1999 - 2013 CostsMaster Ltd.
235
Hearing
Advocacy Rate Type
60
Counsel Advocate
83
FAS
86, 117
List of, Case Plan
119, 134
Mis-Assigned Counsel Search
Solicitor Advocate
83
Summary Assessment
52
Type, FAS
86
Help
187, 188
High Cost Case Plan
History
173
174
119
Import
CostsMaster 2 Files
37
Export Template
139
Profile
170
Import Work
144
Alias
49
CostsMaster File
145
Data Import Wizard
147
Data Mapping
149
Negative Time
165
Party Alias
49
Pending Work
93, 152
Presets
167
Specification
199
Time Recording System
146
Index
Attendances
75
Set for items of same date
34
Individual Enhancement
67
Installation
10, 11
Default Directory
40
157
Instructing Solicitor
37, 43
Inter Partes
Category Presets
167
Costs Draftsman's fee as a percentage
Costs, Show only
178
Export Templates
131
Legal Aid Schedule
131
Limitation
52, 55
Recoverability
75, 78
Success Fees
51
Invoice
Disbursements
Property
25
78
91
236
CostsMaster User Guide Version 4
Legal Aid
Abbreviations, Expand
178
Case Plan
119
Category
58
Category Presets
167
Certificate
46
CLAIM1 & CLAIM1A
114
Code
49, 75, 116, 168, 175, 178
Costs Draftsman's fee as a percentage
Costs, Show only
178
Counsel Account Number
62
Disbursement
78
Enhancement
65
Export Templates
131
Limitation
52, 55
Party
49
Property
25, 58, 78
Schedule
57, 61, 91, 95, 131
Legal Aid & Inter Partes Bills
Categories
58
Disbursements
78
Export Settings
95
Export Templates
131
Letters
Attendances
75
In, Show When Rate is zero
127
Party Details
89
Party Work
88
Rate Type
60
Sounds when entering
162
Splitting parts
23
Limitation
Case Plan, costs on CLAIM1
Legal Aid Certificate
46
Profit Costs for part
55
Recording work in trial mode
Success Fees
51
Local Settings
157
Location
Assign work on import
Importing work
147
Merge
22
Dates
70
Parts
22
Mileage
149
7
91
82
Mis-assigned Counsel Search
174
Miscellaneous Attendances, Party Work
88
Miscellaneous Disbursements
91
Move
Blank Dates on Export
95, 114, 120
Cut, Copy & Paste
20
Drag & Drop
19
Export Phrases
138
Grid
18
Right-Click
19
Multi-Select Mode
24
N260
Counsel Grouping
Party
49
Preparing
112
Section
49
111
Narrative
48
Case Plan
119, 120
Font
165
Part
52
Part, Assigning on export
Position on Export
95
Spelling
163
129
Network
11
Dongle
183
New
File
35
Item in grid
18
Notes
25, 74
Case Plans
134
Check Spelling
163
Exporting
34
Include in exported documents
Properties
25
127
Notice of Commencement
Case Details
44
Export Templates
139
Exporting
135
Presets
167
147
Lodgment Fee
95
Long Telephone Calls, Party Work
Lump Sums
75
Mapping
Import Work
119
Auto-Insert Text
Rate
161
88
Open
Current Window
34
File
35
Parent Window
34
Recent Files, Options
157
Opponent Budget
Comparison
105
Options
Abbreviations
168
© 1999 - 2013 CostsMaster Ltd.
Index
Options
Auto-Insert Text
161
Column
32
Date
160
Enhancement
160
File Locations
159
Fonts
165
General
157
Grid
31, 32
Hints
165
Lock Files
157
Main Toolbar
169
Personal Information
158
Presets
167
Profiles
170
Recent File Names
157
Rounding
161
Running Totals
157
Safety
158
Sounds
160, 162
Spelling
163
Toolbar Settings
169
VAT 161
Output Totals
155
Specification
217
78
Parameters, Command Line
221
Part
52
Assign work on import
147
Assigning On Export
129
Attendances
93
Case Plans
134
Combining On Export
129
Disbursements
93
Enhancement
65
Importing work
147
Legal Aid Schedule, Include in
131
Limiting Profit Costs
55
Merge
22
Outputting
154
Properties
25
Rates
60
Show work from all parts
178
Split
23
Party
49
Assign work on import
Bill Settings
95
© 1999 - 2013 CostsMaster Ltd.
Party to the Action
Properties
25
147
37
37, 44
Paste
20
Pending Work
93, 152
Percentage
Costs Draftsman's fee
91
Costs Draftsman's fee, Case Plan
Counsel, Success Fee
62
Disbursements
78
Enhancement
65
Fixed Fee
116
Limitation
55
Success Fee, Counsel
62
Success Fees
51
Periodic Enhancement
65
Personal Attendances, Party Work
Personal Information
158
PFLRS
Aspect
52
Assessed Costs
114
Output Work
154
Specification
199
Paid
Disbursements
Property
25
Breakdown settings
111
Check Spelling
163
Enhancement
65
Generate List
181
Importing CostsMaster 2 files
Importing work
147
Party Details
89
Party Work
88
Preparation
88
Presets
167
237
124
88
Phase
104
Assign on import
147
Attendances
75
Attendances - Unassigned
174
Costs Budget Window
48
Default (Bill)
43, 178
Default (Part)
52
Disbursement
78
Disbursements - Unassigned
174
Options
166
Party
49
Party Details
89
Procedural Steps
83
Unassigned, Search for
174
Preparation
Bill of costs, Costs of 91
Case Plan, Costs of 124
Documents
91
Party
88
Rate Type
60
Show rates when different from
Prescribed Rates
58
238
CostsMaster User Guide Version 4
Prescribed Rates
Costs of Assessment, CLS Schedule
91
Schedule of inter partes costs at
57, 61, 95,
131
Presets
167
Applying
20
Fixed Fee, Applying
116
Rates, Applying
60
Merging parts
22
Mileage
161
Position on Export
95
Presets
167
Rounding, Effect on
72
Show letters in when zero
Solicitor Events
120
Using
61
Preview
131
Bill Settings
95
Export Phrases
136
Receipt
Disbursements
Property
25
Previous Solicitor
Events Case Plan
Recoverability
81
Attendances
75
Disbursements
78
52
Print Out
Attendances
75
Property
25
Private
Notes
74
Property
25
Procedural Step
Phase Options
166
Procedural Steps
83
Assessment Instruments
46
Bill Settings
95
Breakdowns
111
Create from Legal Aid Certificate
46
Date options
160
Importing CostsMaster 2 files
37
Mis-Assigned Counsel Search
174
Pasting attendances
20
Show In Colour
157
Profiles
170
Program Templates
37
Default Directory
40
File Locations
159
Quick Start Guides
187
Rate Type
60
Attendances
75
Enhancement
66
Hide Where Obvious
Redo
173
Replace
173
Report
Costs Budget
132
Disbursement
125
Export Templates
139
Exporting
135
Settings
125
Rounding
72
Options
161
Running Totals
178
Routine
88, 89
Applying Phases
104
Enhancement
67
Enhancement, importing from CostsMaster 2
37
Letters Out
60
Split by Task
176
Work, Case Plans
121, 124
139
Schedule
Documents
127, 131, 139
Inter partes costs at Legal Aid rates
57, 61, 91,
95, 131
Of time spent, CLAIM1
75, 114, 116
95
Rates
60
Category Description
58
Counsel
62
Counsel Events
120
Expert
78
Importing CostsMaster 2 files
78
Save
As Template
37
Automatic
158
Backups
158
Export Template As
Files
36
Verification
158
Properties
25
Editing
20
Export Phrases
137
Show in columns
157
127
Scratch Pad
178
Search
174
Text
173
37
Selecting
24
Shortcut
Auto-Insert Text
82
© 1999 - 2013 CostsMaster Ltd.
Index
Shortcut
Grids
195
Inputting Information
Other
198
Party
49
Sheets
187
Windows
194
Preparing
113
Settings
111
14
Solicitor
43
Advocate
83
Category
58
Change of, Half Fee
116
Change of, Legal Aid Certificate
46
Events Case Plan
123
Events Rate
120
Fee Earner
57
Grade
58
Hearing
83
Importing CostsMaster 2 files
37
Previous, Events Case Plan
52
Solicitor/Client
Attendances
75
Disbursements
78
Sort
Bill Settings
95
Case Plan
120
CLAIM1 & CLAIM1A
114
Dates on export
127
Grid
31
Index
75
Merging parts
22
Sounds
Dates
160
Options
162
Specific Enhancement
65
Spelling
Check Spelling in File
175
Column
32
Default DictionaryDirectory
40
Grid
29
Options
163
Splitting
23
Spreadsheet
Costs Budget
132
Importing work from
146
Standard Communications
89
Statement of Costs
111
Costs Assessed
85
Dates
52
Export Phrases
136
Export Templates
139
Exporting
133
Hearing Type
52
© 1999 - 2013 CostsMaster Ltd.
239
Success Fees
51
Assignment to part
52
Breakdown
111
Counsel
62
Disbursements
78
Export Settings
95
Importing CostsMaster 2 files
37
In Costs Draftsman's Fee Calculation
On Costs of Assessment
95
On Costs of Assessmentt
91
On Summarily Assessed Costs
95
95
Summary Assessment
111
Costs Assessed
85
Dates
52
Export Phrases
136
Export Templates
139
Exporting a Statement of Costs
133
Hearing Type
52
Importing CostsMaster 2 files
37
Include in Success Fee Calculation
95
N260
112
Settings
111
Statement of Costs
113
Supporting Documentation
Costs Budget
108, 132
System Requirements
7
Task
Apply automatically
176
Attendances
75
Attendances - Unassigned
174
Disbursements
78
Disbursements - Unassigned
174
Options
166
Party Details
89
Presets
167
Procedural Steps
83
Split Routines
176
Unassigned, Search for
174
Technical Support
188
Telephone Calls
Attendances
75
Long, Party
88
Party Details
89
Party Work
88
Rate Type
60
Sounds when entering
Splitting parts
23
Templates
Export Templates
162
131, 139
240
CostsMaster User Guide Version 4
Templates
File Location
159
Program Templates
37
Time
Attendances
75
Blank, Search
174
Entering
71
Estimated
25
Estimated, Search
174
Export Formatting
137
Export Phrase Formatting Reference
Hearing, FAS
86
Mark Estimated as Excluded
176
Negative
152, 165
Recording
176
Spent, Schedule of, CLAIM1
114
Time Recording System
Importing work from
144, 146, 152
Importing work from, Parties
49
Negative Time
165
Outputting work to
154
Work shown only on print-out
25
Toolbar
Grid
32, 33
Main Toolbar
169
Settings
169
Tools
Run Before Export
Fixed Fee
116
Part
52
Property
25
Running Totals
178
Success Fees
51
Viewing
Data
24
Exported Documents
127
Preview
131
Show work from all parts
178
190
Welcome Screen
13
Windows, Working with
16
Work
Anticipated
52, 104
From All Parts
178
Import
144
Import from CostsMaster File
145
Import from Time Recording System
Outputting
154
146
Work Done
Case Plans
134
Section in bill
95
XML
Export Totals
127
Importing Work
144, 146
Outputting Work
154
Schema
199
Schema v1.0
199
Schema v1.1
200
Schema v2.0
202
Schema v2.1
204
Totals
155
165
Totals
Export
127
Outputting
155
Running
178
Running, Options
157
Running, Rounding
72
XML
155
Travelling & Waiting
91
Bill Settings
95
Rate Type
60
Trial Mode
185
Undo
173
Updates
Check for Updates
User Guide
178
187
VAT 43
Auto-complete shortcut
Bill
43
Counsel's Success Fee
Default Rate
161
Disbursements
78
Draftsman
158
195
62
© 1999 - 2013 CostsMaster Ltd.


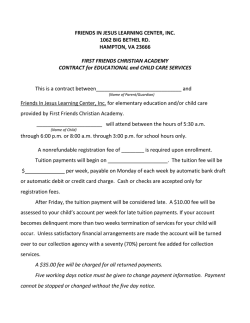
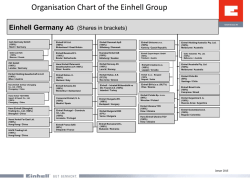
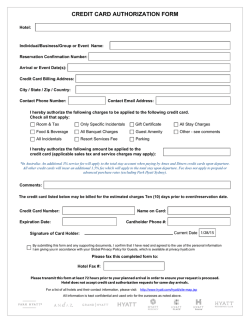
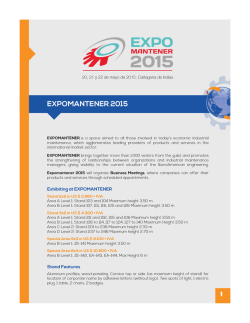


© Copyright 2026