
Always here to help you
Always here to help you
Register your product and get support at
www.philips.com/welcome
SCD860
1
SCD860
ENGLISH 4
DEUTSCH 30
ESPAÑOL 57
FRANÇAIS 84
ITALIANO 112
NEDERLANDS 139
PORTUGUÊS 166
4
ENGLISH
Table of contents
Introduction Product overview First-time setup Mounting the baby monitor on the wall Quick start guide
Viewing, hearing and monitoring your baby Viewing your baby Hearing your baby How to get notified that your baby cries Background monitoring Notification options
Guest viewers and accounts Inviting guests and a second admin Giving and removing access Account management
General app use Video and audio quality optimisation WiFi connection to the Internet Using the baby monitor away from home Using the app on several devices Resetting the baby monitor Firmware upgrades WiFi status light signals Security and privacy Network security Strong passwords Safe use of the baby monitor app Device compatibility Ordering accessories Guarantee and support Frequently asked questions 4
5
5
7
9
12
12
13
14
14
15
16
16
17
18
19
19
20
20
21
21
22
22
24
24
24
24
24
25
25
25
Introduction
Congratulations on your purchase and welcome to Philips Avent! To benefit
fully from the support that Philips Avent offers, register your product at
www.philips.com/welcome.
The uGrow Smart Baby Monitor uses new SafeConnect Technology to
work across networks. It automatically adjusts to the network conditions
to maintain a high-quality constant connection to your baby. It continuously
seeks to reconnect if connection drops. Bandwidth usage has been
optimised so that it does not drain the battery of your mobile device
unnecessarily. It even works when you use your phone for other things.
The uGrow Smart Baby Monitor requires Internet connection and
WiFi. A good Internet connection and WiFi are essential to get the best
performance of your uGrow Smart Baby Monitor. A lower quality Internet
connection and WiFi can reduce the quality of the connection between
the uGrow app and baby monitor. It is compatible with iOS 7 or higher,
or Android 4.1 or higher. It has all the support features you expect of a
baby monitor, including lullabies, multi-colour nightlight, and humidity and
temperature monitoring.
ENGLISH
5
Product overview (Fig. 1)
1 WiFi status light
2 Infrared lights
3 Baby monitor lens
4Microphone
5 Viewing indicator
6Nightlight
7Foot
8 Nightlight button
9 Lullaby play/pause button
10 Light sensor
11 Temperature and humidity sensor unit
12 Appliance plug socket
13 Reset button
14 On/off button
15 Wall mounting bracket
16Adapter
17 Appliance plug
First-time setup
Before you start the set-up procedure, make sure:
-- You have wireless Internet access (2.4 GHz WiFi).
-- You are close enough to the WiFi router to have a good WiFi signal.
-- If you use a WiFi repeater, make sure that your router and your WiFi
repeater have the same SSID (the network name) and that you use
the same password for the router and the repeater.
-- You have the password of your WiFi network at hand. Always connect the
baby monitor to a secure network (see chapter ‘Security and privacy’).
-- Make sure that your smart device runs on iOS 7 or higher, or
Android 4.1 or higher (for device compatibility, see chapter ‘Device
compatibility’).
1Download the Philips Avent uGrow Smart Baby Monitor app from
the App Store or Google Play. Use keywords ‘uGrow smart monitor’
or ‘Philips smart monitor’ to find the app.
2Launch the app.
6
ENGLISH
3Follow the on-screen instructions to create a uGrow account.
1 Make sure that you use a working email address on which you can
always be reached.
2 Use a strong password (see ‘Security and privacy’).
3 When you receive the verification email, follow the instructions in this
email to continue setting up your uGrow Smart Baby Monitor.
4 Create your user profile.
A user profile is needed to identify yourself to invited guest users.
5 Create your baby’s profile.
A baby name is needed to identify your baby monitor in the app, especially
when multiple baby monitors are connected to your account.
4Follow the on-screen instructions to connect the baby monitor to
the mains.
1 Insert the appliance plug into the appliance plug socket in the
temperature and humidity sensor unit and insert the adapter into
a wall socket.
2 The Wifi status light starts to flash orange when the baby monitor is
switched on. Wait until the WiFi status stops flashing. When the WiFi
status light is solid orange, the baby monitor is ready to read the WiFi
QR code.
5Link the baby monitor to your smart device.
1 Select the WiFi network you want to use. Please note that the baby
monitor only works on a 2.4 GHz WiFi network.
2 Enter the WiFi password.
ENGLISH
7
3 As instructed by the app, hold the WiFi QR code on the screen of
your smartphone or tablet at a distance of around 20 cm in front of
the baby monitor lens. Slowly move the smartphone or tablet closer
or further away from the lens to ensure the WiFi QR is read properly.
When the baby monitor has read the WiFi QR code, it plays a short
tune and the WiFi status light starts to flash green.
4 Follow the on-screen instructions to complete the setup procedure.
5 The WiFi status light turns solid green when the baby monitor is linked
to the WiFi network.
Note: If you are unable to complete the setup procedure and your baby monitor
is not linked to your smart device after you have completed the steps above,
check ‘Frequently asked questions’ in this user manual for a possible solution.
Tip: For more information on the WiFi status light, see chapter ‘WiFi status
light signals’.
6 Next you get an introductory tour through the app.
7 You can then choose between two options: ‘Help me mount the baby
monitor’ and ‘Let me see my baby’.
8 If you choose the first option, you can follow the on-screen
instructions to mount the baby monitor on the wall (see chapter
‘Mounting the baby monitor on the wall’). At the end of the on-screen
instructions you can choose ‘Let me see my baby’.
Mounting the baby monitor on the wall
The baby monitor comes with a wall mounting bracket. Before you mount
the baby monitor on the wall, make sure there is a good WiFi signal at the
point where you want to mount the baby monitor. Follow the instructions
below to fasten the wall mounting bracket to the wall and to attach the
baby monitor onto the wall mounting bracket.
1 Use a pencil to put a cross on the wall at the place where you want to
mount the baby monitor.
2 Hold the wall mounting bracket to the wall. Make sure that one of the
holes is right over the cross that you put on the wall at step 1.
Note: Make sure that the ring of the wall mounting bracket slants downward
when you hold it to the wall. If the ring of the wall mounting bracket slants
upward, turn the wall mounting bracket the other way around so that it is in
the correct position.
8
ENGLISH
3 Use a pencil to mark the other screw hole on the wall.
4 Drill 2 holes in the wall at the marks.
5 Use 2 screws to fasten the wall mounting bracket to the wall.
Tighten the screws with a screwdriver.
6 Pass the humidity and temperature sensor unit through the hole in
the wall mounting bracket. Then align the slots in the foot of the baby
monitor with the projections on the ring. Fit the groove in the foot of
the baby monitor onto the raised edge on the inside of the ring.
7 Turn the foot of the baby monitor clockwise to position the baby
monitor.
ENGLISH
9
8 Insert the appliance plug into the appliance plug socket in the
temperature and humidity sensor unit and insert the adapter into
a wall socket. Now your baby monitor is ready for use.
Quick start guide
Main screen features
Top of screen:
1 All notifications on/off
2 Sound level indication bar
3 Switch audio on/off
Bottom of screen:
4 Snap shot
5Talk-back
6Nightlight
7Lullabies
Quick action buttons
,, Snap shot: tap this button to take a photo of your baby.
-- When you take a photo of your baby, the photo will be stored in
the photo album on your smart device.
,, Talk-back: tap this button to talk to your baby directly.
Options available:
-- Talk back on or off
-- Adjust talk-back volume
,, Nightlight: tap this button to switch the nightlight on or off. Tap the
settings icon in the bottom right-hand corner to adjust the colour of
the nightlight or to set the nightlight timer. Options available:
-- Nightlight on/off
-- Set the nightlight timer or switch the nightlight on continuously
10
ENGLISH
-- Set the colour of the nightlight
,, Lullabies: tap this button to switch lullaby playing on or off. Tap the
settings icon in the bottom right-hand corner to select the lullabies,
to set a timer and to adjust the volume. Options available:
-- Select a lullaby from a list of lullabies
-- Program a play list from the lullabies available
-- Set the lullaby timer or choose play continuously
-- Adjust the playback volume.
Background monitoring icons
-- Bell icon: tap to switch notifications on or off.
ENGLISH
11
-- Mobile phone icon: tap to switch audio on or off.
Note: For more information about background monitoring, see chapter ‘Viewing,
hearing and monitoring your baby’.
Sound level indication bar
-- The lights indicate the sound level in your baby’s room.
Note: For more information, see chapter ‘Viewing, hearing and monitoring
your baby’.
Left tray
-- List of baby monitors linked to the app: tap the settings icon to set your
baby monitor preferences and to invite guest users to view your baby
-- My account: tap this option to view and adjust your account
information, your profile and your baby’s profile, and to add or remove
a baby monitor
-- About: tap this option for more information about the app, versions, etc.
-- Support: tap this option to open the support menu
Note: For more information about the left tray, see chapter ‘General app use’.
Right tray
The right tray gives information on the users connected.
Note:The options in the right tray are only available to you if you are an admin
(for more information about the right tray, see chapter ‘General app use’).
-- It shows who is currently watching
-- It shows who has access or has no access
The privacy mode button prevents all users from being able to watch
your baby
Dashboard
The app’s dashboard is in the bottom tray.
1Put your finger on the horizontal line on the screen just above the
icons at the bottom of the screen. Pull this line towards the top of
the screen. The icons at the bottom of the screen also move up.
12
ENGLISH
2When you have pulled the line up, the dashboard in the bottom tray
is fully visible.
On the dashboard you have a number of notification options:
1Sound
2Temperature
3Humidity
Note: For more information about the notification options on the dashboard,
see section ‘Notification options’ in chapter ‘Viewing, hearing and monitoring
your baby’ in this user manual.
Viewing, hearing and monitoring your baby
You can watch, hear and monitor your baby on your smartphone or tablet.
You can also comfort your child by talking to it.
Viewing your baby
Zooming and panning
Note:This feature is only available in portrait viewing mode.
1When in full screen mode, double tap or pinch outwards to zoom in.
2Double tap or pinch inwards to zoom out.
3Drag to pan through a zoomed-in image.
ENGLISH
13
Portrait or landscape viewing
-- Rotate your smartphone or tablet to view your baby in landscape
mode.
Night vision mode
When the light level in the room is low, the baby monitor switches to night
vision mode.
-- In this mode, you see black and white images of your baby on your
smart device.
Hearing your baby
You hear your baby when it starts to cry.
-- How loud you hear the baby, depends on the set volume level of your
smart device.
-- The level of sound produced by the baby is also visible on the sound
level indication bar. The number of lights that light up indicates the
loudness of the sound in your baby’s room. The indication bar works
from left to right. The further to the right the lights light up, the louder
the sound is.
Note:The audio on/off button must be set to ‘on’ for you to hear your baby at all.
Tip: Connect your smart device to mains power when you want to use it for
overnight monitoring to prevent the battery from running out.
14
ENGLISH
How to get notified that your baby cries
1Push notification: you receive a push notification when your baby
starts to cry.
Note: If you want to receive a notification while you are performing other
activities on your smart device (e.g. texting, phoning, browsing the Internet),
make sure that you set the all notifications toggle switch to ‘on ‘.
Tip: Switch on vibration in the ‘Settings’ of your smartphone if you want your
smartphone to vibrate to alert you when your baby cries, for instance when you
carry the smartphone in your pocket or because you are in a loud environment.
How to specify when you receive a notification
You can also specify in the dashboard when you want to receive a notification.
1Receive a notification when the your baby’s sound passes the set level.
2Receive a notification when the baby has been crying for a preset time.
Note: If you choose ‘no notification’, you don’t receive any notification that your
baby is crying (see section ‘Notification options’ in this chapter.
Switching notifications on or off on your smart device
Notifications are a setting on your smart device (outside the app). You can
select if and how you want to receive notifications from the app.
1Go to the notification centre on your device.
2Select notification and click to set it on or off.
Background monitoring
Background monitoring is a feature in the app that ensures that you can
hear your baby and/or receive notifications about your baby while you are
doing other things on your smart device. Background monitoring is on by
default, but you can switch it off.
Switching background monitoring off or on
-- Tap the bell icon to switch all notifications on or off. When the all
notifications toggle switch is set to ‘on’, you receive a message on
your screen when the baby starts crying. You can set your notification
preference in the dashboard and/or monitor settings screen.
Note: Set the all notifications toggle switch to ‘on’ to receive all notifications
about your baby if the app is running in the background, for example when
you do something else on your smart device or the device is on standby with
its screen off.The all notifications toggle switch has to be set to ‘on’ if you want
to adjust personalised notifications on temperature, sound and humidity in the
dashboard.
ENGLISH
15
-- Tap the mobile phone icon to switch audio on or off.
Note: If you mute the sound, you will not be able to hear your baby when you
switch to another function on your smart device (phoning, texting, etc.).
Note:When you make a mobile call or use a VoIP app (e.g. Skype,Viber or
FaceTime) to call someone, you will not hear your baby. As soon as the baby
starts to cry, however, you will receive a notification.
Switching from background monitoring to app main screen
The app remains active in the background, also when the device is on
standby. While background monitoring is active, there is a red bar at the
top of the screen of your smart device.
1To switch from background monitoring to the app main screen,
tap the red bar at the top of the screen to bring the app to the
foreground.
Notification options
The app’s notification options are in the dashboard. The dashboard is
located in the tray at the bottom of the screen. Pull up the dashboard to
see the option menu. The menu contains the following options.
Sound
-- Set the slider to a sound level above which you wish to be notified
Note: If the slider is set to ‘quiet’, you will hear your baby continuously when
you leave the app.
-- Set the duration of the sound after which you wish to be notified
Temperature
-- Set the temperature range above or below which you want to receive
a temperature notification
-- Switch temperature notification on or off
-- Display current temperature or history
Humidity
-- Set the humidity range above or below which you want to receive a
humidity notification
-- Switch humidity notification on or off
-- Display current humidity or history
16
ENGLISH
Guest viewers and accounts
Inviting guests and a second admin
You can invite up to nine relatives or friends as guests and allow them to
watch your baby on their smartphone or tablet. You can invite one of these
guests to act as second admin. A second admin has the same rights as the
first admin. Guests only have viewing rights and these rights are controlled
by the admin(s). Just like a guest, an admin has viewing rights.
On top of that, the admin has the right to invite guests, to give them
access, to remove their access and to disconnect them. The admin can also
deactivate his or her account and thereby disassociate the guests from the
baby monitor.
1In the left tray, tap on the settings icon next to the baby monitor.
2Scroll down and tap ‘Add new user’.
3Add a guest’s email address and his or her role (admin or guest).
4The app sends an email to the person invited and you see a
notification pop up that an email has been sent.
5The guest receives an email with an invitation code that is only valid
for a limited period. The email also contains a link to the App Store.
The guest can click this link to install the app.
6After installing the app, the guest creates an account by following the
instructions in the app.
ENGLISH
17
7The guest selects the ‘Connect to a shared baby monitor’ option
during the setup process. This opens the page on which the invitation
is validated.
8The guest enters the invitation code, his email address and confirms.
The code and the email address are checked.
9The admin receives an email that confirms that the guest has been
connected to the baby monitor and that the admin can now grant
the guest access.
10When the admin has granted the guest access, the guest can view
the baby.
-- When one or more people watch the baby, the red viewing indicator
lights up red.
Note: Although up to ten people (eight or nine guests and one or two admins)
have viewing rights to the same baby monitor, only three people can watch
the baby at the same time. If guests try to access the baby monitor while
three viewers are already watching, they will receive the message ‘Too many
connections’. Admins can always override the access of the guests if they want
to watch the baby.
Giving and removing access
Users with admin rights can determine who can watch the baby.
1To remove access for a guest viewer, go to the right tray, tap the
guest whose access you want to remove and tap the eye icon next
to the guest’s name.
Tip: If there are already three people watching your baby and you want to give
someone, e.g. the babysitter, access to the baby monitor, you can remove access
for one of the current viewers and give someone else access instead.
2To give a guest viewer access, go to the right tray, tap the guest you
want to give access and tap the eye icon next to the guest’s icon.
3If you want to remove access for all viewers simultaneously, tap the
privacy mode button. This will deny everyone except yourself access
to the baby monitor until you tap the privacy mode button again.
Tip:You can use the privacy mode button to have a moment of privacy with
your baby, e.g. to breastfeed or bathe the baby or to change its nappy.
The guests who try to access the baby monitor receive an on-screen notification.
18
ENGLISH
Account management
Disconnecting a guest
To disconnect guest users from the app permanently, you have to
remove them from the list of guests. A guest may also disconnect himself
permanently from the app.
Deactivating your user account
If there is only one admin and this admin deactivates his or her account,
all the accounts of guest users are disassociated from the baby monitor,
although the accounts continue to exist. If there are two admins, both
admins have to deactivate their accounts to disassociate all accounts. If only
one of the two admins deactivates his or her account, the guests remain
connected to the baby monitor.
If you want to transfer the baby monitor to someone else, if you lose the
baby monitor or if the baby monitor is stolen, we advise you to deactivate
the admin account or accounts. This is essential to protect you and your
baby’s privacy.
1To deactivate your account, go to the left tray and tap on
‘My account’.
2Tap on ‘Deactivate account’.
3A pop-up window appears that asks you to confirm that you wish to
deactivate your account.
4When you tap on ‘Deactivate’, a pop-up window confirms that your
account has been deactivated.
Adding or removing baby monitors
You can add up to ten baby monitors in the app. This allows you to
monitor more children or the same child in more rooms. You may, for
instance, want to install a monitor over the baby’s cot in the baby room
and over its playpen in the living room. You have to connect the baby
monitors to the app one by one.
ENGLISH
19
1Go to ‘My account’ in the left tray.
2You will see the list of baby monitors connected. Tap on ‘Add baby
monitor’.
3Follow the instructions in chapter ‘First-time setup’ in this user
manual to connect the baby monitor to the app.
General app use
Video and audio quality optimisation
The quality of the video and audio on your smart device may change
over time, depending on the available bandwidth of your connection to
Internet. Using a WiFi connection typically gives the best results, while 4G
and 3G may offer less bandwidth and deliver reduced quality. The app will
automatically offer you the best possible experience, by matching the video
and audio quality to the bandwidth available.
Matching takes place in steps:
1 Large bandwidth: good video and audio quality, with text notifications.
2 Reduced bandwidth (such as when using 3G): reduced video quality;
good audio quality, with text notifications.
3 Small bandwidth (such as when using 2G): only an audio link will be
available, with text notifications
4 Very small bandwidth: only text notifications are available
20
ENGLISH
WiFi connection to the Internet
You get the best results if you connect your smart device to the Internet
via WiFi. It will then automatically use the WiFi network to link to your baby
monitor. When there is no WiFi connection to the Internet, your smart
device switches to its 3G or 4G mobile data connection. Use of this data
connection may involve extra charges from your provider, depending on
your subscription. A video connection typically requires 0.1 to 0.25 MB of
data per second. An audio connection requires 0.01 MB of data per second.
If you want to prevent your smart device from connecting to the 3G or 4G
network, you have to switch off the mobile data connection of your device.
This will affect all other apps that may use the 3G or 4G mobile data
connection. Please note that, if you switch off the mobile data connection,
you will not be alerted that your baby is crying when you lose the WiFi
connection to the Internet.
Using the baby monitor away from home
You can use the monitor at any place where a 2.4 GHz WiFi network is
available, whether it as a friend’s or relative’s home or at a hotel or holiday
residence. If you have the WiFi network name and the WiFi password, you
can set up and use your baby monitor away from home. Follow the setup
instructions below to do so. Once you have set up connection with a WiFi
network, the settings are stored in the memory of your device and you
need not repeat the setup procedure as long as you use your app and
baby monitor at the same place.
Note: If the WiFi network connection requires an extra confirmation, e.g. to
agree to the terms of use, the baby monitor will not be able to connect to the
WiFi network.This may happen on hotel WiFi networks and other public WiFi
networks.
1There are two options to connect the baby monitor to the WiFi
network.
-- The first option: When you switch on the baby monitor, you get the
message ‘Baby monitor not found’. Wait until the app offers the option
‘Reconnect the baby monitor’.
-- The second option: Switch on the baby monitor. Open the left tray,
select the baby monitor and choose ‘Reconnect the baby monitor’.
2When the app has generated a WiFi QR code, hold the screen of
your smartphone or tablet at a distance of around 20 cm in front
of the baby monitor lens. Slowly move the smartphone or tablet
closer or further away from the lens to ensure the WiFi QR is read
properly.
ENGLISH
21
3Follow the rest of the on-screen instructions to complete setup.
The setup procedure is completed and the baby monitor is
connected to the WiFi network and ready for use, when the WiFi
status light on the front of the baby monitor turns solid green.
Note:When you return home, you have to follow the procedure above to
reconnect the baby monitor to your home WiFi network.
Using the app on several devices
You can use the uGrow Smart Baby Monitor app on more than one device
(e.g. on your iPhone and your iPad).
Note:When you log in with the same account on a device while the app is
active on another device, the device on which the app was active first will
automatically log you out.You cannot use the app under the same account on
two different devices simultaneously.
Resetting the baby monitor
The baby monitor has a reset button on the back. When you press this
button the baby monitor is reset to its factory default settings. This means
that you disassociate all accounts from the baby monitor.
Note: Always reset the baby monitor by pressing the reset button before you
transfer the baby monitor to someone else.This is necessary to protect your
privacy. Also reset the baby monitor when you buy or receive it second-hand.
How to reset to factory default settings
Note: Make sure the baby monitor is switched on before you reset it.
1 While the baby monitor is on, press the reset button on the back
of the baby monitor with a paperclip or another pointed object. It
is recommended to do this when the baby monitor is connected to
your WiFi network.
2Keep the reset button pressed until the baby monitor beeps, then
you can release the button. When you release the button, the baby
monitor plays a short tune to confirm the reset.
What to do after a reset to factory default settings
After the baby monitor has been reset, the WiFi status light flashes orange
when you switch on the baby monitor to indicate that it is rebooting after
a reset. When the WiFi status light stops flashing, you can connect the baby
monitor to your WiFi network again. Follow the instructions in chapter
‘First-time setup’ in this user manual. If you invited other people to access
the baby monitor, you need to invite them again.
22
ENGLISH
Firmware upgrades
Upgrading is essential to safeguard your privacy and the proper functioning
of the baby monitor and the app.
-- Essential upgrades are mandatory. Mandatory app upgrades are
installed on your smart device automatically and do not require
confirmation.You will only receive a notification that a forced
mandatory upgrade is taking place.
-- From time to time, you receive notifications that upgrades are available
for your baby monitor’s firmware or for the app software.
The upgrades are installed when you confirm them.
-- To look for firmware upgrades for your baby monitor, open the left
tray and tap the settings icon next to the baby monitor. Scroll down to
‘Firmware’ and tap on it to check for firmware upgrades. If an upgrade
is available, tap on it to install.
Note:When an upgrade is being installed, you are temporarily unable to view
and hear your baby.
WiFi status light signals
,, Off
1 Off: The baby monitor is off
,, Orange
1 Flashes orange fast: the baby monitor is starting up.
2 Flashes orange slowly: the baby monitor is upgrading its firmware.
Do not switch the baby monitor off during the firmware upgrade.
Note:The WiFi status light might switch off shortly during the firmware upgrade.
ENGLISH
23
3 Solid orange: the camera of the baby monitor is ready to read the WiFi
QR code generated by your smartphone or tablet.
,, Green
1 Flashes green: the WiFI QR code has been read successfully.
2 Solid green: the baby monitor is connected to the WiFi network.
,, Red
1 Flashes red slowly: you entered the wrong WiFi password.
2 Solid red: the baby monitor fails to connect to the WiFi network.
24
ENGLISH
Security and privacy
Network security
WiFi hotspots in public places, such as airports and hotels, are convenient,
but they are often not secure.
We advise you to use the baby monitor only on a WiFi network protected
with WPA2 encryption. We advise you not to use the baby monitor on a
network that uses WEP encryption.
Note:WiFi networks that do not require a password are not secure.
Strong passwords
Passwords are essential to protect your WiFi network and your account
against unauthorised access. The stronger your password, the better
protected your WiFi network and your account is.
The rules for a strong password are:
1 A strong password has at least 8 characters.
2 A strong password does not contain your name, your baby’s name,
another real name or a brand name.
3 A strong password does not contain a complete word.
4 A strong password is very different from passwords that you have used
before.
5 A strong password contains characters from at least two of the
following categories:
-- Letters: A, B, C or a, b, c
-- Numbers: 0, 1, 2, 3, 4, 5, 6, 7, 8, 9
-- Symbols: _ . @ $
Safe use of the baby monitor app
Only use the app on a secure network
Don’t use the app on an unsecured WiFi network. We advise you to use the
baby monitor only on a WiFi network protected with WPA2 encryption.
You can also use your phone’s data network (often referred to as 3G or 4G).
Always use the latest software and firmware
Always upgrade the app software and the baby monitor firmware when
you receive a notification that an upgrade is available. Upgrades are made
available when there are software improvements or to prevent a security
issue. If you fail to upgrade, your connection to the baby monitor via the
app may no longer be safe and private.
Device compatibility
,,
-,,
-,,
-,,
--
iPhone compatibility
iPhone 4S and newer
iPad compatibility
iPad 2 and newer
iPod Touch compatibility
iPod Touch 5th gen and newer
Android compatibility
Android 4.1 or higher
Note: For the latest information on device compatibility, please visit
www.philips.com/ugrow.
ENGLISH
25
Ordering accessories
To buy accessories or spare parts, visit www.shop.philips.com/service
or go to your Philips dealer. You can also contact the Philips Consumer
Care Centre in your country (see the worldwide guarantee leaflet for
contact details).
Guarantee and support
If you need information or support, please visit the Philips website at
www.philips.com/support or read the separate worldwide guarantee
leaflet.
Frequently asked questions
For more frequently asked questions about this baby monitor, see the
support page of this product on www.philips.com/support.
Question
Answer
Troubleshooting
Why can’t I find the
app in the App Store or
Google Play?
You can download the app from the Apple App Store or Google Play, by
searching for uGrow Smart Baby Monitor. If you do not see the app in the
App Store or Google Play, your phone may not have the required iOS or
Android version. This app is only compatible with iOS 7 or higher, or Android
4.1 or higher.
I cannot download and Please check if any of the following factors prevent a smooth download. Is
install the app. What can your WiFi signal stable and strong enough? Does your smart device run on
I do?
iOS 7 or higher, or Android 4.1 and higher? Do you have enough space left
on your smart device to save the app? Did you enter the correct password
for the App Store or Google Play?
I cannot setup the baby If the WiFi status light is solid orange and flashed red while trying to connect,
monitor. Each time I end the WiFi password entered is wrong. Restart the set up process. Re-enter the
WiFi password and make sure that the password is correct .
up in the connection
error screen. What is
the matter?
If the WiFi status light is solid orange and was solid red while trying to
connect, the baby monitor fails to connect to the WiFi network. First check
if your phone or tablet uses the same WiFi network you want to connect
the baby monitor to. Then check if you have Internet access to 2.4GHz WiFi.
If this does not solve the problem, make sure the router SSID (the network
name) does not contain special symbols. If it does, change the name of your
router SSID accordingly.
I have problems making
my baby monitor read
the QR code on my
smart device. What can
I do?
Make sure that you hold the WiFi QR code at approx. 20 cm/8 inch distance
from the lens. Try moving the smart device slightly up or down or left or right
to ensure the WiFi QR code is directly in front of the baby monitor. You can
also try moving the smart device closer to or further away from the baby
monitor lens to allow proper focussing. Make sure that there is enough light
in the room, but avoid too bright light. When the baby monitor has read
the WiFi QR code, you hear a confirmation sound and the WiFi status light
flashes green.
26
ENGLISH
Question
Answer
Perhaps you did not remove the protective foil from the baby monitor lens.
Remove the foil.
Perhaps part of your hand covers the WiFi QR code. Hold your device in
such a way that your hand does not cover the WiFi QR code.
If the WiFi status light is solid orange, the baby monitor did not read the
QR code successfully. Go back using the arrow in the top left-hand corner of
the screen and follow the QR code instructions.
If the WiFi status light flashes orange, the camera is still booting. Wait until the
light is solid orange. Then go back using the arrow in the top left-hand corner
of the screen and follow the QR code instructions.
I cannot see my baby.
What is wrong?
Check if the WiFi signal is strong enough in the room where the baby
monitor is placed.
Check if the baby monitor is connected to a live power socket and switched
on.
The WiFi status light on the front of the baby monitor must be solid green
(see chapter ‘WiFi status light signals’).
If you use more than one baby monitor, check that the correct one is
selected. Go to the left tray and tap the baby monitor to see if it is active.
Perhaps there are already three people watching the baby. The app only
allows three people to watch simultaneously. If you have administrator rights,
you can remove access for one of the guests to be able to watch yourself.
Why does the app not
notify me that the baby
is crying?
Check if the baby monitor is connected to the WiFi network. The WiFi status
light on the front of the baby monitor must be solid green.
The baby monitor may be offline. To receive a notification that the baby
monitor goes offline, go to the left tray and switch on this notification under
‘Settings’.
The sound threshold for notification may have been set too high. In that
case, the app will only notify you when the baby produces a lot of sound.
Open the dashboard to lower the sound threshold to ensure that you will be
notified sooner when the baby starts crying.
You may have set the duration of the crying too long. Choose a shorter time
so that the app notifies you sooner.
The volume of your phone may be off. Set the volume of your phone to
normal.
Perhaps talk-back is active. Tap the talk-back icon to switch off talk-back.
During talk-back you don’t hear any sounds from the baby.
Check if you have not received an email to notify that your account has been
removed. If you have viewing rights as a guest, the administrator may also
deny you access temporarily. Contact the administrator and ask him or her
do enable you or to reinvite you as a guest.
ENGLISH
Question
Answer
I lose connection
frequently. What is the
matter?
Check if the WiFi signal in the room where the baby monitor is placed is
strong enough and stable. If this is not the case, you need a WiFi repeater to
get a strong and stable signal. If you use a WiFi repeater, make sure that your
router and your WiFi repeater have the same SSID and that you use the
same password for the router and the repeater.
27
If the WiFi status light on the front of the baby monitor is solid green and you
keep losing connection, there may be a problem with the Internet connection
of your smart device. Check the WiFi signal on your smart device or the 3G
or 4G speed by trying to watch a movie, e.g. one on YouTube.
After I changed my
router, I cannot see my
baby anymore. What is
wrong?
First make sure that your smart device has a good WiFi signal from the
new router. There are two options to connect the baby monitor to the
WiFi network. The first option is to switch on the baby monitor. The app
will give the message ‘Baby monitor not found’. Go to ‘Troubleshooting’ and
select ‘Reconnect baby monitor’. The second option is to open the left tray
when the app gives the message ‘Baby monitor not found’. Select the baby
monitor in the left tray and select ‘Reconnect baby monitor’. When the
app has generated a WiFi QR code, hold the screen of your smart device
at a distance of 20cm in front of the baby monitor’s lens. Next, follow the
on-screen instructions to complete setup. The setup procedure has been
completed successfully when the WiFi status light on the front of the baby
monitor turns solid green.
I have been invited as
a guest, but why don’t
I see anything when I
open the app?
Check if you have not received an email to notify that your account has been
removed. If you have viewing rights as a guest, the administrator may also
deny you access temporarily. Contact the administrator and ask him or her
do enable you or to reinvite you as a guest.
Check if your smart device is connected to the Internet.
The baby monitor may be offline. To receive a notification that the baby
monitor goes offline, go to the left tray and switch on this notification under
‘Settings’.
The sound threshold for notification may have been set too high. In that
case, the app will only notify you when the baby produces a lot of sound.
Open the dashboard to lower the sound threshold to ensure that you will be
notified sooner when the baby starts crying.
You may have set the duration of the crying too long. Choose a shorter time
so that the app notifies you sooner.
The volume of your phone may be off. Set the volume of your phone to
normal.
28
ENGLISH
Question
Answer
Tips and tricks
Do I have to keep
the app on screen to
monitor my baby?
No, the app can monitor in the background while you do other things on
your smartphone or tablet. Tap the mobile phone icon. Now you hear your
baby and also hear when it starts to cry. When the all notifications toggle
switch is set to on, you will also receive an on-screen notification that the
baby is crying, while the app runs in the background.
Why do I get black and
white images instead of
colour ones?
The baby monitor has switched to night vision mode. The room where the
baby monitor is placed is dark.
If there is enough light in the room, the light sensor on top of the baby
monitor may be covered or dirty. Make sure that this sensor is fully exposed
to the light in the room.
If my device is locked or
I am using another app
or making a phone call,
can I still hear my baby?
Yes, you can choose to continue monitoring your baby in the background.
Please note that if you use your phone to make a call, you will only hear a
ringtone when the baby starts crying. You will not hear your baby. Tap the
mobile phone symbol to switch on background audio. When background
audio is on, you hear your baby while you are engaged in other activities. You
can also choose to receive a notification when your baby is crying. Tap the
bell symbol on the main screen to switch all notifications on or off. When all
notifications is set to on, you will receive a message on your screen when the
baby is crying.
Use and learn
Do I need an extra
account if I have more
baby monitors?
No, you do not need an extra account if you use more baby monitors. You
can add a baby monitor to your uGrow Smart Baby Monitor app. Go to ‘My
account’ in the left tray. Here you see a list of the baby monitors connected
to the app. Tap on ‘Add baby monitor’. Follow the instructions in chapter
‘First-time setup’ to connect the baby monitor to the app.
Can I use more baby
monitors in the same
app?
You can connect up to ten baby monitors to the app, but you can only view
the video from one baby monitor at the time. You will receive notifications
from the other baby monitors connected. If you receive a notification and tap
on it, the app will take you directly to that baby monitor. You can also select
the baby monitor you want to view in the left tray.
Why does it take a
long time for the app
to load?
The Internet connection of your smart device or the WiFi connection of the
baby monitor may be slow. Please check the connection of your smart device
and of the baby monitor. The app needs a stable network connection.
Is the baby monitor
hacker-proof?
We do everything we can to prevent hacking and issue frequent updates.
Please make sure that you always use the latest app software and the latest
baby monitor firmware. If you lose your smart device, reset the baby monitor
to remove any connections to it. You can also log in on the app from another
smart device and delete your account. If you are the only administrator, all
guest users will be disconnected from the baby monitor too.
ENGLISH
29
Question
Answer
I have lost my
smartphone. How can I
prevent strangers from
viewing my baby?
Log in on the app from another smart device and delete your account. If
you are the only administrator, this will disconnect all guest users of the app
from the baby monitor tool. You can also reset the baby monitor to disable all
connections to the device you lost. You find the reset button on the back of
the baby monitor.
Will I be notified of
upgrades of the app
or the baby monitor
software?
Yes, you will receive a notification on your phone to upgrade via the App
Store. This will happen periodically. Upgrade notifications for the firmware of
the baby monitor will appear in the app along with instructions on how to
upgrade.
My phone or tablet
becomes warm when
I use the app. Is this
normal?
Your device needs the power to provide high-quality video. This does not
harm your device. To prevent this, we advise you to update your device to the
latest iOS and uGrow app version. Your device does not warm up when you
run the app in the background.
30
DEUTSCH
Inhaltsangabe
Einführung Produktübersicht Ersteinrichtung Anbringen des Babyphones an der Wand Kurzanleitung Sehen, Hören und Überwachen Ihres Babys Ansehen Ihres Babys Hören Ihres Babys So werden Sie benachrichtigt, dass Ihr Baby weint Hintergrundüberwachung Benachrichtigungsoptionen Gastbenutzer und Konten Einladen von Gästen und einem zweiten Administrator Erteilen und Entziehen von Zugriffsrechten Kontoverwaltung Allgemeine App-Nutzung Optimierung der Video- und Audioqualität WiFi-Verbindung zum Internet Verwenden des Babyphones unterwegs Verwenden der App auf mehreren Geräten Zurücksetzen des Babyphones Firmware-Aktualisierungen WiFi-Statusanzeigen Sicherheit und Datenschutz Netzwerksicherheit Starke Passwörter Sichere Verwendung der Babyphone-App Gerätekompatibilität Zubehör bestellen Garantie und Support Häufig gestellte Fragen 30
31
31
33
35
38
38
39
40
40
41
42
42
44
44
46
46
46
47
48
48
48
49
50
50
51
51
51
51
52
52
Einführung
Herzlichen Glückwunsch zu Ihrem Kauf und willkommen bei Philips Avent!
Um den Support von Philips Avent optimal zu nutzen, registrieren Sie Ihr
Produkt bitte unter www.philips.com/welcome.
Das uGrow Smart-Babyphone nutzt die neue SafeConnect Technology
und funktioniert so in allen Netzwerken. Es passt sich automatisch
an die Netzwerkbedingungen an, sodass jederzeit eine hochwertige,
kontinuierliche Verbindung zu Ihrem Baby gewährleistet wird. Sollte
die Verbindung doch einmal abbrechen, wird diese vom Babyphone
automatisch wiederhergestellt. Die Bandbreitennutzung wurde so optimiert,
dass der Akku Ihres mobilen Geräts geschont wird. Es funktioniert sogar,
wenn Sie Ihr Telefon für andere Zwecke verwenden.
Für das uGrow Smart-Babyphone ist eine Internetverbindung sowie WiFi
erforderlich. Eine gute Internetverbindung und WiFi sind Voraussetzung, damit
Ihr uGrow Smart-Babyphone optimal funktionieren kann. Eine niedrigere
Qualität von Internetverbindung und WiFi kann die Verbindung zwischen der
uGrow App und dem Babyphone beeinträchtigen. Es ist mit iOS7 und höher
DEUTSCH
31
bzw. Android 4.1 und höher kompatibel. Es verfügt über alle Funktionen,
die Sie von einem Babyphone erwarten, wie z. B. Schlaflieder, mehrfarbiges
Nachtlicht sowie Luftfeuchtigkeits- und Temperaturüberwachung.
Produktübersicht (Abb. 1)
1WiFi-Statusanzeige
2Infrarotleuchten
3Babyphone-Objektiv
4Mikrofon
5Beobachtungsanzeige
6Nachtlicht
7Fuß
8Nachtlicht-Taste
9 Wiedergabe-/Pause-Taste für Schlaflieder
10Lichtsensor
11 Temperatur- und Feuchtigkeitssensoreinheit
12Gerätesteckerbuchse
13Rückstelltaste
14Ein-/Ausschalter
15Wandmontagehalterung
16Ladegerät
17Gerätestecker
Ersteinrichtung
Stellen Sie vor der Installation Folgendes sicher:
-- Sie haben kabellosen Internetzugang (2,4 GHz WiFi).
-- Sie befinden sich so nahe am WiFi-Router, dass Sie ein gutes
WiFi-Signal haben.
-- Wenn Sie einen WiFi-Repeater verwenden, vergewissern Sie sich,
dass Ihr Router und Ihr WiFi-Repeater dieselbe SSID (Netzwerkname)
haben und dass Sie dasselbe Passwort für den Router und den
Repeater verwenden.
-- Sie haben das Passwort für Ihr WiFi-Netzwerk zur Hand. Verbinden
Sie das Babyphone immer mit einem sicheren Netzwerk (siehe Kapitel
“Sicherheit und Datenschutz”).
-- Stellen Sie sicher, dass Ihr Smart-Gerät iOS7 oder höher bzw.
Android 4.1 oder höher ausführt (Informationen zur Kompatibilität
finden Sie im Kapitel “Gerätekompatibilität”).
1Laden Sie die Philips Avent uGrow Smart-Babyphone-App aus
dem App Store oder von Google Play herunter.Verwenden Sie die
Stichworte “uGrow smart monitor” oder “Philips smart monitor”,
um die App zu finden.
2Starten Sie die App.
32
DEUTSCH
3Befolgen Sie die Anweisungen auf dem Bildschirm, um ein uGrowKonto zu erstellen.
1 Vergewissern Sie sich, dass Sie eine gültige E- Mail-Adresse verwenden,
über die Sie jederzeit erreichbar sind.
2 Verwenden Sie ein starkes Passwort (siehe “Sicherheit und
Datenschutz”).
3 Anschließend erhalten Sie eine Bestätigungs-E-Mail. Befolgen Sie die
Anweisungen in dieser E-Mail, um mit der Einrichtung des uGrow
Smart-Babyphones fortzufahren.
4 Erstellen Sie ein Benutzerprofil.
Ein Benutzerprofil ist erforderlich, um sich gegenüber eingeladenen
Gastbenutzern zu identifizieren.
5 Erstellen Sie das Profil Ihres Babys.
Ein Babyname ist erforderlich, um Ihr Babyphone in der App zu
identifizieren, insbesondere, wenn mehrere Babyphones mit Ihrem Konto
verbunden sind.
4Befolgen Sie die Anweisungen auf dem Bildschirm, um das Babyphone
an die Stromversorgung anzuschließen.
1 Stecken Sie den Gerätestecker in die Gerätebuchse am Temperaturund Feuchtigkeitssensor, und stecken Sie dann den Adapter in eine
Steckdose.
2 Die WiFi-Statusanzeige blinkt orange, wenn das Babyphone
eingeschaltet wird. Warten Sie, bis die WiFi-Statusanzeige nicht mehr
blinkt. Wenn die WiFi-Statusanzeige dauerhaft orange leuchtet, ist das
Babyphone zum Lesen des WiFi-QR-Codes bereit.
5Verbinden Sie das Babyphone mit Ihrem Smart-Gerät.
1 Wählen Sie das WiFi-Netzwerk aus, das Sie verwenden möchten.
Bitte beachten Sie, dass das Babyphone nur mit einem 2,4-GHz-WiFiNetzwerk funktioniert.
2 Geben Sie das WiFi-Passwort ein.
DEUTSCH
33
3 Halten Sie, wie in der App beschrieben, den WiFi-QR-Code auf dem
Bildschirm Ihres Smartphones oder Tablets in einem Abstand von ca.
20 cm vor das Objektiv des Babyphones. Bewegen Sie das Smartphone
bzw. Tablet langsam näher an das Objektiv heran oder weiter davon
weg, um sicherzustellen, dass der WiFi-QR-Code richtig gelesen wird.
Wenn das Babyphone den WiFi-QR-Code gelesen hat, gibt es eine
kurze Tonfolge aus, und die WiFi-Statusanzeige blinkt grün.
4 Befolgen Sie die Anweisungen auf dem Bildschirm, um die Einrichtung
abzuschließen.
5 Die WiFi-Statusanzeige leuchtet dauerhaft grün, wenn das Babyphone
mit dem WiFi-Netzwerk verbunden ist.
Hinweis:Wenn Sie die Einrichtung nicht abschließen können und das
Babyphone nach den oben beschriebenen Schritten nicht mit Ihrem SmartGerät verbunden ist, lesen Sie das Kapitel “Häufig gestellte Fragen” in dieser
Bedienungsanleitung, um eine Lösung zu finden.
Tipp:Weitere Informationen zur WiFi-Statusanzeige erhalten Sie im Kapitel
“WiFi-Statusanzeigen”.
6 Danach erhalten Sie eine Einführungstour durch die App.
7 Sie können dann zwischen zwei Optionen auswählen: “Help me mount
the baby monitor” (Helfen Sie mir beim Anbringen des Babyphones)
und “Let me see my baby” (Ich möchte mein Baby sehen).
8 Wenn Sie die erste Option auswählen, können Sie den Anweisungen
auf dem Bildschirm folgen, um das Babyphone an der Wand
anzubringen (siehe Kapitel “Anbringen des Babyphones an der Wand”).
Am Ende der Anweisungen können Sie “Let me see my baby”
(Ich möchte mein Baby sehen) auswählen.
Anbringen des Babyphones an der Wand
Das Babyphone verfügt über eine Wandhalterung. Bevor Sie das
Babyphone an der Wand anbringen, vergewissern Sie sich, dass das
WiFi-Signal an der gewünschten Stelle gut ist. Folgen Sie den nachfolgenden
Anweisungen zum Befestigen der Wandhalterung an der Wand bzw. zum
Befestigen des Babyphones an der Wandhalterung.
1 Verwenden Sie einen Bleistift, und markieren Sie die Stelle an der
Wand, an der Sie das Babyphone anbringen möchten.
2 Halten Sie die Wandhalterung an die Wand. Stellen Sie sicher, dass
eines der Löcher sich direkt über der in Schritt 1 markierten Stelle an
der Wand befindet.
Hinweis: Stellen Sie sicher, dass der Ring der Wandhalterung nach unten
geneigt ist, wenn Sie sie an die Wand halten.Wenn der Ring der Wandhalterung
nach oben geneigt ist, drehen Sie die Wandhalterung um, sodass sie sich in der
richtigen Position befindet.
34
DEUTSCH
3 Markieren Sie mit einem Bleistift das zweite Bohrloch an der Wand.
4 Bohren Sie anhand der Markierungen zwei Löcher in die Wand.
5 Verwenden Sie zwei Schrauben, um die Wandhalterung an der Wand
zu befestigen. Ziehen Sie die Schrauben mit einem Schraubendreher fest.
6 Führen Sie die Feuchtigkeits- und Temperatursensoreinheit durch das
Loch in der Wandhalterung. Richten Sie anschließend die Schlitze am
Standfuß des Babyphones an den Vorsprüngen am Ring aus. Setzen Sie
die Rille im Standfuß des Babyphones auf den erhöhten Rand an der
Innenseite des Rings.
7 Drehen Sie den Standfuß des Babyphones im Uhrzeigersinn, um das
Babyphone in Position zu bringen.
DEUTSCH
35
8 Stecken Sie den Gerätestecker in die Gerätesteckerbuchse an der
Temperatur- und Feuchtigkeitssensoreinheit, und stecken Sie den
Adapter in die Steckdose. Das Babyphone ist jetzt betriebsbereit.
Kurzanleitung
Funktionen des Hauptbildschirms
Oben auf dem Bildschirm:
1 Alle Benachrichtigungen ein/aus
2Lautstärkeleiste
3 Audio ein-/ausschalten
Unten auf dem Bildschirm:
4Schnappschuss
5Antworten
6Nachtlicht
7 Schlaflieder
Schnelltasten
,, Schnappschuss: Tippen Sie auf diese Schaltfläche, um ein Foto Ihres
Babys aufzunehmen.
-- Wenn Sie ein Foto Ihres Babys aufnehmen, wird dieses Foto im
Fotoalbum Ihres Smart-Geräts gespeichert.
,, Gegensprechfunktion: Tippen Sie auf diese Schaltfläche, um direkt mit
Ihrem Baby zu sprechen.Verfügbare Optionen:
-- Gegensprechfunktion ein- oder ausschalten
-- Gegensprechlautstärke anpassen
,, Nachtlicht: Tippen Sie auf diese Schaltfläche, um das Nachtlicht einoder auszuschalten. Tippen Sie auf das Symbol für die Einstellungen
in der unteren rechten Ecke, um die Farbe des Nachtlichts oder den
Nachtlicht-Timer einzustellen.Verfügbare Optionen:
-- Nachtlicht ein-/ausschalten
-- Nachtlicht-Timer einstellen oder Nachtlicht dauerhaft einschalten
36
DEUTSCH
-- Farbe des Nachtlichts einstellen
,, Schlaflieder: Tippen Sie auf diese Schaltfläche, um ein Schlaflied
wiedergegeben oder auszuschalten. Tippen Sie auf das Symbol für
die Einstellungen in der unteren rechten Ecke, um die Schlaflieder
auszuwählen, einen Timer festzulegen oder die Lautstärke
einzustellen.Verfügbare Optionen:
-- Ein Schlaflied aus der Liste der Schlaflieder auswählen
-- Eine Wiedergabeliste aus den verfügbaren Schlafliedern erstellen
-- Schlaflied-Timer stellen oder dauerhafte Wiedergabe auswählen
-- Wiedergabelautstärke einstellen
Symbole für die Hintergrundüberwachung
-- Glockensymbol: Tippen Sie auf dieses Symbol, um Benachrichtigungen
ein- oder auszuschalten.
DEUTSCH
37
-- Mobiltelefonsymbol: Tippen Sie auf dieses Symbol, um den Ton
ein- oder auszuschalten.
Hinweis:Weitere Informationen zur Hintergrundüberwachung erhalten Sie im
Kapitel “Sehen, Hören und Überwachen Ihres Babys”.
Lautstärkeleiste
-- Die Leuchtpunkte zeigen den Geräuschpegel im Zimmer Ihres Babys an.
Hinweis:Weitere Informationen erhalten Sie im Kapitel “Sehen, Hören und
Überwachen Ihres Babys”.
Linke Infoleiste
-- Liste der Babyphones, die mit der App verbunden sind: Tippen Sie auf
das Symbol für die Einstellungen, um die bevorzugten Einstellungen für
das Babyphone festzulegen und um Gastbenutzer einzuladen, Ihr Baby
zu sehen.
-- Mein Konto: Tippen Sie auf diese Option, um Ihre Kontoinformationen,
Ihr Profil und das Profil Ihres Babys anzuzeigen und zu bearbeiten oder
um ein Babyphone hinzuzufügen oder zu entfernen.
-- Info: Tippen Sie auf diese Option, um weitere Informationen zur App,
zu den Versionen usw. zu erhalten.
-- Support: Tippen Sie auf diese Option, um das Supportmenü zu öffnen.
Hinweis:Weitere Informationen zur linken Infoleiste erhalten Sie im Kapitel
“Allgemeine App-Nutzung”.
Rechte Infoleiste
In der rechten Infoleiste erhalten Sie Informationen zu den verbundenen
Benutzern.
Hinweis: Die Optionen in der rechten Infoleiste sind nur verfügbar, wenn Sie als
Administrator angemeldet sind (weitere Informationen zur rechten Infoleiste
erhalten Sie im Kapitel “Allgemeine App-Nutzung”).
-- Zeigt an, wer gerade zusieht.
-- Zeigt an, wer Zugriff hat oder keinen Zugriff hat.
Durch Aktivieren der Schaltfläche für den privaten Modus ist Ihr Baby für
keinen Benutzer mehr sichtbar.
38
DEUTSCH
Dashboard
Das Dashboard der App befindet sich in der unteren Infoleiste.
1Legen Sie einen Finger auf die horizontale Linie direkt über den
Symbolen am unteren Rand des Bildschirms. Ziehen Sie diese Linie
nach oben auf dem Bildschirm. Die Symbole am unteren Rand des
Bildschirms bewegen sich ebenfalls nach oben.
2Wenn Sie die Linie nach oben gezogen haben, ist das Dashboard in
der unteren Infoleiste vollständig sichtbar.
Auf dem Dashboard sind folgende Benachrichtigungsoptionen verfügbar:
1Ton
2Temperatur
3Luftfeuchtigkeit
Hinweis:Weitere Informationen zu den Benachrichtigungsoptionen auf dem
Dashboard erhalten Sie im Kapitel “Sehen, Hören und Überwachen Ihres
Babys”, Abschnitt “Benachrichtigungsoptionen”, in dieser Bedienungsanleitung.
Sehen, Hören und Überwachen Ihres Babys
Sie können Ihr Baby auf Ihrem Smartphone oder Tablet sehen, hören und
überwachen. Darüber hinaus besteht die Möglichkeit, Ihr Kind zu beruhigen,
indem Sie mit ihm sprechen.
Ansehen Ihres Babys
Zoomen und Schwenken
Hinweis: Diese Funktion ist nur im Hochformat-Modus verfügbar.
1Wenn der Vollbildmodus aktiviert ist, können Sie das Bild vergrößern,
indem Sie zweimal darauf tippen oder zwei Finger auseinanderziehen.
2Durch zweimaliges Tippen oder das Zusammenführen zweier Finger
wird das Bild verkleinert.
DEUTSCH
39
3Durch Ziehen können Sie durch ein vergrößertes Bild schwenken.
Anzeige im Hoch- oder Querformat
-- Drehen Sie Ihr Smartphone oder Tablet, um Ihr Baby im Querformat
anzuzeigen.
Nachtsichtmodus
Wenn die Lichtintensität im Raum niedrig ist, schaltet das Babyphone in
den Nachtsichtmodus.
-- In diesem Modus sehen Sie Schwarzweißbilder Ihres Babys auf dem
Smart-Gerät.
Hören Ihres Babys
Sie hören Ihr Baby, wenn es anfängt zu weinen.
-- Wie laut Sie das Baby hören, hängt von der Lautstärkeeinstellung Ihres
Smart-Geräts ab.
-- Der von Ihrem Baby erzeugte Geräuschpegel ist ebenfalls auf der
Lautstärkeleiste zu sehen. Die Anzahl der Leuchtpunkte zeigt den
Geräuschpegel im Zimmer Ihres Babys an. Die Anzeigeleiste geht von
links nach rechts. Je weiter rechts die Leuchtpunkte aktiviert werden,
desto lauter ist das Geräusch.
Hinweis: Der Ein-/Ausschalter für den Ton muss auf “Ein” gestellt sein, um Ihr
Baby hören zu können.
Tipp: Schließen Sie Ihr Smart-Gerät an eine Steckdose an, wenn Sie die
Überwachungsfunktion nachts verwenden möchten, um zu verhindern,
dass sich der Akku leert.
40
DEUTSCH
So werden Sie benachrichtigt, dass Ihr Baby weint
1Push-Benachrichtigung: Sie erhalten eine Push-Benachrichtigung,
wenn Ihr Baby anfängt zu weinen.
Hinweis:Wenn Sie auch Benachrichtigungen erhalten möchten während Sie
andere Aktivitäten auf Ihrem Smart-Gerät ausführen (z. B.Textnachrichten
senden, telefonieren, im Internet surfen), stellen Sie sicher, dass der
Wahlschalter für alle Benachrichtigungen auf “Ein” gestellt ist.
Tipp: Schalten Sie in den Einstellungen Ihres Smartphones den Vibrationsmodus
ein, wenn Sie möchten, dass Ihr Smartphone vibriert, um Sie zu
benachrichtigen, wenn Ihr Baby weint, z. B. wenn Sie das Smartphone in Ihrer
Hosentasche tragen oder sich in einer lauten Umgebung aufhalten.
So legen Sie fest, wann Sie eine Benachrichtigung erhalten
Sie können im Dashboard auch festlegen, wann Sie eine Benachrichtigung
erhalten möchten.
1Erhalten Sie Benachrichtigungen, wenn die Geräusche Ihres Babys
den eingestellten Wert überschreiten.
2Erhalten Sie Benachrichtigungen, wenn Ihr Baby die voreingestellte
Zeit lang geweint hat.
Hinweis:Wenn Sie “No notification” (Keine Benachrichtigung) auswählen,
erhalten Sie keine Benachrichtigung, wenn Ihr Baby weint (siehe Abschnitt
“Benachrichtigungsoptionen” in diesem Kapitel).
Ein- oder Ausschalten von Benachrichtigungen auf Ihrem
Smart-Gerät
Benachrichtigungen sind eine Einstellung auf Ihrem Smart-Gerät (außerhalb
der App). Sie können einstellen, ob und wie Sie Benachrichtigungen von
der App erhalten.
1Öffnen Sie die Benachrichtigungsoption auf Ihrem Gerät.
2Schalten Sie die Funktion ein oder aus.
Hintergrundüberwachung
Die Hintergrundüberwachung ist eine Funktion der App, die sicherstellt,
dass Sie Ihr Baby hören und/oder Benachrichtigungen über Ihr Baby
erhalten, während Sie Ihr Smart-Gerät für andere Zwecke verwenden.
Die Hintergrundüberwachung ist standardmäßig eingeschaltet, Sie können
sie jedoch ausschalten.
DEUTSCH
41
Ein- oder Ausschalten der Hintergrundüberwachung
-- Tippen Sie auf das Glockensymbol, um alle Benachrichtigungen einoder auszuschalten. Wenn der Wahlschalter für alle Benachrichtigungen
auf “Ein” gestellt ist, wird auf dem Bildschirm eine Nachricht
angezeigt, wenn das Baby zu weinen beginnt. Sie können Ihre
bevorzugte Benachrichtigungseinstellung im Dashboard und/oder im
Einstellungsbildschirm des Babyphones festlegen.
Hinweis: Stellen Sie den Wahlschalter für alle Benachrichtigungen auf “Ein”, um
alle Benachrichtigungen über Ihr Baby zu erhalten, wenn die App im Hintergrund
ausgeführt wird, z. B. wenn Sie das Smart-Gerät für andere Zwecke verwenden
oder sich das Gerät im Standby-Modus mit ausgeschaltetem Bildschirm befindet.
Der Wahlschalter für alle Benachrichtigungen muss auf “Ein” gestellt sein, wenn
Sie persönliche Benachrichtigungen für Temperatur, Luftfeuchtigkeit und Ton im
Dashboard anpassen möchten.
-- Tippen Sie auf das Mobiltelefonsymbol, um den Ton ein- oder
auszuschalten.
Hinweis:Wenn Sie den Ton ausschalten, können Sie Ihr Baby nicht hören, wenn
Sie zu einer anderen Funktion auf Ihrem Smartphone wechseln (telefonieren,
SMS usw.).
Hinweis:Wenn Sie einen Anruf tätigen oder eine VoIP-App für Anrufe verwenden
(z. B. Skype,Viber oder FaceTime), können Sie Ihr Baby nicht hören. Sie
erhalten jedoch eine Benachrichtigung, wenn Ihr Baby zu weinen beginnt.
Wechseln zwischen der Hintergrundüberwachung und dem
Hauptbildschirm der App
Die App bleibt im Hintergrund aktiv, selbst wenn sich das Gerät im
Standby-Modus befindet. Wenn die Hintergrundüberwachung aktiv ist, wird
ein roter Balken oben auf dem Bildschirm Ihres Smart-Geräts angezeigt.
1Um von der Hintergrundüberwachung zum Hauptbildschirm der
App zu wechseln, tippen Sie auf den roten Balken oben auf dem
Bildschirm. Dadurch wird die App im Vordergrund angezeigt.
Benachrichtigungsoptionen
Die Benachrichtigungsoptionen der App befinden sich im Dashboard. Das
Dashboard befindet sich in der Infoleiste an der Unterseite des Bildschirms.
Ziehen Sie das Dashboard nach oben, um das Optionsmenü anzuzeigen.
Das Menü enthält die folgenden Optionen.
Ton
-- Positionieren Sie den Schieberegler an einem Grenzwert, der bei
Überschreitung eine Benachrichtigung auslöst.
Hinweis:Wenn der Schieberegler leise gestellt wird, hören Sie Ihr Baby
kontinuierlich, wenn Sie die App schließen.
-- Stellen Sie die Dauer der Geräusche fest, nach der Sie eine
Benachrichtigung erhalten möchten.
42
DEUTSCH
Temperatur
-- Stellen Sie den Temperaturbereich ein, über oder unter dem Sie eine
Temperaturbenachrichtigung erhalten möchten.
-- Temperaturbenachrichtigung ein- oder ausschalten
-- Aktuelle Temperatur oder Verlauf anzeigen
Luftfeuchtigkeit
-- Stellen Sie den Luftfeuchtigkeitsbereich ein, über oder unter dem Sie
eine Luftfeuchtigkeitsbenachrichtigung erhalten möchten.
-- Luftfeuchtigkeitsbenachrichtigung ein- oder ausschalten
-- Aktuelle Luftfeuchtigkeit oder Verlauf anzeigen
Gastbenutzer und Konten
Einladen von Gästen und einem zweiten Administrator
Sie können bis zu neun Verwandte oder Freunde als Gäste einladen und
ihnen erlauben, über das Smartphone oder Tablet Ihr Baby zu sehen.
Sie können einen dieser Gäste als zweiten Administrator ernennen.
Der zweite Administrator verfügt über die gleichen Rechte wie der erste
Administrator. Gäste haben nur Anzeigerechte, welche vom Administrator
gesteuert werden. Genau wie die Gäste hat auch der Administrator
Anzeigerechte. Darüber hinaus kann der Administrator Gäste einladen,
ihnen Zugriffsrechte erteilen oder entziehen und ihre Verbindung trennen.
Der Administrator kann außerdem sein Konto deaktivieren und dadurch
die Verknüpfung der Gäste mit dem Babyphone auflösen.
1Tippen Sie in der linken Infoleiste auf das Symbol für die
Einstellungen neben dem Babyphone.
2Blättern Sie nach unten, und tippen Sie auf “Add new user”
(Neuen Benutzer hinzufügen).
DEUTSCH
43
3Fügen Sie die E-Mail-Adresse eines Gasts und seine Rolle
(Administrator oder Gast) hinzu.
4Die App sendet eine E-Mail an die eingeladene Person, und Sie
erhalten eine Benachrichtigung, dass eine E-Mail versendet wurde.
5Der Gast erhält eine E-Mail mit einem Einladungscode, der nur für
einen begrenzten Zeitraum gültig ist. Die E-Mail enthält zudem einen
Link zum App Store. Der Gast kann auf diesen Link klicken, um die
App zu installieren.
6Nach der Installation der App erstellt der Gast ein Konto gemäß den
Anweisungen in der App.
7Der Gast wählt während der Einrichtung die Option “Connect to a
shared baby monitor” (Mit einem gemeinsam genutzten Babyphone
verbinden) aus. Dadurch wird eine Seite geöffnet, auf der die
Einladung überprüft wird.
8Der Gast gibt den Einladungscode und seine E-Mail-Adresse ein und
bestätigt die Eingabe. Der Code und die E-Mail-Adresse werden überprüft.
9Der Administrator erhält eine E-Mail, die ihm mitteilt, dass der Gast
mit dem Babyphone verbunden wurde und der Administrator nun
den Gästezugriff freigeben kann.
10Wenn der Administrator den Gästezugriff gewährt hat, kann der
Gast das Baby sehen.
-- Wenn eine oder mehrere Personen das Baby sehen, leuchtet die rote
Anzeige auf.
Hinweis: Obwohl bis zu zehn Personen (acht oder neun Gäste und ein oder
zwei Administratoren) Anzeigerechte für das gleiche Babyphone haben, können
nur jeweils drei Personen gleichzeitig das Baby sehen.Wenn Gäste versuchen,
auf das Babyphone zuzugreifen, während bereits drei andere Gäste die
Anzeigefunktion nutzen, erhalten diese die Nachricht “Too many connections”
(Zu viele Verbindungen). Der Administrator hat jederzeit Vorrang vor dem
Zugriff der Gäste, wenn dieser das Baby sehen möchte.
44
DEUTSCH
Erteilen und Entziehen von Zugriffsrechten
Benutzer mit Administratorrechten können bestimmen, wer das Baby
sehen kann.
1Um einem Gast die Anzeigerechte zu entziehen, öffnen Sie die rechte
Infoleiste, tippen Sie auf den entsprechenden Gast, und tippen Sie
dann auf das Augensymbol neben dem Namen des Gasts.
Tipp:Wenn bereits drei Personen Ihr Baby sehen und Sie jemandem Zugriff
auf das Babyphone erteilen möchten, z. B. dem Babysitter, können Sie einem
der aktuellen Zuseher die Zugriffsrechte entziehen und diese stattdessen einer
anderen Person zuweisen.
2Um einem Gast Zugriff zu erteilen, öffnen Sie die rechte Infoleiste,
tippen Sie auf den entsprechenden Gast, und tippen Sie dann auf das
Augensymbol neben dem Namen des Gasts.
3Wenn Sie den Zugriff für alle Zuseher gleichzeitig entfernen
möchten, tippen Sie auf die Schaltfläche für den privaten Modus.
Dadurch erhalten nur noch Sie selbst Zugriff auf das Babyphone,
bis Sie erneut auf die Schaltfläche für den privaten Modus tippen.
Tipp: Mithilfe der Schaltfläche für den privaten Modus können Sie für sich und
Ihr Baby etwas Privatsphäre schaffen, z. B. um das Baby zu stillen, zu baden
oder die Windeln zu wechseln. Gäste, die zu dieser Zeit auf das Babyphone
zugreifen möchten, erhalten eine Benachrichtigung auf dem Bildschirm.
Kontoverwaltung
Trennen der Verbindung eines Gasts
Um Gastbenutzer dauerhaft von der App zu trennen, müssen Sie diese aus
der Liste der Gäste entfernen. Ein Gast kann die Verbindung zur App auch
selbst dauerhaft trennen.
Deaktivieren Ihres Benutzerkontos
Wenn nur ein Administrator vorhanden ist und dieser Administrator sein
Konto deaktiviert, werden alle Konten der Gastbenutzer vom Babyphone
getrennt, obwohl die Konten bestehen bleiben. Wenn zwei Administratoren
eingerichtet wurden, müssen beide Administratoren Ihre Konten
deaktivieren, um alle Kontoverbindungen zu trennen. Wenn nur einer
der beiden Administratoren sein Konto deaktiviert, sind die Gäste auch
weiterhin mit dem Babyphone verbunden.
Wenn Sie das Babyphone an eine andere Person übergeben, wenn Sie das
Babyphone verlieren, oder wenn das Babyphone gestohlen wird, empfehlen
wir Ihnen, die Administratorkonten zu deaktivieren. Dies ist wesentlich für
den Schutz der Privatsphäre für Sie und Ihr Baby.
DEUTSCH
45
1Um Ihr Konto zu deaktivieren, öffnen Sie die linke Infoleiste,
und tippen Sie auf “My account” (Mein Konto).
2Tippen Sie auf “Deactivate account” (Konto deaktivieren).
3Ein Popup-Fenster wird angezeigt, das Sie zur Bestätigung der
Kontodeaktivierung auffordert.
4Wenn Sie auf “Deactivate” (Deaktivieren) tippen, erhalten Sie in einem
Popup-Fenster die Bestätigung, dass Ihr Konto deaktiviert wurde.
Hinzufügen oder Entfernen von Babyphones
Sie können in der App bis zu zehn Babyphones hinzufügen. Dadurch
können Sie mehr Kinder oder das gleiche Kind in mehreren Räumen
überwachen. Beispielsweise können Sie ein Babyphone über dem
Kinderbett im Kinderzimmer und eines über dem Laufstall im Wohnzimmer
anbringen. Verbinden Sie die Babyphones nacheinander mit der App.
1Öffnen Sie in der linken Infoleiste “My account” (Mein Konto).
2Eine Liste aller verbundenen Babyphones wird angezeigt. Tippen Sie
auf “Add baby monitor” (Babyphone hinzufügen).
3Befolgen Sie die Anweisungen im Kapitel “Ersteinrichtung” in dieser
Bedienungsanleitung, um das Babyphone mit der App zu verbinden.
46
DEUTSCH
Allgemeine App-Nutzung
Optimierung der Video- und Audioqualität
Die Video- und Audioqualität auf Ihrem Smart-Gerät ändert sich mit der
Zeit möglicherweise, je nach verfügbarer Bandbreite für Ihre Verbindung
zum Internet. Mit einer WiFi-Verbindung erzielen Sie in der Regel die
besten Ergebnisse, während Sie mit 4G und 3G weniger Bandbreite
und reduzierte Qualität erhalten. Die App bietet Ihnen automatisch
die bestmögliche Erfahrung, indem die Video- und Audioqualität auf die
verfügbare Bandbreite abgestimmt wird.
Die Abstimmung erfolgt in mehreren Schritten:
1 Große Bandbreite: gute Video- und Audioqualität, mit
Textbenachrichtigungen.
2 Eingeschränkte Bandbreite (z. B. 3G-Nutzung): geringere Videoqualität;
gute Audioqualität, mit Textbenachrichtigungen.
3 Geringe Bandbreite (z. B. 2G-Nutzung): nur Audio-Link verfügbar,
mit Textbenachrichtigungen
4 Sehr geringe Bandbreite: nur Textbenachrichtigungen verfügbar
WiFi-Verbindung zum Internet
Die besten Ergebnisse erzielen Sie, wenn Sie Ihr Smartphone über
WiFi mit dem Internet verbinden. Es verwendet dann automatisch
das WiFi-Netzwerk zur Verbindung mit dem Babyphone. Wenn keine
WiFi-Verbindung zum Internet verfügbar ist, wechselt Ihr Smart-Gerät
zur mobilen 3G- oder 4G-Datenverbindung. Diese Verbindung kann
Mehrkosten von Ihrem Anbieter nach sich ziehen, je nach Abonnement.
Für eine Videoverbindung ist in der Regel eine Datenübertragungsrate von
DEUTSCH
47
0,1 bis 0,25 MB pro Sekunde erforderlich. Eine Audioverbindung benötigt
eine Übertragungsrate von 0,01 MB pro Sekunde.
Wenn Sie verhindern möchten, dass Ihr Smartphone eine Verbindung
mit dem 3G- oder 4G-Netzwerk herstellt, müssen Sie die mobile
Datenverbindung auf Ihrem Gerät deaktivieren. Dies wirkt sich auf
alle anderen Apps aus, die möglicherweise die mobile 3G- oder 4GDatenverbindung nutzen. Bitte beachten Sie: Wenn Sie die mobile
Datenverbindung deaktivieren und die WiFi-Verbindung zum Internet
unterbrochen wird, werden Sie nicht benachrichtigt, wenn Ihr Baby weint.
Verwenden des Babyphones unterwegs
Sie können das Babyphone überall verwenden, wo ein WiFi-Netzwerk mit
2,4 GHz verfügbar ist, sei es bei Freunden oder Verwandten, in einem Hotel
oder Ferienwohnsitz. Wenn Sie den WiFi-Netzwerknamen und das WiFiPasswort kennen, können Sie das Babyphone auch unterwegs einrichten
und verwenden. Befolgen Sie dazu die unten angegebenen Anweisungen
zur Einrichtung. Sobald Sie die Verbindung mit einem WiFi-Netzwerk
eingerichtet haben, werden die Einstellungen im Speicher des Geräts
abgelegt, sodass Sie das Einrichtungsverfahren nicht wiederholen müssen,
wenn Sie die App und das Babyphone am gleichen Ort verwenden.
Hinweis:Wenn für die WiFi-Verbindung eine zusätzliche Bestätigung erforderlich
ist, z. B. die Bestätigung der Nutzungsbedingungen, kann das Babyphone keine
Verbindung zum WiFi-Netzwerk herstellen. Dies kann bei WiFi-Netzwerken in
Hotels und anderen öffentlichen WiFi-Netzwerken der Fall sein.
1Es gibt zwei Möglichkeiten, um das Babyphone mit dem Wi-FiNetzwerk zu verbinden.
-- Die erste Option: Beim Einschalten des Babyphones erhalten Sie
die Meldung “Baby monitor not found” (Babyphone nicht gefunden).
Warten Sie, bis die App die Option “Reconnect the baby monitor”
(Babyphone erneut verbinden) anbietet.
-- Die zweite Option: Schalten Sie das Babyphone ein. Öffnen Sie die
linke Infoleiste, wählen Sie das Babyphone aus, und wählen Sie dann
“Reconnect the baby monitor” (Babyphone erneut verbinden) aus.
2Wenn die App einen WiFi-QR-Code generiert hat, halten Sie den
Bildschirm Ihres Smartphones oder Tablets in einem Abstand von
ca. 20 cm vor das Objektiv des Babyphones. Bewegen Sie das
Smartphone bzw. Tablet langsam näher an das Objektiv heran oder
weiter davon weg, um sicherzustellen, dass der WiFi-QR-Code richtig
gelesen wird.
3Befolgen Sie die restlichen Bildschirmanweisungen, um die
Einrichtung abzuschließen. Wenn die WiFi-Statusanzeige auf der
Vorderseite des Babyphones dauerhaft grün leuchtet, ist das
Einrichtungsverfahren abgeschlossen und das Babyphone mit dem
WiFi-Netzwerk verbunden und bereit für den Gebrauch.
Hinweis:Wenn Sie wieder zu Hause sind, können Sie das Babyphone über
die oben beschriebenen Anweisungen wieder mit Ihrem WiFi-Heimnetzwerk
verbinden.
48
DEUTSCH
Verwenden der App auf mehreren Geräten
Sie können die uGrow Smart-Babyphone-App auf mehr als einem Gerät
verwenden (z. B. auf dem iPhone und dem iPad).
Hinweis:Wenn Sie sich über das gleiche Konto auf einem Gerät anmelden,
während die App noch auf einem anderen Gerät aktiv ist, werden Sie auf
dem Gerät, auf dem die App zuerst aktiv war, automatisch abgemeldet. Sie
können die App nicht mit dem gleichen Konto auf zwei verschiedenen Geräten
gleichzeitig verwenden.
Zurücksetzen des Babyphones
Das Babyphone verfügt über eine Reset-Taste auf der Rückseite. Wenn
Sie diese Taste drücken, wird das Babyphone auf die Werkseinstellungen
zurückgesetzt. Das bedeutet, dass alle Zuweisungen von Konten auf dem
Babyphone aufgehoben werden.
Hinweis: Bevor Sie das Babyphone einer anderen Person übergeben, sollten Sie
es immer mithilfe der Reset-Taste zurücksetzen. Dies ist notwendig, um den
Schutz Ihrer Privatsphäre zu gewährleisten. Setzen Sie das Babyphone auch
zurück, wenn Sie es aus zweiter Hand kaufen oder erhalten.
So können Sie auf die Werkseinstellungen zurücksetzen
Hinweis: Stellen Sie sicher, dass das Babyphone eingeschaltet ist, bevor Sie es
zurücksetzen.
1 Wenn das Babyphone eingeschaltet ist, drücken Sie die Reset-Taste
auf der Rückseite des Babyphones mit einer Büroklammer oder
einem anderen spitzen Gegenstand. Es wird empfohlen, dies zu tun,
wenn das Babyphone mit dem WiFi-Netzwerk verbunden ist.
2Halten Sie die Reset-Taste gedrückt, bis das Babyphone einen
Signalton ausgibt. Lassen Sie dann die Taste los. Wenn Sie die Taste
loslassen, gibt das Babyphone eine kurze Tonfolge aus, um den
Zurücksetzvorgang zu bestätigen.
Nach dem Zurücksetzen auf die Werkseinstellungen
Nachdem das Babyphone zurückgesetzt wurde, blinkt die WiFiStatusanzeige orange, wenn Sie das Babyphone einschalten. Dadurch wird
angezeigt, dass es nach einem Zurücksetzen neu gestartet wird. Wenn die
WiFi-Statusanzeige nicht mehr blinkt, können Sie das Babyphone wieder
mit Ihrem WiFi-Netzwerk verbinden. Befolgen Sie die Anweisungen im
Kapitel “Ersteinrichtung” in dieser Bedienungsanleitung. Wenn Sie andere
Personen eingeladen haben, auf das Babyphone zuzugreifen, müssen Sie sie
erneut einladen.
Firmware-Aktualisierungen
Die Aktualisierung ist erforderlich, um Ihre Privatsphäre und die
reibungslose Funktion des Babyphones und der App zu gewährleisten.
-- Wichtige Aktualisierungen sind obligatorisch. Obligatorische AppAktualisierungen werden automatisch auf Ihrem Smartphone installiert und
benötigen keine Bestätigung. Sie erhalten lediglich eine Benachrichtigung,
dass eine obligatorische Aktualisierung durchgeführt wird.
DEUTSCH
49
-- Von Zeit zu Zeit erhalten Sie Benachrichtigungen, dass Aktualisierungen
für die Firmware des Babyphones bzw. die App-Software zur Verfügung
stehen. Diese werden installiert, sobald Sie sie bestätigen.
-- Um nach Firmware-Aktualisierungen für Ihr Babyphone zu suchen,
öffnen Sie die linke Infoleiste, und tippen Sie auf das Symbol für die
Einstellungen neben dem Babyphone. Blättern Sie nach unten zu
“Firmware”, und tippen Sie darauf, um nach Firmware-Aktualisierungen
zu suchen. Wenn eine Aktualisierung verfügbar ist, tippen Sie darauf,
um sie zu installieren.
Hinweis:Wenn eine Aktualisierung installiert wird, können Sie Ihr Baby
vorübergehend nicht sehen und hören.
WiFi-Statusanzeigen
,, Aus
1 Aus: Das Babyphone ist ausgeschaltet.
,, Orange
1 Schnelles Blinken, orange: Das Babyphone wird gestartet.
2 Langsames Blinken, orange: Das Babyphone aktualisiert die Firmware.
Schalten Sie das Babyphone während der Firmware-Aktualisierung
nicht aus.
Hinweis: Die WiFi-Statusanzeige kann sich während der FirmwareAktualisierung kurzzeitig ausschalten.
3 Dauerhaftes Leuchten, orange: Die Kamera des Babyphones ist bereit,
den von Ihrem Smartphone oder Tablet generierten WiFi-QR-Code zu
lesen.
,, Grün
50
DEUTSCH
1 Blinken, grün: Der WiFi-QR-Code wurde erfolgreich gelesen.
2 Dauerhaftes Leuchten, grün: Das Babyphone ist mit dem WiFiNetzwerk verbunden.
,, Rot
1 Langsames Blinken, rot: Sie haben das falsche WiFi-Passwort
eingegeben.
2 Dauerhaftes Leuchten, rot: Das Babyphone kann keine Verbindung mit
dem WiFi-Netzwerk aufbauen.
Sicherheit und Datenschutz
Netzwerksicherheit
WiFi-Hotspots an öffentlichen Orten, z. B. in Flughäfen und Hotels, sind
praktisch, aber oft nicht sicher.
Wir empfehlen Ihnen, das Babyphone nur auf WiFi-Netzwerken mit WPA2Verschlüsselung zu verwenden und das Babyphone nicht auf Netzwerken
mit WEP-Verschlüsselung zu verwenden.
Hinweis:WiFi-Netzwerke, für die kein Passwort erforderlich ist, sind nicht sicher.
DEUTSCH
51
Starke Passwörter
Passwörter sind wichtig, um Ihr WiFi-Netzwerk und Ihr Konto vor
unbefugtem Zugriff zu schützen. Je stärker Ihr Passwort ist, desto besser
sind Ihr WiFi-Netzwerk und Ihr Konto geschützt.
Für ein starkes Passwort gelten folgende Regeln:
1 Ein starkes Passwort besteht aus mindestens 8 Zeichen.
2 Ein starkes Passwort enthält nicht Ihren Namen, den Namen Ihres
Babys, einen anderen realen Namen oder einen Markennamen.
3 Ein starkes Passwort enthält kein vollständiges Wort.
4 Ein starkes Passwort unterscheidet sich deutlich von den Passwörtern,
die Sie bereits verwendet haben.
5 Ein starkes Passwort enthält Zeichen aus mindestens zwei der
folgenden Kategorien:
-- Buchstaben: A, B, C oder a, b, c
-- Zahlen: 0, 1, 2, 3, 4, 5, 6, 7, 8, 9
-- Symbole: _ . @ $
Sichere Verwendung der Babyphone-App
Verwenden Sie die App nur in einem sicheren Netzwerk.
Verwenden Sie die App nicht in einem ungesicherten WiFi-Netzwerk.
Wir empfehlen, das Babyphone nur in einem WiFi-Netzwerk mit WPA2Verschlüsselung zu verwenden. Sie können auch das Datennetzwerk Ihres
Telefons verwenden (oft als 3G- oder 4G-Netzwerk bezeichnet).
Verwenden Sie immer die neueste Software und Firmware.
Aktualisieren Sie die App-Software und die Babyphone-Firmware sofort,
wenn Sie eine Benachrichtigung erhalten, dass eine Aktualisierung verfügbar
ist. Aktualisierungen sind verfügbar, wenn Softwareverbesserungen
durchgeführt wurden oder um ein Sicherheitsproblem zu verhindern.
Wenn Sie keine Aktualisierungen durchführen, ist Ihre Verbindung zum
Babyphone über die App möglicherweise nicht mehr sicher und privat.
Gerätekompatibilität
,,
-,,
-,,
-,,
--
iPhone-Kompatibilität
iPhone 4S und höher
iPad-Kompatibilität
iPad 2 und höher
iPod touch-Kompatibilität
iPod touch 5. Generation und höher
Android-Kompatibilität
Android 4.1 oder höher
Hinweis: Die neuesten Informationen zur Gerätekompatibilität erhalten Sie auf
unserer Website unter www.philips.com/ugrow.
Zubehör bestellen
Um Zubehörteile oder Ersatzteile zu kaufen, besuchen Sie
www.shop.philips.com/service, oder gehen Sie zu Ihrem Philips
Händler. Sie können auch das Philips Service-Center in Ihrem Land
kontaktieren (die Kontaktdetails finden Sie in der internationalen
Garantieschrift).
52
DEUTSCH
Garantie und Support
Für Unterstützung und weitere Informationen besuchen Sie die Philips
Website unter www.philips.com/support, oder lesen Sie die
internationale Garantieschrift.
Häufig gestellte Fragen
Weitere häufig gestellte Fragen zu diesem Babyphone finden Sie auf der
Support-Website für dieses Produkt auf www.philips.com/support.
Frage
Antwort
Fehlerbehebung
Warum kann ich die
App nicht im App Store
oder in Google Play
finden?
Sie können die App im Apple App Store oder von Google Play herunterladen,
indem Sie “uGrow Smart Baby Monitor” in das Suchfeld eingeben. Wenn Sie
die App nicht im App Store oder in Google Play finden, unterstützt Ihr Telefon
möglicherweise nicht die erforderliche iOS- oder Android-Version. Diese App
ist nur mit iOS7 und höher bzw. Android 4.1 und höher kompatibel.
Ich kann die App nicht
herunterladen und
installieren. Was kann
ich tun?
Bitte prüfen Sie, ob die folgenden Faktoren das problemlose Herunterladen
verhindern. Ist Ihr WiFi-Signal stabil und stark genug? Führt Ihr Smart-Gerät
iOS 7 oder höher bzw. Android 4.1 oder höher aus? Haben Sie genügend
Speicherplatz auf Ihrem Smartphone zum Speichern der App? Haben Sie das
richtige Passwort für den App Store oder Google Play eingegeben?
Ich kann das Babyphone
nicht einrichten.
Jedes Mal wird ein
Verbindungsfehler
angezeigt. Warum ist
das so?
Wenn die WiFi-Statusanzeige dauerhaft orange leuchtet und bei der
Verbindungsherstellung rot blinkte, wurde das WiFi-Passwort falsch
eingegeben. Geben Sie das WiFi-Passwort erneut ein, und stellen Sie sicher,
dass das Passwort korrekt ist .
Wenn die WiFi-Statusanzeige dauerhaft orange leuchtet und bei der
Verbindungsherstellung dauerhaft rot leuchtete, konnte das Babyphone keine
Verbindung zum WiFi-Netzwerk herstellen. Prüfen Sie, ob Ihr Telefon oder
Tablet dasselbe WiFi-Netzwerk verwendet, mit dem Sie das Babyphone
verbinden möchten. Stellen Sie dann sicher, dass Sie über eine 2,4-GHz-WiFiInternetverbindung verfügen. Wenn das Problem dadurch nicht behoben
wird, stellen Sie sicher, dass die Router-SSID (der Netzwerkname) keine
Sonderzeichen enthält. Wenn doch, ändern Sie den Namen Ihrer Router-SSID
entsprechend.
Ich habe Probleme
beim Lesen des QRCodes auf meinem
Smart-Gerät mit dem
Babyphone. Was kann
ich tun?
Stellen Sie sicher, dass Sie den WiFi-QR-Code in einem Abstand von ca.
20 cm vor die Linse halten. Führen Sie das Gerät leicht nach oben, unten,
links oder rechts, um sicherzustellen, dass der WiFi-QR-Code sich direkt vor
dem Babyphone befindet. Sie können auch versuchen, den Abstand zwischen
Smart-Gerät und Babyphonelinse zu vergrößern oder zu verkleinern, um eine
korrekte Fokussierung zu ermöglichen. Achten Sie darauf, dass es im Raum
hell genug ist, vermeiden Sie jedoch zu helles Licht. Wenn das Babyphone den
WiFi-QR-Code gelesen hat, gibt es zur Bestätigung einen Signalton aus, und
die WiFi-Statusanzeige blinkt grün.
Möglicherweise haben Sie die Schutzfolie nicht von der Babyphonelinse
entfernt. Entfernen Sie die Folie.
DEUTSCH
Frage
53
Antwort
Möglicherweise bedeckt ein Teil Ihrer Hand den WiFi-QR-Code. Halten Sie
das Gerät so, dass Ihre Hand den WiFi-QR-Code nicht bedeckt.
Wenn die WiFi-Statusanzeige dauerhaft orange leuchtet, konnte das
Babyphone den QR-Code nicht ordnungsgemäß lesen. Gehen Sie mit dem
Pfeil in der oberen linken Ecke des Bildschirms zurück, und folgen Sie den
QR-Code-Anweisungen.
Wenn die WiFi-Statusanzeige orange blinkt, befindet sich die Kamera noch im
Startvorgang. Warten Sie, bis die Anzeige dauerhaft orange leuchtet. Gehen
Sie dann mit dem Pfeil in der oberen linken Ecke des Bildschirms zurück, und
folgen Sie den QR-Code-Anweisungen.
Ich kann mein Baby
nicht sehen. Woran liegt
das?
Überprüfen Sie, ob das WiFi-Signal im Raum, in dem sich das Babyphone
befindet, stark genug ist.
Prüfen Sie, ob das Babyphone an eine funktionierende Steckdose
angeschlossen und eingeschaltet ist.
Die WiFi-Statusanzeige auf der Vorderseite des Babyphones muss dauerhaft
grün leuchten (siehe Kapitel “WiFi-Statusanzeigen”).
Wenn Sie mehr als ein Babyphone verwenden, sollten Sie prüfen, ob Sie das
richtige ausgewählt haben. Öffnen Sie die linke Infoleiste, und tippen Sie auf
das Babyphone, um zu sehen, ob es aktiv ist.
Vielleicht nutzen drei andere Personen derzeit die Anzeigefunktion für das
Baby. Die App ermöglicht nur jeweils drei Personen gleichzeitig Zugriff. Wenn
Sie über Administratorrechte verfügen, können Sie den Zugriff eines Gasts
sperren, sodass Sie selbst Ihr Baby sehen können.
Warum benachrichtigt
mich die App nicht,
wenn das Baby weint?
Überprüfen Sie, ob das Babyphone mit dem WiFi-Netzwerk verbunden ist.
Die WiFi-Statusanzeige auf der Vorderseite des Babyphones muss dauerhaft
grün leuchten.
Das Babyphone ist möglicherweise offline. Um eine Benachrichtigung zu
erhalten, wenn das Babyphone offline ist, öffnen Sie die linke Infoleiste, und
schalten Sie diese Benachrichtigung unter “Settings” (Einstellungen) ein.
Der Geräuschgrenzwert für Benachrichtigungen ist möglicherweise zu hoch
eingestellt. In diesem Fall werden Sie von der App nur benachrichtigt, wenn
das Baby einen hohen Geräuschpegel erzeugt. Öffnen Sie das Dashboard,
um den Geräuschgrenzwert zu senken und so sicherzustellen, dass Sie früher
benachrichtigt werden, wenn das Baby zu weinen beginnt.
Möglicherweise haben Sie die Dauer des Weinens zu lange eingestellt. Wählen
Sie eine kürzere Zeit, damit Sie von der App früher benachrichtigt werden.
Möglicherweise ist die Lautstärke Ihres Telefons ausgestellt. Aktivieren Sie die
normale Lautstärke Ihres Telefons.
Möglicherweise ist die Gegensprechfunktion aktiv. Tippen Sie auf das
Gegensprechsymbol, um die Funktion auszuschalten. Während des
Gegensprechens hören Sie keine Geräusche des Babys.
54
DEUTSCH
Frage
Antwort
Überprüfen Sie, ob Sie eine E-Mail mit der Benachrichtigung erhalten haben,
dass Ihr Konto entfernt wurde. Wenn Sie als Gast Anzeigerechte haben,
kann der Administrator Ihnen auch vorübergehend den Zugriff entziehen.
Wenden Sie sich an den Administrator, und bitten Sie ihn, die Rechte erneut
zu aktivieren, oder Sie erneut als Gast einzuladen.
Ich verliere häufig die
Verbindung. Warum ist
das so?
Überprüfen Sie, ob das WiFi-Signal im Raum, in dem sich das Babyphone
befindet, stark genug und stabil ist. Wenn dies nicht der Fall ist, benötigen
Sie einen WiFi-Repeater, der ein starkes und stabiles Signal gewährleistet.
Stellen Sie bei Verwendung eines WiFi-Repeaters sicher, dass Ihr Router und
der WiFi-Repeater dieselbe SSID haben und dass Sie dasselbe Passwort für
Router und Repeater verwenden.
Wenn die WiFi-Statusanzeige auf der Vorderseite des Babyphones
dauerhaft grün leuchtet und die Verbindung immer wieder abbricht, gibt es
möglicherweise ein Problem mit der Internetverbindung Ihres Smart-Geräts.
Überprüfen Sie das WiFi-Signal auf Ihrem Smart-Gerät bzw. die 3G- oder 4GGeschwindigkeit, indem Sie versuchen, einen Film anzusehen, z. B. auf YouTube.
Nachdem ich meinen
Router gewechselt
habe, kann ich mein
Baby nicht mehr sehen.
Woran liegt das?
Stellen Sie zunächst sicher, dass Ihr Smart-Gerät ein gutes WiFi-Signal vom
neuen Router empfängt. Es gibt zwei Möglichkeiten, das Babyphone mit
dem WiFi-Netzwerk zu verbinden. Die erste Option ist, das Babyphone
einzuschalten. Die App zeigt die Nachricht “Baby monitor not found”
(Babyphone nicht gefunden) an. Gehen Sie zu “Troubleshooting”
(Fehlerbehebung), und wählen Sie “Reconnect baby monitor” (Babyphone
erneut verbinden) aus. Die zweite Option ist, die linke Infoleiste zu öffnen,
wenn die App die Nachricht “Baby monitor not found” (Babyphone nicht
gefunden) anzeigt. Wählen Sie das Babyphone in der linken Infoleiste
aus, und wählen Sie dann “Reconnect baby monitor” (Babyphone erneut
verbinden) aus. Halten Sie, sobald die App einen WiFi-QR-Code generiert
hat, den Bildschirm Ihres Smart-Geräts in einem Abstand von 20 cm vor das
Objektiv des Babyphones. Befolgen Sie anschließend die Anweisungen auf
dem Bildschirm, um die Einrichtung abzuschließen. Das Einrichtungsverfahren
wurde erfolgreich abgeschlossen, wenn die WiFi-Statusanzeige auf der
Vorderseite des Babyphones dauerhaft grün leuchtet.
Ich wurde als Gast
eingeladen, aber warum
sehe ich nichts, wenn ich
die App öffne?
Überprüfen Sie, ob Sie eine E-Mail mit der Benachrichtigung erhalten haben,
dass Ihr Konto entfernt wurde. Wenn Sie als Gast Anzeigerechte haben,
kann der Administrator Ihnen auch vorübergehend den Zugriff entziehen.
Wenden Sie sich an den Administrator, und bitten Sie ihn, die Rechte erneut
zu aktivieren, oder Sie erneut als Gast einzuladen.
Überprüfen Sie, ob Ihr Smart-Gerät mit dem Internet verbunden ist.
Das Babyphone ist möglicherweise offline. Um eine Benachrichtigung zu
erhalten, wenn das Babyphone offline ist, öffnen Sie die linke Infoleiste, und
schalten Sie diese Benachrichtigung unter “Settings” (Einstellungen) ein.
Der Geräuschgrenzwert für Benachrichtigungen ist möglicherweise zu hoch
eingestellt. In diesem Fall werden Sie von der App nur benachrichtigt, wenn
das Baby einen hohen Geräuschpegel erzeugt. Öffnen Sie das Dashboard,
um den Geräuschgrenzwert zu senken und so sicherzustellen, dass Sie früher
benachrichtigt werden, wenn das Baby zu weinen beginnt.
DEUTSCH
Frage
55
Antwort
Möglicherweise haben Sie die Dauer des Weinens zu lange eingestellt. Wählen
Sie eine kürzere Zeit, damit Sie von der App früher benachrichtigt werden.
Möglicherweise ist die Lautstärke Ihres Telefons ausgestellt. Aktivieren Sie die
normale Lautstärke Ihres Telefons.
Tipps und Tricks
Muss die App auf dem
Bildschirm geöffnet
bleiben, um mein Baby
zu überwachen?
Nein, die App kann im Hintergrund ausgeführt werden, während Sie Ihr
Smartphone oder Tablet für andere Zwecke verwenden. Tippen Sie auf das
Mobiltelefonsymbol. Jetzt hören Sie Ihr Baby und hören auch, wenn es zu
weinen beginnt. Wenn der Wahlschalter für alle Benachrichtigungen auf “On”
(Ein) gestellt ist und die App im Hintergrund ausgeführt wird, erhalten Sie
auch eine Benachrichtigung auf dem Bildschirm, wenn das Baby weint.
Warum erhalte ich
Schwarzweißbilder und
keine Farbbilder?
Das Babyphone hat in den Nachtsichtmodus gewechselt. Der Raum, in dem
sich das Babyphone befindet, ist dunkel.
Wenn sich genügend Licht im Raum befindet, ist der Lichtsensor auf dem
Babyphone möglicherweise abgedeckt oder verschmutzt. Stellen Sie sicher,
dass dieser Sensor vollständig dem Licht im Raum ausgesetzt ist.
Kann ich mein Baby
immer noch hören,
wenn mein Gerät
gesperrt ist oder
ich eine andere
App verwende oder
telefoniere?
Ja, Sie können wählen, ob Sie Ihr Baby weiterhin im Hintergrund überwachen
möchten. Beachten Sie: Wenn Sie Ihr Telefon zum Telefonieren verwenden,
hören Sie nur einen Klingelton, wenn das Baby zu weinen beginnt. Sie hören
nicht Ihr Baby. Tippen Sie auf das Mobiltelefonsymbol, um den Hintergrundton
einzuschalten. Wenn der Hintergrundton eingeschaltet ist, hören Sie Ihr
Baby auch, wenn Sie andere Aktivitäten durchführen. Sie können auch
auswählen, ob Sie eine Benachrichtigung erhalten möchten, wenn Ihr Baby
weint. Tippen Sie auf das Glockensymbol auf dem Hauptbildschirm, um alle
Benachrichtigungen ein- oder auszuschalten. Wenn alle Benachrichtigungen
eingeschaltet sind, wird auf dem Bildschirm eine Nachricht angezeigt, wenn
das Baby weint.
Verwenden und
kennenlernen
Benötige ich ein
zusätzliches Konto,
wenn ich mehrere
Babyphones habe?
Nein, Sie brauchen kein zusätzliches Konto, wenn Sie mehr Babyphones
verwenden. Sie können Ihrer uGrow Smart-Babyphone-App ein weiteres
Babyphone hinzufügen. Öffnen Sie “My account” (Mein Konto) in der
linken Infoleiste. Hier sehen Sie eine Liste aller mit der App verbundenen
Babyphones. Tippen Sie auf “Add baby monitor” (Babyphone hinzufügen).
Befolgen Sie die Anweisungen im Kapitel “Ersteinrichtung”, um das Babyphone
mit der App zu verbinden.
Kann ich weitere
Babyphones in
der gleichen App
verwenden?
Sie können bis zu zehn Babyphones mit der App verbinden, aber Sie können
nur jeweils von einem Babyphone die Videoübertragung aufrufen. Sie erhalten
Benachrichtigungen von den anderen verbundenen Babyphones. Wenn Sie
eine Benachrichtigung erhalten und darauf tippen, führt Sie die App direkt zu
diesem Babyphone. Sie können das gewünschte Babyphone auch in der linken
Infoleiste auswählen.
56
DEUTSCH
Frage
Antwort
Warum dauert es so
lange, bis die App lädt?
Die Internetverbindung Ihres Smart-Geräts oder der WiFi-Verbindung des
Babyphones ist möglicherweise langsam. Überprüfen Sie die Verbindung
des Smart-Geräts und des Babyphones. Die App benötigt eine stabile
Netzwerkverbindung.
Ist mein Babyphone vor
Hackern sicher?
Wir tun unser Möglichstes, das Babyphone vor Hackern zu schützen, und
veröffentlichen regelmäßig Aktualisierungen. Stellen Sie sicher, dass Sie immer
die neueste App-Software und die neueste Babyphone-Firmware verwenden.
Wenn Sie Ihr Smart-Gerät verlieren, sollten Sie das Babyphone zurücksetzen,
um alle zugehörigen Verbindungen zu entfernen. Sie können sich auch von
einem anderen Smart-Gerät bei der App anmelden und Ihr Konto löschen.
Wenn Sie der einzige Administrator sind, werden alle Gastbenutzer ebenfalls
vom Babyphone getrennt.
Ich habe mein
Smartphone verloren.
Wie kann ich
verhindern, dass Dritte
mein Baby sehen?
Melden Sie sich von einem anderen Smart-Gerät bei der App an, und
löschen Sie Ihr Konto. Wenn Sie der einzige Administrator sind, werden
auch alle Gastbenutzer der App vom Babyphone entfernt. Sie können das
Babyphone auch zurücksetzen, um alle Verbindungen zum verlorenen Gerät
zu deaktivieren. Sie finden die Reset-Taste auf der Rückseite des Babyphones.
Werde ich über
Aktualisierungen
der App oder der
Babyphone-Software
benachrichtigt?
Ja. Sie erhalten eine Benachrichtigung auf Ihrem Telefon, eine
Aktualisierung über den App Store durchzuführen. Dies erfolgt regelmäßig.
Aktualisierungsbenachrichtigungen für die Firmware des Babyphones werden
in der App zusammen mit Anweisungen zur Aktualisierung angezeigt.
Mein Telefon oder Tablet
wird warm, wenn ich
die App verwende. Ist
das normal?
Ihr Gerät benötigt die Leistung, um qualitativ hochwertige Videos
bereitzustellen. Dies verursacht keine Schäden am Gerät. Um dies zu
verhindern, empfehlen wir Ihnen, Ihr Gerät mit der neuesten iOS- und
uGrow-App-Version zu aktualisieren. Ihr Gerät wird nicht warm, wenn Sie die
App im Hintergrund ausführen.
ESPAÑOL
57
Contenido
Introducción Descripción del producto Configuración inicial Montaje del vigilabebés en la pared Guía de inicio rápido Cómo ver, escuchar y vigilar al bebé Visualización del bebé
Cómo escuchar al bebé Cómo recibir una notificación de que el bebé llora Vigilancia en segundo plano Opciones de notificación Usuarios invitados y cuentas Invitación de usuarios y de un segundo administrador Otorgamiento y anulación del acceso Gestión de la cuenta Uso general de la aplicación Optimización de la calidad de audio y vídeo Conexión Wi-Fi a Internet Uso del vigilabebés fuera de casa Uso de la aplicación en varios dispositivos Restablecimiento del vigilabebés Actualizaciones de firmware Señales del piloto de estado Wi-Fi Seguridad y privacidad Seguridad de la red Contraseñas seguras Uso seguro de la aplicación del vigilabebés Compatibilidad con otros dispositivos Solicitud de accesorios Garantía y asistencia Preguntas más frecuentes 57
58
58
60
62
65
65
66
67
67
68
69
69
71
71
73
73
74
74
75
75
75
76
77
77
78
78
78
78
79
79
Introducción
Enhorabuena por la compra de este producto y bienvenido a Philips Avent.
Para sacar el mayor partido de la asistencia que Philips Avent le ofrece,
registre su producto en www.philips.com/welcome.
El vigilabebés inteligente uGrow utiliza la nueva SafeConnect Technology
para funcionar a través de redes. Se ajusta automáticamente a las
condiciones de la red para mantener una conexión constante de alta
calidad que le permita vigilar al bebé. Siempre intenta restablecer
la conexión si esta se interrumpe. El uso del ancho de banda se
ha optimizado para que no agote la batería del dispositivo móvil
innecesariamente. Funciona incluso si utiliza su dispositivo para otras tareas.
El vigilabebés inteligente uGrow requiere conexión a Internet y Wi-Fi,
ya que son esenciales para obtener el mayor rendimiento del vigilabebés.
Una calidad inferior de conexión a Internet y Wi-Fi puede reducir la calidad
de la conexión entre la aplicación uGrow y el vigilabebés. Es compatible
con iOS 7 o posterior o Android 4.1 o posterior. Cuenta con todas las
funciones que cabe esperar de un vigilabebés, entre las que se incluyen
nanas, luz nocturna multicolor y control de la temperatura y la humedad.
58
ESPAÑOL
Descripción del producto (fig. 1)
1 Piloto de estado Wi-Fi
2 Luces infrarrojas
3 Lente del vigilabebés
4Micrófono
5 Indicador de visualización
6 Luz nocturna
7Pie
8 Botón de luz nocturna
9 Botón de reproducción y pausa de nanas
10 Sensor de luz
11 Unidad de sensor de humedad y temperatura
12 Toma para la clavija del aparato
13 Botón de reinicio
14 Botón de encendido/apagado
15 Soporte de montaje en pared
16 Adaptador de corriente
17 Clavija del aparato
Configuración inicial
Antes de comenzar el procedimiento de configuración, asegúrese de que:
-- Tiene acceso a Internet de forma inalámbrica (conexión Wi-Fi de
2,4 GHz).
-- Está lo suficientemente cerca del router Wi-Fi para obtener una buena
señal Wi-Fi.
-- Si utiliza un repetidor Wi-Fi, asegúrese de que el router y el repetidor
Wi-Fi tengan el mismo SSID (el nombre de la red) y de que utiliza la
misma contraseña para ambos dispositivos.
-- Tiene la contraseña de la red Wi-Fi a mano. Conecte siempre el vigilabebés
a una red segura (consulte el capítulo “Seguridad y privacidad”).
-- Asegúrese de que el dispositivo inteligente funciona con iOS 7 o
posterior o con Android 4.1 o posterior (para obtener información
sobre compatibilidad, consulte el capítulo “Compatibilidad con otros
dispositivos”).
1Descargue la aplicación del vigilabebés inteligente uGrow de
Philips Avent de la App Store o de Google Play. Utilice las palabras
clave”uGrow smart monitor” o “Philips smart monitor” para buscar
la aplicación.
2Inicie la aplicación.
ESPAÑOL
59
3Siga las instrucciones que aparecen en pantalla para crear una cuenta
uGrow.
1 Asegúrese de utilizar una dirección de correo electrónico activa en la
que siempre se le pueda localizar.
2 Utilice una contraseña segura (consulte “Seguridad y privacidad”).
3 Cuando reciba el mensaje de correo electrónico de verificación,
siga las instrucciones que aparecen en dicho mensaje para continuar
configurando el vigilabebés inteligente uGrow.
4 Cree su perfil de usuario.
Necesitará un perfil de usuario para identificarse ante los usuarios
invitados.
5 Cree un perfil del bebé.
Es necesario el nombre del bebé para identificar el vigilabebés en la
aplicación, especialmente si hay varios vigilabebés conectados a su cuenta.
4Siga las instrucciones que aparecen en pantalla para conectar el
vigilabebés a la red eléctrica.
1 Inserte la clavija del aparato en la toma de de la clavija del aparato de
la unidad de sensor de humedad y temperatura e inserte el adaptador
en la toma de alimentación.
2 El piloto de estado Wi-Fi comienza a parpadear en naranja al encender
el vigilabebés. Espere hasta que el piloto de estado Wi-Fi deje de
parpadear. Cuando el piloto de estado Wi-Fi permanezca iluminado en
color naranja, el vigilabebés estará preparado para leer el código QR Wi-Fi.
5Conecte el vigilabebés al dispositivo inteligente.
1 Seleccione la red Wi-Fi que desee utilizar. Tenga en cuenta que el
vigilabebés solo funciona con redes Wi-Fi de 2,4 GHz.
2 Introduzca la contraseña de la red Wi-Fi.
60
ESPAÑOL
3 Como se indica en la aplicación, mantenga el código QR WiFi en la pantalla del smartphone o la tableta a una distancia de
aproximadamente 20 cm frente a la lente del vigilabebés. Mueva
lentamente el smartphone o la tableta para acercar o alejar dicho
dispositivo de la lente y asegurarse así de que el código QR Wi-Fi se
lea correctamente. Cuando el vigilabebés haya leído el código QR
Wi-Fi, reproducirá un tono corto y el piloto de estado Wi-Fi
comenzará a parpadear en verde.
4 Para finalizar el proceso de configuración, siga las instrucciones que
aparecen en pantalla.
5 El piloto de estado Wi-Fi se ilumina en verde de forma permanente
cuando el vigilabebés se conecta a la red Wi-Fi.
Nota: Si no puede para completar el proceso de configuración y el vigilabebés
no se ha conectado al dispositivo inteligente una vez que haya completado
los pasos anteriores, consulte la sección “Preguntas más frecuentes” de este
manual de usuario para encontrar una posible solución.
Consejo: Para obtener más información sobre el piloto de estado Wi-Fi, consulte
el capítulo “Señales del piloto de estado Wi-Fi”.
6 A continuación, accederá a un recorrido introductorio de la aplicación.
7 Posteriormente, puede elegir entre dos opciones: “Help me mount my
monitor” (Obtener ayuda para montar el vigilabebés) o “Let me see
my baby” (Ver al bebé).
8 Si elige la primera opción, siga las instrucciones que aparecen en
pantalla para montar el vigilabebés en la pared (consulte el capítulo
“Montaje del vigilabebés en la pared”). Al final de las instrucciones
que aparecen en pantalla, puede seleccionar la opción “Let me see my
baby” (Ver al bebé).
Montaje del vigilabebés en la pared
El vigilabebés incluye un soporte de montaje en pared. Antes de montar
el vigilabebés en la pared, asegúrese de que hay una buena señal Wi-Fi en
el punto en el que desea instalarlo. Siga las instrucciones que aparecen a
continuación para fijar a la pared el soporte de montaje en pared y para
colocar el vigilabebés en el mismo.
1 Utilice un lápiz para marcar con una cruz en la pared el lugar donde
desea instalar el vigilabebés.
2 Sujete contra la pared el soporte de montaje en pared. Asegúrese de
que uno de los orificios queda justo encima de la cruz que ha marcado
en la pared en el paso 1.
Nota: Asegúrese de que el anillo del soporte de montaje en pared queda
inclinado hacia abajo cuando lo sujeta contra la pared. Si el anillo del soporte
de montaje en pared queda inclinado hacia arriba, gire el soporte de montaje
en pared al revés, de modo que esté en la posición correcta.
ESPAÑOL
61
3 Utilice un lápiz para marcar el orificio del otro tornillo en la pared.
4 Perfore dos orificios en la pared en las marcas.
5 Utilice dos tornillos para fijar el soporte de montaje en pared.
Apriete los tornillos con un destornillador.
6 Pase la unidad de sensor de humedad y temperatura a través del
orificio del soporte de montaje en pared. A continuación, alinee las
ranuras de la base del vigilabebés con los salientes del anillo. Encaje la
ranura de la base del vigilabebés con el borde saliente del interior del
anillo.
7 Gire la base del vigilabebés hacia la derecha para colocar el vigilabebés.
62
ESPAÑOL
8 Inserte la clavija del aparato en la toma de la clavija del aparato de la
unidad de sensor de temperatura y humedad, y enchufe el adaptador a
la toma de alimentación. El vigilabebés ya está listo para su uso.
Guía de inicio rápido
Funciones de la pantalla principal
Parte superior de la pantalla:
1 Activar o desactivar todas las notificaciones
2 Barra de indicación de nivel de sonido
3 Activar o desactivar el sonido
Parte inferior de la pantalla:
4Instantánea
5Intercomunicador
6 Luz nocturna
7Nanas
Botones de acción rápida
,, Instantánea: toque este botón para hacerle una foto al bebé.
-- Al hacerle una foto al bebé, esta se almacena en el álbum de fotos del
dispositivo inteligente.
,, Intercomunicador: toque este botón para hablar con su bebé
directamente. Las opciones disponibles son las siguientes:
-- Activar y desactivar el intercomunicador
-- Ajustar el volumen del intercomunicador
,, Luz nocturna: toque este botón para encender o apagar la luz
nocturna. Toque el icono de ajustes de la esquina inferior derecha
para ajustar el color o el temporizador de la luz nocturna.
Las opciones disponibles son las siguientes:
-- Encender/apagar la luz nocturna
-- Ajustar el temporizador de la luz nocturna o encender de forma
permanente la luz nocturna
ESPAÑOL
63
-- Ajustar el color de la luz nocturna
,, Nanas: toque este botón para activar o desactivar la reproducción de
nanas. Toque el icono de ajustes en la esquina inferior derecha para
seleccionar las nanas, ajustar el temporizador y regular el volumen.
Las opciones disponibles son las siguientes:
-- Seleccionar una nana de la lista de nanas
-- Programar una lista de reproducción de las nanas disponibles
-- Ajustar el temporizador de nanas o seleccionar la reproducción
continua
-- Ajustar el volumen de reproducción
Iconos de vigilancia en segundo plano
-- Icono de la campana: toque este icono para activar o desactivar las
notificaciones.
64
ESPAÑOL
-- Icono del teléfono móvil: toque este icono para activar o desactivar el
sonido.
Nota: Para obtener más información sobre la vigilancia en segundo plano,
consulte el capítulo “Cómo ver, escuchar y vigilar al bebé”.
Barra de indicación de nivel de sonido
-- Las luces indican el nivel de sonido de la habitación del bebé.
Nota: Para obtener más información, consulte el capítulo “Cómo ver, escuchar y
vigilar al bebé”.
Bandeja izquierda
-- Lista de vigilabebés conectados a la aplicación: toque el icono de
ajustes para establecer las preferencias del vigilabebés e invitar a otros
usuarios a ver al bebé.
-- My account (Mi cuenta): toque esta opción para ver y ajustar la
información de la cuenta, su perfil y el perfil del bebé, así como para
añadir o eliminar un vigilabebés.
-- About (Acerca de): toque esta opción para obtener más información
sobre la aplicación, las versiones, etc.
-- Support (Asistencia técnica): toque esta opción para abrir el menú de
asistencia técnica.
Nota: Para obtener más información sobre la bandeja izquierda, consulte el
capítulo “Uso general de la aplicación”.
Bandeja derecha
La bandeja derecha ofrece información sobre los usuarios conectados.
Nota: Solo podrá acceder a las opciones de la bandeja derecha si es
administrador (para obtener más información sobre la bandeja derecha,
consulte el capítulo “Uso general de la aplicación”).
-- Se muestra quién está viendo las imágenes en ese momento.
-- Se muestra quién tiene o no acceso.
El botón del modo de privacidad impide que los usuarios puedan ver
al bebé.
Panel de control
El panel de control de la aplicación está en la bandeja inferior.
ESPAÑOL
65
1Coloque el dedo en la línea horizontal de la pantalla justo por
encima de los iconos en la parte inferior de la pantalla. Desplace la
línea hacia la parte superior de la pantalla. Los iconos de la parte
inferior de la pantalla también se desplazarán hacia arriba.
2Cuando haya desplazado la línea hacia arriba, el panel de control de
la bandeja inferior se podrá ver al completo.
En el panel de control, hay varias opciones de notificación:
1Sonido
2Temperatura
3Humedad
Nota: Para obtener más información acerca de las opciones de notificación
del panel de control, consulte la sección “Opciones de notificación” del capítulo
“Cómo ver, escuchar y vigilar al bebé” de este manual de usuario.
Cómo ver, escuchar y vigilar al bebé
Puede ver, escuchar y vigilar al bebé en el smartphone o la tableta.
También puede calmar al bebé hablando con él.
Visualización del bebé
Zoom y visualización panorámica
Nota: Esta opción solo se encuentra disponible en el modo de visualización
vertical.
1En el modo de pantalla completa, toque dos veces o pellizque hacia
fuera para acercar la imagen.
2Toque dos veces o pellizque hacia dentro para alejar la imagen.
66
ESPAÑOL
3Arrastre la imagen ampliada para desplazarse por ella.
Visualización vertical u horizontal
-- Gire el smartphone o la tableta para ver al bebé en el modo
horizontal.
Modo de visión nocturna
Cuando el nivel de luz de la habitación es bajo, el vigilabebés cambia al
modo de visión nocturna.
-- En este modo, verá imágenes en blanco y negro del bebé en el
dispositivo inteligente.
Cómo escuchar al bebé
Oirá al bebé cuando empiece a llorar.
-- El volumen con el que oye al bebé depende de la configuración del
nivel de volumen del dispositivo inteligente.
-- El nivel de sonido producido por el bebé también se puede ver en
la barra de indicación de nivel de sonido. El número de pilotos que
se iluminan indica el nivel de volumen del sonido en la habitación del
bebé. La barra de indicación va de izquierda a derecha. Cuanto más a
la derecha se iluminen los pilotos, más alto será el sonido.
Nota: El botón para activar y desactivar el sonido se debe establecer en la
posición de encendido para poder oír al bebé.
Consejo: Conecte el dispositivo inteligente a la red eléctrica cuando desee
usarlo para vigilar por la noche al bebé y que la batería no se agote.
ESPAÑOL
67
Cómo recibir una notificación de que el bebé llora
1Notificación automática: recibirá una notificación automática si el
bebé empieza a llorar.
Nota: Si desea recibir una notificación mientras que está realizando otras
actividades en el dispositivo inteligente (por ejemplo, enviar mensajes SMS,
hablar por teléfono y navegar por Internet), asegúrese de que ha activado la
opción de todas las notificaciones.
Consejo: Active la vibración en la opción de ajustes del smartphone si desea
que vibre el smartphone para avisarle si el bebé llora, por ejemplo, cuando
tenga que llevar el smartphone en el bolsillo o si se encuentra en un entorno
ruidoso.
Cómo especificar cuándo recibir una notificación
También puede especificar en el panel de control si desea recibir una
notificación.
1Recibirá una notificación cuando el sonido del bebé supere el nivel
establecido.
2Recibirá una notificación cuando el bebé lleve llorando un tiempo
preestablecido.
Nota: Si opta por no recibir ninguna notificación, no se le avisará de que el
bebé está llorando (consulte la sección “Opciones de notificación” de este
capítulo).
Activación y desactivación de las notificaciones en el dispositivo
inteligente
Las notificaciones son un ajuste del dispositivo inteligente (ajeno a la aplicación).
Puede seleccionar si desea recibir notificaciones de la aplicación y cómo.
1Acceda al centro de notificaciones del dispositivo.
2Seleccione la opción de notificación y haga clic para activarla o
desactivarla.
Vigilancia en segundo plano
La vigilancia en segundo plano es una función de la aplicación que garantiza
que pueda oír al bebé y recibir notificaciones sobre el bebé mientras lleva
a cabo otras tareas en su dispositivo inteligente. La vigilancia en segundo
plano está activada de forma predeterminada, pero puede desactivarla.
68
ESPAÑOL
Activación y desactivación de la vigilancia en segundo plano
-- Toque el icono de la campana para activar o desactivar todas las
notificaciones. Si activa la opción de todas las notificaciones, recibirá
un mensaje en la pantalla si el bebé empieza a llorar. Puede ajustar sus
preferencias de notificación en el panel de control, así como los ajustes
de vigilancia.
Nota: Active la opción de todas las notificaciones para recibir todas las
notificaciones relacionadas con el bebé si la aplicación se está ejecutando en
segundo plano, por ejemplo, cuando está haciendo otra cosa en el dispositivo
inteligente o el dispositivo está en modo de espera con la pantalla apagada.
Debe activar la opción de todas las notificaciones si desea ajustar las
notificaciones personalizadas de temperatura, sonido y humedad en el panel
de control.
-- Toque el icono del teléfono móvil para activar o desactivar el sonido.
Nota: Si silencia el sonido, no podrá escuchar al bebé cuando cambie a otra
función en el dispositivo inteligente (llamadas, mensajes SMS, etc.).
Nota: Al realizar una llamada móvil o utilizar una aplicación VoIP (por ejemplo,
Skype,Viber o FaceTime) para llamar a alguien, no escuchará al bebé.
No obstante, en cuanto el bebé empiece a llorar, recibirá una notificación.
Cambio de la vigilancia en segundo plano a la pantalla principal
de la aplicación
La aplicación permanece activa en segundo plano, también cuando el
dispositivo está en modo de espera. Cuando la vigilancia en segundo plano
está activa, aparece una barra roja en la parte superior de la pantalla del
dispositivo inteligente.
1Para cambiar de la vigilancia en segundo plano a la pantalla principal
de la aplicación, toque la barra roja de la parte superior de la pantalla
para acceder a la aplicación en primer plano.
Opciones de notificación
Las opciones de notificación de la aplicación están en el panel de control.
El panel de control se encuentra en la bandeja de la parte inferior de la
pantalla. Desplace hacia arriba el panel de control para ver el menú de
opciones. El menú contiene las opciones que se indican a continuación.
Sonido
-- Ajuste el control deslizante en un nivel de sonido por encima del cual
desee recibir una notificación.
Nota: Si el control deslizante está en la posición de silencio, escuchará al bebé
continuamente al salir de la aplicación.
-- Ajuste la duración del sonido después de la cual desea que se le
notifique.
ESPAÑOL
69
Temperatura
-- Ajuste el intervalo de temperatura por encima o por debajo del cual
desea recibir una notificación de temperatura.
-- Active o desactive la notificación de temperatura.
-- Visualice la temperatura actual o el historial.
Humedad
-- Ajuste el intervalo de humedad por encima o por debajo del cual
desea recibir una notificación de humedad.
-- Active o desactive la notificación de humedad.
-- Visualice la humedad actual o el historial.
Usuarios invitados y cuentas
Invitación de usuarios y de un segundo administrador
Puede invitar a un máximo de nueve familiares y amigos, y permitir que
vean al bebé en su smartphone o tableta. Puede invitar a uno de estos
invitados para que actúe como segundo administrador. Este segundo
administrador tiene los mismos derechos que el primer administrador.
Los invitados solo tienen derechos de visualización, algo que controlan
los administradores. Al igual que un invitado, el administrador tiene
derechos de visualización. Además, el administrador tiene el derecho a
invitar a otros usuarios, otorgarles acceso, eliminar su derecho de acceso
y desconectarlos. El administrador puede también desactivar su cuenta y,
por lo tanto, desvincular a los usuarios invitados del vigilabebés.
1En la bandeja izquierda, toque el icono de ajustes junto al vigilabebés.
2Desplácese hacia abajo y toque “Add new user” (Añadir nuevo
usuario).
70
ESPAÑOL
3Agregue la dirección de correo electrónico del usuario y su función
(administrador o invitado).
4La aplicación envía un mensaje de correo electrónico a la persona
invitada y podrá ver una notificación emergente en la que se indica
que se ha enviado un mensaje de correo electrónico.
5Los invitados recibirán un mensaje de correo electrónico con
un código de invitación que solo será válido durante un periodo
de tiempo limitado. La dirección de correo electrónico contiene
también un enlace a App Store. El invitado podrá hacer clic en este
enlace para instalar la aplicación.
6Después de instalar la aplicación, los invitados deberán crear una
cuenta según las instrucciones que aparecen en la aplicación.
7El invitado selecciona la opción “Connect to a shared baby monitor”
(Conectarse a un vigilabebés compartido) durante el proceso de
configuración. Se abre entonces la página en la que se valida la
invitación.
8El invitado introduce el código de invitación, su dirección de correo
electrónico y confirma la información. Entonces, el código y la
dirección de correo electrónico se comprueban.
9El administrador recibe un mensaje de correo electrónico en el
que se confirma que el invitado se ha conectado al vigilabebés y el
administrador puede entonces otorgarle acceso.
10Cuando el administrador ha concedido el acceso al invitado, este
puede ver al bebé.
-- Cuando una o más personas están viendo al bebé, se ilumina el
indicador de visualización rojo.
Nota: Aunque hasta diez personas (ocho o nueve invitados y uno o dos
administradores) tengan derechos de visualización para el mismo vigilabebés,
solo tres personas pueden ver el bebé al mismo tiempo. Si los invitados
intentan acceder el vigilabebés cuando otros tres usuarios están viendo las
imágenes, recibirán un mensaje en el que se indica que hay demasiadas
conexiones. Los administradores siempre tienen la posibilidad de anular el
acceso de los invitados si desean ver al bebé.
ESPAÑOL
71
Otorgamiento y anulación del acceso
Los usuarios con derechos de administrador pueden determinar quién
puede ver al bebé.
1Para anular el acceso de un usuario invitado, vaya a la bandeja
derecha, toque el invitado cuyo acceso desee anular y toque el icono
en forma de ojo junto al nombre del invitado.
Consejo: Si ya hay tres personas viendo al bebé y desea otorgar a alguien, por
ejemplo, la niñera, acceso al vigilabebés, puede anular el acceso de uno de los
invitados que están viendo al bebé en ese momento y concederle acceso a la
otra persona en su lugar.
2Para proporcionar acceso a un invitado, vaya a la bandeja derecha,
toque al usuario al que desee conceder acceso y toque el icono en
forma de ojo junto al icono del usuario en cuestión.
3Si desea anular el acceso para todos los invitados a la vez, toque el
botón de modo de privacidad. De esta manera, se denegará el acceso
al vigilabebés a todo el mundo excepto a usted mismo hasta que
toque de nuevo el botón del modo de privacidad.
Consejo: Puede utilizar el botón del modo de privacidad para tener un
momento de privacidad con el bebé, por ejemplo, para darle el pecho, bañarle
o cambiarle el pañal. Los invitados que intenten acceder al vigilabebés recibirán
una notificación en pantalla.
Gestión de la cuenta
Desconexión de un invitado
Para desconectar permanentemente a usuarios invitados de la aplicación,
debe eliminarlos de la lista de invitados. Los invitados pueden también
desconectarse permanentemente de la aplicación.
Desactivación de la cuenta de usuario
Si solo hay un administrador y este desactiva su cuenta de administrador,
todas las cuentas de usuarios invitados se desvinculan del vigilabebés,
aunque las cuentas sigan existiendo. Si hay dos administradores, los dos
tendrán que desactivar sus cuentas para desvincular todas las cuentas.
Si solo uno de los administradores desactiva su cuenta, los invitados
permanecerán conectados al vigilabebés.
Si desea transferir el vigilabebés a otra persona o si lo pierde o se lo roban,
le recomendamos que desactive las cuentas de administrador. Esto es
sumamente importante para proteger su privacidad y la del bebé.
72
ESPAÑOL
1Para desactivar una cuenta, vaya a la bandeja izquierda y toque en
“My account” (Mi cuenta).
2Toque en “Deactivate account” (Desactivar cuenta).
3Aparecerá una ventana emergente en la que se le solicitará que
confirme que desea desactivar su cuenta.
4Al tocar en “Deactivate” (Desactivar), se confirmará en una ventana
emergente que su cuenta se ha desactivado.
Adición y eliminación de vigilabebés
Puede añadir hasta diez vigilabebés en la aplicación. Esto le permite vigilar
más niños o al mismo niño en más habitaciones. Es posible que, por
ejemplo, desee instalar un monitor sobre la cuna del bebé en su habitación
y sobre su parque en el salón. Es necesario conectar los vigilabebés a la
aplicación uno a uno.
1Vaya a “My account” (Mi cuenta) en la bandeja izquierda.
2A continuación, verá la lista de vigilabebés conectados. Toque en
“Add baby monitor” (Añadir vigilabebés).
3Siga las instrucciones que aparecen en el capítulo “Configuración
inicial” de este manual de usuario para conectar el vigilabebés a la
aplicación.
ESPAÑOL
73
Uso general de la aplicación
Optimización de la calidad de audio y vídeo
La calidad de audio y vídeo del dispositivo inteligente puede cambiar con el
tiempo en función del ancho de banda disponible de la conexión a Internet.
Con una conexión Wi-Fi, obtendrá normalmente los mejores resultados,
mientras que las conexiones 4G y 3G ofrecen menos ancho de banda y
proporcionan una menor calidad. La aplicación le ofrece automáticamente
la mejor experiencia posible ajustando la calidad de audio y vídeo al ancho
de banda disponible.
Este ajuste se lleva a cabo por niveles:
1 Gran ancho de banda: buena calidad de audio y vídeo con
notificaciones de texto.
2 Ancho de banda reducido (por ejemplo, al utilizar la tecnología 3G):
calidad de vídeo reducida y buena calidad de audio con notificaciones
de texto.
3 Ancho de banda mínimo (por ejemplo, al utilizar la tecnología 2G):
solo la conexión de audio estará disponible, con notificaciones de texto.
4 Ancho de banda ínfimo: solo las notificaciones de texto están
disponibles.
74
ESPAÑOL
Conexión Wi-Fi a Internet
Obtendrá los mejores resultados si conecta el dispositivo inteligente a Internet
a través de Wi-Fi. De esta forma, utilizará automáticamente la red Wi-Fi
para conectarse al vigilabebés. Cuando no hay conexión Wi-Fi a Internet, el
dispositivo inteligente cambia a la conexión de datos móvil 3G o 4G. El uso de
esta conexión de datos puede tener asociado un cargo adicional por parte de
su proveedor, en función de la suscripción que tenga. Una conexión de vídeo
normalmente necesita de 0,1 a 0,25 MB de datos por segundo. Una conexión
de audio requiere 0,01 MB de datos por segundo.
Si desea evitar que el dispositivo inteligente se conecte a la red 3G o
4G, tiene que desactivar la conexión de datos móvil del dispositivo. Esto
afectará a las demás aplicaciones que puedan utilizar la conexión de datos
móvil 3G o 4G. Tenga en cuenta que, si desactiva la conexión de datos
móvil, no se recibirá ninguna alerta si el bebé está llorando cuando se
pierda la conexión Wi-Fi a Internet.
Uso del vigilabebés fuera de casa
Puede utilizar el vigilabebés en cualquier lugar en el que haya disponible una
red Wi-Fi de 2,4 GHz, ya sea en la casa de un amigo o familiar o en un hotel o
residencia de vacaciones. Si dispone del nombre de la red Wi-Fi y la contraseña,
puede configurar y utilizar el vigilabebés fuera de casa. Siga las instrucciones
de configuración que se indican a continuación para ello. Una vez que haya
configurado una conexión a una red Wi-Fi, los ajustes se almacenarán en la
memoria del dispositivo y no tendrá que repetir el proceso de configuración,
siempre que utilice la aplicación y vigilabebés en el mismo lugar.
Nota: Si la conexión de la red Wi-Fi requiere una confirmación adicional, por
ejemplo, aceptar los términos de uso, el vigilabebés no se podrá conectar a la red
Wi-Fi. Esto puede ocurrir en redes Wi-Fi de hoteles y otras redes Wi-Fi públicas.
1Hay dos opciones para conectar el vigilabebés a la red Wi-Fi.
-- Primera opción: al encender el vigilabebés, aparece el mensaje “Baby
monitor not found” (No se ha encontrado el vigilabebés). Espere hasta
que la aplicación ofrezca la opción “Reconnect the baby monitor”
(Volver a conectar el vigilabebés).
-- Segunda opción: encienda el vigilabebés. Abra la bandeja izquierda,
seleccione el vigilabebés y elija “Reconnect the baby monitor”
(Volver a conectar el vigilabebés).
2Cuando la aplicación haya generado un código QR Wi-Fi,
mantenga la pantalla del smartphone o la tableta a una distancia de
aproximadamente 20 cm frente a la lente del vigilabebés. Mueva
lentamente el smartphone o la tableta para acercar o alejar dicho
dispositivo de la lente y asegurarse así de que el código QR Wi-Fi
se lea correctamente.
3Siga el resto de instrucciones que aparecen en pantalla para finalizar
la configuración. El proceso de configuración se completa y el
vigilabebés se conecta a la red Wi-Fi y está listo para su uso cuando
el piloto de estado Wi-Fi de la parte delantera del vigilabebés se
ilumina en verde de forma permanente.
Nota: Cuando vuelva a casa, deberá seguir el procedimiento anterior para
volver a conectar el vigilabebés a la red Wi-Fi doméstica.
ESPAÑOL
75
Uso de la aplicación en varios dispositivos
Puede utilizar la aplicación uGrow Smart Baby Monitor en más de un
dispositivo (por ejemplo, en el iPhone y el iPad).
Nota: Cuando inicie sesión con la misma cuenta en un dispositivo mientras la
aplicación esté activa en otro dispositivo, el dispositivo en el que la aplicación
se activó en primer lugar finalizará la sesión automáticamente. No puede
utilizar la aplicación con la misma cuenta en dos dispositivos diferentes al
mismo tiempo.
Restablecimiento del vigilabebés
El vigilabebés tiene un botón de reinicio situado en la parte posterior.
Al pulsar este botón, se restablecen los ajustes predeterminados de fábrica.
Esto significa que se desvinculan todas las cuentas del vigilabebés.
Nota: Restablezca siempre el vigilabebés pulsando el botón de reinicio antes
de transferir el vigilabebés a otra persona. Este paso es necesario para
proteger su privacidad. Restablezca también el vigilabebés cuando lo compre
de segunda mano o lo obtenga de otro propietario.
Cómo restablecer los ajustes de fábrica
Nota: Asegúrese de que el vigilabebés esté encendido antes de restablecerlo.
1 Mientras el vigilabebés esté encendido, pulse el botón de reinicio
situado en la parte posterior del vigilabebés con un clip o con otro
objeto puntiagudo. Se recomienda hacerlo cuando el vigilabebés esté
conectado a la red Wi-Fi.
2Mantenga pulsado el botón de reinicio hasta que el vigilabebés emita
un pitido y, a continuación, suéltelo. Al soltar el botón, el vigilabebés
reproduce un tono corto para confirmar el restablecimiento.
¿Qué debo hacer después de restablecer los valores
predeterminados de fábrica?
Después de que el vigilabebés se haya restablecido, el piloto de estado
Wi-Fi parpadea en color naranja al encender el vigilabebés para indicar
que se está reiniciando después del restablecimiento. Cuando el piloto de
estado Wi-Fi deje de parpadear, puede conectar de nuevo el vigilabebés
a la red Wi-Fi. Siga las instrucciones que aparecen en el capítulo
“Configuración inicial” de este manual de usuario. Si ha invitado a otras
personas para que puedan utilizar el vigilabebés, deberá invitarlas de nuevo.
Actualizaciones de firmware
La actualización es esencial para proteger su privacidad y el correcto
funcionamiento del vigilabebés y la aplicación.
-- Las actualizaciones esenciales son obligatorias. Las actualizaciones
obligatorias de la aplicación se instalan automáticamente en el dispositivo
inteligente y no necesitan confirmación. Solo recibirá una notificación de
que se está llevando a cabo una actualización obligatoria.
-- De vez en cuando, recibirá notificaciones de que hay actualizaciones
disponibles para el firmware del vigilabebés o el software de la
aplicación. Las actualizaciones se instalan al confirmarlas.
76
ESPAÑOL
-- Para buscar actualizaciones del firmware del vigilabebés, abra la bandeja
izquierda y toque el icono de ajustes junto al vigilabebés. Desplácese hasta
“Firmware” y toque para comprobar si hay actualizaciones de firmware
disponibles. Si hay disponible alguna actualización, toque para instalarla.
Nota: Cuando se esté instalando la actualización, no podrá ver ni escuchar al
bebé temporalmente.
Señales del piloto de estado Wi-Fi
,, Apagado
1 Apagado: el vigilabebés está apagado.
,, Naranja
1 Parpadea rápidamente en naranja: el vigilabebés se está iniciando.
2 Parpadea lentamente en naranja: el vigilabebés está actualizando
el firmware. No apague el vigilabebés durante la actualización del
firmware.
Nota: El piloto de estado de la red Wi-Fi puede apagarse brevemente durante
la actualización del firmware.
3 Naranja permanente: la cámara del vigilabebés está lista para leer el
código QR Wi-Fi generado por el smartphone o la tableta.
,, Verde
ESPAÑOL
77
1 Parpadea en verde: el código QR Wi-Fi se ha leído correctamente.
2 Verde permanente: el vigilabebés está conectado a la red Wi-Fi.
,, Rojo
1 Parpadea lentamente en rojo: ha introducido una contraseña de Wi-Fi
incorrecta.
2 Rojo permanente: el vigilabebés no puede conectarse a la red Wi-Fi.
Seguridad y privacidad
Seguridad de la red
Los puntos de conexión Wi-Fi en lugares públicos, como aeropuertos y
hoteles, resultan cómodos, pero a menudo no son seguros.
Le recomendamos que utilice el vigilabebés solo en una red Wi-Fi
protegida con cifrado WPA2. Le aconsejamos que no utilice el vigilabebés
en una red que utilice el cifrado WEP.
Nota: Las redes Wi-Fi que no requieren contraseña no son seguras.
78
ESPAÑOL
Contraseñas seguras
Las contraseñas son esenciales para proteger la red Wi-Fi y su cuenta
frente a accesos no autorizados. Cuanto más segura sea la contraseña,
mejor protegidas estarán la red Wi-Fi y su cuenta.
Las bases para una contraseña segura son las siguientes:
1 Una contraseña segura contiene al menos ocho caracteres.
2 Una contraseña segura no contiene su nombre, el nombre del bebé,
ni ningún otro nombre real o de una marca.
3 Una contraseña segura no contiene una palabra completa.
4 Una contraseña segura es muy diferente de las contraseñas que ha
utilizado antes.
5 Una contraseña segura contiene caracteres de al menos dos de las
siguientes categorías:
-- Letras: A, B, C o a, b, c
-- Números: 0, 1, 2, 3, 4, 5, 6, 7, 8, 9
-- Símbolos: _ . @ $
Uso seguro de la aplicación del vigilabebés
Utilice únicamente la aplicación en una red segura
No utilice la aplicación en una red Wi-Fi no segura. Le recomendamos que
utilice el vigilabebés solo en una red Wi-Fi protegida con cifrado WPA2.
También puede utilizar la red de datos de su teléfono (se suele denominar
3G o 4G).
Utilice siempre el software y el firmware más recientes
Actualice siempre el software de la aplicación y el firmware del vigilabebés
cuando reciba una notificación de que hay disponible una actualización.
Habrá actualizaciones disponibles cuando se realicen mejoras de software
o para evitar problemas de seguridad. Si no los actualiza, la conexión con el
vigilabebés a través de la aplicación ya no será segura ni privada.
Compatibilidad con otros dispositivos
,,
-,,
-,,
-,,
--
Compatible con iPhone
iPhone 4S y más recientes
Compatibilidad con el iPad
iPad 2 y más recientes
Compatibilidad con iPod touch
iPod touch de 5ª generación y más recientes
Compatibilidad con Android
Android 4.1 o posterior
Nota: Para obtener la información más reciente sobre la compatibilidad con
otros dispositivos, visite www.philips.com/ugrow.
Solicitud de accesorios
Para comprar accesorios o piezas de repuesto, visite www.shop.philips.com/
service o acuda a su distribuidor de Philips.También puede ponerse en
contacto con el Servicio de Atención al Cliente de Philips en su país
(consulte el folleto de garantía mundial para encontrar los datos de contacto).
ESPAÑOL
79
Garantía y asistencia
Si necesita asistencia o información, visite el sitio Web de Philips en
www.philips.com/support o lea el folleto de garantía mundial independiente.
Preguntas más frecuentes
Para consultar las preguntas más frecuentes sobre este vigilabebés, consulte
la página de asistencia del producto en www.philips.com/support.
Pregunta
Respuesta
Guía de resolución
de problemas
¿Por qué no puedo
encontrar la aplicación
en App Store o Google
Play?
Puede descargar la aplicación en App Store de Apple y Google Play buscando
el vigilabebés inteligente uGrow. Si no ve la aplicación en Apple Store ni en
Google Play, es posible que su teléfono no tenga la versión necesaria de
iOS o Android. Esta aplicación solo es compatible con iOS 7 o posterior o
Android 4.1 o posterior.
No puedo descargar
ni instalar la aplicación.
¿Qué puedo hacer?
Compruebe si se dan algunos de los siguientes factores que evitan la correcta
descarga de la aplicación. ¿La señal Wi-Fi es estable y la recibe con intensidad?
¿El dispositivo inteligente funciona con iOS 7 o posterior o con Android 4.1
o posterior? ¿Tiene suficiente espacio en su dispositivo inteligente para
guardar la aplicación? ¿Ha introducido la contraseña correcta de App Store
o Google Play?
No puedo configurar
el vigilabebés. Cada vez
que lo intento, aparece
la pantalla de error de
conexión. ¿Cuál es el
problema?
Si el piloto de estado de Wi-Fi es naranja permanente y parpadea en rojo al
intentar conectar, la contraseña de Wi-Fi introducida no es correcta. Vuelva a
realizar el proceso de configuración. Vuelva a introducir la contraseña Wi-Fi y
asegúrese de que la contraseña es la correcta.
Si el piloto de estado de Wi-Fi es naranja permanente y era rojo permanente
al intentar conectar, el vigilabebés no puede conectarse a la red Wi-Fi. En
primer lugar, compruebe si el teléfono o la tableta utiliza la misma red Wi-Fi
a la que desea conectar el vigilabebés. A continuación, compruebe si tiene
acceso a Internet a la red Wi-Fi de 2,4 GHz. Si esto no resuelve el problema,
asegúrese de que el SSID del router (nombre de red) no contenga símbolos
especiales. En caso de que sí los contenga, cambie el nombre del SSID del
router como corresponda.
Mi vigilabebés tiene
problemas para leer
el código QR de mi
dispositivo inteligente.
¿Qué puedo hacer?
Asegúrese de que mantiene el código QR Wi-Fi a unos 20 cm de distancia
de la lente. Pruebe a mover ligeramente el dispositivo inteligente hacia arriba,
hacia abajo, hacia la izquierda o hacia la derecha para asegurarse de que
el código QR Wi-Fi queda directamente delante del vigilabebés. También
puede alejar o acercar el dispositivo inteligente a la lente del vigilabebés
para que enfoque correctamente. Asegúrese de que la habitación esté lo
suficientemente iluminada, pero evite la luz demasiado intensa. Cuando
el vigilabebés haya leído el código QR Wi-Fi, escuchará un sonido de
confirmación y el piloto de estado Wi-Fi parpadeará en verde.
Es posible que no haya retirado la lámina protectora de la lente del
vigilabebés. Quite la lámina protectora.
80
ESPAÑOL
Pregunta
Respuesta
Es posible que esté tapando con la mano parte del código QR Wi-Fi. Sujete
el dispositivo de tal forma que su mano no cubra el código QR Wi-Fi.
Si el piloto de estado Wi-Fi permanece iluminado en color naranja, el
vigilabebés no ha leído el código QR correctamente. Vuelva atrás con la
flecha de la esquina superior izquierda de la pantalla y siga las instrucciones
del código QR.
Si el piloto de estado Wi-Fi luz parpadea en naranja, significa que la cámara
está aún iniciándose. Espere hasta que el piloto se ilumine permanentemente
en color naranja. A continuación, vuelva atrás con la flecha de la esquina
superior izquierda de la pantalla y siga las instrucciones del código QR.
No puedo ver al bebé.
¿Cuál es el problema?
Compruebe si la señal Wi-Fi es lo suficientemente intensa en el lugar de la
habitación en el que está colocado el vigilabebés.
Compruebe si el vigilabebés está conectado a una toma de corriente activa y
si está encendido.
El piloto de estado Wi-Fi de la parte delantera del vigilabebés debe estar
iluminado en verde (consulte el capítulo “Señales del piloto de estado Wi-Fi”).
Si utiliza más de un vigilabebés, compruebe que está seleccionado el correcto.
Acceda a la bandeja izquierda y toque el vigilabebés para ver si está activo.
Es posible que ya haya tres personas viendo al bebé. La aplicación solo
permite que tres personas vean al bebé a la vez. Si tiene derechos de
administrador, puede anular el acceso de uno de los invitados para poder
verlo usted en su lugar.
¿Por qué la aplicación
no me envía una
notificación de que el
bebé está llorando?
Compruebe si el vigilabebés está conectado a la red Wi-Fi. El piloto de
estado Wi-Fi en la parte delantera del vigilabebés debe estar iluminado en
verde de forma permanente.
Puede que el vigilabebés esté desconectado. Para recibir una notificación de
que el vigilabebés se ha desconectado, vaya a la bandeja izquierda y active
esta notificación en “Settings” (Ajustes).
El umbral de sonido de las notificaciones puede estar ajustado con un
volumen demasiado alto. En ese caso, la aplicación solo le avisará con una
notificación cuando el bebé haga mucho ruido. Abra el panel de control para
reducir el umbral de sonido y asegurarse de que se le notifique antes si el
bebé empieza a llorar.
Puede que haya establecido una duración demasiado larga para el llanto.
Seleccione un periodo menor para que la aplicación le avise antes.
El volumen del teléfono puede estar desactivado. Ajuste el volumen del
teléfono a un nivel normal.
Es posible que el intercomunicador esté activado. Toque el icono
del intercomunicador para desactivarlo. Mientras esté usando el
intercomunicador, no oirá los sonidos del bebé.
ESPAÑOL
Pregunta
81
Respuesta
Asegúrese de que no haya recibido un mensaje de correo electrónico para
notificarle que su cuenta se ha eliminado. Si tiene derechos de visualización
como invitado, el administrador también puede denegar su acceso
temporalmente. Póngase en contacto con el administrador y solicítele que
active su cuenta o le vuelva a invitar.
Pierdo la conexión con
frecuencia. ¿Cuál es el
problema?
Compruebe si la señal Wi-Fi en la habitación en la que está colocado el
vigilabebés es lo suficientemente intensa y estable. Si no es así, necesita un
repetidor Wi-Fi para obtener una señal fuerte y estable. Si utiliza un repetidor
Wi-Fi, asegúrese de que el router y el repetidor Wi-Fi tengan el mismo SSID
y de que utiliza la misma contraseña para ambos dispositivos.
Si el piloto de estado Wi-Fi de la parte delantera del vigilabebés se ilumina
en verde de forma permanente y se sigue interrumpiendo la conexión,
puede que haya algún problema con la conexión a Internet del dispositivo
inteligente. Compruebe la señal Wi-Fi del dispositivo inteligente o la velocidad
3G o 4G probando a ver un vídeo, por ejemplo, en YouTube.
Tras cambiar el router,
ya no puedo ver al
bebé. ¿Cuál es el
problema?
En primer lugar, asegúrese de que el dispositivo inteligente tiene una buena
señal Wi-Fi del router nuevo. Hay dos opciones para conectar el vigilabebés
a la red Wi-Fi. La primera opción es encender el vigilabebés. La aplicación
mostrará el mensaje “Baby monitor not found” (No se ha encontrado
el vigilabebés). Diríjase a “Troubleshooting” (Solución de problemas) y
seleccione “Reconnect the baby monitor” (Volver a conectar el vigilabebés).
La segunda opción es abrir la bandeja izquierda cuando la aplicación muestre
el mensaje “Baby monitor not found” (No se ha encontrado el vigilabebés).
Seleccione el vigilabebés en la bandeja izquierda y elija “Reconnect baby
monitor” (Volver a conectar el vigilabebés). Cuando la aplicación haya
generado un código QR Wi-Fi, mantenga la pantalla del dispositivo inteligente
a una distancia de 20 cm frente a la lente del vigilabebés. A continuación, siga
las instrucciones que aparecen en pantalla para finalizar la configuración. El
proceso de configuración se ha realizado correctamente cuando el piloto
de estado Wi-Fi de la parte delantera del vigilabebés se ilumina en verde de
forma permanente.
He recibido una
invitación como
invitado, pero no se ve
nada cuando abro la
aplicación. ¿Cuál es el
problema?
Asegúrese de que no haya recibido un mensaje de correo electrónico para
notificarle que su cuenta se ha eliminado. Si tiene derechos de visualización
como invitado, el administrador también puede denegar su acceso
temporalmente. Póngase en contacto con el administrador y solicítele que
active su cuenta o le vuelva a invitar.
Compruebe si el dispositivo inteligente está conectado a Internet.
Puede que el vigilabebés esté desconectado. Para recibir una notificación de
que el vigilabebés se ha desconectado, vaya a la bandeja izquierda y active
esta notificación en “Settings” (Ajustes).
El umbral de sonido de las notificaciones puede estar ajustado con un
volumen demasiado alto. En ese caso, la aplicación solo le avisará con una
notificación cuando el bebé haga mucho ruido. Abra el panel de control para
reducir el umbral de sonido y asegurarse de que se le notifique antes si el
bebé empieza a llorar.
82
ESPAÑOL
Pregunta
Respuesta
Puede que haya establecido una duración demasiado larga para el llanto.
Seleccione un periodo menor para que la aplicación le avise antes.
El volumen del teléfono puede estar desactivado. Ajuste el volumen del
teléfono a un nivel normal.
Consejos y trucos
¿Tengo que mantener la
aplicación en la pantalla
para vigilar al bebé?
No, la aplicación puede vigilar en segundo plano mientras realiza otras tareas
en el smartphone o la tableta. Toque el icono del teléfono móvil. Ahora podrá
escuchar al bebé y también le oirá si empieza a llorar. Cuando la opción de
todas las notificaciones esté activada, también recibirá una notificación en
pantalla de que el bebé está llorando, mientras la aplicación se ejecuta en
segundo plano.
¿Por qué se ven
imágenes en blanco y
negro en lugar de en
color?
El vigilabebés ha cambiado al modo de visión nocturna. La habitación en la
que está colocado el vigilabebés está a oscuras.
Si hay suficiente luz en la habitación, puede que el sensor de luz de la parte
superior del vigilabebés esté obstruido o sucio. Asegúrese de que el sensor
está totalmente expuesto a la luz de la habitación.
Si el dispositivo
está bloqueado o
estoy utilizando otra
aplicación o haciendo
una llamada, ¿puedo oír
al bebé?
Sí, puede elegir continuar vigilando al bebé en segundo plano. Tenga en cuenta
que si utiliza el teléfono para realizar una llamada, solo oirá un tono de
llamada si el bebé empieza a llorar. No escuchará al bebé. Toque el símbolo
del teléfono móvil para activar el sonido de fondo. Cuando el sonido de
fondo está activado, puede escuchar al bebé mientras realiza otras actividades.
También puede optar por recibir una notificación si el bebé llora. Toque el
símbolo de la campana en la pantalla principal para activar o desactivar todas
las notificaciones. Cuando todas las notificaciones están activadas, se recibe
un mensaje en la pantalla si el bebé está llorando.
Uso y
familiarización
¿Necesito una cuenta
adicional si tengo más
vigilabebés?
No, no necesita una cuenta adicional si utiliza más vigilabebés. Puede añadir
un vigilabebés a la aplicación uGrow Smart Baby Monitor. Vaya a “My
account” (Mi cuenta) en la bandeja izquierda. Verá una lista de los vigilabebés
conectados a la aplicación. Toque en “Add baby monitor” (Añadir vigilabebés).
Siga las instrucciones que aparecen en el capítulo “Configuración inicial” para
conectar el vigilabebés a la aplicación.
¿Puedo utilizar más
vigilabebés en la misma
aplicación?
Puede conectar hasta diez vigilabebés a la aplicación, pero solo puede ver
el vídeo de un vigilabebés en cada momento. Recibirá notificaciones de los
otros vigilabebés conectados. Si se recibe una notificación y toca en ella, la
aplicación le proporcionará acceso directamente a dicho vigilabebés. También
puede seleccionar el vigilabebés que desea ver en la bandeja izquierda.
¿Por qué tarda la
aplicación tanto tiempo
en cargarse?
Puede que la conexión a Internet del dispositivo inteligente o la conexión
Wi-Fi del vigilabebés esté funcionando de forma lenta. Compruebe la
conexión del dispositivo inteligente y del vigilabebés. La aplicación requiere
una conexión de red estable.
ESPAÑOL
83
Pregunta
Respuesta
¿Los hackers pueden
acceder al vigilabebés?
Hacemos todo lo posible para evitar accesos no autorizados y publicar
actualizaciones frecuentes. Asegúrese de que siempre utiliza la versión
más reciente del software de la aplicación y el firmware más reciente del
vigilabebés. Si pierde su dispositivo inteligente, reinicie el vigilabebés para
eliminar todas las conexiones que tenga establecidas. También puede iniciar
sesión en la aplicación desde otro dispositivo inteligente y eliminar su cuenta.
Si es el único administrador, todos los usuarios invitados se desconectarán
también del vigilabebés.
He perdido el
smartphone. ¿Cómo
puedo evitar que
personas extrañas
puedan ver al bebé?
Inicie sesión en la aplicación desde otro dispositivo inteligente y elimine su
cuenta. Si es el único administrador, con esta operación se desconectará a
todos los usuarios invitados de la aplicación en la herramienta del vigilabebés.
También puede reiniciar el vigilabebés para desactivar todas las conexiones al
dispositivo que se le ha perdido. El botón de reinicio está situado en la parte
posterior del vigilabebés.
¿Se me notificarán las
actualizaciones de la
aplicación o el software
del vigilabebés?
Sí, recibirá una notificación en el teléfono para realizar la actualización a
través de App Store. Esto sucederá periódicamente. Las notificaciones de
actualización del firmware del vigilabebés aparecerán en la aplicación junto
con las instrucciones sobre cómo actualizarlo.
El teléfono o la tableta
se calienta cuando
utilizo la aplicación. ¿Es
normal?
Su dispositivo necesita tener potencia suficiente para proporcionar vídeo de
alta calidad. Esto no dañará el dispositivo. Para evitarlo, le recomendamos que
actualice el dispositivo a la versión más reciente de iOS y de la aplicación
uGrow. El dispositivo no se calienta cuando ejecuta la aplicación en segundo
plano.
84
FRANÇAIS
Table des matières
Introduction Présentation du produit Configuration initiale Montage de l’écoute-bébé au mur Guide de démarrage rapide Voir, entendre et surveiller votre bébé Voir votre bébé Entendre votre bébé Comment être averti que votre bébé pleure Surveillance en arrière-plan Options de notification Utilisateurs et comptes invités Inviter des personnes et un deuxième administrateur Accord et suppression d’accès Gestion de compte Utilisation générale de l’application
Optimisation de la qualité audio et vidéo Connexion à Internet en Wi-Fi Utilisation de l’écoute-bébé en dehors de la maison Utilisation de l’application sur plusieurs appareils Réinitialisation de l’écoute-bébé Mises à niveau du micrologiciel
Signaux du voyant d’état Wi-Fi Sécurité et confidentialité Sécurité réseau Mot de passe fort Utilisation sûre de l’application de l’écoute-bébé Périphériques compatibles Commande d’accessoires Garantie et assistance Foire aux questions 84
85
85
87
89
92
92
93
94
94
95
96
96
98
98
100
100
100
101
102
102
102
103
105
105
105
105
106
106
106
106
Introduction
Félicitations pour votre achat et bienvenue dans l’univers Philips Avent !
Pour profiter pleinement de l’assistance Philips Avent, enregistrez votre
produit sur le site suivant : www.philips.com/welcome.
Grâce à la technologie SafeConnect, l’écoute-bébé connecté uGrow
fonctionne sur de multiples réseaux. Il s’adapte automatiquement à l’état du
réseau afin de maintenir une connexion ininterrompue de qualité avec votre
bébé et tente en permanence de se reconnecter en cas de déconnexion.
L’utilisation de la bande passante a été optimisée afin de ne pas vider
inutilement la batterie de votre appareil mobile. L’écoute-bébé fonctionne
même lorsque vous utilisez votre téléphone pour d’autres activités.
L’écoute-bébé connecté uGrow nécessite une connexion Internet et
un réseau Wi-Fi. Une bonne connexion Internet et un réseau Wi-Fi
de qualité sont essentiels pour tirer le meilleur de votre écoute-bébé
connecté uGrow. Une connexion Internet et un réseau Wi-Fi de moindre
qualité peut réduire l’efficacité de la connexion entre l’application
FRANÇAIS
85
uGrow et l’écoute-bébé. L’écoute-bébé est compatible avec iOS 7 ou
version supérieure ou avec Android 4.1 ou version supérieure. Toutes
les fonctionnalités que vous attendez d’un écoute-bébé sont réunies :
berceuses, veilleuse et surveillance de l’humidité et de la température.
Présentation du produit (fig. 1)
1 Voyant d’état Wi-Fi
2 Lampes infrarouges
3 Objectif de l’écoute-bébé
4Microphone
5 Indicateur visuel
6Veilleuse
7Pied
8 Bouton de veilleuse
9 Bouton lecture/pause de la berceuse
10 Capteur de luminosité
11 Unité de capteur de température et d’humidité
12 Prise d’alimentation de l’appareil
13 Bouton de réinitialisation
14 Bouton marche/arrêt
15 Support mural
16Adaptateur
17 Fiche de l’appareil
Configuration initiale
Avant de commencer la procédure d’installation, assurez-vous que :
-- Vous disposez d’une connexion Internet sans fil (Wi-Fi 2,4 GHz).
-- Vous êtes suffisamment près du routeur Wi-Fi pour obtenir un signal
satisfaisant.
-- Si vous utilisez un répéteur Wi-Fi, assurez-vous que votre routeur et
votre répéteur Wi-Fi ont le même SSID (nom de réseau) et que vous
utilisez le même mot de passe pour le routeur et le répéteur.
-- Vous avez le mot de passe de votre réseau Wi-Fi à portée de main.
Connectez toujours l’écoute-bébé à un réseau sécurisé (reportez-vous
au chapitre « Sécurité et confidentialité »).
-- Assurez-vous que votre appareil fonctionne avec iOS 7 ou version
supérieure, ou Android 4.1 ou version supérieure (pour en savoir
plus sur les périphériques compatibles, reportez-vous au chapitre
« Périphériques compatibles »).
1Téléchargez l’application Philips Avent de l’écoute-bébé connecté
uGrow sur l’App Store ou Google Play. Utilisez les mots-clés
« uGrow smart monitor » ou « Philips smart monitor »
pour trouver l’application.
2Lancez l’application.
86
FRANÇAIS
3Suivez les instructions à l’écran pour créer un compte uGrow.
1 Assurez-vous que vous utilisez une adresse e-mail active sur laquelle
vous pouvez toujours être contacté.
2 Utilisez un mot de passe sûr (reportez-vous à la section « Sécurité et
confidentialité »).
3 Lorsque vous recevez l’e-mail de vérification, suivez les instructions
indiquées dans cet e-mail pour poursuivre la configuration de votre
écoute-bébé connecté uGrow.
4 Créez votre profil utilisateur.
Un profil utilisateur est nécessaire pour vous identifier par rapport aux
utilisateurs invités.
5 Créez le profil de votre bébé.
Le prénom du bébé est nécessaire afin d’identifier votre écoute-bébé dans
l’application, en particulier lorsque plusieurs écoute-bébés sont connectés
à votre compte.
4Suivez les instructions à l’écran pour connecter l’écoute-bébé sur
secteur.
1 Insérez la fiche dans la prise d’alimentation de l’appareil de l’unité du
capteur de température et d’humidité, puis branchez l’adaptateur sur
une prise murale.
2 Une fois l’écoute-bébé allumé, le voyant d’état Wi-Fi commence à
clignoter en orange. Attendez que le voyant d’état Wi-Fi cesse de
clignoter. Lorsqu’il est allumé en orange, l’écoute-bébé est prêt à lire le
code QR Wi-Fi.
5Connectez l’écoute-bébé à votre appareil.
1 Sélectionnez le réseau Wi-Fi que vous souhaitez utiliser. Veuillez
noter que l’écoute-bébé fonctionne uniquement sur un réseau Wi-Fi
2,4 GHz.
2 Saisissez le mot de passe Wi-Fi.
FRANÇAIS
87
3 Comme indiqué par l’application, tenez le code QR Wi-Fi apparaissant
sur l’écran de votre smartphone ou tablette à une distance d’environ
20 cm devant l’objectif de l’écoute-bébé. Approchez ou éloignez
lentement le smartphone ou la tablette de l’objectif pour garantir une
lecture correcte du code QR Wi-Fi. Lorsque l’écoute-bébé a fini de lire
le code QR Wi-Fi, il émet un bref signal sonore et le voyant lumineux
Wi-Fi commence à clignoter en vert.
4 Suivez les instructions à l’écran pour terminer la procédure de
configuration.
5 Le voyant d’état Wi-Fi reste allumé en vert lorsque l’écoute-bébé est
relié au réseau Wi-Fi.
Remarque : Si vous ne parvenez pas à terminer la procédure de configuration
et si votre écoute-bébé n’est pas lié à votre appareil une fois que vous avez
effectué les étapes ci-dessus, consultez la « Foire aux questions » de ce manuel
d’utilisation pour trouver une solution.
Conseil : Pour plus d’informations sur le voyant d’état Wi-Fi, reportez-vous au
chapitre « Signaux du voyant d’état Wi-Fi ».
6 Ensuite, vous bénéficiez d’une présentation de l’application.
7 Vous pouvez ensuite choisir entre deux options : « Aidez-moi à monter
l’écoute-bébé » ou « Voir mon bébé ».
8 Si vous choisissez la première option, vous pouvez suivre les
instructions à l’écran pour monter l’écoute-bébé au mur (voir
le chapitre « Montage de l’écoute-bébé au mur »). À la fin des
instructions à l’écran, vous pouvez choisir l’option « Voir mon bébé ».
Montage de l’écoute-bébé au mur
L’écoute-bébé est fourni avec un support de montage mural. Avant de
monter l’écoute-bébé au mur, assurez-vous qu’il y a un bon signal Wi-Fi
au point où vous voulez installer l’écoute-bébé. Suivez les instructions cidessous pour monter le support mural au mur et pour fixer l’écoute-bébé
au support mural.
1 Faites une croix au crayon sur le mur à l’endroit où vous voulez
installer l’écoute-bébé.
2 Maintenez le support de montage mural au mur. Assurez-vous que l’un
des trous se trouve juste sur la croix que vous avez faite sur le mur à
l’étape 1.
Remarque : Assurez-vous que l’anneau du support de montage mural est
incliné vers le bas lorsque vous le maintenez au mur. Si l’anneau du support
de montage mural est incliné vers le haut, retournez le support de montage
mural pour qu’il soit dans la bonne position.
88
FRANÇAIS
3 Utilisez un crayon pour marquer l’autre trou de vis sur le mur.
4 Percez 2 trous dans le mur au niveau des marques.
5 Utilisez 2 vis pour fixer le support de montage mural au mur. Serrez les
vis à l’aide d’un tournevis.
6 Faites passer le capteur d’humidité et de température dans l’orifice
du support de montage mural. Alignez ensuite les fentes du pied de
l’écoute-bébé avec les parties saillantes de l’anneau. Adaptez la rainure
du pied de l’écoute-bébé sur le bord surélevé à l’intérieur de l’anneau.
7 Tournez le pied de l’écoute-bébé dans le sens des aiguilles d’une
montre pour positionner l’écoute-bébé.
FRANÇAIS
89
8 Insérez la fiche dans la prise d’alimentation de l’appareil de l’unité du
capteur de température et d’humidité, puis branchez l’adaptateur sur
une prise murale. Votre écoute-bébé est désormais prêt à l’emploi.
Guide de démarrage rapide
Principales fonctionnalités de l’écran
Haut de l’écran :
1 Activer/désactiver toutes les notifications
2 Barre de contrôle du niveau sonore
3 Activer/désactiver le son
Bas de l’écran :
4Instantané
5 Fonction « répondre à bébé »
6Veilleuse
7Berceuses
Touches d’action rapide
,, Instantané : appuyez sur ce bouton pour prendre une photo de votre
bébé.
-- Lorsque vous prenez une photo de votre bébé, la photo est
enregistrée dans l’album photo de votre appareil.
,, Fonction Répondre à bébé : appuyez sur ce bouton pour parler
directement à votre bébé. Options disponibles :
-- Activer ou désactiver la fonction Répondre à bébé
-- Régler le volume de la fonction Répondre à bébé
,, Veilleuse : appuyez sur ce bouton pour allumer ou éteindre la
veilleuse. Appuyez sur l’icône de paramètres dans le coin inférieur
droit pour régler la couleur de la veilleuse et le minuteur de la
veilleuse. Options disponibles :
-- Activation/désactivation de la veilleuse
-- Régler le minuteur de la veilleuse ou allumer la veilleuse de manière
continue
90
FRANÇAIS
-- Régler la couleur de la veilleuse
,, Berceuses : appuyez sur ce bouton pour lire ou arrêter les berceuses.
Appuyez sur l’icône de paramètres dans le coin inférieur droit pour
sélectionner les berceuses, régler le minuteur et le son. Options
disponibles :
-- Sélectionner une berceuse dans la liste des berceuses
-- Programmer une liste de lecture des berceuses disponibles
-- Régler le minuteur de la berceuse ou lire des berceuses en continu
-- Régler le volume.
Icônes de surveillance en arrière-plan
-- Cloche : appuyez sur cette icône pour activer ou désactiver les
notifications.
FRANÇAIS
91
-- Téléphone portable : appuyez sur cette icône pour activer ou
désactiver le son.
Remarque : Pour plus d’informations sur la surveillance en arrière-plan,
reportez-vous au chapitre « Voir, entendre et surveiller votre bébé ».
Barre de contrôle du niveau sonore
-- Les voyants indiquent le niveau sonore dans la chambre de bébé.
Remarque : Pour plus d’informations, reportez-vous au chapitre « Voir, entendre
et surveiller votre bébé ».
Barre de gauche
-- Liste d’écoute-bébés liés à l’application : appuyez sur l’icône de
paramètres pour régler vos préférences d’écoute-bébé et proposer à
des utilisateurs invités de voir votre bébé
-- « Mon compte » : appuyez sur cette option pour afficher et modifier
vos informations de compte, votre profil et le profil de votre bébé,
et pour ajouter ou retirer un écoute-bébé.
-- « À propos » : appuyez sur cette option pour obtenir plus
d’informations sur l’application, les versions, etc.
-- « Assistance » : appuyez sur cette option pour ouvrir le menu
d’assistance
Remarque : Pour obtenir plus d’informations sur la barre de gauche, reportezvous au chapitre « Utilisation générale de l’application ».
Barre de droite
La barre de droite fournit des informations sur les utilisateurs connectés.
Remarque :Vous pouvez accéder aux options de la barre de droite uniquement
si vous êtes administrateur (pour obtenir plus d’informations sur la barre de
droite, reportez-vous au chapitre « Utilisation générale de l’application »).
-- Elle indique qui est en train de regarder
-- Elle indique qui a accès ou non
Le bouton du mode de confidentialité empêche tous les utilisateurs de
pouvoir regarder votre bébé
Tableau de bord
Le tableau de bord de l’application se trouve dans la barre inférieure.
92
FRANÇAIS
1Placez votre doigt sur la ligne horizontale figurant sur l’écran juste
au-dessus des icônes en bas de l’écran. Tirez cette ligne vers le
haut de l’écran. Les icônes situées en bas de l’écran se déplacent
également vers le haut.
2Lorsque vous avez tiré la ligne, le tableau de bord de la barre
inférieure est entièrement visible.
Sur le tableau de bord figurent un certain nombre d’options de
notification :
1Son
2Température
3Humidité
Remarque : Pour obtenir plus d’informations sur les options de notification du
tableau de bord, reportez-vous à la section « Options de notification » dans le
chapitre « Voir, entendre et surveiller votre bébé » de ce manuel d’utilisation.
Voir, entendre et surveiller votre bébé
Vous pouvez regarder, entendre et surveiller votre bébé sur votre
smartphone ou tablette. Vous pouvez également réconforter votre enfant
en lui parlant.
Voir votre bébé
Zoom et panoramique
Remarque : Cette fonction est uniquement disponible en vue portrait.
1Lorsque le mode plein écran est activé, appuyez deux fois ou faites
un pincement inverse pour effectuer un zoom avant.
2Appuyez deux fois ou pincez pour effectuer un zoom arrière.
FRANÇAIS
93
3Faites glisser votre doigt sur l’écran pour vous déplacer dans l’image
agrandie.
Vue portrait ou paysage
-- Faites pivoter votre smartphone ou votre tablette pour afficher votre
bébé en mode paysage.
Mode de vision nocturne
Lorsque le niveau de luminosité dans la pièce est faible, l’écoute-bébé
passe en mode de vision nocturne.
-- Dans ce mode, vous voyez des images noir et blanc de votre bébé sur
votre appareil.
Entendre votre bébé
Vous entendez votre bébé lorsqu’il se met à pleurer.
-- Le niveau sonore des pleurs du bébé dépend des paramètres de
volume de votre appareil.
-- Le niveau sonore produit par le bébé est également indiqué sur
la barre de contrôle du niveau sonore. Le nombre de voyants qui
s’allument indique le volume du son dans la chambre de bébé. La barre
de contrôle fonctionne de gauche à droite. Plus les voyants s’allument à
droite, plus le son est fort.
Remarque : Le bouton d’activation/désactivation du son doit être réglé sur
« On » (Activation) pour que vous puissiez entendre votre bébé.
Conseil : Connectez votre appareil sur le secteur lorsque vous voulez l’utiliser
pour une surveillance toute la nuit afin d’éviter que la batterie ne se décharge.
94
FRANÇAIS
Comment être averti que votre bébé pleure
1Notification push : vous recevez une notification push lorsque votre
bébé se mettra à pleurer.
Remarque : Si vous voulez recevoir une notification lorsque vous effectuez
d’autres activités sur votre appareil (par exemple, l’envoi d’un message, un
appel téléphonique ou des recherches sur Internet), assurez-vous d’avoir activé
toutes les notifications en plaçant le bouton en position « On » (Activation).
Conseil : Activez les vibrations dans les paramètres de votre smartphone si vous
souhaitez que votre smartphone vibre pour vous avertir quand bébé pleure,
par exemple lorsque vous transportez votre smartphone dans votre poche ou
parce que vous vous trouvez dans un environnement bruyant.
Comment définir le moment où recevoir une notification
Vous pouvez également indiquer dans le tableau de bord le moment où
vous souhaitez recevoir une notification.
1Recevoir une notification lorsque le bruit de votre bébé dépasse le
niveau défini.
2Recevoir une notification lorsque bébé pleure depuis une durée
prédéfinie.
Remarque : Si vous choisissez « (Aucune notification », vous ne recevez aucune
notification que votre bébé pleure (voir la section « Options de notification »
de ce chapitre).
Activation ou désactivation des notifications sur votre appareil
Les notifications sont un paramètre sur votre appareil (extérieur à
l’application). Vous pouvez indiquer si et comment vous souhaitez recevoir
des notifications de l’application.
1Rendez-vous dans le centre de notifications sur votre appareil.
2Sélectionnez les notifications et cliquez pour les activer ou les
désactiver.
Surveillance en arrière-plan
La surveillance en arrière-plan est une fonction dans l’application qui
garantit que vous pouvez entendre votre bébé et/ou recevoir des
notifications concernant votre bébé lorsque que vous faites d’autres
activités sur votre appareil. La surveillance en arrière-plan est activée par
défaut, mais vous pouvez la désactiver.
FRANÇAIS
95
Activation ou désactivation de la surveillance en arrière-plan
-- Appuyez sur l’icône en forme de cloche pour activer ou désactiver
toutes les notifications. Lorsque toutes les notifications sont activées
(bouton placé sur « On » [Activation]), vous recevez un message à
l’écran lorsque le bébé commence à pleurer. Vous pouvez définir vos
préférences de notification dans le tableau de bord et/ou l’écran de
paramètres de l’écoute-bébé.
Remarque : Activez toutes les notifications en plaçant le bouton en position
« On » (Activation) pour recevoir toutes les notifications concernant votre bébé
si l’application fonctionne en arrière-plan, par exemple lorsque vous faites
autre chose sur votre appareil ou si l’appareil est en mode veille avec l’écran
éteint. Le bouton doit être en position « On » (Activation) si vous souhaitez
personnaliser les notifications relatives à la température, le son et l’humidité
dans le tableau de bord.
-- Appuyez sur l’icône de téléphone portable pour activer ou désactiver
le son.
Remarque : Si vous coupez le son, vous ne pourrez pas entendre votre bébé
lorsque vous utilisez une autre fonction sur votre appareil (appel téléphonique,
envoi de message, etc.)
Remarque : Lorsque vous passez un appel portable ou utilisez une application
VoIP (par exemple Skype,Viber ou FaceTime) pour appeler quelqu’un, vous ne
pourrez pas entendre votre bébé. Cependant, dès que le bébé commence à
pleurer, vous recevrez une notification.
Basculement de la surveillance en arrière-plan sur l’écran
principal de l’application
L’application reste active en arrière-plan, même lorsque l’appareil est en
mode veille. Tant que la surveillance en arrière-plan est active, une barre
rouge s’affiche en haut de l’écran de votre appareil.
1Pour basculer de la surveillance en arrière-plan à l’écran principal
de l’application, appuyez sur la barre rouge en haut de l’écran pour
afficher l’application au premier plan.
Options de notification
Les options de notification de l’application sont dans le tableau de bord.
Le tableau de bord se trouve dans la barre en bas de l’écran. Faites glisser
le tableau de bord vers le haut pour afficher le menu d’options. Le menu
contient les options suivantes.
Son
-- Réglez le curseur à un niveau sonore au-dessus duquel vous souhaitez
recevoir des notifications.
Remarque : Si le curseur est réglé sur « quiet » (silencieux), vous entendrez
votre bébé en continu lorsque vous quittez l’application.
-- Réglez la durée au bout de laquelle vous souhaitez recevoir des
notifications.
96
FRANÇAIS
Température
-- Définissez une plage de température au-dessus ou en dessous
de laquelle vous souhaitez recevoir une notification relative à la
température
-- Activez ou désactivez les notifications relatives à la température
-- Affichez la température actuelle ou l’historique
Humidité
-- Définissez une plage d’humidité au-dessus ou en dessous de laquelle
vous souhaitez recevoir une notification relative à l’humidité
-- Activez ou désactivez les notifications relatives à l’humidité
-- Affichez l’humidité actuelle ou l’historique
Utilisateurs et comptes invités
Inviter des personnes et un deuxième administrateur
Vous pouvez inviter jusqu’à neuf membres de votre famille ou amis et
leur permettre de regarder votre bébé sur leur smartphone ou sur leur
tablette. Vous pouvez inviter l’une de ces personnes à devenir deuxième
administrateur. Un deuxième administrateur dispose des mêmes droits que
le premier administrateur. Les invités n’ont que des droits de visualisation et
ces droits sont contrôlés par l’/les administrateur(s). Tout comme un invité,
un administrateur a des droits de visualisation. Il a de plus le droit d’inviter
d’autres personnes, de leur donner accès, de leur retirer leur accès et de
les déconnecter. L’administrateur peut également désactiver son compte et
ainsi dissocier les invités de l’écoute-bébé.
1Sur la barre de gauche, appuyez sur l’icône de paramètres à côté de
votre écoute-bébé.
2Faites défiler vers le bas et appuyez sur « Ajouter un nouvel
utilisateur ».
FRANÇAIS
97
3Ajoutez l’adresse e-mail de l’invité ainsi que son rôle (administrateur
ou invité).
4L’application envoie un e-mail à la personne invitée et vous voyez une
notification contextuelle confirmant qu’un e-mail a été envoyé.
5L’invité reçoit un e-mail contenant un code d’invitation qui n’est
valable que pour une période limitée. L’adresse e-mail contient
également un lien vers l’App Store. L’invité peut cliquer sur ce lien
pour installer l’application.
6Après avoir installé l’application, l’invité crée un compte en suivant
les instructions dans l’application.
7L’invité sélectionne l’option « Connexion à un écoute-bébé partagé »
pendant le processus de configuration. La page de validation de
l’invitation s’ouvre ensuite.
8L’invité saisit le code d’invitation, son adresse e-mail et confirme.
Le code et l’adresse e-mail sont vérifiés.
9L’administrateur reçoit un e-mail qui confirme que l’invité a été
connecté à l’écoute-bébé et que l’administrateur peut désormais
accorder l’accès à cet invité.
10Après que l’administrateur a accordé l’accès à l’invité, ce dernier
peut voir le bébé.
-- Lorsqu’une ou plusieurs personnes regardent le bébé, le voyant
lumineux de visualisation s’allume en rouge.
Remarque : Bien que jusqu’à dix personnes (huit ou neuf invités et un ou deux
administrateurs) aient des droits de visualisation sur le même écoute-bébé,
seulement trois personnes peuvent regarder le bébé en même temps. Si des
invités essaient d’accéder à l’écoute-bébé alors que trois personnes sont déjà
en train de regarder, elles recevront le message « Trop de connexions ».
Les administrateurs peuvent toujours remplacer l’accès des invités s’ils
souhaitent voir le bébé.
98
FRANÇAIS
Accord et suppression d’accès
Les utilisateurs avec droits d’administrateur peuvent déterminer qui peut
regarder le bébé.
1Pour supprimer l’accès d’un invité, accédez à la barre de droite,
appuyez sur le nom de l’invité dont vous souhaitez supprimer l’accès
et appuyez sur l’icône en forme d’œil à côté de son nom.
Conseil : Si trois personnes sont déjà en train de regarder votre bébé et que
vous souhaitez donner accès à l’écoute-bébé à une autre personne, la babysitter par exemple, vous pouvez supprimer l’accès de l’une des personnes
actuellement connectées et accorder un accès à une autre personne.
2Pour supprimer l’accès d’un invité, accédez à la barre de droite,
appuyez sur le nom de l’invité à qui vous souhaitez donner accès et
appuyez sur l’icône en forme d’œil à côté de son nom.
3Si vous souhaitez supprimer simultanément l’accès de tous les
utilisateurs, appuyez sur le bouton du mode de confidentialité. Cette
manipulation refusera l’accès à l’écoute-bébé à tout le monde sauf
vous, jusqu’à ce que vous appuyiez à nouveau sur le bouton du mode
de confidentialité.
Conseil :Vous pouvez utiliser le mode de confidentialité pour partager un
moment d’intimité avec votre bébé, par exemple pour l’allaiter, le baigner ou lui
changer la couche. Les invités qui essayent d’accéder à l’écoute-bébé recevront
une notification à l’écran.
Gestion de compte
Déconnexion d’un invité
Pour déconnecter les utilisateurs invités de l’application de façon
permanente, vous devez les retirer de la liste d’invités. Un invité peut
également se déconnecter lui-même de l’application de façon permanente.
Désactivation de votre compte utilisateur
S’il n’y a qu’un seul administrateur et qu’il désactive son compte, tous les
comptes d’utilisateurs invités sont dissociés de l’écoute-bébé, bien que les
comptes continuent d’exister. S’il y a deux administrateurs, ils doivent tous
deux désactiver leur compte pour dissocier tous les comptes. Si un seul des
deux administrateurs désactive son compte, les invités restent connectés à
l’écoute-bébé.
Si vous voulez transférer l’écoute-bébé à quelqu’un d’autre, si vous perdez
l’écoute-bébé ou si l’écoute-bébé est volé, nous vous conseillons de
désactiver le(s) compte(s) administrateur. Ceci est essentiel pour protéger
votre vie privée et celle de votre bébé.
FRANÇAIS
99
1Pour désactiver votre compte, accédez à la barre de gauche et
appuyez sur « Mon compte ».
2Appuyez sur « Désactiver compte ».
3Une fenêtre contextuelle s’affiche vous demandant de confirmer que
vous souhaitez désactiver votre compte.
4Lorsque vous appuyez sur « Désactiver », une fenêtre contextuelle
confirme que votre compte a été désactivé.
Ajout ou suppression d’écoute-bébés
Vous pouvez ajouter jusqu’à dix écoute-bébés dans l’application. Cela vous
permet de surveiller plusieurs enfants ou le même enfant dans plusieurs
pièces. Vous pouvez, par exemple, installer un écoute-bébé au-dessus du lit
dans la chambre de bébé, et un au-dessus de son parc dans le salon.
Vous devez connecter les écoute-bébés un par un à l’application.
1Accédez à «Mon compte » dans la barre de gauche.
2Vous serez en mesure de voir la liste d’écoute-bébés connectés.
Appuyez sur « Ajouter un écoute-bébé ».
3Suivez les instructions de la section « Configuration initiale » de ce
manuel d’utilisation pour connecter l’écoute-bébé à l’application.
100
FRANÇAIS
Utilisation générale de l’application
Optimisation de la qualité audio et vidéo
La qualité audio et vidéo sur votre appareil peut changer au fil du temps
en fonction de la bande passante disponible de votre connexion à Internet.
L’utilisation d’une connexion Wi-Fi donne généralement les meilleurs
résultats, tandis que la 4G et la 3G peuvent offrir une bande passante
réduite et une qualité inférieure. L’application vous offrira automatiquement
la meilleure expérience possible, en faisant correspondre la qualité audio et
vidéo à la bande passante disponible.
La mise en correspondance a lieu en plusieurs étapes :
1 Large bande passante : bonne qualité audio et vidéo, avec notifications
texte.
2 Bande passante réduite (par exemple lors de l’utilisation de la 3G) :
qualité vidéo réduite : bonne qualité audio, avec notifications texte.
3 Petite bande passante (par exemple lors de l’utilisation de la 2G) :
seul un lien audio sera disponible, avec notifications texte.
4 Très petite bande passante : seules les notifications texte sont
disponibles.
Connexion à Internet en Wi-Fi
Vous obtiendrez de meilleurs résultats si vous connectez votre appareil à
Internet via Wi-Fi. Il utilisera alors automatiquement le réseau Wi-Fi pour
accéder à votre écoute-bébé. Lorsqu’il n’y a aucune connexion Wi-Fi, votre
appareil bascule en connexion de données mobiles 3G ou 4G.
En fonction de votre abonnement, l’utilisation de cette connexion de données
peut entraîner des frais supplémentaires facturés par votre fournisseur.
Une connexion vidéo nécessite généralement 0,1 à 0,25 Mo de données par
seconde. Une connexion audio nécessite 0,01 Mo de données par seconde.
FRANÇAIS 101
Si vous voulez empêcher votre appareil de se connecter au réseau 3G
ou 4G, vous devez désactiver la connexion de données mobiles de
votre appareil. Cette manipulation affectera toutes les autres applications
susceptibles d’utiliser la connexion de données mobiles 3G ou 4G. Veuillez
noter que, si vous désactivez la connexion de données mobiles, vous ne
serez pas alerté que votre bébé pleure lorsque vous perdez la connexion
Wi-Fi à Internet.
Utilisation de l’écoute-bébé en dehors de la maison
Vous pouvez utiliser l’écoute-bébé partout où un réseau Wi-Fi 2,4 GHz
est disponible, que ce soit chez un ami ou un membre de votre famille, ou
encore dans un hôtel ou une résidence de vacances. Si vous disposez du
nom du réseau Wi-Fi et du mot de passe Wi-Fi, vous pouvez configurer et
utiliser votre écoute-bébé en dehors de la maison. Suivez les instructions
de configuration ci-dessous. Une fois que vous avez configuré la connexion
avec un réseau Wi-Fi, les paramètres sont enregistrés dans la mémoire
de votre appareil et vous n’aurez pas besoin de répéter la procédure de
configuration tant que vous utilisez votre application et votre écoute-bébé
au même endroit.
Remarque : Si la connexion au réseau Wi-Fi nécessite une confirmation
supplémentaire, par exemple l’acceptation de conditions d’utilisation, l’écoutebébé ne pourra pas se connecter au réseau Wi-Fi. Cela peut être le cas des
réseaux Wi-Fi d’hôtel et d’autres réseaux Wi-Fi publics.
1Il existe deux options pour connecter l’écoute-bébé au réseau Wi-Fi.
-- La première option : lorsque vous allumez l’écoute-bébé, le message
« Écoute-bébé introuvable » s’affiche. Patientez jusqu’à ce que
l’application propose l’option « Reconnecter l’écoute-bébé ».
-- La seconde option : allumez l’écoute-bébé. Ouvrez la barre de gauche,
sélectionnez l’écoute-bébé et sélectionner « Reconnecter l’écoutebébé ».
2Après que l’application a généré un code QR Wi-Fi, maintenez
l’écran de votre smartphone ou tablette à une distance d’environ
20 cm devant l’objectif de l’écoute-bébé. Approchez ou éloignez
lentement le smartphone ou la tablette de l’objectif pour garantir
une lecture correcte du code QR Wi-Fi.
3Suivez le reste des instructions à l’écran pour terminer la
configuration. La procédure de configuration est terminée et
l’écoute-bébé est connecté au réseau Wi-Fi et prêt à l’emploi
lorsque le voyant lumineux Wi-Fi situé à l’avant de l’écoute-bébé
reste allumé en vert en continu.
Remarque : Lorsque vous rentrez chez vous, vous devez suivre la procédure
ci-dessus pour reconnecter l’écoute-bébé à votre réseau Wi-Fi domestique.
102
FRANÇAIS
Utilisation de l’application sur plusieurs appareils
Vous pouvez utiliser l’écoute-bébé connecté uGrow sur plusieurs appareils
(par exemple sur votre iPhone et votre iPad).
Remarque : Lorsque vous vous connectez avec le même compte sur un
appareil alors que l’application est active sur un autre appareil, l’appareil
sur lequel l’application a été activée en premier vous déconnectera
automatiquement.Vous ne pouvez pas utiliser l’application avec le même
compte sur deux appareils différents simultanément.
Réinitialisation de l’écoute-bébé
L’écoute-bébé est doté d’un bouton de réinitialisation situé au dos de
l’appareil. Quand vous appuyez sur ce bouton, les paramètres usine par
défaut de l’écoute-bébé sont restaurés. Cela signifie que vous dissociez
tous les comptes de l’écoute-bébé.
Remarque : Réinitialisez toujours l’écoute-bébé en appuyant sur le bouton de
réinitialisation avant de transférer l’écoute-bébé à une autre personne. Cette
opération est nécessaire pour protéger votre vie privée. Réinitialisez également
l’écoute-bébé lorsque vous l’achetez ou le recevez d’occasion.
Comment rétablir les paramètres usine par défaut
Remarque : Assurez-vous que l’écoute-bébé est allumé avant de le réinitialiser.
1 Lorsque l’écoute-bébé est allumé, appuyez sur le bouton de
réinitialisation situé à l’arrière de l’écoute-bébé à l’aide d’un
trombone ou d’un autre objet pointu. Il est recommandé d’effectuer
cette opération lorsque l’écoute-bébé est connecté à votre réseau
Wi-Fi .
2Maintenez le bouton de réinitialisation enfoncé jusqu’à ce que
l’écoute-bébé émette un signal sonore, puis relâchez le bouton.
Lorsque vous relâchez le bouton, l’écoute-bébé émet un bref signal
sonore pour confirmer la réinitialisation.
Que faire après avoir rétabli les paramètres usine par défaut
Une fois l’écoute-bébé réinitialisé, le voyant d’état Wi-Fi clignote en orange
lorsque vous allumez l’écoute-bébé pour indiquer qu’il redémarre après
une réinitialisation. Lorsque le voyant d’état Wi-Fi arrête de clignoter, vous
pouvez à nouveau connecter l’écoute-bébé à votre réseau Wi-Fi. Suivez les
instructions du chapitre « Configuration initiale » de ce manuel d’utilisation.
Si vous avez invité d’autres personnes à accéder à l’écoute-bébé, vous
devrez les inviter à nouveau.
Mises à niveau du micrologiciel
La mise à niveau est essentielle afin de préserver votre vie privée ainsi que
le fonctionnement correct de l’écoute-bébé et de l’application.
-- Les mises à niveau essentielles sont obligatoires. Les mises à niveau
obligatoires de l’application sont installées automatiquement sur
votre appareil et ne nécessitent aucune confirmation. Vous recevrez
uniquement une notification indiquant qu’une mise à niveau forcée et
obligatoire est en cours.
FRANÇAIS 103
-- De temps en temps, vous recevez des notifications indiquant que des
mises à niveau sont disponibles pour le micrologiciel de votre écoutebébé ou pour le logiciel de l’application. Ces mises à niveau sont
installées lorsque vous les confirmez.
-- Pour rechercher des mises à niveau micrologicielles pour votre écoutebébé, ouvrez la barre de gauche et appuyez sur l’icône des paramètres
à côté de l’écoute-bébé. Faites défiler la page vers le bas pour atteindre
la catégorie « Micrologiciel » et appuyez dessus pour vérifier la
présence de mises à niveau du micrologiciel. Si une mise à niveau est
disponible, appuyez dessus pour l’installer.
Remarque : Lorsqu’une mise à niveau est en cours d’installation, il vous est
temporairement impossible de voir et d’écouter votre bébé.
Signaux du voyant d’état Wi-Fi
,, Arrêt
1 Off : (arrêt) l’écoute-bébé est éteint.
,, Orange
1 Clignote rapidement en orange : l’écoute-bébé est en cours de
démarrage.
2 Clignote lentement en orange : l’écoute-bébé met à niveau son
micrologiciel. N’éteignez pas l’écoute-bébé pendant la mise à niveau du
micrologiciel.
Remarque : Le voyant d’état Wi-Fi peut s’éteindre brièvement pendant la mise
à niveau du micrologiciel.
104
FRANÇAIS
3 Orange continu : la caméra de l’écoute-bébé est prête à lire le code
QR Wi-Fi généré par votre smartphone ou tablette.
,, Vert
1 Clignote en vert : le code QR Wi-Fi a été lu correctement.
2 Vert continu : l’écoute-bébé est connecté au réseau Wi-Fi.
,, Rouge
1 Clignote lentement en rouge : le mot de passe Wi-Fi saisi est incorrect.
2 Rouge continu : l’écoute-bébé ne parvient pas à se connecter au
réseau Wi-Fi.
FRANÇAIS 105
Sécurité et confidentialité
Sécurité réseau
Les relais Wi-Fi dans les lieux publics, tels que les aéroports et les hôtels,
sont très pratiques, mais ils ne sont pas souvent sécurisés.
Nous vous recommandons d’utiliser l’écoute-bébé uniquement sur un
réseau Wi-Fi protégé avec une clé de chiffrement WPA2. Nous conseillons
de ne pas utiliser l’écoute-bébé sur un réseau utilisant le chiffrement WEP.
Remarque : Les réseaux Wi-Fi ne nécessitant pas de mot de passe ne sont pas
sécurisés.
Mot de passe fort
Les mots de passe sont essentiels pour protéger votre réseau Wi-Fi et votre
compte contre tout accès non autorisé. Plus votre mot de passe est fort,
plus la protection de votre réseau Wi-Fi et de votre compte est bonne.
Les règles pour un mot de passe fort sont les suivantes :
1 Un mot de passe fort contient au moins 8 caractères.
2 Un mot de passe fort ne contient pas votre nom, le nom de votre
bébé, un autre nom réel ou un nom de marque.
3 Un mot de passe fort ne contient pas un mot complet.
4 Un mot de passe fort est très différent des mots de passe que vous
avez utilisés auparavant.
5 Un mot de passe fort contient des caractères d’au moins deux des
catégories suivantes :
-- Lettres : A, B, C ou a, b, c
-- Chiffres : 0, 1, 2, 3, 4, 5, 6, 7, 8, 9
-- Symboles : _ . @ $
Utilisation sûre de l’application de l’écoute-bébé
Utilisez l’application uniquement sur un réseau sécurisé
N’utilisez pas l’application sur un réseau Wi-Fi non sécurisé. Nous vous
recommandons d’utiliser l’écoute-bébé uniquement sur un réseau Wi-Fi
protégé avec une clé de chiffrement WPA2. Vous pouvez également utiliser
le réseau de données de votre téléphone (souvent appelé 3G ou 4G).
Utilisez toujours la dernière version du logiciel et du
micrologiciel
Procédez toujours aux mises à niveau de l’application du logiciel et du
micrologiciel de l’écoute-bébé lorsque vous recevez une notification
indiquant qu’une mise à niveau est disponible. Les mises à niveau sont
disponibles lorsque des améliorations ont été apportées au logiciel ou
pour éviter un problème de sécurité. Si vous n’effectuez pas la mise à
niveau, votre connexion à l’écoute-bébé via l’application ne sera peut-être
plus sûre ni privée.
106
FRANÇAIS
Périphériques compatibles
,,
-,,
-,,
-,,
--
Compatibilité iPhone
iPhone 4S et ultérieur
Compatible iPad
iPad 2 et ultérieur
Compatibilité iPod touch
iPod touch 5e génération ou ultérieure
Compatibilité Android
Android 4.1 ou version ultérieure
Remarque : Pour obtenir les informations les plus récentes relatives aux
périphériques compatibles, rendez-vous sur www.philips.com/ugrow.
Commande d’accessoires
Pour acheter des accessoires ou des pièces de rechange, visitez le site Web
www.shop.philips.com/service ou rendez-vous chez votre revendeur
Philips. Vous pouvez également contacter le Service Consommateurs
Philips de votre pays (voir le dépliant de garantie internationale pour les
coordonnées).
Garantie et assistance
Si vous avez besoin d’une assistance ou d’informations supplémentaires,
consultez le site Web de Philips à l’adresse www.philips.com/support
ou lisez le dépliant séparé sur la garantie internationale.
Foire aux questions
Pour consulter d’autres foires aux questions à propos de cet écoute-bébé,
consultez la page d’assistance de ce produit sur le site www.philips.com/
support.
Question
Réponse
Dépannage
Je ne trouve pas
l’application sur l’App
Store ou Google Play.
Pourquoi ?
Vous pouvez télécharger l’application depuis l’App Store d’Apple ou depuis
Google Play en recherchant « uGrow Smart Baby Monitor ». Si vous ne
voyez pas l’application dans l’App Store ou Google Play, votre téléphone ne
dispose peut-être pas de la version iOS ou Android requise. Cette application
est uniquement compatible avec iOS 7 ou version supérieure, ou Android 4.1
ou version supérieure.
Je ne parviens pas à
télécharger et à installer
l’application. Que faire ?
Vérifiez si l’une des conditions suivantes empêche le téléchargement. Le signal
Wi-Fi est-il stable et suffisamment puissant ? Le système d’exploitation de
votre smartphone/tablette est-il bien iOS 7 ou Android 4.1 ou une version
ultérieure ? Disposez-vous de suffisamment d’espace sur votre smartphone/
tablette pour enregistrer l’application ? Avez-vous entré le mot de passe
correct pour votre compte App Store ou Google Play ?
FRANÇAIS 107
Question
Réponse
Je ne parviens pas à
configurer l’écoutebébé. J’obtiens à chaque
fois l’écran d’erreur de
connexion. Comment
cela se fait-il ?
Si le voyant d’état Wi-Fi est allumé en orange et a clignoté en rouge lors
de la tentative de connexion, le mot de passe saisi est incorrect. Relancez
la procédure de configuration. Saisissez à nouveau le mot de passe Wi-Fi et
assurez-vous que le mot de passe est correct .
Si le voyant d’état Wi-Fi est allumé en orange et était allumé en rouge lors de
la tentative de connexion, l’écoute-bébé ne parvient pas à se connecter au
réseau Wi-Fi. Commencez par vérifier si votre téléphone ou tablette utilise
le même réseau Wi-Fi auquel vous voulez connecter l’écoute-bébé. Vérifiez
ensuite si vous avez un accès Internet Wi-Fi 2,4 GHz. Si ceci ne résout pas le
problème, assurez-vous que le SSID (nom de réseau) du routeur ne contient
pas de symboles spéciaux. Si c’est le cas, modifiez le nom du SSID de votre
routeur en conséquence.
Mon écoute-bébé
ne parvient pas à
lire le code QR sur
mon smartphone/ma
tablette. Que faire ?
Assurez-vous que vous le code QR Wi-Fi se trouve à environ 20 cm de
l’objectif. Essayez de déplacer l’appareil légèrement vers le haut, le bas,
la gauche ou la droite pour placer le code QR Wi-Fi directement face à
l’écoute-bébé. Vous pouvez également essayer de déplacer l’appareil en
le rapprochant ou en l’éloignant de l’objectif de l’écoute-bébé pour une
meilleure mise au point. Assurez-vous qu’il y a suffisamment de lumière dans
la pièce, mais évitez une lumière trop vive. Lorsque l’écoute-bébé parvient à
lire le code QR Wi-Fi, vous entendez un signal sonore de confirmation et le
voyant d’état Wi-Fi clignote en vert.
Vous n’avez peut-être pas retiré le film de protection de l’objectif de l’écoutebébé. Retirez-le.
Une partie de votre main recouvre peut-être le code QR WiFi. Tenez
l’appareil en veillant à ce que votre main ne cache pas le code QR WiFi.
Si le voyant d’état Wi-Fi est allumé en orange, l’écoute-bébé n’a pas réussi
à lire le code QR. Revenez en arrière grâce à la flèche située dans le coin
supérieur gauche de l’écran et suivez les instructions relatives au code QR.
Si le voyant d’état Wi-Fi clignote en orange, la caméra est en cours de
démarrage. Revenez alors en arrière grâce à la flèche située dans le coin
supérieur gauche de l’écran et suivez les instructions relatives au code QR.
Je ne parviens pas à voir Vérifiez que votre signal Wi-Fi est suffisamment puissant dans la pièce où
l’écoute-bébé est placé.
mon bébé. Quel est le
problème ?
Vérifiez que l’écoute-bébé est branché sur une prise secteur alimentée et est
allumé.
Le voyant d’état Wi-Fi à l’avant de l’écoute-bébé doit être allumé en vert
(reportez-vous au chapitre « Signaux du voyant d’état Wi-Fi ».).
Si vous utilisez plusieurs écoute-bébés, vérifiez que l’écoute-bébé correct est
sélectionné. Accédez à la barre de gauche et appuyez sur l’écoute-bébé pour
voir s’il est actif.
108
FRANÇAIS
Question
Réponse
Trois personnes sont peut-être déjà en train de regarder le bébé. L’application
permet à seulement trois personnes de regarder simultanément. Si vous avez
des droits d’administrateur, vous pouvez supprimer l’accès d’un des invités
pour pouvoir regarder vous-même.
L’application ne
m’avertit pas que le
bébé pleure. Pourquoi ?
Vérifiez que l’écoute-bébé est connecté au réseau Wi-Fi. Le voyant d’état WiFi à l’avant de l’écoute-bébé doit être allumé en vert.
L’écoute-bébé est peut-être hors ligne. Pour recevoir une notification
indiquant que l’écoute-bébé est hors ligne, accédez à la barre de gauche et
activez cette notification dans «  » (Paramètres).
Le seuil de son pour recevoir une notification a peut-être été réglé sur un
niveau trop haut. Dans ce cas, l’application vous avertira uniquement lorsque
le bébé émettra beaucoup de sons. Ouvrez le tableau de bord pour baisser le
seuil de son afin de garantir d’être averti plus tôt lorsque le bébé commence
à pleurer.
Vous avez peut-être réglé une durée de pleurs trop longue. Sélectionnez une
durée plus courte afin que l’application vous avertisse plus tôt.
Le volume de votre téléphone est peut-être coupé. Réglez le volume de
votre téléphone à un niveau normal.
La fonction Répondre à bébé est peut-être active. Appuyez sur l’icône
correspondante pour désactiver la fonction Répondre à bébé. Lorsque la
fonction Répondre à bébé est active, vous n’entendez pas les sons du bébé.
Vérifiez que vous n’avez pas reçu d’e-mail indiquant que votre compte
a été supprimé. Si vous avez des droits de visualisation en tant qu’invité,
l’administrateur peut également vous refuser l’accès temporairement.
Contactez l’administrateur et demandez-lui de vous donner la permission ou
de vous réinviter.
Je perds souvent la
connexion. Comment
cela se fait-il ?
Vérifiez si le signal Wi-Fi dans la pièce où l’écoute-bébé est placé est assez
fort et stable. Si ce n’est pas le cas, vous avez besoin d’un répéteur Wi-Fi pour
obtenir un signal fort et stable. Si vous utilisez un répéteur Wi-Fi, assurez-vous
que votre routeur et votre répéteur Wi-Fi ont le même SSID et que vous
utilisez le même mot de passe pour le routeur et le répéteur.
Si le voyant d’état Wi-Fi à l’avant de l’écoute-bébé est allumé en vert et si
vous continuez à perdre la connexion, il y a peut-être un problème avec la
connexion Internet de votre appareil. Vérifiez le signal Wi-Fi sur votre appareil
ou la vitesse 3G ou 4G en essayant de regarder un film, par exemple sur
YouTube.
FRANÇAIS 109
Question
Réponse
J’ai changé mon routeur
et je ne parviens plus à
voir mon bébé. Quel est
le problème ?
Assurez-vous tout d’abord que votre appareil obtient un bon signal Wi-Fi
du nouveau routeur. Il existe deux options pour connecter l’écoute-bébé
sur le réseau Wi-Fi. La première option consiste à allumer l’écoute-bébé.
L’application affichera le message « Écoute-bébé introuvable ». Accédez à
« Dépannage » et sélectionnez « Reconnecter écoute-bébé ». La seconde
option consiste à ouvrir la barre de gauche lorsque l’application affiche le
message « Écoute-bébé introuvable ». Sélectionnez l’écoute-bébé dans la
barre de gauche et sélectionnez « Reconnecter écoute-bébé ». Une fois que
l’application a généré un code QR Wi-Fi, maintenez l’écran de votre appareil
à une distance de 20 cm devant l’objectif de l’écoute-bébé. Suivez ensuite
les instructions à l’écran pour terminer la configuration. La procédure de
configuration est terminée lorsque le voyant d’état Wi-Fi situé à l’avant de
l’écoute-bébé reste allumé en vert.
J’ai été invité, mais je ne
vois rien lorsque j’ouvre
l’application. Pourquoi ?
Vérifiez que vous n’avez pas reçu d’e-mail indiquant que votre compte
a été supprimé. Si vous avez des droits de visualisation en tant qu’invité,
l’administrateur peut également vous refuser l’accès temporairement.
Contactez l’administrateur et demandez-lui de vous donner la permission ou
de vous réinviter.
Vérifiez que votre appareil est connecté à Internet.
L’écoute-bébé est peut-être hors ligne. Pour recevoir une notification
indiquant que l’écoute-bébé est hors ligne, accédez à la barre de gauche et
activez cette notification dans « Paramètres ».
Le seuil de son pour recevoir une notification a peut-être été réglé sur un
niveau trop haut. Dans ce cas, l’application vous avertira uniquement lorsque
le bébé émettra beaucoup de sons. Ouvrez le tableau de bord pour baisser le
seuil de son afin de garantir d’être averti plus tôt lorsque le bébé commence
à pleurer.
Vous avez peut-être réglé une durée de pleurs trop longue. Sélectionnez une
durée plus courte afin que l’application vous avertisse plus tôt.
Le volume de votre téléphone est peut-être coupé. Réglez le volume de
votre téléphone à un niveau normal.
Conseils et astuces
Dois-je garder
l’application sur l’écran
pour surveiller mon
bébé ?
Non, l’application peut surveiller en arrière-plan pendant que vous effectuez
d’autres tâches sur votre smartphone ou tablette. Appuyez sur l’icône de
téléphone portable. Vous pouvez alors entendre votre bébé et également
l’entendre lorsqu’il commence à pleurer. Lorsque toutes les notifications sont
actives (bouton réglé sur « On » [Activation]), vous recevrez également une
notification à l’écran indiquant que le bébé pleure, tandis que l’application
s’exécute en arrière-plan.
Les images que j’obtiens L’écoute-bébé a basculé en mode de vision nocturne. La pièce dans laquelle
l’écoute-bébé est placé est sombre.
sont en noir et blanc,
et non pas en couleur.
Pourquoi ?
110
FRANÇAIS
Question
Réponse
S’il y a suffisamment de lumière dans la pièce, le capteur de lumière sur le
dessus de l’écoute-bébé est peut-être occulté ou sale. Assurez-vous que le
capteur est entièrement exposé à la lumière dans la pièce.
Si mon appareil est
verrouillé, si j’utilise une
autre application ou si
je passe un coup de
fil, puis-je continuer à
entendre mon bébé ?
Oui, vous pouvez choisir de continuer à surveiller votre bébé en arrière-plan.
Veuillez noter que si vous utilisez votre téléphone pour passer des appels,
vous entendrez uniquement une sonnerie lorsque le bébé commence
à pleurer. Vous n’entendrez pas votre bébé. Appuyez sur le symbole de
téléphone portable pour activer l’audio en fond sonore. Lorsque l’audio
en fond sonore est activé, vous entendrez votre bébé lorsque vous êtes
occupé à faire autre chose. Vous pouvez également choisir de recevoir
une notification lorsque votre bébé pleure. Appuyez sur le symbole de la
cloche pour activer ou désactiver toutes les notifications. Lorsque toutes
les notifications sont activées, vous recevrez un message à l’écran lorsque le
bébé pleure.
Utilisation et
apprentissage
Ai-je besoin de créer un
compte supplémentaire
si je possède plusieurs
écoute-bébés ?
Non, vous n’avez pas besoin d’un compte supplémentaire si vous utilisez
plusieurs écoute-bébés. Vous pouvez ajouter un écoute-bébé à votre
application uGrow Smart Baby Monitor. Accédez à « Mon compte » dans
la barre de gauche pour afficher une liste des écoute-bébés connectés à
l’application. Appuyez sur « Ajouter écoute-bébé ». Suivez les instructions
du chapitre « Configuration initiale » pour connecter l’écoute-bébé à
l’application.
Puis-je utiliser plusieurs
écoute-bébés dans la
même application ?
Vous pouvez connecter jusqu’à dix écoute-bébés à l’application, mais vous
pouvez visionner la vidéo d’un seul écoute-bébé à la fois. Vous recevrez
des notifications des autres écoute-bébés connectés. Si vous recevez une
notification et appuyez dessus, l’application vous amènera directement à cet
écoute-bébé. Vous pouvez également sélectionner l’écoute-bébé que vous
souhaitez voir dans la barre de gauche.
Pourquoi l’application
met-elle du temps à
charger ?
La connexion Internet de votre appareil ou la connexion Wi-Fi de l’écoutebébé est peut-être lente. Veuillez vérifier la connexion de votre appareil et de
l’écoute-bébé. L’application a besoin d’une connexion réseau stable.
L’écoute-bébé estil protégé contre le
piratage ?
Nous faisons tout notre possible pour empêcher le piratage et publions des
mises à jour fréquentes. Assurez-vous que vous utilisez toujours la dernière
version du logiciel de l’application et la dernière version du micrologiciel
de l’écoute-bébé. Si vous perdez votre appareil, réinitialisez l’écoute-bébé
pour supprimer les connexions. Vous pouvez également vous connecter sur
l’application depuis un autre appareil et supprimer votre compte. Si vous
êtes le seul administrateur, tous les utilisateurs invités seront également
déconnectés de l’écoute-bébé.
J’ai perdu mon
smartphone. Comment
empêcher des étrangers
de voir mon bébé ?
Connectez-vous sur l’application depuis un autre appareil et supprimez votre
compte. Si vous êtes le seul administrateur, tous les utilisateurs invités seront
également déconnectés de l’écoute-bébé. Vous pouvez également réinitialiser
l’écoute-bébé pour désactiver toutes les connexions à l’appareil que vous
avez perdu. Vous trouverez le bouton de réinitialisation à l’arrière de l’écoutebébé.
FRANÇAIS 111
Question
Réponse
Serai-je averti des mises
à niveau de l’application
ou du logiciel de
l’écoute-bébé ?
Oui, vous recevrez une notification sur votre téléphone pour procéder à la
mise à niveau via l’App Store. Ces mises à niveau auront lieu de temps en
temps. Les notifications de mise à niveau pour le micrologiciel de l’écoutebébé s’affichent dans l’application ainsi que les instructions pour procéder à la
mise à niveau.
Mon téléphone ou ma
tablette chauffe lorsque
j’utilise l’application. Estce normal ?
Votre appareil a besoin de puissance pour fournir une excellente qualité de
vidéo. Ce n’est pas dangereux pour votre appareil. Pour éviter cela, nous vous
conseillons de mettre à jour votre appareil avec la dernière version d’iOS et
de l’application uGrow. Votre appareil ne chauffe pas lorsque vous exécutez
l’application en arrière-plan.
112 ITALIANO
Sommario
Introduzione Panoramica del prodotto Configurazione iniziale Montaggio a parete del baby monitor Guida di avvio rapido Guardare, ascoltare e controllare il bambino
Guardare il bambino Sentire il bambino Come ottenere una notifica quando il bambino piange Controllo in background Opzioni di notifica Utenti e account ospiti Invitare ospiti e un secondo amministratore Fornire e rimuovere l’accesso
Gestione account Utilizzo generale dell’applicazione Ottimizzazione della qualità audio e video Connessione a Internet tra Wi-Fi Utilizzare il baby monitor lontano da casa Utilizzare l’applicazione su diversi dispositivi Reimpostazione del baby monitor Aggiornamenti firmware Condizioni della spia dello stato del Wi-Fi
Sicurezza e privacy Sicurezza della rete Password complesse Utilizzo sicuro dell’applicazione del baby monitor Dispositivi compatibili Ordinazione degli accessori Garanzia e assistenza
Domande frequenti 112
113
113
115
117
120
120
121
122
122
123
124
124
126
126
128
128
128
129
130
130
130
131
133
133
133
133
134
134
134
134
Introduzione
Congratulazioni per l’acquisto e benvenuti in Philips Avent! Per trarre il
massimo vantaggio dall’assistenza Philips Avent, registrate il vostro prodotto
su www.philips.com/welcome.
Lo smart baby monitor uGrow utilizza la nuova tecnologia SafeConnect
per il funzionamento sulla rete. Regola automaticamente le condizioni
di rete per mantenere un collegamento costante e di alta qualità con
il bambino. Se la connessione si interrompe, cerca continuamente di
ripristinarla. L’utilizzo della larghezza di banda è stato ottimizzato per
salvaguardare la carica della batteria del dispositivo mobile. Funziona anche
se state utilizzando il telefono per altre attività.
Lo smart baby monitor uGrow richiede una connessione Internet e
Wi-Fi. Per prestazioni eccellenti dello smart baby monitor uGrow, sono
fondamentali una buona connessione a Internet e Wi-Fi: se questa è bassa,
la qualità del collegamento fra app uGrow e baby monitor potrebbe
risultare ridotta. È compatibile con iOS 7 e versioni successive o Android
4.1 e versioni successive. Dispone di tutte le tradizionali funzioni di
supporto di un baby monitor, tra cui ninne nanne, luce notturna multicolore
e controllo di umidità e temperatura.
ITALIANO 113
Panoramica del prodotto (fig. 1)
1 Spia dello stato del Wi-Fi
2 Luci a raggi infrarossi
3 Obiettivo del baby monitor
4Microfono
5 Indicatore di visualizzazione
6 Luce notturna
7Piede
8 Pulsante luce notturna
9 Pulsante di riproduzione/pausa ninna nanna
10 Sensore luminoso
11 Sensore di temperatura e umidità
12 Presa dello spinotto
13 Pulsante reset
14 Pulsante on/off
15 Staffa per montaggio a parete
16Adattatore
17Spinotto
Configurazione iniziale
Prima di avviare la procedura di configurazione, assicuratevi di:
-- avere un accesso a Internet wireless (Wi-Fi a 2,4 GHz);
-- trovarvi in prossimità del router Wi-Fi per avere un buon segnale Wi-Fi;
-- Se utilizzate un ripetitore Wi-Fi, assicuratevi di disporre di router e
ripetitore Wi-Fi con stesso SSID (nome della rete) e di utilizzare la
stessa password per entrambi.
-- Avere a portata di mano la password della rete Wi-Fi; collegate sempre
il baby monitor a una rete protetta (consultate il capitolo “Sicurezza e
privacy”).
-- Controllare che il dispositivo disponga di iOS 7 o versione successiva,
o Android 4.1 o versione successiva (per verificare la compatibilità del
dispositivo, consultate il capito “Compatibilità del dispositivo”).
1Scaricate l’applicazione Philips Avent uGrow Smart Baby Monitor
dall’App Store o da Google Play. Utilizzate le parole chiave
“Smart monitor uGrow” o “Smart monitor Philips” per trovare
l’applicazione.
2Avviate l’applicazione.
114
ITALIANO
3Seguite le istruzioni sullo schermo per creare un account uGrow.
1 Accertatevi di utilizzare un indirizzo e-mail attivo a cui siete sempre
raggiungibili.
2 Utilizzate una password complessa (vedete “Sicurezza e privacy”).
3 Quando ricevete l’e-mail di verifica, seguite le istruzioni riportate
nell’e-mail per proseguire con la configurazione dello smart baby
monitor uGrow.
4 Create un profilo utente.
Il profilo utente è necessario per identificarvi agli utenti ospiti invitati.
5 Create un profilo per il bambino.
Il nome del bambino è necessario per identificare il baby monitor
nell’applicazione, soprattutto quando più baby monitor sono collegati a un
account.
4Seguite le istruzioni visualizzate sullo schermo per collegare il baby
monitor all’alimentazione.
1 Inserite lo spinotto dell’apparecchio nella presa dell’unità sensore
di temperatura e umidità. Quindi, inserite l’adattatore nella presa di
corrente.
2 La spia di stato Wi-Fi inizia a lampeggiare in arancione quando il baby
monitor è acceso. Attendete che smetta di lampeggiare. Quando la
luce della spia è arancione fisso, il baby monitor è pronto per leggere il
codice QR Wi-Fi.
5Eseguite il collegamento del baby monitor al vostro dispositivo.
1 Selezionate la rete Wi-Fi che desiderate utilizzare. Il baby monitor
funziona solo su una rete Wi-Fi a 2,4 GHz.
2 Inserite la password della connessione Wi-Fi.
ITALIANO 115
3 Come indicato dall’applicazione, tenete il codice QR Wi-Fi sullo
schermo dello smartphone o del tablet a una distanza di circa 20 cm
davanti all’obiettivo del baby monitor. Muovete lentamente lo
smartphone o il tablet più vicino o più lontano dall’obiettivo affinché il
codice QR Wi-Fi sia letto correttamente. A lettura del codice QR Wi-Fi
avvenuta, il sistema riproduce un breve segnale acustico e la spia di
stato Wi-Fi inizia a lampeggiare in verde.
4 Seguite le istruzioni visualizzate sullo schermo per completare la
procedura di configurazione.
5 La spia di stato Wi-Fi diventa verde fisso quando il baby monitor è
collegato alla rete Wi-Fi.
Nota: se non riuscite a completare la procedura di configurazione e il baby
monitor non si collega al dispositivo dopo aver seguito le istruzioni di cui sopra,
consultate la sezione “Domande frequenti” in questo manuale dell’utente per
trovare una possibile soluzione.
Consiglio: per ulteriori informazioni sulla spia di stato Wi-Fi, consultate il
capitolo “Condizioni della spia dello stato del Wi-Fi”.
6 Il passaggio successivo è un tour introduttivo dell’applicazione.
7 Potete scegliere tra due opzioni: “Help me mount the baby monitor”
(Assistenza per il montaggio del baby monitor) e “Let me see my baby”
(Desidero vedere il mio bambino).
8 Se scegliete la prima opzione, potete seguire le istruzioni sullo
schermo per montare il baby monitor a parete (consultare il capitolo
“Montaggio del baby monitor a parete”). Al termine delle istruzioni su
schermo potete scegliere l’opzione “Let me see my baby” (Desidero
vedere il mio bambino).
Montaggio a parete del baby monitor
Il baby monitor è dotato di una staffa per il montaggio a parete. Prima
di montarlo, verificate che nel punto desiderato il segnale Wi-Fi sia
sufficientemente potente. Per fissare la staffa alla parete e montare il baby
monitor, seguite le istruzioni riportate di seguito.
1 Utilizzate una matita per indicare sulla parete il punto in cui desiderate
montare il baby monitor.
2 Tenete premuta la staffa per il montaggio a parete sul punto in cui
desiderate montare l’apparecchio. Assicuratevi che uno dei fori si trovi
proprio sul punto che avete tracciato nel passaggio 1.
Nota: quando tenete premuta la staffa per il montaggio a parete, verificate che
l’anello sia rivolto verso il basso. Se è rivolto verso l’alto, ruotate la staffa fino a
portarla nella posizione corretta.
116
ITALIANO
3 Utilizzate una matita per indicare il punto in cui praticare l’altro foro.
4 Praticate 2 fori nel muro in corrispondenza dei contrassegni.
5 Utilizzate 2 viti per fissare la staffa per il montaggio a parete.
Stringete le viti con un cacciavite.
6 Passate l’unità sensore di umidità e temperatura attraverso il foro
della staffa per montaggio a parete. Quindi, allineate le fessure presenti
nella base del baby monitor con le sporgenze dell’anello. Inserite la
scanalatura presente nella base del baby monitor sopra il bordo in
rilievo all’interno dell’anello.
7 Per posizionare il baby monitor, ruotate la base in senso orario.
ITALIANO 117
8 Inserite lo spinotto dell’apparecchio nella presa dell’unità sensore
di temperatura e umidità. Quindi, inserite l’adattatore nella presa di
corrente. A questo punto, il baby monitor è pronto all’uso.
Guida di avvio rapido
Funzioni della schermata principale
Parte superiore dello schermo:
1 Tutte le notifiche attivate/disattivate
2 Barra di indicazione del livello audio
3 Audio attivato/disattivato
Parte inferiore dello schermo:
4Istantanea
5 Funzione di richiamo
6 Luce notturna
7 Ninne nanne
Pulsanti di azione rapida
,, Istantanea: toccate questo pulsante per scattare una foto del vostro
bambino.
-- Quando si scatta una foto al bambino, questa viene memorizzata
nell’album fotografico sul vostro dispositivo.
,, Funzione di richiamo: toccate questo pulsante per parlare con il
bambino direttamente. Opzioni disponibili:
-- Funzione di richiamo attivata o disattivata
-- Regolazione del volume della funzione di richiamo
,, Luce notturna: toccate questo pulsante per accendere o spegnere la
luce notturna. Toccate l’icona delle impostazioni nell’angolo in basso
a destra per regolare il colore o per impostare il timer della luce
notturna. Opzioni disponibili:
-- Accensione e spegnimento della luce notturna
-- Impostate il timer della luce notturna o tenete la luce sempre accesa
118
ITALIANO
-- Impostate il colore della luce notturna
,, Ninne nanne: toccate questo pulsante per attivare o interrompere
la riproduzione delle ninne nanne. Toccate l’icona delle impostazioni
nell’angolo in basso a destra per selezionare le ninne nanne,
impostare il timer o regolare il volume. Opzioni disponibili:
-- Selezionate una delle ninne nanne in elenco
-- Programmate un elenco di riproduzione con le ninne nanne disponibili
-- Impostate il timer per le ninne nanne o scegliete la riproduzione
continua
-- Regolate il volume di riproduzione.
Icone del controllo in background
-- Icona della campana: toccate l’icona per attivare o disattivare le
notifiche.
ITALIANO 119
-- Icona del telefono cellulare: toccate l’icona per attivare o disattivare
l’audio.
Nota: per ulteriori informazioni sul controllo in background, consultate il
capitolo “Guardare, ascoltare e controllare il bambino”.
Barra di indicazione del livello audio
-- Le spie indicano il livello dell’audio nella stanza del bambino.
Nota: per ulteriori informazioni, consultate il capitolo “Guardare, ascoltare e
controllare il bambino”.
Pannello sinistro
-- Elenco dei baby monitor collegati all’applicazione: toccate l’icona delle
impostazioni per configurare le preferenze del baby monitor e per
invitare utenti ospiti a guardare il vostro bambino.
-- My account (Il mio account): toccate questa opzione per visualizzare
e modificare le informazioni sul vostro account, il vostro profilo e il
profilo del vostro bimbo, oppure per aggiungere o rimuovere un baby
monitor.
-- About (Informazioni): toccate questa opzione per ulteriori informazioni
relative all’applicazione, alle versioni ecc.
-- Support (Assistenza): toccate questa opzione per aprire il menu
relativo all’assistenza.
Nota: per ulteriori informazioni sul pannello sinistro, consultate il capitolo
“Utilizzo generale dell’applicazione”.
Pannello destro
Il pannello destro fornisce informazioni sugli utenti collegati.
Nota: le opzioni nel pannello destro sono disponibili solo per l’amministratore
(per ulteriori informazioni sul pannello destro consultate il capitolo “Utilizzo
generale dell’applicazione”).
-- Mostra chi sta guardando.
-- Mostra chi ha o non ha accesso.
Il pulsante Privacy Mode (Modalità privacy) impedisce a tutti gli utenti di
guardare il vostro bambino.
120
ITALIANO
Pannello di controllo
Il pannello di controllo dell’applicazione si trova nel pannello inferiore.
1Posizionate il dito sulla linea orizzontale sullo schermo appena sopra
le icone nella parte inferiore dello schermo. Spostate questa linea
verso la parte superiore dello schermo. Anche le icone nella parte
inferiore dello schermo vengono spostate in alto.
2Dopo aver spostato la linea verso l’alto, il pannello di controllo nel
pannello inferiore sarà completamente visibile.
Nel pannello di controllo sono disponibili diverse opzioni di notifica.
1Audio
2Temperatura
3Umidità
Nota: per ulteriori informazioni sulle opzioni di notifica disponibili nel pannello
di controllo, consultate la sezione “Opzioni di notifica” nel capitolo “Guardare,
ascoltare e controllare il bambino” in questo manuale dell’utente.
Guardare, ascoltare e controllare il bambino
È possibile guardare, ascoltare e controllare il bambino sullo smartphone
o sul tablet. È anche possibile calmare il bambino con la propria voce.
Guardare il bambino
Zoom e panoramica
Nota: questa funzione è disponibile solo nella modalità di visualizzazione
verticale.
1In modalità schermo intero, toccate due volte o toccate allontanando
le dita per eseguire lo zoom avanti.
2Toccate due volte o toccate avvicinando le dita per eseguire lo zoom
indietro.
ITALIANO 121
3Trascinate per effettuare una panoramica dell’immagine ingrandita.
Visualizzazione orizzontale o verticale
-- Ruotate lo smartphone o il tablet per visualizzare il bambino in
modalità orizzontale.
Modalità di visione notturna
Quando il livello di illuminazione della stanza è basso, il baby monitor passa
alla modalità di visione notturna.
-- In questa modalità, potete visualizzare immagini in bianco e nero del
bambino sul dispositivo smart.
Sentire il bambino
Consente di udire il bambino quando inizia a piangere.
-- Il livello dell’audio emesso dal bambino dipende dal volume impostato
sul dispositivo smart.
-- L’intensità dell’audio emesso dal bambino è visibile anche sulla barra di
indicazione del livello audio ed è rappresentata da indicatori luminosi
(maggiore è il numero di indicatori accessi, più alto è il livello dell’audio
nella stanza del bambino). La barra con gli indicatori luminosi va letta
da sinistra a destra: più a destra si trovano indicatori accesi e più alto è
il livello dell’audio.
Nota: per riuscire a udire il bambino, l’audio deve essere attivato.
Consiglio: collegate il dispositivo smart alla presa di corrente quando desiderate
utilizzarlo durante la notte per evitare che la batteria si esaurisca.
122
ITALIANO
Come ottenere una notifica quando il bambino piange
1Notifica push: si riceve una notifica push quando il bambino inizia a
piangere.
Nota: se desiderate ricevere una notifica mentre svolgete altre attività sul
dispositivo smart (ad esempio scrivere messaggi, telefonare, navigare in
Internet), assicuratevi di attivare l’impostazione per la ricezione di tutte le
notifiche.
Consiglio: attivate la vibrazione dalle impostazioni dello smartphone se
desiderate che questo vibri per avvisarvi quando il bambino piange, una
funzione utile se, ad esempio, portate lo smartphone in tasca o vi trovate in un
ambiente rumoroso.
Come specificare quando ricevere una notifica
Nel pannello di controllo potete anche specificare quando desiderate
ricevere una notifica.
1Quando l’audio del bambino supera il livello impostato.
2Quando il bambino piange per un periodo di tempo specificato.
Nota: se l’opzione per la ricezione di notifiche è stata disattivata, non
riceverete alcuna notifica quando il bambino piange (consultate la sezione
“Opzioni di notifica” in questo capitolo).
Attivazione o disattivazione delle notifiche sul dispositivo
smart
Le notifiche sono un’impostazione del dispositivo smart esterna
all’applicazione. Potete scegliere se e come ricevere notifiche
dall’applicazione.
1Accedete al centro notifiche sul dispositivo.
2Selezionate l’opzione di notifica e fate clic per attivarla o disattivarla.
Controllo in background
Il controllo in background è una funzione dell’applicazione che vi permette
di sentire il bambino e/o di ricevere notifiche riguardanti il bambino anche
mentre state eseguendo altre attività sul dispositivo smart. Il controllo
in background è attivo per impostazione predefinita, ma è possibile
disattivarlo.
ITALIANO 123
Attivare o disattivare il controllo in background
-- Toccate l’icona della campana per attivare o disattivare tutte le
notifiche. Quando tutte le notifiche sono attivate, vedrete un
messaggio sullo schermo quando il bambino inizia a piangere. Potete
impostare le preferenze di notifica dal pannello di controllo e/o dalla
schermata delle impostazioni del monitor.
Nota: attivate l’opzione di notifica per ricevere tutte le notifiche relative al
bambino se l’applicazione è in esecuzione in background, ad esempio quando
state eseguendo altre attività sul dispositivo smart oppure quando il dispositivo
è in modalità standby e lo schermo è spento. Dovete attivare l’opzione
di notifica se desiderate visualizzare notifiche personalizzate riguardanti
temperatura, audio e umidità sul pannello di controllo.
-- Toccate l’icona del telefono cellulare per attivare o disattivare l’audio.
Nota: disattivando l’audio, non sarete in grado sentire il vostro bambino quando
eseguite un’altra attività sul dispositivo smart (telefonare, scrivere messaggi ecc.).
Nota: quando effettuate una chiamata sul cellulare o utilizzate un’applicazione
VoIP (ad esempio Skype,Viber o FaceTime) per chiamare qualcuno, non sarete
in grado di sentire il vostro bambino. Non appena il bambino inizia a piangere,
tuttavia, riceverete una notifica.
Passare dal controllo in background alla schermata principale
dell’applicazione
L’applicazione rimane attiva in background, anche quando il dispositivo è in
modalità standby. Quando il controllo in background è attivo, è presente
una barra rossa nella parte superiore dello schermo del dispositivo smart.
1Per passare dal controllo in background alla schermata principale
dell’applicazione, toccate la barra rossa sulla parte superiore dello
schermo per portare l’applicazione in primo piano.
Opzioni di notifica
Le opzioni di notifica dell’applicazione possono essere modificate dal
pannello di controllo, situato nel pannello nella parte inferiore dello
schermo. Spostate il pannello di controllo verso l’alto per visualizzare il
menu delle opzioni. Il menu include le seguenti opzioni.
Audio
-- Utilizzando il dispositivo di scorrimento, impostate il livello dell’audio
oltre il quale desiderate ricevere una notifica.
Nota: se il dispositivo di scorrimento è impostato su “low” (basso), una volta
usciti dall’applicazione sentirete sempre il vostro bambino.
-- Impostate il tempo di emissione dell’audio oltre il quale desiderate
ricevere una notifica.
124
ITALIANO
Temperatura
-- Impostate l’intervallo di temperatura al di sopra o al di sotto del quale
desiderate ricevere una notifica relativa alla temperatura.
-- Attivate le notifiche relative alla temperatura.
-- Visualizzate la temperatura corrente o una cronologia delle
temperature.
Umidità
-- Impostate l’intervallo di umidità al di sopra o al di sotto del quale
desiderate ricevere una notifica relativa all’umidità.
-- Attivate le notifiche relative all’umidità.
-- Visualizzate l’umidità corrente o una cronologia dei valori dell’umidità.
Utenti e account ospiti
Invitare ospiti e un secondo amministratore
Potete invitare fino a nove parenti o amici come ospiti e consentirgli di
guardare il vostro bambino sul loro smartphone o tablet. Potete invitare
uno di questi ospiti a svolgere la funzione di secondo amministratore.
Un secondo amministratore ha gli stessi diritti del primo amministratore.
Gli ospiti hanno soltanto diritti di visualizzazione e tali diritti sono controllati
dagli amministratori. Un amministratore ha gli stessi diritti di visualizzazione
degli utenti ospiti, ma in più può invitare ospiti, concedere o togliere loro il
diritto di accesso e disconnetterli. L’amministratore può inoltre disattivare
l’account degli ospiti e, quindi, dissociarli dal baby monitor.
1Nel pannello sinistro, toccate l’icona delle impostazioni accanto al
baby monitor.
2Scorrete verso il basso e toccate “Add new user” (Aggiungi nuovo
utente).
ITALIANO 125
3Aggiungete l’indirizzo e-mail dell’utente e il suo ruolo (ospite o
amministratore).
4L’applicazione invia un’e-mail alla persona invitata e visualizzerete una
notifica che vi informa dell’invio dell’e-mail.
5L’ospite riceve un’e-mail con un codice di invito che è valido solo
per un periodo di tempo limitato. L’e-mail contiene anche un link
per l’App Store. L’ospite può fare clic su questo link per installare
l’applicazione.
6Dopo aver installato l’applicazione, l’ospite può creare un account
seguendo le istruzioni presenti nell’applicazione.
7L’ospite sceglie l’opzione “Connect to a shared baby monitor”
(Connessione a un baby monitor condiviso) durante il processo di
configurazione.Viene visualizzata la pagina di convalida dell’invito.
8L’ospite inserisce il codice di invito, l’indirizzo e-mail e conferma.
Il codice e l’indirizzo e-mail vengono controllati.
9L’amministratore riceve un’e-mail di conferma del collegamento
dell’ospite al baby monitor; l’amministratore può ora concedere
l’accesso all’ospite.
10Una volta concesso l’accesso, l’ospite sarà in grado di guardare il
bambino.
-- Quando una o più persone guardano il bambino, la spia di indicazione
rossa si illumina di rosso.
Nota: sebbene fino a dieci persone (otto o nove ospiti e uno o due
amministratori) possono avere i diritti di visualizzazione per lo stesso baby
monitor, solo tre persone possono guardare il bambino allo stesso tempo.
Se gli ospiti provano ad accedere al baby monitor mentre tre utenti sono già
impegnati nella visione, riceveranno il messaggio “Too many connections”
(Troppe connessioni). Gli amministratori possono sempre avere la precedenza
sull’accesso degli ospiti se desiderano guardare il bambino.
126
ITALIANO
Fornire e rimuovere l’accesso
Gli utenti con i diritti di amministratore hanno la facoltà di stabilire chi può
guardare il bambino.
1Per togliere l’accesso a un ospite impegnato nella visione, andate al
pannello destro, toccate l’ospite al quale desiderate togliere l’accesso
e toccate l’icona dell’occhio accanto al nome dell’ospite.
Consiglio: se tre persone stanno già guardando il bambino e desiderate
assegnare a qualcuno, ad esempio alla babysitter, l’accesso al baby monitor,
potete togliere l’accesso a uno degli utenti impegnati nella visione e concederlo
a qualcun altro.
2Per concedere l’accesso a un ospite, andate al pannello destro,
toccate l’ospite al quale desiderate concedere l’accesso e toccate
l’icona dell’occhio accanto al nome dell’ospite.
3Se desiderate togliere l’accesso a tutti gli utenti impegnati nella
visione contemporaneamente, toccate il pulsante della modalità
privacy. In questo modo potrete negare l’accesso al baby monitor a
tutti gli utenti tranne voi fino a quando non toccherete nuovamente
il pulsante della modalità privacy.
Consiglio: potete premere il pulsante della modalità privacy per trascorrere un
momento in privato con il vostro bambino, ad esempio per allattarlo al seno,
fargli il bagnetto o cambiargli il pannolino. Gli ospiti che provano ad accedere
al baby monitor visualizzeranno una notifica sullo schermo.
Gestione account
Disconnettere un ospite
Per disconnettere utenti ospiti dall’applicazione in modo permanente,
dovete rimuoverli dall’elenco degli ospiti. Anche gli ospiti possono
disconnettersi in modo permanente dall’applicazione.
Disattivare il vostro account utente
Se è presente un solo amministratore e questo amministratore disattiva il
proprio account, tutti gli account degli utenti ospiti verranno dissociati dal
baby monitor, pur non venendo eliminati. Nel caso in cui siano presenti due
amministratori, entrambi gli amministratori dovranno disattivare i propri
account per dissociare tutti gli account. Se solo uno dei due amministratori
disattiva il proprio account, gli ospiti resteranno connessi al baby monitor.
Se desiderate trasferire il baby monitor a qualcun altro o in caso di
smarrimento o furto del baby monitor, vi consigliamo di disattivare
gli account amministratore. Si tratta di una procedura essenziale per
proteggere la privacy vostra e del vostro bambino.
ITALIANO 127
1Per disattivare il vostro account, andate al pannello sinistro e toccate
“My account” (Il mio account).
2Toccate “Deactivate account” (Disattivare account).
3Viene visualizzata una finestra a comparsa che richiede la conferma
di disattivazione dell’account.
4Toccando “Deactivate” (Disattivazione), viene visualizzata una
finestra a comparsa che conferma la disattivazione dell’account.
Aggiungere o rimuovere baby monitor
Potete aggiungere fino a dieci baby monitor nell’applicazione. Ciò vi
consente di controllare più bambini o uno stesso bambino in più stanze.
Ad esempio, potreste installare un monitor sul lettino del bambino nella
sua stanza e sul box in salotto. I baby monitor devono essere collegati
all’applicazione uno per volta.
1Andate a “My account” (Il mio account) nel pannello sinistro.
2Visualizzerete l’elenco dei baby monitor collegati. Toccate “Add baby
monitor” (Aggiungi baby monitor).
3Seguite le istruzioni riportate nel capitolo “Configurazione iniziale”
di questo manuale dell’utente per collegare il baby monitor
all’applicazione.
128
ITALIANO
Utilizzo generale dell’applicazione
Ottimizzazione della qualità audio e video
La qualità dell’audio e del video sul vostro dispositivo smart potrebbe
cambiare a seconda della larghezza di banda della connessione a
Internet. In genere, l’utilizzo di una connessione Wi-Fi garantisce risultati
migliori, mentre connessioni 4G e 3G possono offrire una larghezza
di banda inferiore e una qualità non ottimale. L’applicazione vi offrirà
automaticamente l’esperienza migliore possibile, abbinando la qualità audio
e video alla larghezza di banda disponibile.
L’abbinamento avviene per fasi:
1 Larghezza di banda ampia: buona qualità audio e video, con notifiche
testuali.
2 Larghezza di banda ridotta (ad esempio, quando si utilizza una
connessione 3G): ridotta qualità video, buona qualità audio, con
notifiche testuali.
3 Larghezza di banda limitata (ad esempio, quando si utilizza una
connessione 2G): sarà disponibile solo un collegamento audio, con
notifiche testuali.
4 Larghezza di banda molto limitata: saranno disponibili solo notifiche
testuali.
Connessione a Internet tra Wi-Fi
I risultati migliori si ottengono collegando il dispositivo smart a Internet
tramite Wi-Fi. In questo modo il dispositivo utilizzerà automaticamente la rete
Wi-Fi per collegarsi al baby monitor. Se non è presente una connessione
Wi-Fi, il dispositivo smart passerà alla connessione dati mobile 3G o 4G.
L’utilizzo di questa connessione dati può comportare costi aggiuntivi da parte
del vostro gestore, a seconda del tipo di abbonamento che avete sottoscritto.
Un collegamento video richiede solitamente da 0,1 a 0,25 MB di dati al
secondo. Un collegamento audio richiede 0,01 MB dati al secondo.
ITALIANO 129
Se desiderate evitare che il vostro dispositivo smart si colleghi alla rete
3G o 4G, dovete disattivare la connessione dati mobile del dispositivo.
L’operazione influirà su tutte le altre applicazioni che potrebbero utilizzare
la connessione dati mobile 3G o 4G. Inoltre, disattivando la connessione
dati mobile non verrete avvisati che il vostro bambino sta piangendo in
caso di interruzione della connessione a Internet tramite Wi-Fi.
Utilizzare il baby monitor lontano da casa
Potete utilizzare il monitor in qualsiasi luogo in cui è disponibile una rete
Wi-Fi a 2,4 GHz, ad esempio a casa di un amico o di un parente, in albergo
o in un residence mentre siete in vacanza. Se conoscete il nome della rete
Wi-Fi e la relativa password, potrete configurare e utilizzare il baby monitor
lontano da casa. Per farlo, seguite le istruzioni per la configurazione qui
sotto. Dopo aver configurato la connessione a una rete Wi-Fi la prima
volta, le impostazioni verranno memorizzate nella memoria del dispositivo
e non dovrete ripetere la procedura di configurazione se utilizzerete
l’applicazione e il baby monitor nello stesso luogo.
Nota: se la connessione alla rete Wi-Fi richiede un ulteriore conferma, ad
esempio per accettare i termini di utilizzo, il baby monitor non sarà in grado di
collegarsi alla rete Wi-Fi. Questo problema potrebbe verificarsi con le reti Wi-Fi
di alberghi e con altre reti Wi-Fi pubbliche.
1Sono disponibili due opzioni per collegare il baby monitor alla rete
Wi-Fi.
-- Prima opzione: quando accendete il baby monitor visualizzate il
messaggio “Baby monitor not found” (Baby monitor non trovato).
Attendete fino a quando l’applicazione non offre l’opzione “Reconnect
the baby monitor (Ricollegare il baby monitor).
-- Seconda opzione: accendete il baby monitor. Aprite il pannello sinistro,
selezionate il baby monitor e scegliete “Reconnect the baby monitor
(Ricollegare il baby monitor).
2Quando l’applicazione ha generato una codice QR Wi-Fi, tenete lo
schermo dello smartphone o del tablet a una distanza di circa 20 cm
davanti all’obiettivo del baby monitor lente. Muovete lentamente
lo smartphone o il tablet più vicino o più lontano dall’obiettivo per
garantire che il codice QR Wi-Fi venga letto correttamente.
3Attenetevi alle istruzioni visualizzate sullo schermo per completare
la configurazione. La procedura di configurazione termina e il baby
monitor è collegato alla rete Wi-Fi ed è pronto per l’uso quando la
spia di stato Wi-Fi sulla parte anteriore del baby monitor emette una
luce verde fisso.
Nota: una volta tornati a casa, dovrete seguire la procedura precedente per
ricollegare il baby monitor alla vostra rete Wi-Fi domestica.
130
ITALIANO
Utilizzare l’applicazione su diversi dispositivi
Potete utilizzare l’applicazione uGrow Smart Baby Monitor su più di un
dispositivo (ad esempio iPhone e iPad).
Nota: quando accedete con lo stesso account su un dispositivo mentre
l’applicazione è attiva su un altro dispositivo, il primo dispositivo in cui l’applicazione
era attiva si scollega automaticamente. Non potete utilizzare l’applicazione con lo
stesso account su due dispositivi diversi contemporaneamente.
Reimpostazione del baby monitor
Sul retro del baby monitor è presente il pulsante reset che consente
di ripristinarne le impostazioni di fabbrica. Tale operazione comporta la
dissociazione di tutti gli account dal baby monitor.
Nota: reimpostate sempre il baby monitor premendo il pulsante reset prima
di cederlo a qualcun altro. Questa operazione è necessario per proteggere la
vostra privacy. Reimpostate il baby monitor anche quando ne acquistate o ne
ricevete uno di seconda mano.
Ripristino delle impostazioni di fabbrica
Nota: assicuratevi che il baby monitor sia acceso prima di reimpostarlo.
1Mentre il baby monitor è acceso, premete il pulsante reset posto sul
retro con una graffetta o un altro oggetto appuntito. Si consiglia di
eseguire questa operazione quando il baby monitor è collegato alla
rete Wi-Fi.
2Tenete premuto il pulsante reset finché il baby monitor non emette
un segnale acustico. Quindi, rilasciate il pulsante. Il baby monitor
emette un breve segnale acustico per confermare la reimpostazione.
Operazioni successive al ripristino delle impostazioni di
fabbrica
Una volta eseguito il ripristino del baby monitor, la spia di stato Wi-Fi
lampeggia in arancione quando accendete il baby monitor, ad indicare che
l’apparecchio è in fase di riavvio dopo il ripristino. Quando la spia di stato
Wi-Fi smette di lampeggiare, potete collegare nuovamente il baby monitor
alla rete Wi-Fi. Seguite le istruzioni riportate nel capitolo “Configurazione
iniziale” in questo manuale dell’utente. Se avete invitato altre persone ad
accedere al baby monitor, dovrete invitarle nuovamente.
Aggiornamenti firmware
L’aggiornamento è essenziale per proteggere la vostra privacy e garantire il
corretto funzionamento del baby monitor e dell’applicazione.
-- Gli aggiornamenti essenziali sono obbligatori. Gli aggiornamenti
obbligatori dell’applicazione vengono installati sul dispositivo smart
automaticamente e non richiedono conferma. Riceverete solo una
notifica che vi informa che un aggiornamento obbligatorio è in corso.
-- Di tanto in tanto riceverete notifiche che vi informano della
disponibilità di aggiornamenti disponibili per il firmware del baby
monitor o per il software dell’applicazione. Gli aggiornamenti vengono
installati quando li confermate.
ITALIANO 131
-- Per cercare aggiornamenti del firmware per il vostro baby monitor,
aprite il pannello sinistro e toccate l’icona delle impostazioni accanto
al baby monitor. Scorrete verso il basso fino all’opzione “Firmware”,
quindi toccatela per verificare la disponibilità di aggiornamenti del
firmware. Se è disponibile un aggiornamento, toccatelo per installarlo.
Nota: durante l’installazione di un aggiornamento non sarete in grado di
guardare o udire temporaneamente il vostro bambino.
Condizioni della spia dello stato del Wi-Fi
,, Off
1 Spento: il baby monitor è spento.
,, Arancione
1 Lampeggia rapidamente in arancione: il baby monitor si sta avviando.
2 Lampeggia lentamente in arancione: il baby monitor sta aggiornando il
firmware. Non spegnete il baby monitor durante l’aggiornamento del
firmware.
Nota: la spia Wi-Fi potrebbe disattivarsi durante l’aggiornamento del firmware.
132
ITALIANO
3 Arancione fisso: la fotocamera del baby monitor è pronta per la lettura
del codice QR Wi-Fi generato dallo smartphone o dal tablet.
,, Verde
1 Lampeggia in verde: il codice QR Wi-Fi è stato letto correttamente.
2 Verde fisso: il baby monitor è connesso alla rete Wi-Fi.
,, Rosso
1 Lampeggia lentamente in rosso: la password Wi-Fi inserita non è
corretta.
2 Rosso fisso: il baby monitor non riesce a stabilire una connessione con
la rete Wi-Fi.
ITALIANO 133
Sicurezza e privacy
Sicurezza della rete
Gli hotspot Wi-Fi in luoghi pubblici, come aeroporti e alberghi, sono
comodi, ma spesso non sono sicuri.
Vi consigliamo di utilizzare il baby monitor solo su una rete Wi-Fi protetta
da crittografia WPA2. Non utilizzate il baby monitor su una rete con
crittografia WEP.
Nota: le reti Wi-Fi che non richiedono una password non sono sicure.
Password complesse
Le password sono essenziali per proteggere la rete Wi-Fi e il vostro
account da accessi non autorizzati. Più complessa è la password, maggiore è
il livello di protezione per la rete Wi-Fi e il vostro account.
Le regole per una password complessa sono:
1 Una password complessa è composta almeno da 8 caratteri.
2 Una password complessa non contiene il vostro nome, quello del
vostro bambino o un altro nome reale o di un marchio.
3 Una password complessa non contiene una parola completa.
4 Una password complessa è molto diversa dalle password che avete
utilizzato in precedenza.
5 Una password complessa contiene caratteri di almeno due delle
seguenti categorie:
-- Lettere: A, B, C or a, b, c
-- Numeri: 0, 1, 2, 3, 4, 5, 6, 7, 8, 9
-- Simboli: _ . @ $
Utilizzo sicuro dell’applicazione del baby monitor
Utilizzate l’applicazione solo su una rete sicura
Non utilizzate l’applicazione su una rete Wi-Fi non sicura. Vi consigliamo
di utilizzare il baby monitor solo su una rete Wi-Fi protetta da crittografia
WPA2. Potete anche utilizzare la rete dati del vostro telefono (spesso
chiamata 3G o 4G).
Utilizzate sempre la versione più recente del software e del
firmware
Eseguite sempre l’aggiornamento del software dell’applicazione e del
firmware del baby monitor quando ricevete una notifica che vi informa
sulla disponibilità di un aggiornamento. Gli aggiornamenti vengono rilasciati
quando sono disponibili miglioramenti del software o per evitare un
problema di sicurezza. Se non eseguite l’aggiornamento, la connessione al
baby monitor tramite l’applicazione potrebbe non essere più sicura e privata.
134
ITALIANO
Dispositivi compatibili
,,
-,,
-,,
-,,
--
Compatibilità con iPhone
iPhone 4S e successivi
Compatibilità iPad
iPad 2 e successivi
Compatibilità con iPod Touch
iPod Touch quinta generazione e più recenti
Compatibilità con Android
Android 4.1 o versione successiva
Nota: per le ultime informazioni sui dispositivi compatibili, visitate il sito Web
www.philips.com/uGrow.
Ordinazione degli accessori
Per acquistare accessori o parti di ricambio, visitate il sito
www.shop.philips.com/service oppure recatevi presso il vostro
rivenditore Philips. Potete contattare anche il centro assistenza Philips del
vostro paese (per i dettagli di contatto, consultate l’opuscolo della garanzia
internazionale).
Garanzia e assistenza
Per assistenza o informazioni, visitate il sito Web Philips all’indirizzo
www.philips.com/support oppure leggete l’opuscolo della garanzia
internazionale.
Domande frequenti
Per ulteriori domande frequenti su questo baby monitor, consultate la
pagina di assistenza del prodotto all’indirizzo www.philips.com/support.
Domanda
Risposta
Risoluzione dei
problemi
Perché non riesco a
trovare l’applicazione
nell’App Store o su
Google Play?
Potete scaricare l’applicazione dall’App Store di Apple o da Google Play cercandola
con le parole chiave “smart baby monitor uGrow”. Se non trovate l’applicazione
nell’App Store o su Google Play, sul vostro telefono potrebbe non essere installata
la versione iOS o Android richiesta. Questa applicazione è compatibile solo con
iOS 7 e versioni successive o Android 4.1 e versioni successive.
Non è possibile
scaricare e installare
l’applicazione. Cosa si
può fare?
Verificate se uno o più dei seguenti fattori ostacola il download. Il vostro
segnale Wi-Fi è abbastanza stabile e forte? Il vostro dispositivo smart utilizza
un sistema iOS 7 o superiore oppure Android 4.1 o superiore? Avete spazio
sufficiente sul vostro dispositivo smart per salvare l’applicazione? Avete
immesso la password corretta per l’App Store o Google Play?
Non riesco a configurare
il baby monitor. Ogni
volta visualizzo la
schermata di errore di
connessione. Qual è il
problema?
Se la spia di stato Wi-Fi è in arancione fisso e ha lampeggiato in rosso durante
il tentativo di connessione, la password Wi-Fi inserita non è corretta. Riavviate
il processo di configurazione, inserite nuovamente la password Wi-Fi e
verificatene la correttezza .
ITALIANO 135
Domanda
Risposta
Se la spia di stato Wi-Fi è in arancione fisso e durante il tentativo di
connessione era in rosso fisso, il baby monitor non ha effettuato la
connessione alla rete Wi-Fi. Per prima cosa, controllate che il telefono o
il tablet stia utilizzando la stessa rete Wi-Fi a cui desiderate connettere il
baby monitor. Quindi, verificate di avere accesso a Internet tramite una
connessione Wi-Fi a 2,4 GHz. Se questo non risolve il problema, controllare
che l’SSID (nome della rete) del router non contenga caratteri speciali;
in caso contrario, modificate il nome, eliminandoli.
Il baby monitor ha
problemi a leggere
il codice QR sul
dispositivo smart. Cosa
si può fare?
Accertatevi di avere il codice QR Wi-Fi a circa 20 cm (8”) di distanza
dall’obiettivo. Provate a spostare il dispositivo smart leggermente verso l’alto
o verso il basso, verso sinistra o verso destra per assicurarvi che il codice
QR Wi-Fi sia esattamente davanti al baby monitor. Potete provare inoltre ad
avvicinare o ad allontanare il dispositivo smart dall’obiettivo del baby monitor
per consentire una messa a fuoco corretta. Assicuratevi che ci sia abbastanza
luce nella stanza, ma evitate una luce troppo forte. Una volta letto il codice
QR Wi-Fi, il baby monitor emette un segnale acustico di conferma e la spia di
stato del Wi-Fi lampeggia in verde.
È possibile che non abbiate rimosso la pellicola di protezione dall’obiettivo del
baby monitor. Rimuovete la pellicola.
È possibile che copriate parzialmente il codice QR Wi-Fi con la mano. Tenete
il dispositivo in modo tale da non coprire il codice QR Wi-Fi con la mano.
Se la spia di stato Wi-Fi è arancione fisso, la lettura del codice QR non è
riuscita. Tornate indietro usando la freccia nell’angolo in alto a sinistra sullo
schermo e seguite le istruzioni relative al codice QR.
Se la spia di stato Wi-Fi lampeggia in arancione, la fotocamera è ancora in
fase di avvio. Attendete fino a quando la spia non diventa arancione fisso.
Quindi tornate indietro utilizzando la freccia nell’angolo in alto a sinistra sullo
schermo e seguite le istruzioni relative al codice QR.
Non riesco a vedere il
mio bambino. Qual è il
problema?
Verificate che il segnale della connessione Wi-Fi nella stanza in cui si trova il
baby monitor sia abbastanza forte.
Verificate che il baby monitor sia collegato a una presa di corrente
funzionante e che sia acceso.
La spia di stato Wi-Fi sulla parte anteriore del baby monitor deve essere
verde fisso (consultate il capitolo “Condizioni della spia dello stato del Wi-Fi”).
Se utilizzate più di un baby monitor, verificate di aver selezionato quello giusto.
Andate al pannello sinistro e toccate il baby monitor per vedere se è attivo.
È possibile che tre persone stiano già guardando il bambino. L’applicazione
consente la visione a un massimo di tre persone contemporaneamente. Se
disponete dei diritti di amministratore, potete togliere l’accesso a uno degli
ospiti e guardare il bambino.
Verificate che il baby monitor sia collegato alla rete Wi-Fi. La spia di stato WiPerché l’applicazione
non mi invia una notifica Fi sulla parte anteriore del baby monitor deve essere verde fisso.
quando il bambino
piange?
136
ITALIANO
Domanda
Risposta
Il baby monitor potrebbe essere non in linea. Per ricevere una notifica
quando il baby monitor passa alla modalità non in linea, andate al pannello di
sinistra e attivate questa notifica da “Settings” (Impostazioni).
La soglia dell’audio per la ricezione di notifiche potrebbe essere stata
impostata su un livello troppo alto. In tal caso, l’applicazione vi invierà una
notifica soltanto quando il livel o dell’audio nella stanza del bambino è elevato.
Aprite il pannello di controllo per diminuire il valore della soglia audio, in
modo da ricevere notifiche non appena il bambino inizia a piangere.
Il periodo di tempo in cui il bambino piange impostato per la ricezione di
notifiche è troppo lungo. Scegliete un periodo di tempo più breve, in modo
che l’applicazione vi invii una notifica prima.
Il volume del telefono potrebbe essere stato disattivato. Impostate il volume
del telefono a un livello normale.
È possibile che la funzione di richiamo sia attiva. Toccate l’icona della funzione
di richiamo per disattivarla. Se utilizzate la funzione di richiamo non sarete in
grado di udire i suoni emessi del bambino.
Controllate di non aver ricevuto un’e-mail riguardante la rimozione del vostro
account. Se avete i diritti di visualizzazione come ospite, l’amministratore può
inoltre negarvi l’accesso in via temporanea. Contattate l’amministratore e
chiedetegli di concedervi l’accesso o di inviarvi un nuovo invito come ospite.
La connessione
viene interrotta
frequentemente. Qual è
il problema?
Verificate che il segnale della connessione Wi-Fi nella stanza in cui si trova
il baby monitor sia sufficientemente forte e stabile. In caso contrario, per
ottenere un segnale forte e stabile vi occorre un ripetitore Wi-Fi, il quale
deve avere lo stesso SSID e la stessa password del router.
Se la spia di stato Wi-Fi sulla parte anteriore del baby monitor è verde fisso
e la connessione si interrompe di continuo, potrebbe trattarsi di un problema
con la connessione Internet del dispositivo smart. Controllate il segnale
Wi-Fi sul vostro dispositivo smart o la velocità della connessione 3G o 4G
guardando un filmato, ad esempio su YouTube.
Dopo aver cambiato il
router, non riesco più a
vedere il bambino. Qual
è il problema?
Innanzitutto, verificate che il dispositivo smart riceva un buon segnale Wi-Fi dal
nuovo router. Sono disponibili due opzioni per collegare il baby monitor alla rete
Wi-Fi. La prima consiste nell’accendere il baby monitor. L’applicazione visualizzerà
il messaggio “Baby monitor not found” (Baby monitor non trovato). Andate su
“Troubleshooting” (Risoluzione dei problemi) e selezionate “Reconnect baby
monitor” (Ricollegare il baby monitor). La seconda opzione consiste nell’aprire
il pannello sinistro quando l’applicazione visualizza il messaggio “Baby monitor
not found” (Baby monitor non trovato). Scegliete il baby monitor sul pannello
sinistro e selezionate “Reconnect the baby monitor” (Ricollegare il baby monitor).
Quando l’applicazione ha generato un codice QR Wi-Fi, tenete lo schermo
dello smartphone o del tablet a una distanza di circa 20 cm davanti all’obiettivo
del baby monitor. Quindi, seguite le istruzioni visualizzate sullo schermo per
completare la configurazione. La procedura di configurazione è stata eseguita
in modo corretto quando la spia di stato Wi-Fi sulla parte anteriore del baby
monitor diventa verde fissa.
ITALIANO 137
Domanda
Risposta
Sono stato invitato
come ospite, ma
non riesco a vedere
nulla quando apro
l’applicazione. Perché?
Controllate di non aver ricevuto un’e-mail riguardante la rimozione del vostro
account. Se avete i diritti di visualizzazione come ospite, l’amministratore può
inoltre negarvi l’accesso in via temporanea. Contattate l’amministratore e
chiedetegli di concedervi l’accesso o di inviarvi un nuovo invito come ospite.
Controllate che il dispositivo smart sia collegato a Internet.
Il baby monitor potrebbe essere non in linea. Per ricevere una notifica
quando il baby monitor passa alla modalità non in linea, andate al pannello di
sinistra e attivate questa notifica da “Settings” (Impostazioni).
La soglia dell’audio per la ricezione di notifiche potrebbe essere stata
impostata su un livello troppo alto. In tal caso, l’applicazione vi invierà una
notifica soltanto quando il livello dell’audio nella stanza del bambino è elevato.
Aprite il pannello di controllo per diminuire il valore della soglia audio, in
modo da ricevere notifiche non appena il bambino inizia a piangere.
Il periodo di tempo in cui il bambino piange impostato per la ricezione di
notifiche è troppo lungo. Scegliete un periodo di tempo più breve, in modo
che l’applicazione vi invii una notifica prima.
Il volume del telefono potrebbe essere stato disattivato. Impostate il volume
del telefono a un livello normale.
Suggerimenti e
trucchi
Devo tenere
l’applicazione in primo
piano sullo schermo
per controllare il mio
bambino?
No, l’applicazione può essere eseguita in background mentre svolgete altre
attività sullo smartphone o sul tablet. Toccate l’icona del telefono cellulare.
In questo modo potrete udire il vostro bambino e sentirete quando inizia a
piangere. Quando l’opzione per la ricezione di tutte le notifiche è attivata,
mentre l’applicazione viene eseguita in background visualizzerete anche una
notifica sullo schermo quando il bambino piange.
Perché ricevo immagini
in bianco e nero invece
che a colori?
Il baby monitor è passato alla modalità visione notturna. La stanza in cui si
trova il baby monitor è buia.
Se nella stanza è presente una luce sufficiente, è possibile che il sensore
luminoso sulla parte superiore del baby monitor sia coperto o sporco.
Accertatevi che il sensore sia completamente esposto alla luce della stanza.
Riesco a sentire il mio
bambino se il mio
dispositivo è bloccato
o se sto utilizzando
un’altra applicazione
o sto effettuando una
chiamata?
Sì, potete scegliere di continuare a controllare il bambino in background. Se
state utilizzando il telefono per effettuare una chiamata, quando il bambino
inizia a piangere sentirete soltanto un tono di chiamata e non potrete udire il
vostro bambino. Toccate il simbolo del telefono cellulare per attivare l’audio di
sottofondo. Quando l’audio di sottofondo è attivato, sentire il bambino mentre
siete impegnati in altre attività. Potete inoltre scegliere di ricevere una notifica
quando il bambino piange. Toccate il simbolo della campana sulla schermata
principale per attivare o disattivare tutte le notifiche. Se tutte le notifiche sono
attivate, visualizzerete un messaggio sullo schermo quando il bambino piange.
138
ITALIANO
Domanda
Risposta
Utilizzo e
apprendimento
Mi serve un account
aggiuntivo se ho più
baby monitor?
No, non vi occorre un account aggiuntivo se utilizzate più baby monitor. Potete
aggiungere un baby monitor alla vostra applicazione uGrow Smart Baby
Monitor. Andate a “My account” (Il mio account) nel pannello sinistro. Da qui
potrete visualizzare l’elenco dei baby monitor collegati all’applicazione. Toccate
“Add baby monitor” (Aggiungi baby monitor). Seguite le istruzioni riportate nel
capitolo “Configurazione iniziale” per collegare il baby monitor all’applicazione.
Posso utilizzare più baby Potete collegare fino a dieci baby monitor all’applicazione, ma potete
monitor con la stessa
guardare le immagini solo di un baby monitor alla volta, benché riceverete
applicazione?
le notifiche degli altri baby monitor collegati. Se ricevete una notifica e la
toccate, accederete direttamente a quel baby monitor. Potete selezionare il
baby monitor che desiderate visualizzare anche dal pannello sinistro.
Perché il caricamento
dell’applicazione
richiede molto tempo?
La connessione a Internet del vostro dispositivo smart o la connessione
Wi-Fi del baby monitor potrebbero essere lente. Controllate la connessione
del vostro dispositivo smart e del baby monitor. L’applicazione richiede una
connessione di rete stabile.
Il baby monitor è a
prova di hacker?
Facciamo il possibile per prevenire casi di pirateria informatica e rilasciamo
aggiornamenti frequenti. Assicuratevi di utilizzare sempre la versione più recente
del software dell’applicazione e del firmware del baby monitor. In caso di
smarrimento del dispositivo smart, reimpostate il baby monitor per rimuovere
eventuali collegamenti con esso. Potete inoltre accedere all’applicazione da un
altro dispositivo smart ed eliminare l’account. Se siete l’unico amministratore,
tutti gli utenti ospiti verranno disconnessi dal baby monitor.
Ho perso il mio
smartphone. Come
posso evitare che degli
estranei guardino il mio
bambino?
Accedete all’applicazione da un altro dispositivo smart ed eliminate l’account.
Se siete l’unico amministratore, l’operazione comporterà la disconnessione
di tutti gli utenti ospiti dell’applicazione dal baby monitor. Inoltre, potete
reimpostare il baby monitor per disabilitare tutti i collegamenti al dispositivo
smarrito. Il pulsante reset si trova sul retro del baby monitor.
Riceverò una notifica
quando sono disponibili
aggiornamenti
dell’applicazione o
del software del baby
monitor?
Sì, riceverete una notifica sul telefono che vi chiederà di eseguire
l’aggiornamento tramite l’App Store. Ciò avverrà periodicamente. Le notifiche
di aggiornamento per il firmware del baby monitor verranno visualizzate
nell’applicazione insieme alle istruzioni su come effettuare l’aggiornamento.
Il mio telefono o tablet
si surriscaldano quando
utilizzo l’applicazione. È
normale?
Il vostro dispositivo richiede potenza per offrire video di alta qualità. Ciò non
nuoce al dispositivo. Vi consigliamo di aggiornare il dispositivo alla versione
più recente di iOS e dell’applicazione uGrow. Il dispositivo non si surriscalda
quando l’applicazione viene utilizzata in background.
NEDERLANDS 139
Inhoudsopgave
Introductie Productoverzicht Eerste installatie De babyfoon aan de muur monteren Snelstartgids
Uw baby zien, horen en in de gaten houden Bekijken van uw baby Luisteren naar uw baby Instellen dat u een melding krijgt dat uw baby huilt
Achtergrondbewaking Opties voor meldingen Gastkijkers en accounts Gasten en een tweede beheerder uitnodigen Toegang verlenen en ontzeggen Accountbeheer Algemeen gebruik van de app Optimalisatie van beeld en geluid Wi-Fi-verbinding met internet De babyfoon buitenshuis gebruiken De app gebruiken op meerdere apparaten De babyfoon resetten Firmware-upgrades Signalen Wi-Fi-statuslampje Beveiliging en privacy Netwerkbeveiliging Sterke wachtwoorden Veilig gebruik van de babyfoon-app Apparaatcompatibiliteit Accessoires bestellen Garantie en ondersteuning Veelgestelde vragen 139
140
140
142
144
147
147
148
149
149
150
151
151
153
153
155
155
155
156
156
157
157
158
159
159
160
160
160
160
161
161
Introductie
Gefeliciteerd met uw aankoop en welkom bij Philips Avent! Als u volledig
wilt profiteren van de ondersteuning die Philips Avent biedt, registreer uw
product dan op www.philips.com/welcome.
The slimme uGrow-babyfoon gebruikt de nieuwe SafeConnect-technologie
om te schakelen tussen netwerken. Hij past zich automatisch aan de
netwerkomstandigheden aan voor een hoogwaardige constante verbinding
met uw baby. Hij probeert continu een nieuwe verbinding tot stand te brengen
als de verbinding wegvalt. Gebruik van bandbreedte is geoptimaliseerd zodat
de batterij van uw mobiele apparaat niet onnodig wordt belast. Hij werkt zelfs
wanneer u uw telefoon gebruikt voor andere dingen.
De slimme uGrow-babyfoon vereist een internetverbinding en Wi-Fi. Een
goede internetverbinding en Wi-Fi zijn essentieel voor goed functioneren
van de slimme uGrow-babyfoon. Een internetverbinding en Wi-Fi van lagere
kwaliteit kunnen ten koste gaan van de kwaliteit van de verbinding tussen
de uGrow-app en de babyfoon. De babyfoon is compatibel met iOS 7 of
hoger, of Android 4.1 of hoger. Hij heeft alle ondersteunende functies die u
verwacht van een babyfoon, waaronder slaapliedjes, een nachtlampje met
meerdere kleuren en bewaking van de luchtvochtigheid en temperatuur.
140
NEDERLANDS
Productoverzicht (fig. 1)
1Wi-Fi-statuslampje
2Infraroodlampen
3Babyfoonlens
4Microfoon
5Weergave-indicator
6Nachtlampje
7Voet
8Nachtlampknop
9 Afspeel-/pauzeknop voor slaapliedjes
10Lichtsensor
11 Temperatuur- en vochtigheidssensoreenheid
12 Aansluiting voor apparaatstekkertje
13Resetknop
14Aan-uitknop
15Wandhouder
16Adapter
17Apparaatstekkertje
Eerste installatie
Controleer voordat u met de installatieprocedure begint:
-- U hebt toegang tot draadloos internet (2,4 GHz Wi-Fi).
-- U bevindt zich dicht genoeg bij de Wi-Fi-router voor een goed
Wi-Fi-signaal.
-- Als u een Wi-Fi-versterker hebt, zorg er dan voor dat uw router en
uw Wi-Fi-versterker dezelfde SSID (netwerknaam) hebben en dat u
hetzelfde wachtwoord gebruikt voor de router en de Wi-Fi-versterker.
-- U hebt het wachtwoord van uw Wi-Fi-netwerk bij de hand. Verbind de
babyfoon altijd met een beveiligd netwerk (zie het hoofdstuk ‘Veiligheid
en privacy’).
-- Zorg dat uw mobiele apparaat iOS 7 of hoger, of Android 4.1 of hoger
heeft (zie het hoofdstuk ‘Apparaatcompatibiliteit’ voor compatibiliteit
met apparaten).
1Download de Philips Avent slimme uGrow-babyfoon-app in de
App Store of Google Play. Gebruik de trefwoorden ‘uGrow smart
monitor’ of ‘Philips smart monitor’ om de app te vinden.
2Start de app.
NEDERLANDS 141
3Volg de instructies op het scherm voor het maken van een uGrowaccount.
1 Zorg ervoor dat u een werkend e-mailadres hebt waarop u altijd
bereikbaar bent.
2 Gebruik een sterk wachtwoord (zie ‘Veiligheid en privacy’ ).
3 Wanneer u de bevestigingsmail ontvangt, volgt u de instructies in deze
e-mail om door te gaan met het instellen van uw slimme uGrowbabyfoon.
4 Maak uw gebruikersprofiel.
Een gebruikersprofiel is nodig om uzelf bekend te maken aan uitgenodigde
gastgebruikers.
5 Maak het profiel van uw baby.
Een babynaam is vereist voor identificatie van uw babyfoon in de app,
vooral als er meerdere babyfoons op uw account zijn aangesloten.
4Volg de instructies op het scherm om de babyfoon aan te sluiten op
netspanning.
1 Steek het apparaatstekkertje in het stopcontact van het apparaat in de
temperatuur- en vochtigheidssensorunit, en sluit de adapter aan op een
stopcontact.
2 Het Wi-Fi-statuslampje gaat oranje knipperen wanneer de babyfoon
wordt ingeschakeld. Wacht tot het Wi-Fi-statuslampje stopt met
knipperen. Wanneer het Wi-Fi-statuslampje continu oranje brandt, is de
babyfoon gereed om de QR-code voor Wi-Fi te lezen.
5Koppel de babyfoon met uw mobiele apparaat.
1 Selecteer het Wi-Fi-netwerk dat u wilt gebruiken. Houd er rekening
mee dat de babyfoon alleen werkt in een 2,4 GHz Wi-Fi-netwerk.
2 Voer het Wi-Fi-wachtwoord in.
142
NEDERLANDS
3 Houd de QR-code voor Wi-Fi op het scherm van uw smartphone
of tablet, zoals wordt aangegeven door de app, op een afstand
van ongeveer 20 cm voor de lens van de babyfoon. Beweeg de
smartphone of tablet langzaam dichter bij of verder van de lens om
ervoor te zorgen dat de QR-code voor Wi-Fi correct wordt gelezen.
Wanneer de babyfoon de QR-code voor Wi-Fi heeft gelezen, speelt
hij een kort melodietje af en begint het Wi-Fi-statuslampje groen te
knipperen.
4 Volg de instructies op het scherm om de installatie te voltooien.
5 Het Wi-Fi-statuslampje gaat continu groen branden als de babyfoon is
gekoppeld met het Wi-Fi-netwerk.
Opmerking: Raadpleeg de ‘Veelgestelde vragen’ in deze gebruikershandleiding
voor een mogelijke oplossing, als u er niet in slaagt de installatieprocedure te
voltooien en de babyfoon niet wordt gekoppeld met uw slimme apparaat na
het uitvoeren van de bovenstaande stappen.
Tip: Zie het hoofdstuk ‘Signalen Wi-Fi-statuslampje’ voor meer informatie over
het Wi-Fi-statuslampje.
6 Vervolgens krijgt u een introductierondleiding door de app.
7 U kunt dan kiezen tussen twee opties: ‘Help me mijn babyfoon te
bevestigen’ en ‘Laat me mijn baby zien’.
8 Als u voor de eerste optie kiest, volgt u de instructies op het scherm
voor het monteren van de babyfoon aan de wand (zie het hoofdstuk
‘Montage van de babyfoon aan de wand’). Aan het einde van de
instructies op het scherm kunt u ‘Laat mij mijn baby zien’ kiezen.
De babyfoon aan de muur monteren
De babyfoon wordt geleverd met een beugel voor wandmontage.
Voordat u de babyfoon aan de wand monteert, moet u controleren of er
op het punt waar u de babyfoon wilt monteren, een goed Wi-Fi-signaal
beschikbaar is. Volg de onderstaande instructies om de beugel voor
wandmontage aan de wand te bevestigen en de babyfoon hieraan te
bevestigen.
1 Zet met een potlood een kruisje op de muur op de plaats waar u de
babyfoon wilt bevestigen.
2 Houd de beugel voor wandmontage tegen de wand. Zorg ervoor dat
een van de gaten zich recht boven het kruisje bevindt dat u bij stap 1
op de wand hebt gezet.
Opmerking: Zorg ervoor dat de ring van de beugel voor wandmontage
omlaag helt als u deze tegen de wand houdt. Als de ring van de beugel voor
wandmontage omhoog helt, draait u de beugel voor wandmontage om zodat
deze zich in de juiste stand bevindt.
NEDERLANDS 143
3 Markeer met een potlood waar de andere schroefgaten in de wand
moeten komen.
4 Boor twee gaten in de muur bij de markeringen.
5 Gebruik 2 schroeven om de beugel voor wandmontage aan de wand
te bevestigen. Zet de schroeven met een schroevendraaier vast.
6 Voer de vochtigheids- en temperatuursensorunit door het gat in de
beugel voor wandmontage. Lijn de sleuven in de voet van de babyfoon
met de uitsparingen op de ring uit. Pas de groef in de voet van de
babyfoon op de opstaande rand aan de binnenzijde van de ring.
7 Draai de voet van de babyfoon rechtsom om de babyfoon plaatsen.
144
NEDERLANDS
8 Steek het apparaatstekkertje in het stopcontact van het apparaat in de
temperatuur- en vochtigheidssensorunit, en sluit de adapter aan op een
stopcontact. De babyfoon is nu klaar voor gebruik.
Snelstartgids
Functies op het hoofdscherm
Boven aan het scherm:
1 Alle meldingen in-/uitschakelen
2 Indicatiebalk geluidsniveau
3 Geluid in-/uitschakelen
Onder aan het scherm:
4Snapshot
5Terugspreekfunctie
6Nachtlampje
7Slaapliedjes
Snelknoppen
,, Snapshot: tik op deze knop om een foto te maken van uw baby.
-- Wanneer u een foto maakt van uw baby, wordt die opgeslagen in het
fotoalbum op uw mobiele apparaat.
,, Terugspreken: tik op deze knop om rechtstreeks tegen uw baby te
praten. Beschikbare opties:
-- Terugspreken Aan of Uit
-- Volume Terugspreken instellen
,, Nachtlampje: tik op deze knop om het nachtlampje in of uit te
schakelen. Tik op het instellingenpictogram rechtsonder in de hoek
om de kleur van het nachtlampje aan te passen of de timer voor het
nachtlampje in te stellen. Beschikbare opties:
-- In-/uitschakelen van het nachtlampje
-- De timer voor het nachtlampje instellen of het nachtlampje
ononderbroken inschakelen
NEDERLANDS 145
-- De kleur van het nachtlampje instellen
,, Slaapliedjes: tik op deze knop om het afspelen van slaapliedjes in of
uit te schakelen. Tik op het instellingenpictogram rechtsonder in de
hoek om slaapliedjes te selecteren, een timer in te stellen en het
volume aan te passen. Beschikbare opties:
-- Een slaapliedje kiezen in een lijst met slaapliedjes
-- Een afspeellijst maken met de beschikbare slaapliedjes
-- De timer voor slaapliedjes instellen of kiezen voor ononderbroken
afspelen
-- Het volume voor afspelen instellen.
Pictogrammen voor achtergrondbewaking
-- Belpictogram: tik op deze knop om meldingen in of uit te schakelen.
146
NEDERLANDS
-- Pictogram Mobiele telefoon: tik op deze knop om geluid in of uit te
schakelen.
Opmerking: Zie het hoofdstuk ‘Uw baby zien, horen en in de gaten houden’
voor meer informatie over achtergrondbewaking.
Indicatiebalk geluidsniveau
-- De lampjes geven een indicatie van het geluidsniveau in de babykamer.
Opmerking: Zie het hoofdstuk ‘Kijken, luisteren en uw baby bewaken’ voor
meer informatie.
Linkerpaneel
-- Lijst met aan de app gekoppelde babyfoons: tik op het
instellingenpictogram om voorkeuren op te geven voor de babyfoon
en gastgebruikers uit te nodigen om naar uw baby te kijken
-- Mijn account: tik op deze optie om uw accountgegevens, uw profiel en
uw babyprofiel weer te geven en aan te passen, en een babyfoon toe
te voegen of te verwijderen
-- Over: tik op deze optie voor meer informatie over de app, versies, enz.
-- Ondersteuning: tik op deze optie om het menu Ondersteuning te
openen
Opmerking: Zie het hoofdstuk ‘Algemeen gebruik van de app’ voor meer
informatie over het linkerpaneel.
Rechterpaneel
Het rechterpaneel geeft informatie over de gebruikers die zijn aangesloten.
Opmerking: De opties in het rechterpaneel zijn alleen beschikbaar als u
beheerder bent (zie het hoofdstuk ‘Algemeen gebruik van de app’ voor meer
informatie over het rechterpaneel).
-- In het paneel wordt weergegeven wie er op dat moment kijkt
-- Er wordt weergegeven wie toegang heeft en wie niet
Met de knop voor de privacymodus maakt u het alle gebruikers onmogelijk
naar uw baby te kijken
NEDERLANDS 147
Dashboard
Het dashboard van de app staat in het onderste paneel.
1Plaats uw vinger op de horizontale lijn op het scherm net boven
de pictogrammen langs de onderrand van het scherm. Sleep de lijn
naar de bovenkant van het scherm. De pictogrammen onder aan het
scherm schuiven ook omhoog.
2Wanneer u de lijn omhoog hebt gesleept, wordt het dashboard in
het onderste paneel volledig weergegeven.
Op het dashboard staat een aantal opties voor meldingen:
1Geluid
2Temperatuur
3Vochtigheid
Opmerking: Zie ‘Opties voor meldingen’ in het hoofdstuk ‘Uw baby zien, horen
en in de gaten houden’ in deze gebruikershandleiding voor meer informatie
over de opties voor meldingen op het dashboard.
Uw baby zien, horen en in de gaten houden
U kunt naar uw baby kijken en luisteren en de baby bewaken op uw
smartphone of tablet. U kunt ook tegen uw kind spreken om het te
troosten.
Bekijken van uw baby
Zoomen en pannen
Opmerking: Deze functie is alleen beschikbaar in de modus voor staande
weergave.
1Tik in de modus voor volledig scherm twee keer op het scherm of
schuif twee vingertoppen op het scherm uit elkaar om in te zoomen.
2Tik twee keer op het scherm of schuif twee vingertoppen op het
scherm naar elkaar toe om uit te zoomen.
148
NEDERLANDS
3Sleep de weergave over het scherm om te pannen door het
ingezoomde beeld.
Staande of liggende weergave
-- Draai uw smartphone of tablet om uw baby in liggende modus te
bekijken.
Nachtzichtmodus
Bij weinig licht in de babykamer schakelt de babyfoon over naar de
nachtzichtmodus.
-- In deze modus worden zwart-witbeelden van uw baby weergegeven
op uw mobiele apparaat.
Luisteren naar uw baby
U hoort de baby als hij of zij begint te huilen.
-- Hoe luid u de baby hoort, is afhankelijk van het ingestelde volume van
uw mobiele apparaat.
-- Het niveau van het geluid dat de baby maakt, is ook zichtbaar op de
indicatiebalk voor het geluidsniveau. Het aantal lampjes dat brandt,
geeft de sterkte van het geluid aan in de babykamer. De indicatiebalk
werkt van links naar rechts. Hoe verder naar rechts de lampjes
branden, hoe harder het geluid is.
Opmerking: De aan-uitknop voor geluid moet zijn ingesteld op ‘aan’ om de
baby te kunnen horen.
Tip: Sluit uw mobiele apparaat aan op netspanning wanneer u het wilt
gebruiken voor bewaking ‘s nachts, om te voorkomen dat de batterij leeg raakt.
NEDERLANDS 149
Instellen dat u een melding krijgt dat uw baby huilt
1Push-melding: u ontvangt een push-melding wanneer de baby begint
te huilen.
Opmerking: Zet de tuimelschakelaar voor alle meldingen in de stand ‘aan’ als
u een melding wilt ontvangen terwijl u andere activiteiten op uw smart device
uitvoert (bijv. sms’en, bellen of surfen op internet).
Tip: Schakel bij de ‘Instellingen’ van uw smartphone de stand Trillen in als u
wilt dat uw smartphone trilt om u te waarschuwen wanneer uw baby huilt,
bijvoorbeeld wanneer u de smartphone in uw zak hebt of omdat u zich in een
omgeving bevindt met veel lawaai.
Instellen wanneer u een melding krijgt
U kunt ook op het dashboard aangeven wanneer u een melding wilt
ontvangen.
1Een melding ontvangen wanneer het geluid van uw baby een
ingesteld niveau overschrijdt.
2Een melding ontvangen wanneer uw baby een ingestelde tijd heeft
gehuild.
Opmerking: Als u kiest voor ‘Geen melding’, ontvangt u geen enkele melding dat
uw baby huilt (zie ‘Opties voor meldingen’ in dit hoofdstuk.
Meldingen in- en uitschakelen op uw mobiele apparaat
Meldingen zijn een instelling op uw mobiele apparaat (buiten de app om).
U kunt kiezen of en hoe u meldingen van de app wilt ontvangen.
1Ga naar het meldingenvenster op uw apparaat.
2Selecteer meldingen en tik om deze in of uit te schakelen.
Achtergrondbewaking
Achtergrondbewaking is een functie van de app die ervoor zorgt dat
u uw baby kunt horen en/of meldingen over uw baby kunt ontvangen
terwijl u andere dingen doet op uw smart device. Achtergrondbewaking is
standaard ingeschakeld, maar u kunt de functie uitschakelen.
150
NEDERLANDS
Achtergrondbewaking in- en uitschakelen
-- Tik op het belpictogram om alle meldingen in of uit te schakelen. Als
de tuimelschakelaar voor alle meldingen is ingesteld op ‘aan’, ontvangt u
op het scherm een melding wanneer de baby begint te huilen. U kunt
uw voorkeuren voor meldingen opgeven op het dashboard en/of het
instellingenscherm van de babyfoon.
Opmerking: Zet de tuimelschakelaar voor alle meldingen in de stand ‘aan’
om alle meldingen over de baby te ontvangen als de app op de achtergrond
werkt, bijvoorbeeld wanneer u zich met andere dingen bezighoudt op uw
mobiele apparaat of als het apparaat stand-by is met uitgeschakeld scherm.
U dient de tuimelschakelaar voor alle meldingen in de stand ‘aan’ te zetten,
als u persoonlijke meldingen voor temperatuur, geluid en vochtigheid op het
dashboard wilt aanpassen.
-- Tik op het pictogram voor mobiele telefoon om geluid in of uit te
schakelen.
Opmerking: Als u het geluid dempt, kunt u uw baby niet horen wanneer u
overschakelt naar een andere functie op uw smart device (bellen, sms’en, enz.).
Opmerking:Wanneer u een mobiel gesprek voert of gebruikmaakt van een
VOIP-app (bijv. Skype,Viber of FaceTime) om met iemand te bellen, hoort u uw
baby niet. Zodra de baby begint te huilen, ontvangt u echter een melding.
Overschakelen van achtergrondbewaking naar het
hoofdscherm van de app
De app blijft actief op de achtergrond, ook wanneer het apparaat standby is. Als achtergrondbewaking actief is, is er een rode balk boven in het
scherm van uw mobiele apparaat.
1Tik op de rode balk boven in het scherm om de app op
de voorgrond te plaatsen als u wilt overschakelen van
achtergrondbewaking naar het hoofdscherm van de app.
Opties voor meldingen
De opties voor meldingen staan op het dashboard van de app. Het
dashboard bevindt zich in het onderste paneel van het scherm. Sleep het
dashboard omhoog om het menu met opties weer te geven. Het menu
bevat de volgende opties.
Geluid
-- Met de schuifbalk een geluidsniveau instellen waarboven u een melding
wilt ontvangen
Opmerking: Als de schuifregelaar wordt ingesteld op ‘stil’, hoort u uw baby
continu als u de app verlaat.
-- De tijdsduur voor het geluid instellen waarna u een melding wilt
ontvangen
NEDERLANDS 151
Temperatuur
-- Het temperatuurbereik instellen waarboven of waaronder u een
temperatuurmelding wilt ontvangen
-- Temperatuurmeldingen in- en uitschakelen
-- De huidige temperatuur of de temperatuurgeschiedenis weergeven
Vochtigheid
-- Het vochtigheidsbereik instellen waarboven of waaronder u een
vochtigheidsmelding wilt ontvangen
-- Vochtigheidsmeldingen in- en uitschakelen
-- De huidige vochtigheid of de vochtigheidsgeschiedenis weergeven
Gastkijkers en accounts
Gasten en een tweede beheerder uitnodigen
U kunt maximaal negen familieleden of vrienden uitnodigen als gast en
hen toestaan naar uw baby te kijken op hun smartphone of tablet.
U kunt een van deze gasten uitnodigen als tweede beheerder. Een tweede
beheerder heeft dezelfde rechten als de eerste beheerder. Gasten hebben
alleen rechten om te kijken en deze rechten worden verleend door de
beheerder(s). Net als een gast heeft een beheerder het recht om te kijken.
Bovendien heeft de beheerder het recht om gasten uit te nodigen, om ze
toegang te geven, toegang te ontzeggen en hun verbinding te verbreken.
De beheerder kan zijn of haar account ook uitschakelen en zo de gasten
loskoppelen van de babyfoon.
1Tik in het linkerpaneel op het instellingenpictogram naast de
babyfoon.
2Blader omlaag en tik op ‘Nieuwe gebruiker toevoegen’.
152
NEDERLANDS
3Voeg het e-mailadres van een gast en zijn of haar rol toe
(beheerder of gast).
4De app verzendt een e-mail naar de uitgenodigde persoon en er
wordt een melding weergegeven dat er een e-mail is verzonden.
5De gast ontvangt een e-mail met een uitnodigingscode die slechts
een beperkte periode geldig is. In de e-mail staat ook een koppeling
naar de App Store. De gast kan op deze koppeling klikken om de app
te installeren.
6Na de installatie van de app maakt de gast een account door de
instructies in de app te volgen.
7De gast selecteert tijdens de installatie de optie ‘Verbinding maken
met een gedeelde babyfoon’. Daarmee wordt de pagina voor validatie
van de uitnodiging geopend.
8De gast voert de uitnodigingscode en zijn e-mailadres in en bevestigt
die. De code en het e-mailadres worden gecontroleerd.
9De beheerder ontvangt een e-mail die bevestigt dat de gast is
aangesloten op de babyfoon en dat de beheerder de gast nu toegang
kan verlenen.
10Wanneer de beheerder de gast toegang heeft verleend, kan de gast
naar de baby kijken.
-- Wanneer een of meerdere mensen naar de baby kijken, brandt het
rode indicatielampje voor kijken.
Opmerking: Hoewel maximaal tien personen (acht of negen gasten en één of
twee beheerders) rechten hebben voor dezelfde babyfoon, kunnen slechts drie
mensen tegelijkertijd kijken naar de baby. Als een gast probeert om toegang te
krijgen tot de babyfoon terwijl er al drie kijkers zijn, ontvangt deze het bericht
‘Te veel verbindingen’. Beheerders krijgen altijd voorrang boven gasten als ze
naar de baby willen kijken.
NEDERLANDS 153
Toegang verlenen en ontzeggen
Gebruikers met beheerdersrechten kunnen bepalen wie er kan kijken naar
de baby.
1Als u een gast wilt verwijderen, gaat u naar het rechterpaneel,
tikt u op de gast die u de toegang wilt ontzeggen en tikt u op het
oogpictogram naast de naam van de gast.
Tip: Als er al drie mensen kijken naar uw baby en u wilt iemand, bijv. de
babysitter, toegang geven tot de babyfoon, kunt u één van de huidige kijkers de
toegang ontzeggen en die verlenen aan iemand anders.
2Als u een gast toegang wilt verlenen, gaat u naar het rechterpaneel,
tikt u op de gast die u toegang wilt verlenen en tikt u op het
oogpictogram naast de naam van de gast.
3Als u alle kijkers in één keer de toegang wilt ontzeggen, tikt u op de
knop Privacymodus. Daarmee ontzegt u iedereen, behalve uzelf,
de toegang tot de babyfoon totdat u opnieuw op de knop
Privacymodus tikt.
Tip: U kunt de knop Privacymodus gebruiken om een moment alleen te zijn
met uw baby, bijvoorbeeld voor borstvoeding, om de baby in bad te doen of
te verschonen. Gasten die proberen om toegang te krijgen tot de babyfoon,
ontvangen op het scherm een melding.
Accountbeheer
Gasten loskoppelen
U kunt de verbinding van gasten met de app permanent verbreken door
ze te verwijderen uit de lijst met gasten. Een gast kan die handeling ook zelf
verrichten.
Uw gebruikersaccount deactiveren
Als er slechts één beheerder is, en deze zijn of haar account deactiveert,
worden alle accounts van gastgebruikers losgekoppeld van de babyfoon, al
blijven de accounts wel bestaan. Als er twee beheerders zijn, moeten beide
beheerders hun account deactiveren om alle accounts los te koppelen.
Als slechts één van de twee beheerders zijn of haar account deactiveert,
blijven de gasten aangesloten op de babyfoon.
Als u de babyfoon wilt overdragen aan iemand anders, als u de babyfoon
verliest of als de babyfoon wordt gestolen, raden wij u aan om de
beheerdersaccount(s) te deactiveren. Dit is van cruciaal belang om uw
privacy en die van de baby te beschermen.
154
NEDERLANDS
1Ga naar het linkerpaneel en tik op ‘Mijn account’ om uw account te
deactiveren.
2Tik op ‘Account deactiveren’.
3Er wordt een pop-upvenster weergegeven waarin u wordt gevraagd
om te bevestigen dat u uw account wilt deactiveren.
4Als u op ‘Deactiveren’ tikt, wordt met een pop-upvenster bevestigd
dat uw account is gedeactiveerd.
Babyfoons toevoegen of verwijderen
U kunt maximaal tien babyfoons toevoegen aan de app. Daarmee kunt
u meer kinderen bewaken of hetzelfde kind in meerdere kamers. U kunt
bijvoorbeeld een babyfoon installeren boven de wieg in de babykamer en
boven de box in de woonkamer. U dient de babyfoons één voor één aan
te sluiten op de app.
1Ga naar ‘Mijn account’ in het linkerpaneel.
2De lijst met aangesloten babyfoons wordt weergegeven. Tik op
‘Babyfoon toevoegen’.
3Volg de instructies in het hoofdstuk ‘Voor de eerste keer instellen’
in deze gebruiksaanwijzing om de babyfoon aan te sluiten op de app.
NEDERLANDS 155
Algemeen gebruik van de app
Optimalisatie van beeld en geluid
De kwaliteit van beeld en geluid op uw mobiele apparaat kan na verloop
van tijd veranderen, afhankelijk van de beschikbare bandbreedte van
uw internetverbinding. Een Wi-Fi-verbinding geeft doorgaans het beste
resultaat, terwijl 4G en 3G mogelijk minder bandbreedte bieden en
zorgen voor een lagere kwaliteit. De app kiest automatisch de best
mogelijke kwaliteit door de beeld- en geluidskwaliteit aan te passen aan de
beschikbare bandbreedte.
De aanpassing vindt plaats in stappen:
1 Grote bandbreedte: goede beeld- en geluidskwaliteit, met
tekstmeldingen.
2 Beperkte bandbreedte (bijvoorbeeld bij het gebruik van 3G):
verminderde beeldkwaliteit; goede geluidskwaliteit, met tekstmeldingen.
3 Kleine bandbreedte (bijvoorbeeld bij het gebruik van 2G): alleen een
geluidsverbinding, met tekstmeldingen
4 Zeer kleine bandbreedte: alleen tekstmeldingen
Wi-Fi-verbinding met internet
U bereikt het beste resultaat als u uw mobiele apparaat via Wi-Fi aansluit op
internet. Het apparaat zal dan automatisch het Wi-Fi-netwerk gebruiken voor
een verbinding met uw babyfoon. Als er geen Wi-Fi-verbinding met internet
is, schakelt uw mobiele apparaat over naar de 3G- of 4G-verbinding voor
mobiel dataverkeer.Voor gebruik van deze gegevensverbinding kunnen extra
kosten door uw provider in rekening worden gebracht, afhankelijk van uw
abonnement. Een beeldverbinding vereist doorgaans 0,1 tot 0,25 MB gegevens
per seconde. Een geluidsverbinding vereist 0,01 MB gegevens per seconde.
156
NEDERLANDS
Als u wilt voorkomen dat uw mobiele apparaat verbinding maakt met
het 3G- of 4G-netwerk, moet u de functie voor mobiel gegevensverkeer
op uw apparaat uitschakelen. Dit heeft gevolgen voor alle andere
toepassingen die mogelijk het 3G- of 4G-netwerk gebruiken voor mobiel
gegevensverkeer. Houd er rekening mee dat u niet wordt gewaarschuwd
dat uw baby huilt, als Wi-Fi-verbinding met internet wordt verbroken.
De babyfoon buitenshuis gebruiken
U kunt de babyfoon overal gebruiken waar een 2,4 GHz Wi-Fi-netwerk
beschikbaar is, bij vrienden of familieleden thuis, in een hotel of een
vakantiewoning. Met de Wi-Fi-netwerknaam en het Wi-Fi-wachtwoord kunt
u de babyfoon elders instellen en gebruiken. Volg daartoe de onderstaande
instructies voor installatie. Zodra u een verbinding hebt ingesteld met een
Wi-Fi-netwerk, worden die instellingen opgeslagen in het geheugen van
uw apparaat en hoeft u de installatieprocedure niet opnieuw uit te voeren
zolang u de app en de babyfoon op dezelfde plaats gebruikt.
Opmerking: Als de Wi-Fi-verbinding een extra bevestiging vereist, bijvoorbeeld
om akkoord te gaan met de gebruiksvoorwaarden, kunt u de babyfoon niet
aansluiten op het Wi-Fi-netwerk. Dit kan gebeuren bij Wi-Fi-netwerken van
hotels en andere openbare Wi-Fi-netwerken.
1Er zijn twee manieren om de babyfoon aan het Wi-Fi-netwerk te
verbinden.
-- De eerste optie: wanneer u de babyfoon inschakelt, wordt het bericht
‘Babyfoon niet gevonden’ weergegeven. Wacht tot door de app de
optie ‘Babyfoon opnieuw verbinden’ wordt weergegeven.
-- De tweede optie: schakel de babyfoon in. Ga naar het linkerpaneel,
selecteer de babyfoon en kies ‘Babyfoon opnieuw verbinden’.
2Houd het scherm van uw smartphone of tablet op een afstand van
ongeveer 20 cm voor de lens van de babyfoon als de app een QRcode voor Wi-Fi heeft gegenereerd. Beweeg de smartphone of tablet
langzaam dichter bij of verder van de lens om ervoor te zorgen dat
de QR-code voor Wi-Fi correct wordt gelezen.
3Volg de rest van de instructies op het scherm om de installatie te
voltooien. De installatieprocedure wordt voltooid en de babyfoon
wordt verbonden met het Wi-Fi-netwerk en is gereed voor gebruik,
wanneer het Wi-Fi-statuslampje op de voorkant van de babyfoon
continu groen brandt.
Opmerking: Bij thuiskomst dient u de bovenstaande procedure opnieuw uit te
voeren om de babyfoon opnieuw te verbinden met uw Wi-Fi-netwerk thuis.
De app gebruiken op meerdere apparaten
U kunt de slimme uGrow-babyfoon-app op meerdere apparaten
(bijv. op uw iPhone en uw iPad) installeren.
Opmerking:Wanneer u zich met hetzelfde account aanmeldt op een apparaat
terwijl de app actief is op een ander apparaat, wordt u op het apparaat
waarop de app eerst actief was, automatisch afgemeld. U kunt de app niet
met hetzelfde account op twee verschillende apparaten bedienen.
NEDERLANDS 157
De babyfoon resetten
De babyfoon heeft een resetknop op de achterzijde. Als u op deze knop
drukt, worden de fabrieksinstellingen van de babyfoon hersteld.
Dit betekent dat u alle accounts loskoppelt van de babyfoon.
Opmerking: Reset de babyfoon altijd door op de resetknop te drukken voordat
u de babyfoon aan iemand anders overdraagt. Dit is nodig om uw privacy te
beschermen. Reset de babyfoon ook wanneer u die tweedehands koopt of van
iemand anders hebt gekregen.
Resetten naar fabrieksinstellingen
Opmerking: Zorg ervoor dat de babyfoon is ingeschakeld voordat u de reset
uitvoert.
1 Terwijl de babyfoon is ingeschakeld, drukt u met een paperclip of
een ander puntig voorwerp op de resetknop aan de achterzijde van
de babyfoon. We raden u aan dit te doen wanneer de babyfoon is
verbonden met uw Wi-Fi-netwerk.
2Houd de resetknop ingedrukt tot de babyfoon een geluidssignaal
geeft, laat dan de knop los. Wanneer u de knop loslaat, speelt de
babyfoon een kort muziekje af om de reset te bevestigen.
Wat te doen na een reset naar fabrieksinstellingen
Nadat de babyfoon is gereset, knippert het Wi-Fi-statuslampje oranje
wanneer u de babyfoon inschakelt, om aan te geven dat hij opnieuw
opstart na een reset. Wanneer het Wi-Fi-statuslampje stopt met knipperen,
kunt u de babyfoon opnieuw op uw Wi-Fi-netwerk aansluiten. Volg
de instructies in het hoofdstuk ‘Voor de eerste keer instellen’ in deze
gebruiksaanwijzing. Als u andere mensen toegang had verleend tot de
babyfoon, moet u die opnieuw uitnodigen.
Firmware-upgrades
Een upgrade is van essentieel belang om uw privacy en een goede
werking van de babyfoon en de app te waarborgen.
-- Essentiële upgrades zijn verplicht. Verplichte upgrades van de app
worden automatisch op uw mobiele apparaat geïnstalleerd en vereisen
geen bevestiging. U ontvangt alleen een melding dat een verplichte
upgrade plaatsvindt.
-- Van tijd tot tijd ontvangt u meldingen dat er upgrades beschikbaar zijn
voor de firmware van uw babyfoon of de software van de app.
De upgrades worden geïnstalleerd wanneer u ze bevestigt.
-- Open het linkerpaneel en tik op het instellingenpictogram naast de
babyfoon om te zoeken naar firmware-upgrades voor uw babyfoon.
Blader omlaag naar ‘Firmware’ en tik op het woord om te controleren
op firmware-upgrades. Als er een upgrade beschikbaar is, tik er dan op
om die te installeren.
158
NEDERLANDS
Opmerking:Wanneer een upgrade wordt geïnstalleerd, kunt u tijdelijk niet naar
uw baby kijken en luisteren.
Signalen Wi-Fi-statuslampje
,, Uit
1 Uit: de babyfoon is uitgeschakeld
,, Oranje
1 Knippert snel oranje: de babyfoon is bezig met opstarten.
2 Knippert langzaam oranje: de babyfoon is firmware aan het upgraden.
Schakel de babyfoon niet uit tijdens de firmware-upgrade.
Opmerking: Het Wi-Fi-statuslampje gaat mogelijk kort uit tijdens de firmwareupgrade.
3 Brandt onafgebroken oranje: de camera van de babyfoon is klaar om
de QR-code voor Wi-Fi te lezen die door uw smartphone of tablet
wordt gegenereerd.
,, Groen
NEDERLANDS 159
1 Knippert langzaam groen: de QR-code voor Wi-Fi is gelezen.
2 Brandt onafgebroken groen: de babyfoon is verbonden met het Wi-Finetwerk.
,, Rood
1 Knippert langzaam rood: u hebt het verkeerde Wi-Fi-wachtwoord
ingevoerd.
2 Brandt onafgebroken rood: de babyfoon kan geen verbinding maken
met het Wi-Fi-netwerk.
Beveiliging en privacy
Netwerkbeveiliging
Wi-Fi-hotspots in openbare ruimten, zoals luchthavens en hotels, zijn
handig, maar ze zijn vaak niet veilig.
We raden u aan om de babyfoon alleen te gebruiken in een Wi-Fi-netwerk
dat is beveiligd met WPA2-encryptie. Wij raden u aan de babyfoon niet te
gebruiken in een netwerk dat gebruikmaakt van WEP-codering.
Opmerking:Wi-Fi-netwerken die geen wachtwoord vereisen, zijn niet veilig.
160
NEDERLANDS
Sterke wachtwoorden
Wachtwoorden zijn essentieel voor de bescherming van uw Wi-Finetwerk en uw account tegen ongeoorloofde toegang. Hoe sterker
uw wachtwoord, des te beter beschermd zijn uw Wi-Fi-netwerk en uw
account.
De regels voor een sterk wachtwoord zijn:
1 Een sterk wachtwoord is minimaal 8 tekens lang.
2 Een sterk wachtwoord bevat niet uw naam, de naam van uw baby, een
andere naam of een merknaam.
3 Een sterk wachtwoord bevat geen compleet woord.
4 Een sterk wachtwoord wijkt sterk af van de wachtwoorden die u
eerder hebt gebruikt.
5 Een sterk wachtwoord bevat tekens uit ten minste twee van de
volgende categorieën:
-- Letters: A, B, C of a, b, c
-- Cijfers: 0, 1, 2, 3, 4, 5, 6, 7, 8, 9
-- Symbolen: _ . @ $
Veilig gebruik van de babyfoon-app
Gebruik de app alleen in een beveiligd netwerk
Gebruik de app niet in een onbeveiligd Wi-Fi-netwerk. We raden u aan
om de babyfoon alleen te gebruiken in een Wi-Fi-netwerk dat is beveiligd
met WPA2-encryptie. U kunt ook gebruikmaken van het netwerk voor
gegevensverkeer van uw telefoon (vaak aangeduid als 3G of 4G).
Gebruik altijd de nieuwste software en firmware
Voer altijd de upgrades uit voor de software van de app en de firmware
van de babyfoon wanneer u een melding ontvangt dat een upgrade
beschikbaar is. Upgrades worden beschikbaar gesteld bij verbeteringen
in de software of om veiligheidsproblemen te voorkomen. Als u geen
upgrades uitvoert, is uw verbinding met de babyfoon via de app mogelijk
niet meer veilig en privé.
Apparaatcompatibiliteit
,,
-,,
-,,
-,,
--
Compatibiliteit iPhone
iPhone 4S en nieuwer
iPad-compatibiliteit
iPad 2 en nieuwer
Compatibiliteit met iPod touch
iPod touch 5e generatie en nieuwer
Compatibiliteit met Android
Android 4.1 of hoger
Opmerking:Voor de meest actuele informatie over apparaatcompatibiliteit gaat
u naar www.philips.com/ugrow.
Accessoires bestellen
Ga naar www.shop.philips.com/service om accessoires en
reserveonderdelen te kopen of ga naar uw Philips-dealer. U kunt ook
contact opnemen met het Philips Consumer Care Centre in uw land
(zie het ‘worldwide guarantee’-vouwblad voor contactgegevens).
NEDERLANDS 161
Garantie en ondersteuning
Als u informatie of ondersteuning nodig hebt, bezoek dan de Philipswebsite (www.philips.com/support) of lees het ‘worldwide guarantee’vouwblad.
Veelgestelde vragen
Zie de ondersteuningspagina voor dit product op www.philips.com/
support voor meer veelgestelde vragen over deze babyfoon.
Vraag
Antwoord
Problemen oplossen
Waarom kan ik de app
niet vinden in de App
Store of Google Play?
U kunt de app downloaden van de Apple App Store en Google Play door
te zoeken naar uGrow Smart Baby Monitor. Als u de app niet ziet in de
App Store of Google Play, kan het zijn dat uw telefoon niet beschikt over de
vereiste iOS- of Android-versie. Deze app is alleen compatibel met iOS 7 of
hoger, of Android 4.1 of hoger.
Ik kan de app niet
downloaden en
installeren. Wat kan ik
doen?
Controleer of een van de volgende factoren een goede download verhindert.
Is uw Wi-Fi-signaal stabiel en sterk genoeg? Heeft uw smart device iOS 7
of hoger, of Android 4.1 of hoger? Hebt u genoeg ruimte beschikbaar op
uw smart device om de app op te slaan? Hebt u het juiste wachtwoord
ingevoerd voor de App Store of Google Play?
Ik kan de babyfoon niet
instellen. Ik blijf iedere
keer steken bij een
verbindingsfout. Wat is
er aan de hand?
Als het Wi-Fi-statuslampje oranje brandt, maar rood knipperde toen u
probeerde een verbinding tot stand te brengen, is een verkeerd Wi-Fiwachtwoord ingevoerd. Start het installatieproces opnieuw. Voer het Wi-Fiwachtwoord in en zorg ervoor dat het wachtwoord juist is .
Als het Wi-Fi-statuslampje oranje brandt, maar rood was tijdens het
aansluiten, kan de babyfoon geen verbinding maken met het Wi-Fi-netwerk.
Controleer eerst of uw telefoon of tablet gebruikmaakt van hetzelfde Wi-Finetwerk waarop u de babyfoon wilt aansluiten. Controleer vervolgens of u
toegang hebt tot internet op 2,4 GHz Wi-Fi. Als het probleem dan nog steeds
bestaat, controleert u of de SSID van de router (de netwerknaam) geen
speciale symbolen bevat. Wijzig de SSID van uw router als dit het geval is.
Ik kan mijn babyfoon de
QR-code op mijn smart
device niet laten lezen.
Wat kan ik doen?
Zorg ervoor dat u de QR-code voor Wi-Fi op ca. 20 cm afstand van de lens
houdt. Beweeg uw mobiele apparaat iets omhoog of omlaag of naar links of
rechts om er zeker van te zijn dat de QR-code voor Wi-Fi zich recht voor
de babyfoon bevindt. U kunt ook proberen om uw mobiele apparaat dichter
bij of verder weg van de babyfoonlens te houden voor beter scherpstellen.
Zorg ervoor dat er voldoende, maar niet te fel licht is in de kamer. Wanneer
de babyfoon de QR-code voor Wi-Fi heeft gelezen, geeft deze ter bevestiging
een geluidssignaal.
Misschien hebt u de beschermfolie niet van de babyfoonlens verwijderd.
Verwijder de folie.
Misschien bedekt u de QR-code voor Wi-Fi met een gedeelte van uw hand.
Houd uw smart device zo vast dat uw hand de QR-code voor Wi-Fi niet
bedekt.
162
NEDERLANDS
Vraag
Antwoord
Als het Wi-Fi-statuslampje oranje brandt, heeft de babyfoon de QR-code niet
kunnen lezen. Ga terug met de pijl in de linkerbovenhoek van het scherm en
volg de instructies voor de QR-code.
Als het Wi-Fi-statuslampje oranje knippert, is de camera nog steeds bezig met
opstarten. Wacht tot het lampje continu oranje brandt. Keer dan terug met
de pijl in de linkerbovenhoek van het scherm en volg de instructies voor de
QR-code.
Ik kan mijn baby niet
zien. Wat is er aan de
hand?
Controleer of het Wi-Fi-signaal sterk genoeg is in de kamer waar de
babyfoon is geplaatst.
Controleer of de stekker van de babyfoon in een werkend stopcontact is
gestoken, en of de babyfoon is ingeschakeld.
Het Wi-Fi-statuslampje aan de voorkant van de babyfoon moet continu groen
branden (zie het hoofdstuk ‘Signalen Wi-Fi-statuslampje’ ).
Als u meer dan één babyfoon gebruikt, dient u te controleren of de juiste
babyfoon is geselecteerd. Ga naar het linkerpaneel en tik op de babyfoon om
te zien of deze actief is.
Misschien kijken er al drie mensen naar de baby. Slechts drie mensen kunnen
tegelijkertijd met de app naar de baby kijken. Als u beheerdersrechten hebt,
kunt u een van de gasten de toegang ontzeggen om zelf te kunnen kijken.
Waarom meldt de app
niet dat de baby huilt?
Controleer of de babyfoon is verbonden met het Wi-Fi-netwerk. Het Wi-Fistatuslampje op de voorkant van de babyfoon moet continu groen branden.
De babyfoon is mogelijk offline. Als u een melding wilt ontvangen dat
de babyfoon offline gaat, gaat u naar het linkerpaneel en schakelt u bij
‘Instellingen’ de optie voor het doen van die melding in.
De geluidsdrempel voor het doen van meldingen is mogelijk te hoog
ingesteld. In dat geval zal de app u alleen waarschuwen als de baby veel geluid
produceert. Open het dashboard om de drempel te verlagen zodat u sneller
wordt gewaarschuwd als de baby begint te huilen.
Mogelijk hebt u een te lange wachttijd ingesteld voor de duur van het huilen.
Kies een kortere tijd zodat de app u eerder zal waarschuwen.
Het geluid van uw telefoon is mogelijk uitgeschakeld. Stel het volume van uw
telefoon in op normaal.
Misschien is de functie Terugspreken actief. Tik op het pictogram Terugspreken
om de functie uit te schakelen. Als de functie actief is, hoort u geen geluiden
van de baby.
Controleer of u misschien een e-mail hebt ontvangen dat uw account is
verwijderd. Als u rechten hebt om als gast te kijken, kan de beheerder u
ook tijdelijk de toegang ontzeggen. Neem contact op met de beheerder en
vraag hem of haar om uw account weer in te schakelen of u opnieuw uit te
nodigen als gast.
NEDERLANDS 163
Vraag
Antwoord
De verbinding wordt
vaak verbroken. Wat is
er aan de hand?
Controleer of het Wi-Fi-signaal in de kamer waar de babyfoon is geplaatst,
sterk genoeg is en stabiel. Als dit niet het geval is, hebt u een Wi-Fi-versterker
nodig voor een sterk en stabiel signaal. Als u een Wi-Fi-versterker gebruikt,
dient u ervoor te zorgen dat uw router en uw Wi-Fi-versterker dezelfde
SSID hebben en dat u hetzelfde wachtwoord gebruikt voor de router en de
versterker.
Als het Wi-Fi-statuslampje op de voorkant van de babyfoon groen blijft
branden, terwijl toch de verbinding wordt verbroken, is er mogelijk een
probleem met de internetverbinding van uw mobiele apparaat. Controleer
het Wi-Fi-signaal op uw mobiele apparaat of de snelheid van 3G of 4G door
te proberen een film te kijken, bijvoorbeeld een clip op YouTube.
Na installatie van een
andere router, zie ik
mijn baby niet meer.
Wat is er aan de hand?
Controleer eerst of uw mobiele apparaat een goed Wi-Fi-signaal ontvangt
van de nieuwe router. U kunt de babyfoon op twee manieren aansluiten
op het Wi-Fi-netwerk. Bij de eerste manier schakelt u de babyfoon in. De
app geeft het bericht ‘Babyfoon niet gevonden’ weer. Ga naar ‘Problemen
oplossen’ en kies ‘Babyfoon opnieuw verbinden’. Bij de tweede manier opent
u het linkerpaneel als de app het bericht ‘Babyfoon niet gevonden’ weergeeft.
U selecteert de babyfoon in het linkerpaneel en vervolgens ‘Babyfoon
opnieuw verbinden’. Als de app een QR-code voor Wi-Fi heeft gegenereerd,
houd u het scherm van uw mobiele apparaat op een afstand van 20 cm voor
de lens van de babyfoon. Volg daarna de instructies op het scherm om de
installatie te voltooien. De installatieprocedure is voltooid als het Wi-Fi-status
lampje op de voorkant van de babyfoon continu groen brandt.
Ik ben uitgenodigd als
Controleer of u misschien een e-mail hebt ontvangen dat uw account is
gast, maar waarom zie ik verwijderd. Als u rechten hebt om als gast te kijken, kan de beheerder u
niets als ik de app open? ook tijdelijk de toegang ontzeggen. Neem contact op met de beheerder en
vraag hem of haar om uw account weer in te schakelen of u opnieuw uit te
nodigen als gast.
Controleer of uw mobiele apparaat verbinding heeft met internet.
De babyfoon is mogelijk offline. Als u een melding wilt ontvangen dat
de babyfoon offline gaat, gaat u naar het linkerpaneel en schakelt u bij
‘Instellingen’ de optie voor het doen van die melding in.
De geluidsdrempel voor het doen van meldingen is mogelijk te hoog
ingesteld. In dat geval zal de app u alleen waarschuwen als de baby veel geluid
produceert. Open het dashboard om de drempel te verlagen zodat u sneller
wordt gewaarschuwd als de baby begint te huilen.
Mogelijk hebt u een te lange wachttijd ingesteld voor de duur van het huilen.
Kies een kortere tijd zodat de app u eerder zal waarschuwen.
Het geluid van uw telefoon is mogelijk uitgeschakeld. Stel het volume van uw
telefoon in op normaal.
164
NEDERLANDS
Vraag
Antwoord
Tips en trucs
Moet ik de app op het
scherm houden om
mijn baby in de gaten te
kunnen houden?
Nee, de app kan op de achtergrond waken terwijl u andere dingen doet
op uw smartphone of tablet. Tik op het pictogram Mobiele telefoon. Nu
hoort u uw baby en hoort u het ook wanneer de baby begint te huilen.
Als de tuimelschakelaar Alle meldingen is ingesteld op ‘aan’, ontvangt u
bovendien een melding op het scherm als de baby huilt, terwijl de app op de
achtergrond werkt.
Waarom krijg ik zwartwitbeelden in plaats van
kleur?
De babyfoon is overgeschakeld naar de nachtzichtmodus. De kamer waarin
de babyfoon is geplaatst, is donker.
Als er voldoende licht is in de kamer, is mogelijk de lichtsensor boven
op de babyfoon afgedekt of vuil. Zorg ervoor dat deze sensor volledig is
blootgesteld aan het licht in de kamer.
Als mijn apparaat is
vergrendeld of als ik
een andere app gebruik
of een telefoongesprek
voer, kan ik dan mijn
baby nog horen?
Ja, u kunt ervoor kiezen om achtergrondbewaking in te schakelen voor
de baby. Houd er rekening mee dat u alleen een beltoon hoort wanneer
de baby begint te huilen, als u uw telefoon gebruikt om te bellen. U kunt
niet naar uw baby luisteren. Tik op het pictogram Mobiele telefoon om
achtergrondgeluid in te schakelen. Als achtergrondgeluid is ingeschakeld,
hoort u uw baby terwijl u andere activiteiten onderneemt. U kunt er ook
voor kiezen een melding te ontvangen wanneer de baby huilt. Tik op het
belpictogram op het hoofdscherm om alle meldingen in of uit te schakelen.
Als Alle meldingen is ingesteld op ‘aan’, wordt een bericht weergegeven op
uw scherm wanneer de baby huilt.
Gebruik en
informatie
Heb ik een extra
account nodig als ik
meerdere babyfoons
heb?
Nee, u hebt geen extra account nodig als u meer babyfoons hebt. U kunt
een babyfoon toevoegen aan uw slimme uGrow-babyfoon-app. Ga naar
‘Mijn account’ in het linkerpaneel. Daar staat een lijst met de babyfoons
die verbinding hebben met de app. Tik op ‘Babyfoon toevoegen’. Volg de
instructies in het hoofdstuk ‘Voor de eerste keer instellen’ om een verbinding
tot stand te brengen tussen de babyfoon en de app.
Kan ik meer babyfoons
gebruiken met dezelfde
app?
U kunt maximaal tien babyfoons met de app verbinden, maar u kunt op
elk willekeurig moment slechts het beeld van één babyfoon weergeven.
U ontvangt wel meldingen van andere aangesloten babyfoons. Als u een
melding ontvangt en erop tikt, gaat u rechtstreeks naar die babyfoon. U kunt
de babyfoon waarvan u het beeld wilt weergeven, ook selecteren in het
linkerpaneel.
Waarom duurt het
lang voordat de app is
geladen?
De internetverbinding van uw mobiele apparaat of de Wi-Fi-verbinding van
de babyfoon is mogelijk traag. Controleer de verbinding van uw mobiele
apparaat en de babyfoon. De app vereist een stabiele netwerkverbinding.
NEDERLANDS 165
Vraag
Antwoord
Is mijn babyfoon
beveiligd tegen hacken?
Wij doen er alles aan om hacken te voorkomen en verzorgen regelmatig
updates. Gebruik altijd de nieuwste app-software en de nieuwste firmware
voor de babyfoon. Als u uw mobiele apparaat verliest, herstelt u de
standaardinstellingen van de babyfoon om alle aansluitingen te verwijderen.
U kunt u ook aanmelden bij de app op een ander mobiel apparaat en uw
account verwijderen. Als u de enige beheerder bent, wordt de verbinding van
alle gastgebruikers met de babyfoon verbroken.
Ik heb mijn smartphone
verloren. Hoe kan
ik voorkomen dat
vreemden mijn baby
zien?
Meld u aan bij de app op een ander mobiel apparaat en verwijder uw
account. Als u de enige beheerder bent, wordt de verbinding van alle
gastgebruikers van de app met de babyfoon verbroken. U kunt ook de
standaardinstellingen van de babyfoon herstellen om alle verbindingen met
het verloren apparaat te verbreken. U vindt de resetknop op de achterkant
van de babyfoon.
Word ik op de hoogte
gesteld van upgrades
van de app of de
babyfoonsoftware?
Ja, u krijgt een melding op uw telefoon om een upgrade uit te voeren via de
App Store. Dit gebeurt regelmatig. Meldingen van upgrades van de firmware
voor de babyfoon worden weergegeven in de app, samen met instructies
voor het upgraden.
Mijn telefoon of tablet
wordt warm als ik
de app gebruik. Is dit
normaal?
Het apparaat heeft energie nodig om te zorgen voor hoogwaardige
videobeelden. Dit is niet schadelijk voor uw apparaat. Om dit te voorkomen
raden we u aan uw apparaat bij te werken naar de nieuwste versie van iOS
en de uGrow-app. Uw apparaat wordt niet warm wanneer de app op de
achtergrond werkt.
166 PORTUGUÊS
Índice
Introdução Descrição do produto Configuração inicial Montar o intercomunicador na parede Guia de início rápido Ver, ouvir e monitorizar o seu bebé Ver o seu bebé Ouvir o seu bebé Como receber notificações quando o seu bebé chora Monitorização em segundo plano Opções de notificação Convidados e contas Convidar utilizadores e um segundo administrador. Conceder e anular acesso Gestão de conta
Utilização geral da aplicação Optimização da qualidade de vídeo e áudio Ligação Wi-Fi à Internet Utilizar o intercomunicador para bebé fora de casa Utilizar a aplicação em vários dispositivos Repor o intercomunicador Actualizações de firmware Sinais da luz de estado do Wi-Fi Segurança e privacidade Segurança de rede Palavras-passe fortes Utilização segura da aplicação do intercomunicador para bebé Compatibilidade com dispositivos Encomendar acessórios
Garantia e assistência Perguntas mais frequentes 166
167
167
169
171
174
174
175
176
176
177
178
178
180
180
182
182
182
183
184
184
184
185
187
187
187
187
188
188
188
188
Introdução
Parabéns pela sua compra e bem-vindo à Philips Avent! Para usufruir
totalmente da assistência da Philips Avent, registe o seu produto em
www.philips.com/welcome.
O intercomunicador inteligente uGrow foi desenvolvido com SafeConnect
Technology para funcionar em várias redes, ajustando-se automaticamente à
rede para manter uma ligação de alta qualidade ao seu bebé. Em situações
de falha na emissão de sinal, tenta restabelecer a ligação continuamente. A
ligação à banda larga foi optimizada, evitando o desgaste da bateria do seu
smartphone ou tablet desnecessariamente. Funciona até quando estiver a
utilizar o seu telefone para outras funções.
O intercomunicador inteligente uGrow necessita de ligação Wi-Fi à Internet.
Uma boa ligação à Internet é essencial para obter o melhor desempenho
do seu intercomunicador inteligente uGrow. Uma ligação Wi-Fi à Internet
de qualidade inferior poderá reduzir a qualidade da ligação entre a aplicação
uGrow e o seu intercomunicador. É compatível com o iOS 7 ou superior e o
Android 4.1 ou superior. Possui todas as funcionalidades auxiliares normalmente
oferecidas por um intercomunicador para bebé, incluindo canções de embalar,
luz de presença multicolor e monitorização da humidade e temperatura.
PORTUGUÊS 167
Descrição do produto (fig. 1)
1 Luz de estado do Wi-Fi
2 Luzes infravermelhas
3 Lente do intercomunicador
4Microfone
5 Indicador de visualização
6 Luz de presença
7Base
8 Botão da luz de presença
9 Botão de reprodução/pausa de canções de embalar
10 Sensor de luz
11 Sensor de temperatura e humidade
12 Tomada para a ficha do aparelho
13 Botão de reinício
14 Botão ligar/desligar
15 Suporte de montagem na parede
16Transformador
17 Ficha do aparelho
Configuração inicial
Antes de iniciar o procedimento de configuração, certifique-se de que:
-- Tem acesso à Internet sem fios (Wi-Fi de 2,4 GHz).
-- Está suficientemente próximo do router Wi-Fi para ter um bom sinal
de Wi-Fi.
-- Se utilizar um repetidor de sinal Wi-Fi, certifique-se de que o seu
router e o repetidor de sinal Wi-Fi possuem a mesma SSID (nome de
rede) e que a palavra-passe é a mesma para ambos.
-- Tenha a palavra-passe da sua rede Wi-Fi à mão. Ligue sempre o
intercomunicador a uma rede segura (consulte o capítulo “Segurança e
privacidade”).
-- Assegure-se de que o seu dispositivo inteligente funciona com iOS 7
ou superior, ou Android 4.1 ou superior (para compatibilidade com
dispositivos, consulte o capítulo “Compatibilidade com dispositivos”).
1Transfira a aplicação Philips Avent uGrow Smart Baby Monitor da
App Store ou do Google Play. Utilize as palavras-chave “uGrow smart
monitor” ou “Philips smart monitor” para encontrar a aplicação.
2Inicie a aplicação.
168
PORTUGUÊS
3Siga as instruções no ecrã para criar uma conta uGrow.
1 Certifique-se de que utiliza um endereço de correio electrónico válido
através do qual pode ser contactado a qualquer altura.
2 Use uma palavra-passe forte (consulte “Segurança e privacidade”).
3 Quando receber a mensagem de correio electrónico de verificação,
siga as instruções na mensagem para prosseguir com a configuração do
intercomunicador inteligente para bebé uGrow.
4 Crie o seu perfil de utilizador.
É necessário um perfil de utilizador para se identificar junto de utilizadores
convidados.
5 Crie o perfil do seu bebé.
É necessário um nome de bebé para identificar o seu intercomunicador
para bebé na aplicação, especialmente se tiver vários intercomunicadores
para bebé ligados à sua conta.
4Siga as instruções no ecrã para ligar o intercomunicador para bebé à
alimentação.
1 Introduza a ficha do aparelho na respectiva tomada no sensor de
temperatura e humidade e ligue o transformador a uma tomada
eléctrica.
2 A luz de estado do Wi-Fi fica intermitente a laranja quando o
intercomunicador para bebé está ligado. Aguarde até a luz de estado
do Wi-Fi deixar de piscar. Quando a luz de estado do Wi-Fi se
mantiver continuamente acesa a laranja, o intercomunicador para bebé
está pronto para ler o código QR do Wi-Fi.
5Ligue o intercomunicador para bebé ao seu dispositivo inteligente.
1 Seleccione a rede Wi-Fi que pretende utilizar. Tenha em atenção que
o intercomunicador para bebé funciona apenas numa rede Wi-Fi de
2,4 GHz.
2 Introduza a palavra-passe.
PORTUGUÊS 169
3 Tal como indicado pela aplicação, mantenha o código QR do Wi-Fi no
ecrã do seu smartphone ou tablet a uma distância de aprox. 20 cm, à
frente da lente do intercomunicador para bebé. Aproxime ou afaste
lentamente o smartphone ou tablet da lente para garantir que o QR
do Wi-Fi é lido correctamente. Quando o intercomunicador para bebé
tiver lido o código QR do Wi-Fi, este reproduz um som curto e a luz
de estado do Wi-Fi fica intermitente a verde.
4 Siga as instruções no ecrã para concluir o processo de configuração.
5 A luz de estado do Wi-Fi mantém-se continuamente acesa a verde
quando o intercomunicador para bebé estiver ligado à rede Wi-Fi.
Nota: Se não for possível completar o processo de configuração e o seu
intercomunicador para bebé não estiver ligado ao seu dispositivo inteligente
depois de concluir os passos acima, verifique as “Perguntas mais frequentes”
deste manual do utilizador para procurar possíveis soluções.
Sugestão: Para obter mais informações sobre a luz de estado do Wi-Fi, consulte
o capítulo “Sinais da luz de estado do Wi-Fi”.
6 Segue-se uma apresentação introdutória através da aplicação.
7 Em seguida, pode escolher entre duas opções: “Help me mount the
baby monitor” (Ajudar-me a montar o intercomunicador para bebé)
e “Let me see my baby” (Ver o meu bebé).
8 Se escolher a primeira opção, pode seguir as instruções no ecrã para
montar o intercomunicador para bebé na parede (consulte o capítulo
“Montar o intercomunicador para bebé na parede”). No final das
instruções no ecrã, pode escolher “Let me see my baby” (Ver o meu bebé).
Montar o intercomunicador na parede
O intercomunicador é fornecido com um suporte de parede. Antes de
montar o intercomunicador na parede, certifique-se de que existe um
bom sinal Wi-Fi no local onde pretende montar o intercomunicador. Siga
as instruções abaixo para fixar o suporte de montagem na parede e para
encaixar o intercomunicador no suporte na parede.
1 Utilize um lápis para assinalar com uma cruz na parede no local onde
pretende montar o intercomunicador.
2 Segure o suporte de montagem encostado à parede. Certifique-se de
que um dos orifícios está exactamente sobre a cruz que marcou na
parede no passo 1.
Nota: Certifique-se de que o anel do suporte de montagem na parede está
inclinado para baixo quando o segura contra a parede. Se o anel do suporte
de montagem na parede estiver inclinado para cima, volte o suporte de
montagem na parede ao contrário de modo colocá-lo na posição correcta.
170
PORTUGUÊS
3 Utilize um lápis para marcar o outro orifício na parede.
4 Perfure 2 orifícios na parede, nas respectivas marcas.
5 Utilize 2 parafusos para fixar o suporte de montagem na parede.
Aperte os parafusos com uma chave de fendas.
6 Passe o sensor de humidade e temperatura através do orifício no
suporte de montagem na parede. Em seguida, alinhe as ranhuras na
base do intercomunicador com as saliências no anel. Insira a ranhura na
base do intercomunicador no rebordo saliente no interior do anel.
7 Rode a base do intercomunicador para a direita para posicionar o
intercomunicador.
PORTUGUÊS 171
8 Introduza a ficha do aparelho na tomada para a ficha do aparelho no
sensor de temperatura e humidade e ligue o transformador a uma
tomada eléctrica. Agora o seu intercomunicador está pronto para ser
utilizado.
Guia de início rápido
Funcionalidade do ecrã principal
Parte superior do ecrã:
1 Activar/desactivar todas as notificações
2 Barra de indicação do nível de som
3 Ligar/desligar o áudio
Parte inferior do ecrã:
4Instantâneo
5 Função de conversa
6 Luz de presença
7 Canções de embalar
Botões de acção rápida
,, Instantâneo: prima este botão para tirar uma fotografia do seu bebé.
-- Quando tira uma fotografia do seu bebé, a fotografia será guardada no
álbum de fotografias do seu dispositivo inteligente.
,, Função de conversa: prima este botão para falar directamente com o
seu bebé. Opções disponíveis:
-- Ligar ou desligar função de conversa
-- Ajustar volume da função de conversa
,, Luz de presença: prima este botão para ligar ou desligar a luz de
presença. Toque no ícone das definições no canto inferior direito
para ajustar a cor da luz de presença ou para definir o temporizador
da luz de presença. Opções disponíveis:
-- Ligar/desligar a luz de presença
-- Definir o temporizador da luz de presença ou ligar a luz de presença
continuamente
172
PORTUGUÊS
-- Definir a cor da luz de presença
,, Canções de embalar: prima este botão para ligar ou desligar a
reprodução das canções de embalar. Toque no ícone das definições
no canto inferior direito para seleccionar as canções de embalar,
para definir um temporizador e para ajustar o volume. Opções
disponíveis:
-- Seleccionar uma canção de embalar da lista de canções de embalar
-- Programar uma lista de reprodução a partir das canções de embalar
disponíveis
-- Definir o temporizador das canções de embalar ou seleccionar a
reprodução contínua
-- Ajustar o volume de reprodução.
Ícones de monitorização em segundo plano
-- Ícone de sino: toque para activar ou desactivar as notificações.
PORTUGUÊS 173
-- Ícone de telemóvel: tocar para ligar ou desligar o áudio.
Nota: Para obter mais informações sobre a monitorização em segundo plano,
consulte o capítulo “Ver, ouvir e monitorizar o seu bebé”.
Barra de indicação do nível de som
-- As luzes indicam o nível de som no quarto do seu bebé.
Nota: Para obter mais informações, consulte o capítulo “Ver, ouvir e monitorizar
o seu bebé”.
Painel esquerdo
-- Lista de intercomunicadores para bebé ligados à aplicação: toque
no ícone das definições para definir as preferências do seu
intercomunicador para bebé e para convidar utilizadores visitantes para
ver o seu bebé
-- My account (A minha conta): toque nesta opção para ver e ajustar as
informações da sua conta, o seu perfil e o perfil do seu bebé e para
adicionar ou remover um intercomunicador para bebé
-- About (Sobre): toque nesta opção para obter mais informações sobre
a aplicação, versões, etc.
-- Support (Assistência): toque nesta opção para abrir o menu de
assistência
Nota: Para obter mais informações sobre o painel esquerdo, consulte o capítulo
“Utilização geral da aplicação”.
Painel direito
O painel direito fornece informações sobre os utilizadores ligados.
Nota: As opções do painel direito estão disponíveis apenas se for um
administrador (para mais informações sobre o painel direito, consulte o
capítulo “Utilização geral da aplicação”).
-- Mostra quem está actualmente a ver
-- Mostra quem tem e quem não tem acesso
O botão do modo de privacidade impede todos os utilizadores de ver
o seu bebé
Painel de instrumentos
O painel de instrumentos da aplicação encontra-se no painel inferior.
174
PORTUGUÊS
1Coloque o dedo na linha horizontal do ecrã, imediatamente acima
dos ícones na margem inferior do ecrã. Desloque esta linha em
direcção à margem superior do ecrã. Os ícones na margem inferior
do ecrã também se deslocam para cima.
2Quando tiver deslocado a linha para cima, o painel de instrumentos
no painel inferior está totalmente visível.
O painel de instrumentos oferece várias opções de notificação:
1Som
2Temperatura
3Humidade
Nota: Para mais informações sobre as opções de notificação no painel de
instrumentos, consulte a secção “Opções de notificação” no capítulo
“Ver, ouvir e monitorizar o seu bebé” neste manual do utilizador.
Ver, ouvir e monitorizar o seu bebé
Pode ver, ouvir e monitorizar o seu bebé no seu smartphone ou tablet.
Pode também reconfortar o seu filho falando com ele.
Ver o seu bebé
Zoom e deslocamento
Nota: Esta função está disponível apenas no modo de visualização vertical.
1Quando estiver no modo de ecrã total, toque duas vezes ou coloque
os dedos no ecrã e afaste-os para aumentar o zoom.
2Toque duas vezes ou coloque os dedos no ecrã e aproxime-os para
diminuir o zoom.
PORTUGUÊS 175
3Arraste para se deslocar através de uma imagem ampliada com
zoom.
Visualização vertical ou horizontal
-- Rode o seu smartphone ou tablet para ver o seu bebé na posição
horizontal.
Modo de visão nocturna
Se a iluminação na divisão for fraca, o intercomunicador para bebé muda
para o modo de visão nocturna.
-- Neste modo, pode ver imagens a preto e branco do seu bebé no seu
dispositivo inteligente.
Ouvir o seu bebé
Pode ouvir o seu bebé quando ele começar a chorar.
-- O nível de volume a que ouve o bebé depende do nível de volume
definido no seu dispositivo inteligente.
-- O nível de som produzido pelo bebé também é visível na barra de
indicação do nível de som. O número de luzes que se acendem indica
a intensidade do som no quarto do seu bebé. A barra de indicação
funciona da esquerda para a direita. Quanto mais luzes se acenderem
em direcção ao lado direito, mais alto é o som.
Nota: O botão para ligar/desligar o áudio tem de estar definido para “on”
(ligado) para poder ouvir o seu bebé.
Sugestão: Ligue o seu dispositivo inteligente à corrente quando quiser utilizá-lo
para a monitorização durante a noite, de modo a evitar que a bateria fique
sem carga.
176
PORTUGUÊS
Como receber notificações quando o seu bebé chora
1Notificações push: recebe uma notificação push quando o seu bebé
começa a chorar.
Nota: Se pretender receber uma notificação enquanto estiver a executar outras
actividades no seu dispositivo inteligente (por ex., enviar sms, telefonar, navegar
na Internet), assegure-se de que definiu o botão de todas as notificações para
“on” (ligado).
Sugestão: Ligue a vibração nas definições do seu smartphone se desejar que o
seu smartphone vibre para o alertar quando o seu bebé chorar, por exemplo,
quando transporta o smartphone no bolso ou quando está num ambiente com
muito ruído.
Como especificar quando recebe uma notificação
Também pode especificar no painel de instrumentos quando deseja
receber uma notificação.
1Receber uma notificação quando o ruído do bebé ultrapassa o nível
definido.
2Receber uma notificação quando o bebé estiver a chorar durante um
período de tempo predefinido.
Nota: Se seleccionar “no notification” (nenhuma notificação), não receberá
qualquer notificação quando o seu bebé estiver a chorar (consulte a secção
“Opções de notificação” neste capítulo).
Ligar ou desligar as notificações no seu dispositivo inteligente
As notificações são uma definição no seu dispositivo inteligente (externa à
aplicação). Pode seleccionar se e como pretende receber notificações da
aplicação.
1Abra o centro das notificações no seu dispositivo.
2Seleccione a notificação e clique para a activar ou desactivar.
Monitorização em segundo plano
A monitorização em segundo plano é uma funcionalidade na aplicação que
assegura que pode ouvir o seu bebé e/ou receber notificações sobre o seu
bebé enquanto está a usar o seu dispositivo inteligente noutras tarefas.
A monitorização em segundo plano está activada por predefinição,
mas pode ser desactivada.
PORTUGUÊS 177
Ligar ou desligar a monitorização em segundo plano
-- Toque no ícone de sino para activar ou desactivar todas as notificações.
Se o botão de todas as notificações estiver definido para “on”
(ligado), receberá uma mensagem no ecrã quando o bebé começar a
chorar. Pode definir as suas preferências de notificação no painel de
instrumentos e/ou na janela de definições do intercomunicador.
Nota: Defina o interruptor de todas as notificações para “on” (ligado) para
receber todas as notificações sobre o seu bebé, se a aplicação estiver a ser
executada em segundo plano, por exemplo, quando usa outras funções do seu
dispositivo inteligente ou quando o dispositivo está no modo de espera com o
ecrã desligado. O botão de todas as notificações tem de estar definido para
“on” (ligado) se quiser ajustar notificações personalizadas de temperatura, som
e humidade no painel de instrumentos.
-- Toque no ícone de telemóvel para ligar ou desligar o áudio.
Nota: Se cortar o som, não poderá ouvir o seu bebé quando mudar para outra
função no seu dispositivo inteligente (telefonar, enviar sms, etc.).
Nota: Quando efectuar uma chamada no telemóvel ou utilizar uma aplicação
VoIP (p. ex. Skype,Viber ou FaceTime) para ligar a alguém, não ouvirá o
seu bebé. No entanto, assim que o bebé começar a chorar, receberá uma
notificação.
Mudar da monitorização em segundo plano para o ecrã
principal da aplicação
A aplicação permanece activa em segundo plano, mesmo quando o
dispositivo está no modo de espera. Enquanto a monitorização em
segundo plano estiver activa, aparece uma barra vermelha na margem
superior do ecrã do seu dispositivo inteligente.
1Para mudar da monitorização em segundo plano para o ecrã
principal da aplicação, toque na barra vermelha na margem superior
do ecrã para colocar a aplicação em primeiro plano.
Opções de notificação
As opções de notificação da aplicação encontram-se no painel de
instrumentos. O painel de instrumentos está localizado no painel inferior
do ecrã. Desloque o painel de instrumentos para cima para ver o menu de
opções. O menu contém as seguintes opções.
Som
-- Definir a barra de deslocamento para o nível de som acima do qual
pretende ser notificado
Nota: Se a barra de deslocamento estiver definida para “quiet” (silencioso),
irá ouvir o seu bebé continuamente quando sair da aplicação.
-- Definir a duração do som após a qual pretende ser notificado
178
PORTUGUÊS
Temperatura
-- Definir os limites do intervalo de temperatura após os quais deseja
receber uma notificação da temperatura
-- Activar ou desactivar a notificação da temperatura
-- Apresentar a temperatura actual ou o histórico
Humidade
-- Definir os limites do intervalo de humidade após os quais deseja
receber uma notificação da humidade
-- Activar ou desactivar a notificação da humidade
-- Apresentar a humidade actual ou o histórico
Convidados e contas
Convidar utilizadores e um segundo administrador.
Pode convidar até nove familiares ou amigos como utilizadores convidados
e permitir que eles vejam o seu bebé no smartphone ou tablet. Pode
convidar um deles para actuar como segundo administrador. Um segundo
administrador tem os mesmos direitos que o primeiro administrador.
Os convidados apenas têm direitos de visualização e estes direitos
são controlados pelo(s) administrador(s). Tal como um convidado, um
administrador tem direitos de visualização. Para além disso, o administrador
tem direitos para convidar pessoas, para lhe conceder acesso, para
cancelar o seu acesso e para os desconectar. O administrador pode
também desactivar a conta de convidados e desassociar os convidados do
intercomunicador para bebé.
1No painel esquerdo, toque no ícone das definições, ao lado do
intercomunicador para bebé.
2Desloque-se para baixo e toque em “Add new user” (Adicionar novo
utilizador).
PORTUGUÊS 179
3Adicione o endereço de correio electrónico de um convidado e a
sua função (administrador ou convidado).
4A aplicação envia uma mensagem de correio electrónico para a
pessoa convidada e será apresentada uma notificação a informar que
foi enviada uma mensagem de correio electrónico.
5O convidado recebe uma mensagem de correio electrónico com um
código de convite que é válido apenas para um período limitado.
A mensagem também contém uma ligação à App Store. O convidado
pode clicar nesta ligação para instalar a aplicação.
6Depois de instalar a aplicação, o convidado cria uma conta seguindo
as instruções na aplicação.
7O convidado selecciona a opção “Connect to a shared baby
monitor” (Ligar a um intercomunicador para bebé partilhado)
durante o processo de configuração. Isto abre a página onde o
convite é validado.
8O convidado introduz o código do convite, o seu endereço de
correio electrónico e confirma. O código e o endereço electrónico
são verificados.
9O administrador recebe uma mensagem de correio electrónico
que confirma que o convidado foi conectado ao intercomunicador
para bebé e que o administrador pode agora conceder acesso ao
convidado.
10Quando o administrador tiver concedido acesso ao convidado,
ele poderá ver o bebé.
180
PORTUGUÊS
-- Quando uma ou mais pessoas estão a ver o bebé, o indicador de
visualização vermelho acende-se a vermelho.
Nota: Apesar de ser possível conceder direitos de visualização a até dez
pessoas (oito ou nove convidados e um ou dois administradores) para o
mesmo intercomunicador para bebé, apenas três pessoas podem ver o bebé
em simultâneo. Se os convidados tentarem aceder ao intercomunicador
para bebé quando já houver três pessoas a ver o bebé, será apresentada a
mensagem “Too many connections” (Demasiadas ligações). Os administradores
podem sempre anular o acesso dos seus convidados se quiserem ver o bebé.
Conceder e anular acesso
Os utilizadores com direitos de administrador podem determinar quem
pode ver o bebé.
1Para anular o acesso de um convidado, vá ao painel direito, toque no
convidado cujo acesso pretende anular e toque no ícone de olho ao
lado do nome do convidado.
Sugestão: Se já houver três pessoas a ver o seu bebé e quiser conceder acesso
ao intercomunicador para bebé a alguém, por exemplo, à ama, pode cancelar
o acesso de um dos convidados que está a ver o bebé actualmente e conceder
esse acesso a outra pessoa.
2Para conceder acesso a um convidado, vá ao painel direito, toque no
convidado a quem pretende conceder o acesso e toque no ícone de
olho ao lado do ícone do convidado.
3Se quiser cancelar o acesso de todos os convidados em simultâneo,
toque no botão do modo de privacidade. Isto negará o acesso ao
intercomunicador a todos, excepto a si, até tocar novamente no
botão do modo de privacidade.
Sugestão: Pode utilizar o botão do modo de privacidade para ter um momento
de privacidade com o seu bebé, por exemplo, para amamentar, dar banho
ao bebé ou para mudar a fralda. Os convidados que tentarem aceder ao
intercomunicador para bebé verão uma notificação no ecrã.
Gestão de conta
Desconectar um convidado
Para desconectar permanentemente utilizadores convidados da aplicação,
tem de os retirar da lista de convidados. Um convidado também pode
desconectar-se permanentemente da aplicação.
Desactivar a sua conta de utilizador
Se houver apenas um administrador e este administrador desactivar a sua
própria conta, todas as contas de utilizadores convidados são desassociadas
do intercomunicador para bebé, apesar de as contas continuarem a
existir. Se houver dois administradores, ambos os administradores têm de
desactivar as suas contas para desassociar todas as contas. Se apenas um
dos dois administradores desactivar a sua conta, os convidados continuam
conectados ao intercomunicador para bebé.
PORTUGUÊS 181
Se pretender transferir o intercomunicador para bebé a outra pessoa, se
perder o intercomunicador para bebé ou se o intercomunicador para bebé
for roubado, aconselhamo-lo a desactivar a conta do administrador ou
administradores. Isto é essencial para proteger a sua privacidade e a do seu
bebé.
1Para desactivar a sua conta, vá ao painel esquerdo e toque em
“My account” (A minha conta).
2Toque em “Deactivate account” (Desactivar conta).
3É apresentada uma janela de contexto que solicita a confirmação de
que pretende desactivar a sua conta.
4Quando tocar em “Deactivate” (Desactivar), uma janela de contexto
confirma que a sua conta foi desactivada.
Adicionar ou remover intercomunicadores para bebé
Pode adicionar até dez intercomunicadores para bebé à aplicação. Isto
permite-lhe monitorizar mais crianças ou a mesma criança em mais
divisões. Pode, por exemplo, desejar instalar um intercomunicador sobre
o berço do bebé no quarto e outro sobre o parque na sua sala de estar.
É necessário ligar os intercomunicadores para bebé individualmente à
aplicação.
1Vá a “My account” (A minha conta) no painel esquerdo.
2Poderá ver a lista de intercomunicadores para bebé ligados. Toque
em “Add baby monitor” (Adicionar intercomunicador para bebé).
3Siga as instruções no capítulo “Configuração inicial” neste manual do
utilizador para ligar o intercomunicador para bebé à aplicação.
182
PORTUGUÊS
Utilização geral da aplicação
Optimização da qualidade de vídeo e áudio
A qualidade de vídeo e áudio no seu dispositivo inteligente pode mudar
com o tempo, dependendo da largura de banda disponível da sua ligação
à Internet. Normalmente, a utilização de uma ligação Wi-Fi proporciona
os melhores resultados, enquanto o 4G e o 3G podem oferecer menos
largura de banda e proporcionar uma qualidade limitada. A aplicação
oferece-lhe automaticamente a melhor experiência possível, adaptando a
qualidade de vídeo e áudio à largura de banda disponível.
A adaptação ocorre em intervalos:
1 Elevada largura de banda: boa qualidade de vídeo e áudio, com
notificações de texto.
2 Largura de banda reduzida (como ao utilizar 3G): qualidade de vídeo
reduzida; boa qualidade de áudio, com notificações de texto.
3 Baixa largura de banda (como ao utilizar 2G): estará disponível apenas
uma ligação de áudio, com notificações de texto
4 Largura de banda muito baixa: estão disponíveis apenas notificações de
texto
Ligação Wi-Fi à Internet
Obtém os melhores resultados se ligar o seu dispositivo inteligente à
Internet via Wi-Fi. Este utilizará automaticamente a rede Wi-Fi para se ligar
ao seu intercomunicador para bebé. Se não houver nenhuma ligação Wi-Fi
à Internet, o seu dispositivo inteligente utiliza a sua ligação de dados móvel
3G ou 4G. A utilização desta ligação de dados pode incluir taxas adicionais
do seu fornecedor de serviços, dependendo da sua subscrição. Uma ligação
de vídeo normal requer 0,1 a 0,25 MB de dados por segundo. Uma ligação
de áudio requer 0,01 MB de dados por segundo.
PORTUGUÊS 183
Se quiser evitar que o seu dispositivo inteligente se ligue à rede 3G ou
4G, tem de desligar a ligação de dados móveis do seu dispositivo. Isto irá
afectar todas as outras aplicações que possam utilizar a ligação de dados
móveis 3G ou 4G. Tenha em atenção que, se desligar a ligação de dados
móveis, não será alertado de que o seu bebé está a chorar, quando perder
a ligação Wi-Fi à Internet.
Utilizar o intercomunicador para bebé fora de casa
Pode utilizar o intercomunicador em qualquer local onde houver uma
rede Wi-Fi de 2,4 GHz disponível, quer seja em casa de um amigo ou
familiar, num hotel ou numa residência de férias. Se tiver o nome da rede
Wi-Fi e a palavra-passe correspondente, pode configurar e utilizar o seu
intercomunicador para bebé fora de casa. Para tal, siga as instruções de
configuração apresentadas abaixo. Depois de configurar a ligação a uma
rede Wi-Fi, as definições são guardadas na memória do seu dispositivo e
não será necessário repetir o procedimento de configuração enquanto
utilizar a sua aplicação e o intercomunicador para bebé no mesmo local.
Nota: Se a ligação de rede Wi-Fi necessitar de uma confirmação extra, p. ex.,
concordar com os termos de utilização, o intercomunicador para bebé não se
conseguirá ligar à rede Wi-Fi. Isto pode acontecer em redes Wi-Fi de hotéis e
noutras redes Wi-Fi públicas.
1Há duas opções para ligar o intercomunicador para bebé à rede Wi-Fi.
-- A primeira opção: quando liga o intercomunicador para bebé, é
apresentada a mensagem “Baby monitor not found” (Intercomunicador
para bebé não encontrado). Aguarde até que a aplicação
apresente a opção “Reconnect the baby monitor” (Voltar a ligar o
intercomunicador para bebé).
-- A segunda opção: ligue o intercomunicador para bebé. Abra o painel
esquerdo, seleccione o intercomunicador para bebé e escolha “Reconnect
the baby monitor” (Voltar a ligar o intercomunicador para bebé).
2Quando a aplicação tiver gerado um código QR do Wi-Fi,
segure o ecrã do seu smartphone ou tablet à frente da lente do
intercomunicador para bebé, a uma distância de cerca de 20 cm.
Aproxime ou afaste lentamente o smartphone ou tablet da lente
para garantir que o QR do Wi-Fi é lido correctamente.
3Siga as restantes instruções no ecrã para completar a configuração.
O procedimento de configuração é concluído e o intercomunicador
para bebé é ligado à rede Wi-Fi e fica pronto a utilizar, quando a luz
de estado do Wi-Fi na parte frontal do intercomunicador para bebé
se mantiver continuamente acesa a verde.
Nota: Quando voltar para casa, tem de seguir o procedimento acima para
voltar a ligar o intercomunicador para bebé à sua rede Wi-Fi de casa.
184
PORTUGUÊS
Utilizar a aplicação em vários dispositivos
Pode utilizar a aplicação uGrow Smart Baby Monitor em mais de um
dispositivo (por exemplo, no seu iPhone e iPad).
Nota: Quando iniciar sessão na mesma conta num dispositivo enquanto a
aplicação está activa noutro dispositivo, o dispositivo no qual a aplicação
estava activa em primeiro lugar irá terminar a sua sessão automaticamente.
Não é possível utilizar a aplicação na mesma conta em dois dispositivos
diferentes em simultâneo.
Repor o intercomunicador
O intercomunicador tem um botão de reposição na parte posterior do
aparelho. Quando premir este botão, as predefinições de fábrica do seu
intercomunicador serão repostas. Isto significa que irá perder a ligação a
todas as contas do intercomunicador.
Nota: Reponha sempre o intercomunicador para bebé premindo o botão
de reposição antes de transferir o intercomunicador para bebé para outra
pessoa. Isto é necessário para proteger a sua privacidade.Também deve repor
o intercomunicador para bebé quando o comprar ou receber em segunda mão.
Como repor as predefinições de fábrica
Nota: Certifique-se de que o intercomunicador para bebé está ligado antes de
o repor.
1Com o intercomunicador ligado, prima o botão de reposição na
parte posterior do intercomunicador com um clipe ou outro objecto
pontiagudo. A execução desta operação é recomendada quando o
intercomunicador está ligado à sua rede Wi-Fi.
2Mantenha o botão de reposição premido até o intercomunicador
emitir um sinal sonoro e, em seguida, solte o botão. Quando soltar o
botão, o intercomunicador reproduz um som breve para confirmar a
reposição.
O que fazer depois de uma reposição das predefinições de fábrica
Depois de repor o intercomunicador, a luz de estado do Wi-Fi fica laranja
intermitente, indicando que está a reiniciar. Quando a intermitência da luz
de estado do Wi-Fi parar, pode voltar a ligar o intercomunicador à sua rede
Wi-Fi. Siga as instruções no capítulo “Configuração inicial” neste manual
do utilizador. Se anteriormente tiver convidado outras pessoas a aceder ao
intercomunicador, terá de as convidar novamente.
Actualizações de firmware
A actualização é essencial para proteger a sua privacidade e o bom
funcionamento do intercomunicador para bebé e da aplicação.
-- As actualizações essenciais são obrigatórias. As actualizações
obrigatórias da aplicação são instaladas automaticamente no seu
dispositivo inteligente e não requerem confirmação. Receberá apenas
uma notificação de que está a decorrer uma actualização obrigatória.
-- Ocasionalmente, receberá notificações de que estão disponíveis
actualizações para o firmware do seu intercomunicador para bebé
ou para o software da aplicação. As actualizações são instaladas se as
confirmar.
PORTUGUÊS 185
-- Para procurar actualizações de firmware para o seu intercomunicador
para bebé, abra o painel esquerdo e toque no ícone das definições
junto do intercomunicador para bebé. Desloque-se para baixo até ao
item “Firmware” e toque para verificar se existem actualizações de
firmware. Se houver uma actualização disponível, toque na actualização
para a instalar.
Nota: Quando está a ser instalada uma actualização, fica temporariamente
impedido de ver e ouvir o seu bebé.
Sinais da luz de estado do Wi-Fi
,, Apagado
1 Apagado: o intercomunicador para bebé está desligado
,, Laranja
1 Intermitência rápida a laranja: o intercomunicador para bebé está a
iniciar.
2 Intermitência lenta a laranja: o intercomunicador está a actualizar o
firmware. Não desligue o intercomunicador durante a actualização do
firmware.
Nota: A luz de estado do Wi-Fi poderá desligar-se por breves instantes durante
a actualização de firmware.
186
PORTUGUÊS
3 Continuamente aceso a laranja: a câmara do intercomunicador está
pronta para ler o código QR de Wi-Fi gerado pelo seu smartphone ou
tablet.
,, Verde
1 Intermitente a verde: o código QR de Wi-Fi foi lido com sucesso.
2 Continuamente aceso a verde: o intercomunicador para bebé está
ligado à rede Wi-Fi.
,, Vermelho
1 Intermitência lenta a vermelho: introduziu a palavra-passe do Wi-Fi
incorrecta.
2 Continuamente aceso a vermelho: o intercomunicador não consegue
estabelecer ligação à rede Wi-Fi.
PORTUGUÊS 187
Segurança e privacidade
Segurança de rede
Os hotspots Wi-Fi em locais públicos - como aeroportos e hotéis - são
convenientes, mas muitas vezes não são seguros.
Aconselhamo-lo a utilizar o intercomunicador para bebé apenas numa
rede Wi-Fi protegida com encriptação WPA2. Não é aconselhável utilizar o
intercomunicador para bebé numa rede que utilize encriptação WEP.
Nota: Redes Wi-Fi que não requerem uma palavra-passe não são seguras.
Palavras-passe fortes
As palavras-passe são essenciais para proteger a sua rede Wi-Fi e a sua
conta contra acesso não autorizado. Quanto mais forte for a sua palavrapasse, mais bem protegida está a sua rede Wi-Fi e a sua conta.
As regras de uma palavra-passe forte são:
1 Uma palavra-passe forte tem, no mínimo, 8 caracteres.
2 Uma palavra-passe forte não contém o seu nome, o nome do seu
bebé, outro nome real ou de uma marca.
3 Uma palavra-passe forte não contém uma palavra completa.
4 Uma palavra-passe forte é muito diferente de palavras-passe que tenha
utilizado anteriormente.
5 Uma palavra-passe forte contém caracteres de duas das seguintes
categorias, no mínimo:
-- Letras: A, B, C ou a, b, c
-- Números: 0, 1, 2, 3, 4, 5, 6, 7, 8, 9
-- Símbolos: _ . @ $
Utilização segura da aplicação do intercomunicador para bebé
Utilize a aplicação apenas numa rede segura
Não utilize a aplicação numa rede Wi-Fi não protegida. Aconselhamo-lo a
utilizar o intercomunicador para bebé apenas numa rede Wi-Fi protegida
com encriptação WPA2. Também pode utilizar a rede de dados do seu
telemóvel (frequentemente referida como 3G ou 4G).
Utilize sempre o software e o firmware mais actuais
Actualize sempre o software da aplicação e o firmware do
intercomunicador para bebé quando receber uma notificação de que está
disponível uma actualização. As actualizações são disponibilizadas quando
há melhoramentos de software ou para evitar um problema de segurança.
Se não efectuar a actualização, a sua ligação ao intercomunicador para
bebé através da aplicação pode deixar de ser segura e privada.
188
PORTUGUÊS
Compatibilidade com dispositivos
,,
-,,
-,,
-,,
--
Compatibilidade com iPhone
iPhone 4S e mais recentes
Compatível com iPad
iPad 2 e mais recentes
Compatibilidade com iPod touch
iPod touch de 5.ª geração e mais recentes
Compatibilidade com Android
Android 4.1 ou superior
Nota: Para obter as informações mais recentes sobre compatibilidade de
dispositivos, visite www.philips.com/ugrow.
Encomendar acessórios
Para comprar acessórios ou peças sobressalentes, visite
www.shop.philips.com/service ou vá ao seu revendedor Philips.
Também pode contactar o centro de apoio ao cliente da Philips no seu
país (consulte os detalhes de contacto no folheto da garantia mundial).
Garantia e assistência
Se precisar de informações ou assistência, visite o Web site da Philips em
www.philips.com/support ou leia o folheto da garantia mundial em
separado.
Perguntas mais frequentes
Para consultar mais perguntas frequentes relacionadas com este
intercomunicador, consulte a página de assistência deste produto em
www.philips.com/support.
Pergunta
Resposta
Resolução de
problemas
Por que razão não
consigo encontrar a
aplicação na App Store
ou no Google Play?
Pode transferir a aplicação da App Store da Apple ou do Google Play,
procurando uGrow Smart Baby Monitor. Se não vir a aplicação na App Store
ou no Google Play, o seu telemóvel poderá não ter a versão necessária do
iOS ou do Android. Esta aplicação é compatível apenas com o iOS 7 ou
superior e o Android 4.1 ou superior.
Não é possível transferir Verifique se algum dos seguintes factores está a impedir uma transferência
e instalar a aplicação. O correcta. O seu sinal de Wi-Fi é suficientemente estável e forte? O seu
que posso fazer?
dispositivo inteligente funciona com o iOS 7 ou superior, ou o Android 4.1
ou superior? Tem espaço suficiente no seu dispositivo inteligente para guardar
a aplicação? Introduziu a palavra-passe correcta para a App Store ou para o
Google Play?
PORTUGUÊS 189
Pergunta
Resposta
Não consigo configurar
o intercomunicador
para bebé. É sempre
apresentado o ecrã de
erro de ligação. Qual é
o problema?
Se ao tentar estabelecer a ligação, a luz de estado do Wi-Fi permanecer
continuamente acesa a laranja depois de estar intermitente a vermelho,
significa que a palavra-passe Wi-Fi introduzida está incorrecta. Reinicie o
processo de configuração. Volte a introduzir a palavra-passe Wi-Fi e assegurese de que a palavra-passe está correcta.
Se ao tentar estabelecer a ligação a luz de estado do Wi-Fi permanecer
continuamente acesa a laranja, depois de ter estado continuamente acesa
a vermelho, significa que o intercomunicador não consegue ligar-se à rede
Wi-Fi. Primeiro verifique se o seu telemóvel ou tablet utiliza a mesma rede
Wi-Fi a que pretende ligar o seu intercomunicador. Em seguida, verifique se
tem acesso à Internet via Wi-Fi de 2,4 GHz. Se isto não resolver o problema,
certifique-se de que a SSID (nome da rede) do router não contém símbolos
especiais. Se for este o caso, altere o nome da sua SSID do router de forma
correspondente.
Estou a ter problemas
com o meu
intercomunicador ler
o código QR no meu
dispositivo inteligente.
O que posso fazer?
Certifique-se de que mantém o código QR de Wi-Fi a aprox. 20 cm de
distância da lente. Tente mover o dispositivo inteligente ligeiramente para cima,
para baixo, para a esquerda ou para a direita para assegurar que o código QR
de Wi-Fi está directamente à frente do intercomunicador. Também poderá
aproximar ou afastar o dispositivo inteligente da lente do intercomunicador,
assegurando uma focagem correcta do mesmo. Certifique-se de que há
luz suficiente na divisão, mas evite luz demasiado brilhante. Quando o
intercomunicador tiver lido o código QR de Wi-Fi, emitirá um sinal sonoro de
confirmação e a luz de estado do Wi-Fi ficará intermitente a verde.
Poderá não ter retirado a película de protecção da lente do
intercomunicador. Retire a película.
A sua mão poderá estar a tapar o código QR de Wi-Fi. Mantenha o
dispositivo de forma a que a sua mão não tape o código QR de Wi-Fi.
Se a luz de estado do Wi-Fi se mantiver continuamente acesa a laranja, o
intercomunicador para bebé não leu o código QR com sucesso. Volte atrás
usando a seta no canto superior esquerdo do ecrã e siga as instruções para
o código QR.
Se a luz de estado do Wi-Fi estiver intermitente a laranja, a câmara ainda
está a iniciar. Aguarde até a luz se manter continuamente acesa a laranja. Em
seguida, volte atrás usando a seta no canto superior esquerdo do ecrã e siga
as instruções para o código QR.
Não consigo ver o
meu bebé. Qual é o
problema?
Verifique se o sinal Wi-Fi é suficientemente forte na divisão onde o
intercomunicador para bebé está colocado.
Verifique se o intercomunicador para bebé está conectado a uma tomada de
alimentação com corrente e se este está ligado.
A luz de estado do Wi-Fi na parte frontal do intercomunicador para bebé
tem de estar continuamente acesa a verde (consulte o capítulo “Sinais da luz
de estado do Wi-Fi”).
190
PORTUGUÊS
Pergunta
Resposta
Se utilizar mais do que um intercomunicador para bebé, verifique se está
seleccionado o intercomunicador correcto. Vá ao painel esquerdo e toque no
intercomunicador para bebé para verificar se este está activo.
Talvez já estejam três pessoas a ver o bebé. A aplicação permite apenas que
três pessoas vejam o bebé em simultâneo. Se tiver direitos de administrador,
pode remover o acesso de um dos convidados para poder obter acesso.
Por que razão a
aplicação não me
notifica quando o bebé
está a chorar?
Verifique se o intercomunicador para bebé está ligado à rede Wi-Fi. A luz
de estado do Wi-Fi na parte frontal do intercomunicador para bebé tem se
manter continuamente acesa a verde.
O intercomunicador para bebé poderá estar offline. Para receber uma
notificação quando o intercomunicador estiver offline, vá ao painel esquerdo
e active esta notificação em “Settings” (Definições).
O limite de som para notificações pode ter sido definido para um nível
demasiado alto. Nesse caso, a aplicação notifica-o apenas quando o bebé
produzir um som muito elevado. Abra o painel de instrumentos para
reduzir o limite de som de modo a assegurar-se de que será notificado mais
rapidamente quando o bebé começar a chorar.
Poderá ter definido um período de tempo demasiado longo. Seleccione
um período de tempo mais curto para que a aplicação o notifique mais
rapidamente.
O volume do seu telemóvel pode estar desligado. Defina o volume do seu
telemóvel para um nível normal.
A função de conversa pode estar activa. Toque no ícone da função de conversa
para a desactivar. Durante a função de conversa, não ouve os sons do bebé.
Verifique se não recebeu uma mensagem de correio electrónico a notificálo de que a sua conta foi removida. Se tiver direitos de visualização como
convidado, o administrador também poderá ter negado o seu acesso
temporariamente. Contacte o administrador e peça-lhe para o reactivar ou
para o convidar novamente como utilizador convidado.
Perco a ligação
frequentemente. Qual é
o problema?
Verifique se o sinal de Wi-Fi na divisão onde o intercomunicador está colocado
é suficientemente forte e estável. Se não for este o caso, para conseguir um
sinal mais forte e estável, necessita de um repetidor de sinal Wi-Fi. Se utilizar
um repetidor de sinal Wi-Fi, certifique-se de que o router e o repetidor de sinal
Wi-Fi têm a mesma SSID e que utiliza a mesma palavra-passe em ambos.
Se a luz de estado do Wi-Fi na parte frontal do intercomunicador para bebé
se mantiver continuamente acesa a verde e se perder repetidamente a
ligação, pode haver um problema com a ligação à Internet do seu dispositivo
inteligente. Verifique o sinal Wi-Fi no seu dispositivo inteligente ou a
velocidade do 3G ou 4G tentando ver um filme, por exemplo, no YouTube.
PORTUGUÊS 191
Pergunta
Resposta
Depois de ter alterado
o meu router, deixei
de conseguir ver o
meu bebé. Qual é o
problema?
Primeiro, certifique-se de que o seu dispositivo inteligente recebe um bom sinal
Wi-Fi do novo router. Poderá ligar o intercomunicador à rede Wi-Fi de duas
formas. A primeira opção é ligar o intercomunicador e a aplicação apresentarlhe-á a mensagem “Baby monitor not found” (Intercomunicador não encontrado).
Vá a “Troubleshooting” (Resolução de problemas) e seleccione “Reconnect
baby monitor” (Voltar a ligar o intercomunicador). A segunda opção é abrir
o painel esquerdo quando a aplicação apresenta a mensagem “Baby monitor
not found” (Intercomunicador para bebé não encontrado), seleccionar o
intercomunicador no painel esquerdo e seleccionar “Reconnect baby monitor”
(Voltar a ligar o intercomunicador para bebé). Quando a aplicação tiver gerado
o código QR Wi-Fi, segure o ecrã do seu dispositivo inteligente à frente da lente
do intercomunicador, a uma distância de 20 cm. Em seguida, siga as instruções
no ecrã para completar a configuração. O procedimento de instalação é
concluído com sucesso quando a luz de estado do Wi-Fi na parte frontal do
intercomunicador se mantiver continuamente acesa a verde.
Fui convidado como
utilizador convidado. Por
que razão não consigo
ver nada quando abro a
aplicação?
Verifique se não recebeu uma mensagem de correio electrónico a notificálo de que a sua conta foi removida. Se tiver direitos de visualização como
convidado, o administrador também poderá ter negado o seu acesso
temporariamente. Contacte o administrador e peça-lhe para o reactivar ou
para o convidar novamente como utilizador convidado.
Verifique se o seu dispositivo inteligente está ligado à Internet.
O intercomunicador para bebé poderá estar offline. Para receber uma
notificação quando o intercomunicador estiver offline, vá ao painel esquerdo
e active esta notificação em “Settings” (Definições).
O limite de som para notificações pode ter sido definido para um nível
demasiado alto. Nesse caso, a aplicação notifica-o apenas quando o bebé
produzir um som muito elevado. Abra o painel de instrumentos para
reduzir o limite de som de modo a assegurar-se de que será notificado mais
rapidamente quando o bebé começar a chorar.
Poderá ter definido um período de tempo demasiado longo. Seleccione
um período de tempo mais curto para que a aplicação o notifique mais
rapidamente.
O volume do seu telemóvel pode estar desligado. Defina o volume do seu
telemóvel para um nível normal.
Dicas e sugestões
Tenho de manter a
aplicação no ecrã para
monitorizar o meu
bebé?
Não, a aplicação pode monitorizar em segundo plano enquanto usa outras
funcionalidades do seu smartphone ou tablet. Toque no ícone do telemóvel.
Agora pode ouvir o seu bebé e também pode ouvi-lo quando ele começar
a chorar. Se o botão de todas as notificações estiver definido para ligado,
também receberá uma notificação no ecrã quando o bebé estiver a chorar
enquanto a aplicação é executada em segundo plano.
192
PORTUGUÊS
Pergunta
Resposta
Por que razão recebo
imagens a preto e
branco em vez de
imagens a cores?
O intercomunicador para bebé mudou para o modo de visão nocturna. A
divisão onde o intercomunicador para bebé está colocado está escura.
Se houver luz suficiente na divisão, o sensor de luz na parte superior do
intercomunicador para bebé poderá estar coberto ou sujo. Certifique-se de
que este sensor está totalmente exposto à luz na divisão.
Se o dispositivo estiver
bloqueado ou eu estiver
a utilizar outra aplicação
ou a fazer uma
chamada, posso ouvir o
meu bebé na mesma?
Sim, pode optar por continuar a monitorizar o seu bebé em segundo
plano. Tenha em atenção que se utilizar o seu telemóvel para efectuar uma
chamada, irá ouvir um toque apenas quando o bebé chorar. Não conseguirá
ouvir o seu bebé. Toque no símbolo do telemóvel para ligar o áudio em
segundo plano. Quando o áudio em segundo plano está ligado, pode ouvir
o seu bebé enquanto está a efectuar outras actividades. Também pode
optar por receber uma notificação quando o bebé estiver a chorar. Toque
no símbolo de sino no ecrã principal para activar ou desactivar todas as
notificações. Quando todas as notificações estiverem activadas, receberá uma
mensagem no ecrã quando o bebé estiver a chorar.
Utilizar e aprender
Preciso de uma conta
extra se tiver vários
intercomunicadores
para bebé?
Não, não necessita de uma conta extra se utilizar mais intercomunicadores
para bebé. Pode adicionar um intercomunicador para bebé à sua aplicação
uGrow Smart Baby Monitor. Vá a “My account” (A minha conta) no painel
esquerdo. Aqui pode ver uma lista dos intercomunicadores para bebé ligados
à aplicação. Toque em “Add baby monitor” (Adicionar intercomunicador
para bebé). Siga as instruções no capítulo “Configuração inicial” para ligar o
intercomunicador para bebé à aplicação.
Posso utilizar vários
intercomunicadores
para bebé na mesma
aplicação?
Pode ligar até dez intercomunicadores para bebé à aplicação, mas pode ver
o vídeo de apenas um intercomunicador para bebé de cada vez. Receberá
notificações dos outros intercomunicadores para bebé ligados. Se receber
uma notificação e tocar nesta, a aplicação levá-lo-á directamente para o
intercomunicador para bebé. Também pode seleccionar o intercomunicador
para bebé que pretende ver no painel esquerdo.
Por que razão a
aplicação demora muito
tempo a carregar?
A ligação à Internet do seu dispositivo inteligente ou a ligação Wi-Fi do
intercomunicador para bebé pode ser lenta. Verifique a ligação do seu
dispositivo inteligente e do intercomunicador para bebé. A aplicação precisa
de uma ligação de rede estável.
O intercomunicador
para bebé é à prova de
hackers?
Fazemos todos os possíveis para evitar pirataria informática e lançamos
actualizações frequentes. Certifique-se de que utiliza sempre o software mais
recente da aplicação e o firmware mais actual do intercomunicador para
bebé. Se perder o seu dispositivo inteligente, reponha o intercomunicador
para bebé para remover quaisquer ligações a este. Também pode iniciar
sessão na aplicação a partir de outro dispositivo inteligente e eliminar a sua
conta. Se for o único administrador, todos os utilizadores convidados também
serão desconectados do intercomunicador para bebé.
PORTUGUÊS 193
Pergunta
Resposta
Perdi o meu
smartphone. Como
posso evitar que
estranhos vejam o meu
bebé?
Inicie sessão na aplicação a partir de outro dispositivo inteligente e elimine
a sua conta. Se for o único administrador, isto irá desconectar todos os
utilizadores convidados da aplicação do intercomunicador para bebé. Também
pode repor o intercomunicador para bebé para desactivar todas as ligações
ao dispositivo que perdeu. Pode encontrar o botão de reposição na parte
posterior do intercomunicador para bebé.
Serei notificado
de actualizações
da aplicação ou
do software do
intercomunicador para
bebé?
Sim, receberá uma notificação no seu telemóvel para actualizar através da
App Store. Isto acontecerá periodicamente. As notificações para actualizar
o firmware do intercomunicador para bebé são apresentadas na aplicação
juntamente com instruções sobre como actualizar.
O meu telemóvel ou
tablet aquece quando
utilizo a aplicação. Isto é
uma situação normal?
O seu dispositivo necessita de bateria para emitir vídeos de alta qualidade.
Isto não irá danificar o seu dispositivo e recomendamos que actualize o seu
dispositivo com a versão mais actual do iOS e da aplicação uGrow. O seu
dispositivo não irá aquecer ao executar a aplicação em segundo plano.
www.philips.com/avent
Philips Consumer Lifestyle BV
Tussendiepen 4, 9206 AD Drachten, Netherlands
Trademarks owned by the Philips Group.
©2015 Koninklijke Philips N.V. All rights reserved
4213.328.0006.2


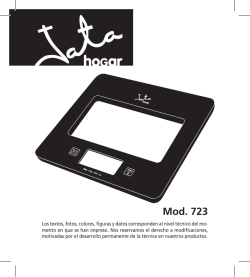

© Copyright 2026