
i sicurezza - Riello UPS
- 0MNSDL6K5RU5LUC - I GB D F E SICUREZZA 5 MANUALE D’USO 15 SAFETY 6 USER’S MANUAL 51 SICHERHEIT 7 BEDIENUNGSANLEITUNG SÉCURITÉ 87 8 MANUEL D’UTILISATEUR SEGURIDAD 123 9 MANUAL DE USUARIO 159 ΑΣΦΑΛΕΙΑ 10 SÄKERHETEN 11 NL VEILIGHEID 12 P SEGURANÇA 13 GR S 3 4 I SICUREZZA I Questa parte del manuale contiene precauzioni da seguire scrupolosamente in quanto riguardano la SICUREZZA. a) L’UPS NON DEVE FUNZIONARE SENZA COLLEGAMENTO DI TERRA. Il primo collegamento da effettuare è quello del conduttore di terra, da collegare al morsetto segnato con . b) Evitare di collegare il neutro di uscita a quello di ingresso o a terra perché questa operazione potrebbe causare malfunzionamenti. c) L'UPS genera al suo interno delle tensioni elettriche PERICOLOSE. Tutte le operazioni di installazione e manutenzione devono essere eseguite ESCLUSIVAMENTE da personale qualificato. d) L'UPS contiene al suo interno una sorgente di energia: le batterie. I morsetti e le prese d’uscita possono essere in tensione anche senza connettere l'UPS alla rete. e) La tensione totale di batteria può generare uno shock elettrico. Le batterie sostituite vanno considerate RIFIUTO TOSSICO e trattate di conseguenza. Non gettare i pacchi batterie sul fuoco: possono esplodere. Non tentare di aprire i pacchi batterie: sono prive di manutenzione. Inoltre l'elettrolita è pericoloso per la pelle e per gli occhi e può risultare tossico. f) Non accendere l'UPS se si nota una perdita di liquido, o se si vede una polvere bianca residua. g) Evitare che acqua, liquidi in genere e/o altri oggetti estranei entrino nell'UPS. h) In condizioni di pericolo spegnere l’UPS con l’interruttore posto sul pannello frontale ed aprire la protezione magnetotermica installata a monte dell’UPS. Sezionare la batteria rimuovendo la parte inferiore del pannello frontale e scollegando i due connettori dei battery pack. i) L' UPS genera una corrente di dispersione inferiore a 2 mA. Attenzione: la corrente di dispersione del carico si somma a quella dell’UPS sul conduttore di protezione di terra. j) Per l’espansione di batteria usare esclusivamente connettori forniti o autorizzati dalla ditta. k) Gli UPS di questa serie sono stati realizzati per l’uso professionale e quindi non sono adatti per l’uso in ambiente domestico. 5 GB SAFETY GB This part of the manual contains precautions that must be adhered to strictly since they regard SAFETY. a) THE UPS MUST NOT OPERATE WITHOUT AN EARTH CONNECTION. The first connection to be carried out is the earth conductor, which has to be connected to the terminal marked . b) Avoid connecting the output neutral to the input neutral or to earth as this could cause malfunctions. c) DANGEROUS electrical voltages are generated inside the UPS. All installation and maintenance operations must be carried out EXCLUSIVELY by authorized personnel. d) The UPS contains an internal power source: the batteries. The terminals and the output sockets may be powered even when the UPS is not connected to the mains. e) The total battery voltage can generate an electric shock. Replaced batteries should be considered as TOXIC WASTE and treated as such. Do not throw the battery packs into fire: they may explode. Do not try to open the battery packs: they do not require any maintenance. Furthermore the electrolyte is dangerous if it comes into contact with the skin or the eyes and may be toxic. f) Do not switch the UPS on if there is any leak of liquid, or if a residual white powder is noted. g) Do not allow water, liquids in general and/or other foreign bodies to get into the UPS. h) In the event of dangerous conditions switch the UPS off with the switch located on the front panel and open the magneto-thermal protection installed upstream of the UPS. Isolate the battery by removing the lower part of the front panel and disconnecting the two battery pack connectors. i) The UPS generates a leakage current of less than 2 mA. Warning: the leakage current of the load is added to that of the UPS on the earth protection conductor. j) For battery expansion use exclusively connectors supplied by or authorized by the manufacturers. k) The UPSs of this series have been designed for professional use and are therefore not suitable for use in a domestic environment. 6 D SICHERHEIT D Dieser Teil des Handbuchs enthält die Vorsichtsmaßnahmen, die genau einzuhalten sind, um SICHEREN BETRIEB zu garantieren. a) Die USV DARF NICHT OHNE ERDUNG BETRIEBEN werden. Bei Installation muss als erstes die Erdungsleitung an die mit bezeichnete Klemme angeschlossen werden. b) Den neutralen Ausgang nicht mit dem neutralen Eingang oder der Erde verbinden. Diese Operation könnte Fehlfunktionen bewirken. c) Die USV erzeugt intern GEFÄHRLICHE SPANNUNGEN. Alle Installations- und Wartungsarbeiten dürfen nur von qualifizierten Technikern vorgenommen werden. d) Die USV enthält eine Energiequelle: die Batterien. Daher können die Ausgangsklemmen unter Spannung stehen, auch wenn die USV vom Netz getrennt ist. e) Die Gesamtbatteriespannung kann elektrische Schläge verursachen. Ausgewechselte Batterien gelten als GIFTIGER ABFALL und müssen entsprechend entsorgt werden. Die Batteriepakete nicht ins Feuer werfen: sie können explodieren. Nicht versuchen die Batteriepakete zu öffnen: sie sind wartungsfrei. Das Elektrolyt schadet Haut und Augen und kann zu Vergiftungen führen. f) Die USV nicht einschalten, wenn Flüssigkeit austritt oder man weiße Pulverrückstände findet. g) Verhindern, dass Wasser und/oder ganz allgemein Flüssigkeiten und/oder Fremdkörper in die USV gelangen. h) In Gefahrensituationen die USV mit dem Hauptschalter auf der Fronttafel abschalten und den vor der USV installierten Thermoschütz öffnen. Die Batterie durch Entfernen des unteren Teils der Fronttafel und Abziehen der beiden Anschlüsse des Batteriepakets abtrennen. i) Die USV erzeugt einen Leckstrom von weniger als 2 mA. Wichtig: auf der Erdleitung addiert sich der Leckstrom der Lasten zu dem der USV. j) Zur Batterieerweiterung nur von der Firma gelieferte oder genehmigte Stecker verwenden. k) Die USVs dieser Baureihe sind für professionelle Einsatz konstruiert und eignen sich nicht für Haushaltseinsatz. 7 F SÉCURITÉ F Cette partie du Manuel concerne les mesures de SÉCURITÉ à suivre scrupuleusement. a) L’ASI NE DOIT PAS FONCTIONNER SANS RACCORDEMENT A LA TERRE. Le premier raccordement à effectuer est celui du conducteur de terre qui doit être branché à la borne marquée . b) Eviter de brancher le neutre de sortie à celui d’entrée ou de terre car cette opération pourrait causer de mauvais fonctionnements. c) L'ASI génère des tensions électriques DANGEREUSES. Toutes les opérations d’installation et d’entretien doivent être exécutées EXCLUSIVEMENT par un personnel qualifié. d) L'ASI contient une source d’énergie: les batteries. Les bornes et les prises de sorties peuvent être sous tension même si l’ASI n’est pas branché au réseau. e) La tension totale de la batterie peut provoquer une décharge électrique. Les batteries remplacées doivent être considérées comme des DECHETS TOXIQUES et traitées en conséquence. Je pas jeter les packs batteries dans le feu: les batteries pourraient exploser. Ne pas essayer d’ouvrir les packs batteries: ils ne nécessitent aucun entretien. De plus l’électrolyte est dangereux pour la peau et les yeux, et il peut s’avérer toxique. f) Ne pas mettre l'ASI en marche en cas de perte de liquide ou en présence d’une poudre blanche résiduelle. g) Eviter que de l’eau, des liquides en général et/ou tout autre objet étranger ne pénètrent dans l'ASI. h) Dans des conditions de danger, arrêter l’ASI à l’aide de l’interrupteur placé sur le panneau frontal et ouvrir la protection magnétothermique installée en amont de l’ASI. Sectionner la batterie en enlevant la partie inférieure du panneau frontal et en débranchant les deux connecteurs des packs batteries. i) L'ASI génère un courant de dispersion inférieur à 2 mA. Attention: le courant de dispersion de la charge s’additionne à celui de l’ASI sur le conducteur de protection de terre. j) Pour l’extension de la batterie utiliser exclusivement des connecteurs fournis ou autorisés par l’entreprise. k) Les ASI de cette série sont à usage professionnel et donc inaptes à être utilisés en milieu domestique. 8 E SEGURIDAD E Esta parte del manual contiene las medidas de precaución que deben ser escrupulosamente observadas para garantizar la SEGURIDAD. a) El SAI (Sistema de Alimentación Ininterrumpida) NO DEBE FUNCIONAR SIN TOMA DE TIERRA. El primer paso de la instalación será conectar el conductor de tierra al terminal señalado con . b) Ha de evitarse conectar el neutro de salida con el de entrada o la tierra, puesto que podría dar lugar a malfuncionamientos. c) El SAI genera en su interior TENSIONES PELIGROSAS. Todas las tareas de instalación y manutención han de ser realizadas exclusivamente por personal cualificado. d) El SAI contiene una fuente de energía: las baterías. Por ello los terminales de salida pueden tener tensión aunque el SAI esté desconectado de la red. e) La tensión total de la batería puede provocar shocks eléctricos. Las baterías sustituidas se consideran RESIDUO PELIGROSO y han de desecharse correctamente. No tire nunca los paquetes de baterías al fuego: podrían explotar. No intente abrir los paquetes de baterías: éstos no requieren mantenimiento. El electrolito puede dañar la piel y los ojos e incluso resultar tóxico. f) No encienda el SAI si detecta que una pérdida de líquido o si observa residuos de polvo blanco. g) Ha de evitarse que entren agua, líquidos en general y/o cuerpos extraños en el SAI. h) En situación de peligro desconecte el SAI con el interruptor situado en el panel frontal y abra el dispositivo de protección térmica instalado en la parte posterior del SAI. Desconecte la batería retirando la parte inferior del panel frontal y extrayendo los dos conectores del paquete de baterías. i) El SAI genera una corriente de fuga inferior a 2 mA. Nota importante: la corriente de fuga de la carga se añade a la del SAI en el contacto de toma de tierra. j) Para la ampliación de la batería utilice exclusivamente los conectores suministrados o autorizados por el fabricante. k) Los SAI de esta serie han sido desarrollados para un uso profesional y, por lo tanto, no son aptos para uso doméstico. 9 GR ΑΣΦΑΛΕΙΑ GR Το μέπορ αςηό ηος εγσειπιδίος πεπιέσει πποθςλάξειρ πος ππέπει να εθαπμόζονηαι αςζηηπώρ αθού αθοπούν ηην ΑΣΦΑΛΕΙΑ. α) ΣΟ UPS ΓΔΝ ΠΡΔΠΔΙ ΝΑ ΛΔΙΣΟΤΡΓΔΙ ΥΩΡΙ ΠΡΟΓΔΙΩΗ. Η πξώηε ζύλδεζε πνπ ζα γίλεη είλαη ν αγσγόο γείσζεο, πνπ πξέπεη λα ζπλδεζεί κε ηνλ αθξνδέθηε ζπκεησκέλν . β) Απνθεύγεηε λα ζπλδέζεηε ηελ νπδέηεξε έμνδν κε ηελ νπδέηεξε είζνδν ή κε ηε γείσζε επεηδή απηό ζα κπνξνύζε λα πξνθαιέζεη δπζιεηηνπξγίεο. γ) ΔΠΙΚΙΝΓΤΝΔ ειεθηξηθέο ηάζεηο παξάγνληαη κέζα ζην UPS. Πάζα εξγαζία εγθαηάζηαζεο θαη ζπληήξεζεο πξέπεη λα εθηειείηαη ΑΠΟΚΛΔΙΣΙΚΩ από εμνπζηνδνηεκέλν πξνζσπηθό. δ) Σν UPS εκπεξηέρεη εζσηεξηθή πεγή ελεξγείαο: ηηο ζπζηνηρίεο. Οη αθξνδέθηεο θαη νη ξεπκαηνδόηεο εμόδνπ κπνξεί λαη παξακέλνπλ ελεξγνί αθόκε όηαλ ην UPS δελ είλαη ζπλδεδεκέλν ζην ειεθηξηθό δίθηπν. ε) Η ζπλνιηθή ηάζε ζπζηνηρίαο κπνξεί λα παξαγάγεη ειεθηξνπιεμία. Αληηθαηεζηεκέλεο ζπζηνηρίεο ζα πξέπεη λα ζεσξνύληα σο ΣΟΞΙΚΑ ΑΠΟΒΛΗΣΑ θαη λα ρεηξίδνληαη αλαιόγσο. Μελ πεηάγεηε ηηο κπαηαξίεο ζε θσηηά, κπνξεί λα εθξαγνύλ. Με δνθηκάζεηε λα αλνίμεηε ηα παθέηα ζπζηνηρηώλ, δελ ρξεηάδνληαη θακηά ζπληήξεζε. Δμάιινπ ν ειεθηξνιύηεο είλαη επηθίλδπλνο αλ έιζεη ζ’επαθή κε ην δέξκα ή ηα κάηηα θαη κπνξεί λα είλαη ηνμηθόο. ζη) Μελ αλάςεηε ην UPS αλ ππάξρεη θάπνηα δηαξξνή πγξνύ, ή αλ παξαηεξεζεί ππόιεηκκα ιεπθήο ζθόλεο. δ) Μελ επηηξέςεηε λεξό ή γεληθώο πγξά θαη/ή άιια μέλα ζώκαηα λα εηζρσξήζνπλ ζην UPS. ε) ηελ πεξίπησζε επηθίλδπλσλ ζπλζεθώλ ζβήζηε ην UPS κε ην δηαθόπηε πνπ βξίζθεηαη ζην εκπξόζζην πιαίζην θαη αλνίμηε ηελ καγλεην-ζεξκηθή πξνζηαζία εγθαηεζηεκέλε πξνο ηα αλάληε ηνπ UPS. Απνκνλώζηε ηελ ζπζηνηρία αθαηξώληαο ην θάησ κέξνο ηνπ εκπξόζζηνπ πιαηζίνπ θαη απνζπλδένληαο ηνπο δπν ζπλδεηήξεο ηνπ παθέηνπ κπαηαξηώλ. ζ) Σν UPS παξάγεη ξεύκα δηαξξνήο ιηγόηεξν ησλ 2 mA. Πποζοσή: ην ξεύκα δηαξξνήο ηνπ θνξηίνπ πξνζηίζεηαη ζ’εθείλν ηνπ UPS ζηνλ πξνζηαηεπηηθό αγσγό γείσζεο. Γηα ηελ εθηόλσζε ησλ ζπζηνηρηώλ ρξεζηκνπνηείηε απνθιεηζηηθώο ζπλδεηήξεο πνπ πξνκεζεύνληαη ή εμνπζηνδνηνύληαη από ηνπο θαηαζθεπαζηέο. Σα UPS ηεο ζεηξάο απηήο ζρεδηάζηεθαλ γηα επαγγεικαηηθή ρξήζε θη επνκέλσο δελ είλαη θαηάιιεια γηα ρξήζε ζε νηθηαθό πεξηβάιινλ. η) θ) 10 S SÄKERHETEN S Denna del av manualen innehåller försiktighetsåtgärder som noggrant måste tillämpas eftersom de avser SÄKERHET. a) UPS-ENHETEN (OAVBRYTBAR STRÖMFÖRSÖRJNING) FÅR INTE ANVÄNDAS UTAN JORDNING. Den första anslutning som skall göras är jordningen som skall kopplas till uttaget märkt . b) Undvik att koppla utgång neutral till ingång neutral eller till jord då detta kan orsaka funktionsstörningar. c) FARLIG elektrisk spänning alstras inuti UPS-enheten (oavbrytbar strömförsörjning). All installation och underhållsarbete får UTESLUTANDE utföras av auktoriserad personal. d) UPS-enheten (oavbrytbar strömförsörjning) innehåller en intern strömkälla: batterierna. Kabelfästen och uttagen kan vara strömförande även om UPS-enheten (oavbrytbar strömförsörjning) inte är kopplad till elnätet. e) Den sammanlagda batterispänningen kan generera en elektrisk stöt. Utbytta batterier skall uppfattas som GIFTIGT AVFALL och behandlas som sådant. Kasta inte batterierna i eld: de kan explodera. Försök inte öppna batterierna: de behöver inget underhåll. Dessutom är syran farlig vid kontakt med hud eller ögon och kan vara giftig. f) Sätt inte på UPS-enheten (oavbrytbar strömförsörjning) om det finns läckage av vätska eller om rester av vitt pulver konstateras. g) Tillåt inte att vatten, vätskor i allmänhet och/eller övriga främmande föremål kan komma in i UPSenheten (oavbrytbar strömförsörjning). h) I händelse av fara, stäng av UPS-enheten (oavbrytbar strömförsörjning) med strömbrytaren på framsidan och öppna det magneto-termiska skyddet som är installerat uppströms hos UPS-enheten (oavbrytbar strömförsörjning). Isolera batteriet genom att ta bort den nedre delen av frontplattan och koppla från batteriets två kontaktdon. i) UPS-enheten (oavbrytbar strömförsörjning) genererar läckström mindre än 2mA. Varning: läckströmmen hos belastningen adderas till den befintliga hos UPS-enheten (oavbrytbar strömförsörjning) hos jordskyddsledaren. j) För att expandera batteriet använd endast kontaktdon levererade eller godkända av tillverkaren. k) UPS-enheterna i denna serie har beräknats för professionell användning och är därför inte lämpliga för användning i hemmiljö. 11 NL VEILIGHEID NL Dit deel van de handleiding bevat veiligheidsmaatregelen die strikt nageleefd moeten worden omdat ze betrekking hebben op de VEILIGHEID. a) DE UPS MAG NOOIT GEBRUIKT WORDEN ZONDER EEN AARDING. De eerste aansluiting die moet worden uitgevoerd is de aardgeleider. Deze dient te worden aangesloten op de uitgang aangeduid met . b) Sluit de uitgang neutraal niet aan op de ingang neutraal of op de aarding want dit kan defecten veroorzaken. c) GEVAARLIJKE elektrische voltages worden gegenereerd binnen de UPS. Iedere installatie of onderhoudsbeurt mag UITSLUITEND door goedgekeurd personeel uitgevoerd worden. d) De UPS bevat een interne stroombron: de accu’s. De uitgangen en de uitgangscontacten kunnen onder stroom staan, zelfs wanneer de UPS niet aangesloten is of het elektriciteitsnet. e) De totale voltage van de accu kan een elektrische schok veroorzaken. Vervangen accu’s moeten als TOXISCH AFVAL beschouwd worden en aldus behandeld. Werp geen accu’s in het vuur: ze zouden kunnen ontploffen. Probeer de accu’s nooit te openen: ze vereisen absoluut geen onderhoud. Bovendien is de elektrolyt gevaarlijk als deze in aanraking komt met de huid of de ogen. De elektrolyt kan ook giftig zijn. f) De UPS niet aanschakelen wanneer zich deze lekt, of wanneer u wit poeder opmerkt. g) Let erop dat geen water, vloeistoffen in het algemeen en/of vreemde voorwerpen in de UPS terecht raken. h) Indien zich gevaarlijke omstandigheden voordoen, schakelt u de UPS uit met de schakelaar op het voorpaneel en u opent de magnetische-thermische bescherming die stroomopwaarts van de UPS werd geïnstalleerd. Isoleer de accu door de onderste deel van het voorpaneel te verwijderen en de twee aansluitingen van de accu los te koppelen. i) De UPS genereert een lekstroom van minder dan 2 mA. Waarschuwing: de lekstroom van de lading wordt toegevoegd aan die van de UPS op de beschermende aarding. j) Indien u het vermogen van de accu wenst uit te breiden, mag u uitsluitend aansluitingen gebruiken die geleverd of goedgekeurd werden door de fabrikanten. k) De UPS modellen van deze serie werden ontworpen voor professioneel gebruik en daarom zijn zij niet geschikt voor gebruik in huiselijke omgeving. 12 P SEGURANÇA P Esta parte do manual contém as devidas precauções em relação à SEGURANÇA, e por isso devem ser seguidas rigorosamente. a) NÃO LIGAR O UPS SEM LIGAÇÃO TERRA. A primeira conexão a ser feita, é a do condutor de ligação à terra a ser conectado ao terminal marcado com . b) Evitar ligar o cabo do Neutro de Saída ao Neutro de Entrada ou ao cabo de terra, pois esta operação poderá causar falhas no sistema. c) Tensões eléctricas de ALTO RISCO são geradas dentro do UPS. Todos os procedimentos de instalação e manutenção devem ser comissionados EXCLUSIVAMENTE por técnicos devidamente qualificados e autorizados para o efeito. d) O UPS possui sua própria fonte de corrente de energia interna: as baterias. Os bornes e as tomadas da saída podem estar sob tensão eléctrica mesmo quando o UPS não está conectado à rede eléctrica. e) A carga total da bateria pode causar choque eléctrico. Baterias substituídas são consideradas LIXO TÓXICO e devem ser manejadas de tal maneira. Não deixe as baterias entrarem em contacto com fogo: elas são inflamáveis e podem explodir. Não tente abrir as baterias: elas não requerem manutenção. À parte disso, o electrólito liberado é nocivo à pele e aos olhos e pode ser tóxico. f) Não ligar o UPS, caso observe uma perda de líquido ou note um pó residual branco. g) Evitar que água, líquidos em geral e/ou outros objetos estranhos entrem na UPS. h) Em situações de risco, desligar o UPS com o interruptor situado no painel frontal e abrir a protecção magnetotérmica instalada a montante do UPS. Isolar a bateria removendo a parte inferior do painel frontal e desconectando a ligação das baterias. i) O UPS origina uma corrente de fuga inferior a 2 mA. Atenção: a corrente de fuga da carga se soma a do UPS no condutor de ligação à terra de proteção. j) Para aumentar o desempenho das baterias, use somente conectores fornecidos ou autorizados pelo fabricante. k) Os sistemas de alimentação ininterrupta (UPS) desta série foram projectados para uso profissional, portanto não são adequados para uso em ambiente doméstico. 13 14 I MANUALE D’USO 15 I INTRODUZIONE Vi ringraziamo per la scelta di un prodotto della gamma Sentinel Dual. Riello UPS è prettamente specializzata nello sviluppo e nella produzione di gruppi statici di continuità (UPS). Gli UPS di questa serie sono prodotti di alta qualità, attentamente progettati e costruiti allo scopo di garantire le migliori prestazioni. Questa apparecchiatura può essere installata da qualsiasi persona, previa ATTENTA E SCRUPOLOSA LETTURA DEL PRESENTE MANUALE. Questo manuale contiene le istruzioni dettagliate per l’uso e l’installazione dell’UPS. Per informazioni sull’utilizzo e per ottenere il massimo delle prestazioni dalla Vostra apparecchiatura, il presente manuale dovrà essere conservato con cura vicino all’UPS e CONSULTATO PRIMA DI OPERARE SULLO STESSO. TUTELA DELL’AMBIENTE Nello sviluppo dei suoi prodotti l’azienda dedica ampie risorse nell’analisi degli aspetti ambientali. Tutti i nostri prodotti perseguono gli obiettivi definiti nella politica del sistema di gestione ambientale sviluppato dall’azienda in accordo con la normativa vigente. In questo prodotto non sono utilizzati materiali pericolosi quali CFC, HCFC o amianto. Nella valutazione degli imballi la scelta del materiale è stata fatta prediligendo materie riciclabili. Per il corretto smaltimento si prega di separare e di identificare la tipologia di materiale costituente l’imballo seguendo la tabella sottostante. Smaltire ogni materiale secondo le normative vigenti nel paese di utilizzo del prodotto. Descrizione Pallet Angolare imballo Scatola Tampone adesivo Sacco di protezione Materiale Abete trattato HT Stratocell/cartone Cartone Stratocell Polietilene HD SMALTIMENTO DEL PRODOTTO L'UPS contiene al suo interno materiali che (in caso di dismissione/smaltimento) vengono considerati RIFIUTI TOSSICI e PERICOLOSI, ad esempio schede elettroniche e batterie. Trattare questi materiali secondo le legislazioni vigenti rivolgendosi a personale qualificato. Un loro corretto smaltimento contribuisce a rispettare l’ambiente e la salute delle persone. © E’ vietata la riproduzione di qualsiasi parte del presente manuale anche se parziale salvo autorizzazione della ditta costruttrice. Per scopi migliorativi, il costruttore si riserva la facoltà di modificare il prodotto descritto in qualsiasi momento e senza preavviso. 16 SOMMARIO PRESENTAZIONE 18 VISTE UPS VISTE BATTERY BOX VISTA MASCHERA DISPLAY 19 20 21 INSTALLAZIONE 22 APERTURA DELL’IMBALLO E VERIFICA DEL SUO CONTENUTO VERSIONE TOWER VERSIONE RACK MODALITÀ DI INSTALLAZIONE CONNESSIONE DELL’UPS AL BATTERY BOX USO 22 24 25 26 27 28 COLLEGAMENTI 28 Versione monofase 8-10kVA 29 Versione trifase 30 Versione con comando di By-pass remoto esterno PRIMA ACCENSIONE ACCENSIONE DA RETE ACCENSIONE DA BATTERIA SPEGNIMENTO DELL’UPS INDICAZIONI PANNELLO DISPLAY 31 33 33 33 33 34 Indicatori di stato dell’UPS 34 Area visualizzazione misure 35 Versione monofase 35 Versione trifase 36 Area di configurazione MODALITÀ DI FUNZIONAMENTO R.E.P.O. PRESA AUSILIARIA PROGRAMMABILE (POWER SHARE) CONFIGURAZIONE UPS PORTE DI COMUNICAZIONE Connettori RS232 e USB 37 38 38 38 39 41 41 Communication Slot SOFTWARE 41 42 Software di monitoraggio e controllo 42 Software di configurazione 42 RISOLUZIONE PROBLEMI 43 CODICI DI ALLARME 45 TABELLA DATI TECNICI 47 TABELLA DATI TECNICI UPS MONO/MONO TABELLA DATI TECNICI UPS TRI/MONO TABELLA DATI TECNICI BATTERY BOX TABELLA TEMPI DI SOVRACCARICO 47 48 49 49 17 PRESENTAZIONE La nuova famiglia di UPS Sentinel Dual è stata studiata con un occhio di riguardo alla versatilità. Infatti tali UPS possono essere installati, a seconda delle esigenze, sia in versione tower che in versione rack. Ecco come si presenta il prodotto nelle 2 differenti versioni: Tower Rack SDL 6500 TM Potenza nominale Tensione nominale Dimensioni H x L x P Peso (1) [VA] [Vac] [mm] [Kg] 6500 28 + 63 circa SDL 8000 SDL 8000 TM 8000 220/230/240 2 x [455 x 175 x 660] (1) 29 + 65 circa SDL 10000 SDL 10000 TM 10000 30 + 65 circa Nella versione rack, con maniglie installate, la dimensione H è diversa: 483mm x 175mm x 660mm (H x L x P) Nota: 175mm = 4U 483mm = 19” 18 PRESENTAZIONE VISTE UPS Feritoie di sgancio Maschera display ruotabile Interruttore bypass manuale Interruttore generale Pannello frontale rimuovibile Vista frontale (pannello frontale rimosso) (con pannello frontale) Connettore espansione batteria Remote emergency power off (R.E.P.O.) Ventola di raffreddamento Slot di espansione COMUNICATION SLOT Porta di comunicazione RS232 Porta di comunicazione USB Prese IEC 10 A Power share Protezione termica prese Power share Ventola di raffreddamento Cassetto connessioni IN/OUT Vista posteriore 19 PRESENTAZIONE VISTE BATTERY BOX Feritoie di sgancio Maschera estraibile/ruotabile Pannello frontale rimuovibile Vista frontale Griglia di aerazione Connettori per espansione batterie Sezionatori portafusibili Vista posteriore 20 PRESENTAZIONE VISTA MASCHERA DISPLAY Pulsante “SEL / SET” Pulsante “ON” Pulsante “STBY” Display LCD 1 Funzionamento regolare 7 Area di configurazione 2 Funzionamento da rete 8 Richiesta manutenzione 3 Funzionamento da batteria 9 Timer 4 Carico alimentato da bypass 10 Area visualizzazione misure 5 Indicatore autonomia batteria 11 Stand-by / allarme 6 Indicatore livello carico 21 INSTALLAZIONE APERTURA DELL’IMBALLO E VERIFICA DEL SUO CONTENUTO Dopo l’apertura dell’imballo, per prima cosa procedere alla verifica del contenuto. L’imballo dovrà contenere: UPS Battery box 1 passacavo + 2 blocca guaina 6 cover in plastica (pannelli superiori UPS e Battery box) Puntali per connessione cavi - morsettiera 2 chiavette in plastica er sgancio display 2 Kit maniglie Cavo seriale RS232 22 INSTALLAZIONE Cavo di connessione UPS-Battery box 2 Fusibili per Battery box - 14x51 mm, 50A, 400V Manuale utente + CD-ROM software User's manual 23 INSTALLAZIONE ATTENZIONE: questo Gruppo di Continuità (UPS) è un prodotto che rispetta le normative vigenti di compatibilità elettromagnetica (categoria C2). In ambiente domestico può provocare interferenze radio. L’utilizzatore potrebbe dover adottare provvedimenti supplementari. VERSIONE TOWER In questo capitolo vengono descritte le operazioni per preparare l’UPS e il Battery box all’utilizzo in versione tower. ATTENZIONE: per la Vostra sicurezza e del Vostro prodotto, è necessario seguire scrupolosamente le informazioni riportate qui di seguito. PRIMA DI EFFETTUARE LA SEGUENTE SEQUENZA DI OPERAZIONI, ASSICURARSI CHE L’UPS SIA COMPLETAMENTE SPENTO E PRIVO DI COLLEGAMENTO ALLA RETE ELETTRICA E A QUALSIASI CARICO Una volta estratti dagli imballi, l’UPS e il Battery box si presentano già predisposti per l’installazione in configurazione tower. Per completare tale configurazione basta montare le sei cover in plastica in dotazione, tre nella parte superiore dell’UPS e le altre tre nella parte superiore del Battery box, seguendo quanto riportato di seguito: Le cover hanno un sistema di fissaggio ad incastro: individuare i fori appositi per il montaggio delle cover nella parte superiore dell’UPS e del Battery box e, prestando la massima cautela, aggangiare le stesse esercitando una leggera pressione (vedi figura a lato). 24 INSTALLAZIONE VERSIONE RACK Di seguito viene descritta la sequenza di operazioni da seguire per trasformare l’UPS e il Battery box in versione rack. ATTENZIONE: per la Vostra sicurezza e del Vostro prodotto, è necessario seguire scrupolosamente le informazioni riportate qui di seguito. PRIMA DI EFFETTUARE LA SEGUENTE SEQUENZA DI OPERAZIONI, ASSICURARSI CHE L’UPS SIA COMPLETAMENTE SPENTO E PRIVO DI COLLEGAMENTO ALLA RETE ELETTRICA E A QUALSIASI CARICO 1 - Per prima cosa è necessario smontare i piedini sul fondo dell’UPS e del Battery box. Portare l’UPS e il Battery box in posizione orizzontale prestando la massima cautela e con un piccolo cacciavite a taglio sollevare delicatamente il perno posto al centro del piedino. Una volta sollevato, sfilare il piedino dalle basi dell’UPS e del Battery box. Ripetere le stesse operazioni per tutti i piedini rimanenti. A lato viene illustrata l’esatta sequenza da seguire: 1 2 2 - Smontati tutti i piedini, si deve procedere a ruotare le maschera display. Infilare le chiavette in dotazione nelle feritoie di sgancio che si trovano ai lati della maschera display ed esercitare una leggera pressione quanto basta per sganciare la maschera dall’UPS, come evidenziato nella figura a lato. Ripetere le stesso operazioni per sganciare la maschera dal Battery box. 3 - ATTENZIONE: La maschera display è collegata all’UPS tramite apposito cavo. E’ necessario quindi estrarre la maschera con estrema cautela evitando violenti strappi o altri movimenti bruschi, onde evitare possibili danni al display e/o all’UPS stesso. NON TENTARE IN NESSUN MODO DI SEPARARE LA MASCHERA DISPLAY DALL’UPS. 4 - Ruotare la maschera di 90° in senso antiorario e riagganciarla all’UPS inserendola delicatamente nell’apposito alloggio fino ad udire un leggero scatto con la maschera che rimane in posizione. Si procede analogamente per ruotare e riagganciare la maschera al Battery box. NOTA: La pressione deve essere esercitata in prossimità delle feritoie di aggancio. 5 - Ruotare l’UPS e il Battery box di 90° in senso orario prestando la massima cautela 25 INSTALLAZIONE 6 - A questo punto, con l’UPS e il Battery box in posizione orizzontale, fissare le maniglie in dotazione ai lati dell’UPS e del Battery box tramite le viti apposite come mostrato nelle figure sottostanti. NOTE: UPS e Battery box sono compatibili al montaggio in armadi rack standard 600mm x 800mm o superiore (in profondità). Nell’installazione rack dati i pesi dell’UPS e del Battery box è obbligatorio l’utilizzo delle staffe di sostegno (guida con supporto a L). Sempre per lo stesso motivo, è consigliabile installare l’UPS sopra il Battery box e nella parte bassa dell’armadio rack. L’Azienda non si assume responsabilità per danneggiamenti causati da collegamenti errati o da operazioni non descritte in questo manuale. MODALITÀ DI INSTALLAZIONE Prima di effettuare il collegamento dell’UPS al Battery box avere cura di seguire le seguenti note: Installare l’UPS e il Battery box su di una superficie piana e stabile. Evitare il posizionamento in luoghi esposti alla luce diretta del sole o ad aria calda Mantenere la temperatura ambiente tra 0°C e 40°C N.B.: l’UPS è in grado di funzionare con una temperatura ambiente compresa tra 0°C e 40°C. La temperatura ottimale di funzionamento delle batterie poste all’interno del Battery box è compresa fra 20 e 25°C. Se infatti la vita operativa delle batterie è mediamente di 4 anni con una temperatura ambiente di 20°C, portando la temperatura a 30°C la vita si dimezza. L'umidità relativa dell’ambiente non deve superare il 90%. Evitare gli ambienti polverosi. Avere cura di posizionare l’UPS e il Battery box con il fronte e il retro ad almeno 10 cm dalle pareti e di non appoggiare oggetti sulle feritoie di aerazione per permettere un’adeguata ventilazione. Il cavo che collega l’UPS al Battery box non può essere prolungato dall’utente. In caso di necessità contattare il fornitore. 26 INSTALLAZIONE CONNESSIONE DELL’UPS AL BATTERY BOX Collegare l’UPS al Battery box tramite il cavo di espansione fornito in dotazione (vedi figura sottostante) Inserire i due fusibili in dotazione negli appositi sezionatori portafusibili presenti sul retro del Battery box. Chiudere i sezionatori. Il cavo può essere collegato indifferentemente ad una delle due prese presenti sul retro del Battery box. La presa d’espansione, che rimane inutilizzata sul retro del Battery box, è una predisposizione per il collegamento in cascata di ulteriori Battery box, per aumentare l’autonomia dell’UPS. ATTENZIONE: Non è ammesso collegare più di un UPS per ogni Battery box o per più Battery box collegati in cascata. 27 USO COLLEGAMENTI L’INSTALLAZIONE DEVE ESSERE ESEGUITA ESCLUSIVAMENTE DA PERSONALE QUALIFICATO. IL PRIMO COLLEGAMENTO DA EFFETTUARE E’ QUELLO DEL CONDUTTORE DI PROTEZIONE ( CAVO DI TERRA), DA INSERIRE NEL MORSETTO SIGLATO . L’UPS NON DEVE FUNZIONARE SENZA IL COLLEGAMENTO CON L’IMPIANTO DI TERRA. Avvertenza: rispettando le indicazioni di neutro (N) e fase (F) relative a spine e prese, l’UPS inserito in un impianto non modifica il regime di neutro preesistente. La resistenza sul collegamento di neutro risulta inferiore a 0,1 ohm. Un interruttore differenziale posto a monte interviene anche per un guasto che si verifichi a valle dell’UPS. La sensibilità di tale interruttore deve tener conto della corrente dispersa del gruppo (che è di circa 2 mA) e di quella del carico che si sommano sul conduttore di terra dell’UPS. Ingresso UPS Monofase Trifase Differenziale Tipo B o Tipo A Tipo B Il regime di neutro viene modificato solo se è presente un trasformatore di isolamento o quando l’UPS funziona con neutro sezionato a monte. Evitare comunque di collegare il neutro di uscita a quello di ingresso o a terra perchè questa operazione potrebbe danneggiare l’UPS. Per effettuare i collegamenti di rete e carico seguire le indicazioni sottostanti: 1. Installare a monte dell’apparecchiatura un interruttore magnetotermico da 63A con curva di intervento B o C (4 poli per versioni trifase, 2 poli per versioni monofase). 2. I morsetti da utilizzare per il collegamento delle linee di ingresso e uscita sono situati all’interno del cassetto connessioni IN/OUT. Svitare quindi la vite che fissa il cassetto connessioni situata sulla parte destra del cassetto (vedi figura a lato). 3. Estrarre il cassetto quanto basta perchè i morsetti siano ben accessibili (vedi figura a lato). ATTENZIONE: il cassetto ha un sistema di bloccaggio che ne impedisce la totale estrazione. Non tentare di separare il cassetto dalla sua sede. 28 USO Versione monofase 8-10kVA 1. Utilizzare 3 cavi con sezione 10 mm2 (TERRA, N e L) in ingresso, e 3 cavi con sezione 10 mm2 per l’uscita (TERRA, N e L). Facendo riferimento alla figura qui a fianco: - Inserire i cavi provenienti dal magnetotermico da 63A all’interno del blocca guaina P2 (linea di ingresso). - Inserire i cavi provenienti dal carico all’interno del blocca guaina P1 (linea di uscita). - Spellare i cavi rispettando la misura indicata. - Inserire la parte appena spellata nei puntali in dotazione. 2. Collegare i fili ai relativi morsetti seguendo scrupolosamente le indicazioni riportate qui di seguito: Linea di ingresso a - Assicurarsi che il magnetotermico a monte sia aperto. b - Collegare il filo di terra al morsetto 3. c - Collegare il filo di neutro al morsetto 1. d - Collegare il filo della fase al morsetto 2. Linea di uscita a - Collegare il filo di terra al morsetto 6. b - Collegare il filo di neutro al morsetto 7. c - Collegare il filo di fase al morsetto 8. Linea di Bypass a - Assicurarsi che ai morsetti 9 e 10 vi sia collegato un ponticello, necessario per il corretto funzionamento dell’UPS. 3. Serrare i passacavi alla flangia, chiudere il cassetto e fissarlo con la vite tolta in precedenza. 29 USO Versione trifase 1. (VERSIONE TRIFASE 8-10kVA): Utilizzare 3 cavi con sezione 6 mm2 (TERRA, L2 e L3) e 2 con sezione 10 mm2 (N, L1) in ingresso (N.B.: L1 e N hanno sezione maggiore perché in funzionamento da bypass devono portare tutta la corrente d’ingresso). Per l’uscita utilizzare 3 cavi con sezione 10 mm2 (TERRA, N e L). Facendo riferimento alla figura qui a fianco: - Inserire i cavi provenienti dal magnetotermico da 63A all’interno del blocca guaina P2 (linea di ingresso). - Inserire i cavi provenienti dal carico all’interno del blocca guaina P1 (linea di uscita). - Spellare i cavi rispettando la misura indicata. - Inserire la parte appena spellata nei puntali in dotazione. (VERSIONE TRIFASE 6,5kVA): Utilizzare 3 cavi con sezione 4 mm2 (TERRA, L2 e L3) e 2 con sezione 6 mm2 (N, L1) in ingresso (N.B.: L1 e N hanno sezione maggiore perché in funzionamento da bypass devono portare tutta la corrente d’ingresso). Per l’uscita utilizzare 3 cavi con sezione 6 mm2 (TERRA, N e L). Facendo riferimento alla figura qui a fianco: - Inserire i cavi provenienti dal magnetotermico da 63A all’interno del blocca guaina P2 (linea di ingresso). - Inserire i cavi provenienti dal carico all’interno del blocca guaina P1 (linea di uscita). - Spellare i cavi rispettando la misura indicata. - Inserire la parte appena spellata nei puntali in dotazione. 2. Collegare i fili ai relativi morsetti seguendo scrupolosamente le indicazioni riportate qui di seguito: Linea di ingresso a - Assicurarsi che il magnetotermico a monte sia aperto. b - Collegare il filo di terra al morsetto 5. c - Collegare il filo di neutro al morsetto 1. d - Collegare i fili delle fasi ai morsetti 2, 3 e 4 (per L1 utilizzare il filo rosso). Linea di uscita a - Collegare il filo di terra al morsetto 6. b - Collegare il filo di neutro al morsetto 7. c - Collegare il filo di fase al morsetto 8. Linea di Bypass a - Assicurarsi che ai morsetti 9 e 10 vi sia collegato un ponticello, necessario per il corretto funzionamento dell’UPS. 3. Serrare i passacavi alla flangia, chiudere il cassetto e fissarlo con la vite tolta in precedenza. 30 USO Versione con comando di Bypass remoto esterno Se si vuole portare all’esterno il comando di Bypass manutenzione remoto, seguire i punti 1, 2 e 3 precedentemente spiegati. Procedere quindi nel modo seguente: 1. Togliere il tappo presente nel primo foro in alto del cassetto estraibile e montare il passacavo in dotazione. 2. Seguire le istruzioni precedentemente spiegate per il collegamento, il numero e la sezione dei cavi da utilizzare, passanti attraverso i blocca guaine P1 e P2. Per fare il collegamento con i morsetti di Bypass remoto utilizzare un cavo 2x0.75 mm2. Facendo riferimento alla figura qui a fianco: - Inserire il cavo di comando esterno di Bypass all’interno del passacavo P3. - Spellare i cavi rispettando la misura indicata. - Inserire la parte appena spellata nei puntali in dotazione. 3. Collegare i fili ai relativi morsetti seguendo le istruzioni precedentemente spiegate. La linea di Bypass può essere collegata sia con l’UPS in collegamento monofase che in collegamento trifase. Collegare i fili della linea di Bypass come segue: Linea di Bypass a - Collegare i due fili del cavo ai morsetti 9 e 10 per riuscire a comandare dall’esterno il Bypass remoto. 31 USO Serrare il passacavo e i blocca guaina alla flangia, chiudere il cassetto e fissarlo con la vite tolta in precedenza. É NECESSARIO APPORRE UN’ETICHETTA DI AVVERTIMENTO SU TUTTI I SEZIONATORI DELLA POTENZA DI RETE INSTALLATI LONTANO DALL’AREA DELL’UPS, ALLO SCOPO DI RICHIAMARE IL PERSONALE DI ASSISTENZA SUL FATTO CHE IL CIRCUITO É COLLEGATO AD UN UPS. L’ETICHETTA DEVE RIPORTARE IL TESTO SEGUENTE: ISOLARE IL SISTEMA DI CONTINUITÀ (UPS) PRIMA DI OPERARE SU QUESTO CIRCUITO 32 USO PRIMA ACCENSIONE 1) Accertarsi che tutte le operazioni descritte nel paragrafo precedente “Collegamenti” siano state eseguite in maniera corretta. 2) Chiudere l’interruttore magnetotermico posto a monte dell’UPS. 3) Premere l’interruttore generale posto sul pannello frontale. 4) Dopo qualche istante l’UPS si attiva, si accende il display, viene emesso un beep e lampeggia l’icona . L’UPS è in stato di stand-by: questo significa che l’UPS è in una condizione di minimo consumo. Il microcontrollore è alimentato e svolge il compito di supervisione e autodiagnosi; le batterie sono in carica; tutto è predisposto per attivare l’UPS. Si ha uno stato di stand-by anche nel funzionamento da batteria purchè ci sia il timer attivato. 5) Verificare a display i settaggi impostati (vedi paragrafo: Area di configurazione) ACCENSIONE DA RETE 1) Premere il pulsante “ON”. Dopo averlo premuto tutte le icone del display si accendono per 1 secondo e l’UPS emette un beep. 2) Accendere l’apparecchiatura collegata all’UPS. Solo per la prima accensione: trascorsi circa 30 sec., verificare il corretto funzionamento dell’UPS: 1. Simulare un black-out aprendo l’interruttore collegato a monte dell’UPS. 2. 3. Il carico deve continuare ad essere alimentato, si deve accendere l’icona deve udire un beep ogni 4 secondi. Richiudendo l’interrutore a monte l’UPS deve ritornare a funzionare da rete. sul display, e si ACCENSIONE DA BATTERIA 1) Premere l’interruttore generale posto sul pannello frontale. 2) Tenere premuto il pulsante “ON” per almeno 5 secondi. Tutte le icone del display si accendono per 1 secondo e l’UPS emette un beep. 3) Accendere le apparecchiature collegate all’UPS. SPEGNIMENTO DELL’UPS Per spegnere l’UPS tenere premuto il tasto “STBY” per almeno 1,5 secondi. L’UPS ritorna in condizione di stand-by e l’icona inizia a lampeggiare: a. Se la rete è presente, per spegnere completamente l’UPS si deve premere l’interruttore generale, in modo da riportare l’interruttore nella posizione originale (posizione alzata). b. Se l’UPS funziona da batteria e non è stato impostato il timer, si spegne completamente in automatico dopo 5 secondi. Se invece è impostato il timer, per spegnere l’UPS occorre tenere premuto il tasto “STBY” per almeno 5 secondi. Se si desidera che al ritorno della rete l’UPS rimanga spento completamente è necessario premere l’interruttore generale (vedi punto a.). ATTENZIONE: l'UPS è dotato di alimentatore ridondante di emergenza il quale, in caso di guasto dell'UPS, interviene evitando lo spegnimento del carico commutandolo su bypass. Se si spegne l'UPS premendo direttamente l'interruttore generale (senza prima portarlo in stand-by come spiegato nel manuale), il carico rimane alimentato da bypass. 33 USO INDICAZIONI PANNELLO DISPLAY In questo capitolo verranno descritte in modo approfondito tutte le informazioni che possono essere visualizzate sul display LCD. Per una maggiore comprensione, possiamo suddividere le informazioni visualizzate in tre gruppi principali: Indicatori di stato dell’UPS Area visualizzazione misure Area di configurazione Indicatori di stato dell’UPS ICONA STATO DESCRIZIONE Fissa Indica la presenza di un’anomalia Lampeggiante L’UPS è in stato di stand-by Fissa Indica un funzionamento regolare Fissa L’UPS sta funzionando da rete Lampeggiante L’UPS funziona da rete, ma la tensione di uscita non è sincronizzata con la tensione di rete Fissa L’UPS sta funzionando da batteria. Quando si trova in questo stato l’UPS emette un segnale acustico (beep) ad intervalli regolari di 4 sec. Lampeggiante Preallarme di fine scarica. Indica che l’autonomia delle batterie sta terminando. In questa condizione l’UPS emette un beep ad intervalli regolari di 1 sec. Fissa Indica che i carichi collegati all’UPS sono alimentati da bypass Dinamica Indica la percentuale di autonomia stimata Dinamica Indica la % di carico applicato all’UPS rispetto al valore nominale Lampeggiante E’ richiesto un intervento di manutenzione Fissa Lampeggiante Indica che il timer è attivato (accensione o spegnimento programmato). Il timer è attivabile/disattivabile tramite software in dotazione Manca 1 minuto alla riaccensione dell’UPS o 3 minuti al suo spegnimento 34 USO Area visualizzazione misure Sul display possono essere visualizzate in sequenza le più importanti misure relative all’UPS. All’accensione dell’UPS, il display visualizza il valore della tensione di rete. Per passare ad una visualizzazione differente premere il pulsante “SEL / SET” ripetutamente finchè non compare la misura desiderata. In caso si verifichi un’anomalia / allarme (FAULT) o un blocco (LOCK), automaticamente sul display verrà visualizzato il tipo ed il codice di allarme corrispondente. Versione monofase Di seguito sono riportati alcuni esempi: ESEMPIO GRAFICO (1) DESCRIZIONE ESEMPIO GRAFICO (1) DESCRIZIONE Tensione di rete Tensione totale delle batterie Frequenza di rete Percentuale del carico applicato Tensione in uscita dall’UPS Corrente assorbita dal carico Frequenza della tensione di uscita Temperatura del sistema di raffreddamento della elettronica interna all’UPS Autonomia residua delle batterie Anomalia / Allarme (2): viene visualizzato il codice corrispondente Percentuale di carica delle batterie Blocco (2): viene visualizzato il codice corrispondente (1) I valori riportati nelle immagini in tabella sono puramente indicativi. (2) I codici di FAULT / LOCK possono essere visualizzati solo se al momento attivi (presenza di un’anomalia / allarme o di un blocco). 35 USO Versione trifase Di seguito sono riportati alcuni esempi: ESEMPIO GRAFICO (1) DESCRIZIONE ESEMPIO GRAFICO (1) DESCRIZIONE Percentuale di carica delle batterie Tensione fase 1 (2) Tensione totale delle batterie Percentuale del carico applicato Tensione fase 2 (2) Corrente assorbita dal carico Temperatura del sistema di raffreddamento della elettronica interna all’UPS Tensione fase 3 (2) Anomalia / Allarme (3): viene visualizzato il codice corrispondente Blocco (2): viene visualizzato il codice corrispondente Frequenza della tensione di uscita Autonomia residua delle batterie (1) I valori riportati nelle immagini in tabella sono puramente indicativi. (2) Indicazione alternata N°Fase/Tensione. (3) I codici di FAULT / LOCK possono essere visualizzati solo se al momento attivi (presenza di un’anomalia / allarme o di un blocco). 36 USO Area di configurazione L’area di configurazione raggruppa i parametri principali di funzionamento dell’UPS e ne visualizza lo stato attuale. I parametri contenuti in quest’area sono modificabili agendo direttamente da pannello display. PARAMETRI SETTABILI: Frequenza: Frequenza della tensione di uscita Frequenza Tensione: Tensione di uscita Modalità: Modalità di funzionamento dell’UPS Tensione Modalità L’immagine a lato rappresenta la zona del display relativa ai settaggi (area di configurazione) con in evidenza i tre parametri settabili. Come procedere: Per accedere all’area di configurazione tener premuto il pulsante “SEL / SET” per almeno 2 sec. La scritta “SET” si accende e compare una freccia ( ► ) alla sinistra di Frequenza. La freccia indica il settaggio selezionato. Per cambiare la selezione del parametro da modificare premere il pulsante “SEL / SET”. Per modificare la voce selezionata premere il pulsante “ON”. Per uscire dall’area di configurazione tener premuto il pulsante “SEL / SET” per almeno 2 sec. SETTAGGI POSSIBILI Frequenza: □ 50 Hz □ 60 Hz □ Spento (autoapprendimento della frequenza) Tensione: □ 220 V □ 230 V □ 240 V Modalità: □ ON LINE □ ECO □ SMART □ STBYOFF NOTA: Per rendere effettiva la modifica della configurazione della frequenza di uscita è necessario spegnere completamente l’UPS e riaccenderlo (tramite interruttore generale). I PARAMETRI TENSIONE E FREQUENZA DI USCITA DEVONO ESSERE COMPATIBILI CON QUELLI DEL CARICO ALIMENTATO DALL’UPS 37 USO MODALITÀ DI FUNZIONAMENTO La modalità che garantisce la massima protezione al carico è la modalità ON LINE (default), dove l’energia per il carico subisce una doppia conversione e viene ricostruita in uscita in modo perfettamente sinusoidale con frequenza e tensione fissata dal preciso controllo digitale a microprocessore in modo indipendente dall’ingresso (V.F.I.). * Accanto alla tradizionale modalità di funzionamento ON LINE doppia conversione è possibile settare le seguenti modalità: ECO (LINE INTERACTIVE) SMART (SMART ACTIVE) STBYOFF (STAND-BY OFF) Al fine di ottimizzare il rendimento, nella modalità ECO il carico è normalmente alimentato da bypass. Nel caso in cui la rete esca dalle tolleranze previste l’UPS commuta nel normale funzionamento ON LINE doppia conversione. Dopo circa cinque minuti dal rientro della rete in tolleranza il carico viene nuovamente commutato su bypass. Nel caso in cui l’utente non sappia decidere la modalità più adatta di funzionamento (tra ON LINE e ECO) può affidare la scelta alla modalità SMART ACTIVE nella quale, in base ad una statistica rilevata sulla qualità della rete di alimentazione, l’UPS decide in modo autonomo in quale modalità configurarsi. Nella modalità STAND-BY OFF infine si consegue il funzionamento come soccorritore: in presenza di rete il carico è disalimentato mentre all’avvento di un black-out il carico viene alimentato da inverter tramite le batterie. R.E.P.O. Questo ingresso isolato è utilizzato per spegnere l’UPS a distanza in caso di emergenza. L’eventuale interruttore normalmente chiuso di “Remote Emergency Power Off” (R.E.P.O.) deve essere collegato al connettore presente sul retro dell’UPS. L’UPS viene fornito dalla fabbrica con i morsetti R.E.P.O. cortocircuitati: rimuovere il cortocircuito se tale contatto è collegato all’ausiliario di un interruttore remoto di emergenza. Il circuito di R.E.P.O. é autoalimentato con circuiti di tipo SELV. Non è richiesta quindi una tensione esterna di alimentazione. Quando è chiuso (condizione normale) scorre una corrente di 10mA max. PRESA AUSILIARIA PROGRAMMABILE (POWER SHARE) L’UPS è dotato di una presa di uscita che consente lo scollegamento automatico del carico ad essa applicato in determinate condizioni di funzionamento. Gli eventi che determinano lo stacco automatico della presa di Power share, possono essere selezionati dall’utente tramite il software di configurazione (vedi paragrafi Software di configurazione e Configurazione UPS). E’ possibile ad esempio selezionare lo stacco dopo un certo tempo di funzionamento da batteria, o al raggiungimento della soglia di preallarme di fine scarica delle batterie, o ancora al verificarsi di un evento di sovraccarico. * Il valore rms della tensione di uscita è fissato dal preciso controllo a microprocessore in modo indipendente dalla tensione di ingresso mentre la frequenza della tensione di uscita è sincronizzata (all’interno di una tolleranza impostabile dall’utente) con quella di ingresso per consentire l’utilizzo del bypass. Al di fuori di questa tolleranza l’UPS si desincronizza portandosi a frequenza nominale ed il bypass non è più utilizzabile (free running mode). 38 USO CONFIGURAZIONE UPS La seguente tabella illustra tutte le possibili configurazioni a disposizione dell’utente per adattare al meglio l’UPS alle proprie necessità. LEGENDA: = Indica che la configurazione può essere modificata, oltre che dal software di configurazione, anche tramite intervento da pannello display. = Indica che la configurazione può essere modificata solamente tramite software di configurazione. FUNZIONE DESCRIZIONE PREDEFINITO CONFIGURAZIONI POSSIBILI Frequenza di uscita Selezione della frequenza nominale di uscita Tensione di uscita Selezione della tensione nominale di uscita Modalità di funzionamento Selezione di una delle 4 diverse modalità di funzionamento ON LINE Ritardo di accensione Tempo di attesa per la riaccensione automatica dopo il ritorno della rete 5 sec. Spegnimento per carico minimo Spegnimento automatico dell’UPS in funzionamento da batteria, se il carico è inferiore al 5% Disabilitato Abilitato Disabilitato Limitazione autonomia Tempo massimo di funzionamento da batteria Disabilitato Disabilitato (scarica completa batterie) 1 ÷ 65000 in step di 1 sec. Preavviso fine scarica Tempo rimanente di autonomia stimata per il preavviso di fine scarica 3 min. 1 ÷ 255 in step di 1 min. Test batteria Intervallo di tempo per il test automatico delle batterie 40 ore Disabilitato 1 ÷ 1000 in step di 1 ora Auto 50 Hz 60 Hz Auto: apprendimento automatico dalla frequenza di ingresso 230V 220V 230V 240V 220 ÷ 240 in step di 1V (solo tramite software) ON LINE ECO SMART ACTIVE STAND-BY OFF Disabilitato 1 ÷ 255 in step di 1 sec. 39 MODALITÀ USO FUNZIONE DESCRIZIONE PREDEFINITO Soglia di allarme per carico massimo Seleziona il limite utente di sovraccarico Disabilitato Luminosità display Seleziona il livello di luminosità del display LCD Massima Allarme sonoro Seleziona la modalità di funzionamento dell’allarme sonoro Ridotto Presa ausiliaria (power share) Seleziona la modalità di funzionamento della presa ausiliaria CONFIGURAZIONI POSSIBILI Disabilitato 0 ÷ 103 in step di 1% Minima ÷ Massima in 20 step Normale Ridotto: non suona per intervento momentaneo del bypass Sempre collegata Sempre collegata Stacco dopo n secondi di funzionamento da batteria Stacco dopo n secondi dal segnale di preallarme fine scarica ... (vedi manuale del software di configurazione) FUNZIONI AVANZATE Tolleranza della frequenza di ingresso Seleziona il range ammesso per la frequenza di ingresso per il passaggio su bypass e per la sincronizzazione dell’uscita ± 5% Soglie di tensione bypass Seleziona il range di tensione ammesso per il passaggio su bypass Bassa: 180V Alta: 264V Bassa: 180 ÷ 200 in step di 1V Alta: 250 ÷ 264 in step di 1V Soglie di tensione bypass per ECO Seleziona il range di tensione ammesso per il funzionamento in modalità ECO Bassa: 200V Alta: 253V Bassa: 180 ÷ 220 in step di 1V Alta: 240 ÷ 264 in step di 1V Sensibilità intervento per ECO Seleziona la sensibilità di intervento durante il funzionamento in modalità ECO Normale Alimentazione del carico in stand-by Alimentazione del carico su bypass con UPS spento (stato di stand-by) Disabilitato (carico NON alimentato) Funzionamento bypass Seleziona la modalità di utilizzo della linea bypass ± 0.25% ± 0.5% ± 0.75% ± 1 ÷ ±10 in step di 1% Abilitato / Alta sensibilità 40 Bassa Normale Alta Disabilitato (non alimentato) Abilitato (alimentato) Abilitato / Alta sensibilità Abilitato / Bassa sensibilità Disabilitato con sincronizzazione ingresso / uscita Disabilitato senza sincronizzazione ingresso / uscita MODALITÀ USO PORTE DI COMUNICAZIONE Nella parte posteriore dell’UPS (vedi Viste UPS) sono presenti le seguenti porte di comunicazione: Porta seriale, disponibile con connettore RS232 e connettore USB. NOTA: l’utilizzo di un connettore esclude automaticamente l’altro. Slot di espansione per schede di interfaccia aggiuntive COMMUNICATION SLOT. Connettori RS232 e USB CONNETTORE RS232 PIN # 1 2 3 4 5 6 7 8 9 CONNETTORE USB SEGNALE Contatto chiuso: UPS in blocco * TXD RXD PIN # 1 2 3 4 GND Ingresso di alimentazione interfaccia +12Vdc Contatto chiuso: preallarme di fine scarica * Contatto chiuso: funzionamento da batteria * * Contatto optoisolato max. +30Vdc / 10mA Communication Slot l’UPS è fornito di uno slot di espansione per schede di comunicazione opzionali (vedi figura a lato) che consentono all’apparecchiatura di dialogare utilizzando i principali standard di comunicazione. Alcuni esempi: Seconda porta RS232 Duplicatore di seriale Agente di rete Ethernet con protocollo TCP/IP, HTTP e SNMP Porta RS232 + RS485 con protocollo JBUS / MODBUS Scheda relay di segnalazione Per maggiori informazioni sugli consultare il sito del produttore. accessori disponibili 41 4 3 1 2 SEGNALE VBUS DD+ GND USO SOFTWARE Software di monitoraggio e controllo Il software PowerShield3 garantisce un’efficace ed intuitiva gestione dell’UPS, visualizzando tutte le più importanti informazioni come tensione di ingresso, carico applicato, capacità delle batterie. E’ inoltre in grado di eseguire in modo automatico operazioni di shutdown, invio e-mail, sms e messaggi di rete al verificarsi di particolari eventi selezionati dall’utente. Operazioni per l’installazione: Collegare la porta di comunicazione RS232 dell’UPS ad una porta di comunicazione COM del PC tramite il cavo seriale in dotazione* oppure collegare la porta USB dell’UPS ad una porta USB del PC utilizzando un cavo standard USB*. Scaricare il software dal sito web www.riello-ups.com, selezionando il sistema operativo desiderato. Seguire le istruzioni del programma di installazione. Per informazioni più dettagliate sull’installazione ed utilizzo consultare il manuale del software scaricabile dal nostro sito web www.riello-ups.com. Software di configurazione Tramite un software dedicato è possibile accedere alla configurazione dei più importanti parametri dell’UPS. Per un elenco delle possibili configurazioni fare riferimento al paragrafo Configurazione UPS. * Si raccomanda di utilizzare un cavo di lunghezza max. 3 metri. 42 RISOLUZIONE PROBLEMI Un funzionamento non regolare dell’UPS molto spesso non è indice di guasto ma è dovuto solamente a problemi banali, inconvenienti oppure distrazioni. Si consiglia pertanto di consultare attentamente la tabella sottostante che riassume informazioni utili alla risoluzione dei problemi più comuni. PROBLEMA POSSIBILE CAUSA SOLUZIONE INTERRUTTORE GENERALE Premere l’interruttore generale posto sul pannello NON PREMUTO frontale. IL CONNETTORE DEL BATTERY BOX E’ SCOLLEGATO NON SI ACCENDE IL DISPLAY Collegare il connettore del battery box. MANCA IL COLLEGAMENTO Verificare la connessione alla rete elettrica. ALLA RETE ELETTRICA MANCANZA DELLA TENSIONE DI RETE (BLACK- Verificare la presenza della tensione della rete elettrica. OUT) IL DISPLAY E’ ACCESO MA NON VIENE ALIMENTATO IL CARICO INTERVENTO DELLA PROTEZIONE A MONTE Resettare la protezione. ATTENZIONE: Verificare che non sia presente un sovraccarico in uscita all’UPS. L’UPS E’ IN MODALITA’ STAND-BY Premere il tasto “ON” posto sul pannello frontale per alimentare i carichi. LA MODALITA’ STAND-BY OFF E’ SELEZIONATA E’ necessario cambiare la modalità. Infatti la modalità STAND-BY OFF (soccorritore) alimenta i carichi solo in caso di black-out. MANCA IL COLLEGAMENTO Verificare il collegamento al carico. AL CARICO L’UPS FUNZIONA DA BATTERIA NONOSTANTE SIA PRESENTE LA TENSIONE DI RETE Resettare la protezione. ATTENZIONE: Verificare che non sia presente un sovraccarico in uscita all’UPS. INTERVENTO DELLA PROTEZIONE A MONTE LA TENSIONE DI INGRESSO Problema dipendente dalla rete. Attendere il rientro in SI TROVA AL DI FUORI DELLE TOLLERANZE tolleranza della rete di ingresso. L’UPS tornerà AMMESSE PER IL automaticamente al funzionamento da rete. FUNZIONAMENTO DA RETE L’UPS NON SI ACCENDE ED IL DISPLAY SEGNALA UNO TRA I CODICI: A06, A08 LA TEMPERATURA DELL’UPS E’ INFERIORE A 0°C IL DISPLAY SEGNALA IL CODICE: A11 RELÈ DI INGRESSO BLOCCATO Verificare la temperatura dell’ambiente in cui è posizionato l’UPS; se troppo bassa, portarla sopra la soglia minima (0°C). L’anomalia non provoca particolari malfunzionamenti. Se il problema si ripresentasse ad una successiva riaccensione, contattare il centro assistenza. 43 RISOLUZIONE PROBLEMI PROBLEMA POSSIBILE CAUSA IL CICALINO SUONA IN MODO CONTINUO ED IL DISPLAY SEGNALA UNO TRA I CODICI: A54, F50, F51, F52, F55, L50, L51, L52 IL CARICO APPLICATO ALL’UPS E’ TROPPO ELEVATO IL DISPLAY SEGNALA IL CODICE: A61 BATTERIE DA SOSTITUIRE Sostituire il battery box. IL DISPLAY SEGNALA IL CODICE: A62 BATTERY BOX ASSENTE O NON COLLEGATO Verificare che il battery box sia presente e collegato correttamente. IL DISPLAY SEGNALA IL CODICE: A63 LE BATTERIE SONO SCARICHE; L’UPS E’ IN ATTESA CHE LA TENSIONE DELLE BATTERIE SUPERI LA SOGLIA IMPOSTATA Attendere la ricarica delle batterie o forzare in modo manuale l’accensione tenendo premuto il tasto “ON” per almeno 2 sec. IL CICALINO SUONA IN MODO CONTINUO ED IL DISPLAY SEGNALA UNO TRA I CODICI: F03, F05, F07, F10, F13, F21, F40, F41, F42, F43 SI STA VERIFICANDO UN MALFUNZIONAMENTO DELL’UPS; PROBABILE PROSSIMO BLOCCO Se è possibile disalimentare il carico, spegnere e riaccendere l’UPS; nel caso il problema si ripresentasse, chiamare il centro assistenza. IL CICALINO SUONA IN MODO CONTINUO ED IL DISPLAY SEGNALA UNO TRA I CODICI: F04, L04 LA TEMPERATURA DEI DISSIPATORI INTERNI DELL’UPS E’ TROPPO ELEVATA Verificare che la temperatura dell’ambiente in cui si trova l’UPS non superi i 40°C. IL CICALINO SUONA IN MODO CONTINUO ED IL DISPLAY SEGNALA UNO TRA I CODICI: F53, L53 E’ STATA RILEVATA UN’ANOMALIA SU UNA O PIU’ UTENZE ALIMENTATE DALL’UPS IL CICALINO SUONA IN MODO CONTINUO ED IL DISPLAY SEGNALA UNO TRA I CODICI: F60, L03, L05, L07, L10, L13, L20, L21, L40, L41, L42, L43 SI E’ VERIFICATO UN MALFUNZIONAMENTO DELL’UPS Se è possibile disalimentare il carico, spegnere e riaccendere l’UPS; nel caso il problema si ripresentasse, chiamare il centro assistenza. E’ ATTIVO UN COMANDO REMOTO Se non voluto, verificare la posizione dell’interruttore di bypass manuale o lo stato degli ingressi di comando di un eventuale scheda a contatti opzionale. Verificare la chiusura del contatto R.E.P.O. sul retro dell’UPS. IL DISPLAY SEGNALA UNO TRA I CODICI: C01, C02, C03 SOLUZIONE Ridurre il carico entro la soglia del 100% (o soglia utente in caso di codice A54). 44 Scollegare tutte le utenze e ricollegarle una alla volta per identificare quella guasta. RISOLUZIONE PROBLEMI CODICI DI ALLARME Utilizzando un sofisticato sistema di autodiagnosi, l’UPS è in grado di verificare e segnalare sul pannello display eventuali anomalie e/o guasti che si dovessero verificare durante il normale funzionamento dell’apparecchiatura. In presenza di un problema l’UPS segnala l’evento visualizzando sul display il codice ed il tipo di allarme attivo (FAULT e/o LOCK). FAULT Le segnalazioni di tipo FAULT si suddividono in tre categorie. Anomalie: sono problemi “minori” che non comportano il blocco dell’UPS ma riducono le prestazioni o impediscono l’utilizzo di alcune sue funzionalità. CODICE DESCRIZIONE A06 A08 A11 A54 A61 A62 A63 Temperatura sensore1 inferiore a 0°C Temperatura sensore2 inferiore a 0°C Relè di ingresso bloccato (non apre) Carico > della soglia utente impostata Batterie da sostituire Battery box assente o non collegato Attesa ricarica batterie Allarmi: sono problemi più critici rispetto alle anomalie perché il loro perdurare può provocare, anche in un tempo molto breve, il blocco dell’UPS. CODICE F03 F04 F05 F07 F10 F13 F21 F40 F41 F42 F43 F50 F51 F52 F53 F55 F60 DESCRIZIONE Alimentazione ausiliaria non corretta Sovratemperatura dissipatori Sensore1 di temperatura guasto Sensore2 di temperatura guasto Fusibile di ingresso rotto o relè di ingresso bloccato (non chiude) Precarica condensatori fallita Sovratensione banco condensatori Sovratensione inverter Tensione continua in uscita Tensione inverter non corretta Sottotensione inverter Sovraccarico: carico > 103% Sovraccarico: carico > 125% Sovraccarico: carico > 150% Corto circuito Attesa riduzione carico per ritorno su inverter Sovratensione batterie 45 RISOLUZIONE PROBLEMI Comandi attivi: indica la presenza di un comando remoto attivo. CODICE DESCRIZIONE C01 C02 C03 C04 Comando remoto di spegnimento Comando remoto carico su bypass Comando remoto di accensione Test batterie in esecuzione LOCK Le segnalazioni di tipo LOCK (blocchi) sono solitamente precedute da una segnalazione di allarme e, per la loro portata, comportano lo spegnimento dell’inverter e l’alimentazione del carico attraverso la linea di bypass (tale procedura è esclusa per i blocchi da sovraccarico forti e persistenti e per il blocco per corto circuito). CODICE DESCRIZIONE L03 L04 L05 L06 L07 L10 L13 L20 L21 L31 L40 L41 L42 L43 L50 L51 L52 L53 Alimentazione ausiliaria non corretta Sovratemperatura dissipatori Sensore1 di temperatura guasto Sensore3 di temperatura guasto Sensore2 di temperatura guasto Fusibile di ingresso rotto o relè di ingresso bloccato (non chiude) Precarica condensatori fallita Sottotensione banco condensatori Sovratensione banco condensatori Anomalia bypass Sovratensione inverter Tensione continua in uscita Tensione inverter non corretta Sottotensione inverter Sovraccarico: carico > 103% Sovraccarico: carico > 125% Sovraccarico: carico > 150% Corto circuito 46 TABELLA DATI TECNICI 1- TABELLA DATI TECNICI UPS MONO/MONO MODELLI INGRESSO Tensione nominale Range accettato Range di tensione per non intervento batteria Frequenza nominale Corrente massima (1) Corrente nominale (2) Fattore di potenza Distorsione corrente @ carico massimo BYPASS Range di tensione accettato per la commutazione Range frequenza accettato per la commutazione Tempo di commutazione BATTERIA Tempo di ricarica (8) USCITA Tensione nominale Variazione statica (3) Variazione dinamica (4) Forma d’onda Distorsione tensione @ carico lineare Distorsione tensione @ carico distorcente Frequenza (5) Fattore cresta della corrente Potenza nominale in VA Potenza nominale in W Corrente di cortocircuito VARIE Corrente di fuga verso terra Rendimento AC/AC Temperatura ambiente (6) Umidità Protezioni Hold-up time Rumorosità Dimensioni H x L x P (mm) Peso in Kg (stimato) SDL 8000 SDL 10000 220/230/240 Vac 0 – 280 Vac Massima tensione 276Vac Minima tensione: da 184 a 138 Vac dal 100% al 50% del carico in modo lineare Ritorno funzionamento da rete a 190Vac 50 – 60 Hz ±5Hz 44A 54A 34A 43A 0.98 6% 180 – 264 Vac Frequenza selezionata +5% 0.1ms 6-8 h 220/230/240 Vac selezionabile ±1.5% 1.5% (7) 5% in 20ms Sinusoidale 3% 5% 50 o 60 Hz selezionabile 3:1 8000 10000 7200 9000 1,5 x In per t= 0.5sec 10mA 92% 0 – 40 °C < 90% senza condensa eccessiva scarica delle batterie - sovracorrente - cortocircuito sovratensione - sottotensione - termica 30msec < 45dB(A) a 1mt. 2 x [455mm (19”) x 175mm (4U) x 660mm (26”)] 29 + 65 Kg circa 30 + 65 Kg circa (1) (2) (3) (4) (5) @ carico nominale, tensione minima di 180Vac, batteria in carica @ carico nominale, tensione nominale di 230Vac, batteria in carica Rete/Batteria @ carico 0% -100% @ Rete/batteria/rete @ carico resistivo 0%/100%/0% Se la frequenza di rete è entro ±5% (settabile dall’utente) del valore selezionato, l’UPS è sincronizzato con la rete. Se la frequenza è fuori tolleranza o in funzionamento da batteria, la frequenza è quella selezionata ±0.1% (6) 20 - 25 °C per una maggiore vita delle batterie (7) Per mantenere la tensione di uscita entro il campo di precisione indicato, può rendersi necessaria una ricalibrazione dopo un lungo periodo di esercizio. (8) Tempo necessario al raggiungimento del 90% della carica (dopo una scarica completa a carico ≥80%) 47 TABELLA DATI TECNICI TABELLA DATI TECNICI UPS TRI/MONO MODELLI INGRESSO (3 Ø + N tensioni stellate) Tensione nominale Range accettato Range di tensione per non intervento batteria Frequenza nominale Corrente massima (1) Corrente nominale (2) Fattore di potenza Distorsione corrente @ carico massimo BYPASS (su L1) Range di tensione accettato per la commutazione Range frequenza accettato per la commutazione Tempo di commutazione BATTERIA Tempo di ricarica (8) USCITA Tensione nominale Variazione statica (3) Variazione dinamica (4) Forma d’onda Distorsione tensione @ carico lineare Distorsione tensione @ carico distorcente Frequenza (5) Fattore cresta della corrente Potenza nominale in VA Potenza nominale in W Corrente di cortocircuito VARIE Corrente di fuga verso terra Rendimento AC/AC Temperatura ambiente (6) Umidità Protezioni Hold-up time Rumorosità Dimensioni H x L x P (mm) Peso in Kg (stimato) SDL 6500 TM SDL 8000 TM SDL 10000 TM 220/230/240 Vac 0 – 280 Vac Massima tensione 276Vac Minima tensione: da 184 a 138 Vac dal 100% al 50% del carico in modo lineare Ritorno funzionamento da rete a 190Vac 50 - 60 Hz ±5Hz 13A 15A 19A 9A 11A 14A 0.95 26% 180 – 264 Vac Frequenza selezionata ±5% 0.1ms 6-8 h 6500 5850 220/230/240 Vac selezionabile ±1.5% 1.5% (7) 5% in 20ms Sinusoidale 3% 6% 50 o 60 Hz selezionabile 3:1 8000 7200 1,5 x In per t= 0.5sec 10000 9000 10mA 92% 0 – 40 °C < 90% senza condensa eccessiva scarica delle batterie - sovracorrente - cortocircuito - sovratensione sottotensione - termica 40msec < 45dB(A) a 1mt. 2 x [455mm (19”) x 175mm (4U) x 660mm (26”)] 28 + 63 Kg circa 29 + 65 Kg circa 30 + 65 Kg circa (1) (2) (3) (4) (5) @ carico nominale, tensione minima di 180Vac, batteria in carica @ carico nominale, tensione nominale di 230Vac, batteria in carica Rete/Batteria @ carico 0% -100% @ Rete/batteria/rete @ carico resistivo 0%/100%/0% Se la frequenza di rete è entro ±5% (settabile dall’utente) del valore selezionato, l’UPS è sincronizzato con la rete. Se la frequenza è fuori tolleranza o in funzionamento da batteria, la frequenza è quella selezionata ±0.1% (6) 20 - 25 °C per una maggiore vita delle batterie (7) Per mantenere la tensione di uscita entro il campo di precisione indicato, può rendersi necessaria una ricalibrazione dopo un lungo periodo di esercizio. (8) Tempo necessario al raggiungimento del 90% della carica (dopo una scarica completa a carico ≥80%) 48 TABELLA DATI TECNICI TABELLA DATI TECNICI BATTERY BOX MODELLI BASE BBX SDL 240V BB NP A3 BATTERIA Tensione nominale Tensione fine carica N° batterie / V VARIE Temperatura ambiente (1) Umidità Protezioni Dimensioni H x L x P Peso [Vdc] [Vdc] BBX SDL 240V BB NP A5 240 273 20 / 12 0 – 40 < 90% senza condensa sovracorrente - cortocircuito 455 x 175 x 660 [°C] [mm] [Kg] 63 65 (1) 20-25°C per una maggior vita delle batterie TABELLA TEMPI DI SOVRACCARICO FUNZIONAMENTO DA TEMPI DI SOVRACCARICO BYPASS 100% < Load 125% 125% < Load 150% Load > 150% Attiva bypass dopo 2 sec In blocco dopo 120 sec Attiva bypass dopo 2 sec In blocco dopo 4 sec Attiva bypass istantaneamente In blocco dopo 1 sec 49 INVERTER In blocco dopo 60 sec In blocco dopo 4 sec In blocco dopo 0.5 sec 50 GB USER MANUAL 51 GB INTRODUCTION Thanks you for choosing this product of the Sentinel Dual range. Riello UPS are renowned specialists in the development and production of uninterruptible power supplies (UPS). The UPS in this range are high quality products, designed and built with care in order to give you the best performance. This equipment can be installed by anyone, subject to CAREFULLY AND THOROUGHLY READING THIS MANUAL. The manual contains detailed instructions on how to use and install the UPS. For information on using and getting the best performance from your UPS, this manual should be kept safely in the vicinity of the UPS and CONSULTED BEFORE TAKING ANY ACTION ON THE UPS. ENVIRONMENTAL PROTECTION During the development of its products, the company uses extensive resources with regards to all environmental aspects. All our products pursue the objective defined in the environmental management system developed by the company in compliance with standards in force. No hazardous materials such as CFC, HCFC or asbestos are used in this product. When evaluating packaging, the choice of material has been made favouring recyclable materials. For correct disposal, please separate and identify the type of material of which the packaging is made in the table below. Dispose of all material in compliance with standards in force in the country in which the product is used. Description Pallet Packaging corner Box Adhesive pad Protective bag Material Heat-treated pine Stratocell/cardboard Cardboard Stratocell HD Polyethylene DISPOSING OF THE PRODUCT The UPS contains internal material that (in case of dismiss / disposal) are considered TOXIC and HAZARDOUS WASTE, such as electronic circuit boards and batteries. Treat these materials according to the laws applicable referring to qualified service personnel. Their proper disposal contributes to respect the environment and human health. © Reproduction of any part of this manual, including partial, is strictly prohibited without the prior consent of the manufacturer. For the purpose of improving it, the manufacturer reserves the right to modify the product described herein at any time and without notice. 52 CONTENTS PRESENTATION 54 UPS VIEWS BATTERY BOX VIEWS 55 56 57 DISPLAY MASK VIEW INSTALLATION 58 OPENING THE PACKAGING AND CHECKING ITS CONTENTS TOWER VERSION RACK VERSION INSTALLATION PROCEDURES CONNECTING THE UPS TO THE BATTERY BOX USE 58 60 61 62 63 64 CONNECTIONS 64 8-10kVA single phase version 65 Three phase version 66 Version with external Bypass remote control FIRST START-UP START-UP FROM MAINS START-UP FROM BATTERY UPS SHUTDOWN DISPLAY PANEL INDICATIONS 67 69 69 69 69 70 UPS status indicators 70 Measurements display area 71 Single phase version 71 Three phase version 72 Configuration area OPERATING MODES R.E.P.O. PROGRAMMABLE AUXILIARY SOCKET (POWER SHARE) UPS CONFIGURATION COMMUNICATION PORTS RS232 and USB connectors 73 74 74 74 75 77 77 Communication Slot SOFTWARE 77 78 Monitoring and control software 78 Configuration software 78 TROUBLESHOOTING 79 81 ALARM CODES TECHNICAL DATA TABLE 83 SINGLE/SINGLE PHASE UPS TECHNICAL DATA TABLE THREE/SINGLE PHASE UPS TECHNICAL DATA TABLE BATTERY BOX TECHNICAL DATA TABLE TABLE OF OVERLOAD TIMES 83 84 85 85 53 PRESENTATION The new Sentinel Dual UPS family has been designed with a special eye to versatility. These UPSs can in fact be installed either in a tower version or in a rack version, according to requirements. The 2 different versions of the product are shown below: Tower Rack SDL 6500 TM Nominal power Nominal voltage Dimensions H x L x D Weight (1) [VA] [Vac] [mm] [Kg] 6500 approx 28 + 63 SDL 8000 SDL 8000 TM 8000 220/230/240 2 x [455 x 175 x 660] (1) approx 29 + 65 SDL 10000 SDL 10000 TM 10000 approx 30 + 65 The H dimension is different in the rack version with handles mounted: 483mm x 175mm x 660mm (H x L x D) Note: 175mm = 4U 483mm = 19” 54 PRESENTATION UPS VIEWS Release slots Rotatable display mask Manual bypass switch General switch Removable front panel Front view (with front panel removed) (with front panel) Battery expansion connector Remote emergency power off (R.E.P.O.) Cooling fan COMMUNICATION expansion slot RS232 communication port USB communication port IEC 10 A Power share sockets Power share sockets thermal protection Cooling fan IN/OUT connections drawer Rear view 55 PRESENTATION BATTERY BOX VIEWS Release slots Extractable/rotatable mask Removable front panel Front view Ventilation grille Connectors for battery expansion Fuse-holder disconnecting switches Rear view 56 PRESENTATION DISPLAY MASK VIEW “SEL / SET” button “ON” button “STBY” button LCD Display 1 Normal operation 7 Configuration area 2 Operation from mains 8 Maintenance request 3 Operation from battery 9 Timer 4 Load powered by the bypass 10 Measurement display area 5 Battery back up time indicator 11 Stand-by/alarm 6 Load level indicator 57 INSTALLATION OPENING THE PACKAGING AND CHECKING ITS CONTENTS After opening the packaging, first check the contents. The packaging should contain the following: UPS Battery box 1 cable guide + 2 seal stops 6 plastic covers (upper panels UPS and Battery box) Ferrules for cables - terminal board connection 2 plastic keys to release display 2 Handles kits RS232 serial cable 58 INSTALLATION UPS-Battery box connection cable 2 Fuses for Battery box - 14x51 mm, 50A, 400V User manual + CD-ROM software User's manual 59 INSTALLATION WARNING: this UPS product conforms to the current electromagnetic compatibility (EMC) regulations (C2 class). It may cause radio interference in the home environment. The user may have to adopt supplementary measures. TOWER VERSION This chapter describes the operations required to prepare the UPS and the Battery box for use in the tower version. WARNING: for your safety and that of your product, the information set out below should be followed carefully. BEFORE CARRYING OUT THE FOLLOWING SEQUENCE OF OPERATIONS, ENSURE THAT THE UPS IS COMPLETELY SWITCHED OFF AND NOT CONNECTED TO THE ELECTRICITY MAINS OR TO ANY LOAD Once removed from the packaging, the UPS and the Battery box are ready for installation in a tower configuration. All that is needed to complete this configuration is to mount the six plastic covers provided, three in the upper part of the UPS and the other three in the upper part of the Battery box, as described below: The three covers have an interlocking system: locate the cover mounting holes in the upper part of the UPS and of the Battery box and very carefully engage them by exerting gentle pressure (see figure at side). 60 INSTALLATION RACK VERSION The sequence of operations required to convert the UPS and the Battery box into the rack version is described below. WARNING: for your safety and that of your product, the information set out below should be followed carefully. BEFORE CARRYING OUT THE FOLLOWING SEQUENCE OF OPERATIONS, ENSURE THAT THE UPS IS COMPLETELY SWITCHED OFF AND NOT CONNECTED TO THE ELECTRICITY MAINS OR TO ANY LOAD 1 - First remove the feet at the base of the UPS and Battery box. Put the UPS and the Battery box into a horizontal position very carefully, and with a small slotted screwdriver carefully lift the pin at the centre of the foot. Once it has been lifted, remove the foot from the bases of the UPS and Battery box. Repeat these operations for the remaining feet. The exact sequence to follow is shown at the side: 1 2 2 - Once all the feet have been removed, the display mask must then be rotated. Insert the keys provided in the release slots located at the sides of the display mask and exert enough gentle pressure to release the mask from the UPS, as shown in the figure at the side. Repeat the same operations to release the mask from the Battery box. 3 - WARNING: The display mask is connected to the UPS by means of a cable. The mask must therefore be removed very carefully, without pulling or exerting undue force, in order to avoid damaging the display and/or the UPS. DO NOT TRY TO SEPARATE THE DISPLAY MASK FROM THE UPS IN ANY WAY. 4 - Rotate the mask 90° anticlockwise and reengage it in the UPS by carefully inserting it in the housing until a slight click is heard with the mask remaining in position. Do the same to rotate and reengage the mask to the Battery box. NOTE: The pressure must be exerted near the release slots 5 - Rotate the UPS and the Battery box 90° clockwise taking the utmost care 61 INSTALLATION 6 - At this point, with the UPS and the Battery box in a horizontal position, fasten the handles to the sides of the UPS and Battery box with the screws as shown in the figures below. NOTE: The UPS and Battery box are compatible for mounting in standard rack cabinets of 600mm x 800mm or more (in width). Support brackets (guides with L-shaped support) must be used in rack installations due to the weight of the UPS and of the Battery box. It is recommended to install the UPS above the Battery box and in the lower part of the rack cabinet for the same reason. The manufacturers cannot accept liability for damage caused by wrong connections or by operations other than those described in this manual. INSTALLATION PROCEDURES Before connecting the UPS to the Battery box, ensure compliance with the following points: Install the UPS and the Battery box on a flat, stable surface. Avoid placing in positions exposed to direct sunlight or hot air Maintain room temperature between 0°C and 40°C N.B.: the UPS can operate with an ambient temperature of between 0°C and 40°C. The optimal operating temperature for the batteries inside the Battery box is between 20 and 25°C. If the operational lifetime of the batteries is an average of 4 years with an ambient temperature of 20°C, this will be halved if the temperature goes up to 30°C. The ambient humidity rate must not exceed 90%. Avoid dusty environments. Ensure that the UPS and the Battery box are placed with the front and the rear at least 10 cm away from walls. Do not place objects on top of the ventilation holes in order to allow adequate ventilation. The cable connecting the UPS to the Battery box must not be extended by the user. Contact the supplier in case of need. 62 INSTALLATION CONNECTING THE UPS TO THE BATTERY BOX Connect the UPS to the Battery box by means of the expansion cable provided (see figure below) Insert the two fuses provided into the fuse-holder disconnecting switches at the back of the Battery box. Close the disconnecting switches. The cable can be connected to either of the two sockets located at the back of the Battery box. The remaining unused expansion socket at the back of the Battery box can be used for the cascade connection of further Battery boxes to increase UPS autonomy. WARNING: Only one UPS can be connected for each Battery box or for several cascade-connected Battery boxes. 63 USE CONNECTIONS INSTALLATION MUST BE CARRIED OUT EXCLUSIVELY BY QUALIFIED PERSONNEL. THE FIRST CONNECTION TO BE CARRIED OUT IS THE PROTECTION CONDUCTOR (EARTH CABLE), TO BE INSERTED IN THE TERMINAL MARKED . THE UPS MUST NOT BE OPERATED WITHOUT BEING CONNECTED TO THE EARTHING SYSTEM. Warning: if the neutral (N) and phase (F) instructions are observed for the plugs and sockets, the UPS will not change the existing neutral arrangements when inserted in a system. The resistance on the neutral connection is less than 0.1 ohm. A differential switch placed upstream will also be triggered for a fault occurring downstream of the UPS. The sensitivity of this switch has to take into account the leakage current of the unit (approx. 2 mA) and of the load which are added together on the UPS earth conductor. UPS input Single-phase Three-phase Differential switch Type B or Type A Type B The neutral arrangements will only be changed if an isolation transformer is connected or when the UPS is operating with the neutral isolated upstream. Avoid connecting the output neutral to the input neutral or to earth as this could damage the UPS . For the mains and load connections follow the instructions below: 1. Install a 63A magneto-thermal switch with B or C trip curve (4 poles for three phase versions, 2 poles for single phase versions) upstream of the device. 2. The terminals to be used for the connection of the input and output lines are located inside the IN/OUT connections drawer. Undo the screw securing the connections drawer located on the right-hand side of the drawer (see figure at side). 3. Pull the drawer out as much as is needed for the terminals to be easily accessible (see figure at side). WARNING: the drawer has a locking system to prevent it being pulled out completely. Do not try to remove the drawer completely. 64 USE 8-10kVA single phase version 1. Use 3 cables with 10 mm2 section (EARTH, N and L) in input, and 3 cables with 10 mm2 section for the output (EARTH, N and L). With reference to the figure shown at the side: - Insert the cables from the 63A magneto-thermal switch into seal stop P2 (input line). - Insert the cables from the load into seal stop P1 (output line). - Strip the cables observing the measurements provided. - Insert the part that has just been stripped into the ferrules provided. 2. Connect the wires to the relative terminals strictly following the instructions set out below: Input line a - Ensure that the magneto-thermal switch upstream is open. b - Connect the earth wire to terminal 3. c - Connect the neutral wire to terminal 1. d - Connect the phase wire to terminal 2. Output line a - Connect the earth wire to terminal 6. b - Connect the neutral wire to terminal 7. c - Connect the phase wire to terminal 8. Bypass line a - Ensure that a jumper is connected at terminals 9 and 10; this is needed for the correct operation of the UPS. 3. Secure the cable guides to the flange, close the drawer and secure it with the screw removed previously. 65 USE Three phase version 1. (8-10kVA THREE PHASE VERSION): Use 3 cables with 6 mm2 section (EARTH, L2 and L3) and 2 with 10 mm2 section (N, L1) in input (N.B.: L1 and N have a greater section because in operation from bypass they have to carry all the input current). For the output use 3 cables with 10 mm2 section (EARTH, N and L). With reference to the figure shown at the side: - Insert the cables from the 63A magneto-thermal switch into seal stop P2 (input line). - Insert the cables from the load into seal stop P1 (output line). - Strip the cables observing the measurements provided. - Insert the part that has just been stripped into the ferrules provided. (6,5kVA THREE PHASE VERSION): Use 3 cables with 4 mm2 section (EARTH, L2 and L3) and 2 with 6 mm2 section (N, L1) in input (N.B.: L1 and N have a greater section because in operation from bypass they have to carry all the input current). For the output use 3 cables with 6 mm2 section (EARTH, N and L). With reference to the figure shown at the side: - Insert the cables from the 63A magneto-thermal switch into seal stop P2 (input line). - Insert the cables from the load into seal stop P1 (output line). - Strip the cables observing the measurements provided. - Insert the part that has just been stripped into the ferrules provided. 2. Connect the wires to the relative terminals strictly following the instructions set out below: Input line a - Ensure that the magneto-thermal switch upstream is open. b - Connect the earth wire to terminal 5. c - Connect the neutral wire to terminal 1. d - Connect the phase wires to terminals 2, 3 and 4 (use the red wire for L1). Output line a - Connect the earth wire to terminal 6. b - Connect the neutral wire to terminal 7. c - Connect the phase wire to terminal 8. Bypass line a - Ensure that a jumper is connected at terminals 9 and 10; this is needed for the correct operation of the UPS. 3. Secure the cable guides to the flange, close the drawer and secure it with the screw removed previously. 66 USE Version with external Bypass remote control If it is required to make the Bypass remote maintenance control external, follow points 1, 2 and 3 as described above. Then continue as shown below: 1. Remove the plug from the first hole at the top of the removable drawer and mount the cable guide provided. 2. Follow the instructions described above for the connection, number and section of the cables to be used, passing through seal stops P1 and P2. Use a 2x0.75 mm2 cable for connection with the remote Bypass terminals. With reference to the figure shown at the side: - Insert the Bypass external control cable to the inside of cable guide P3. - Strip the cables observing the measurements provided. - Insert the part that has just been stripped into the ferrules provided. 3. Connect the wires to the relative terminals strictly following the instructions described above. The Bypass line can be connected to the UPS in single phase or three phase connection. Connect the wires of the Bypass line as follows: Bypass line a - Connect the two wires of the cable to terminals 9 and 10 for the external control of the remote Bypass. 67 USE Secure the cable guide and the seal stop to the flange, close the drawer and secure it with the screw removed previously. A WARNING LABEL MUST BE AFFIXED TO ALL MAINS POWER ISOLATING SWITCHES INSTALLED FAR FROM THE UPS AREA, IN ORDER TO REMIND SUPPORT SERVICE PERSONNEL THAT THE CIRCUIT IS CONNECTED TO A UPS. THE LABEL MUST CARRY THE FOLLOWING MESSAGE: ISOLATE THE UNINTERRUPTIBLE POWER SYSTEM (UPS) BEFORE WORKING ON THIS CIRCUIT 68 USE FIRST START-UP 1) Ensure that all the operations described in the paragraph above, “Connections”, have been carried out correctly. 2) Close the magneto-thermal switch located upstream of the UPS. 3) Press the general switch located on the front panel. 4) The UPS will start up after a few seconds; the display will come on, a beep will be emitted and the icon will flash. The UPS is now in stand-by state: this means that the UPS is in a minimum consumption condition. The microcontroller is powered and carries out monitoring and autodiagnostics tasks; the batteries are charging; everything is ready to activate the UPS. There is also a stand-by state during operation from battery if the timer is activated. 5) Check the settings on the display (see paragraph: Configuration area) START-UP FROM MAINS 1) Press the “ON” button. When this is pressed all the icons on the display will light up for 1 second and the UPS will emit a beep. 2) Switch on the equipment connected to the UPS. Only for the first start-up: after approx. 30 sec., check that the UPS is operating correctly: 1. Simulate a black-out by opening the switch connected upstream of the UPS. 2. The load must continue to be powered, the icon should appear on the display and a beep should be heard every 4 seconds. 3. If the switch upstream is closed again the UPS must go back to operating from the mains. START-UP FROM BATTERY 1) Press the general switch located on the front panel. 2) Keep the “ON” button pressed for at least 5 seconds. All the icons on the display will light up for 1 second and the UPS will emit a beep. 3) Switch on the equipment connected to the UPS. UPS SHUTDOWN To switch the UPS off, keep the “STBY” key pressed down for at least 1.5 seconds. The UPS will return to the stand-by condition and the icon will start to flash: a) If the mains is present, the general switch must be pressed so that it returns to its original position (raised position) to switch the UPS off completely. b) If the UPS is operating from battery and the timer has not been set, it will automatically switch off completely after 5 seconds. If however the timer has been set, the “STBY” key has to be pressed for at least 5 seconds to switch off the UPS. If it is required for the UPS to stay completely switched off when mains power returns, the general switch has to be pressed (see point a.). WARNING: the UPS is equipped with an emergency redundant power supply which, in the event of a UPS failure, will act to avoid the load being shut off by switching it on to the bypass. If you switch the UPS off simply be pressing the main switch (without first putting it in stand-by as explained in the manual), the load will still be powered by the bypass. 69 USE DISPLAY PANEL INDICATIONS This section describes in detail all the information that can be shown on the LCD display. In order to make it clearer, all the information displayed can be divided into three main groups: UPS status indicators Measurements display area Configuration area UPS status indicators ICON STATUS DESCRIPTION Constant Indicates a fault Flashing The UPS is in stand-by state Constant Indicates regular operation Constant The UPS is operating from the mains Flashing The UPS is operating from the mains, but the output voltage is not synchronized with the mains voltage Constant The UPS is operating from the battery. When it is in this state the UPS emits an acoustic signal (beep) at regular intervals of 4 sec. Flashing End of discharge prealarm. Indicates that the battery back up time is coming to an end. In this condition the UPS emits a beep at regular intervals of 1 sec. Constant Indicates that the loads connected to the UPS are powered from the bypass Dynamic Indicates the estimated percentage of back-up time Dynamic Indicates the % of load applied to the UPS with respect to the nominal value Flashing A maintenance operation is required Constant Flashing Indicates that the timer is activated (programmed start-up or shutdown). The timer can be activated/deactivated via the software provided 1 minute to go before the UPS starts up or 3 minutes before it shuts down 70 USE Measurements display area The most important measurements relating to the UPS can be shown in sequence on the display. When the UPS is started up, the display shows the value of the mains voltage. To go to a different display press the “SEL/SET” button repeatedly until the required measurement is displayed. If a fault/alarm (FAULT) or a lock (LOCK) should occur, the type and corresponding alarm code is automatically shown on the display. Single phase version Some examples are shown below: GRAPHIC EXAMPLE (1) DESCRIPTION GRAPHIC EXAMPLE (1) DESCRIPTION Mains voltage Total battery voltage Mains frequency Percentage of the applied load Voltage output from the UPS Current absorbed by the load Output voltage frequency Temperature of the cooling system for the UPS internal electronics Residual battery back up time Fault/Alarm (2): the corresponding code is displayed Percentage of battery charge Lock (2): the corresponding code is displayed (1) The values shown in the images in the table are purely indicative. (2) The FAULT/LOCK codes can only be displayed if they are active (i.e., if there is a fault/alarm or a lock). 71 USE Three phase version Some examples are shown below: GRAPHIC EXAMPLE (1) GRAPHIC EXAMPLE (1) DESCRIPTION DESCRIPTION Percentage of battery charge Voltage phase 1 (2) Total battery voltage Percentage of the applied load Voltage phase 2 (2) Current absorbed by the load Temperature of the cooling system for the UPS internal electronics Voltage phase 3 (2) Fault/Alarm (3): the corresponding code is displayed Lock (3): the corresponding code is displayed Output voltage frequency Residual battery back up time (1) The values shown in the images in the table are purely indicative. (2) Alternative indication Phase No./Voltage. (3) The FAULT/LOCK codes can only be displayed if they are active (i.e., if there is a fault/alarm or a lock). 72 USE Configuration area The configuration area groups together the main UPS operating parameters and displays its current status. The parameters contained in this area can be changed directly from the display panel. SETTABLE PARAMETERS: Frequency: Output voltage frequency Frequency Voltage: Output voltage Mode: UPS operating mode Voltage Mode The image at the side shows the display zone for the settings (configuration area) showing the three settable parameters. How to change the settings: To access the configuration area, hold the “SEL/SET” button down for at least 2 sec. The word “SET” will light up and an arrow ( ► ) will appear to the left of Frequency. The arrow shows the selected setting. To select a different parameter press the “SEL/SET” button. To change the selected item, press the “ON” button. To exit from the configuration area, hold the “SEL/SET” button down for at least 2 sec. POSSIBLE SETTINGS Frequency: □ 50 Hz □ 60 Hz □ Off (frequency auto-sensing) Voltage: □ 220 V □ 230 V □ 240 V Mode: □ ON LINE □ ECO □ SMART □ STBYOFF NOTE: Changes in the output frequency configuration will only become effective when the UPS has been completely shut down and restarted (via the general switch). THE OUTPUT FREQUENCY AND VOLTAGE PARAMETERS MUST BE COMPATIBLE WITH THE PARAMETERS OF THE LOAD POWERED BY THE UPS 73 USE OPERATING MODES The mode that ensures maximum protection to the load is ON LINE mode (default), where the energy for the load undergoes a double conversion and is reconstructed fully sinusoidal in output with frequency and voltage set by accurate digital microprocessor control independently of the input (V.F.I.). * The following modes can be set in addition to the conventional ON LINE double conversion operating mode: ECO (LINE INTERACTIVE) SMART (SMART ACTIVE) STBYOFF (STAND-BY OFF) The load is normally powered from the bypass in ECO mode, in order to optimize efficiency. If the mains goes out of the admitted tolerances, the UPS switches to normal ON LINE double conversion operation. About five minutes after the mains returns within tolerance, the load is once again switched onto the bypass. If the user cannot decide which operating mode is the most suitable (ON LINE or ECO), this decision can be left to SMART ACTIVE mode. In this mode, the UPS decides autonomously which mode to configure on the basis of statistics collected on the quality of the mains power supply. STAND-BY OFF mode is used for operation as a back-up unit: when the mains is present, the load is unpowered while if a blackout occurs, the load is powered from the inverter via the batteries. R.E.P.O. This isolated input is used to remotely switch off the UPS in an emergency. Any “Remote Emergency Power Off” (R.E.P.O.) switch that is normally closed must be connected to the connector located at the back of the UPS. The UPS is supplied ex-works with the R.E.P.O. terminals short circuited: remove the short circuit if this contact is connected to the auxiliary of a remote emergency switch. The R.E.P.O. circuit is self-powered with SELV type circuits. No external power supply voltage is therefore required. When it is closed (normal condition) there is a current of 10mA max. PROGRAMMABLE AUXILIARY SOCKET (POWER SHARE) The UPS is provided with an output socket that allows the automatic disconnection of the load applied to it under certain operating conditions. The events that determine the automatic cut-out of the Power share socket can be user-selected by means of the configuration software (see paragraphs Configuration software and UPS Configuration). It is possible for example to select cut-out after a certain time of operation from battery, or on reaching the end of the battery discharging prealarm threshold, or in the event of an overload. * The rms value of the output voltage is fixed by accurate microprocessor control independently of the input voltage while the frequency of the output voltage is synchronized (within a user-selectable tolerance) with that of the input to enable use of the bypass. The UPS will desynchronize outside of this tolerance, returning to nominal frequency, and the bypass can no longer be used (free running mode). 74 USE UPS CONFIGURATION The following table shows all the possible configurations available to adapt the UPS to the user’s requirements. KEY: = Indicates that the configuration can be changed from the display panel as well as by means of the configuration software. = Indicates that the configuration can only be changed via the configuration software. FUNCTION DESCRIPTION Output frequency To select the nominal output frequency PREDEFINED POSSIBLE CONFIGURATIONS Auto 50 Hz 60 Hz Auto: automatic sensing from the input frequency 230V 220V 230V 240V 220 ÷ 240 in 1V steps (only via software) Output voltage To select the nominal output voltage Operating mode To select one of the 4 different operating modes ON LINE Start-up delay Delay before automatic restart after the mains returns 5 sec. Shutdown due to minimum load Automatic shutdown of the UPS in operation from the battery if the load is less than 5% Disabled Enabled Disabled Back up time limit Maximum time of operation from the battery Disabled Disabled (full battery discharge) 1 ÷ 65000 in 1 sec. steps End of discharge alert Estimated remaining back up time for the end of discharge alert 3 min. 1 ÷ 255 in 1 min. steps Battery test Time interval for the automatic battery test 40 hours Disabled 1 ÷ 1000 in 1 hour steps ON LINE ECO SMART ACTIVE STAND-BY OFF Disabled 1 ÷ 255 in 1 sec. steps 75 MODE USE FUNCTION DESCRIPTION PREDEFINED Alarm threshold for maximum load Selects the user overload limit Disabled Display brightness Selects the level of brightness of the LCD display Maximum Minimum ÷ Maximum in 20 steps Acoustic alarm Selects the operating mode of the acoustic alarm Low Normal Low: does not sound for momentary bypass intervention Always connected Always connected Disconnection after n seconds of operation from battery Disconnection after n seconds from the end of discharge prealarm signal ... (see the configuration software manual) Auxiliary socket (power share) Selects the operating mode of the auxiliary socket POSSIBLE CONFIGURATIONS Disabled 0 ÷ 103 in 1% steps ADVANCED SETTINGS Input frequency tolerance Selects the allowed input frequency range for the passage onto bypass and for synchronization of the output ± 5% Bypass voltage thresholds Selects the allowed voltage range for the passage onto bypass Low: 180V High: 264V Low: 180 ÷ 200 in 1V steps High: 250 ÷ 264 in 1V steps Bypass voltage thresholds for ECO Selects the allowed voltage range for operation in ECO mode Low: 200V High: 253V Low: 180 ÷ 220 in 1V steps High: 240 ÷ 264 in 1V steps Sensitivity of intervention for ECO Selects the sensitivity of intervention during operation in ECO mode Normal Power supply of the load in standby Power supply of the load on bypass with UPS switched off (stand-by state) Disabled (load NOT powered) Disabled (not powered) Enabled (powered) Enabled / High sensitivity Enabled/High sensitivity Enabled/Low sensitivity Disabled with input/output synchronization Disabled without input/output synchronization Bypass operation Selects the mode of use of the bypass line ± 0.25% ± 0.5% ± 0.75% ± 1 ÷ ±10 in 1% steps Low Normal High 76 MODE USE COMMUNICATION PORTS The following communication ports are located at the back of the UPS (see UPS Views): Serial port, available with RS232 connector and USB connector. NOTE: use of one connector automatically excludes the other. Expansion slots for additional COMMUNICATION SLOT interface cards. RS232 and USB connectors RS232 CONNECTOR PIN # 1 2 3 4 5 6 7 8 9 USB CONNECTOR SIGNAL Contact closed: UPS locked * TXD RXD PIN # 1 2 3 4 GND Interface power supply input +12Vdc Contact closed: end of discharge prealarm * Contact closed: operation from battery * * Optoisolated contact max. +30Vdc/10mA Communication Slot The UPS is provided with an expansion slot for optional communication cards (see figure at the side) which enable the device to dialog using the main communication standards. Some examples: Second RS232 port Serial duplexer Ethernet network agent with TCP/IP, HTTP and SNMP protocol RS232 port + RS485 with JBUS/MODBUS protocol Signalling relay card Refer to the manufacturer’s website for more information on the accessories that are available. 77 4 3 1 2 SIGNAL VBUS DD+ GND USE SOFTWARE Monitoring and control software The PowerShield3 software provides effective and intuitive management of the UPS, displaying all the most important information, such as input voltage, load applied, and battery capacity. It is also able to automatically effect operations such as shutdown, transmission of e-mails, SMS and network messages when particular events that can be selected by the user occur. Installation procedure: Connect the UPS’s RS232 communication port to a COM communication port on the PC by means of the serial cable provided* or connect the USB port on the UPS to a USB port on the PC using a USB standard cable*. Download the software from www.riello-ups.com, selecting the desired operating system. Follow the installation program instructions. For more detailed information about installation and use, refer to the software manual which can be downloaded from our website www.riello-ups.com. Configuration software Using special software, it is possible to configure the most important UPS parameters. For a list of possible configurations, refer to the UPS configuration paragraph. * It is recommended to use a cable with a max. length of 3 metres. 78 TROUBLESHOOTING Irregular functioning of the UPS is most often not an indication of a fault but due simply to trivial problems, minor difficulties or carelessness. We therefore recommend that you refer to the table below which gives a summary of useful information to solve the most common problems. PROBLEM POSSIBLE CAUSE SOLUTION GENERAL SWITCH NOT PRESSED Press the general switch located on the front panel. THE BATTERY BOX CONNECTOR IS DISCONNECTED THE DISPLAY DOES NOT SWITCH ON Connect the battery box connector. NO CONNECTION TO THE ELECTRICITY MAINS MAINS VOLTAGE FAILURE (BLACKOUT) THE DISPLAY IS ON BUT THE LOAD IS NOT POWERED THE UPS IS OPERATING FROM BATTERY EVEN THOUGH THE MAINS VOLTAGE IS PRESENT THE UPS DOES NOT SWITCH ON AND THE DISPLAY SHOWS ONE OF THESE CODES: A06, A08 THE DISPLAY SHOWS THE CODE: A11 Check the connection to the electricity mains. Check the presence of the electricity mains voltage. UPSTREAM PROTECTION TRIGGERED Reset the protection. WARNING: Check that there is no overload in output to the UPS. THE UPS IS IN STAND-BY MODE Press the “ON” key located on the front panel to power the loads. STAND-BY OFF MODE HAS BEEN SELECTED The mode has to be changed. The STAND-BY OFF mode (back-up) in fact only powers the loads in the event of a blackout. NO CONNECTION TO THE LOAD Check the connection to the load. UPSTREAM PROTECTION TRIGGERED Reset the protection. WARNING: Check that there is no overload in output to the UPS. THE INPUT VOLTAGE IS OUTSIDE THE ALLOWED TOLERANCE FOR OPERATION FROM MAINS Problem dependent on the mains. Wait for the input mains to return within tolerance. The UPS will automatically go back to operation from mains. Check the temperature of the environment where the THE TEMPERATURE OF THE UPS is located; if it is too low, bring it to above the UPS IS LOWER THAN 0°C minimum threshold (0°C). INPUT RELAY BLOCKED 79 The fault does not cause any particular malfunctions. If the problem should occur again on a subsequent startup, contact the support service centre. TROUBLESHOOTING PROBLEM THE BUZZER SOUNDS CONTINUOUSLY AND THE DISPLAY SHOWS ONE OF THESE CODES: A54, F50, F51, F52, F55, L50, L51, L52 POSSIBLE CAUSE SOLUTION THE LOAD APPLIED TO THE Reduce the load to within the threshold of 100% (or UPS IS TOO HIGH user threshold in the case of code A54). THE DISPLAY SHOWS THE CODE: A61 BATTERIES SHOULD BE REPLACED THE DISPLAY SHOWS THE CODE: A62 BATTERY BOX NOT PRESENT OR NOT CONNECTED Check that the battery box is inserted and connected correctly. THE DISPLAY SHOWS THE CODE: A63 THE BATTERIES ARE DISCHARGED; THE UPS IS WAITING FOR THE VOLTAGE OF THE BATTERIES TO GO OVER THE SET THRESHOLD Wait for the batteries to recharge or force start-up manually by keeping the “ON” key pressed for at least 2 sec. Replace the battery box. THE BUZZER SOUNDS CONTINUOUSLY AND THE A MALFUNCTION OF THE If power can be removed from the load, switch the UPS DISPLAY SHOWS ONE OF UPS HAS BEEN VERIFIED; off and then on again; if the problem should occur THESE CODES: F03, F05, PROBABLY ABOUT TO STOP again, contact the support service centre. F07, F10, F13, F21, F40, F41, F42, F43 THE BUZZER SOUNDS THE TEMPERATURE OF THE Check that the temperature of the environment where CONTINUOUSLY AND THE DISSIPATORS INSIDE THE DISPLAY SHOWS ONE OF the UPS is located does not exceed 40°C. UPS IS TOO HIGH THESE CODES: F04, L04 THE BUZZER SOUNDS CONTINUOUSLY AND THE DISPLAY SHOWS ONE OF THESE CODES: F53, L53 A FAULT HAS BEEN DETECTED ON ONE OR MORE APPLICATIONS POWERED BY THE UPS THE BUZZER SOUNDS CONTINUOUSLY AND THE DISPLAY SHOWS ONE OF THESE CODES: F60, L03, L05, L07, L10, L13, L20, L21, L40, L41, L42, L43 A UPS MALFUNCTION HAS BEEN VERIFIED If power can be removed from the load, switch the UPS off and then on again; if the problem should occur again, contact the support service centre. A REMOTE CONTROL HAS BEEN ACTIVATED If this is not required, check the position of the manual bypass switch or the status of the control inputs of any optional contacts card. Check the closing of the R.E.P.O. contact at the back of the UPS. THE DISPLAY SHOWS ONE OF THESE CODES: C01, C02, C03 Disconnect all the applications and reconnect them one by one to identify the faulty one. 80 TROUBLESHOOTING ALARM CODES Using a sophisticated self check system, the UPS can verify and indicate on the display panel any faults and/or malfunctions that may occur during the normal operation of the device. In the event of a problem, the UPS indicates this by displaying the code and the type of alarm (FAULT and/or LOCK). FAULT FAULT signals can be subdivided into three categories. Faults: these are “minor” problems that do not stop the UPS but reduce performance or prevent the use of some of its functions. CODE DESCRIPTION A06 A08 A11 A54 A61 A62 A63 Sensor1 temperature less than 0°C Sensor2 temperature less than 0°C Input relay locked (does not open) Load > preset user threshhold Batteries to be replaced No Battery box or not connected Waiting to recharge batteries Alarms: these are more critical problems than faults since if they persist, even for a very short time, they may cause the UPS to stop. CODE DESCRIPTION F03 F04 F05 F07 F10 F13 F21 F40 F41 F42 F43 F50 F51 F52 F53 F55 F60 Auxiliary power supply not correct Dissipators overtemperature Temperature sensor1 faulty Temperature sensor2 faulty Input fuse broken or input relay locked (does not close) Condenser precharge failed Condenser bank overvoltage Inverter overvoltage Direct voltage in output Inverter voltage not correct Inverter undervoltage Overload: load > 103% Overload: load > 125% Overload: load > 150% Short circuit Waiting for reduction of load to return onto inverter Batteries overvoltage 81 TROUBLESHOOTING Active controls: indicate the presence of an active remote control. CODE DESCRIPTION C01 C02 C03 C04 Shutdown remote control Load on bypass remote control Startup remote control Battery test underway LOCK LOCK signals are usually preceded by an alarm signal and, due to their significance, cause the inverter to shut down and the load to be powered via the bypass line (this procedure does not include locks from strong and persistent overloads or locks due to short circuits). CODE DESCRIPTION L03 L04 L05 L06 L07 L10 L13 L20 L21 L31 L40 L41 L42 L43 L50 L51 L52 L53 Auxiliary power supply not correct Dissipators overtemperature Temperature sensor1 faulty Temperature sensor3 faulty Temperature sensor2 faulty Input fuse broken or input relay locked (does not close) Condenser precharge failed Condenser bank undervoltage Condenser bank overvoltage Bypass fault Inverter overvoltage Direct voltage in output Inverter voltage not correct Inverter undervoltage Overload: load > 103% Overload: load > 125% Overload: load > 150% Short circuit 82 TECHNICAL DATA TABLE 2- SINGLE/SINGLE PHASE UPS TECHNICAL DATA TABLE MODELS INPUT Nominal voltage Accepted range Voltage range for non-intervention of battery Nominal frequency Maximum current (1) Nominal current (2) Power factor Current distortion @ max load BYPASS Voltage range accepted for switching Frequency range accepted for switching Switching time BATTERY Recharge time (8) OUTPUT Nominal voltage Static variation (3) Dynamic variation (4) Waveform Voltage distortion @ linear load Voltage distortion @ distorting load Frequency (5) Current crest factor Nominal power (VA) Nominal power (W) Short circuit current SUNDRY Leakage current to earth AC/AC performance Ambient temperature (6) Humidity Protections Hold-up time Noise Dimensions H x L x D (mm) Weight in Kg (estimated) SDL 8000 SDL 10000 220/230/240 Vac 0 - 280 Vac Maximum voltage 276Vac Minimum voltage: from 184 to 138 Vac from 100% to 50% of the linear load Return of operation from mains at 190Vac 50 - 60 Hz ±5Hz 44A 54A 34A 43A 0.98 6% 180 – 264 Vac Frequency selected ±5% 0.1ms 6-8 h 220/230/240 Vac selectable ±1.5% 1.5% (7) 5% in 20ms Sinusoidal 3% 5% 50 or 60 Hz selectable 3:1 8000 10000 7200 9000 1.5 x In for t= 0.5sec 10mA 92% 0 – 40 °C < 90% non condensing excessive battery discharge - overcurrent - short circuit - overvoltage undervoltage - thermal 30msec < 45 dB(A) at 1mt. 2 x [455mm (19”) x 175mm (4U) x 660mm (26”)] approx 29 + 65 Kg approx 30 + 65 Kg (1) (2) (3) (4) (5) @ nominal load, minimum voltage of 180Vac, battery charging @ nominal load, nominal voltage of 230Vac, battery charging Mains/Battery @ load 0% -100% @ Mains/battery/mains @ resistive load 0%/100%/0% If the mains frequency is within ±5% (user definable) of the selected value, the UPS is synchronized with the mains. If the frequency is out of tolerance or in operation from battery, the frequency is the selected value ±0.1% (6) 20 - 25 °C for extended battery life (7) Recalibration may be necessary after a long period of operation, in order to maintain the output voltage within the indicated range. (8) Time needed to reach 90% of charge (after a full discharge at load ≥80%) 83 TECHNICAL DATA TABLE THREE/SINGLE PHASE UPS TECHNICAL DATA TABLE MODELS INPUT (3 Ø + N star-configured voltages) Nominal voltage Accepted range Voltage range for non-intervention of battery Nominal frequency Maximum current (1) Nominal current (2) Power factor Current distortion @ max load BYPASS (on L1) Voltage range accepted for switching Frequency range accepted for switching Switching time BATTERY Recharge time (8) OUTPUT Nominal voltage Static variation (3) Dynamic variation (4) Waveform Voltage distortion @ linear load Voltage distortion @ distorting load Frequency (5) Current crest factor Nominal power (VA) Nominal power (W) Short circuit current SUNDRY Leakage current to earth AC/AC performance Ambient temperature (6) Humidity Protections Hold-up time Noise Dimensions H x L x D (mm) Weight in Kg (estimated) SDL 6500 TM SDL 8000 TM SDL 10000 TM 220/230/240 Vac 0 - 280 Vac Maximum voltage 276Vac Minimum voltage: from 184 to 138 Vac from 100% to 50% of the linear load Return of operation from mains at 190Vac 50 - 60 Hz ±5Hz 13A 15A 19A 9A 11A 14A 0.95 26% 180 - 264 Vac Frequency selected ±5% 0.1ms 6-8 h 6500 5850 220/230/240 Vac selectable ±1.5% 1.5% (7) 5% in 20ms Sinusoidal 3% 6% 50 o 60 Hz selectable 3:1 8000 7200 1.5 x In for t= 0.5sec 10000 9000 10mA 92% 0 – 40 °C < 90% non condensing excessive battery discharge - overcurrent - short circuit - overvoltage undervoltage - thermal 40msec < 45 dB(A) at 1mt. 2 x [455mm (19”) x 175mm (4U) x 660mm (26”)] approx 28 + 63 Kg approx 29 + 65 Kg approx 30 + 65 Kg (1) (2) (3) (4) (5) @ nominal load, minimum voltage of 180Vac, battery charging @ nominal load, nominal voltage of 230Vac, battery charging Mains/Battery @ load 0% -100% @ Mains/battery/mains @ resistive load 0%/100%/0% If the mains frequency is within ±5% (user definable) of the selected value, the UPS is synchronized with the mains. If the frequency is out of tolerance or in operation from battery, the frequency is the selected value ±0.1% (6) 20 - 25 °C for extended battery life (7) Recalibration may be necessary after a long period of operation, in order to maintain the output voltage within the indicated range. (8) Time needed to reach 90% of charge (after a full discharge at load ≥80%) 84 TECHNICAL DATA TABLE BATTERY BOX TECHNICAL DATA TABLE BASIC MODELS BBX SDL 240V BB NP A3 BATTERY Nominal voltage End of charge voltage No. of batteries/V SUNDRY Ambient temperature (1) Humidity Protections Dimensions H x L x D Weight [Vdc] [Vdc] BBX SDL 240V BB NP A5 240 273 20 / 12 0 – 40 < 90% non condensing overcurrent - short circuit 455 x 175 x 660 [°C] [mm] [Kg] 63 65 (1) 20-25°C for extended battery life TABLE OF OVERLOAD TIMES OPERATION FROM OVERLOAD TIMES BYPASS 100% < Load 125% 125% < Load 150% Load > 150% Bypass active after 2 sec Locked after 120 sec Bypass active after 2 sec Locked after 4 sec Bypass active instantly Locked after 1 sec 85 INVERTER Locked after 60 sec Locked after 4 sec Locked after 0.5 sec 86 D BEDIENUNGSANLEITUNG 87 D EINLEITUNG Wir danken Ihnen für die Wahl eines Produks aus der Sentinel Dual Reihe. Riello UPS ist völlig auf die Entwicklung und Produktion von unterbrechungsfreien Stromversorgungen (UPS) spezialisiert. Die USV-Systeme aus dieser Serie sind Produkte von hochwertiger Qualität, die aufmerksam entworfen und gebaut wurden mit dem Ziel, die besten Leistungen zu gewährleisten. Nach vorheriger AUFMERSAMER UND SORGFÄLTIGER LEKTÜRE DES VORLIEGENDEN HANDBUCHS kann dieses Gerät durch jedwede Person installiert werden Dieses Handbuch enthält detaillierte Anweisungen zur Benutzung und Installation der USV. Um Informationen über die Benutzung und die besten Leistungen Ihres Geräts zu erzielen, muss dieses Handbuch mit Sorgfalt in der Nähe der USV aufbewahrt und VOR DEREN GEBRRAUCH ZU RATE GEZOGEN WERDEN. UMWELTSCHUTZ Bei der Entwicklung dieses Produktes wurden durch das Unternehmen sehr viele Ressourcen für Umweltaspekte bereitgestellt. All unsere Produkte folgen den durch die Unternehmenspolitik festegelegten Zielen der durch das Unternehmen in Übereinstimmung mit den geltenden Bestimmungen bezüglich Umweltverträglichkeit. So wurden zur Fertigung des vorliegenden Produkts keinerlei gefährlichen Materialien wie CFC, HCFC oder Asbest verwendet. Zur Verpackung wurden recyclebare Materialien verwendet. Zur ordnungsgemäßen Entsorgung müssen die verschiedenen Materialien der Verpackung getrennt werden, wobei die unten folgende Tabelle zu Hilfe genommen werden kann. Die jeweiligen Materialien sind strikt nach den geltenden Bestimmungen des Landes in dem die Anlage zum Einsatz kommt zu entsorgen. Beschreibung Palette Kantenschutz Schachtel Klebestreifen Schutzhülle Material HAT behandeltes Tannenholz Stratocell/Karton Karton Stratocell HD Polyäthylen ENTSORGUNG DES ERZEUGNISSES Die USV enthält in ihrem Inneren Stoffe, die (im Falle der Freisetzung / Entsorgung) als GIFTIGER und GEFÄHRLICHER ABFALL betrachtet werden müssen, wie zum Beispiel elektronische Leiterplatten und Batterien. Lassen Sie diese Stoffe gemäß den geltenden gesetzlichen Vorschriften durch qualifiziertes Service-Personal entsorgen. Die sorgfältige und ordnungsgemäße Entsorgung ist ein Beitrag zum Schutz der Umwelt und der menschlichen Gesundheit. © Vorbehaltlich der Autorisierung durch die Herstellerfirma, ist die Reproduktion jedweden Teils des vorliegenden Handbuchs, auch partiell, ist verboten. Zum Zwecke der Verbesserung behält der Hersteller sich das Recht vor, das beschriebene Produkt jederzeit und ohne Vorwarnung abzuändern. 88 INHALTSVERZEICHNIS DARSTELLUNG 90 ANSICHTEN DER USV ANSICHTEN DER BATTERY BOX ANSICHT DISPLAY-MASKE 91 92 93 INSTALLATION 94 ÖFFNEN DER VERPACKUNG UND KONTROLLE DES INHALTS VERSION TOWER VERSION RACK INSTALLATIONSMODALITÄT ANSCHLUSS DER USV AN DIE BATTERY BOX BEDIENUNG 94 96 97 98 99 100 ANSCHLÜSSE 100 Version einphasig 8-10kVA 101 Version dreiphasig 102 Version mit externer By-Pass Fernsteuerung ERSTMALIGES EINSCHALTEN EINSCHALTEN MIT NETZSTROM EINSCHALTEN MIT BATTERIESTROM ABSCHALTEN DER USV ANZEIGEN AM DISPLAY 103 105 105 105 105 106 Anzeigen des USV-Status 106 Bereich Messwert-Anzeige 107 Version einphasig 107 Version dreiphasig 108 Konfigurations-Bereich BETRIEBSMODUS R.E.P.O. PROGRAMMIERBARER ZUSATZSTECKER (POWER SHARE) USV-KONFIGURATION COMPUTER-SCHNITTSTELLEN 109 110 110 110 111 113 Anschlüsse RS232 und USB 113 Communication Slot 113 114 SOFTWARE Überwachungs- und Steuer-Software 114 Konfigurations-Software 114 PROBLEMBEHEBUNG 115 ALARMCODE 117 TABELLE TECHNISCHE DATEN 119 TABELLE TECHNISCHE DATEN USV EINPHASIG/ EINPHASIG TABELLE TECHNISCHE DATEN USV DREIPHASIG/ EINPHASIG TABELLE TECHNISCHE DATEN BATTERY BOX TABELLE ÜBERLASTZEITEN 89 119 120 121 121 DARSTELLUNG Die neue USV Sentinel Dual Familie ist unter Berücksichtigung der Vielseitigkeit ausgearbeitet worden. Je nach Anforderung können diese USV daher sowohl als Version Tower als auch als Version Rack installiert werden. So stellt sich das Produkt in seinen zwei unterschiedlichen Versionen dar: Tower Rack SDL 6500 TM Nennleistung Nennspannung Abmessungen H x B x T Gewicht (1) [VA] [Vac] [mm] [Kg] 6500 28 + 63 ungefähr SDL 8000 SDL 8000 TM 8000 220/230/240 2 x [455 x 175 x 660] (1) 29 + 65 ungefähr SDL 10000 SDL 10000 TM 10000 30 + 65 ungefähr In der Version Rack mit installierten Griffen ist die Abmessung H anders: 483mm x 175mm x 660mm (H x B x T) Anmerkung: 175mm = 4U 483mm = 19” 90 DARSTELLUNG ANSICHTEN DER USV AushakSchlitze Drehbare DisplayMaske Manueller BypassSchalter Hauptschalter Abnehmbares Frontpaneel Vorderansicht (Frontpaneel abmontiert) (mit Frontpaneel) Anschluss Batterie-Erweiterung Remote emergency power off (R.E.P.O.) Kühlgebläse Erweiterungs-Steckplatz COMUNICATION SLOT Schnittstelle RS232 Schnittstelle USB Stecker IEC 10 A Power share Stecker-Thermoschutz Power share Anschlussgehäuse IN/OUT Kühlgebläse Rückansicht 91 DARSTELLUNG ANSICHTEN DER BATTERY BOX Aushakschlitze Herausziehbare/ drehbare Maske Abnehmbares Frontpaneel Vorderansicht Lüftungsrost Anschlüsse BatterieErweiterung Trennschalter Sicherungshalter Rückansicht 92 DARSTELLUNG ANSICHT DISPLAY-MASKE “SEL / SET” Taste “ON” Taste “STBY” Taste LCD Display 1 Normalbetrieb 7 Konfigurations-Bereich 2 Netzbetrieb 8 Anforderung Wartung 3 Batteriebetrieb 9 Timer 4 Last-Stromversorgung über Bypass 10 Bereich Messwert-Anzeige 5 Anzeige Batterie-Autonomie 11 Stand-By / Alarm 6 Anzeige Ladezustand 93 INSTALLATION ÖFFNEN DER VERPACKUNG UND KONTROLLE DES INHALTS Nach dem Öffnen der Verpackung muss als erstes der Inhalt geprüft werden. Die Verpackung muss folgendes enthalten: USV Battery box 1 Kabelführung +2 Schutzhüllensperre 6 Plastikabdeckungen (Obere Paneele USV und Battery Box) Spitzen für Anschluss Kabel - Klemme 2 Plastikkeile zum Aushaken des Display 2 Sätze Handgriffe Serielles Kabel RS232 94 INSTALLATION Verbindungskabel USV – Battery Box 2 Sicherungen für Battery Box - 14x51 mm, 50A, 400V Bedienungsanleitung + CD-ROM Software User's manual 95 INSTALLATION WICHTIG: diese unterbrechungsfreie Stromversorgungseinheit ist ein Produkt, das die geltenden Vorschriften für elektromagnetische Verträglichkeit einhält (Kategorie C2). In einer Haushaltsumgebung kann es Radiointerferenzen verursachen. Der Benutzer könnte zusätzliche Vorkehrungen treffen müssen. VERSION TOWER In diesem Kapitel werden die Arbeitsschritte für die Vorbereitung der USV und der Battery Box für den Einsatz in der Version Tower beschrieben. ACHTUNG: Für Ihre eigene Sicherheit und für die Sicherheit Ihres Produktes müssen die nachstehend angegebenen Informationen genau befolgt werden. VOR AUSFÜHRUNG DER NACHFOLGENDEN ARBEITSSCHRITTE SICHERSTELLEN, DASS DIE USV VOLLSTÄNDIG AUSGESCHALTET IST UND WEDER AN DAS STROMNETZ NOCH AN LASTEN ANGESCHLOSSEN IST. Nach dem Auspacken sind die USV und die Battery Box bereits für die Installation in der TowerKonfiguration vorbereitet. Für die Vervollständigung dieser Konfiguration reicht es aus die sechs Plastikabdeckungen aus dem Lieferumfang zu montieren. Drei werden auf der Oberseite der USV und die anderen drei auf der Oberseite der Battery Box angebracht. Wie folgt vorgehen: Die Plastikabdeckungen haben ein Steck-Befestigungssystem: Die entsprechenden Öffnungen für die Montage der Plastikabdeckungen auf der Oberseite der USV und der Battery Box ausfindig machen und die Abdeckungen vorsichtig mit leichtem Druck einsetzen (siehe nebenstehende Abbildung). 96 INSTALLATION VERSION RACK Nachstehend werden die Arbeitsschritte beschrieben, die zum Umbau der USV und der Battery Box zur Version Rack benötigt werden. ACHTUNG: Für Ihre eigene Sicherheit und für die Sicherheit Ihres Produktes müssen die nachstehend angegebenen Informationen genau befolgt werden. VOR AUSFÜHRUNG DER NACHFOLGENDEN ARBEITSSCHRITTE SICHERSTELLEN, DASS DIE USV VOLLSTÄNDIG AUSGESCHALTET IST UND WEDER AN DAS STROMNETZ NOCH AN LASTEN ANGESCHLOSSEN IST. 1 - Als erstes müssen die kleinen Stellfüße auf der Unterseite der USV und der Battery Box abgebaut werden. Die USV und die Battery Box sehr vorsichtig waagerecht legen und mit einem kleinen Flachkopfschraubenzieher den Stift in der Mitte des Stellfußes vorsichtig anheben. Ist der Stift angehoben, können die Stellfüße aus den Unterseite der USV und der Battery Box herausgezogen werden. Der gleiche Arbeitsschritt muss an allen Stellfüße wiederholt werden. Seitlich ist die genau Abfolge dargestellt. 1 2 2 - Nach dem Ausbau der Stellfüße muss die Displaymaske gedreht werden. Die Plastikkeile aus dem Lieferumfang in die Schlitze seitlich an der Display-Maske einführen und anschließend leicht solange drücken, bis die Maske von der USV ausgehakt ist. Siehe nebenstehende Abbildung. Die gleichen Arbeitsschritte zum Aushaken der Maske an der Battery Box wiederholen. 3 - ACHTUNG: Die Display-Maske ist mit einem entsprechenden Kabel mit der USV verbunden. Die Maske muss dass sehr vorsichtig herausgezogen werden. Ein plötzliches Ziehen oder andere ruckartige Bewegungen sind zu vermeiden, um Schäden am Display bzw. an der USV zu verhindern. AUF KEINEN FALL VERSUCHEN DIE DISPLAY-MASKE VON DER USV ZU TRENNEN. 4 - Die Maske um 90° gegen den Uhrzeigersinn drehen und dann wieder vorsichtig soweit in die Aufnahme an der USV einstecken, bis ein leichtes Einrastgeräusch zu hören ist und die Maske in Position bleibt. Die gleichen Arbeitsschritt gelten für die Maske an der Battery Box. ANMERKUNG: Es muss in der Nähe der Einrastschlitze gedrückt werden. 5 - Die USV und die Battery Box sehr vorsichtig um 90° in Uhrzeigersinn drehen 97 INSTALLATION 6 - Mit USV und Battery Box in waagerechter Position können jetzt die Griffe aus dem Lieferumfang mit den entsprechenden Schrauben montiert werden. Siehe nachstehende Abbildungen. ANMERKUNGEN: Die USV und die Battery Box können in Standard-Rackschränke 600mm x 800mm oder größer (in Tiefe) eingebaut werden. Wegen des Gewichtes der USV und der Battery Box müssen bei einem Einbau in Rack die Halterungen benutzt werden (Führungen mit L-förmiger Halterung). Aus dem gleichen Grund sollte die USV oberhalb der Battery Box und im unteren Bereich des Rack-Schranks installiert werden. Das Unternehmen haftet nicht für Schäden, die durch falsche Anschlüsse oder nicht in der Bedienungsanleitung beschriebene Arbeiten entstehen. INSTALLATIONSMODALITÄT Bevor die USV an die Battery Box angeschlossen wird, müssen folgende Hinweise befolgt werden: Die USV und die Battery Box auf einer ebenen und stabilen Oberfläche installieren. Einen Aufstellungsort mit direkter Sonnen- oder Warmlufteinstrahlung vermeiden. Die Raumtemperatur muss zwischen 0°C und 40°C gehalten werden. Anmerkung: Die USV kann bei einer Raumtemperatur zwischen 0°C und 40°C arbeiten. Die optimale Betriebstemperatur der Batterien in der Battery Box liegt zwischen 20°C und 25°C. Beträgt die durchschnittliche Lebensdauer der Batterien bei einer Raumtemperatur von 20°C 4 Jahre, halbiert sie sich bei einer Temperatur von 30°C. Die Raum-Luftfeuchtigkeit darf nicht mehr als 90% betragen. Staubig Räume sind zu vermeiden. Um eine ausreichende Lüftung zu gewährleisten, darauf achten, dass die Front- und Rückseite der USV und der Battery Box in einem Abstand von mindestens 10 cm von Wänden aufgestellt werden, und niemals Gegenstände auf die Lüftungsschlitze stellen. Das Verbindungskabel, mit dem die USV an die Battery Box angeschlossen wird, darf vom Kunden nicht verlängert werden. Gegebenenfalls muss der Zulieferer benachrichtigt werden. 98 INSTALLATION ANSCHLUSS DER USV AN DIE BATTERY BOX Die USV mit dem Anschlusskabel aus dem Lieferumfang an die Battery Box anschließen (siehe nachstehende Abbildung). Die beiden Sicherungen aus dem Lieferumfang in die entsprechenden Trennschalter am Sicherungshalter auf der Rückseite der Battery Box einsetzen. Die Trennschalter schließen. Das Kabel kann beliebig an einen der beiden Stecker auf der Rückseite der Battery Box angeschlossen werden. Der unbenutzte Ausbaustecker auf der Rückseite der Battery Box ist eine Vorbereitung für einen Kaskadenanschluss weiterer Battery Boxen, um die Autonomie der USV zu vergrößern. ACHTUNG: Ein Anschluss von mehr als einer USV pro Battery Box oder mehrerer in Kaskade angeschlossener Battery Boxen ist nicht gestattet. 99 BEDIENUNG ANSCHLÜSSE DIE INSTALLATION MUSS AUSSCHLIESSLICH VON FACHPERSONAL VORGENOMMEN WERDEN. ALS ERSTES MUSS DER SCHUTZLEITER (ERDLEITER) AN DIE MIT .GEKENNZEICHNETE KLEMME ANGESCHLOSSEN WERDEN. DIE USV DARF NICHT OHNE ERDUNG BETRIEBEN WERDEN. Hinweis: Werden die Angaben zu Nullleiter (N) und Phase (F) an den Steckdosen und Steckern beachtet, verändert der Einbau einer USV in eine bestehende Anlage den bestehenden Nullleiterbetrieb nicht. Der Widerstand am Nullleiteranschluss ist kleiner als 0,1 Ohm. Ein vorgeschalteter Fehlerstrom-Schutzschalter wird auch bei einer Störung nach der USV ausgelöst. Die Empfindlichkeit des Fehlerstrom-Schutzschalters muss den Verluststrom der Einheit (der beträgt ungefähr 2 mA) sowie der Lasten berücksichtigen, die sich am Erdleiter der USV summieren. USV-Eingang Einphasiger Dreiphasiger Differentialschutz Typ B oder Typ A Typ B Der Nullleiterbetrieb wird nur geändert, wenn ein Isoliertransformator vorhanden ist, oder wenn die USV mit getrenntem vorgeschaltetem Nullleiter funktioniert. Den Nullleiter am Ausgang nicht an den Nullleiter am Eingang oder an Erde anschließen, weil dies die USV beschädigen könnte. Für die Anschlüsse an das Netz und an die Lasten die nachstehenden Anleitungen befolgen: 1. Vor dem Gerät einen magnetothermischen Schutzschalter mit 63A und Auslösekurve B oder C installieren (4 Pole für dreiphasige Versionen, 2 Pole für einphasige Versionen). 2. Die Klemmen, die für den Anschluss der Eingangs- und Ausganglinien benutzt werden, befinden sich im Anschlussgehäuse IN/OUT. Anschließend die Befestigungsschraube rechts am Anschlussgehäuse abschrauben (siehe nebenstehende Abbildung). 3. Das Anschlussgehäuse soweit herausziehen bis die Klemmen gut zugänglich sind (siehe nebenstehende Abbildung). ACHTUNG: Das Anschlussgehäuse hat eine Verriegelung, die verhindert, dass das Gehäuse vollständig herausgezogen wird. Nicht versuchen das Gehäuse aus seinem Sitz zu trennen. 100 BEDIENUNG Version einphasig 8-10kVA 1. 3 Kabel mit Querschnitt 10 mm2 (ERDE, N und L) am Eingang, und 3 Kabel mit Querschnitt 10 mm2 für den Ausgang (ERDE, N und L) verwenden. Siehe auch die nebenstehende Abbildung: - Die von dem 63A magnetothermischen Schutzschalter kommenden Kabel in die Schutzhüllensperre P2 (Eingangslinie) einsetzen. - Die von den Lasten kommenden Kabel in die Schutzhüllensperre P1 (Ausgangslinie) einsetzen. - Die Kabel auf der angegebenen Länge abisolieren. - Das abisolierte Teil in die Spitzen aus dem Lieferumfang einsetzen. 2. Die Kabel an den entsprechenden Klemmen anschließen. Dabei müssen die folgenden Abweisungen genau eingehalten werden: Eingangsleitung a - Sicherstellen, dass der vorgeschaltete magnetothermische Schutzschalter geöffnet ist. b - Das Erdkabel an Klemme 3 anschließen. c - Das Nullleiterkabel an Klemme 1 anschließen. d - Das Phasenkabel an Klemme 2 anschließen. Ausgangsleitung a - Das Erdkabel an Klemme 6 anschließen. b - Das Nullleiterkabel an Klemme 7 anschließen. c - Das Phasenkabel an Klemme 8 anschließen. Bypass-Leitung a - Sicherstellen, dass die Klemmen 9 und 10 überbrückt sind. Das wird für einen richtigen Betrieb der USV benötigt. 3. Die Kabelführung an der Flansch festziehen, das Gehäuse schließen und mit der vorher abgenommenen Schraube befestigen. 101 BEDIENUNG Version dreiphasig 1. (VERSION DREIPHASIG 8-10kVA): 3 Kabel mit Querschnitt 6 mm2 (ERDE, L2 und L3) und 2 Kabel mit Querschnitt 10 mm2 (N, L1) am Eingang verwenden (Anmerkung: L1 und L2 haben einen größeren Querschnitt, weil sie im BypassBetrieb den gesamten Eingangsstrom leiten). Für den Ausgang 3 Kabel mit Querschnitt 10 mm2 (ERDE, N und L) verwenden. Siehe auch die nebenstehende Abbildung: - Die von dem 63A magnetothermischen Schutzschalter kommenden Kabel in die Schutzhüllensperre P2 (Eingangslinie) einsetzen. - Die von den Lasten kommenden Kabel in die Schutzhüllensperre P1 (Ausgangslinie) einsetzen. - Die Kabel auf der angegebenen Länge abisolieren. - Das abisolierte Teil in die Spitzen aus dem Lieferumfang einsetzen. (VERSION DREIPHASIG 6,5kVA): 3 Kabel mit Querschnitt 4 mm2 (ERDE, L2 und L3) und 2 Kabel mit Querschnitt 6 mm2 (N, L1) am Eingang verwenden (Anmerkung: L1 und L2 haben einen größeren Querschnitt, weil sie im BypassBetrieb den gesamten Eingangsstrom leiten). Für den Ausgang 3 Kabel mit Querschnitt 6 mm2 (ERDE, N und L) verwenden. Siehe auch die nebenstehende Abbildung: - Die von dem 63A magnetothermischen Schutzschalter kommenden Kabel in die Schutzhüllensperre P2 (Eingangslinie) einsetzen. - Die von den Lasten kommenden Kabel in die Schutzhüllensperre P1 (Ausgangslinie) einsetzen. - Die Kabel auf der angegebenen Länge abisolieren. - Das abisolierte Teil in die Spitzen aus dem Lieferumfang einsetzen. 2. Die Kabel an den entsprechenden Klemmen anschließen. Dabei müssen die folgenden Abweisungen genau eingehalten werden: Eingangsleitung a - Sicherstellen, dass der vorgeschaltete magnetothermische Schutzschalter geöffnet ist. b - Das Erdkabel an Klemme 5 anschließen. c - Das Nullleiterkab,el an Klemme 1 anschließen. d - Die Phasenkabel an die Klemmen 2, 3 und 4 anschließen (für L1 das rote Kabel verwenden). Ausgangsleitung a - Das Erdkabel an Klemme 6 anschließen. b - Das Nullleiterkabel an Klemme 7 anschließen. c - Das Phasenkabel an Klemme 8 anschließen. Bypass-Leitung a - Sicherstellen, dass die Klemmen 9 und 10 überbrückt sind. Das wird für einen richtigen Betrieb der USV benötigt. 3. Die Kabelführung an der Flansch festziehen, das Gehäuse schließen und mit der vorher abgenommenen Schraube befestigen. 102 BEDIENUNG Version mit externer Bypass Fernsteuerung Soll der Wartungs-Bypass extern ferngesteuert werden, zuerst die oben angeführten Punkte 1, 2 und 3 ausführen. Anschließend wie folgt vorgehen: 1. Den Verschluss an der oberen Öffnung ausziehbaren Gehäuse entfernen und Kabelführung aus dem Lieferumfang einbauen. am die 2. Die oben angegebenen Anleitungen für die Anschlüsse sowie Anzahl und Querschnitt der Kabel befolgen, die durch die Schutzhüllensperre P1 und P2 geführt werden. Für den Anschluss an die Klemmen für die Fernsteuerung des Bypass ein Kabel mit 2x0.75 mm2 verwenden. Siehe auch die nebenstehende Abbildung: - Das Kabel für die Bypass-Fernsteuerung in die Kabelführung P3 einsetzen. - Die Kabel auf der angegebenen Länge abisolieren. - Das abisolierte Teil in die Spitzen aus dem Lieferumfang einsetzen. 3. Die Kabel an den entsprechenden Klemmen anschließen. Dabei müssen die oben angegebenen Abweisungen eingehalten werden. Die Bypass-Leitung kann sowohl für USV mit Einphasen- als auch mit Dreiphasen-Anschluss angeschlossen werden. Die Kabel der Bypass-Leitung wie folgt anschließen: Bypass-Leitung a - Die beiden Adern des Kabels an die Klemmen 9 und 10 anschließen, so dass der Bypass extern ferngesteuert werden kann. 103 BEDIENUNG Die Kabelführung und die Schutzhüllensperre an der Flansch festziehen, das Gehäuse schließen und mit der vorher abgenommenen Schraube befestigen. AN ALLEN, VON DER USV ENTFERNT ANGEBRACHTEN, LEISTUNGS-NETZTRENNSCHALTERN MÜSSEN WARNSCHILDER ANGEBRACHT WERDEN, DIE DAS WARTUNGSPERSONAL DARAUF HINWEISEN, DASS DER STROMKREIS AN EINE USV ANGESCHLOSSEN IST. AUF DEM WARN-ETIKETT MUSS FOLGENDES STEHEN: VOR ARBEITEN AN DIESEM STROMKREIS MUSS DIE UNTERBRECHUNGSFREIE STROMVERSORGUNG (USV) GETRENNT WERDEN. 104 BEDIENUNG ERSTMALIGES EINSCHALTEN 1) Sicherstellen, dass alle im vorstehenden Abschnitt "Anschlüsse" beschriebenen Arbeiten richtig ausgeführt worden sind. 2) Den der USV vorgeschalteten magnetothermischen Schalter schließen. 3) Den Hauptschalter am Frontpaneel drücken. 4) Nach einem kurzen Moment schaltet sich die USV ein, das Display schaltet sich ein, ein Beep-Ton ertönt und das Symbol fängt an zu blinken. Die USV ist in Stand-by: Das bedeutet, dass die USV in einem Zustand mit minimalem Verbrauch ist. Der Mikrocontroller wird mit Strom versorgt und führt Überwachung und Autodiagnose aus. Die Batterien werden geladen, alles ist für die Aktivierung der USV vorbereitet. Auch bei Batteriebetrieb hat man einen Stand-by Status, vorausgesetzt, dass der Timer eingeschaltet ist 5) Am Display die eingegebenen Einstellungen überprüfen (siehe Abschnitt: Konfigurations-Bereich) EINSCHALTEN MIT NETZSTROM 1) Die Taste “ON” drücken. Nachdem die Taste gedrückt worden ist, schalten sich alle Symbole am Display für 1 Sekunde ein, an der USV ertönt ein Beep-Ton. 2) Die an die USV angeschlossenen Geräte einschalten. Nur beim erstmaligen Einschalten: Nach ungefähr 30 Sekunden den richtigen Betrieb der USV überprüfen: 1. Einen Stromausfall (Blackout) simulieren. Dazu den der USV vorgeschalteten Schalter öffnen. 2. Die Lasten müssen weiterhin versorgt bleiben, das Symbol für Batteriebetrieb am Display muss sich einschalten und es muss alle 4 Sek. ein Beep-Ton zu hören sein. 3. Den der USV vorgeschalteten Schalter wieder schließen, die USV muss sich wieder auf normalen Netzbetrieb zurückstellen. EINSCHALTEN MIT BATTERIESTROM 1) Den Hauptschalter am Frontpaneel drücken. 2) Die Taste "ON" für mindestens 5 Sekunden gedrückt halten. Alle Symbole am Display schalten sich für 1 Sekunde ein, an der USV ertönt ein Beep-Ton. 3) Die an die USV angeschlossenen Geräte einschalten. ABSCHALTEN DER USV Zum Abschalten der USV die Taste "STBY" mindestens 1,5 Sekunden gedrückt halten. Die USV stellt sich auf Stand-By zurück und das Symbol fängt an zu blinken: a) Ist das Netz vorhanden, muss zum Ausschalten der USV der Hauptschalter so gedrückt werden, dass der Schalter auf Originalposition zurückgestellt wird (angehobene Position). b) Ist die USV in Batteriebetrieb, und ist der Timer nicht eingestellt, schaltet sie sich nach 5 Sekunden automatisch vollständig ab. Ist der Timer hingegen eingestellt, zum Abschalten der USV die Taste "STBY" mindestens 5 Sekunden gedrückt halten. Soll die USV nach Rückkehr der Netzversorgung vollständig ausgeschaltet bleiben, muss der Hauptschalter gedrückt werden (siehe Punkt a.). WICHTIG: die USV hat eine redundante Notstromversorgung, die bei Ausfall der USV eingreift und ein Abschalten der Verbraucher verhindert, indem sie diese auf den Bypass schaltet. Wird die USV direkt durch Drücken des Hauptschalters abgeschaltet (ohne sie zuerst, wie im Handbuch beschrieben, in Bereitschaft zu setzen), so bleiben die Verbraucher vom Bypass versorgt. 105 BEDIENUNG ANZEIGEN AM DISPLAY In diesem Kapitel werden ausführlich alle Informationen beschrieben, die am LCD-Display angezeigt werden können. Für ein besseres Verständnis können wir die angezeigten Informationen in drei Hauptgruppen unterteilen: Anzeigen des USV-Status Bereich Messwert-Anzeige Konfigurations-Bereich Anzeigen des USV-Status SYMBOL STATUS BESCHREIBUNG Dauernd Zeigt eine Störung an. Blinkend Die USV ist in Stand-by Dauernd Zeigt den Normalbetrieb an. Dauernd Die USV ist in Netzbetrieb. Die USV ist in Netzbetrieb, aber die Ausgangsspannung ist nicht mit der Netzspannung synchronisiert. Blinkend Dauernd Blinkend Die USV ist in Batteriebetrieb. In diesem USV-Status ertönt in regelmäßigen Abständen alle 4 Sekunden ein Ton (Beep). Voralarm für Ende Entladung. Zeigt an, dass die Batterie-Autonomie zur Neige geht. In diesem USV-Status ertönt in regelmäßigen Abständen alle 1 Sekunden ein Ton (Beep). Dauernd Zeigt an, dass die an der USV angeschlossenen Lasten über Bypass versorgt werden. Dynamisch Zeigt den geschätzten Autonomie-Prozentwert an. Dynamisch Zeigt den Prozentwert (%) der an der USV angelegten Last in Bezug auf den Nennwert an. Blinkend Es ist ein Wartungseingriff erforderlich. Dauernd Blinkend Zeigt an, dass der Timer eingeschaltet ist (programmiertes Ein- oder Ausschalten). Der Timer kann über die Software aus dem Lieferumfang ein- bzw. ausgeschaltet werden. Es fehlen 1 Minute zum Wiedereinschalten oder 3 Minuten zum Abschalten der USV. 106 BEDIENUNG Bereich Messwert-Anzeige Am Display können nacheinander die wichtigsten USV-Messwerte angezeigt werden. Beim Einschalten der USV wird der Wert für die Netzspannung angezeigt. Um auf eine andere Anzeige umzuschalten, die Taste "SEL / SET" mehrfach drücken, bis der gewünschte Messwert angezeigt wird. Bei Auftreten einer Störung / Alarm (FAULT) oder einer Schutzabschaltung (LOCK) wird am Display automatisch die Art und der Code des entsprechenden Alarms angezeigt. Version einphasig Nachstehend finden Sie einige Beispiele: GRAFISCHES BEISPIEL (1) GRAFISCHES (1) BEISPIEL BESCHREIBUNG BESCHREIBUNG Netzspannung Gesamt-Batteriespannung Netzfrequenz Prozentwert der angelegten Last. Ausgangsspannung an der USV Stromaufnahme durch Last Frequenz der Ausgangsspannung Temperatur des Elektronik-Kühlsystems in der USV Batterie-Restautonomie Störung / Alarm (2): Es wird der entsprechende Code angezeigt Prozentwert Batterieladung Schutzabschaltung (2): Es wird der entsprechende Code angezeigt (1) Die in den Abbildung gezeigten Werte sind reine Beispielwerte. (2) Die Code FAULT / LOCK können nur angezeigt werden, wenn sie in diesem Moment aktiv sind (Vorliegen einer Störung/ Alarm oder Schutzabschaltung), 107 BEDIENUNG Version dreiphasig Nachstehend finden Sie einige Beispiele: GRAFISCHES BEISPIEL (1) GRAFISCHES BEISPIEL BESCHREIBUNG (1) BESCHREIBUNG Prozentwert Batterieladung Spannung Phase 1 (2) Gesamt-Batteriespannung Spannung Phase 2 Prozentwert der angelegten Last. (2) Stromaufnahme durch Last Temperatur des Elektronik-Kühlsystems in der USV Spannung Phase 3 (2) Störung / Alarm (3): Es wird der entsprechende Code angezeigt Frequenz der Ausgangsspannung Schutzabschaltung (2): Es wird der entsprechende Code angezeigt Batterie-Restautonomie (1) Die in den Abbildung gezeigten Werte sind reine Beispielwerte. (2) Abwechselnde Anzeige Nr. Phase/ Spannung (3) Die Code FAULT / LOCK können nur angezeigt werden, wenn sie in diesem Moment aktiv sind (Vorliegen einer Störung / Alarm oder Schutzabschaltung), 108 BEDIENUNG Konfigurations-Bereich Im Konfigurationsbereich sind die wichtigsten Betriebsparameter der USV zusammengefasst und es wird der Ist-Status angezeigt. Die in diesem Bereich enthaltenen Parameter können direkt über das Display geändert werden. EINSTELLBARE PARAMETER: Frequenz: Frequenz der Ausgangsspannung Frequenz Spannung: Ausgangsspannung Betriebsmodalität: USV-Betriebsmodalität Spannung Betriebsmodalität Die nebenstehende Abbildung zeigt den Displaybereich für die Einstellungen (Konfigurations-Bereich) mit den drei einstellbaren Parametern. Wie folgt vorgehen: Die Taste "SEL / SET" mindestens 2 Sekunden gedrückt halten, um den Konfigurations-Bereich zu öffnen. Die Schrift "SET" schaltet sich ein und links neben Frequenz erscheint ein Pfeil ( ► ). Der Pfeil zeigt die ausgewählte Einstellung an. Um die Auswahl des zu ändernden Parameters zu wechseln, die Taste "SEL / SET" drücken. Um den ausgewählten Parameter zu ändern, die Taste "ON" drücken. Die Taste "SEL / SET" mindestens 2 Sekunden gedrückt halten, um den Konfigurations-Bereich zu schließen. MÖGLICHE EINSTELLUNGEN Frequenz: □ 50 Hz □ 60 Hz □ Aus (Selbsterlernung der Frequenz) Spannung: □ 220 V □ 230 V □ 240 V Betriebsmodalität: □ ON LINE □ ECO □ SMART □ STBYOFF ANMERKUNG: Um eine Änderung der Ausgangsfrequenz zu übernehmen, muss die USV vollständig ausund wieder eingeschaltet werden (über den Hauptschalter). DIE PARAMETER ZU SPANNUNG UND AUSGANGSFREQUENZ MÜSSEN MIT DENEN DER VON DER USV VERSORGTEN LASTEN KOMPATIBEL SEIN. 109 BEDIENUNG BETRIEBSMODUS Der Betriebsmodus, der den Lasten den größten Schutz bietet, ist der Modus ON LINE (Default/ Voreinstellung), bei dem der Strom für die Last doppelt umgewandelt wird und am Ausgang so wieder hergestellt wird, dass er perfekt sinusförmig ist und Frequenz und Spannung unabhängig vom Eingang durch die präzise Steuerung des Mikroprozessors festgelegt werden (V.F.I.). * Neben dem traditionellen Betriebsmodus ON LINE mit doppelter Umwandlung können folgende Betriebsmodalitäten eingestellt werden: ECO (LINE-INTERAKTIV) SMART (SMART ACTIVE) STBYOFF (STAND-BY OFF) Um die Leistung zu optimieren, werden die Lasten im ECO-Modus normalerweise über den Bypass versorgt. Verlässt das Netz die von der USV vorgesehenen Toleranzwerte, wird auf normalen ON LINE Betriebsmodus mit doppelter Umwandlung umgeschaltet. Ungefähr 5 Minuten nach Rückkehr des Netzes innerhalb der Toleranzwerte wird erneut auf Bypass umgeschaltet. Kann sich der Anwender nicht für den geeignetsten Betriebsmodus entscheiden (zwischen ON LINE und ECO), kann er den Betriebsmodus SMART ACTIVE wählen, bei dem, anhand einer Statistik zur Netzqualität, die USV autonom entscheidet auf welchen Betriebsmodus sie sich einstellt. Im Betriebsmodus STAND-BY OFF funktioniert sie als Netzreserve: Bei vorhandenem Netz werden die Lasten nicht versorgt, bei einem Blackout werden die Lasten über die Batterien durch einen Wechselrichter versorgt. R.E.P.O. Diese isolierte Eingang wird verwendet, um die USV im Notfall über Fernsteuerung auszuschalten. Ein eventueller, normalerweise geschlossener, Schalter für “Remote Emergency Power Off” (R.E.P.O.) [FernNotabschaltung] muss an den Kabelstecker auf der Rückseite der USV angeschlossen werden. Fabrikseitig wird die USV mit überbrückten Klemmen “Remote Emergency Power Off” (R.E.P.O.) ausgeliefert: Diese Überbrückung muss entfernt werden, wenn dieser Kontakt an einen Steuerkreis eines Fern-Notabschalters angeschlossen ist. Der R.E.P.O. Stromkreis hat eine Eigenspannung mit Stromkreisen des Typs SELV. Eine externe Stromversorgung wird daher nicht benötigt. Im geschlossenen Stromkreis (Normalzustand) zirkuliert ein Strom mit max. 10mA. PROGRAMMIERBARER ZUSATZSTECKER (POWER SHARE) Die USV ist mit einem Ausgangsstecker ausgestattet, mit dem eine automatische Trennung der an diesem Stecker angeschlossenen Lasten bei bestimmten Betriebszuständen möglich ist. Die Ereignisse, bei denen der Power Share Stecker automatisch getrennt wird, können vom Anwender über die Konfigurations-Software ausgewählt werden (siehe Absatz Konfigurations-Software und USV-Konfiguration). Es kann zum Beispiel ein Trennen nach einer bestimmten Dauer in Batteriebetrieb, oder bei Erreichen der Voralarmschwelle für Ende Batterieladung, sowie bei Auftreten einer Überlast gewählt werden. * Der Wert für die Ausgangsspannung (rms) wird durch die präzise Mikroprozessor-Steuerung unabhängig von der Eingangsspannung festgelegt. Die Ausgangsfrequenz wird hingegen (innerhalb eines vom Anwender einstellbaren Toleranzwertes) mit der Eingangsfrequenz synchronisiert, so dass der Bypass genutzt werden kann. Außerhalb dieser Toleranzwerte synchronisiert sich die USV nicht mehr und stellt sich auf Nennfrequenz. Der Bypass kann dann nicht mehr genutzt werden (free running mode). 110 BEDIENUNG USV-KONFIGURATION In den nachstehenden Tabelle sind alle Konfigurationsmöglichkeiten aufgeführt, die dem Anwender zur Verfügung stehen, um die USV optimal an seine Bedürfnisse anzupassen. ZEICHENERKLÄRUNG: = Zeigt an, dass die Konfiguration außer über die Konfigurations-Software auch über das Display geändert werden kann. = Zeigt an, dass die Konfiguration nur über die Konfigurations-Software geändert werden kann. FUNKTION BESCHREIBUNG Ausgangsfrequenz Auswahl der AusgangsNennfrequenz Ausgangsspannung Auswahl der AusgangsNennspannung Betriebsmodus Auswahl einer der 4 unterschiedlichen Betriebsmodalitäten Wartezeit bis zur automatischen Einschaltverzögeru Neueinschaltung nach ng Rückkehr der Netzversorgung Abschalten wegen geringer Last STANDARD MÖGLICHE KONFIGURATIONEN Auto 50 Hz 60 Hz Auto: Automatisches Lernen der Eingangsfrequenz 230V 220V 230V 240V 220 ÷ 240 in Schritten von 1V (nur über Software) ON LINE ON LINE ECO SMART ACTIVE STAND-BY OFF Ausgeschaltet 1 ÷ 255 in Schritten von 1Sek. 5 Sek. Automatisches Abschalten der USV Ausgeschalt bei Batterie-Betrieb, et wenn die Last geringer als 5% ist Eingeschaltet Ausgeschaltet Ausgeschaltet (vollständiges Entladen der Batterien) 1 ÷ 65000 in Schritten von 1Sek. AutonomieBegrenzung Höchstdauer für Batterie-Betrieb. Ausgeschalt et Voralarm Entladungsende Geschätzte RestAutonomiezeit für die Voralarm Entladungsende 3 Min. 1 ÷ 255 in Schritten von 1 Min. Batterie-Test Zeitintervall für den automatischen Batterie-Test 40 Std. Ausgeschaltet 1 ÷ 1000 in Schritten von 1 Std. 111 MODUS BEDIENUNG FUNKTION BESCHREIBUNG STANDARD Alarmschwelle für Höchstlast Kundeneinstellung für Überlast-Grenzwert. Ausgeschaltet Helligkeit des LCD-Display Auswahl der Helligkeitsstufe für das LCD-Display. Maximal Minimal ÷ Maximal in 20 Schritten Warnton Auswahl des Betriebsmodus für den Warnton. Reduziert Normal Reduziert: ertönt nicht bei vorübergehendem Einschalten des Bypass. Auswahl des Zusatz-Anschluss Betriebsmodus für den (power share) Zusatz-Anschluss. Immer angeschlossen MÖGLICHE KONFIGURATIONEN Ausgeschaltet 0 ÷ 103 in Schritten von 1% Immer angeschlossen Trennen nach n Sekunden in BatterieBetrieb Trennen nach n Sekunden nach Voralarm Entladungsende ... (siehe Bedienungsanleitung Konfigurations-Software). ERWEITERTE FUNKTIONEN Auswahl der zulässigen Spanne für die Eingangsfrequenz Toleranz der zum Umschalten auf Eingangsfrequenz Bypass und für die Synchronisierung des Ausgangs. ± 0.25% ± 0.5% ± 0.75% ± 1 ÷ ±10 in Schritten von 1% ± 5% Spannungsschwel len Bypass Auswahl zulässiger Spannungsbereich zum Umschalten auf Bypass. Unterer:180V Oberer: 264V Unterer: 180 ÷ 200 in Schritten von 1V Oberer: 250 ÷ 264 in Schritten von 1V Spannungsschwel len Bypass für ECO Auswahl zulässiger Spannungsbereich für Betrieb im ECOModus. Unterer:200V Oberer: 253V Unterer: 180 ÷ 220 in Schritten von 1V Oberer: 240 ÷ 264 in Schritten von 1V AuslöseEmpfindlichkeit für ECO Auswahl der AuslöseEmpfindlichkeit bei Betrieb im ECOModus. Normal LastStromversorgung in Stand-By Last-Stromversorgung über Bypass bei ausgeschalteter USV (Stand-By-Status). Ausgeschaltet (Last NICHT mit Strom versorgt) Ausgeschaltet (nicht mit Strom versorgt) Eingeschaltet (mit Strom versorgt) Eingeschaltet/ Hochempfindli ch Eingeschaltet/ Hochempfindlich Eingeschaltet/ gering empfindlich Ausgeschaltet mit Synchronisierung Eingang/ Ausgang Ausgeschaltet ohne Synchronisierung Eingang/ Ausgang Bypass-Betrieb Auswahl des Betriebsmodus für die Bypass-Leitung. 112 Niedrig Normal Hoch MODUS BEDIENUNG COMPUTER-SCHNITTSTELLEN Auf der Rückseite der USV (siehe Ansichten USV) befinden sich folgende Computer-Schnittstellen: Serielle Schnittstelle, erhältlich mit Anschluss RS232 und USB-Anschluss. ANMERKUNG: Bei Verwendung eines Anschlusses wird der andere automatisch ausgeschaltet. Erweiterungs-Steckplatz für zusätzliche Schnittstellen-Karten COMMUNICATION SLOT. Anschlüsse RS232 und USB ANSCHLUSS RS232 PIN # 1 2 3 4 5 6 7 8 9 USB-ANSCHLUSS SIGNAL Kontakt geschlossen: USV in Schutzabschaltung * TXD RXD GND Eingang Stromversorgung Schnittstelle +12Vdc Kontakt geschlossen: Voralarm für Ende Entladung * Kontakt geschlossen: Batteriebetrieb * * Optisch isolierter Kontakt max. +30Vdc / 10mA Communication Slot ie USV ist mit einem Erweiterungs-Steckplatz für zusätzliche Schnittstellen-Karten ausgestattet (siehe nebenstehende Abbildung), die es dem Gerät ermöglichen durch die wichtigsten Kommunikations-Standards Daten auszutauschen. Einige Beispiele: Zweiter RS232-Anschluss. Verdoppler für serielle Schnittstelle. Ethernet Netzanschluss mit Protokoll TCP/IP, HTTP und SNMP Anschluss RS232 + RS485 mit Protokoll JBUS / MODBUS Karte Anzeige-Relais Für weitere Informationen zum erhältlichen Zubehör siehe die Internetseite des Herstellers. 113 4 3 1 2 PIN # SIGNAL 1 VBUS 2 3 4 DD+ GND BEDIENUNG SOFTWARE Überwachungs- und Steuer-Software Die PowerShield3 Software gewährleistet eine wirksame und intuitive Verwaltung der USV, indem sie alle wichtigsten Informationen wie Eingangsspannung, angelegte Last, Batteriekapazität visualisiert. Ferner ist sie in der Lage, beim Eintreten eines besonderen, durch den Anwender gewählten Ereignisses Shut down Vorgänge, das Versenden von E-mails, Sms und Netzmeldungen automatisch auszuführen. Vorgänge für die Installation: Die Kommunikationsschnittstelle RS232 der USV an eine Kommunikationsschnittstelle COM des PCs über das mitgelieferte* serielle Kabel anschliessen oder die Schnittstelle USB der USV an eine Schnittstelle USB des PCs anschliessen, wofür ein Standard Kabel USB* benutzt wird. Laden Sie von der Webseite www.riello-ups.com, die Software für das gewünschte Betriebssystem herunter. Folgen Sie den Anleitungen des Installationsprogramms. Für genauere Informationen zur Installation und zum Gebrauch lesen Sie im Softwarehandbuch nach, das zum Download auf unserer Seite www.riello-ups.com zur Verfügung steht. Konfigurations-Software Über eine entsprechende Software können die wichtigsten Parameter der USV konfiguriert werden. Für eine Liste mit den möglichen Konfigurationen sehen Sie unter dem abschnitt USV Konfiguration nach. * Es wird empfohlen ein Kabel mit einer maximalen Länge von 3 Metern zu verwenden. 114 PROBLEMBEHEBUNG Ein unregelmäßiger Betrieb der USV ist in vielen Fällen kein Anzeichen eines Defekts, sondern durch banale Probleme, Pannen oder Zerstreutheit verursacht. Wir empfehlen daher aufmerksam die nachstehende Tabelle zu lesen, in der für die Problembehebung nützliche Informationen zusammengefasst sind. PROBLEM DAS DISPLAY SCHALTET SICH NICHT EIN MÖGLICHE URSACHE HAUPTSCHALTER NICHT GEDRÜCKT DER KABELSTECKER DER BATTERY BOX IST GETRENNT AUSFALL ANSCHLUSS AN STROMNETZ AUSFALL NETZSPANNUNG (BLACKOUT) AUSLÖSEN VORGESCHALTETER SCHUTZVORRICHTUNGEN BEHEBUNG Den Hauptschalter am Frontpaneel drücken. Den Kabelstecker der Battery Box anschließen. Den Anschluss an das Stromnetz überprüfen. Prüfen, ob Spannung des Stromnetzes anliegt. Die Schutzvorrichtung zurücksetzen. ACHTUNG: Prüfen, dass keine Überlast am USVAusgang anliegt. Zur Stromversorgung der Lasten die Taste "ON" am Frontpaneel drücken. Der Betriebsmodus muss geändert werden. DER STAND-BY OFF MODUS Im Modus STAND-BY OFF (Netzreserve) werden die IST AUSGEWÄHLT WORDEN Lasten nur bei einem Blackout versorgt. DIE USV IST IN STAND-BY MODUS DAS DISPLAY IST EINGESCHALTET ABER DIE LASTEN WERDEN NICHT VERSORGT AUSFALL ANSCHLUSS ZU DEN LASTEN Den Anschluss zu den Lasten überprüfen. AUSLÖSEN VORGESCHALTETER SCHUTZVORRICHTUNGEN Die Schutzvorrichtung zurücksetzen. ACHTUNG: Prüfen, dass keine Überlast am USVAusgang anliegt. DIE EINGANGSSPANNUNG LIEGT AUSSERHALB DER ZULÄSSIGEN TOLERANZWERTE FÜR DEN NETZBETRIEB Dieses Problem hängt vom Netz ab. Abwarten, bis die Werte für das Eingangsnetz wieder im Toleranzbereich liegen. Die USV stellt sich automatisch auf Netzbetrieb zurück. DIE USV SCHALTET SICH NICHT EIN UND AM DISPLAY WIRD EINER DER CODE ANGEZEIGT: A06, A08 DIE USV-TEMPERATUR LIEGT UNTER 0°C. Die Temperatur im Raum überprüfen, in dem die USV aufgestellt ist. Ist die Temperatur zu niedrig, muss sich auf den Mindestwert von 0°C gebracht werden. AM DISPLAY WIRD DER CODE ANGEZEIGT: A11 EINGANGSRELAIS BLOCKIERT Diese Anomalie verursacht keine besonderen Störungen. Bleibt das Problem bestehen, beim nächsten Auftauchen den Kundendienst benachrichtigen. DIE USV ARBEITET IN BATTERIEBETRIEB, OBWOHL DAS STROMNETZ VORHANDEN IST 115 PROBLEMBEHEBUNG PROBLEM MÖGLICHE URSACHE BEHEBUNG DER SUMMER ERTÖNT STÄNDIG UND AM DISPLAY WIRD EINER DER FOLGENDEN CODE ANGEZEIGT: A54, F50, F51, F52, F55, L50, L51, L52 DIE AN DER USV ANGELEGTE LAST IST ZU GROSS Die Lasten auf einen Schwellenwert von 100% begrenzen (oder auf Anwender-Schwellenwert bei Code A54). AM DISPLAY WIRD DER CODE ANGEZEIGT: A61 BATTERIE AUSWECHSELN Die Battery Box wechseln. AM DISPLAY WIRD DER CODE ANGEZEIGT: A62 BATTERY BOX NICHT VORHANDEN ODER NICHT ANGESCHLOSSEN Prüfen, dass die Battery Box vorhanden und richtig angeschlossen ist. AM DISPLAY WIRD DER CODE ANGEZEIGT: A63 DIE BATTERIEN SIND ENTLADEN. DIE USV WARTET AB, DASS DIE BATTERIESPANNUNG DEN EINGEGEBENEN SCHWELLENWERT ÜBERSTEIGT Das Aufladen der Batterie abwarten oder das Einschalten manuell übersteuern. Dazu die Taste "ON" mindestens 2 Sekunden gedrückt halten. DER SUMMER ERTÖNT STÄNDIG UND AM DISPLAY WIRD EINER DER FOLGENDEN CODE ANGEZEIGT: F03, F05, F07, F10, F13, F21, F40, F41, F42, F43 ES IST EINE STÖRUNG AN DER USV AUFGETRETEN. BALDIGE SCHUTZABSCHALTUNG. Wenn möglich die Stromversorgung zu den Lasten abschalten, die USV aus- und wieder einschalten, tritt das Problem wieder auf, den Kundendienst benachrichtigen. DER SUMMER ERTÖNT STÄNDIG UND AM DISPLAY WIRD EINER DER FOLGENDEN CODE ANGEZEIGT: F04, L04 DIE TEMPERATUR DER KÜHLKÖRPER IN DER USV IST ZU HOCH Prüfen, dass die Temperatur im Aufstellungsraum der USV nicht über 40°C beträgt. DER SUMMER ERTÖNT STÄNDIG UND AM DISPLAY WIRD EINER DER FOLGENDEN CODE ANGEZEIGT: F53, L53 ES IST EINE STÖRUNG AN EINEM ODER MEHREREN VON DER USV VERSORGTEN ABNEHMER ERFASST WORDEN Alle Abnehmer trennen und nacheinander einzeln wieder anschließen, um die Störung festzustellen. DER SUMMER ERTÖNT STÄNDIG UND AM DISPLAY WIRD EINER DER FOLGENDEN CODE ANGEZEIGT: F60, L03, L05, L07, L10, L13, L20, L21, L40, L41, L42, L43 ES IST EINE STÖRUNG AN DER USV AUFGETRETEN Wenn möglich die Stromversorgung zu den Lasten abschalten, die USV aus- und wieder einschalten, tritt das Problem wieder auf, den Kundendienst benachrichtigen. ES IST EINE FERNSTEUERUNG AKTIVIERT Falls nicht gewünscht, die Position des manuellen Bypass Schalters oder den Status der Steuereingänge einer eventuellen Karte mit optionalen Kotakten kontrollieren. Prüfen, ob der Kontakt R.E.P.O. auf der Rückseite der USV geschlossen ist. AM DISPLAY WIRD EINER DER CODE ANGEZEIGT: C01, C02, C03 116 PROBLEMBEHEBUNG ALARMCODE Durch die Verwendung eines hochentwickelten Autodiagnosesystems ist die USV in der Lage am Display eventuelle Anomalien/ Störungen anzuzeigen, die während des Normalbetrieb des Gerätes auftreten können. Besteht ein Problem, zeigt die USV am Display einen Code und den aktiven Alarmtyp (FAULT bzw. LOCK) an. FAULT Die Anzeige des Typs FAULT kann in drei Kategorien unterteilt werden. Anomalien: Hier handelt es sich um "kleinere" Probleme vorliegen, die nicht zur Schutzabschaltung der USV führen, die aber die Leistung reduzieren oder die Nutzung einiger Funktionen verhindern. CODE BESCHREIBUNG A06 A08 A11 A54 A61 A62 A63 Temperatursensor1 unter 0°C Temperatursensor2 unter 0°C Eingangsrelais blockiert (öffnet sich nicht) Last > als eingegebener Anwender-Grenzwert Batterien auswechseln Battery Box nicht vorhanden oder nicht angeschlossen Batterie-Ladung abwarten Alarme: Hier handelt es sich um kritischere Probleme als "Anomalie", die bei längerem Anhalten, auch in sehr kurzer Zeit, zur Schutzabschaltung der USV führen können. CODE BESCHREIBUNG F03 F04 F05 F07 F10 F13 F21 F40 F41 F42 F43 F50 F51 F52 F53 F55 F60 Falsche Zusatz-Versorgung Überhitzung der Kühlkörper Temperatursensor1 ausgefallen Temperatursensor2 ausgefallen Eingangs-Sicherung beschädigt oder Eingangsrelais blockiert (schließt nicht) Vorladen der Kondensatoren fehlgeschlagen Überspannung Kondensatorenbank Überspannung Wechselrichter Gleichspannung am Ausgang Falsche Wechselrichterspannung Unterspannung Wechselrichter Überlast: Last > 103% Überlast: Last > 125% Überlast: Last > 150% Kurzschluss Abwarten Lastreduzierung für Rückstellen auf Wechselrichter Überspannung Batterien 117 PROBLEMBEHEBUNG Aktive Steuerungen: Zeigt an, dass eine Fernsteuerung aktiv ist. CODE BESCHREIBUNG C01 C02 C03 C04 Fernsteuerungen zum Abschalten Fernsteuerungen Lasten auf Bypass Fernsteuerungen zum Einschalten Batterie-Test läuft LOCK Die Anzeigen des Typs LOCK (Schutzabschaltung) haben normalerweise vorher eine Alarmanzeige. Wegen ihrer Bedeutung führen sie zum Abschalten des Wechselrichters und der Lasten-Stromversorgung über den Bypass (dieses Verfahren gilt nicht für Schutzabschaltungen wegen starker und länger anhaltender Überlast sowie für Schutzabschaltungen wegen Kurzschluss). CODE BESCHREIBUNG L03 L04 L05 L06 L07 L10 L13 L20 L21 L31 L40 L41 L42 L43 L50 L51 L52 L53 Falsche Zusatz-Versorgung Überhitzung der Kühlkörper Temperatursensor1 ausgefallen Temperatursensor3 ausgefallen Temperatursensor2 ausgefallen Eingangs-Sicherung beschädigt oder Eingangsrelais blockiert (schließt nicht) Vorladen der Kondensatoren fehlgeschlagen Unterspannung Kondensatorenbank Überspannung Kondensatorenbank Anomalie Bypass Überspannung Wechselrichter Gleichspannung am Ausgang Falsche Wechselrichterspannung Unterspannung Wechselrichter Überlast: Last > 103% Überlast: Last > 125% Überlast: Last > 150% Kurzschluss 118 TABELLE TECHNISCHE DATEN 3- TABELLE TECHNISCHE DATEN USV EINPHASIG/ EINPHASIG MODELLE EINGANG Nennspannung Zulässiger Bereich Spannungsbereich für Nichteinschaltung der Batterie Nennfrequenz Maximalstrom (1) Nennstrom (2) Leistungsfaktor Verzerrung Strom @ maximaler Last BYPASS Zulässiger Spannungsbereich für Umschalt-Freigabe Zulässiger Frequenzbereich für Umschalt-Freigabe Umschaltdauer BATTERIE Ladedauer (8) AUSGANG Nennspannung Statische Schwankung (3) Dynamische Schwankung (4) Wellenform Spannungs-Verzerrung @ linearer Last Spannungs-Verzerrung @ verzerrter Last Frequenz (5) Crestfaktor des Stroms Nennleistung in VA Nennleistung in W Kurzschlussstrom VERSCHIEDENES Leckstrom Richtung Erde Wirkungsgrad AC/AC Raumtemperatur(6) Luftfeuchtigkeit Schutz gegen Hold-up time Geräuschentwicklung Abmessungen H x B x T (mm) Gewicht in kg (geschätzt) SDL 8000 SDL 10000 220/230/240 Vac 0 - 280 Vac Maximale Spannung 276Vac Minimale Spannung: von 184 bis 138 Vac von 100% bis 50% der Last in linearen Modus Rückstellen auf Netzbetrieb bei 190Vac 50 - 60 Hz ±5Hz 44A 54A 34A 43A 0.98 6% 180 - 264 Vac Gewählte Frequenz ±5% 0.1ms 6-8 Std. 220/230/240 Vac auswählbar ±1.5% 1.5% (7) 5% in 20ms Sinusförmig 3% 5% 50 oder 60 Hz wählbar 3:1 8000 10000 7200 9000 1.5 x In für t= 0.5Sek 10mA 92% 0 – 40 °C < 90% (ohne Kondenswasser) Tiefenentladung der Batterien - Überstrom – Kurzschluss - Überspannung Unterspannung - Überhitzung 30msek < 45 dB(A) in 1m Abstand 2 x [455mm (19”) x 175mm (4U) x 660mm (26”)] 29 + 65 Kg ungefähr 30 + 65 Kg ungefähr (1) (2) (3) (4) (5) @ Nennlast, Mindestspannung 180Vac, Batterie in Ladung @ Nennlast, Nennspannung von 230Vac, Batterie in Ladung Netz / Batterie @ Last 0% -100% @ Netz / Batterie/ Netz @ Widerstandsbelastung 0% / 100% / 0% Liegt die Netzfrequenz innerhalb von ±5% (kann vom Anwender eingestellt werden) des gewählten Wertes, ist die USV mit dem Netz synchronisiert. Liegt die Frequenz außerhalb der Toleranzwerte oder bei Batteriebetrieb, ist die Frequenz die gewählte Frequenz ±0.1%. (6) 20 – 25°C für eine längere Lebensdauer der Batterien. (7) Um die Ausgangsspannung innerhalb des angegebenen Präzisionsbereiches zu halten, kann es sein, dass nach langem Betrieb eine Neukalibrierung erforderlich ist. (8) Benötigte Zeit zum Erreichen von 90% Ladung (nach vollständigen Entladen mit Last ≥80%). 119 TABELLE TECHNISCHE DATEN TABELLE TECHNISCHE DATEN USV DREIPHASIG/ EINPHASIG MODELLE EINGANG (3 Ø + N Phasenspannungen) Nennspannung Zulässiger Bereich Spannungsbereich für Nichteinschaltung der Batterie Nennfrequenz Maximalstrom (1) Nennstrom (2) Leistungsfaktor Verzerrung Strom @ maximaler Last BYPASS (an L1) Zulässiger Spannungsbereich für UmschaltFreigabe Zulässiger Frequenzbereich für UmschaltFreigabe Umschaltdauer BATTERIE Ladedauer (8) AUSGANG Nennspannung Statische Schwankung (3) Dynamische Schwankung (4) Wellenform Spannungs-Verzerrung @ linearer Last Spannungs-Verzerrung @ verzerrter Last Frequenz (5) Crestfaktor des Stroms Nennleistung in VA Nennleistung in W Kurzschlussstrom VERSCHIEDENES Leckstrom Richtung Erde Wirkungsgrad AC/AC Raumtemperatur (6) Luftfeuchtigkeit Schutz gegen Hold-up time Geräuschentwicklung Abmessungen H x B x T (mm) Gewicht in kg (geschätzt) SDL 6500 TM SDL 8000 TM SDL 10000 TM 220/230/240 Vac 0 - 280 Vac Maximale Spannung 276Vac Minimale Spannung: von 184 bis 138Vac von 100% bis 50% der Last in linearen Modus Rückstellen auf Netzbetrieb bei 190Vac 50 - 60 Hz ±5Hz 13A 15A 19A 9A 11A 14A 0.95 26% 180 - 264 Vac Gewählte Frequenz ±5% 0.1ms 6-8 Std. 6500 5850 220/230/240 Vac auswählbar ±1.5% 1.5% (7) 5% in 20ms Sinusförmig 3% 6% 50 oder 60 Hz wählbar 3:1 8000 7200 1.5 x In für t= 0.5Sek 10000 9000 10mA 92% 0 – 40 °C < 90% (ohne Kondenswasser) Tiefenentladung der Batterien - Überstrom - Kurzschluss - Überspannung Unterspannung - Überhitzung 40msek < 45 dB(A) in 1m Abstand 2 x [455mm (19”) x 175mm (4U) x 660mm (26”)] 28 + 63 Kg ungefähr 29 + 65 Kg ungefähr 30 + 65 Kg ungefähr (1) (2) (3) (4) (5) @ Nennlast, Mindestspannung 180Vac, Batterie in Ladung @ Nennlast, Nennspannung von 230Vac, Batterie in Ladung Netz / Batterie @ Last 0% -100% @ Netz / Batterie/ Netz @ Widerstandsbelastung 0% / 100% / 0% Liegt die Netzfrequenz innerhalb von ±5% (kann vom Anwender eingestellt werden) des gewählten Wertes, ist die USV mit dem Netz synchronisiert. Liegt die Frequenz außerhalb der Toleranzwerte oder bei Batteriebetrieb, ist die Frequenz die gewählte Frequenz ±0.1%. (6) 20 – 25°C für eine längere Lebensdauer der Batterien. (7) Um die Ausgangsspannung innerhalb des angegebenen Präzisionsbereiches zu halten, kann es sein, dass nach langem Betrieb eine Neukalibrierung erforderlich ist. (8) Benötigte Zeit zum Erreichen von 90% Ladung (nach vollständigen Entladen mit Last ≥80%). 120 TABELLE TECHNISCHE DATEN TABELLE TECHNISCHE DATEN BATTERY BOX GRUNDMODELL BBX SDL 240V BB NP A3 BATTERIE Nennspannung Spannung bei Ende Ladung Anzahl Batterien / V VERSCHIEDENES Raumtemperatur (1) Luftfeuchtigkeit Schutz gegen Abmessungen H x B x T Gewicht [Vdc] [Vdc] BBX SDL 240V BB NP A5 240 273 20 / 12 0 – 40 < 90% ohne Kondenswasser Überstrom - Kurzschluss 455 x 175 x 660 [°C] [mm] [Kg] 63 65 (1) 20 – 25°C für eine längere Lebensdauer der Batterien. TABELLE ÜBERLASTZEITEN ÜBERLASTZEITEN 100% < Last 125% 125% < Last 150% Last > 150% BYPASS BETRIEB ÜBER WECHSELRICHTER Schaltet den Bypass nach 2 Sek ein Schutzabschaltung nach 120 Sek Schaltet den Bypass nach 2 Sek. ein Schutzabschaltung nach 4 Sek Schaltet den Bypass sofort ein Schutzabschaltung nach 1 Sek 121 Schutzabschaltung nach 60 Sek Schutzabschaltung nach 4 Sek Schutzabschaltung nach 0.5 Sek 122 F MANUEL DE L’UTILISATEUR 123 F INTRODUCTION Nous vous remercions pour avoir choisi un produit de la gamme Sentinel Dual. Riello UPS est spécialisée dans le développement et la production d’alimentateurs sans interruption (ASI). Les ASI de cette série sont des produits de haute qualité, attentivement conçus et construits afin de garantir les meilleures performances. Cet appareil peut être installé par tout utilisateur, après une LECTURE ATTENTIVE ET SCRUPULEUSE DU PRESENT MANUEL. Ce Manuel contient les instructions détaillées relatives à l’utilisation et à l’installation de l’ASI. Pour avoir des informations concernant l’utilisation pour obtenir les meilleures performances de votre appareil, le présent Manuel devra être conservé avec soin à proximité de l’ASI et CONSULTE AVANT TOUTE OPERATION. PROTECTION DE L’ENVIRONNEMENT Lors du développement de ses produits, l’entreprise consacre d’importantes ressources dans les aspects environnementaux Tous nos produits poursuivent les objectifs définis dans la politique du système de gestion environnementale qui a été développé par l’entreprise en accord avec la règlementation en vigueur. Ce produit ne contient pas de matériaux dangereux comme le CFC, l’HCFC ou l’amiante. En ce qui concerne les emballages on a choisi des matériaux recyclables. Pour l’éliminer correctement prière de séparer et d’identifier le type de matériau constituant l’emballage suivant le tableau sous-jacent. Eliminer chaque matériau selon les règlementations en vigueur dans le pays d’utilisation du produit. Description Palette Cornière emballage Boite Tampon adhésif Sac de protection Materiau Pin traité HT Stratocell/carton Carton Stratocell Polyéthylène HD TRAITEMENT DU PRODUIT L'ASI contient des éléments tels que cartes électroniques et batteries qui (en cas de mise au rebut ou d'abandon) sont considérés DÉCHETS TOXIQUES et DANGEREUX. Traiter ces composants conformément à la législation en vigueur en s'adressant à des services qualifiés. Un traitement correct contribue à respecter l’environnement et la santé des personnes. © Toute reproduction intégrale ou partielle du présent manuel faite sans l’autorisation du fabricant est illicite. En vue d’améliorer le produit décrit, le fabricant se réserve la faculté de le modifier à tout moment et sans préavis. 124 SOMMAIRE PRESENTATION 126 VUES ONDULEUR VUES BOX BATTERIE VUE CACHE AFFICHEUR 127 128 129 INSTALLATION 130 OUVERTURE DE L’EMBALLAGE ET VERIFICATION DE SON CONTENU VERSION TOWER VERSION RACK MODALITES D’INSTALLATION CONNEXION DE L’ONDULEUR AU BOX BATTERIE 130 132 133 134 135 UTILISATION 136 RACCORDEMENTS 136 Version monophasée 8-10kVA 137 Version triphasée 138 Version avec commande de by-pass externe distant PREMIERE MISE EN MARCHE MISE EN MARCHE SUR RESEAU MISE EN MARCHE SUR BATTERIE ARRET DE L’ONDULEUR INDICATIONS PANNEAU AFFICHEUR 139 141 141 141 141 142 Indicateurs d’état de l’onduleur 142 Champ d’affichage des mesures 143 Version monophasée 143 Version triphasée 144 Champ de configuration MODE DE FONCTIONNEMENT R.E.P.O. PRISE AUXILIAIRE PROGRAMMABLE (POWER SHARE) CONFIGURATION DE L’ONDULEUR PORTS DE COMMUNICATION 145 146 146 146 147 149 Connecteurs RS232 et USB 149 Slot de communication LOGICIELS 149 150 Logiciel de surveillance et de contrôle 150 Logiciel de configuration 150 RESOLUTION DES PROBLEMES 151 CODES D’ALARME 153 TABLEAU DONNEES TECHNIQUES 155 TABLEAU DES DONNEES TECHNIQUES ONDULEUR MONO/MONO TABLEAU DES DONNEES TECHNIQUES ONDULEUR TRI/MONO TABLEAU DES DONNEES TECHNIQUES BOX BATTERIE TABLEAU DES TEMPS DE SURCHARGE 125 155 156 157 157 PRESENTATION La nouvelle famille d’ASI Sentinel Dual a été étudiée en réservant une attention particulière à la versatilité. En effet, ces onduleurs peuvent être installés, selon les exigences, aussi bien dans la version tower que dans la version rack. Voilà comment se présente le produit dans les deux différentes versions : Tower Rack SDL 6500 TM Puissance nominale Tension nominale Dimensions H x L x P Poids [VA] [Vca] [mm] [Kg] 6500 28 + 63 environ (1) SDL 8000 SDL 8000 TM 8000 220/230/240 2 x [455 x 175 x 660] (1) 29 + 65 environ SDL 10000 SDL 10000 TM 10000 30 + 65 environ Dans la version rack, si les poignées sont déjà installées, la dimension H est différente : 483mm x 175mm x 660mm (H x L x P) Note : 175mm = 4U 483mm = 19” 126 PRÉSENTATION VUES ONDULEUR Fentes de démontage Cache afficheur pivotant Interrupteur bypass manuel Interrupteur général Panneau frontal amovible Vue de face (sans panneau frontal) (avec panneau frontal) Connecteur d’extension batterie Remote emergency power off (R.E.P.O.) Ventitaleur de refroidissement Slot d’extension COMUNICATION SLOT Port de communication RS232 Port de communication USB Prises IEC 10 A Power share Protection thermique prises Power share Ventitaleur de refroidissement Boîte de connexion IN/OUT Vue arrière 127 PRÉSENTATION VUES BOX BATTERIE Fentes de démontage Cache amovible/pivotant Panneau frontal amovible Vue de face Grille d’aération Connecteurs d’extension batteries Vue arrière 128 PRÉSENTATION VUE CACHE AFFICHEUR Bouton “SEL / SET” Bouton “ON” Bouton “STBY” Afficheur LCD 1 Fonctionnement normal 7 Champ de configuration 2 Fonctionnement sur réseau 8 Demande de maintenance 3 Fonctionnement sur batterie 9 Timer 4 Charge alimentée par bypass 10 Champ d’affichage mesures 5 Indicateur d’autonomie batterie 11 Stand-by / alarme 6 Indicateur du niveau de charge 129 INSTALLATION OUVERTURE DE L’EMBALLAGE ET VERIFICATION DE SON CONTENU Après avoir ouvert l’emballage, commencer par vérifier son contenu. L’emballage doit contenir: Onduleur Box batterie 1 passe-câble + 2 presse-étoupe 6 couvercles en plastique (panneaux supérieurs onduleur et box batterie) Embouts pour connexion câbles – plaque à bornes 2 clavettes en plastique pour démonter l’afficheur 2 kits poignées Câble série RS232 130 INSTALLATION Câble de connexion onduleur-box batterie 2 fusibles pour box batterie - 14x51 mm, 50A, 400V Manuel utilisateur + CD-ROM logiciel User's manual 131 INSTALLATION ATTENTION: cet onduleur est un produit conforme aux normes en vigueur en matière de compatibilité électromagnétique (classe C2). En milieu domestique il peut provoquer des interférences radio. L’utilisateur pourrait être contraint d’adopter des mesures supplémentaires. VERSION TOWER Ce chapitre décrit les opérations à effectuer pour préparer l’onduleur et le box batterie à une utilisation dans la version tower. ATTENTION : pour votre sécurité et celle de votre produit, il est recommandé de suivre scrupuleusement les indications reportées ci-après. AVANT D’EFFECTUER LA SEQUENCE D’OPÉRATIONS SUIVANTE, S’ASSURER QUE L’ONDULEUR EST COMPLETEMENT ARRETE ET DEBRANCHE DU RESEAU ÉLECTRIQUE OU DE TOUTE AUTRE CHARGE Une fois déballés, l’onduleur et le box batterie sont prêts à être installés dans la configuration tower. Pour compléter cette configuration, il suffit de monter les six couvercles en plastique fournis avec l’appareil, trois dans la partie supérieure de l’onduleur et les trois autres dans la partie supérieure du box batterie, en suivant les indications reportées ci-après: Les couvercles ont un système de fixation à emboîtement: identifier les trous prévus pour le montage des couvercles dans la partie supérieure de l’onduleur et du box batterie puis les enclencher avec soin en exerçant une légère pression (voir figure ci-contre). 132 INSTALLATION VERSION RACK Ce chapitre décrit la séquence d’opérations à effectuer pour transformer l’onduleur en version rack. ATTENTION: pour votre sécurité et celle de votre produit, il est recommandé de suivre scrupuleusement les indications reportées ci-après. AVANT D’EFFECTUER LA SEQUENCE D’OPÉRATIONS SUIVANTE, S’ASSURER QUE L’ONDULEUR EST COMPLETEMENT ARRETE ET DEBRANCHE DU RESEAU ÉLECTRIQUE OU DE TOUTE AUTRE CHARGE 1 - Avant tout il faut démonter les pieds situés à la base de l’onduleur et du box batterie. Placer l’onduleur et le box batterie en position horizontale en faisant très attention et, à l’aide d’un petit tournevis plat, soulever doucement le capuchon situé au centre du pied. Une fois soulevé, dégager le pied de la base de l’onduleur et du box batterie. Répéter ces opérations pour tous les pieds restants. La séquence exacte à suivre est illustrée cicontre: 1 2 2 - Une fois que tous les pieds sont démontés, tourner le cache de l’afficheur. Enfiler les clavettes fournies dans les fentes de démontage qui se trouvent sur les côtés du cache de l’afficheur et exercer une légère pression jusqu’à décrocher le cache de l’onduleur, comme le montre la figure ci-contre. Répéter les mêmes opérations pour démonter le cache du box batterie. 3 - ATTENTION: Le cache de l’afficheur est raccordé à l’onduleur par un câble spécial. Il faut donc dégager le cache avec précaution et éviter l’arrachement ou tout autre mouvement brusque qui endommagerait l’afficheur et/ou l’onduleur. N’ESSAYER EN AUCUN CAS DE SEPARER LE CACHE DE L’AFFICHEUR DE L’ONDULEUR. 4 - Tourner le cache de 90° dans le sens inverse des aiguilles d’une montre et le réenclencher à l’onduleur en l’introduisant délicatement dans son logement jusqu’à percevoir un léger déclic indiquant que le cache est dans la bonne position. Procéder de manière analogue pour tourner et réenclencher le cache du box batterie. NOTE: La pression doit être exercée à proximité des fentes de montage. 5 - Tourner l’onduleur et le box batterie de 90° dans le sens des aiguilles d’une montre en prenant le maximum de précautions. 133 INSTALLATION 6 - L’onduleur et le box batterie étant en position horizontale, fixer les poignées fournies sur les côtés de l’onduleur et du box batterie à l’aide des vis prévues à cet effet, comme le montre les figures cidessous. NOTE: L’onduleur et le box batterie sont compatibles pour le montage dans des armoires rack standard 600mm x 800mm ou supérieures (en profondeur). Dans l’installation rack, vu les poids de l’onduleur et du box batterie, il faut utiliser des étriers de support (guide avec support en L). Pour la même raison, il est conseillé d’installer l’onduleur au-dessus du box batterie et dans la partie basse de l’armoire rack. L’Entreprise décline toute responsabilité relative aux dommages dérivant de raccordements incorrects ou d’opérations non décrites dans le présent manuel. MODALITES D’INSTALLATION Avant d’effectuer le raccordement de l’onduleur au box batterie, suivre rigoureusement les indications suivantes: Installer l’onduleur et le box batterie sur une surface horizontale et stable. Eviter de positionner l’appareil dans des endroits exposés à la lumière directe du soleil ou à proximité d’une source de chaleur. Garantir une température ambiante comprise entre 0°C et 40°C. N.B.: L’onduleur est à même de fonctionner à une température ambiante comprise entre 0 et 40°C. La température optimale de fonctionnement des batteries situées à l’intérieur du box batterie est comprise entre 20 et 25°C. En effet si la vie des batteries a une durée moyenne de 4 ans à une température de fonctionnement de 20°C, elle est réduite de moitié à une température de 30°C. L'humidité relative ambiante ne doit pas dépasser 90%. Eviter les atmosphères poussiéreuses. Positionner l’onduleur et le box batterie à une distance minimum de 10 cm des murs et évitez de poser tout objet sur les fentes d’aération pour permettre une bonne ventilation. Le câble qui relie l’onduleur au box batterie ne peut pas être prolongé par l’utilisateur. Le cas échéant, contacter le fournisseur. 134 INSTALLATION CONNEXION DE L’ONDULEUR AU BOX BATTERIE Raccorder l’onduleur au box batterie à l’aide du câble d’extension fourni avec l’appareil (voir figure ci-dessous) Introduire les deux fusibles fournis dans les sectionneurs porte-fusibles situés à l’arrière du box batterie. Refermer les sectionneurs. Le câble peut être branché indifféremment à l’une des deux prises situées à l’arrière du box batterie. La prise d’extension non utilisée à l’arrière du box batterie est prévue pour la connexion en cascade d’autres box batteries en vue d’augmenter l’autonomie de l’onduleur. ATTENTION: Il est interdit de raccorder plusieurs onduleurs à un seul box batterie ou à plusieurs box batteries connectés en cascade. 135 UTILISATION RACCORDEMENTS L’INSTALLATION DOIT ETRE EXECUTEE EXCLUSIVEMENT PAR UN PERSONNEL QUALIFIE. LE PREMIER RACCORDEMENT A EFFECTUER EST CELUI DU CONDUCTEUR DE PROTECTION (CABLE DE PROTECTION) QUI DOIT ETRE BRANCHE A LA BORNE REPORTANT LE SYMBOLE . L’ONDULEUR NE DOIT JAMAIS FONCTIONNER SANS RACCORDEMENT A L’INSTALLATION DE TERRE. Avertissement: si les indications de neutre (N) et phase(F) relatives aux fiches et aux prises sont respectées, l’onduleur inséré dans une installation ne modifie pas le régime de neutre préexistant. La résistance sur le raccordement de neutre est inférieure à 0,1 ohm. Un interrupteur différentiel placé en amont intervient même après une panne survenant en aval de l’onduleur. La sensibilité de cet interrupteur doit tenir compte du courant dispersé du groupe (qui est de 2 mA environ) et de celui de la charge qui s’ajoutent sur le conducteur de terre de l’onduleur. entrée onduleur monophasées triphasées Différentiel Type B ou Type A Type B Le régime de neutre n’est modifié qu’en présence d’un transformateur d’isolement ou lorsque l’onduleur fonctionne avec un neutre sectionné en amont. Quoi qu’il est soit, éviter de raccorder le neutre de sortie à celui d’entrée ou de terre car cette opération pourrait endommager l’onduleur. Pour effectuer les raccordements du réseau et de la charge, suivre les indications reportées ci-dessous: 1. Installer en amont de l’appareil un interrupteur magnétothermique de 63A à courbe d’intervention B ou C (4 pôles pour les versions triphasées, 2 pôles pour les versions monophasées). 2. Les bornes à utiliser pour le raccordement des lignes d’entrée et de sortie sont situées dans la boîte de connexion IN/OUT. Dévisser ensuite la vis qui fixe la boîte de connexion et qui est située à droite de la boîte (voir figure ci-contre). 3. Dégager la boîte de connexion jusqu’à ce que les bornes soient accessibles (voir figure ci-contre). ATTENTION: la boîte de connexion présente un système de blocage qui empêche de l’enlever complètement. Ne pas essayer de séparer la boîte de son logement. 136 UTILISATION Version monophasée 8-10kVA 1. Utiliser 3 câbles ayant une section de 10 mm2 (TERRE, N et L) en entrée, et 3 câbles ayant une section de 10 mm2 en sortie (TERRE, N et L). Exécuter les opérations suivantes en faisant référence à la figure ci-contre: - Introduire les câbles provenant de l’interrupteur magnétothermique de 63A dans le presse-étoupe P2 (ligne d’entrée). - Introduire les câbles provenant de la charge dans le presse-étoupe P1 (ligne de sortie). - Dépouiller les câbles en respectant la mesure indiquée. - Introduire la partie venant d’être dépouillée dans les embouts fournis. 2. Brancher les fils aux bornes correspondantes en suivant scrupuleusement les indications reportées ci-dessous: Ligne d’entrée a - S’assurer que l’interrupteur magnétothermique situé en amont est ouvert. b - Brancher le fil de terre à la borne 3. c - Brancher le fil de neutre à la borne 1. d - Brancher le fil de phase à la borne 2. Ligne de sortie a - Brancher le fil de terre à la borne 6. b - Brancher le fil de neutre à la borne 7. c - Brancher le fil de phase à la borne 8. Ligne de bypass a - S’assurer qu’un fil de liaison, nécessaire pour le bon fonctionnement de l’onduleur, est branché aux bornes 9 et 10. 3. Serrer les passe-câbles à la bride, fermer la boîte de connexion et la fixer à l’aide de la vis précédemment enlevée. 137 UTILISATION Version triphasée 1. (VERSION TRIPHASEE 8-10kVA): Utiliser 3 câbles ayant une section de 6 mm2 (TERRE, L2 et L3) et 2 ayant une section de 10 mm2 (N, L1) en entrée (N.B.: L1 et N ont une section supérieure car en fonctionnement sur bypass ils doivent supporter tout le courant d’entrée). Pour la sortie utiliser 3 câbles ayant une section de 10 mm2 (TERRE, N et L). Exécuter les opérations suivantes en faisant référence à la figure ci-contre: - Introduire les câbles provenant de l’interrupteur magnétothermique de 63A dans le presse-étoupe P2 (ligne d’entrée). - Introduire les câbles provenant de la charge dans le presseétoupe P1 (ligne de sortie). - Dépouiller les câbles en respectant la mesure indiquée. - Introduire la partie venant d’être dépouillée dans les embouts fournis. (VERSION TRIPHASEE 6,5kVA): Utiliser 3 câbles ayant une section de 4 mm2 (TERRE, L2 et L3) et 2 ayant une section de 6 mm2 (N, L1) en entrée (N.B.: L1 et N ont une section supérieure car en fonctionnement sur bypass ils doivent supporter tout le courant d’entrée). Pour la sortie utiliser 3 câbles ayant une section de 6 mm2 (TERRE, N et L). Exécuter les opérations suivantes en faisant référence à la figure ci-contre: - Introduire les câbles provenant de l’interrupteur magnétothermique de 63A dans le presse-étoupe P2 (ligne d’entrée). - Introduire les câbles provenant de la charge dans le presse-étoupe P1 (ligne de sortie). - Dépouiller les câbles en respectant la mesure indiquée. - Introduire la partie venant d’être dépouillée dans les embouts fournis. 2. Brancher les fils aux bornes correspondantes en suivant scrupuleusement les indications reportées cidessous: Ligne d’entrée a - S’assurer que l’interrupteur magnétothermique situé en amont est ouvert. b - Brancher le fil de terre à la borne 5. c - Brancher le fil de neutre à la borne 1. d - Brancher les fils des phases aux bornes 2, 3 et 4 (pour L1 utiliser le fil rouge). Ligne de sortie a - Brancher le fil de terre à la borne 6. b - Brancher le fil de neutre à la borne 7. c - Brancher le fil de phase à la borne 8. Ligne de bypass a - S’assurer qu’un fil de liaison, nécessaire pour le bon fonctionnement de l’onduleur, est branché aux bornes 9 et 10. 3. Serrer les passe-câbles à la bride, fermer la boîte de connexion et la fixer à l’aide de la vis précédemment enlevée. 138 UTILISATION Version avec commande de bypass externe distant Si l’on souhaite séparer la commande de bypass de maintenance distant, suivre les indications des points 1, 2 et 3 précédents puis procéder comme suit: 1. Enlever le capuchon présent dans le premier trou en haut de la boîte amovible et monter le passe-câble fourni. 2. Suivre les instructions reportées précédemment pour le raccordement, le nombre et la section des câbles à utiliser, passant à travers les presseétoupe P1 et P2. Pour effectuer le raccordement avec les bornes de bypass distant, utiliser un câble 2x0.75 mm2. Exécuter les opérations suivantes en faisant référence à la figure ci-contre: - Introduire le câble de commande externe de bypass dans le passe-câble P3. - Dépouiller les câbles en respectant la mesure indiquée. - Introduire la partie venant d’être dépouillée dans les embouts fournis. 3. Brancher les fils aux bornes correspondantes en suivant les instructions reportées précédemment. La ligne de bypass peut être branchée à l’onduleur aussi bien en raccordement monophasé que triphasé. Brancher les fils de la ligne de bypass de la façon suivante: Ligne de bypass a - Brancher les deux fils du câble aux bornes 9 et 10 pour réussir à commander de l’extérieur le bypass distant. 139 UTILISATION Serrer les passe-câbles à la bride, fermer la boîte de connexion et la fixer à l’aide de la vis précédemment enlevée IL FAUT APPOSER UNE ETIQUETTE D’AVERTISSEMENT SUR TOUS LES SECTIONNEURS DE LA PUISSANCE DE RÉSEAU INSTALLES LOIN DE LA ZONE DE L’ONDULEUR AFIN DE RAPPELER AU PERSONNEL D’ASSISTANCE QUE LE CIRCUIT EST BRANCHE A UN ONDULEUR. L’ETIQUETTE DOIT REPORTER LE TEXTE SUIVANT: ISOLER LE SYSTEME D’ALIMENTATION SANS INTERRUPTION (ONDULEUR) AVANT D’INTERVENIR SUR CE CIRCUIT 140 UTILISATION PREMIERE MISE EN MARCHE 1) S’assurer que toutes les opérations décrites au paragraphe précédent “Raccordements” ont été exécutées correctement. 2) Fermer l’interrupteur magnétothermique situé en amont de l’onduleur. 3) Appuyer sur l’interrupteur général situé sur le panneau frontal. 4) Au bout de quelques instants l’onduleur se met en marche, l’afficheur s’allume, un signal sonore est émis et l’icône clignote. L’onduleur est en stand-by: cela signifie qu’il est dans une condition de consommation minimum. Le microcontrôleur est alimenté et remplit une fonction de supervision et d’autodiagnostic. Les batteries sont en charge. Tout est prêt pour activer l’onduleur. L’appareil est en stand-by également lorsqu’il fonctionne sur batterie à condition que le timer soit activé. 5) Vérifier les réglages instaurés sur l’afficheur (voir paragraphe: Champ de configuration) MISE EN MARCHE SUR RESEAU 1) Presser le bouton “ON”. Après l’avoir pressé, toutes les icônes de l’afficheur s’allument pendant 1 seconde et l’onduleur émet un bip. 2) Mettre en marche l’appareil branché à l’onduleur. Pour la première mise en marche seulement: au bout de 30 s. environ, vérifier le fonctionnement de l’onduleur: 1. Simuler un black-out en ouvrant l’interrupteur branché en amont de l’onduleur. La charge doit continuer à être alimentée, l’icône doit s’allumer sur l’afficheur et l’on doit entendre un bip toutes les 4 secondes. 3. Dès que l’on referme l’interrupteur situé en amont, l’onduleur doit recommencer à fonctionner sur réseau. 2. MISE EN MARCHE SUR BATTERIE 1) Presser l’interrupteur général situé sur le panneau frontal. 2) Presser le bouton “ON” pendant au moins 5 secondes. Toutes les icônes de l’afficheur s’allument pendant 1 seconde et l’onduleur émet un bip. 3) Mettre en marche les appareils branchés à l’onduleur. ARRET DE L’ONDULEUR Pour arrêter l’onduleur, presser le bouton “STBY” pendant au moins 1,5 secondes. L’onduleur revient en condition de stand-by et l’icône commence à clignoter: a) Si le réseau est présent, pour arrêter complètement l’onduleur il faut presser l’interrupteur général afin de reporter l’interrupteur dans sa position originale (position relevée). b) Si l’onduleur fonctionne sur batterie et que le timer n’a pas été programmé, il s’arrête automatiquement au bout de 5 secondes. En revanche, si le timer a été programmé, pour arrêter l’onduleur il faut presser le bouton “STBY” pendant au moins 5 secondes. Si l’on veut qu’au retour du réseau l’onduleur reste complètement arrêté, il faut presser l’interrupteur général (voir point a.). ATTENTION: l'ASI est équipé d'un alimentateur redondant de secours qui intervient, en cas de panne de l'ASI, pour éviter l'arrêt de la charge en la commutant sur le bypass. Si l'ASI est arrêté en appuyant directement sur l'interrupteur général (sans préalablement le placer en standby selon l'indication reportée dans le manuel), la charge reste alimentée par le bypass. 141 UTILISATION INDICATIONS PANNEAU AFFICHEUR Ce chapitre décrit de manière détaillée toutes les informations pouvant être visualisées sur l’afficheur LCD. Pour plus de clarté, les informations affichées peuvent être divisées en trois groupes principaux: Indicateurs d’état de l’onduleur Champ d’affichage des mesures Champ de configuration Indicateurs d’état de l’onduleur ICONE ETAT DESCRIPTION Fixe Indique la présence d’une anomalie Clignotante L’onduleur est en stand-by Fixe Indique un fonctionnement normal Fixe L’onduleur fonctionne sur réseau Clignotante L’onduleur fonctionne sur réseau mais la tension de sortie n’est pas synchronisée avec la tension de réseau Fixe L’onduleur fonctionne sur batterie. Quand il se trouve dans cet état, l’onduleur émet un signal sonore (bip) à intervalles réguliers de 4 s. Clignotante Pré-alarme de fin de décharge. Indique que l’autonomie des batteries est sur le point de se terminer. Dans cette condition, l’onduleur émet un bip à intervalles réguliers d’1 s. Fixe Indique que les charges branchées à l’onduleur sont alimentées sur bypass Dynamique Indique le pourcentage d’autonomie estimé Dynamique Indique le % de charge appliquée à l’onduleur par rapport à la valeur nominale Clignotante Une intervention de maintenance est requise Fixe Clignotante Indique que le timer est activé (mise en marche ou arrêt programmé). Le timer est activable/désactivable à travers le logiciel fourni Il manque 1 minute à la remise en marche de l’onduleur ou 3 minutes à son arrêt 142 UTILISATION Champ d’affichage des mesures L’afficheur permet de visualiser en séquence les mesures les plus importantes relatives à l’onduleur. Au moment de la mise en marche de l’onduleur, l’afficheur visualise la valeur de la tension de réseau. Pour passer à un affichage différent, presser plusieurs fois le bouton “SEL / SET” jusqu’à ce qu’apparaisse la mesure souhaitée. En cas d’anomalie / alarme (FAULT) ou d’arrêt total (LOCK), l’afficheur visualisera automatiquement le type et le code d’alarme correspondant. Version monophasée Quelques exemples sont reportés ci-après: EXEMPLE GRAPHIQUE (1) EXEMPLE (1) GRAPHIQUE DESCRIPTION DESCRIPTION Tension de réseau Tension totale des batteries Fréquence de réseau Pourcentage de la charge appliquée Tension en sortie de l’onduleur Courant absorbé par la charge Fréquence de la tension de sortie Température du système de refroidissement du système électronique de l’onduleur Autonomie résiduelle des batteries Anomalie / Alarme (2): le code correspondant s’affiche Pourcentage de charge des batteries Arrêt total (2): le code correspondant s’affiche (1) Les valeurs reportées dans les images du tableau sont purement indicatives. (2) Les codes de FAULT / LOCK ne peuvent être visualisés que s’ils sont actifs à ce moment-là (présence d’une anomalie / alarme ou d’un arrêt total). 143 UTILISATION Version triphasée Quelques exemples sont reportés ci-après : EXEMPLE GRAPHIQUE (1) EXEMPLE GRAPHIQUE DESCRIPTION (1) DESCRIPTION Pourcentage de charge des batteries Tension phase 1 (2) Tension totale des batteries Pourcentage de la charge appliquée Tension phase 2 (2) Courant absorbé par la charge Température du système de refroidissement du système électronique de l’onduleur Tension phase 3 (2) Anomalie / Alarme (2): le code correspondant s’affiche Arrêt total (2): le code correspondant s’affiche Fréquence de la tension de sortie Autonomie résiduelle des batteries (1) Les valeurs reportées dans les images du tableau sont purement indicatives. (2) Indication alternée N° Phase/Tension. (3) Les codes de FAULT / LOCK ne peuvent être visualisés que s’ils sont actifs à ce moment-là (présence d’une anomalie / alarme ou d’un arrêt total). 144 UTILISATION Champ de configuration Le champ de configuration regroupe les principaux paramètres de fonctionnement de l’onduleur et affiche leur état actuel. Les paramètres contenus dans ce champ peuvent être directement modifiés à partir du panneau afficheur. PARAMETRES CONFIGURABLES: Fréquence: Fréquence de la tension de sortie Fréquence Tension: Tension de sortie Mode: Mode de fonctionnement de l’onduleur Tension Mode L’image ci-contre représente la zone de l’afficheur relative aux réglages (champ de configuration) et montre les trois paramètres configurables. Procédure : Pour accéder au champ de configuration, presser le bouton “SEL / SET” pendant au moins 2 s. L’indicateur “SET” s’allume et une flèche ( ► ) apparaît à gauche de Fréquence. La flèche indique la configuration sélectionnée. Pour changer la sélection du paramètre à modifier, presser le bouton “SEL / SET”. Pour modifier le paramètre sélectionné, presser le bouton “ON”. Pour quitter le champ de configuration, presser le bouton “SEL / SET” pendant au moins 2 s. CONFIGURATIONS POSSIBLES Fréquence : □ 50 Hz □ 60 Hz □ Eteint (auto-apprentissage de la fréquence) Tension : □ 220 V □ 230 V □ 240 V Mode : □ ON LINE □ ECO □ SMART □ STBYOFF NOTE: Pour valider la modification de la configuration de la fréquence de sortie, il faut arrêter complètement l’onduleur puis le remettre en marche (au moyen de l’interrupteur général). LES PARAMÈTRES TENSION ET FRÉQUENCE DE SORTIE DOIVENT ÊTRE COMPATIBLES AVEC CEUX DE LA CHARGE ALIMENTEE PAR L’ONDULEUR 145 UTILISATION MODE DE FONCTIONNEMENT Le mode qui garantit le maximum de protection à la charge est le mode ON LINE (défaut) où l’énergie pour la charge subit une double conversion et où elle est reconstruite en sortie de manière parfaitement sinusoïdale avec une fréquence et une tension fixées par le contrôle numérique par microprocesseur indépendamment de l’entrée (V.F.I.). * A part le mode traditionnel de fonctionnement ON LINE double conversion, il est possible de configurer les autres modes suivants: ECO (LINE INTERACTIVE) SMART (SMART ACTIVE) STBYOFF (STAND-BY OFF) Afin d’optimiser le rendement, en mode ECO la charge est normalement alimentée par bypass. Au cas où le réseau dépasserait les tolérances prévues, l’onduleur commute en fonctionnement ON LINE normal double conversion. Cinq minutes environ après que le réseau est rentré dans la tolérance, la charge est de nouveau commutée sur bypass. Dans le cas où l’utilisateur ne saurait choisir le mode de fonctionnement le plus approprié (ON LINE ou ECO), il peut sélectionner le mode SMART ACTIVE dans lequel l’onduleur décide de manière autonome le mode de configuration en fonction d’une statistique relevée sur la qualité du réseau d’alimentation,. Enfin, le mode STAND-BY OFF permet d’obtenir un fonctionnement de secours: en présence du réseau la charge est coupée tandis qu’en cas de black-out la charge est alimentée sur onduleur par les batteries. R.E.P.O. Cette entrée isolée est utilisée pour arrêter l’onduleur à distance en cas d’urgence. L’éventuel interrupteur normalement fermé de “Remote Emergency Power Off” (R.E.P.O.) doit être raccordé au connecteur présent à l’arrière de l’onduleur. L’onduleur sort de l’usine avec les bornes R.E.P.O. court-circuitées: éliminer le court-circuit si ce contact est raccordé au moyen d’un interrupteur d’urgence distant. Le circuit de R.E.P.O. est auto-alimenté par des circuits de type SELV. Aucune tension externe d’alimentation n’est donc requise. Quand il est fermé (condition normale), il passe un courant de 10mA maximum. PRISE AUXILIAIRE PROGRAMMABLE (POWER SHARE) L’onduleur est équipé d’une prise de sortie qui permet de débrancher automatiquement la charge qui y est appliquée dans certaines conditions de fonctionnement. Les événements qui déterminent le déclenchement automatique de la prise de Power share peuvent être sélectionnés par l’utilisateur à travers le logiciel de configuration (voir paragraphes Logiciel de configuration et Configuration onduleur). Il est possible, par exemple, de sélectionner le déclenchement après un certain temps de fonctionnement sur batterie, ou dès qu’est atteint le seuil de pré-alarme de fin de décharge des batteries, ou encore quand un événement de surcharge se produit. * La valeur rms de la tension de sortie est fixée par le contrôle par microprocesseur indépendamment de la tension d’entrée tandis que la fréquence de la tension de sortie est synchronisée (dans une tolérance configurable par l’utilisateur) avec celle d’entrée pour permettre l’utilisation du bypass. Au-delà de cette tolérance, l’onduleur se désynchronise et se place en fréquence nominale, le bypass n’est alors plus utilisable (free running mode). 146 UTILISATION CONFIGURATION DE L’ONDULEUR Le tableau suivant illustre toutes les configurations possibles dont dispose l’utilisateur pour adapter au mieux l’onduleur à ses exigences. LEGENDE : = Indique que la configuration peut être modifiée non seulement à travers le logiciel de configuration fourni mais aussi depuis le panneau afficheur. = Indique que la configuration ne peut être modifiée qu’à travers le logiciel de configuration fourni. FONCTION DESCRIPTION Fréquence de sortie Sélection de la fréquence nominale de sortie PREDEFINI CONFIGURATIONS POSSIBLES Auto 50 Hz 60 Hz Auto-apprentissage automatique de la fréquence d’entrée 230V 220V 230V 240V 220 ÷ 240 par palier d’1V (par logiciel seulement) Tension de sortie Sélection de la tension nominale de sortie Mode de fonctionnement Sélection d’un des 4 différents modes de fonctionnement ON LINE Retard de mise en marche Temps d’attente pour la remise en marche automatique après le retour du réseau 5 s. Arrêt pour cause de charge minimum Arrêt automatique de l’onduleur en fonctionnement sur batterie, si la charge est inférieure à 5% Désactivé Activé Désactivé Limitation autonomie Temps maximum de fonctionnement sur batterie Désactivée Désactivée (décharge complète des batteries) 1 ÷ 65000 par palier d’1 s. Préavis fin de décharge Temps restant d’autonomie estimée pour le préavis de fin de décharge 3 min. Test batterie Intervalle de temps pour le test automatique des batteries 40 heures ON LINE ECO SMART ACTIVE STAND-BY OFF Désactivé 1 ÷ 255 par palier d’1 s. 1 ÷ 255 par palier d’1 min. 147 Désactivé 1 ÷ 1000 par palier d’1 heure MODE UTILISATION FONCTION DESCRIPTION PREDEFINI Seuil d’alarme pour charge maximum Sélectionne la limite de surcharge Désactivé Luminosité afficheur Sélectionne le niveau de luminosité de l’afficheur LCD Maximum Alarme sonore Sélectionne le mode de fonctionnement de l’alarme sonore Réduite Normale Réduite: ne sonne pas en cas d’intervention momentanée du bypass Toujours branchée Toujours branchée Déclenchement au bout de n secondes de fonctionnement sur batterie Déclenchement au bout de n secondes du signal de pré-alarme de fin de décharge ... (voir manuel du logiciel de configuration) Prise auxiliaire (power share) Sélectionne le mode de fonctionnement de la prise auxiliaire CONFIGURATIONS POSSIBLES Désactivé 0 ÷ 103 par palier d’1% Minimum ÷ Maximum : 20 graduations FONCTIONS AVANCEES Tolérance de la fréquence d’entrée Sélectionne la plage admise pour la fréquence d’entrée pour le passage sur bypass et pour la synchronisation de la sortie ± 5% Seuils de tension bypass Sélectionne la plage de tension admise pour le passage sur bypass Bas: 180V Haut: 264V Bas: 180 ÷ 200 par palier d’1V Haut: 250 ÷ 264 par palier d’1V Seuils de tension bypass pour ECO Sélectionne la plage de tension admise pour le fonctionnement en mode ECO Bas: 200V Haut: 253V Bas: 180 ÷ 220 par palier d’1V Haut: 240 ÷ 264 par palier d’1V Sensibilité d’intervention pour ECO Sélectionne la sensibilité d’intervention pendant le fonctionnement en mode ECO Normal Alimentation de la charge en stand-by Fonctionnement bypass ± 0.25% ± 0.5% ± 0.75% ± 1 ÷ ±10 par palier d’1% Basse Normal Haute Alimentation de la Désactivée charge sur bypass avec (charge onduleur éteint (état NON de stand-by) alimentée) Sélectionne le mode d’utilisation de la ligne de bypass Désactivée (non alimentée) Activée (alimentée) Activé/Haute sensibilité Activé/Basse sensibilité Désactivé avec synchronisation entrée/sortie Désactivé sans synchronisation entrée/sortie Activé / Haute sensibilité 148 MODE UTILISATION PORTS DE COMMUNICATION La partie arrière de l’onduleur (voir Vues onduleur) présente les ports de communication suivants: Port série, disponible avec connecteur RS232 et connecteur USB. NOTE: l’utilisation d’un connecteur exclut automatiquement l’autre. Slot d’extension pour cartes d’interface supplémentaires COMMUNICATION SLOT Connecteurs RS232 et USB CONNECTEUR RS232 BROCHE # 1 2 3 4 5 6 7 8 9 CONNECTEUR USB BROCHE # 1 2 3 4 SIGNAL Contact fermé : arrêt total onduleur * TXD RXD GND Entrée d’alimentation interface +12Vcc Contact fermé: pré-alarme de fin de décharge * Contact fermé: fonctionnement sur batterie * * Contact opto-isolé maxi +30Vcc / 10mA Slot de communication L’onduleur est équipé d’un slot d’extension pour cartes de communication fournies en option (voir figure ci-contre) qui permettent à l’appareil de dialoguer en utilisant les principaux standards de communication. Voici quelques exemples: Second port RS232 Duplicateur de série Agent de réseau Ethernet à protocole TCP/IP, HTTP et SNMP Port RS232 + RS485 à protocole JBUS / MODBUS Carte relais de signalisation Pour de plus amples informations sur les accessoires disponibles, consulter le site du fabricant. 149 4 3 1 2 SIGNAL VBUS DD+ GND UTILISATION LOGICIELS Logiciel de surveillance et de contrôle Le logiciel PowerShield3 garantit une gestion efficace et intuitive de l’onduleur. En effet, il permet de visualiser toutes les informations les plus importantes telles que la tension d’entrée, la charge appliquée et la capacité des batteries. Il est également à même d’exécuter automatiquement des opérations de clôture, d’envoi d’e-mails, de sms et de messages de réseau en cas de situations particulières sélectionnées par l’utilisateur. Opérations d’installation: Connecter le port de communication RS232 de l’onduleur à un port de communication COM du PC au moyen du câble série fourni* ou bien connecter le port USB de l’onduleur à un port USB du PC au moyen d’un câble standard USB*. Télécharger le logiciel depuis le site internet www.riello-ups.com, en sélectionnant le système d’exploitation souhaité. Suivre les instructions du programme d’installation. Pour de plus amples informations détaillées sur l’installation et l’utilisation, consulter le manuel du logiciel qui peut être téléchargé depuis notre plateforme internet www.riello-ups.com. Logiciel de configuration Grâce à un logiciel dédié, il est possible d’accéder à la configuration des paramètres de l’UPS les plus importants. Pour obtenir une liste des configurations possibles, se reporter au paragraphe Configuration onduleur. * Il est recommandé d’utiliser un câble d’une longueur maximum de 3 mètres. 150 RÉSOLUTION DES PROBLÈMES Un mauvais fonctionnement de l’onduleur n’est pas forcément signe d’une panne mais il est souvent dû à des problèmes simples, à des inconvénients ou à des négligences. Par conséquent il est conseillé de consulter attentivement le tableau reporté ci-dessous qui résume les informations utiles pour la résolution des problèmes les plus communs. PROBLÈME CAUSE POSSIBLE SOLUTION INTERRUPTEUR GENERAL NON ENCLENCHE Presser l’interrupteur général situé sur le panneau frontal. LE CONNECTEUR DU BOX Brancher le connecteur du box batterie. BATTERIE EST DEBRANCHE L’AFFICHEUR NE S’ALLUME PAS ABSENCE DE RACCORDEMENT AU RESEAU ELECTRIQUE Vérifier la connexion au réseau électrique. ABSENCE DE TENSION DE RÉSEAU (BLACK-OUT) Vérifier la présence de la tension du réseau électrique. INTERVENTION DE LA PROTECTION EN AMONT Réinitialiser la protection. ATTENTION: Vérifier l’absence de surcharge en sortie de l’onduleur. L’ONDULEUR EST EN MODE Presser le bouton “ON” placé sur le panneau frontal STAND-BY pour alimenter les charges. L’AFFICHEUR EST ALLUME MAIS LA CHARGE N’EST PAS ALIMENTEE L’ONDULEUR FONCTIONNE SUR BATTERIE MEME SI LA TENSION DU RÉSEAU EST PRESENTE L’ONDULEUR NE SE MET PAS EN MARCHE ET L’AFFICHEUR SIGNALE L’UN DES CODES SUIVANTS : A06, A08 L’AFFICHEUR SIGNALE LE CODE : A11 LE MODE STAND-BY OFF EST SÉLECTIONNÉ ABSENCE DE RACCORDEMENT A LA CHARGE Il faut changer le mode. En effet le mode STAND-BY OFF (secours) alimente les charges seulement en cas de black-out. Vérifier le raccordement à la charge. INTERVENTION DE LA PROTECTION EN AMONT Réinitialiser la protection. ATTENTION: Vérifier l’absence de surcharge en sortie de l’onduleur. LA TENSION D’ENTRÉE DEPASSE LES TOLERANCES Problème lié au réseau. Attendre que le réseau d’entrée ADMISES POUR LE rentre dans la tolérance. L’onduleur reviendra FONCTIONNEMENT SUR automatiquement au fonctionnement sur réseau. RÉSEAU Vérifier la température du local où l’onduleur est positionné; si elle est trop basse, la porter au-dessus de la limite minimum (0°C). LA TEMPÉRATURE DE L’ONDULEUR EST INFERIEURE A 0°C Cette anomalie ne provoque pas de mauvais fonctionnements particuliers. Si le problème persiste RELAIS D’ENTRÉE BLOQUE lors de la mise en marche suivante, contacter le service d’assistance. 151 RÉSOLUTION DES PROBLÈMES PROBLÈME CAUSE POSSIBLE SOLUTION LE BUZZER SONNE EN CONTINU ET L’AFFICHEUR SIGNALE L’UN DES CODES SUIVANTS : A54, F50, F51, F52, F55, L50, L51, L52 LA CHARGE APPLIQUÉE À L’ONDULEUR EST TROP ELEVEE Réduire la charge jusqu’au seuil de 100% ( ou seuil d’utilisation en cas de code A54). L’AFFICHEUR SIGNALE LE CODE : A61 BATTERIES A REMPLACER Remplacer le box batterie. L’AFFICHEUR SIGNALE LE CODE : A62 BOX BATTERIE ABSENT OU Vérifier si le box batterie est correctement placé et MAL BRANCHE branché. L’AFFICHEUR SIGNALE LE CODE : A63 LES BATTERIES SONT DECHARGEES; Attendre la recharge des batteries ou forcer L’ONDULEUR ATTEND QUE manuellement la mise en marche en pressant le bouton LA TENSION DES “ON” pendant au moins 2s. BATTERIES DEPASSE LE SEUIL ETABLI LE BUZZER SONNE EN CONTINU ET L’AFFICHEUR SIGNALE L’UN DES CODES SUIVANTS : F03, F05, F07, F10, F13, F21, F40, F41, F42, F43 MAUVAIS FONCTIONNEMENT DE L’ONDULEUR; ARRET TOTAL PROBABLE S’il est possible de couper d’alimentation de la charge, arrêter puis remettre en marche l’onduleur; si le problème persiste, contacter le centre d’assistance. LE BUZZER SONNE EN CONTINU ET L’AFFICHEUR SIGNALE L’UN DES CODES SUIVANTS : F04, L04 LA TEMPÉRATURE DES DISSIPATEURS INTERNES DE L’ONDULEUR EST TROP ELEVEE Vérifier que la température du local où se trouve l’onduleur ne dépasse pas 40°C. LE BUZZER SONNE EN CONTINU ET L’AFFICHEUR SIGNALE L’UN DES CODES SUIVANTS : F53, L53 PRESENCE D’UNE ANOMALIE SUR UNE OU PLUSIEURS UTILISATIONS ALIMENTEES PAR L’ONDULEUR Débrancher toutes les utilisations et les rebrancher une par une pour identifier celle qui est en panne. LE BUZZER SONNE EN CONTINU ET L’AFFICHEUR SIGNALE L’UN DES CODES SUIVANTS : F60, L03, L05, L07, L10, L13, L20, L21, L40, L41, L42, L43 MAUVAIS FONCTIONNEMENT DE L’ONDULEUR S’il est possible de couper l’alimentation de la charge, arrêter puis remettre en marche l’onduleur; si le problème persiste, contacter le centre d’assistance. COMMANDE DISTANTE ACTIVE Si non souhaitée, vérifier la position de l’interrupteur du bypass manuel ou l’état des entrées de commande d’une éventuelle carte à contacts fournie en option. Vérifier la fermeture du contact R.E.P.O. à l’arrière de l’onduleur. L’AFFICHEUR SIGNALE L’UN DES CODES SUIVANTS : C01, C02, C03 152 RÉSOLUTION DES PROBLÈMES CODES D’ALARME A travers un système d’autodiagnostic sophistiqué, l’onduleur est en mesure de vérifier et de signaler sur le panneau afficheur les anomalies et/ou pannes éventuelles susceptibles de se produire pendant le fonctionnement normal de l’appareil. En présence d’un problème, l’onduleur signale cette situation en affichant le code et le type d’alarme active (FAULT et/ou LOCK). FAULT Les signalisations de type FAULT se divisent en trois catégories: Anomalies: il s’agit de problèmes “mineurs” qui ne comportent pas l’arrêt total de l’onduleur mais qui réduisent les prestations ou empêchent l’utilisation de certaines de ses fonctions. CODE DESCRIPTION A06 A08 A11 A54 A61 A62 A63 Température capteur1 inférieure à 0°C Température capteur2 inférieure à 0°C Relais d’entrée bloqué (ne s’ouvre pas) Charge > seuil configuré par l’utilisateur Batteries à remplacer Box batterie absent ou mal branché Attente recharge batteries Alarmes: il s’agit de problèmes plus critiques que les anomalies dans la mesure où leur persistance peut provoquer en peu de temps l’arrêt total de l’onduleur. CODE DESCRIPTION F03 F04 F05 F07 F10 F13 F21 F40 F41 F42 F43 F50 F51 F52 F53 F55 F60 Alimentation auxiliaire incorrecte Surchauffe dissipateurs Capteur1 de température en panne Capteur2 de température en panne Fusible d’entrée grillé ou relais d’entrée bloqué (ne se ferme pas) Précharge condensateurs échouée Surtension banc condensateurs Surtension onduleur Tension continue en sortie Tension onduleur incorrecte Sous-tension onduleur Surcharge: charge > 103% Surcharge: charge > 125% Surcharge: charge > 150% Court-circuit Attente réduction charge pour retour sur onduleur Surtension batteries 153 RÉSOLUTION DES PROBLÈMES Commandes actives: Indique la présence d’une commande distante active. CODE DESCRIPTION C01 C02 C03 C04 Commande distante d’arrêt Commande distante de charge sur bypass Commande distante de mise en marche Test batterie en exécution LOCK Les signalisations de type LOCK (arrêt total) sont généralement précédées d’un signal d’alarme et, en raison de leur envergure, elles comportent l’arrêt de l’onduleur et l’alimentation de la charge à travers la ligne de bypass (cette procédure est exclue pour les arrêts totaux dus à des surcharges fortes et persistantes et pour l’arrêt total dû à un court-circuit). CODE DESCRIPTION L03 L04 L05 L06 L07 L10 L13 L20 L21 L31 L40 L41 L42 L43 L50 L51 L52 L53 Alimentation auxiliaire incorrecte Surchauffe dissipateurs Capteur1 de température en panne Capteur3 de température en panne Capteur2 de température en panne Fusible d’entrée grillé ou relais d’entrée bloqué (ne se ferme pas) Précharge condensateurs échouée Sous-tension banc condensateurs Surtension banc condensateurs Surtension onduleur Tension continue en sortie Tension onduleur incorrecte Sous-tension onduleur Alimentation auxiliaire incorrecte Surcharge: charge > 103% Surcharge: charge > 125% Surcharge: charge > 150% Court-circuit 154 TABLEAU DONNÉES TECHNIQUES 4- TABLEAU DES DONNEES TECHNIQUES ONDULEUR MONO/MONO MODÈLES ENTRÉE Tension nominale Plage acceptée Plage de tension pour non-intervention batterie Fréquence nominale Courant maximum (1) Courant nominal (2) Facteur de puissance Distorsion courant à charge maximum BYPASS Plage de tension acceptée pour la commutation Plage de fréquence acceptée pour la commutation Temps de commutation BATTERIES Temps de recharge (8) SORTIE Tension nominale Variation statique (3) Variation dynamique (4) Forme d’onde Distorsion tension à charge linéaire Distorsion tension à charge déformante Fréquence (5) Facteur de crête du courant Puissance nominale en VA Puissance nominale en W Courant de court-circuit DIVERS Courant de fuite vers la terre Rendement CA/CA Température ambiante (7) Humidité Protections Temps de hold-up Niveau sonore Dimensions H x L x P (mm) Poids en Kg (estimé) SDL 8000 SDL 10000 220/230/240 Vca 0 - 280 Vca Tension maximum 276Vca Tension minimum: de 184 à 138 Vca de 100% à 50% de la charge de manière linéaire Retour fonctionnement sur réseau à 190Vca 50 - 60 Hz ±5Hz 44A 54A 34A 43A 0.98 6% 180 - 264 Vca Fréquence sélectionnée ±5% 0.1ms 6-8 h 220/230/240 Vca sélectionnable ±1.5% 1.5% (7) 5% en 20ms Sinusoïdale 3% 5% 50 ou 60 Hz sélectionnable 3:1 8000 10000 7200 9000 1.5 x In pendant t= 0.5s 10mA 92% 0 – 40 °C < 90% sans condensation décharge excessive des batteries - surintensité - court-circuit - surtension sous-tension - thermique 30ms < 45 dB(A) à 1m. 2 x [455mm (19”) x 175mm (4U) x 660mm (26”)] 29 + 65 Kg environ 30 + 65 Kg environ (1) (2) (3) (4) (5) @ charge nominale, tension minimum de 180Vca, batterie en charge @ charge nominale, tension nominale de 230Vca, batterie en charge Réseau/Batterie @ charge 0% -100% @ Réseau / batterie / réseau @ charge résistive 0% / 100% / 0% Si la fréquence de réseau est de ±5% (configurable par l’utilisateur) de la valeur sélectionnée, l’onduleur est synchronisé avec le réseau. Si la fréquence est hors tolérance ou en fonctionnement sur batterie, la fréquence est celle qui est sélectionnée ±0.1% (6) 20 - 25 °C pour une durée de vie plus longue des batteries (7) Pour maintenir la tension de sortie dans le champ de précision indiqué, un recalibrage peut s’avérer nécessaire après une longue période d’exercice (8) Temps nécessaire pour atteindre 90% de la charge (au bout d’une décharge complète à charge ≥80%) 155 TABLEAU DONNÉES TECHNIQUES TABLEAU DES DONNEES TECHNIQUES ONDULEUR TRI/MONO MODÈLES ENTRÉE (3 Ø + N tensions étoilées) Tension nominale Plage acceptée Plage de tension pour non-intervention batterie Fréquence nominale Courant maximum (1) Courant nominal (2) Facteur de puissance Distorsion courant à charge maximum BYPASS (sur L1) Plage de tension acceptée pour la commutation Plage de fréquence acceptée pour la commutation Temps de commutation BATTERIES Temps de recharge (8) SORTIE Tension nominale Variation statique (3) Variation dynamique (4) Forme d’onde Distorsion tension à charge linéaire Distorsion tension à charge déformante Fréquence (5) Facteur de crête du courant Puissance nominale en VA Puissance nominale en W Courant de court-circuit DIVERS Courant de fuite vers la terre Rendement CA/CA Température ambiante (6) Humidité Protections Temps de hold-up Niveau sonore Dimensions H x L x P (mm) Poids en Kg (estimé) SDL 6500 TM SDL 8000 TM SDL 10000 TM 220/230/240 Vca 0 - 280 Vca Tension maximum 276Vca Tension minimum: de 184 à 138 Vca de 100% à 50% de la charge de manière linéaire Retour fonctionnement sur réseau à 190Vca 50 - 60 Hz ±5Hz 13A 15A 19A 9A 11A 14A 0.95 26% 180 - 264 Vca Fréquence sélectionnée ±5% 0.1ms 6-8 h 6500 5850 220/230/240 Vca sélectionnable ±1.5% 1.5% (7) 5% en 20ms Sinusoïdale 3% 6% 50 ou 60 Hz sélectionnable 3:1 8000 7200 1.5 x In pendant t= 0.5s 10000 9000 10mA 92% 0 – 40 °C < 90% sans condensation décharge excessive des batteries - surintensité - court-circuit - surtension sous-tension - thermique 40ms < 45 dB(A) à 1m. 2 x [455mm (19”) x 175mm (4U) x 660mm (26”)] 28 + 63 Kg environ 29 + 65 Kg environ 30 + 65 Kg environ (1) (2) (3) (4) (5) @ charge nominale, tension minimum de 180Vca, batterie en charge @ charge nominale, tension nominale de 230Vca, batterie en charge Réseau/Batterie @ charge 0% -100% @ Réseau / batterie / réseau @ charge résistive 0% / 100% / 0% Si la fréquence de réseau est de ±5% (configurable par l’utilisateur) de la valeur sélectionnée, l’onduleur est synchronisé avec le réseau. Si la fréquence est hors tolérance ou en fonctionnement sur batterie, la fréquence est celle qui est sélectionnée ±0.1% (6) 20 - 25 °C pour une durée de vie plus longue des batteries (7) Pour maintenir la tension de sortie dans le champ de précision indiqué, un recalibrage peut s’avérer nécessaire après une longue période d’exercice (8) Temps nécessaire pour atteindre 90% de la charge (au bout d’une décharge complète à charge ≥80%) 156 TABLEAU DONNÉES TECHNIQUES TABLEAU DES DONNEES TECHNIQUES BOX BATTERIE MODÈLES DE BASE BATTERIES Tension nominale Tension fin de chargement N.bre batteries / V DIVERS Température ambiante (1) Humidité Protections Dimensions H x L x P Poids BBX SDL 240V BB NP A3 [Vcc] [Vcc] BBX SDL 240V BB NP A5 240 273 20 / 12 0 – 40 < 90% sans condensation surintensité - court-circuit 455 x 175 x 660 [°C] [mm] [Kg] 63 65 (1) 20-25°C pour une durée de vie plus longue des batteries TABLEAU DES TEMPS DE SURCHARGE FONCTIONNEMENT SUR TEMPS DE SURCHARGE BYPASS 100% < Charge 125% 125% < Charge 150% Charge > 150% Activation bypass au bout de 2 s arrêt total au bout de 120 s Activation bypass au bout de 2 s arrêt total au bout de 4 s Activation instantanée bypass Arrêt total au bout de 1 s 157 ONDULEUR Arrêt total au bout de 60 s Arrêt total au bout de 4 s Arrêt total au bout de 0.5 s 158 E MANUAL DE USO 159 E INTRODUCCIÓN Le agradecemos que haya elegido un producto de la gama Sentinel Dual. Riello UPS está únicamente especializada en el desarrollo y producción de sistemas de alimentación ininterrumpida (SAI). Los SAI de esta serie son productos de alta calidad, cuidadosamente diseñados y construidos con el objeto de asegurar las mejores prestaciones. Este aparato puede ser instalado por cualquier persona, previa ATENTA Y CUIDADOSA LECTURA DE ESTE MANUAL. Este manual contiene las instrucciones detalladas para el uso y la instalación del SAI. Para disponer siempre de las instrucciones para su uso y para obtener el máximo rendimiento de su aparato, deberá conservar cuidadosamente este manual cerca del SAI y CONSULTARLO ANTES DE REALIZAR NINGUNA OPERACIÓN EN ÉL. TUTELA DEL AMBIENTE En el desarrollo de sus productos, la compañía invierte gran cantidad de recursos en los aspectos ambientales. Todos nuestros productos persiguen los objetivos definidos en la política del sistema de gestión ambiental desarrollado por la empresa de acuerdo con la normativa vigente. En este producto no se han utilizado materiales peligrosos como CFC, HCFC o amianto. Al evaluar los embalajes la elección del material se ha realizado prefiriendo materiales reciclables. Para una correcta eliminación se ruega separar e identificar la tipología de material que constituye el embalaje siguiendo la tabla de más abajo. Eliminar todos los materiales de acuerdo con la normativa vigente en los países de uso del producto. Descripción Pallet Angular embalaje Caja Tope adhesivo Saco de protección Material Abeto tratado HT Stratocell/cartón Cartón Stratocell Polietileno HD ELIMINACIÓN DEL PRODUCTO El SAI comprende en sí unos materiales, por exempó tarjetas electrónicas y baterías, que en caso de desecho/eliminación, sean considerados DESECHOS TóXICO Y PELIGROSOS. Hay que tratar esos materiales según la ley vigente y recurriendo a personas competentes. Una correcta eliminación de esos materiales contribuye a respetar el ambiente y la salud de las personas. © Queda prohibida la reproducción de cualquier parte de esta manual, sea total o parcial, sin la autorización expresa del fabricante. El fabricante se reserva la facultad de, con objeto de realizar mejoras, modificar el producto descrito en cualquier momento y sin aviso previo. 160 ÍNDICE PRESENTACIÓN 162 VISTAS SAI VISTA DE LA CAJA DE BATERÍA VISTA DE LA PANTALLA 163 164 165 INSTALACIÓN 166 APERTURA DEL EMBALAJE Y COMPROBACIÓN DE SU CONTENIDO VERSIÓN TORRE VERSIÓN RACK MODO DE INSTALACIÓN CONEXIÓN DEL SAI A LA CAJA DE BATERÍA USO 166 168 169 170 171 172 CONEXIONES 172 Versión monofásica 8-10kVA 173 Versión trifásica 8-10kVA 174 Versión con by-pass remoto externo 175 177 177 177 177 178 PRIMER ENCENDIDO ENCENDIDO CON LA RED ENCENDIDO CON LA BATERÍA APAGADO DEL SAI INDICACIONES DEL PANEL DE LA PANTALLA Indicadores del estado del SAI 178 Área de visualización de mediciones 179 Versión monofásica 179 Versión trifásica 180 Área de configuración MODOS DE FUNCIONAMIENTO R.E.P.O. TOMA AUXILIAR PROGRAMABLE (POWER SHARE) CONFIGURACIÓN DEL SAI PUERTOS DE COMUNICACIÓN 181 182 182 182 183 185 Conectores RS232 y USB 185 Ranura de comunicación SOFTWARE 185 186 Software de supervisión y control 186 Software de configuración 186 SOLUCIÓN DE PROBLEMAS CÓDIGOS DE ALARMA 187 CUADRO DE DATOS TÉCNICOS 191 189 CUADRO DE DATOS TÉCNICOS SAI MONO/MONO CUADRO DE DATOS TÉCNICOS SAI TRI/MONO CUADRO DE DATOS TÉCNICOS DE LA CAJA DE BATERÍA CUADRO DE TIEMPOS DE SOBRECARGA 161 191 192 193 193 PRESENTACIÓN La nueva familia de SAI Sentinel Dual ha sido estudiada con vistas a su versatilidad. En efecto, estos SAI pueden ser instalados, dependiendo de las necesidades, tanto en la versión torre como en la configuración rack. Así se presenta el producto en las 2 versiones: Torre Rack SDL 6500 TM Potencia nominal Tensión nominal Dimensiones alto x ancho x fondo Peso (1) [VA] [Vac] [mm] 6500 [kg] aprox. 28 + 63 SDL 8000 SDL 8000 TM 8000 220/230/240 SDL 10000 SDL 10000 TM 10000 2 x [455 x 175 x 660] (1) aprox. 29 + 65 aprox. 30 + 65 En la versión rack, con asas instaladas, la altura es distinta: 483mm x 175mm x 660mm (alto x ancho x fondo) Nota: 175mm = 4U 483mm = 19” 162 PRESENTACIÓN VISTAS SAI Ranuras de desmontaje Pantalla girable Interruptor de bypass manual Interruptor general Panel frontal extraíble Vista frontal (sin el panel frontal) (con panel frontal) Conector de expansión de batería Remote emergency power off (R.E.P.O.) Ventilador de refrigeración Ranura de expansión COMUNICATION SLOT Puerto de comunicación RS232 Puerto de comunicación USB Toma IEC 10 A Power share Protección térmica de tomas Power share Ventilador de refrigeración Caja de conexiones IN/OUT Vista posterior 163 PRESENTACIÓN VISTA DE LA CAJA DE BATERÍA Ranuras de desmontaje Pantalla extraíble/girable Panel frontal extraíble Vista frontal Rejilla de ventilación Conectores para expansión de baterías Seccionadores portafusibles Vista posterior 164 PRESENTACIÓN VISTA DE LA PANTALLA Botón “SEL / SET” Botón “ON” Botón “STBY” Pantalla LCD 1 Funcionamiento normal 7 Área de configuración 2 Funcionamiento con la red 8 Solicitud de mantenimiento 3 Funcionamiento con la batería 9 Temporizador 4 Carga alimentada por bypass 10 Área de visualización de mediciones 5 Indicador de autonomía de la batería 11 Stand-by / Alarma 6 Indicador del nivel de carga 165 INSTALACIÓN APERTURA DEL EMBALAJE Y COMPROBACIÓN DE SU CONTENIDO Tras la apertura del embalaje, en primer lugar compruebe su contenido. El embalaje debe contener: SAI Caja de baterías 1 pasahilos + 2 retenedores 6 tapas de plástico (paneles superiores SAI y caja de baterías) Puntas de conexión cables– caja de bornes 2 llaves de plástico para desmontar la pantalla 2 juegos de asas Cable serial RS232 166 INSTALACIÓN Cable de conexión SAI – caja de baterías 2 fusibles para caja de baterías - 14x51 mm, 50A, 400V Manual de usuario + CD User's manual 167 INSTALACIÓN NOTA IMPORTANTE: este sistema de alimentación ininterrumpida (SAI) es un producto que respeta las normativas vigentes sobre compatibilidad electromagnética (categoría C2). En ambiente doméstico puede provocar interferencias radio. El usuario podría adoptar medidas suplementarias. VERSIÓN TORRE En este capítulo se describen las operaciones necesarias para preparar el SAI y la caja de batería para su utilización en la versión torre. ATENCIÓN: Para su seguridad personal y la del producto siga atentamente la información que se indica a continuación. ANTES DE EFECTUAR LAS SIGUIENTES OPERACIONES, ASEGÚRESE DE QUE EL SAI ESTÁ COMPLETAMENTE APAGADO Y TOTALMENTE DESCONECTADO DE LA RED ELÉCTRICA Y DE CUALQUIER CARGA En la versión torre, el SAI y la caja de batería están listos para su instalación una vez retirado el embalaje. Para completar dicha configuración basta montar las seis tapas de plástico, tres en la parte superior del SAI y las otras tres en la parte superior de la caja de batería, tal y como se indica a continuación. Las tapas tienen un sistema de fijación por encaje. Localice los orificios correspondientes para el montaje de las tapas en la parte superior del SAI y de la caja de batería y, con la máxima atención, encájelas presionando ligeramente (véase la figura de al lado). 168 INSTALACIÓN VERSIÓN RACK A continuación se describen las operaciones que se han de realizar para convertir el SAI y la caja de batería en la versión rack. ATENCIÓN: Para su seguridad personal y la del producto siga atentamente la información que se indica a continuación. ANTES DE EFECTUAR LAS SIGUIENTES OPERACIONES, ASEGÚRESE DE QUE EL SAI ESTÁ COMPLETAMENTE APAGADO Y TOTALMENTE DESCONECTADO DE LA RED ELÉCTRICA Y DE CUALQUIER CARGA 1 - En primer lugar es necesario desmontar las patas situadas en la parte inferior del SAI y de la caja de batería. Coloque con la máxima atención el SAI y la caja de batería en posición horizontal y con un pequeño destornillador plano levante con suavidad el eje situado en el centro de la pata. Una vez levantado, retire la pata de la base del SAI y de la caja de batería. Repita la misma operación con todas las patas restantes. Al lado se ilustra la secuencia exacta que se ha de seguir. 1 2 2 - Una vez desmontadas las patas, gire la pantalla. Introduzca las llaves incluidas en el paquete en las ranuras de desmontaje que se encuentran a los lados de la pantalla y presione ligeramente hasta desenganchar la pantalla del SAI, tal y como se indica en la figura de al lado. Repita la misma operación para desmontar la pantalla de la caja de batería. 3 - ATENCIÓN: La pantalla está unida al SAI a través de un cable. Por tanto, es necesario extraer la pantalla con mucho cuidado evitando tirones violentos u otros movimientos bruscos, con el fin de no causar daños a la pantalla y/o al propio SAI. NO TRATE DE SEPARAR DE NINGÚN MODO LA PANTALLA DEL SAI. 4 - Gire la pantalla 90º en sentido contrario a las agujas del reloj y vuelva a montarla en el SAI introduciéndola con suavidad en el vano correspondiente hasta que oiga un ligero clic que indica que la pantalla se halla en su posición. Se procede del mismo modo para girar y volver a montar la pantalla de la caja de batería. NOTA: La presión se ha de ejercer cerca de las ranuras de montaje. 5 - Gire el SAI y la caja de batería 90º en sentido contrario a las agujas del reloj poniendo la máxima atención. 169 INSTALACIÓN 6 - Ahora, con el SAI y la caja de batería en posición horizontal, coloque las asas suministradas a los lados del SAI y de la caja de batería por medio de los tornillos correspondientes, tal y como se indica en las siguientes figuras. ATENCIÓN: El SAI y la caja de batería son compatibles para el montaje en armario rack estándar 600mm x 800mm o superior (de profundidad). Para la instalación rack, debido al peso del SAI y de la caja de batería, es obligatorio utilizar bridas de sujeción (guía con soporte en L). Por el mismo motivo se aconseja instalar el SAI encima de la caja de batería y en la parte baja del armario rack. La Empresa no asume la responsabilidad por daños provocados por conexiones incorrectas o por operaciones no descritas en este manual. MODO DE INSTALACIÓN Antes de conectar el SAI a la caja de batería asegúrese de: Instalar el SAI y la caja de batería encima de una superficie plana y estable. Evitar la ubicación en lugares que estén expuestos a la luz directa del sol o al aire caliente Mantener la temperatura ambiente entre 0ºC y 40ºC NOTA: El SAI puede funcionar a una temperatura ambiente de entre 0 y 40°C. La temperatura que se aconseja para el funcionamiento de las baterías colocadas dentro de la caja de batería se encuentra entre 20 y 25°C. Es decir, si la vida operativa media de las baterías es de 4 años con una temperatura de funcionamiento de 20°C, la vida de éstas se reducirá considerablemente al trabajar a una temperatura de 30°C. La humedad relativa del aire no debe superar el 90%. Evitar los lugares con polvo. Colocar el SAI y la caja de batería con la parte delantera y trasera al menos a 10 cm de distancia de las paredes y no apoyar objetos en las ranuras de ventilación para permitir una ventilación adecuada. El cable que conecta el SAI a la caja de batería no puede ser prolongado por el usuario. En caso de necesidad, póngase en contacto con su proveedor. 170 INSTALACIÓN CONEXIÓN DEL SAI A LA CAJA DE BATERÍA Conecte el SAI a la caja de batería por medio del cable de expansión suministrado (véase figura en la parte inferior). Introduzca los dos fusibles en los seccionadores portafusibles correspondientes que se hallan situados en la parte trasera de la caja de batería. Cierre los seccionadores. El cable se puede conectar indistintamente a cualquiera de las dos tomas situadas en la parte posterior de la caja de batería. La toma de expansión, que permanece sin ser usada en la parte posterior de la caja de batería, es un dispositivo para la conexión en cascada de otras cajas de batería, con el fin de aumentar la autonomía del SAI. ATENCIÓN: No se puede conectar más de un SAI a una o varias cajas de baterías que estén conectadas en cascada. 171 USO CONEXIONES LA INSTALACIÓN HA DE SER EFECTUADA EXCLUSIVAMENTE POR PERSONAL CUALIFICADO. LA PRIMERA CONEXIÓN QUE HAY QUE REALIZAR ES LA DEL CONDUCTOR DE PROTECCIÓN (CABLE DE TIERRA), QUE HAY QUE INTRODUCIR EN EL BORNE CON LA SIGLA . EL SAI NO DEBE FUNCIONAR NUNCA SIN LA CONEXIÓN A TIERRA. Advertencia: Si se respetan las indicaciones de neutro (N) y fase (F) correspondientes a los enchufes y tomas, el SAI montado en una instalación no modifica el régimen de neutro preexistente. La resistencia en la conexión de neutro resulta inferior a 0,1 ohmios. Un interruptor diferencial colocado más arriba actúa también en el caso de una avería que se produce más abajo en la línea del SAI. La sensibilidad de dicho interruptor tiene que tener en cuenta la corriente dispersa del grupo (que es de aproximadamente 2 mA) y la de la carga que se suman en el conductor de tierra del SAI. Ingreso SAI monofásicas trifásicas Diferencial Tipo B o Tipo A Tipo B El régimen de neutro se modifica solamente si está presente un transformador de aislamiento o cuando el SAI funcione con el neutro seccionado más arriba en la red. En cualquier caso, evite conectar el neutro de salida al de entrada o a tierra ya que esta operación podría dañar el SAI. Para efectuar las conexiones de red y de la carga, siga las indicaciones siguientes. 1. Instale a la entrada del aparato un interruptor magnetotérmico de 63A con curva de intervención B o C (4 polos para las versiones trifásicas, 2 polos para las versiones monofásicas). 2. Los bornes que hay que utilizar para la conexión de las líneas de entrada y salida se hallan situados dentro de la caja de conexiones IN/OUT. Por tanto, desenrosque el tornillo que sujeta la caja de conexiones y que se halla situado a la derecha de la misma (véase la figura de al lado). 3. Extraiga la caja lo suficiente como para poder acceder cómodamente a los bornes (véase la figura de al lado). ATENCIÓN: la caja cuenta con un sistema de bloqueo que impide que pueda extraerse por completo. No trate de extraer completamente la caja de su sitio. 172 USO Versión monofásica 8-10kVA 1. Utilice 3 cables con sección de 10 mm2 (TIERRA, N y L) en la entrada y 3 cables con sección de 10 mm2 para la salida (TIERRA, N y L) tal y como se ilustra en la figura de al lado. - Introduzca los cables procedentes del magnetotérmico de 63A en el retenedor P2 (línea de entrada). - Introduzca los cables procedentes de la carga en el retenedor P1 (línea de salida). - Pele el cable respetando la medida indicada. - Introduzca la parte que acaba de pelar en las puntas de conexión suministradas. 2. Conecte los hilos a los correspondientes bornes observando atentamente las siguientes indicaciones. Línea de entrada a- Asegúrese de que el magnetotérmico a la entrada de la línea está abierto. b - Conecte el hilo de tierra al borne 3. c - Conecte el hilo de neutro al borne 1. d - Conecte el hilo de la fase al borne 2. Línea de salida a- Conecte el hilo de tierra al borne 4. b - Conecte el hilo de neutro al borne 5. c - Conecte el hilo de la fase al borne 6. Línea de bypass a- Asegúrese de que a los bornes 9 y 10 esté conectado un puente, necesario para el correcto funcionamiento del SAI. 3. Ajuste el pasahilos a la brida, cierre la caja y fíjela con el tornillo que ha quitado anteriormente. 173 USO Versión trifásica 8-10kVA 1. (VERSIÓN TRIFÁSICA 8-10kVA): Utilice 3 cables con sección 6 mm2 (TIERRA, L2 y L3) y dos con sección 10 mm2 (N, L1) en entrada (Nota: L1 y N tienen secciones mayores porque cuando funcionan con bypass tienen que transportar toda la corriente de entrada). Para la salida utilice 3 cables con sección 10 mm2 (TIERRA, N y L) tal y como se ilustra en la figura de al lado. - Introduzca los cables procedentes del magnetotérmico de 63A en el retenedor P2 (línea de entrada). - Introduzca los cables procedentes de la carga en el retenedor P1 (línea de salida). - Pele los cables respetando la medida indicada. - Introduzca la parte que acaba de pelar en las puntas de conexión suministradas. (VERSIÓN TRIFÁSICA 6,5kVA): Utilice 3 cables con sección 4 mm2 (TIERRA, L2 y L3) y dos con sección 6 mm2 (N, L1) en entrada (Nota: L1 y N tienen una sección mayor porque cuando funcionan con bypass tienen que transportar toda la corriente de entrada). Para la salida utilice 3 cables con sección 6 mm2 (TIERRA, N y L) tal y como se ilustra en la figura de al lado. - Introduzca los cables procedentes del magnetotérmico de 63A en el retenedor P2 (línea de entrada). - Introduzca los cables procedentes de la carga en el retenedor P1 (línea de salida). - Pele los cables respetando la medida indicada. - Introduzca la parte que acaba de pelar en las puntas de conexión suministradas. 2. Conecte los hilos a los correspondientes bornes observando atentamente las siguientes indicaciones. Línea de entrada a- Asegúrese de que el magnetotérmico colocado más arriba está abierto. b - Conecte el hilo de tierra al borne 5. c - Conecte el hilo de neutro al borne 1. d - Conecte los hilos de las fases a los bornes 2, 3 y 4 (para L1 utilice el hilo rojo). Línea de salida a- Conecte el hilo de tierra al borne 6. b - Conecte el hilo de neutro al borne 7. c - Conecte el hilo de la fase al borne 8. Línea de bypass a- Asegúrese de que a los bornes 9 y 10 esté conectado un puente, necesario para el correcto funcionamiento del SAI. 3. Ajuste el pasahilos a la brida, cierre la caja y fíjela con el tornillo que ha quitado anteriormente. 174 USO Versión con bypass remoto externo Si quiere sacar al exterior el bypass de mantenimiento remoto, siga los puntos 1, 2 y 3 explicados anteriormente. Después realice las siguientes operaciones: 1. Retire la tapa del primer orificio situado en la parte superior de la caja extraíble e instale el pasahilos suministrado. 2. Siga las instrucciones anteriores relativas a la conexión, el número y la sección de los cables a utilizar que pasan a través de los retenedores P1 y P2. Para efectuar la conexión con los bornes de bypass remoto utilice un cable de 2x0,75 mm2 tal y como se ilustra en la figura de al lado. - Introduzca el cable de bypass externo en el pasahilos P3. - Pele los cables respetando la medida indicada. - Introduzca la parte que acaba de pelar en las puntas de conexión suministradas. 3. Conecte los hilos a los correspondientes bornes siguiendo las indicaciones anteriores. La línea de bypass puede conectarse al SAI con una conexión tanto monofásica como trifásica. Conecte los hilos de la línea de bypass como sigue: Línea de bypass a- Conecte los dos hilos del cable a los bornes 9 y 10 para poder controlar desde el exterior el bypass remoto. 175 USO Ajuste el pasahilos y el retenedor a la brida, cierre la caja y fíjela con el tornillo que ha quitado anteriormente. ES NECESARIO COLOCAR UNA ETIQUETA DE ADVERTENCIA EN TODOS LOS SECCIONADORES DE POTENCIA DE RED INSTALADOS LEJOS DEL ÁREA DEL SAI PARA ADVERTIR AL PERSONAL DE ASISTENCIA DE QUE EL CIRCUITO ESTÁ CONECTADO A UN SAI. LA ETIQUETA DEBERÁ LLEVAR EL SIGUIENTE TEXTO: AISLAR EL SAI ANTES DE USAR ESTE CIRCUITO 176 USO PRIMER ENCENDIDO 1) Asegúrese de que todas las operaciones descritas en el apartado anterior “Conexiones” han sido realizadas de forma correcta. 2) Cierre el interruptor magnetotérmico situado a la entrada del SAI. 3) Pulse el interruptor general situado en el panel frontal. 4) Tras unos instantes se activa el SAI, se enciende la pantalla, se oye un bip y parpadea el icono . El SAI se encuentra en modo stand-by: esto significa que el SAI está en un estado de consumo mínimo. El microcontrolador está siendo alimentado y tiene la función de supervisar y realizar el autodiagnóstico; las baterías están cargándose; todo está preparado para activar el SAI. El SAI también se encuentra en modo stand-by cuando funciona la batería y el temporizador está activado. 5) Verifique en la pantalla la configuración seleccionada (véase apartado Área de configuración) ENCENDIDO CON LA RED 1) Pulse el botón “ON”. A continuación se encienden todos los iconos de la pantalla durante 1 segundo y el SAI emite un bip. 2) Encienda los aparatos conectados al SAI. Solamente para el primer encendido: transcurridos alrededor de 30 segundos, compruebe el correcto funcionamiento del SAI: 1. Simule un corte de energía eléctrica abriendo el interruptor situado a la entrada del SAI. 2. La carga tiene que seguir siendo alimentada, se ha de encender el icono en la pantalla y se ha de oír un bip cada 4 segundos. 3. Al cerrar el interruptor a la entrada, el SAI tiene que volver a funcionar con la red. ENCENDIDO CON LA BATERÍA 1) Pulse el interruptor general situado en el panel frontal. 2) Mantenga pulsado el botón “ON” durante al menos 5 segundos. Todos los iconos de la pantalla se encienden durante 1 segundo y el SAI emite un bip. 3) Encienda los aparatos conectados al SAI. APAGADO DEL SAI Para apagar el SAI mantenga pulsado el botón “STBY” durante al menos 1,5 segundos. El SAI vuelve al modo stand-by y el icono empieza a parpadear: a) Si el SAI está funcionando con la red, para apagarlo completamente hay que pulsar el interruptor general, de modo que éste vuelva a su posición original (posición levantada). b) Si el SAI funciona con batería y no se ha activado el temporizador, se apaga completamente de forma automática después de 5 segundos. Si por el contrario el temporizador está activado, para apagar el SAI hay que mantener pulsado el botón “STBY” durante al menos 5 segundos. Si desea que cuando vuelva la corriente eléctrica el SAI siga apagado completamente, deberá pulsar el interruptor general (véase el punto a). ATENCIÓN: El SAI está dotado de un alimentador de redundancia de emergencia que, en caso de avería del SAI, interviene evitando el apagado de la carga conmutándola al modo bypass. Si apaga el SAI directamente a través del interruptor general (sin haberlo colocado antes en modo stand-by como se explica en el manual), la carga seguirá siendo alimentada por el bypass. 177 USO INDICACIONES DEL PANEL DE LA PANTALLA En este capítulo se describe de forma detallada toda la información que puede aparecer en la pantalla LCD. Para una mejor comprensión, podemos subdividir la información visualizada en tres grupos principales: Indicadores del estado del SAI Área de visualización de mediciones Área de configuración Indicadores del estado del SAI ICONO ESTADO DESCRIPCIÓN Fija Indica la presencia de una anomalía Parpadeando El SAI se encuentra en modo stand-by Fija Indica un funcionamiento normal Fija El SAI está funcionando con la red Parpadeando El SAI funciona con la red, pero la tensión de salida no está sincronizada con la tensión de la red Fija El SAI está funcionando con la batería. En este estado emite una señal acústica (bip) a intervalos regulares de 4 segundos. Parpadeando Prealarma de fin de descarga Indica que la autonomía de las baterías se está acabando En este caso el SAI emite un bip a intervalos regulares de 1 segundo. Fija Indica que las cargas conectadas al SAI están alimentadas por bypass Dinámica Indica el porcentaje de autonomía estimado Dinámica Indica el porcentaje de carga aplicado al SAI respecto al valor nominal Parpadeando Es necesaria una operación de mantenimiento Fija Parpadeando Indica que el temporizador está activado (encendido o apagado programado) El temporizador se puede activar/desactivar utilizando el software suministrado Falta 1 minuto para que se vuelva a encender el SAI o 3 minutos para que se apague 178 USO Área de visualización de mediciones En la pantalla se pueden ver en secuencia las principales mediciones del SAI. Cuando se enciende el SAI, en la pantalla aparece el valor de la tensión de la red. Para ver otras mediciones pulse la tecla “SEL / SET” repetidas veces hasta que aparezca la medición que desea. Si se produce una anomalía/alarma (FAULT) o un bloqueo (LOCK), en la pantalla aparecerá automáticamente el tipo y el código de alarma correspondiente. Versión monofásica A continuación se ofrecen algunos ejemplos: EJEMPLO GRÁFICO(1) EJEMPLO GRÁFICO(1) DESCRIPCIÓN DESCRIPCIÓN Tensión de red Tensión total de las baterías Frecuencia de red Porcentaje de la carga aplicada Tensión de salida del SAI Corriente absorbida por la carga Frecuencia de la tensión de salida Temperatura del sistema de refrigeración de la electrónica interna del SAI Autonomía residual de las baterías Anomalía/Alarma (2): Se visualiza el código correspondiente Porcentaje de carga de las baterías Bloqueo (2): Se visualiza el código correspondiente (1) Los valores presentes en las imágenes de la tabla son únicamente indicativos. (2) Los códigos de FAULT/LOCK se visualizan solamente si en ese momento están activos (presencia de una anomalía/alarma o de un bloqueo). 179 USO Versión trifásica A continuación se ofrecen algunos ejemplos: EJEMPLO GRÁFICO(1) EJEMPLO GRÁFICO(1) DESCRIPCIÓN DESCRIPCIÓN Porcentaje de carga de las baterías Tensión fase 1 (2) Tensión total de las baterías Porcentaje de la carga aplicada Tensión fase 2 (2) Corriente absorbida por la carga Temperatura del sistema de refrigeración de la electrónica interna del SAI Tensión fase 3 (2) Anomalía/Alarma (3): Se visualiza el código correspondiente Bloqueo (2): Se visualiza el código correspondiente Frecuencia de la tensión de salida Autonomía residual de las baterías (1) Los valores presentes en las imágenes de las tablas son únicamente indicativos. (2) Indicación alternada Nº Fase/Tensión. (3) Los códigos de FAULT/LOCK se visualizan solamente si en ese momento están activos (presencia de una anomalía/alarma o de un bloqueo). 180 USO Área de configuración El área de configuración reagrupa los principales parámetros de funcionamiento del SAI y muestra su estado actual. Los parámetros contenidos en esta área se pueden modificar directamente en la pantalla. PARÁMETROS CONFIGURABLES: Frecuencia: Frecuencia de la tensión de salida Frecuencia Tensión: Tensión de salida Modo: Modo de funcionamiento del SAI Tensión Modo La imagen de al lado representa la zona de la pantalla correspondiente a las configuraciones (área de configuración) destacando los tres parámetros que se pueden configurar. Pasos a seguir: Para acceder al área de configuración mantenga pulsado el botón “SEL / SET” durante al menos 2 segundos. Se enciende la palabra “SET” y aparece una flecha ( ► ) a la izquierda de Frecuencia. La flecha indica la configuración seleccionada. Para cambiar la selección de un parámetro pulse el botón “SEL / SET”. Para modificar el parámetro seleccionado pulse el botón “ON”. Para salir del área de configuración mantenga pulsado el botón “SEL / SET” durante al menos 2 segundos. POSIBLES CONFIGURACIONES Frecuencia: □ 50 Hz □ 60 Hz □ Apagado (autoaprendizaje de la frecuencia) Tensión: □ 220 V □ 230 V □ 240 V Modo: □ ON LINE □ ECO □ SMART □ STBYOFF NOTA: Para hacer efectiva la modificación de la configuración de la frecuencia de salida hay que apagar completamente el SAI y volver a encenderlo (usando el interruptor general). LOS PARÁMETROS DE TENSIÓN Y FRECUENCIA DE SALIDA HAN DE SER COMPATIBLES CON LOS DE LA CARGA ALIMENTADA POR EL SAI 181 USO MODOS DE FUNCIONAMIENTO El modo que garantiza la máxima protección a la carga es el modo ON LINE (predeterminado): en él la energía para la carga sufre una doble conversión y se reconstruye en la salida de una forma perfectamente sinusoidal, y la frecuencia y la tensión son fijadas por un control digital preciso con microprocesador de forma independiente de la entrada (V.F.I.). * Junto con el modo tradicional de funcionamiento ON LINE de doble conversión, es posible seleccionar los siguientes modos: ECO (LÍNEAS INTERACTIVAS) SMART (SMART ACTIVE) STBYOFF (STAND-BY OFF) Con la finalidad de optimizar el rendimiento, el bypass suministra la energía a la carga en el modo ECO. En el caso de que la red sobrepase la tolerancia prevista, el SAI conmuta al funcionamiento normal ON LINE de doble conversión. Después de unos cinco minutos desde la vuelta de la red a los valores normales, la carga se conmuta en el bypass. En el caso de que el usuario no sepa elegir el modo más adecuado de funcionamiento (entre ON LINE y ECO), puede utilizar el modo SMART ACTIVE con el que, conforme a una estadística obtenida sobre la calidad de la red de alimentación, el SAI decide de forma autónoma el modo en el que se debe configurar. Finalmente, se configura el funcionamiento en el modo STAND-BY OFF como dispositivo de emergencia: si hay red, la carga no se alimenta, mientras que si se produce un corte de energía eléctrica, la carga es alimentada por el inversor por medio de las baterías. R.E.P.O. Esta entrada aislada se emplea para apagar el SAI a distancia en caso de emergencia. El eventual interruptor, normalmente apagado, de “Remote Emergency Power Off” (R.E.P.O.) tiene que estar conectado al conector que se halla situado en la parte trasera del SAI. El SAI viene de fábrica con los bornes R.E.P.O. en cortocircuito. Retire el cortocircuito si dicho contacto está conectado al auxiliar de un interruptor remoto de emergencia. El circuito de R.E.P.O. se autoalimenta con circuitos de tipo SELV. Por lo tanto, no es necesaria una tensión externa de alimentación. Cuando está cerrado (situación normal), circula una corriente de 10mA máx. TOMA AUXILIAR PROGRAMABLE (POWER SHARE) El SAI cuenta con una toma de salida que permite la desconexión automática de la carga a la que se aplica la toma en determinadas condiciones de funcionamiento. El usuario puede elegir las situaciones que determinan la desconexión automática de la toma de Power share mediante el software de configuración (véanse los apartados Software de configuración y Configuración del SAI). Por ejemplo, es posible seleccionar la desconexión después de un determinado tiempo de funcionamiento con la batería o al alcanzar el umbral de prealarma que indica el fin de la descarga de las baterías, o incluso cuando se produce una situación de sobrecarga. * El control preciso con microprocesador fija el valor rms de la tensión de salida de forma independiente de la tensión de entrada, mientras que la frecuencia de la tensión de salida se sincroniza (dentro de una tolerancia configurable por el usuario) con la de entrada para permitir el empleo del bypass. Más allá de esta tolerancia, el SAI deja de sincronizarse y vuelve a la frecuencia nominal y el bypass deja de poder utilizarse (“free running mode” o modo de marcha continua). 182 USO CONFIGURACIÓN DEL SAI El siguiente cuadro muestra todas las posibilidades que tiene el usuario de configurar el SAI para adaptarlo de la mejor forma a sus propias necesidades. LEYENDA: = Indica que la configuración se puede modificar, además de a través del software de configuración, mediante el panel de la pantalla. = Indica que se puede modificar la configuración únicamente mediante el software de configuración. FUNCIÓN DESCRIPCIÓN Frecuencia de salida Selección de la frecuencia nominal de salida PREDEFINIDO Auto 50 Hz 60 Hz Auto: aprendizaje automático de la frecuencia de entrada 230V 220V 230V 240V 220 ÷ 240 en pasos de 1V (solamente a través del software) Tensión de salida Selección de la tensión nominal de salida Modos de funcionamiento Selección de uno de los 4 modos de funcionamiento ON LINE Encendido retardado Tiempo de espera para el reencendido automático tras la vuelta de la alimentación de red 5s Apagado por carga mínima Apagado automático del SAI que está funcionando con la batería, si la carga es inferior al 5% Deshabilitado Limitación de la autonomía POSIBLES CONFIGURACIONES Deshabilitado 1 ÷ 255 en pasos de 1 s Tiempo máximo de funcionamiento con la Deshabilitado batería Preaviso de batería descargada Tiempo restante de autonomía calculada para el preaviso de batería descargada 3 min Prueba de la batería Intervalo de tiempo para prueba automática de baterías 40 horas ON LINE ECO SMART ACTIVE STAND-BY OFF Habilitado Deshabilitado Deshabilitado (descarga completa de las baterías) 1 ÷ 65000 en pasos de 1 s 1 ÷ 255 en pasos de 1 min Deshabilitado 1 ÷ 1000 en pasos de 1 hora 183 MODOS USO FUNCIÓN DESCRIPCIÓN PREDEFINIDO Umbral de alarma para carga máxima Selecciona el límite de usuario de sobrecarga Deshabilitado Luminosidad de la pantalla Selecciona el nivel de luminosidad de la pantalla LCD Máxima Alarma sonora Selecciona el modo de funcionamiento de la alarma sonora Reducido Toma auxiliar (power share) Selecciona el modo de funcionamiento de la toma auxiliar POSIBLES CONFIGURACIONES Deshabilitado 0 ÷ 103 en pasos de 1% Mínima ÷ Máxima en 20 pasos Normal Siempre conectada Reducido: no suena por intervención momentánea del bypass Siempre conectada Desconexión tras n segundos de funcionamiento con la batería Desconexión tras n segundos desde la señal de prealarma de batería descargada ... (véase manual del software de configuración) FUNCIONES AVANZADAS Tolerancia de la frecuencia de entrada Selecciona el rango admitido para la frecuencia de entrada, para el paso a bypass y para la sincronización de la salida Umbrales de tensión del bypass Selecciona el rango de tensión admitido para el paso a bypass Baja: Alta: 180V 264V Baja: Alta: 180 ÷ 200 en pasos de 1V 250 ÷ 264 en pasos de 1V Umbrales de tensión del bypass para ECO Selecciona el rango de tensión admitido para el funcionamiento en modo ECO Baja: Alta: 200V 253V Baja: Alta: 180 ÷ 220 en pasos de 1V 240 ÷ 264 en pasos de 1V Selecciona la sensibilidad de Sensibilidad de la intervención para intervención durante el funcionamiento en ECO modo ECO Alimentación de la carga en standby Funcionamiento bypass Alimentación de la carga desde el bypass con el SAI apagado (modo stand-by) Selecciona el modo de empleo de la línea de bypass ± 0,25% ± 0,5% ± 0,75% ± 1 ÷ ±10 en pasos de 1% ± 5% Normal Deshabilitado (carga SIN alimentar) Habilitado / Alta sensibilidad 184 Baja Normal Alta Deshabilitado (sin alimentar) Habilitado (alimentado) Habilitado / Alta sensibilidad Habilitado / Baja sensibilidad Deshabilitado con sincronización de entrada / salida Deshabilitado sin sincronización de entrada / salida MODOS USO PUERTOS DE COMUNICACIÓN En la parte posterior del SAI (véase Vistas SAI) están presentes los siguientes puertos de comunicación: Puerto serial, disponible con conector RS232 y conector USB. ATENCIÓN: el empleo de un conector excluye automáticamente el otro. Ranura de expansión para tarjetas de interfaz auxiliares COMMUNICATION SLOT. Conectores RS232 y USB CONECTOR RS232 PIN # 1 2 3 4 5 6 7 8 9 CONECTOR USB SEÑAL Contacto cerrado: SAI bloqueado * TXD RXD PIN # 1 2 3 4 GND Entrada de alimentación interfaz +12Vdc Contacto cerrado: prealarma de batería descargada * Contacto cerrado: funcionamiento con la batería * * Contacto optoaislado máx. +35Vdc / 10mA Ranura de comunicación El SAI dispone de una ranura de expansión para tarjetas de comunicación auxiliares (véase figura de al lado) que permiten al aparato comunicar mediante los principales estándares de comunicación. Algunos ejemplos: Segundo puerto RS232 Duplicador de puertos seriales Agente de red Ethernet con protocolo TCP/IP, HTTP y SNMP Puerto RS232 + RS485 con protocolo JBUS / MODBUS Tarjeta de relé para señalización Para más información sobre los accesorios disponibles, consulte la página web del fabricante. 185 4 3 1 2 SEÑAL VBUS DD+ GND USO SOFTWARE Software de supervisión y control El software PowerShield3 garantiza una gestión del SAI eficaz e intuitiva, viéndose todas las informaciones más importantes, como la tensión de entrada, la carga aplicada, la capacidad de la batería, etc. Además es capaz de ejecutar de forma automática las operaciones de apagado, envío de correos electrónicos, sms y mensajes de red cuando se producen uno eventos concretos seleccionados por el usuario. Operaciones para la instalación: Conectar el puerto de comunicaciones RS232 del SAI a un puerto de comunicaciones COM del PC empleando un cable serial que se incluye* con el SAI o se puede conectar el puerto USB del SAI a un puerto USB del PC utilizando un cable estándar USB*. Descargar el software desde el sitio Web www.riello-ups.com, seleccionando el sistema operativo deseado. Seguir las instrucciones del programa de instalación. Para informaciones más detalladas sobre la instalación y uso, consultar el manual del software que se puede descargar desde nuestro sitio Web www.riello-ups.com. Software de configuración Mediante un software específico se puede acceder a la configuración de los parámetros más importantes del UPS. Para obtener una lista de las posibles configuraciones, remitirse al apartado Configuración del SAI. * Se aconseja emplear un cable de 3 metros como máximo. 186 SOLUCIÓN DE PROBLEMAS A menudo un funcionamiento del SAI que no sea normal no indica una avería, sino que se debe únicamente a problemas menores, inconvenientes o distracciones. Por lo tanto, se aconseja consultar atentamente el siguiente cuadro que recoge información útil para la resolución de los problemas más frecuentes. PROBLEMA CAUSA POSIBLE SOLUCIÓN NO SE HA PULSADO EL INTERRUPTOR GENERAL NO SE ENCIENDE LA PANTALLA LA PANTALLA ESTÁ ENCENDIDA PERO NO SE ALIMENTA LA CARGA EL CONECTOR DE LA CAJA DE BATERÍA ESTÁ DESCONECTADO Conecte el conector de la caja de batería. FALTA LA CONEXIÓN A LA RED ELÉCTRICA Compruebe la conexión a la red eléctrica. AUSENCIA DE LA TENSIÓN DE RED (FALTA DE CORRIENTE ELÉCTRICA) Compruebe la presencia de la tensión de red eléctrica. FUNCIONAMIENTO DE LA PROTECCIÓN MÁS ARRIBA EN LA LÍNEA Reconfigure la protección. ATENCIÓN: compruebe que no haya sobrecarga en la salida del SAI. EL SAI ESTÁ EN EL MODO STAND-BY Pulse el botón “ON” situado en el panel frontal para alimentar las cargas. Es necesario cambiar el modo. De hecho, el modo STAND-BY OFF (dispositivo de emergencia) alimenta las cargas solamente en caso de corte de la corriente eléctrica. ESTÁ SELECCIONADO EL MODO STAND-BY OFF FALTA LA CONEXIÓN A LA CARGA EL SAI FUNCIONA CON LA BATERÍA, A PESAR DE HABER TENSIÓN DE RED EL SAI NO SE ENCIENDE Y LA PANTALLA INDICA UNO DE LOS SIGUIENTES CÓDIGOS: A06, A08 LA PANTALLA MUESTRA EL CÓDIGO: A11 Pulse el interruptor general situado en el panel frontal. Compruebe la conexión a la carga. FUNCIONAMIENTO DE LA PROTECCIÓN A LA ENTRADA Reconfigure la protección. ATENCIÓN: Compruebe que no haya sobrecarga en la salida del SAI. LA TENSIÓN DE ENTRADA SE ENCUENTRA FUERA DE LOS LÍMITES DE TOLERANCIA ADMITIDOS PARA FUNCIONAR CON LA RED Problema dependiente de la red. Espere a que la red de entrada vuelva a los valores normales de tolerancia. El SAI volverá a funcionar automáticamente con la red. Compruebe la temperatura ambiente del lugar en el que LA TEMPERATURA DEL SAI está colocado el SAI; si es demasiado baja, sitúela por ES INFERIOR A 0ºC encima del umbral mínimo (0ºC). La anomalía no provoca un mal funcionamiento particular. Si el problema se vuelve a presentar al encender el SAI, póngase en contacto con el centro de asistencia. RELÉ DE ENTRADA BLOQUEADO 187 SOLUCIÓN DE PROBLEMAS PROBLEMA CAUSA POSIBLE SOLUCIÓN EL ZUMBADOR SUENA DE FORMA CONTINUADA Y LA PANTALLA INDICA UNO DE LOS SIGUIENTES CÓDIGOS: A54, F50, F51, F52, F55, L50, L51, L52 LA CARGA QUE SE APLICA AL SAI ES DEMASIADO ALTA Reduzca la carga hasta el umbral del 100% (o umbral de usuario en el caso del código A54). LA PANTALLA MUESTRA EL CÓDIGO: A61 HAY QUE SUSTITUIR LA BATERÍA LA PANTALLA MUESTRA EL CÓDIGO: A62 NO HAY CAJA DE BATERÍA O ÉSTA NO ESTÁ CONECTADA Controle que la caja de batería está instalada y que se halla conectada correctamente. LA PANTALLA MUESTRA EL CÓDIGO: A63 LAS BATERÍAS ESTÁN DESCARGADAS; EL SAI PERMANECE A LA ESPERA DE QUE LA TENSIÓN DE LA BATERÍA SUPERE EL UMBRAL ESTABLECIDO Espere a que se recarguen las baterías o efectúe el encendido manualmente manteniendo pulsado el botón “ON” durante al menos 2 segundos. Sustituya la caja de batería EL ZUMBADOR SUENA DE FORMA CONTINUADA Y SE ESTÁ PRODUCIENDO UN Si es posible interrumpa la alimentación de la carga, LA PANTALLA INDICA MAL FUNCIONAMIENTO UNO DE LOS SIGUIENTES DEL SAI, ES PROBABLE QUE apague y vuelva a encender el SAI. Si el problema se CÓDIGOS: F03, F05, F07, SE PRODUZCA UN vuelve a presentar, llame al centro de asistencia. BLOQUEO F10, F13, F21, F40, F41, F42, F43 EL ZUMBADOR SUENA DE FORMA CONTINUADA Y LA PANTALLA INDICA UNO DE LOS SIGUIENTES CÓDIGOS: F04, L04 LA TEMPERATURA DE LOS DISIPADORES INTERNOS DEL SAI ES DEMASIADO ALTA Compruebe que la temperatura ambiente del lugar en el que se encuentra el SAI no supera los 40ºC. EL ZUMBADOR SUENA DE FORMA CONTINUADA Y LA PANTALLA INDICA UNO DE LOS SIGUIENTES CÓDIGOS: F53, L53 SE HA REGISTRADO UNA ANOMALÍA EN UNO O VARIOS USUARIOS ALIMENTADOS POR EL SAI Desconecte todos los usuarios y vuelva a conectarlos uno por uno para identificar el que está averiado. EL ZUMBADOR SUENA DE FORMA CONTINUADA Y LA PANTALLA INDICA UNO DE LOS SIGUIENTES CÓDIGOS: F60, L03, L05, L07, L10, L13, L20, L21, L40, L41, L42, L43 SE HA PRODUCIDO UN MAL apague y vuelva a encender el SAI. Si el problema se FUNCIONAMIENTO DEL SAI LA PANTALLA INDICA UNO DE LOS SIGUIENTES CÓDIGOS: C01, C02, C03 Si no es un comando deseado, compruebe la posición del interruptor de bypass manual o el estado de las entradas de comando de una eventual tarjeta de contactos opcional. Compruebe el cierre del contacto R.E.P.O. en la parte posterior del SAI. Si es posible interrumpa la alimentación de la carga, vuelve a presentar, llame al centro de asistencia. UN COMANDO REMOTO ESTÁ ACTIVADO 188 SOLUCIÓN DE PROBLEMAS CÓDIGOS DE ALARMA Gracias a un sofisticado sistema de autodiagnóstico, el SAI es capaz de comprobar e indicar en la pantalla las posibles anomalías y/o averías que se pudieran producir durante su funcionamiento normal. Cuando hay un problema, el SAI lo indica mostrando en la pantalla el código y el tipo de alarma que está activada (FAULT y/o LOCK). FAULT Las señalizaciones de tipo FAULT se subdividen en tres categorías Anomalías: son problemas “menores” que no implican el bloqueo del SAI, pero que reducen las prestaciones o impiden el uso de algunas de sus funciones. CÓDIGO DESCRIPCIÓN A06 A08 A11 A54 A61 A62 A63 Temperatura sensor1 inferior a 0ºC Temperatura sensor2 inferior a 0ºC Relé de entrada bloqueado (no abre) Carga > al umbral de usuario establecido Sustituir baterías No hay caja de batería o ésta no esta conectada A la espera de la recarga de las baterías Alarmas: son problemas más críticos que las anomalías, ya que, si persisten, pueden provocar, incluso en poco tiempo, un bloqueo del SAI. CÓDIGO F03 F04 F05 F07 F10 F13 F21 F40 F41 F42 F43 F50 F51 F52 F53 F55 F60 DESCRIPCIÓN Alimentación auxiliar incorrecta Sobrecalentamiento de los disipadores Sensor1 de temperatura averiado Sensor2 de temperatura averiado Rotura del fusible de entrada o relé de entrada bloqueado (no cierra) No se ha producido la precarga de los condensadores Sobretensión en banco de condensadores Sobretensión en inversor Tensión continua de salida La tensión del inversor no es correcta Subtensión del inversor Sobrecarga: carga > 103% Sobrecarga: carga > 125% Sobrecarga: carga > 150% Cortocircuito A la espera de la reducción de la carga para vuelta a inversor Sobretensión de las baterías 189 SOLUCIÓN DE PROBLEMAS Comandos activos: señala la presencia de un comando remoto activado. CÓDIGO DESCRIPCIÓN C01 C02 C03 C04 Comando remoto de apagado Comando remoto de carga en el bypass Comando remoto de encendido Realizando la prueba de baterías LOCK Las señalizaciones de tipo LOCK (bloqueo) normalmente van precedidas de una señal de alarma y, por su importancia, implican el apagado del inversor y la alimentación de la carga a través de la línea de bypass (se excluye dicho procedimiento para los bloqueos por sobrecargas fuertes y persistentes y para el bloqueo por cortocircuito). CÓDIGO DESCRIPCIÓN L03 L04 L05 L06 L07 L10 L13 L20 L21 L31 L40 L41 L42 L43 L50 L51 L52 L53 Alimentación auxiliar incorrecta Sobrecalentamiento de los disipadores Sensor1 de temperatura averiado Sensor3 de temperatura averiado Sensor2 de temperatura averiado Rotura del fusible de entrada o relé de entrada bloqueado (no cierra) No se ha producido la precarga de los condensadores Subtensión en banco de condensadores Sobretensión en banco de condensadores Anomalía en el bypass Sobretensión en inversor Tensión continua de salida Tensión del inversor incorrecta Subtensión del inversor Sobrecarga: carga > 103% Sobrecarga: carga > 125% Sobrecarga: carga > 150% Cortocircuito 190 CUADRO DE DATOS TÉCNICOS 5- CUADRO DE DATOS TÉCNICOS SAI MONO/MONO MODELOS ENTRADA Tensión nominal Rango aceptado Rango de tensión para que no intervenga la batería Frecuencia nominal Corriente máxima (1) Corriente nominal (2) Factor de potencia Distorsión corriente @ carga máxima BYPASS Rango de tensión aceptado para la conmutación Rango de frecuencia aceptado para la conmutación Tiempo de conmutación BATERÍA Tiempo de recarga (8) SALIDA Tensión nominal Variación estática (3) Variación dinámica (4) Forma de onda Distorsión tensión @ carga lineal Distorsión tensión @ carga distorsionante Frecuencia (5) Factor de cresta de la corriente Potencia nominal en VA Potencia nominal en W Corriente de cortocircuito OTROS DATOS Corriente de fuga hacia tierra Eficiencia AC/AC Temperatura ambiente (6) Humedad Protecciones Hold-up time Ruido Dimensiones alto x ancho x fondo (mm) Peso en kg (estimado) SDL 8000 SDL 10000 220/230/240 Vac 0 - 280 Vac Tensión máxima 276Vac Tensión mínima: de 184 a 138 Vac del 100% al 50% de la carga de modo lineal Retorno funcionamiento de red a 190Vac 50 - 60 Hz ±5Hz 44A 54A 34A 43A 0.98 6% 180 - 264 Vac Frecuencia seleccionada ±5% 0.1ms 6-8 h 220/230/240 Vac seleccionable ±1.5% 1.5% (7) 5% en 20ms Sinusoidal 3% 5% 50 ó 60 Hz seleccionable 3:1 8000 10000 7200 9000 1.5 x In por t= 0.5s 10mA 92% 0 – 40 °C <90% sin condensación descarga excesiva de las baterías - sobrecorriente - cortocircuito sobretensión - subtensión térmica 30ms < 45 dBA a 1m 2 x [455mm (19”) x 175mm (4U) x 660mm (26”)] aprox. 29 + 65 kg aprox. 30 + 65 kg (1) (2) (3) (4) (5) @ carga nominal, tensión mínima de 180Vac, batería cargándose @ carga nominal, tensión mínima de 230Vac, batería cargándose Red/Batería @ carga del 0% -100% @ Red / batería / red @ carga resistiva 0% /100% / 0% Si la frecuencia de red no supera el ±5% (configurable por el usuario) del valor seleccionado, el SAI está sincronizado con la red. Si la frecuencia supera los límites de tolerancia o el funcionamiento es con batería, la frecuencia es la seleccionada ±0.1% (6) 20 – 25 °C para una mayor duración de las baterías (7) Para mantener la tensión de salida dentro del campo de precisión indicado, puede hacerse necesaria una recalibración tras un largo período de funcionamiento (8) Tiempo necesario para llegar al 90% de la carga (tras una descarga completa, a la carga ≥80%) 191 CUADRO DE DATOS TÉCNICOS CUADRO DE DATOS TÉCNICOS SAI TRI/MONO MODELOS ENTRADA (3 Ø + N tensiones estrelladas) Tensión nominal Rango aceptado Rango de tensión para que no entre en funcionamiento la batería Frecuencia nominal Corriente máxima (1) Corriente nominal (2) Factor de potencia Distorsión corriente @ carga máxima BYPASS (en L1) Rango de tensión aceptado para la conmutación Rango de frecuencia aceptado para la conmutación Tiempo de conmutación BATERÍA Tiempo de recarga (8) SALIDA Tensión nominal Variación estática (3) Variación dinámica (4) Forma de onda Distorsión tensión @ carga lineal Distorsión tensión @ carga distorsionante Frecuencia (5) Factor de cresta de la corriente Potencia nominal en VA Potencia nominal en W Corriente de cortocircuito OTROS DATOS Corriente de fuga hacia tierra Eficiencia AC/AC Temperatura ambiente (6) Humedad Protecciones Hold-up time Ruido Dimensiones alto x ancho x fondo (mm) Peso en kg (estimado) SDL 6500 TM SDL 8000 TM SDL 10000 TM 220/230/240 Vac 0 - 280 Vac Tensión máxima 276Vac Tensión mínima: de 184 a 138 Vac del 100% al 50% de la carga de modo lineal Retorno funcionamiento de red a 190Vac 50 - 60 Hz ±5Hz 13A 15A 19A 9A 11A 14A 0,95 26% 180 - 264 Vac Frecuencia seleccionada ±5% 0.1ms 6-8 h 6500 5850 220/230/240 Vac seleccionable ±1.5% 1.5% (7) 5% en 20ms Sinusoidal 3% 6% 50 ó 60 Hz configurable 3:1 8000 7200 1.5 x In por t= 0.5s 10000 9000 10mA 92% 0 – 40 °C <90 % sin condensación descarga excesiva de las baterías - sobrecorriente - cortocircuito - sobretensión subtensión térmica 40ms < 45 dBA a 1m 2 x [455mm (19”) x 175mm (4U) x 660mm (26”)] aprox. 28 + 63 kg aprox. 29 + 65 kg aprox. 30 + 65 kg (1) (2) (3) (4) (5) @ carga nominal, tensión mínima de 180Vac, batería cargándose @ carga nominal, tensión mínima de 230Vac, batería cargándose Red/Batería @ carga 0% -100% @ Red / batería / red @ carga resistiva 0% /100% / 0% Si la frecuencia de red no supera el ±5% (configurable por el usuario) del valor seleccionado, el SAI está sincronizado con la red. Si la frecuencia supera los límites de tolerancia o el funcionamiento es con batería, la frecuencia es la seleccionada ±0.1% (6) 20 – 25 °C para una mayor duración de las baterías (7) Para mantener la tensión de salida dentro del campo de precisión indicado, puede hacerse necesaria una recalibración tras un largo período de funcionamiento (8) Tiempo necesario para llegar al 90% de la carga (tras una descarga completa, a la carga ≥80%) 192 CUADRO DE DATOS TÉCNICOS CUADRO DE DATOS TÉCNICOS DE LA CAJA DE BATERÍA MODELOS BÁSICOS BBX SDL 240V BB NP A3 BATERÍA Tensión nominal Tensión al final de la carga Núm. de baterías / V OTROS DATOS Temperatura ambiente (1) Humedad Protecciones Dimensiones alto x ancho x fondo Peso [Vdc] [Vdc] BBX SDL 240V BB NP A5 240 273 20 / 12 0 – 40 <90% sin condensación sobrecorriente - cortocircuito 455 x 175 x 660 [°C] [mm] [kg] 63 65 (1) 20 –25°C para una mayor duración de las baterías CUADRO DE TIEMPOS DE SOBRECARGA FUNCIONAMIENTO CON TIEMPOS DE SOBRECARGA BYPASS 100% < Carga 125% 125% < Carga 150% Carga > 150% Activa bypass a los 2 s Bloqueo después de 120 s Activa bypass a los 2 s Bloqueo después de 4 s Activa bypass al instante Bloqueo después de 1 s 193 INVERSOR Bloqueo después de 60 s Bloqueo después de 4 s Bloqueo después de 0,5 s 0MNSDL6K5RU5LUC

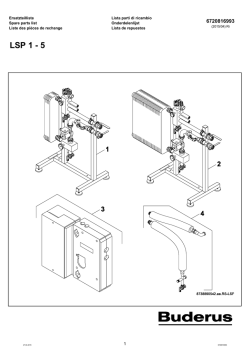
© Copyright 2026